Omni Portal
Build Powerful Communication Experiences
SMS, RCS, WhatsApp, Voice and APIs from one platform.
50M+
Messages Sent
99.9%
Delivery Rate
20+
Integrations
24/7
Support
Platform Capabilities
Communication Channels
Available Plugins
Login
The Login page allows authorized users to securely access Omni Portal and manage communication services, campaigns, reports, and integrations.
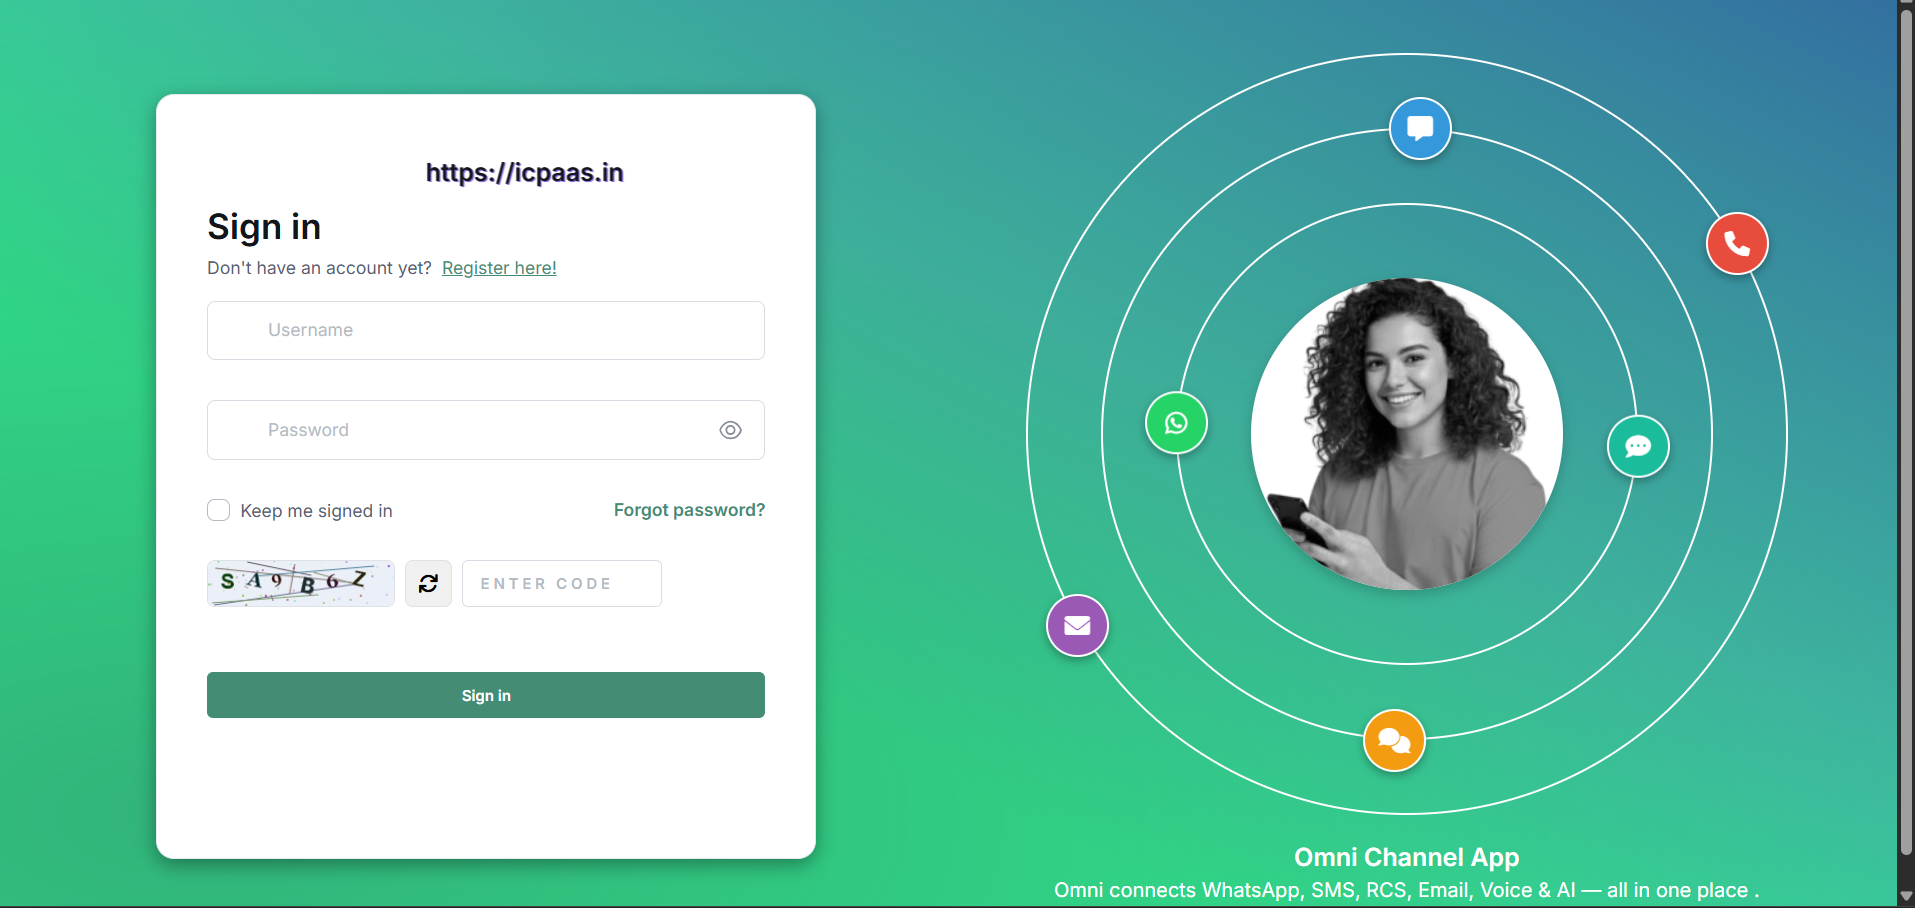
Login Page Components
| Component | Description |
|---|---|
| Username | Enter the registered username provided by the administrator. |
| Password | Enter the associated account password. |
| Keep Me Signed In | Allows users to remain logged in on the current device across sessions. |
| Forgot Password | Reset the password if login credentials are forgotten. |
| CAPTCHA Verification | Enter the displayed verification code before signing in. Mandatory. |
| Sign In Button | Authenticates the user and redirects to the Dashboard on success. |
Steps to Login
https://icpaas.in in your web browser.Dashboard
The Dashboard is the central control panel of Omni Portal. It provides quick access to communication channels, utilities, plugins, reports, and account management from a single screen.
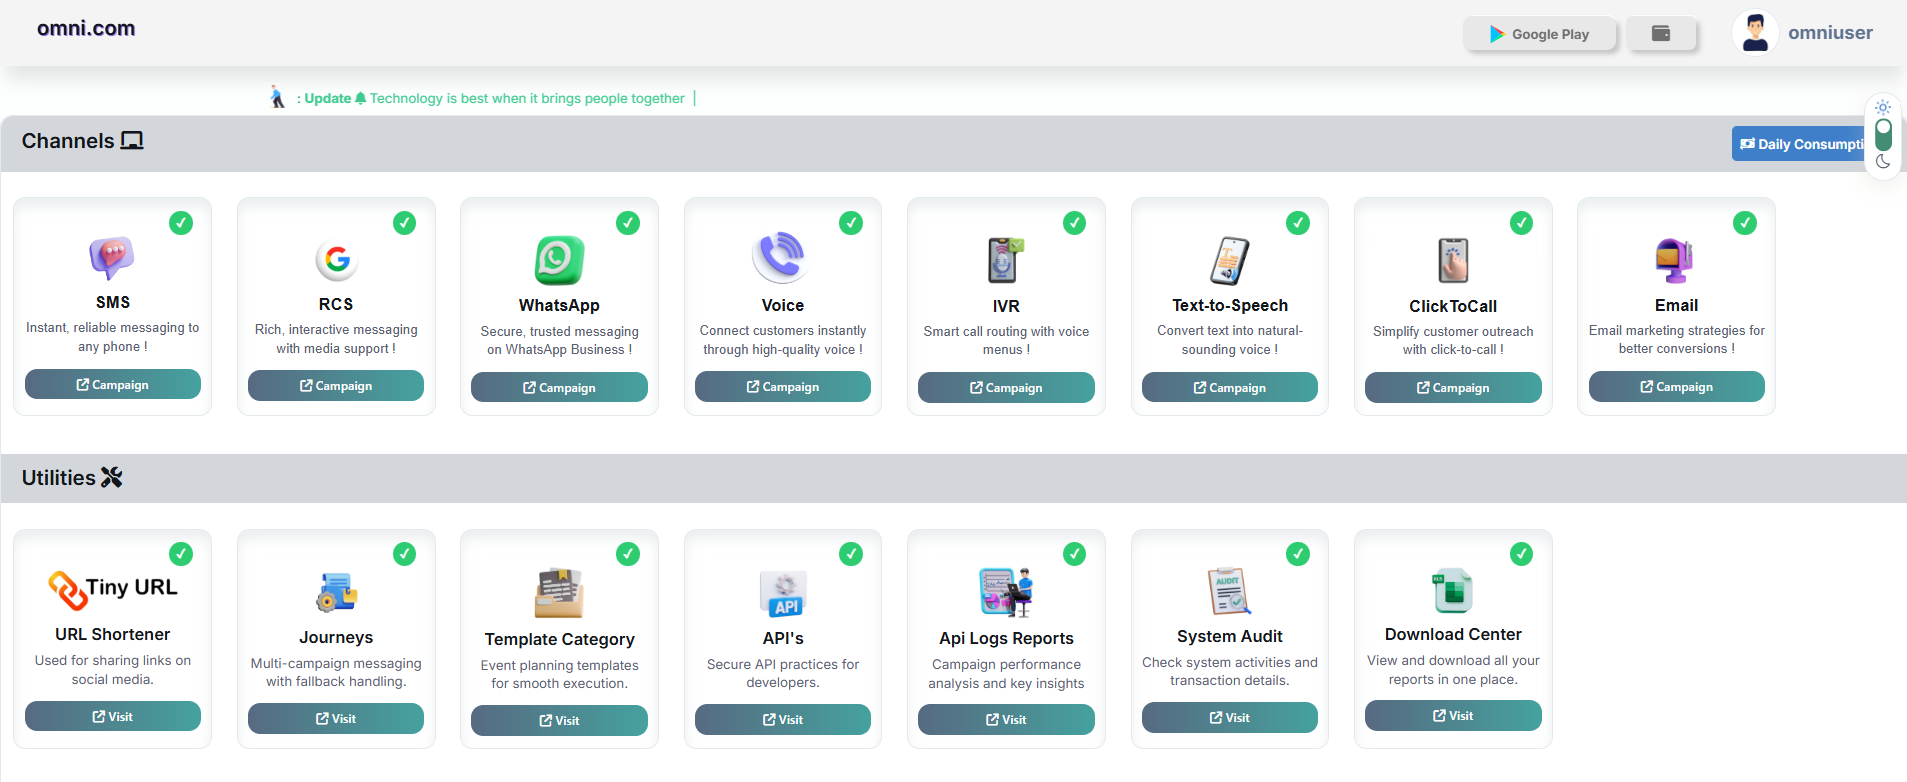

Dashboard Sections
Channels
Access and manage all communication services. Create and run campaigns directly from each channel card.
Utilities
Supporting tools for campaign management, automation, and administration.
Plugins
Third-party platform integrations available directly from the dashboard.
SMS
The SMS module is a comprehensive communication solution that enables businesses to create, schedule, manage, and monitor SMS campaigns for effective customer engagement. It provides an easy-to-use interface for sending promotional, transactional, and informational messages to individual contacts, multiple recipients, or large contact groups. Users can upload contact lists, organize recipients into groups, configure Sender IDs, select message routes, and use approved DLT templates to ensure regulatory compliance. The module also supports Smart URL (Tiny Campaign) creation for trackable links, blacklist management to prevent messages from being sent to restricted numbers, and detailed campaign reports for monitoring delivery status and performance. With its centralized dashboard and powerful campaign management tools, the SMS module helps organizations streamline communication, improve customer reach, and efficiently manage every stage of the SMS campaign lifecycle.
Create SMS Campaign
The Create Campaign page allows you to configure and send SMS campaigns to individuals, groups, or uploaded contact files.
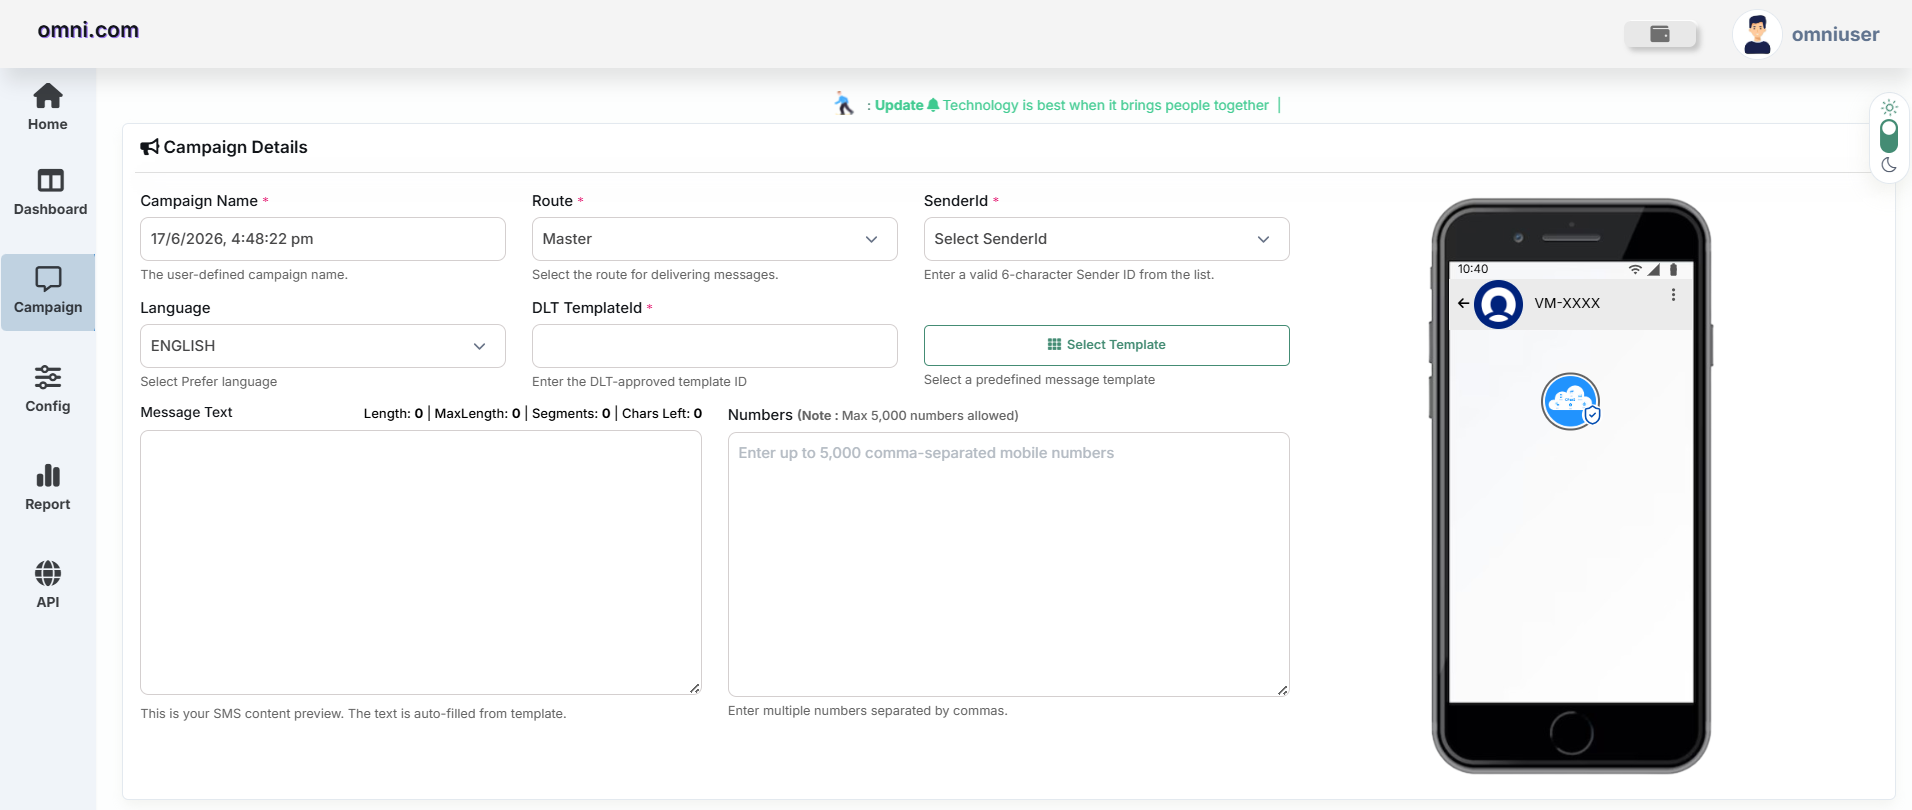
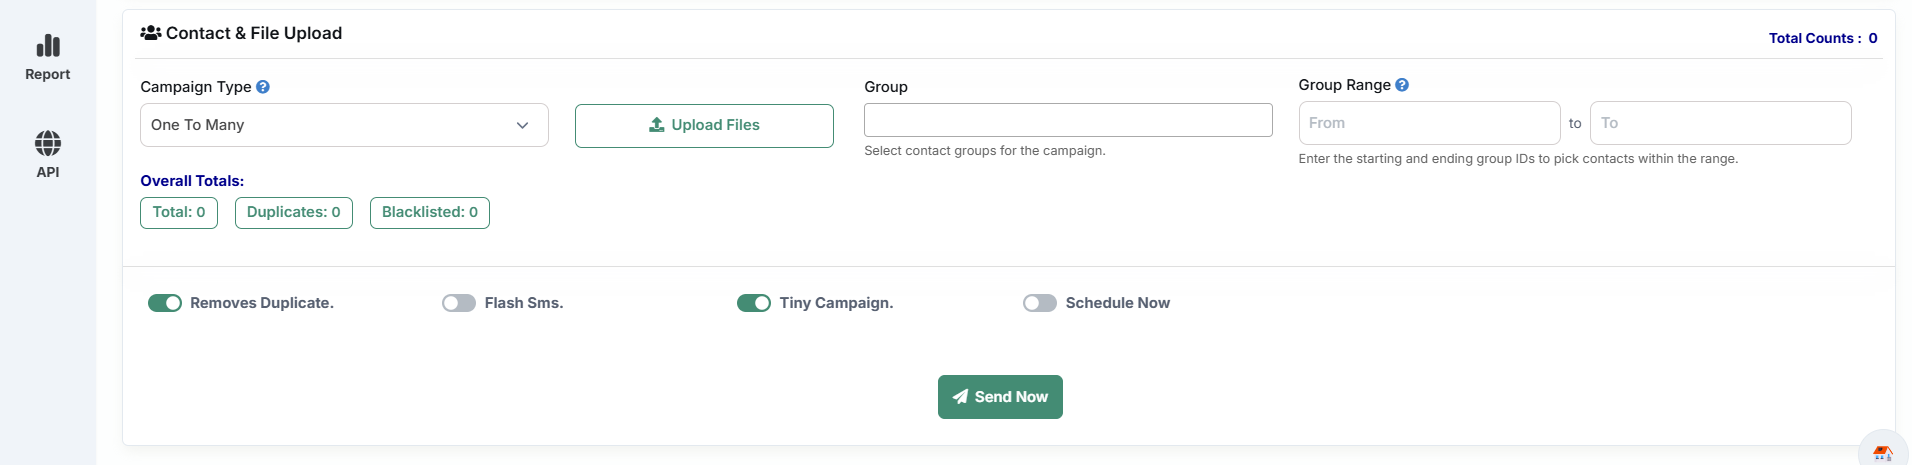
Campaign Details
| Field | Description |
|---|---|
| Campaign Name | User-defined name for the campaign. Auto-filled with timestamp. |
| Route | Message delivery route — select from available routing options. |
| Sender ID | Sender identity displayed to recipients (6–8 character alpha code). |
| Language | Preferred language for the message content (e.g. English). |
| DLT Template ID | Government-approved Distributed Ledger Technology template identifier. |
| Select Template | Choose a predefined SMS template. Message text auto-fills from selection. |
| Message Text | SMS content to be delivered. Shows Length, MaxLength, Segments, Chars Left. |
| Numbers | Recipient mobile numbers — up to 5,000 comma-separated entries. |
Steps to Create a Campaign
Tiny Campaign (Smart URL)
The Tiny Campaign feature is used when a URL is very long. Instead of sending the complete URL in the SMS message, the system generates a Smart URL (short URL), making messages cleaner, easier to read, and trackable.
Purpose
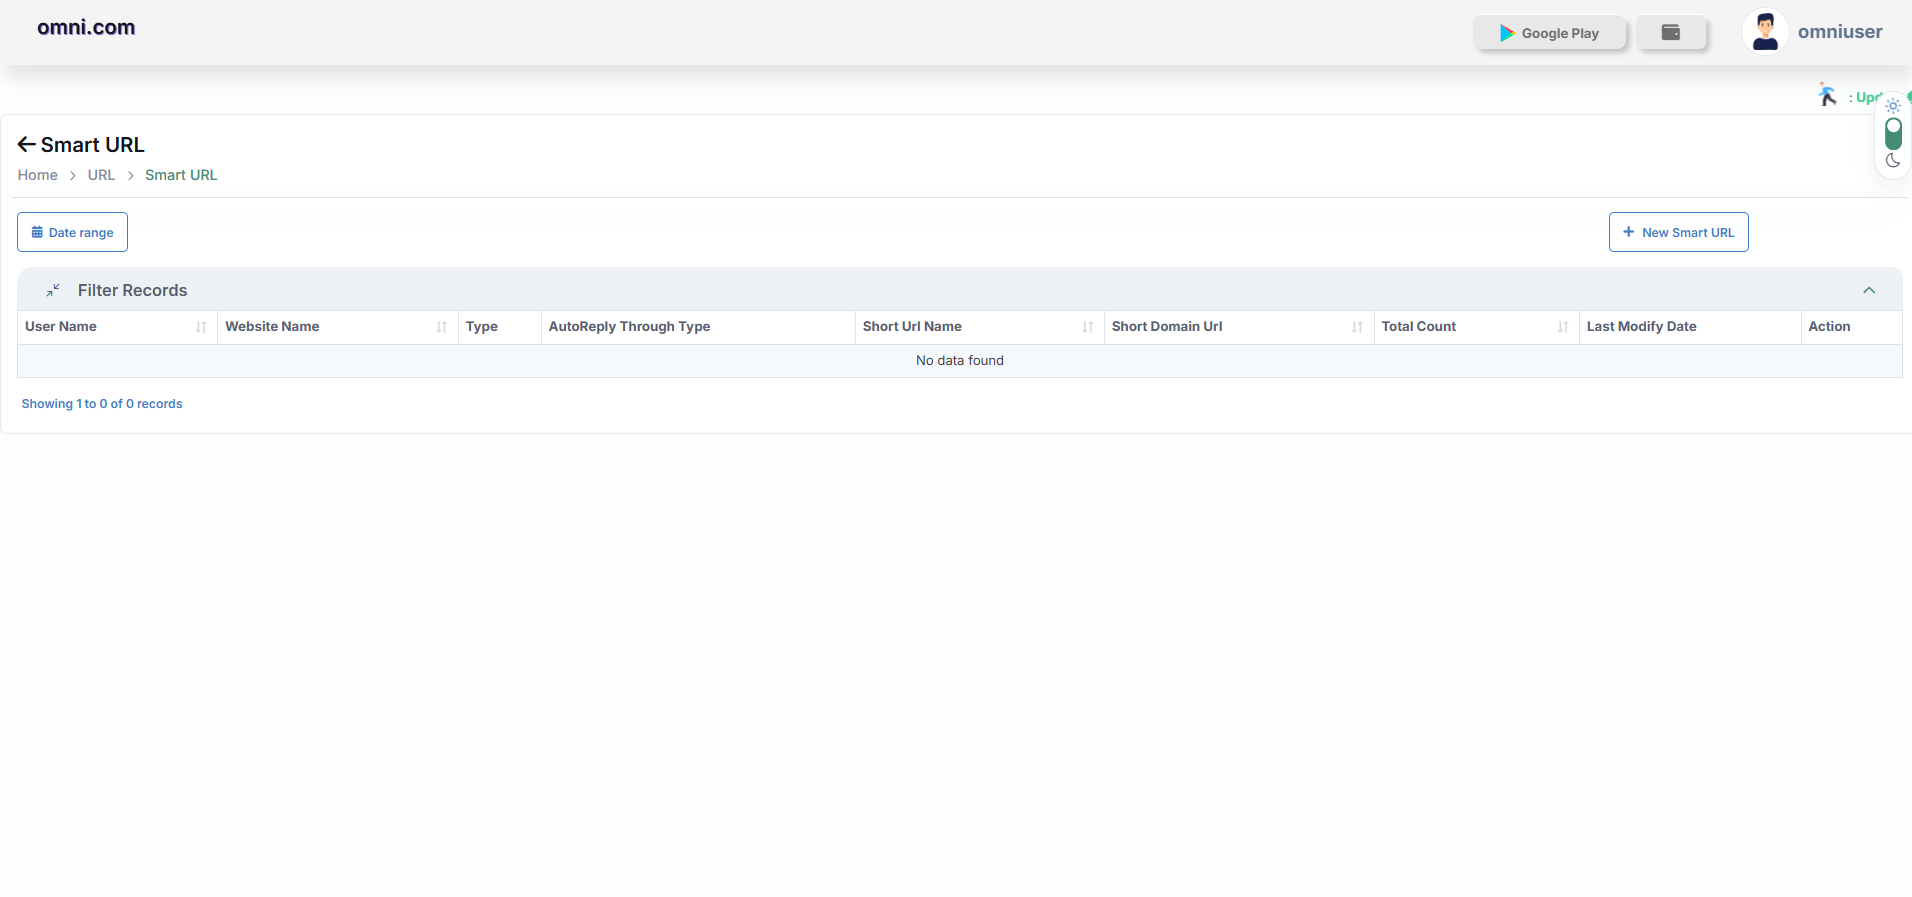
Step 1: Create Smart URL
Navigation: Home → Utilities → Tiny URL
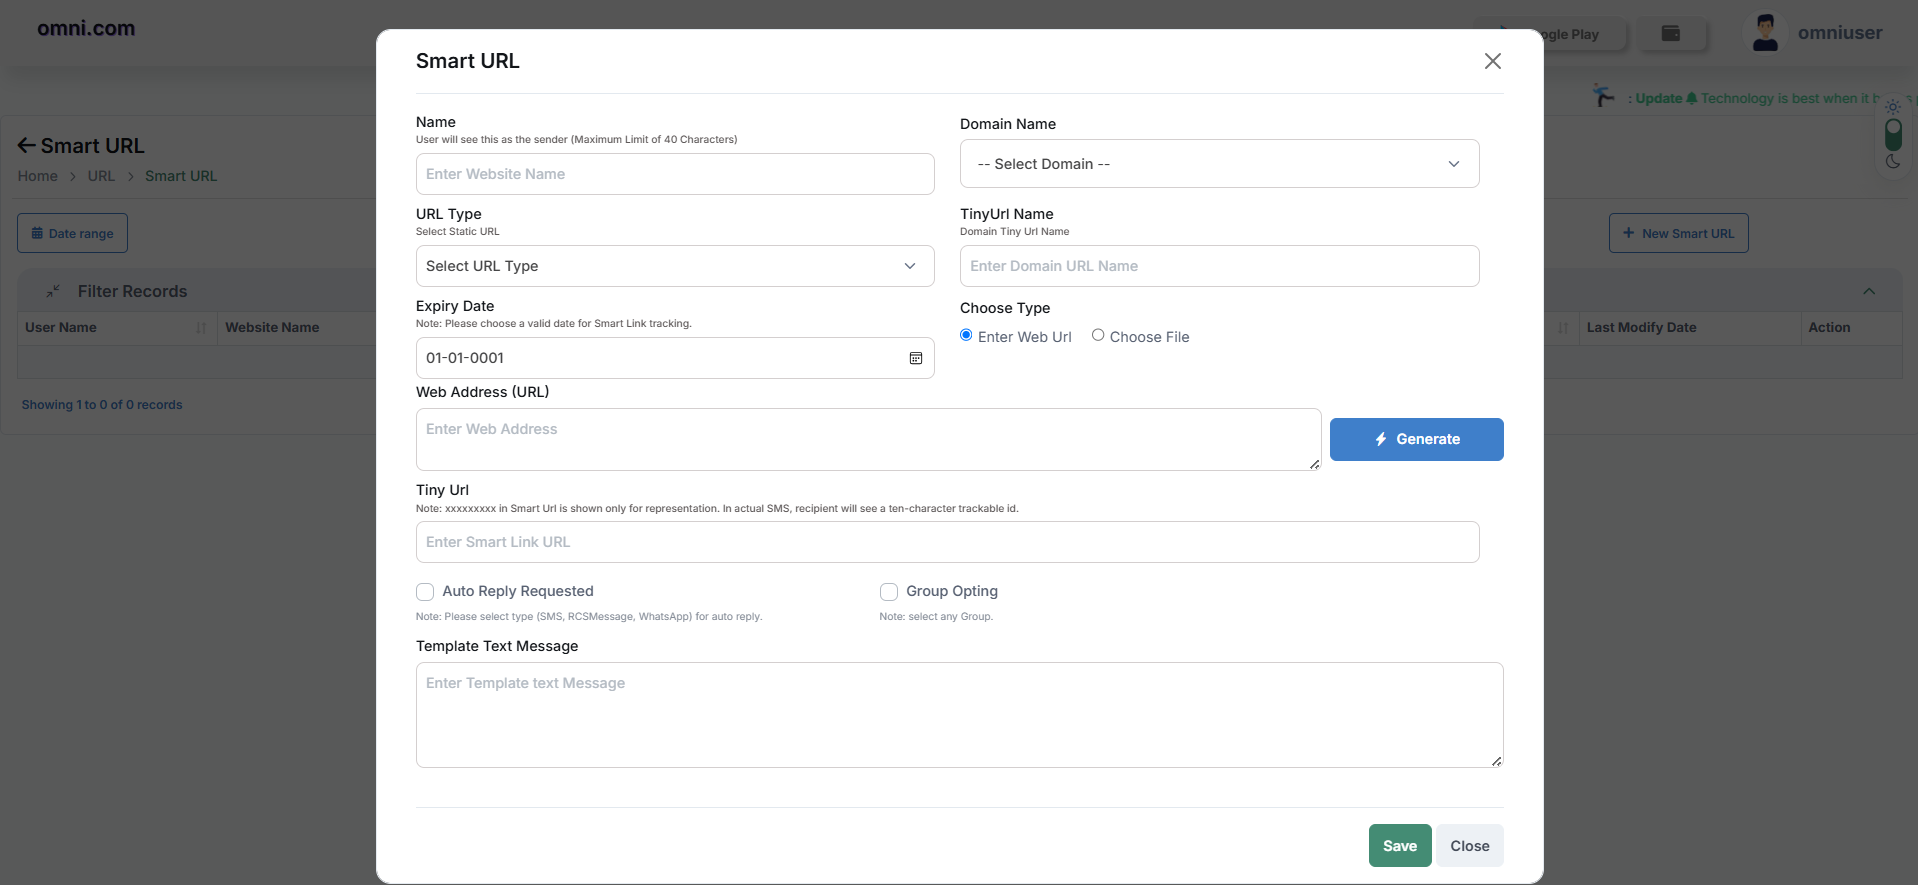
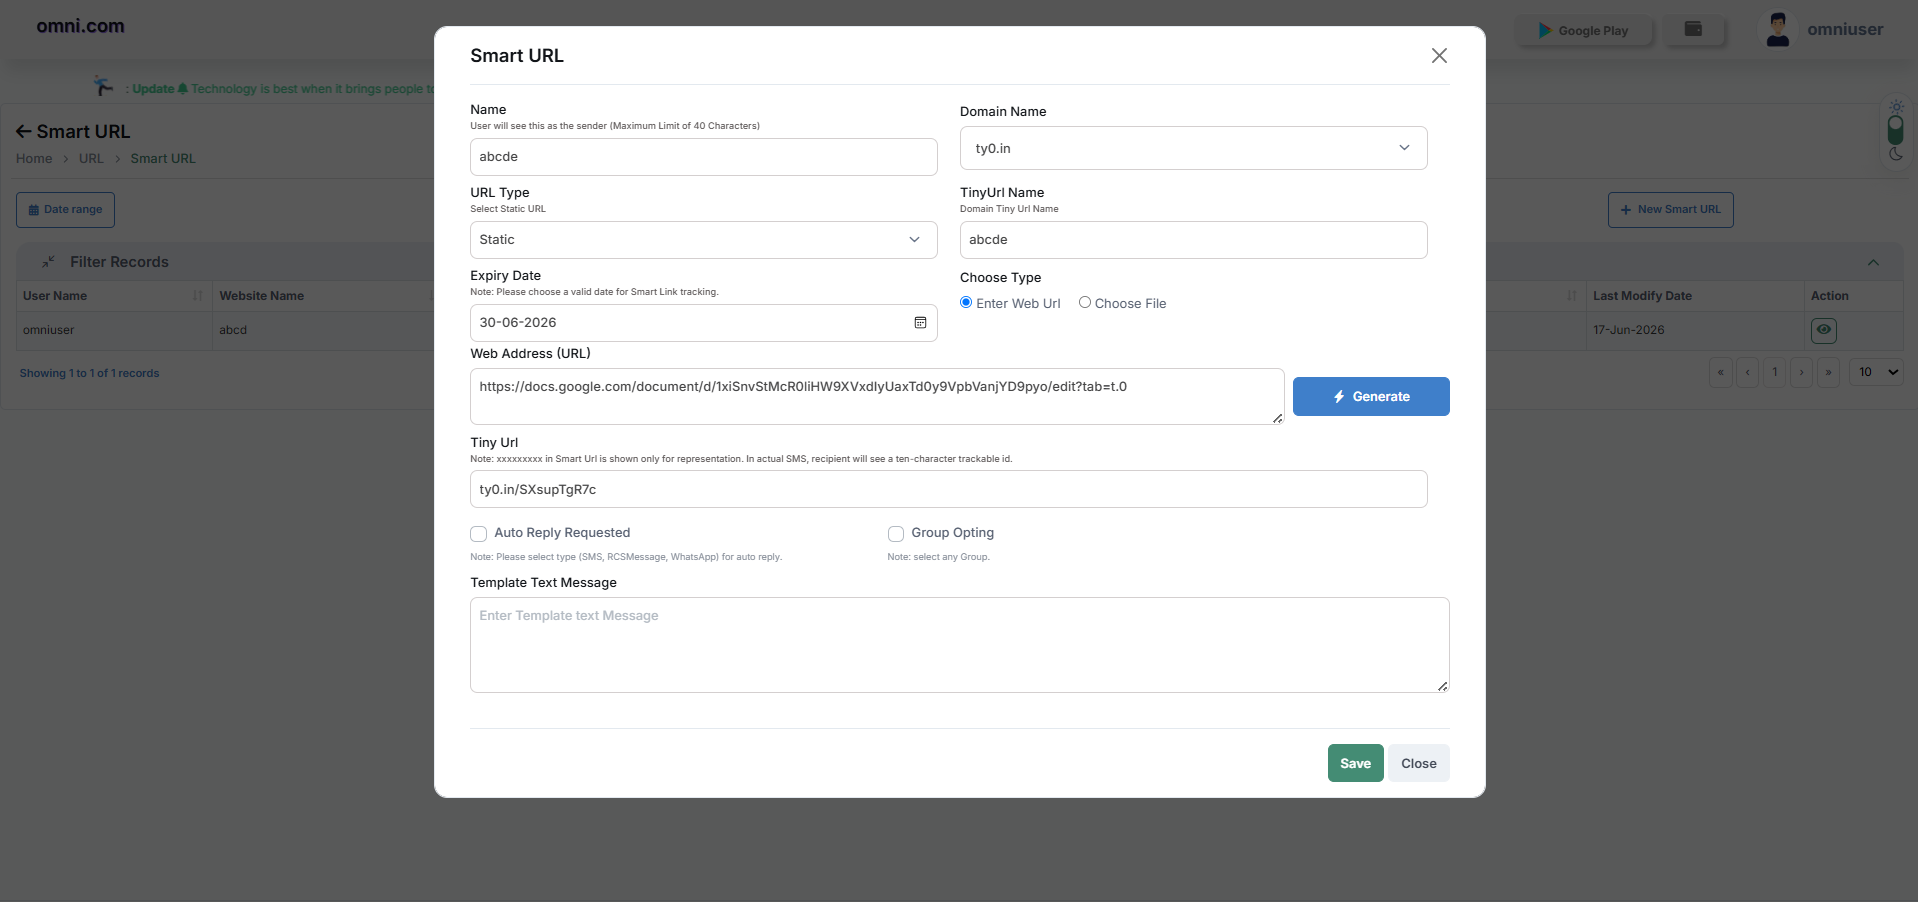
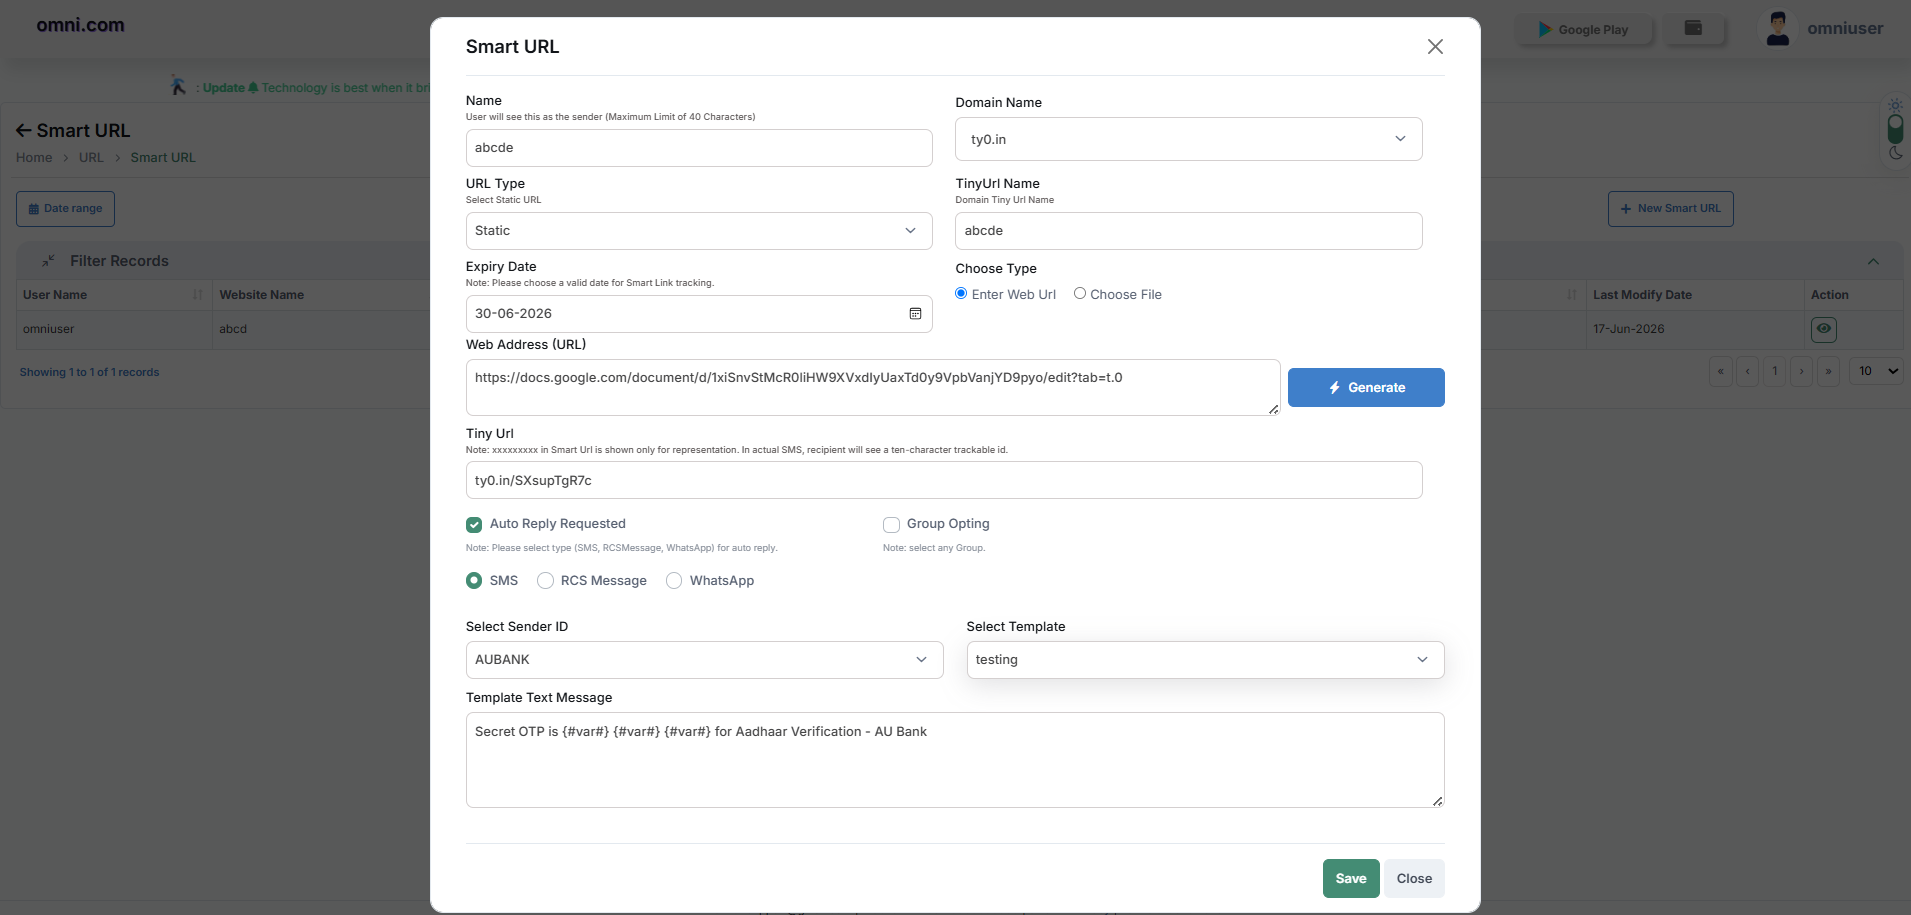
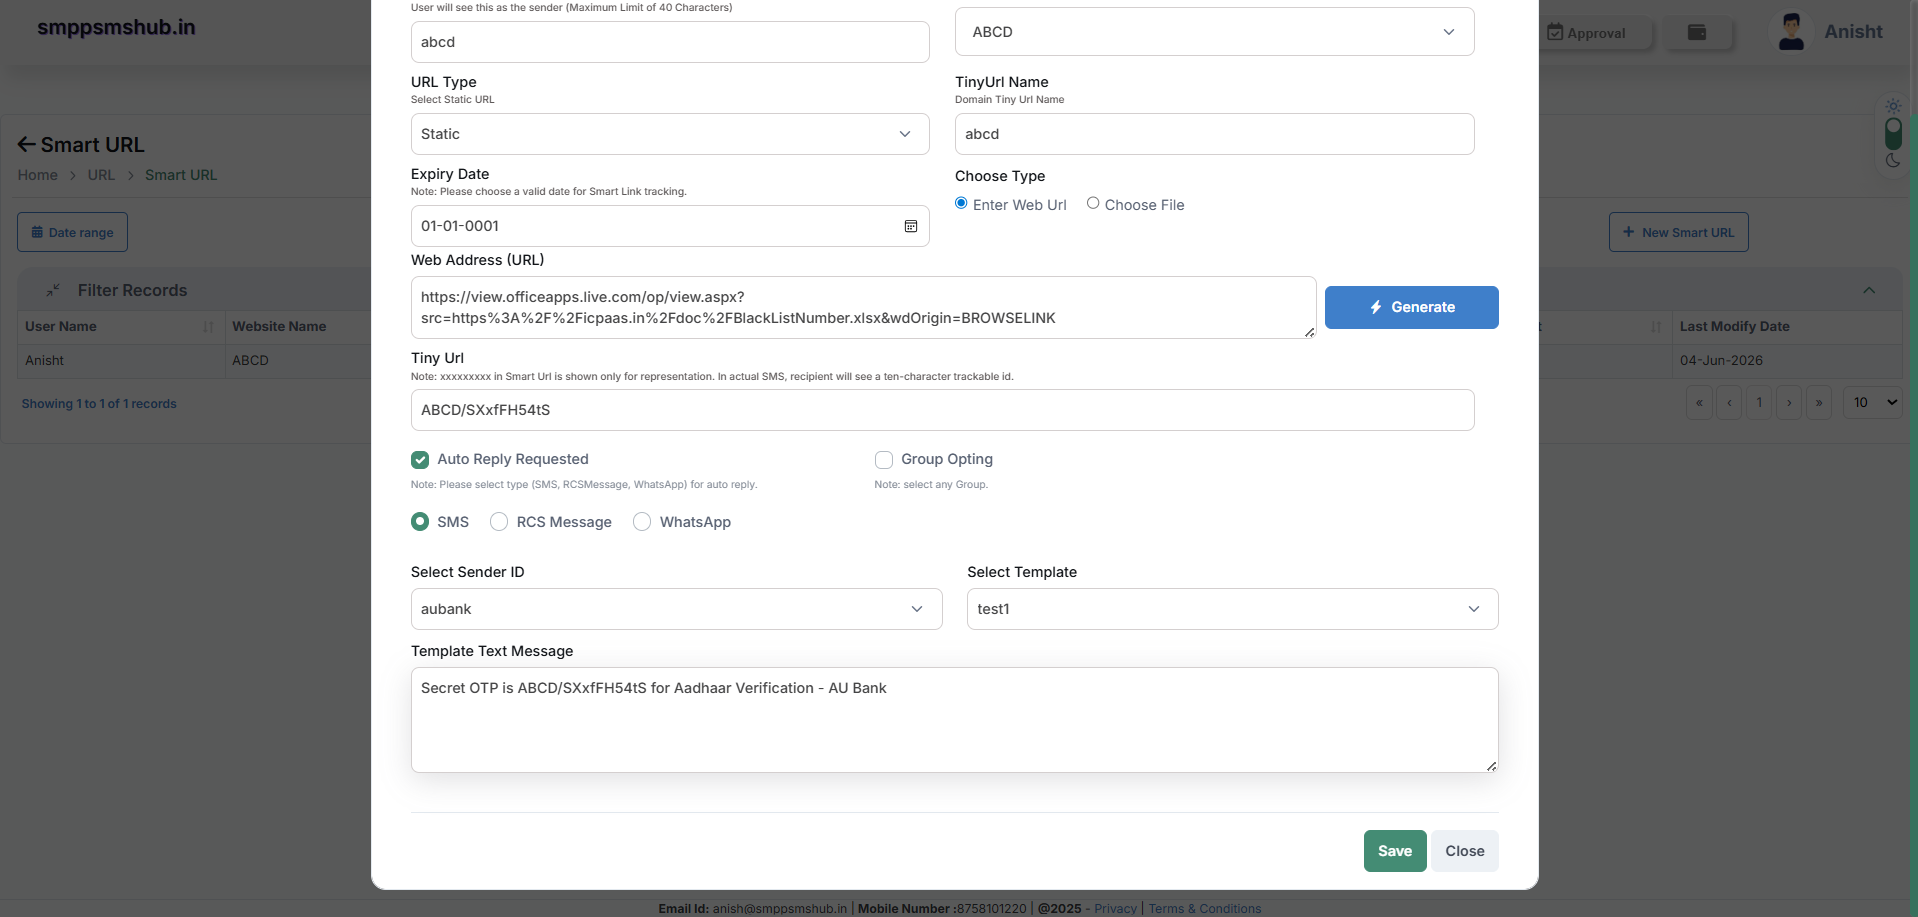
Smart URL Fields
| Field | Description |
|---|---|
| Name | Website or campaign name |
| Domain Name | Select the domain created earlier |
| URL Type | Static or Dynamic |
| Tiny URL Name | Custom short URL name |
| Expiry Date | Expiration date of Smart URL |
| Web Address | Paste the long URL |
Step 2: Use Smart URL in SMS Campaign
Navigation: Campaign → SMS Campaign
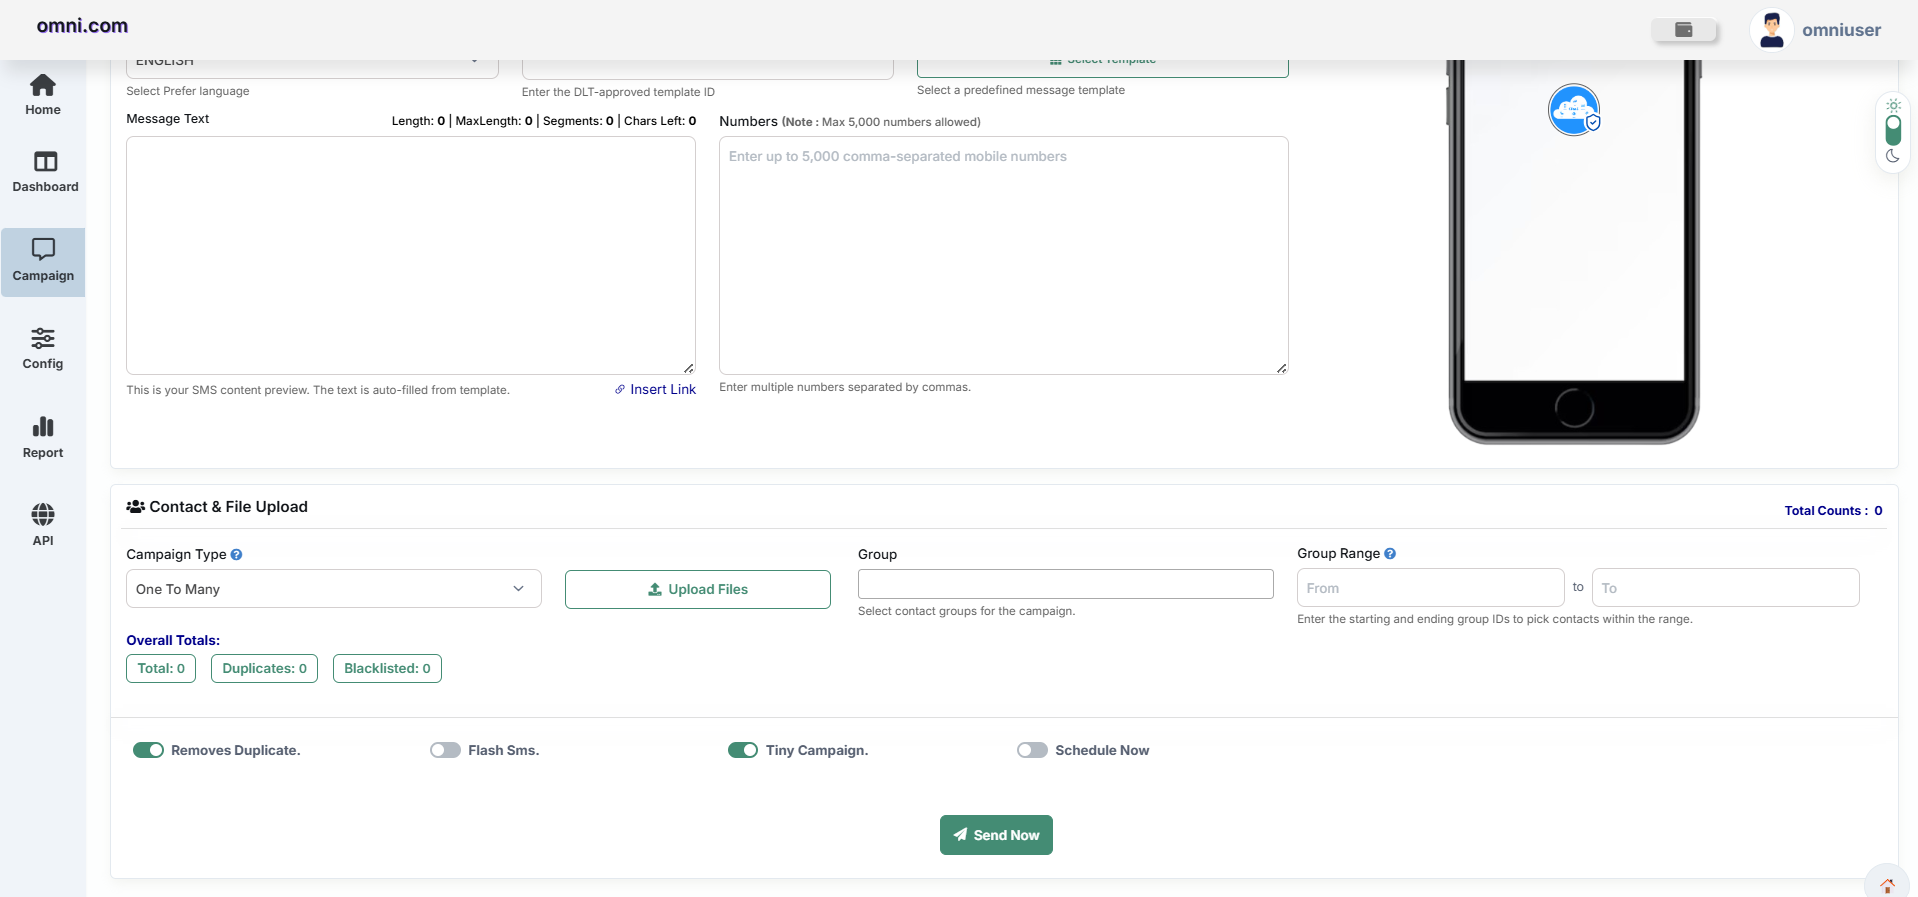
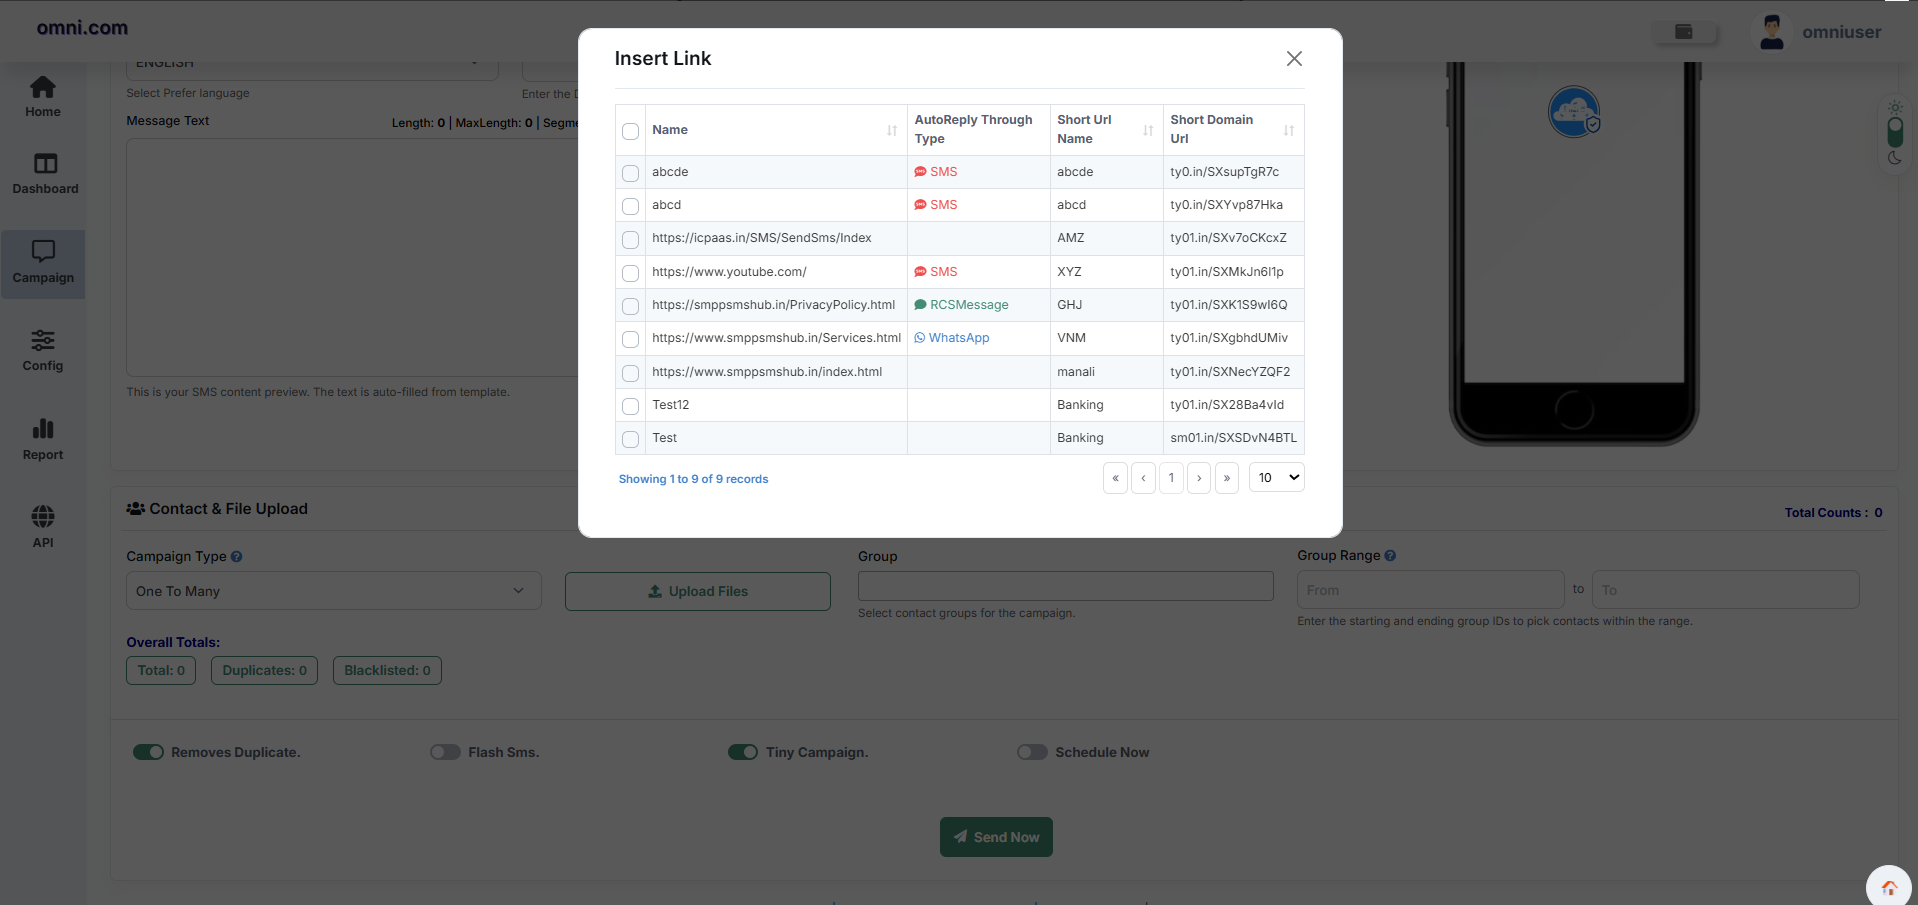
Step 3: Select SMS Template
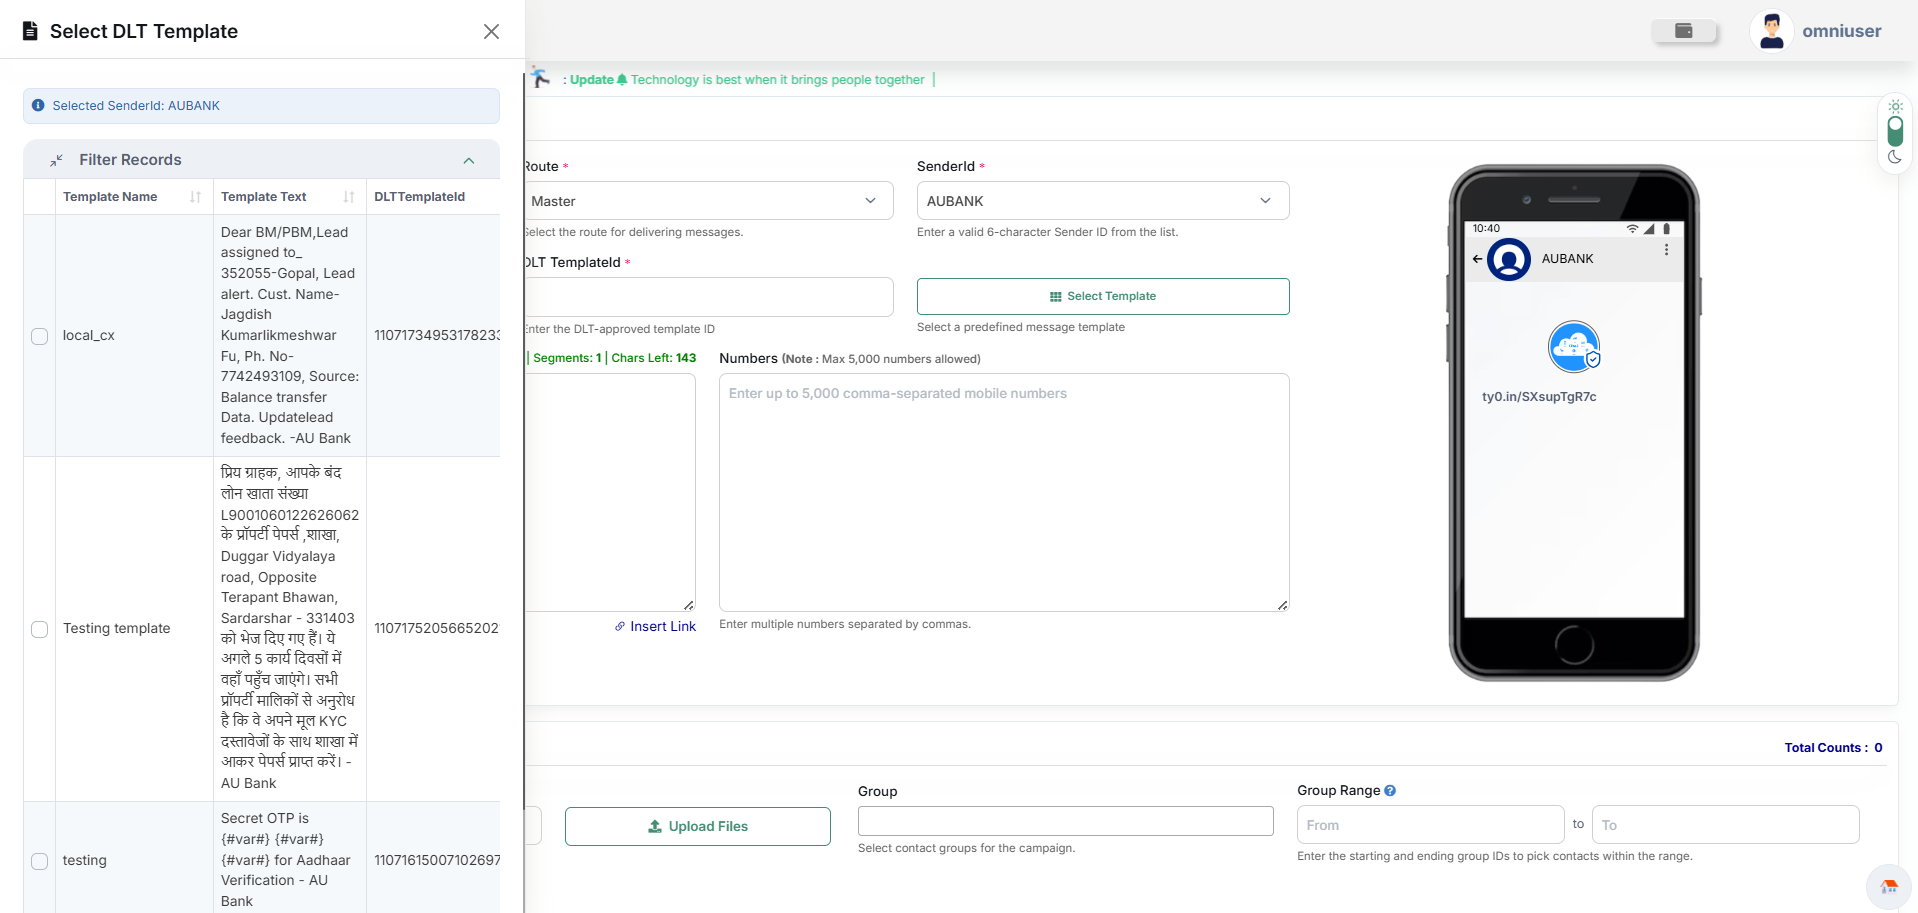
Step 4: Replace the Numeric Placeholder
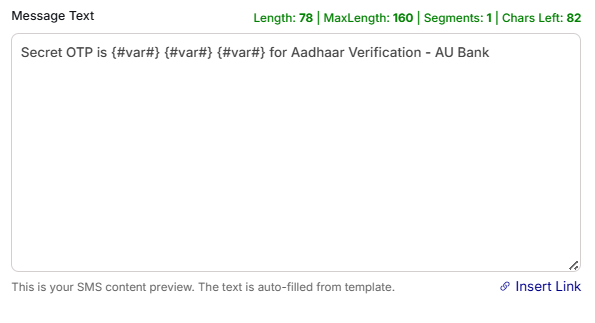
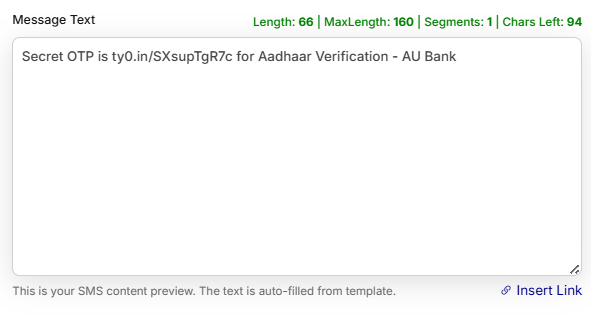
Final Result
The recipient receives a message containing a Smart URL instead of a long URL. This reduces SMS length, improves readability, and provides click tracking.
Manage Sender ID
The Manage Sender ID module allows users to create, upload, edit, and manage Sender IDs used for SMS campaign delivery.
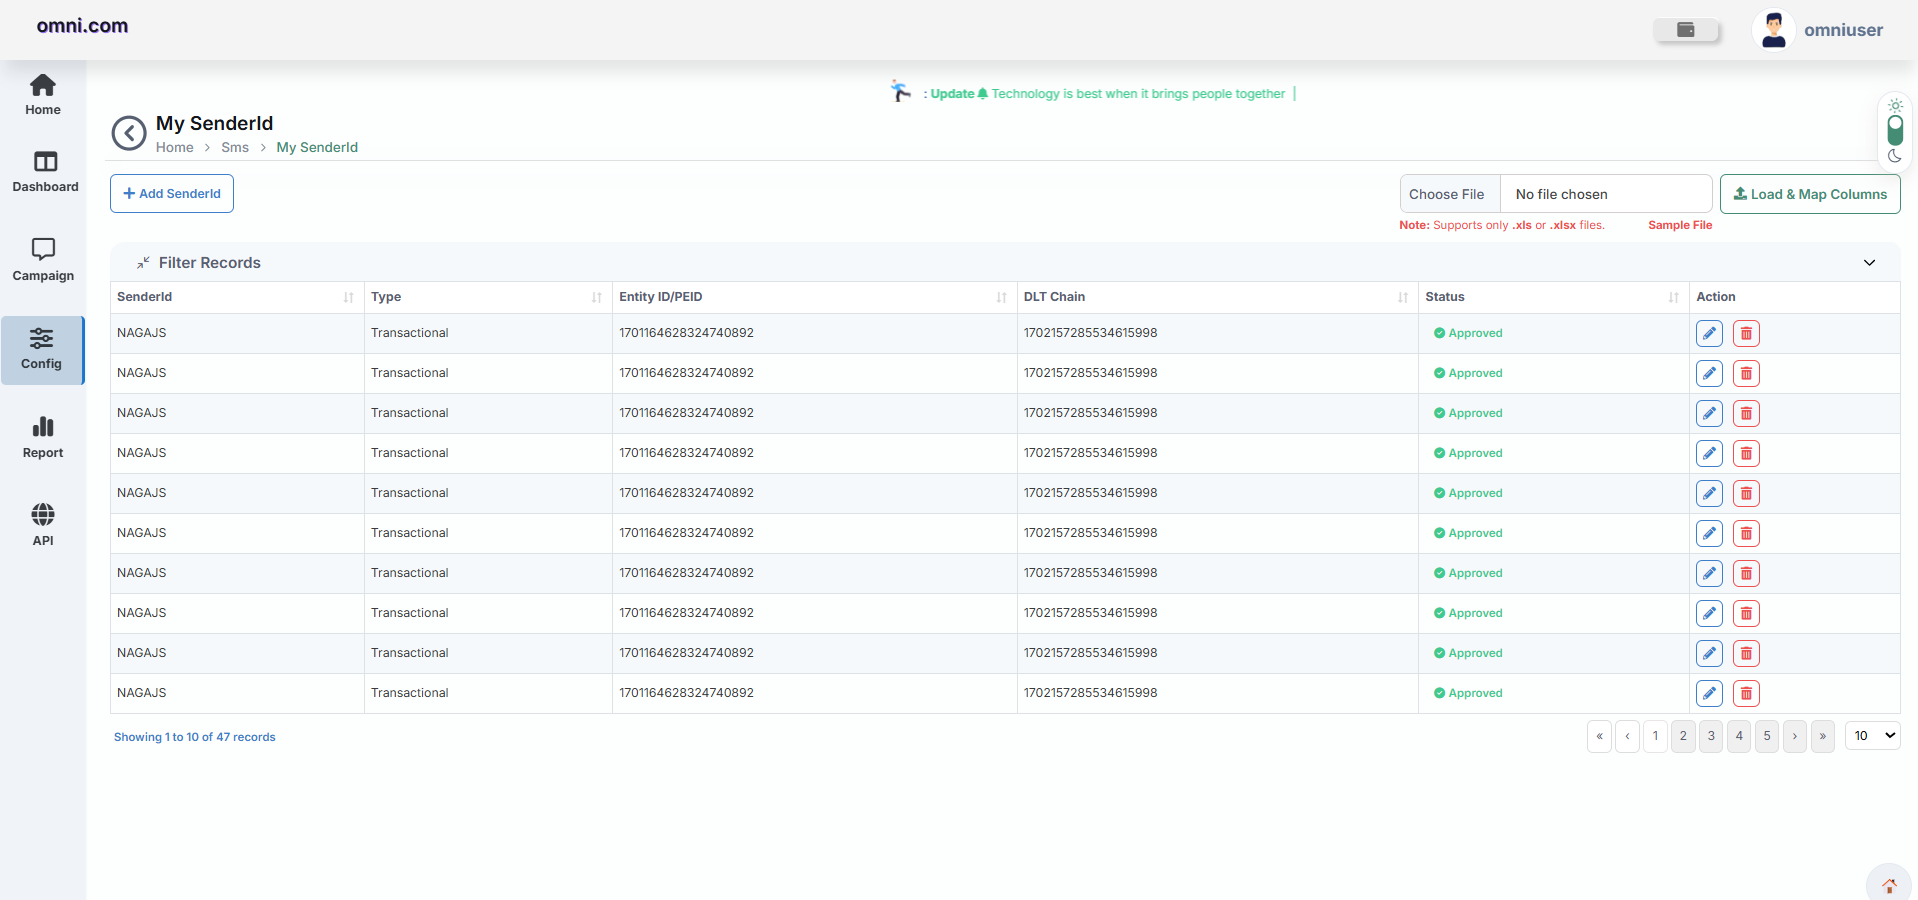
Available Functions
| Function | Description |
|---|---|
| Add Sender ID | Create a new Sender ID |
| Upload Sender IDs | Import Sender IDs using supported files |
| Edit | Modify existing Sender ID details |
| Delete | Remove a Sender ID |
| Status | Displays approval status of Sender ID |
Sender ID Information
Add Sender ID
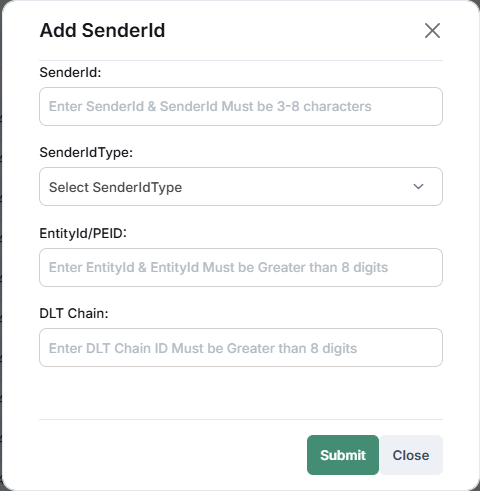
The Add Sender ID feature allows users to register a new Sender ID for SMS communication.
| Field | Description |
|---|---|
| Sender ID | Unique sender name displayed to recipients |
| Sender ID Type | Type of SMS communication |
| Entity ID / PEID | Registered Principal Entity Identifier |
| DLT Chain | Distributed Ledger Technology chain identifier |
Sender ID Types
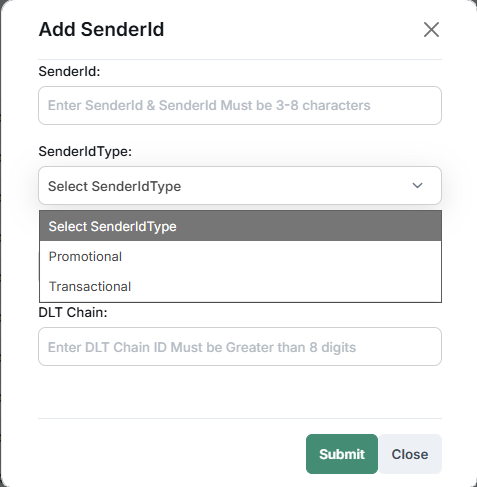
Steps to Add Sender ID
The Sender ID request is submitted and appears in the Sender ID list for approval and future campaign usage.
Manage Template
The Manage Template module allows users to create, manage, and use DLT-approved SMS templates for campaign delivery.
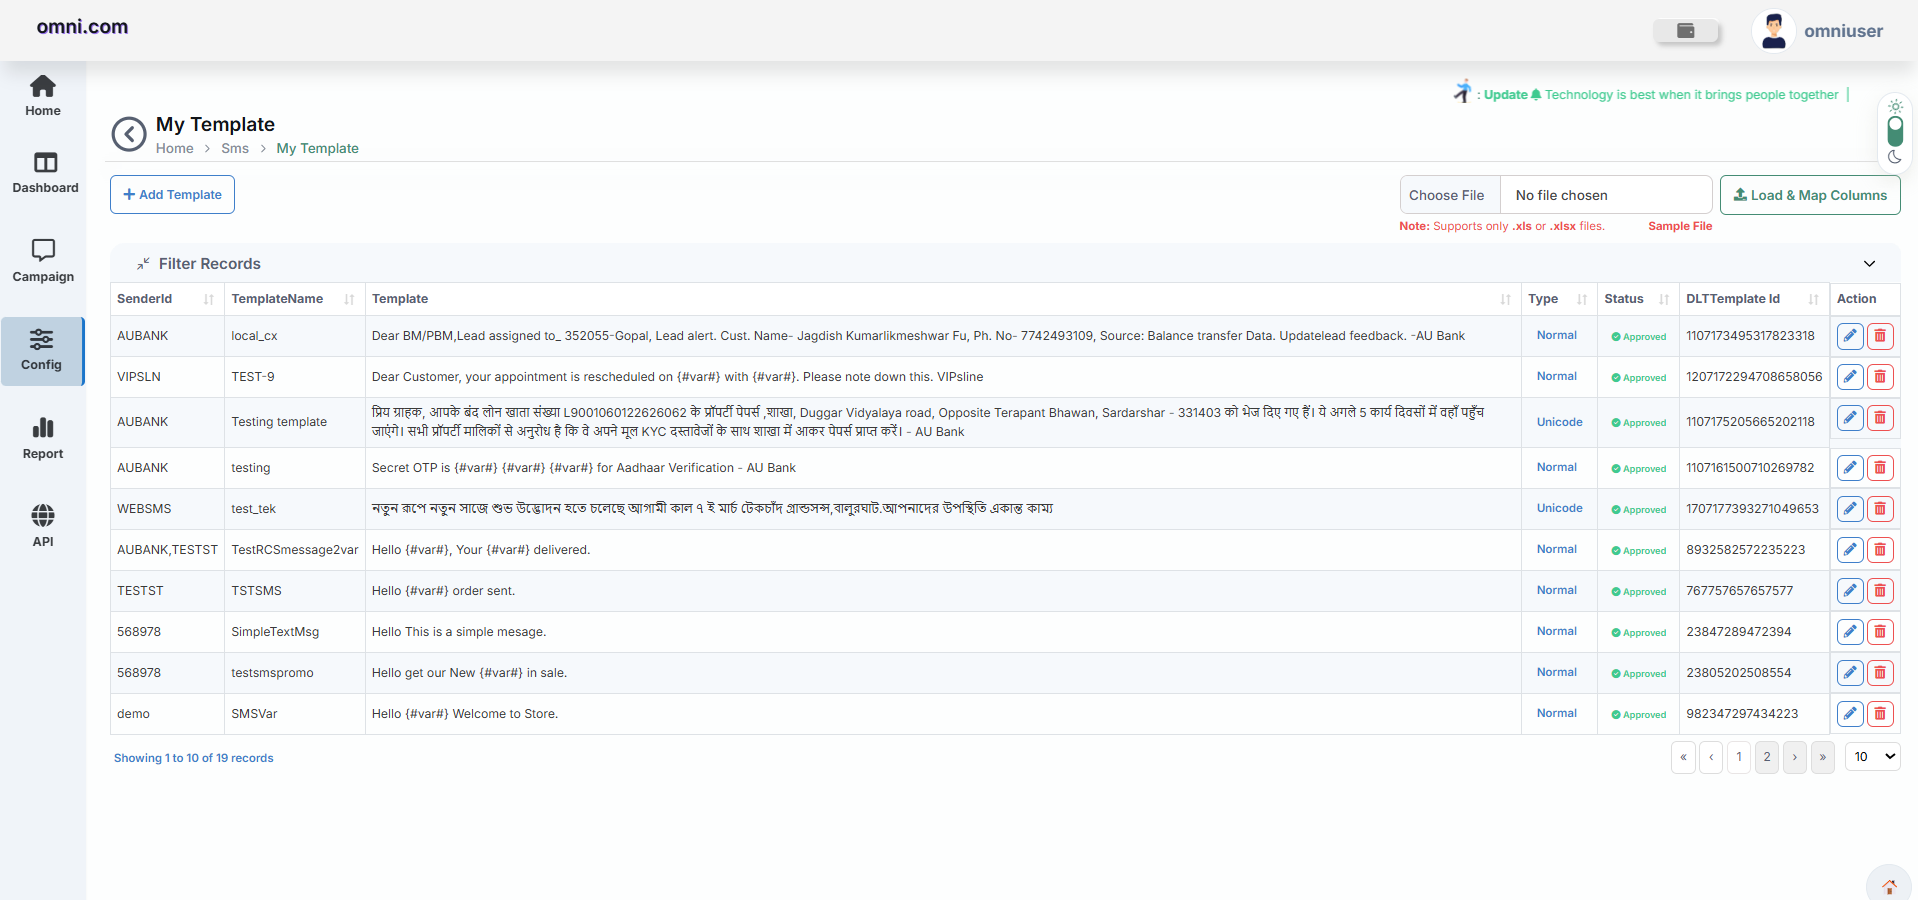
Template Features
Template Information
| Field | Description |
|---|---|
| Template Name | Name of the template |
| Template ID | DLT approved template identifier |
| Message Content | Approved SMS content |
| Template Type | Promotional or Transactional |
| Status | Approval status |
Create a Template
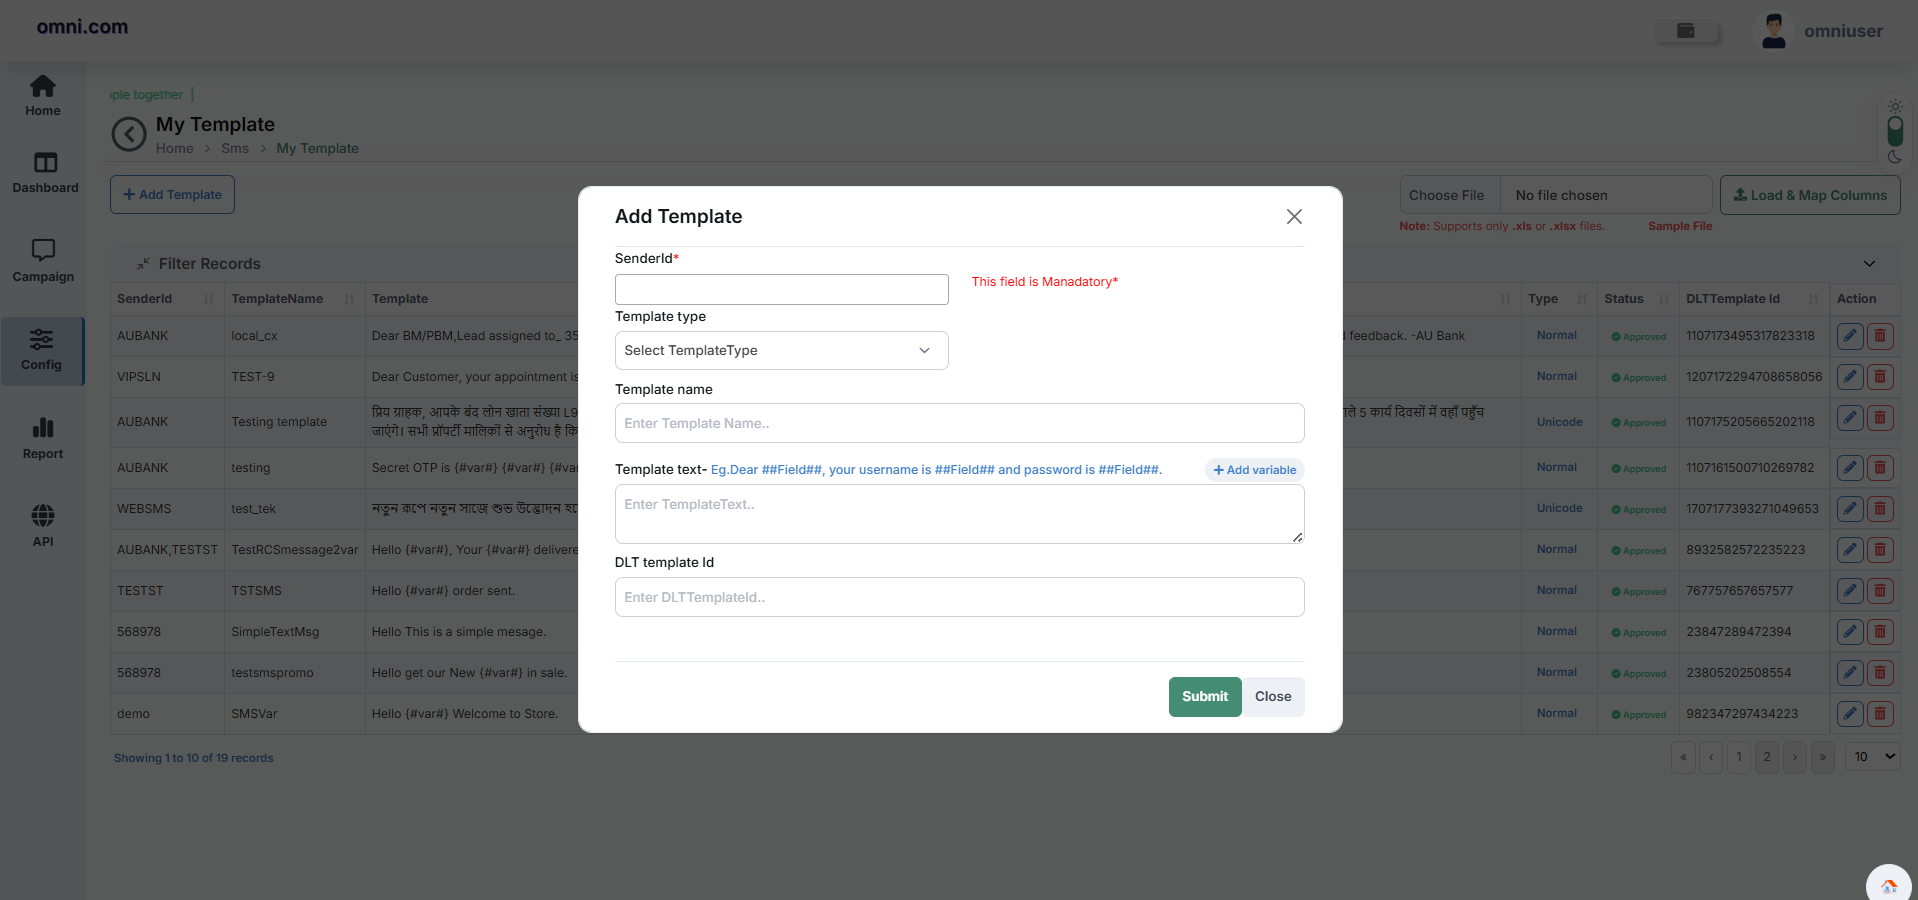
Using Templates in Campaigns
Approved templates are available for selection during SMS campaign creation.
Contact Manager
The Contact Manager module helps users organize, import, manage, and group recipient contacts for SMS campaigns.
Key Features
Contact Group Fields
| Field | Description |
|---|---|
| Group Name | Name of the contact group |
| Description | Purpose of the group |
| Total Contacts | Number of contacts in the group |
| Status | Active or inactive |
Create a Contact Group
Import Contacts
Using Groups in Campaigns
Contacts are organized into groups and can be selected directly while creating SMS campaigns.
My Routes
The My Routes section allows users to view and manage available SMS delivery routes used for sending messages.
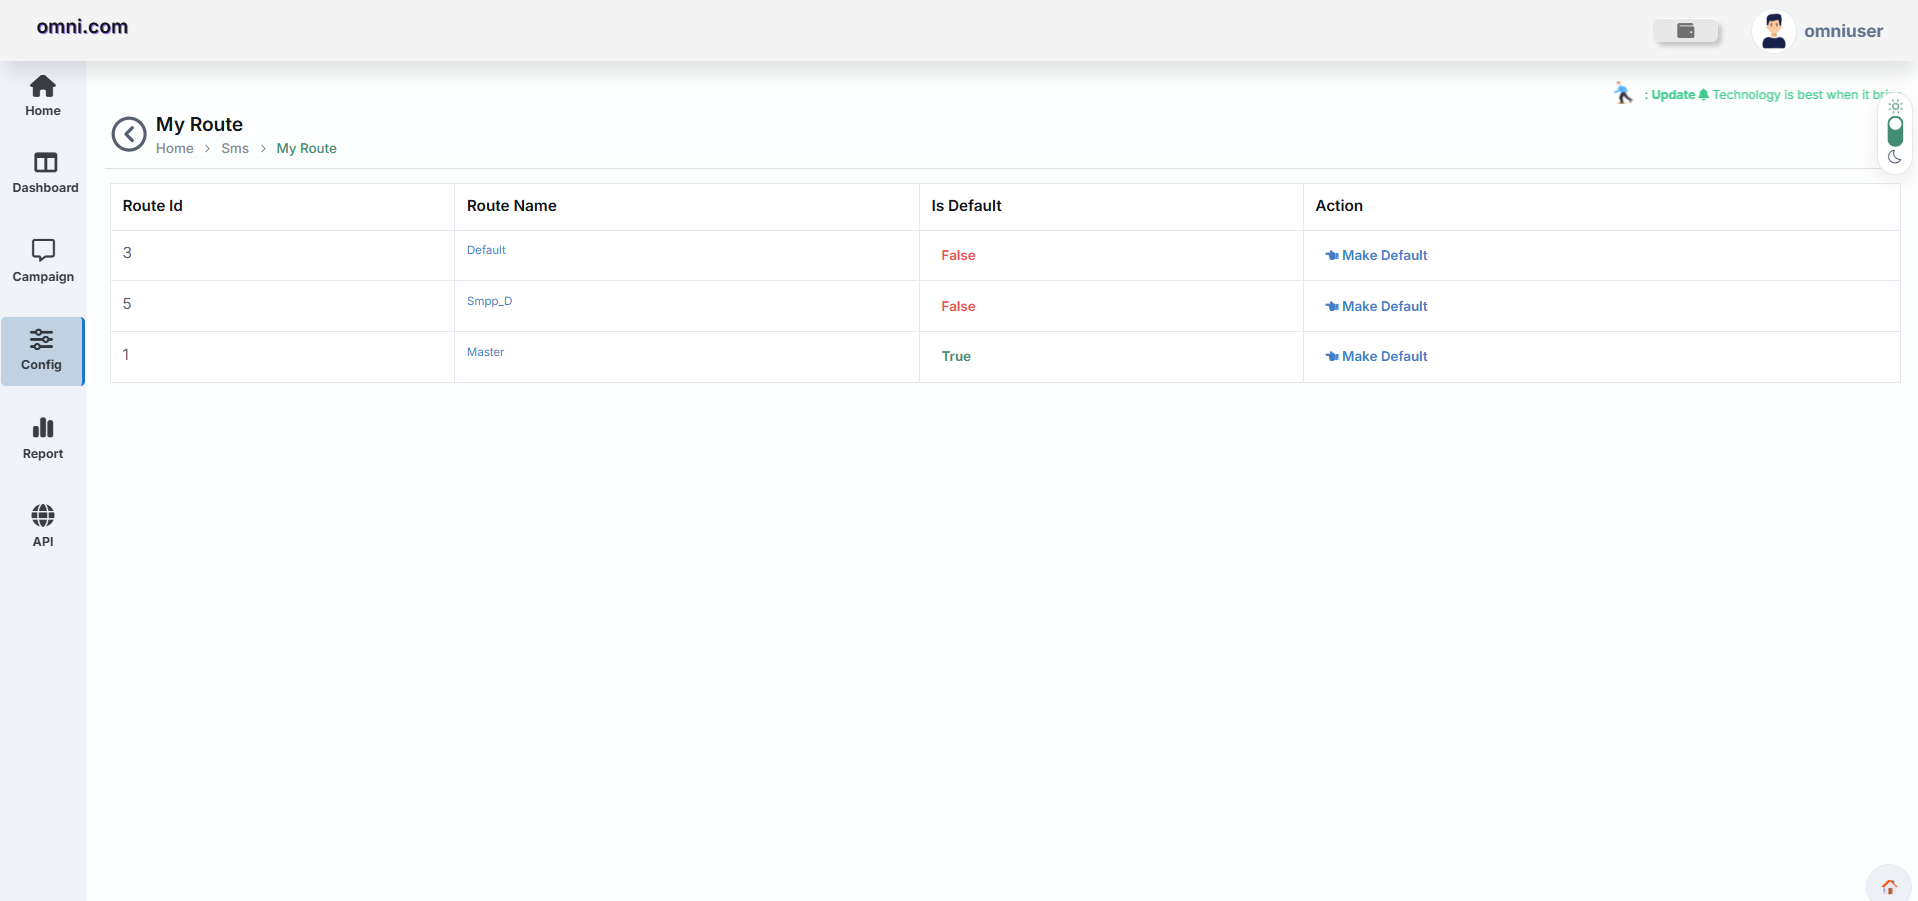
Available Information
| Field | Description |
|---|---|
| Route ID | Unique identifier of the route |
| Route Name | Name of the SMS delivery route |
| Is Default | Indicates whether the route is the default route |
| Action | Allows users to set a route as the default route |
Available Actions
Users can view available routes and configure the preferred default route for SMS delivery.
Manage Group
The Manage Group section allows users to create and maintain contact groups for SMS campaigns. Groups help organize recipients and simplify campaign management.
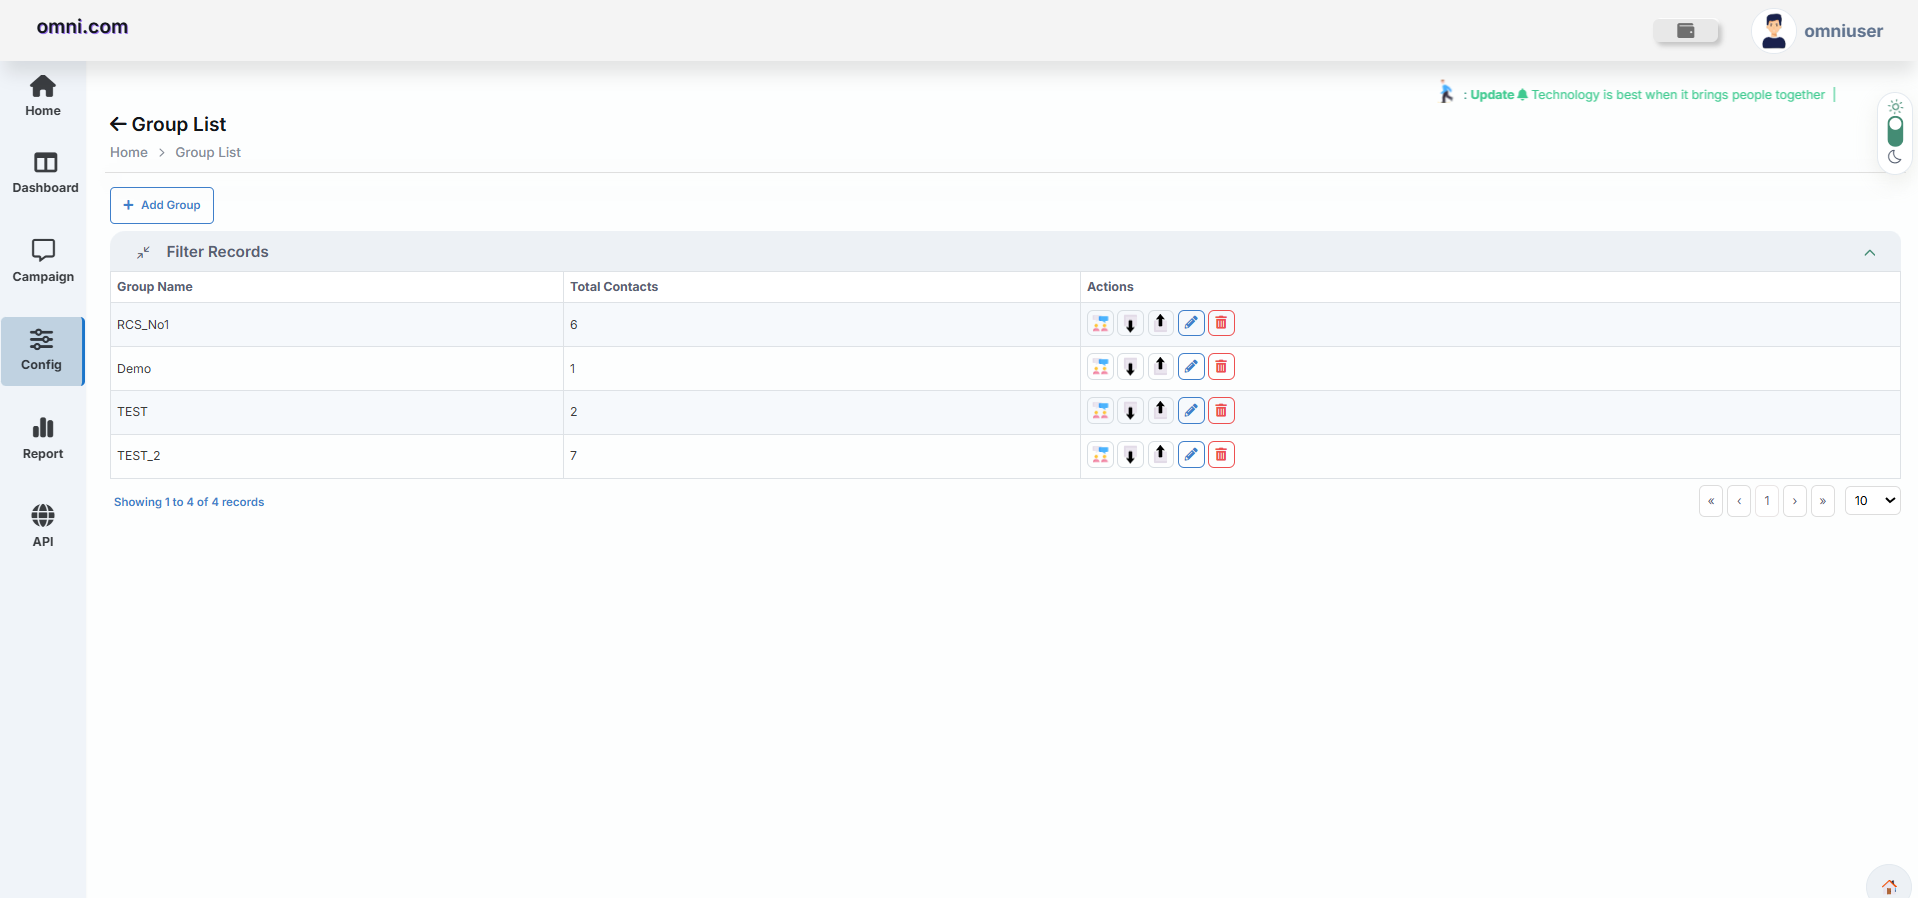
Available Information
| Field | Description |
|---|---|
| Group Name | Name of the contact group |
| Total Contacts | Total number of contacts in the group |
| Actions | Available management actions for the group |
Available Actions
Create a New Group
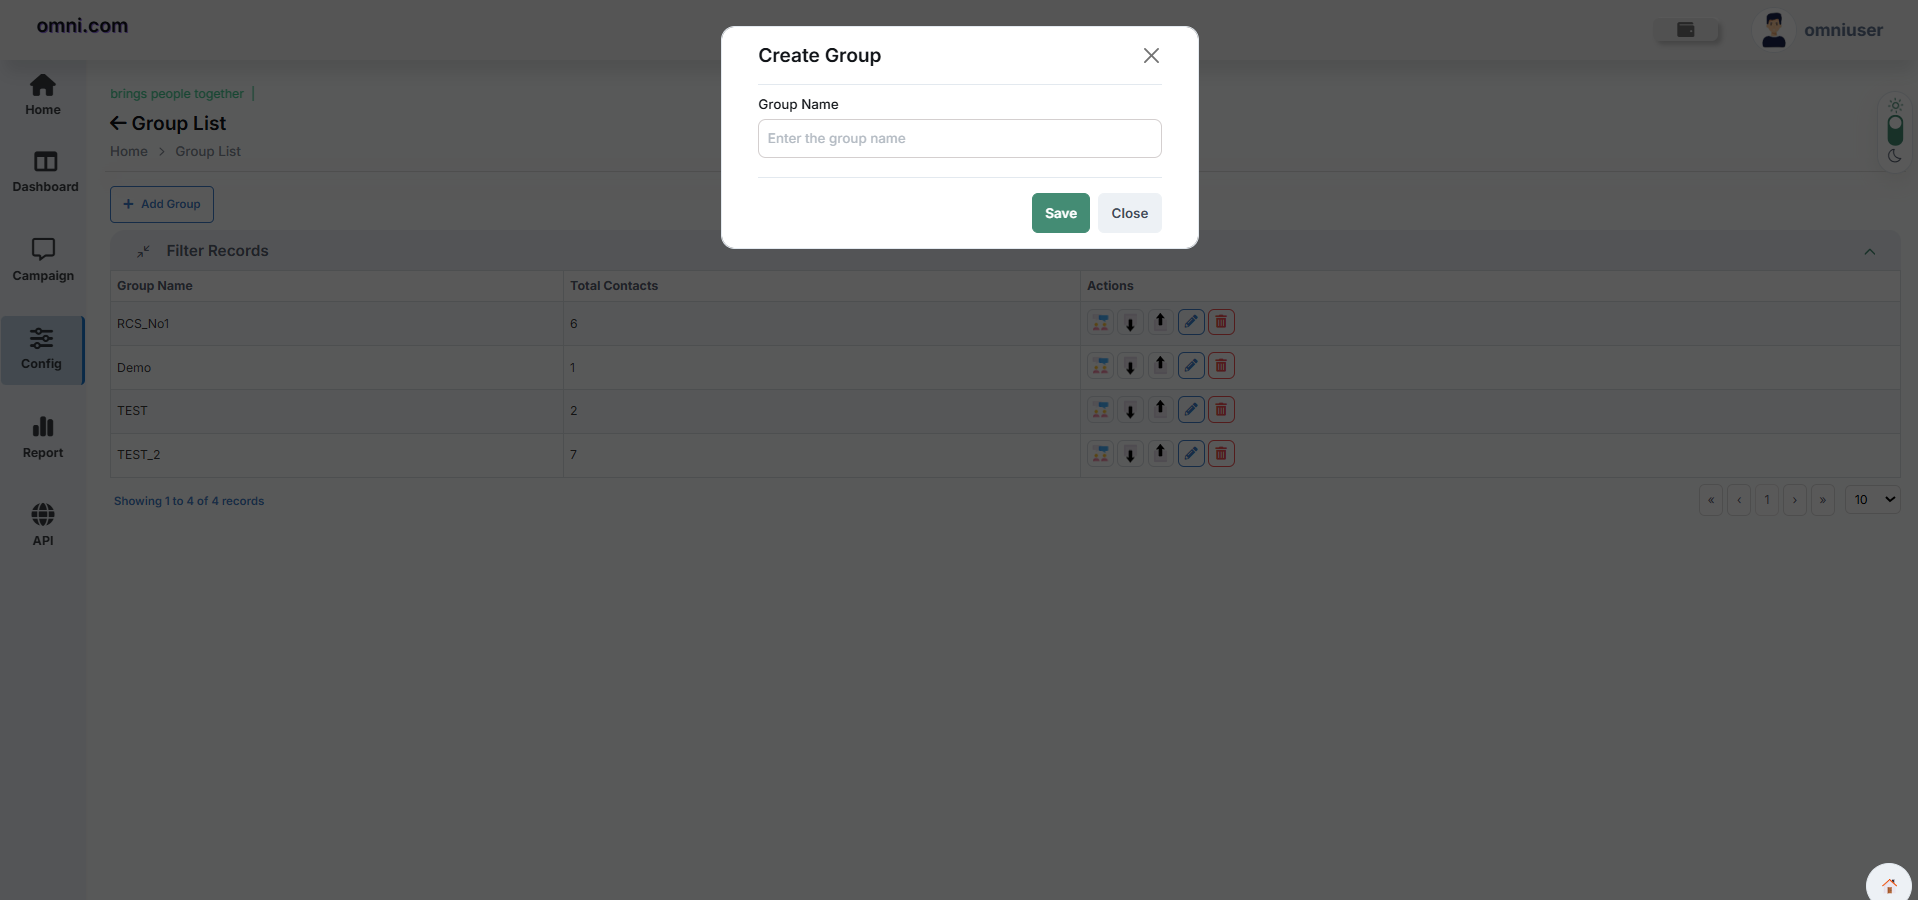
The new group is created successfully and appears in the group listing.
Blacklist Numbers
The Blacklist Numbers module allows users to block specific mobile numbers from receiving SMS campaigns. Blacklisted numbers are excluded from campaign delivery, helping organizations avoid sending messages to unwanted or restricted recipients.
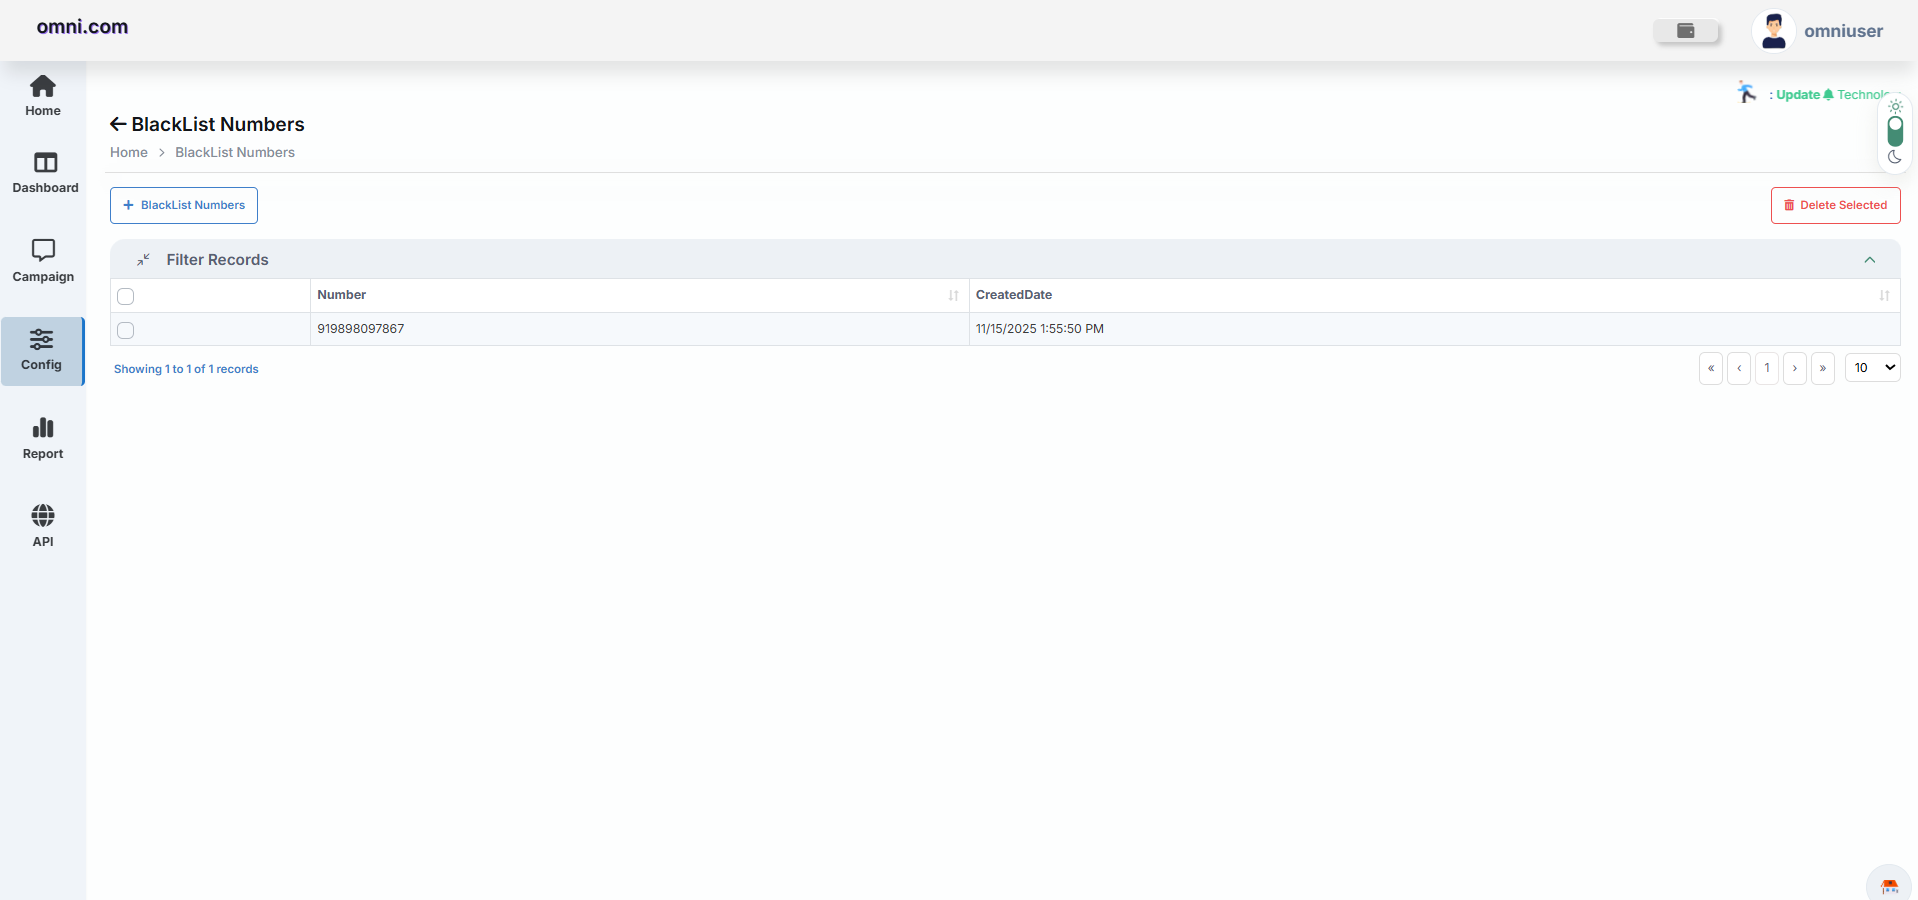
Available Information
| Field | Description |
|---|---|
| Number | Blacklisted mobile number |
| Created Date | Date when the number was added to the blacklist |
Available Actions
| Action | Description |
|---|---|
| Delete Selected | Removes selected blacklisted numbers |
Users can view and manage all blacklisted mobile numbers from a centralized list.
Upload Blacklist Numbers via Excel
Users can upload multiple blacklisted numbers using an Excel file.
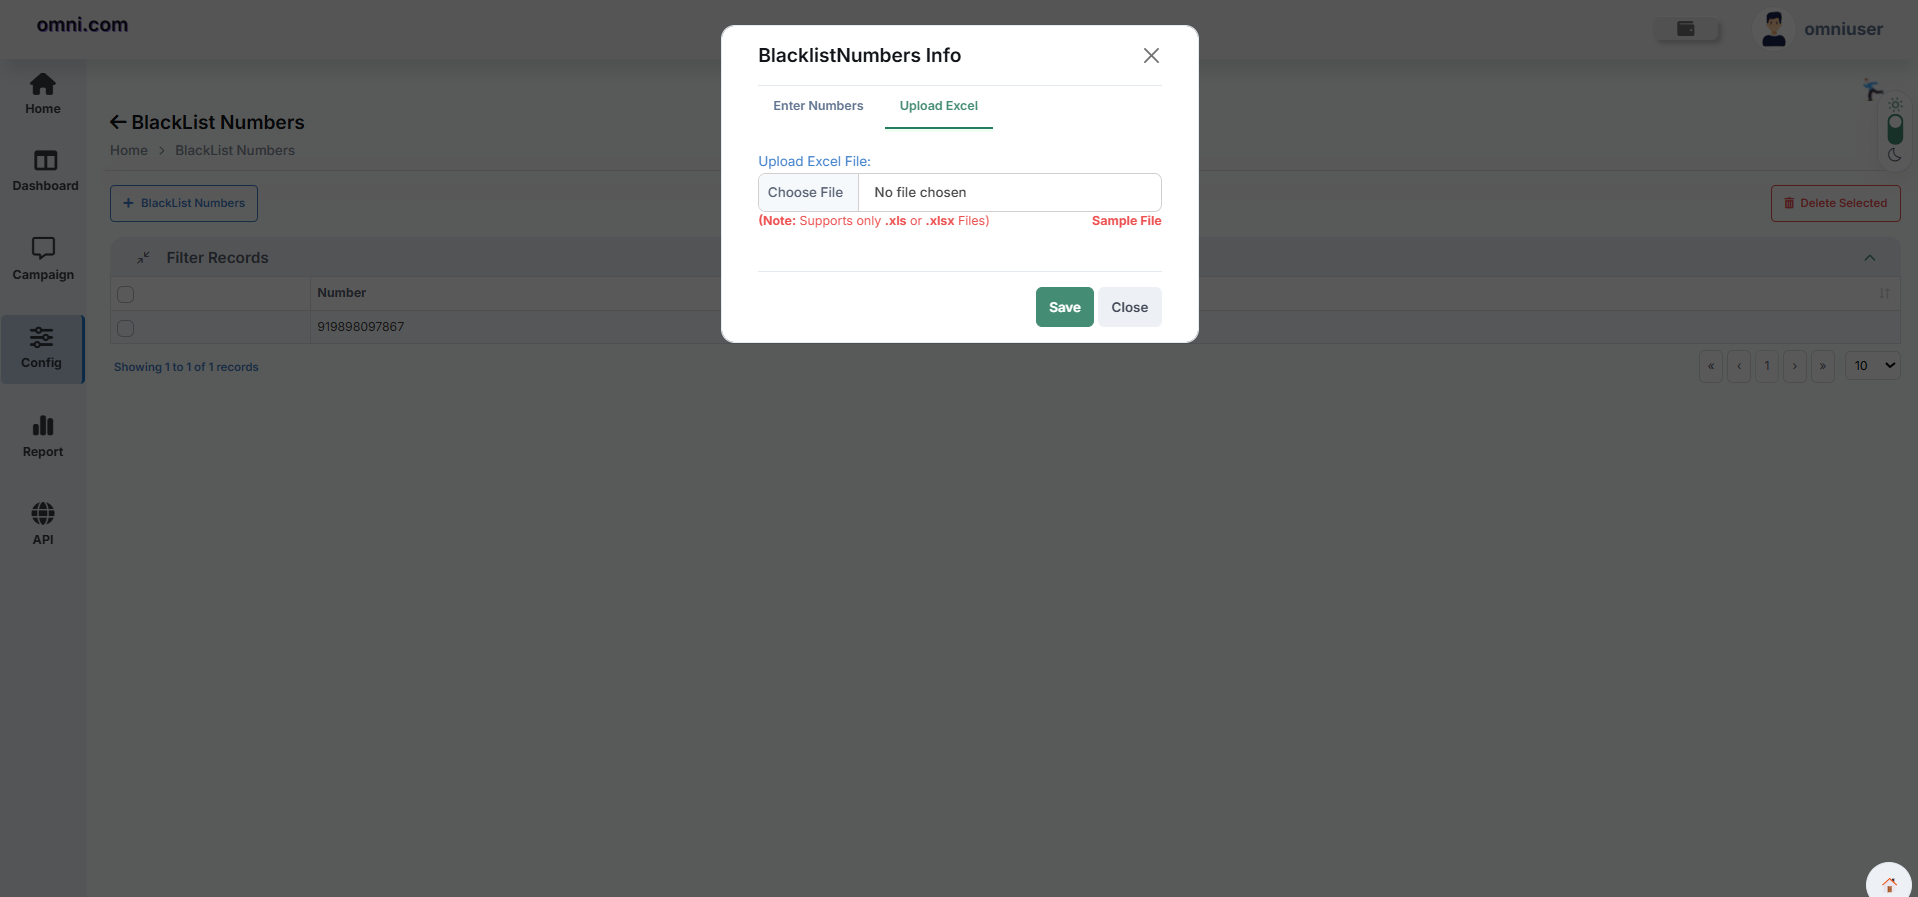
Available Options
| Field | Description |
|---|---|
| Choose File | Select an Excel file containing mobile numbers |
| Sample File | Download sample format for upload |
Supported Formats
- .xls
- .xlsx
Steps
All valid mobile numbers from the uploaded file are added to the blacklist.
SMS Reports
The Reports module provides insights into SMS campaign performance, delivery statistics, and archived reporting data. Users can monitor campaign effectiveness, review delivery outcomes, and access historical reports.
Report Dashboard
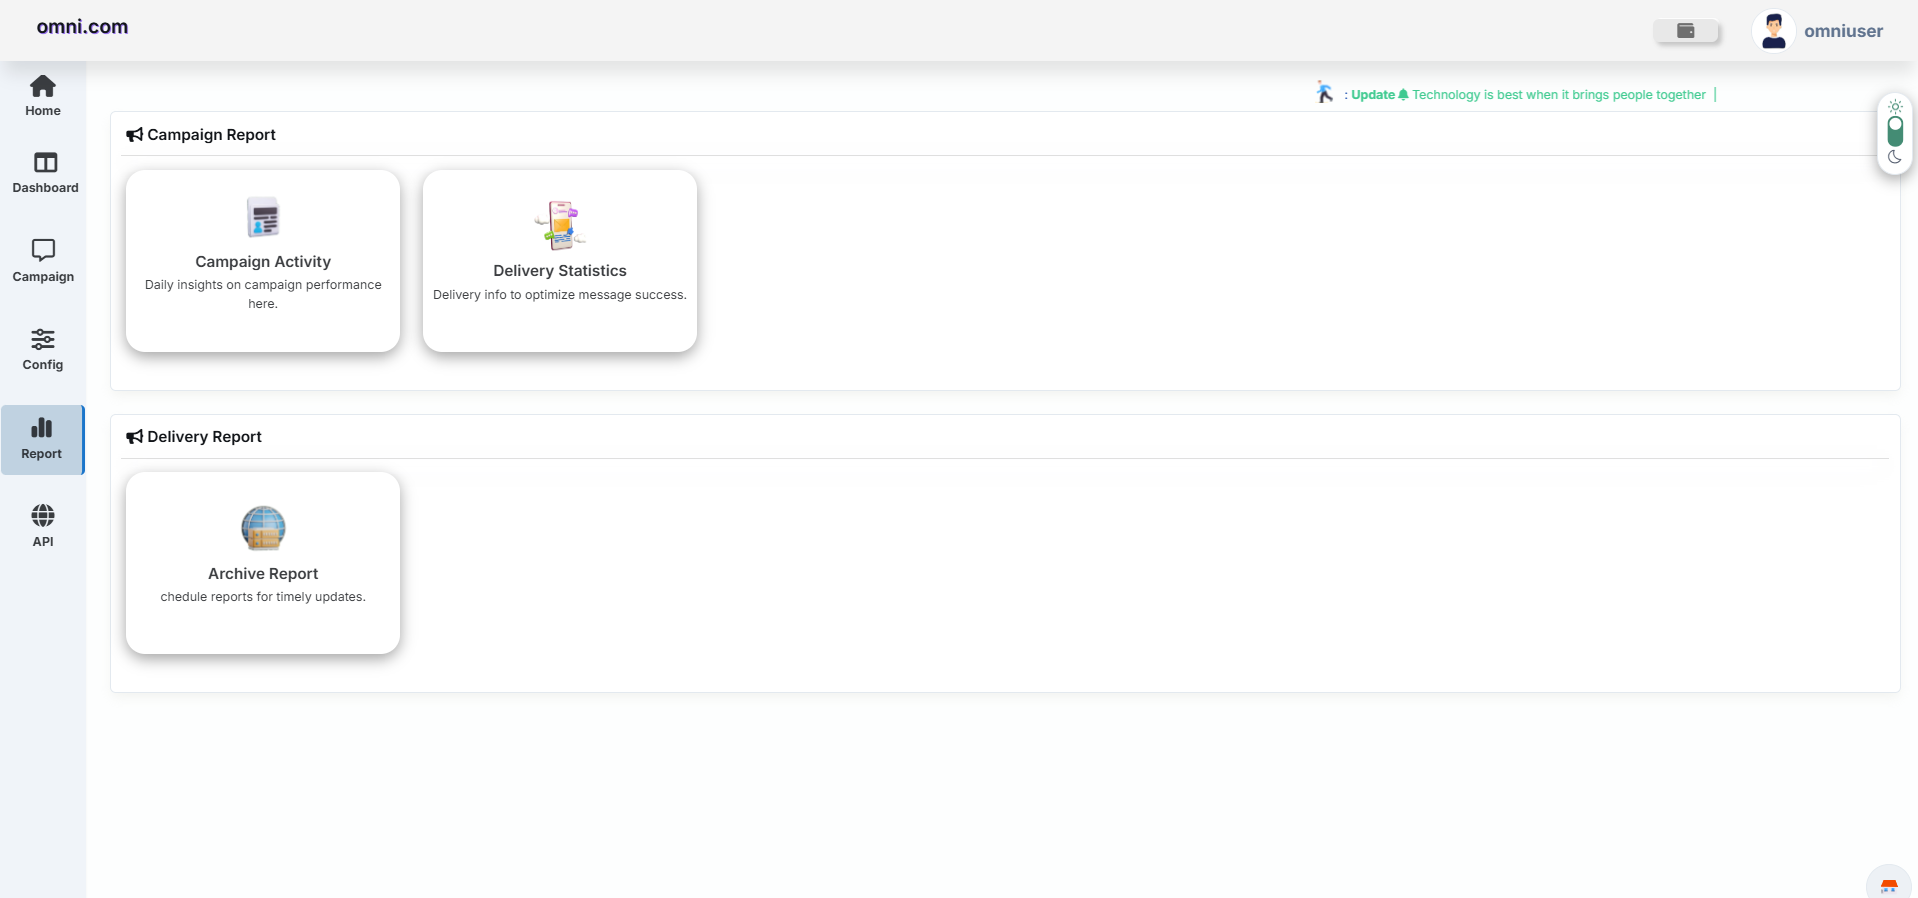
Purpose
The SMS Reports module is designed to provide comprehensive visibility into campaign execution, message delivery performance, scheduled campaigns, fallback activities, and archived reporting records. It enables organizations to analyze communication effectiveness and track message status in real time.
Available Report Sections
| Section | Description |
|---|---|
| Campaign Activity | View campaign performance and activity details. |
| Delivery Statistics | Analyze SMS delivery metrics and status information. |
| Archive Report | Access historical and archived reports. |
Benefits
- Monitor campaign performance.
- Track RCS delivery outcomes.
- Track customer engagement and CTA responses.
- Analyze messaging effectiveness.
Users can access reporting tools and monitor SMS campaign performance from a centralized location.
Campaign Activity
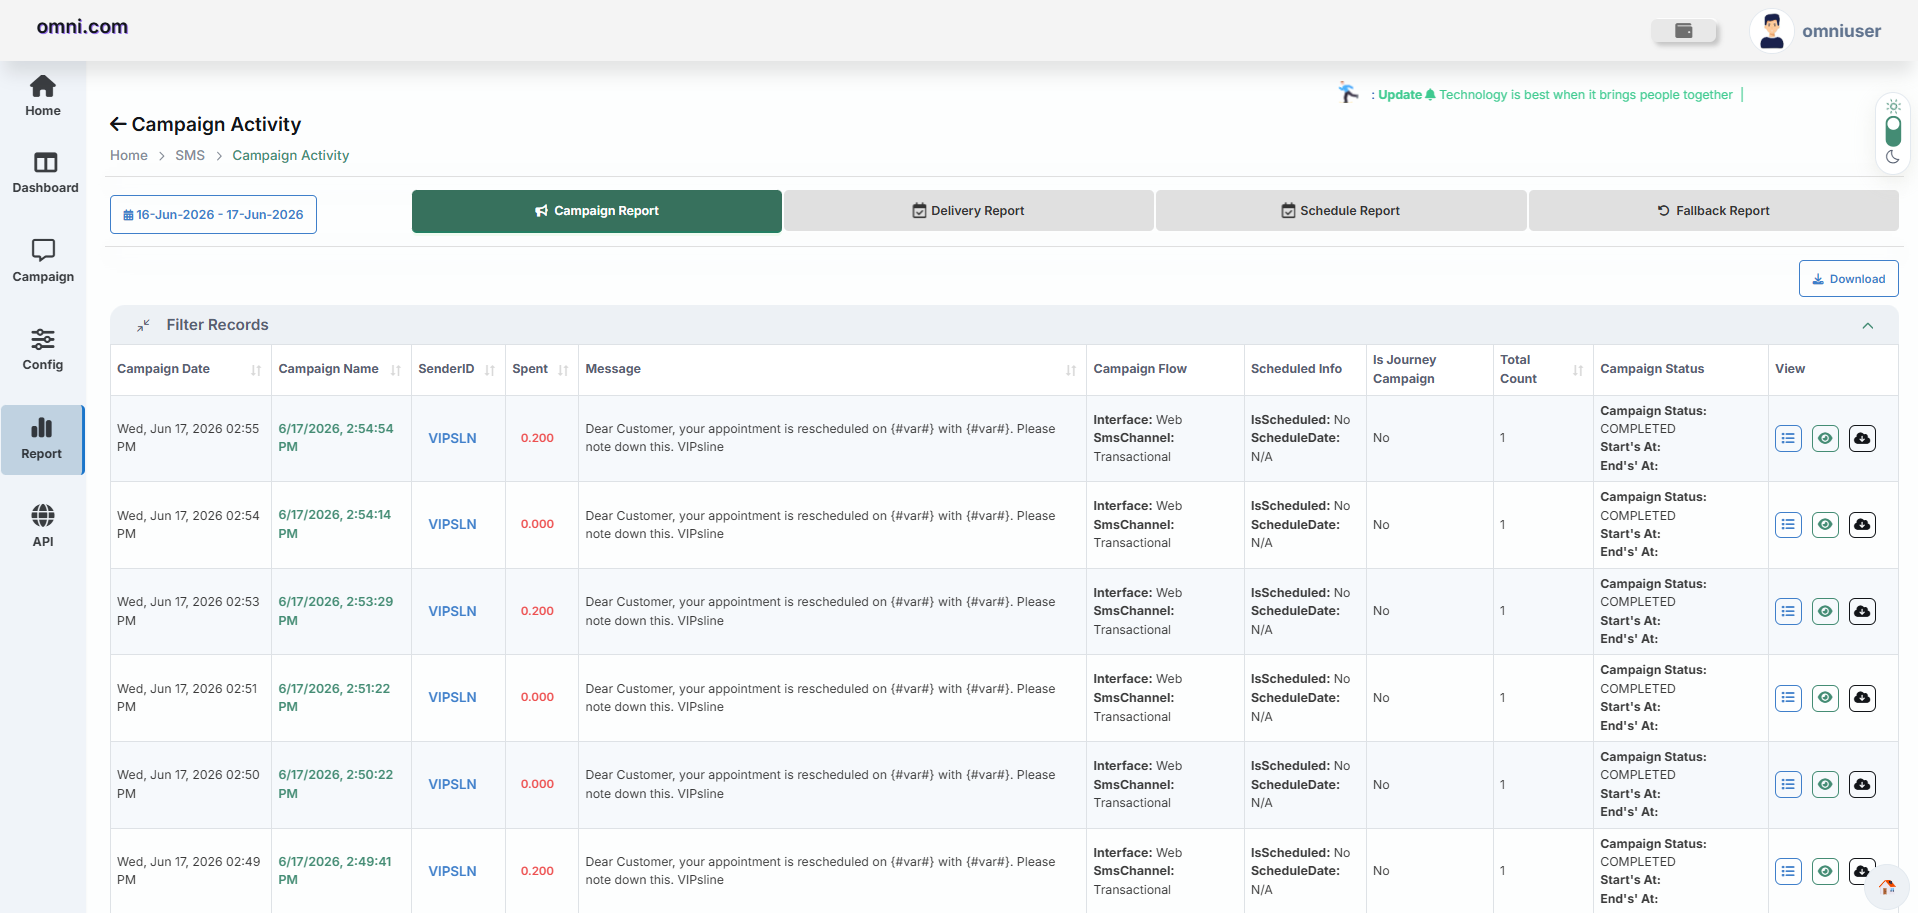
Purpose
The Campaign Activity report provides detailed information about SMS campaigns executed during a selected date range. Users can review campaign performance, delivery status, scheduled campaigns, and fallback reports.
Date Range Filter
Users can select a custom date range to view campaign records.
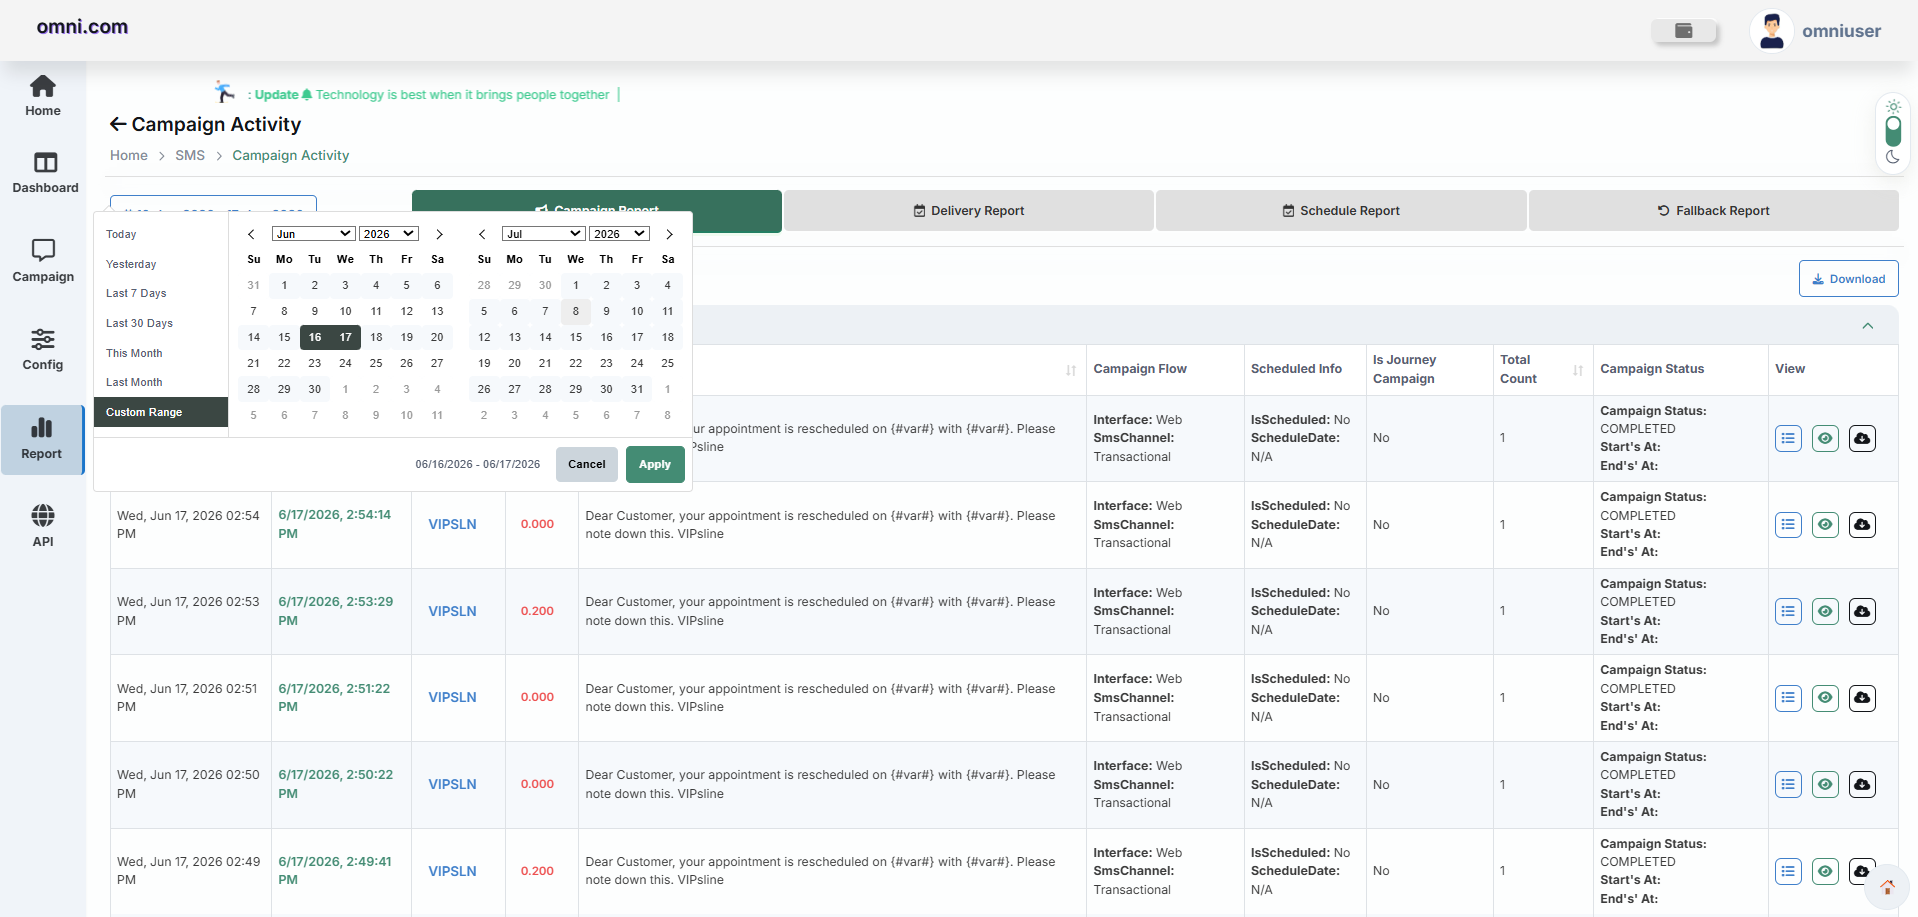
Available Options
- Today
- Yesterday
- Last 7 Days
- Last 30 Days
- This Month
- Last Month
- Custom Range
Click Apply to load campaign data for the selected period.
Campaign Report Information
| Field | Description |
|---|---|
| Campaign Date | Displays the date and time when the campaign was created. |
| Campaign Name | Displays the name of the campaign. |
| Template Name | Displays the template used in the campaign. |
| Agent Info | Displays the Agent Name and Agent ID associated with the campaign. |
| Interface | Displays the interface used to create the campaign, such as Web or HTTP. |
| Message Type | Displays the type of RCS message sent, such as RichCard. |
| Scheduled Info | Displays whether the campaign is scheduled along with the scheduled date and time. |
| Is Journey Campaign | Indicates whether the campaign is part of a Journey Campaign. |
| Total Count | Displays the total number of messages sent in the campaign. |
| Credit Used | Displays the total credits consumed by the campaign. |
| Campaign Status | Displays the current campaign status along with the start and end timestamps. |
| View | Provides options to view campaign details and related information. |
Available Actions
- View Campaign Details
- View Delivery Information
- Download Report
Delivery Report
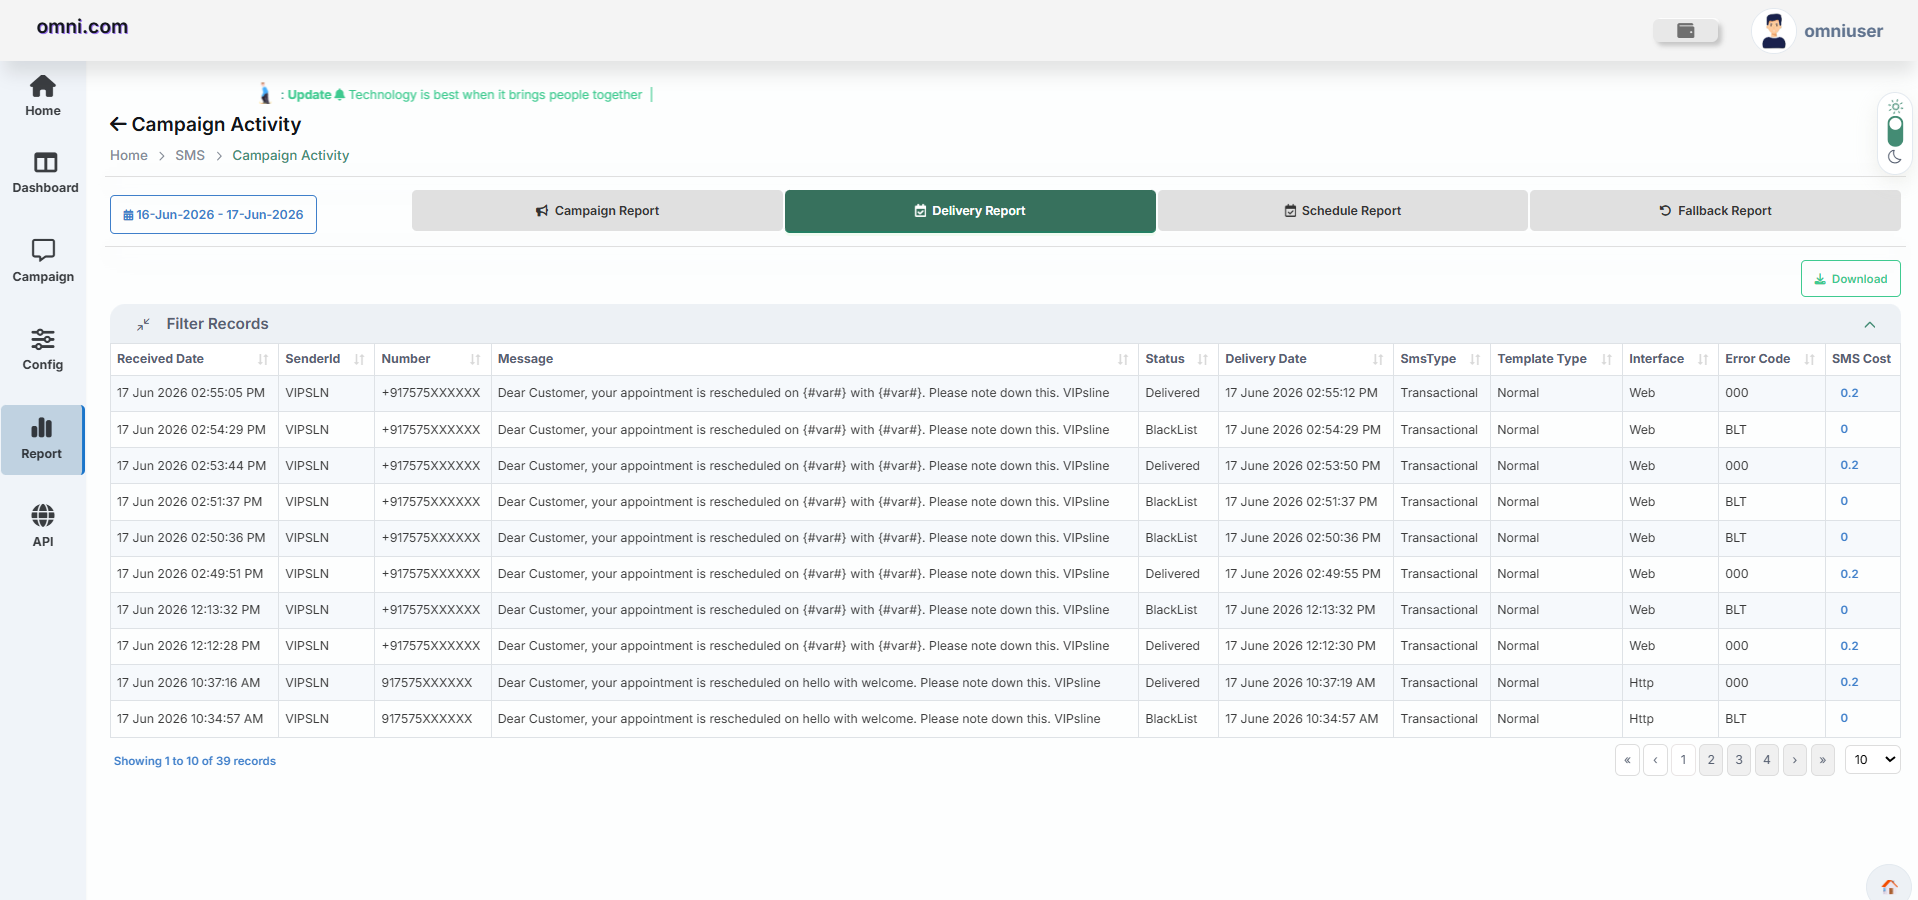
The Delivery Report displays recipient-level delivery information and helps users verify message delivery status.
| Field | Description |
|---|---|
| Received Date | Displays the date and time when the RCS message was received. |
| Number | Displays the recipient mobile number. |
| Reference ID | Unique identifier generated for the RCS message transaction. |
| Template Info | Displays the template name and message type used in the campaign. |
| Delivery Info | Displays the message status along with delivery and read timestamps. |
| Interface | Displays the interface used to send the RCS message, such as Web or HTTP. |
| SMS Cost | Displays the cost incurred for sending the SMS message. |
| View | Allows users to view detailed information about the message. |
Features
- View delivery records.
- Download delivery report.
Schedule Report
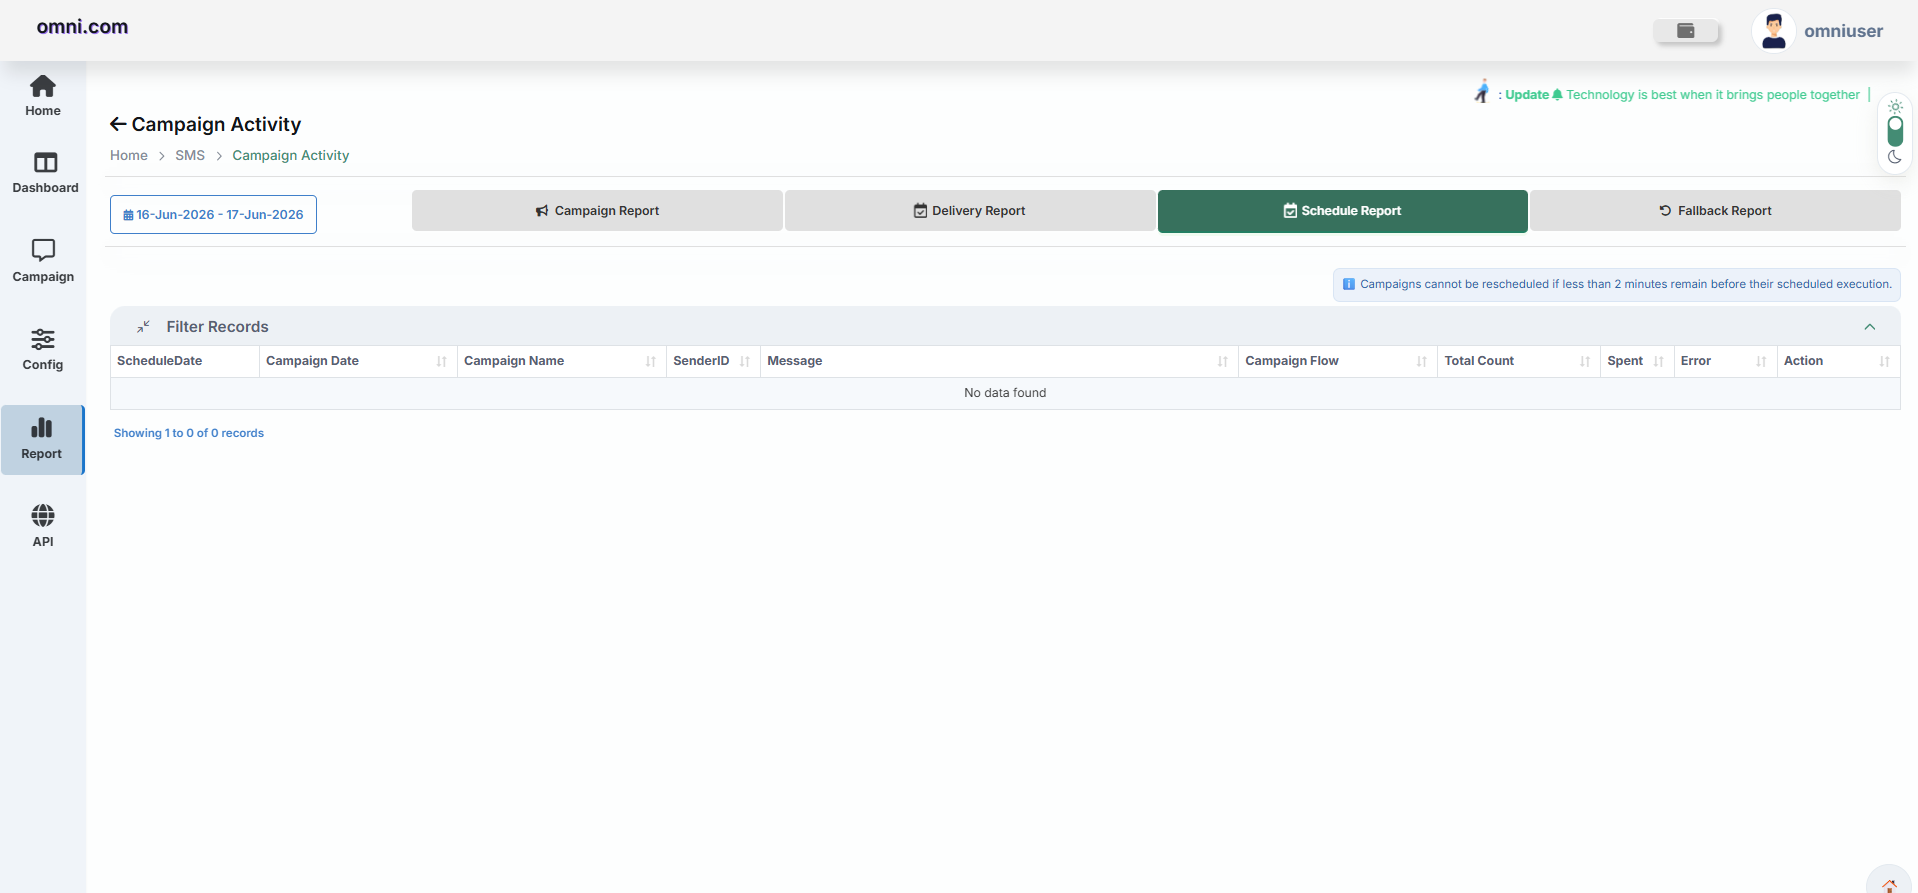
The Schedule Report displays scheduled campaigns that are pending execution.
| Field | Description |
|---|---|
| ScheduleDate | Scheduled execution date and time. |
| Campaign Date | Campaign creation date and time. |
| Campaign Name | Name of the campaign. |
| Template Name | Name of the template used in the campaign. |
| Agent Info | Displays the RCS Agent Name and Agent ID. |
| Interface | Interface used to create the campaign. |
| Message Type | Type of message sent in the campaign. |
| Total Count | Total number of recipients. |
| Credit Used | Total credits consumed by the campaign. |
| Campaign Status | Displays the current status along with start and end time. |
| Action | Displays the available actions for the campaign. |
Fallback Report
The Fallback Report displays fallback campaign activity when messages are redirected through alternate channels.
- SMS to SMS Fallback – Redirected to alternate SMS route.
- RCS Fallback – Redirected from RCS to SMS or another supported channel.
- WA Fallback – Redirected to WhatsApp channels.
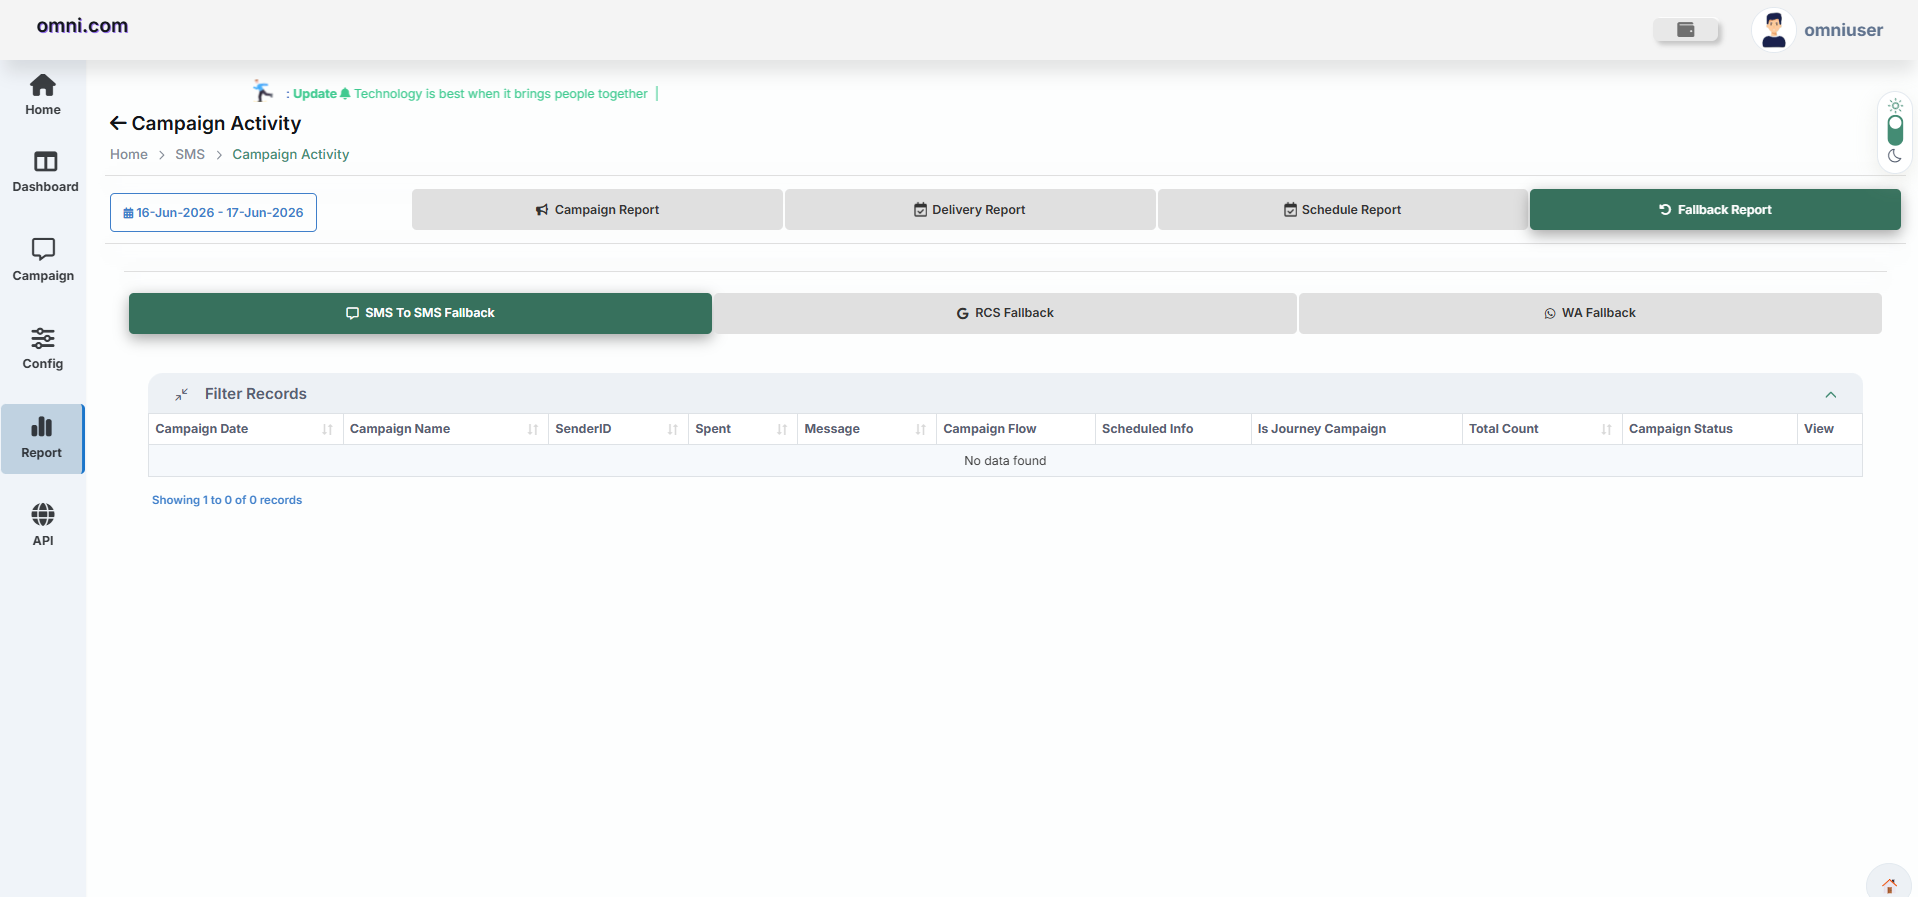
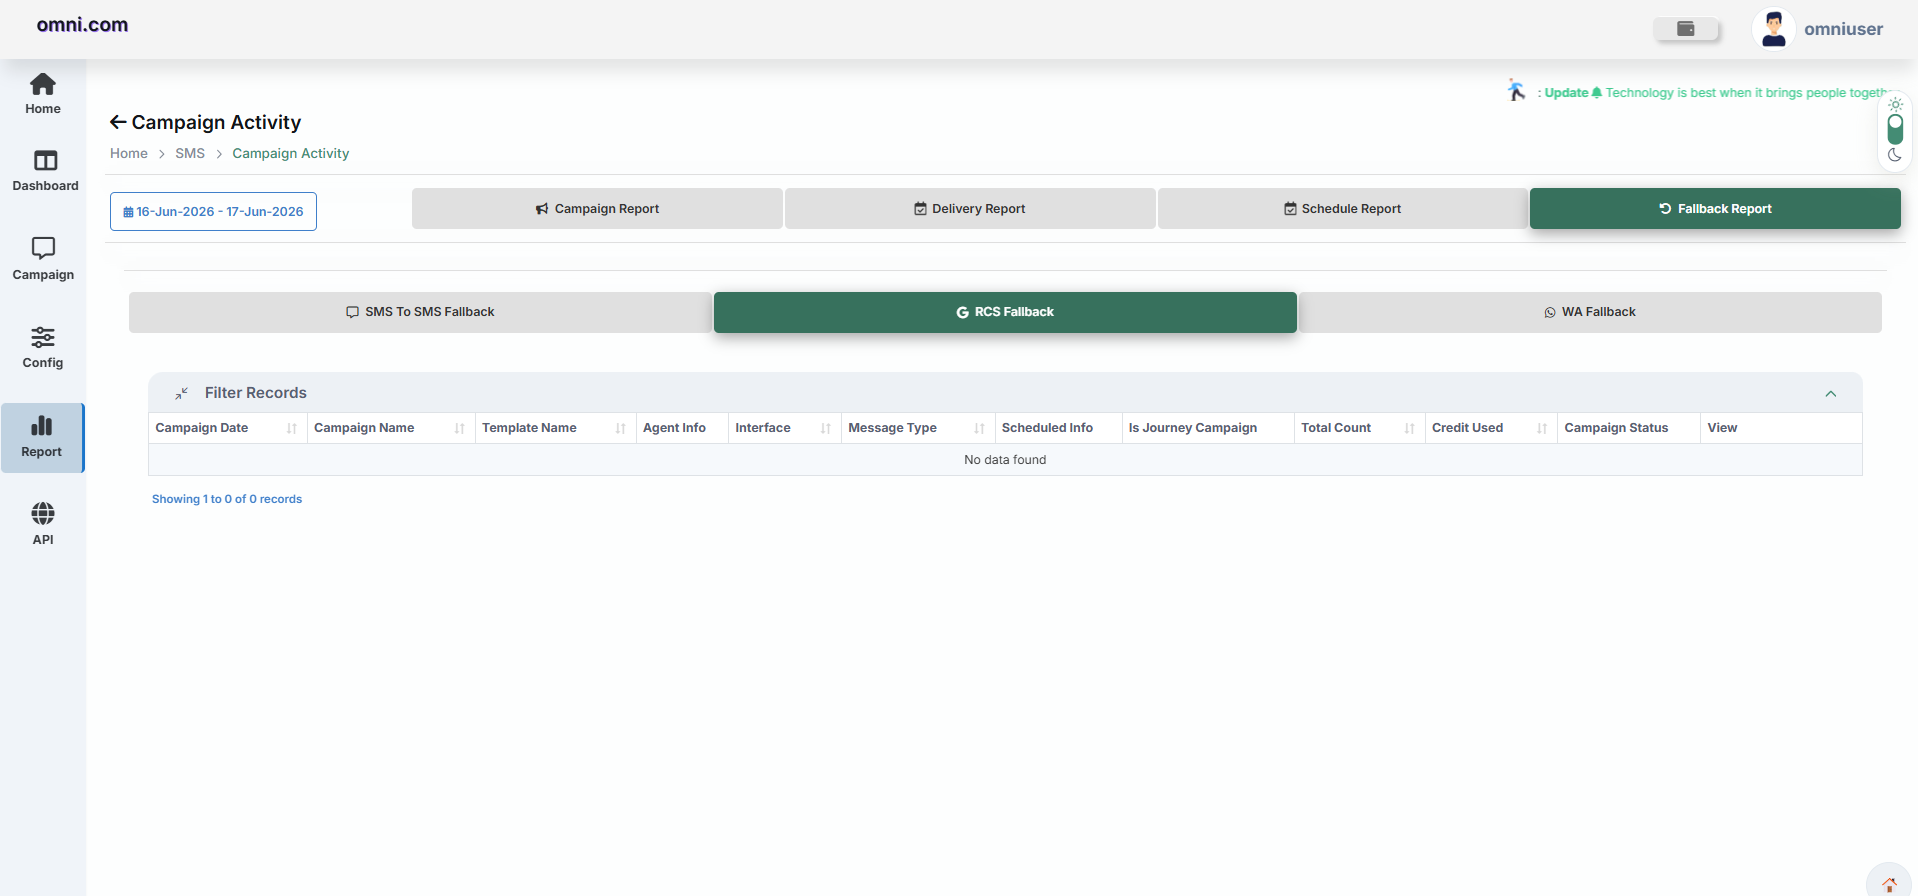
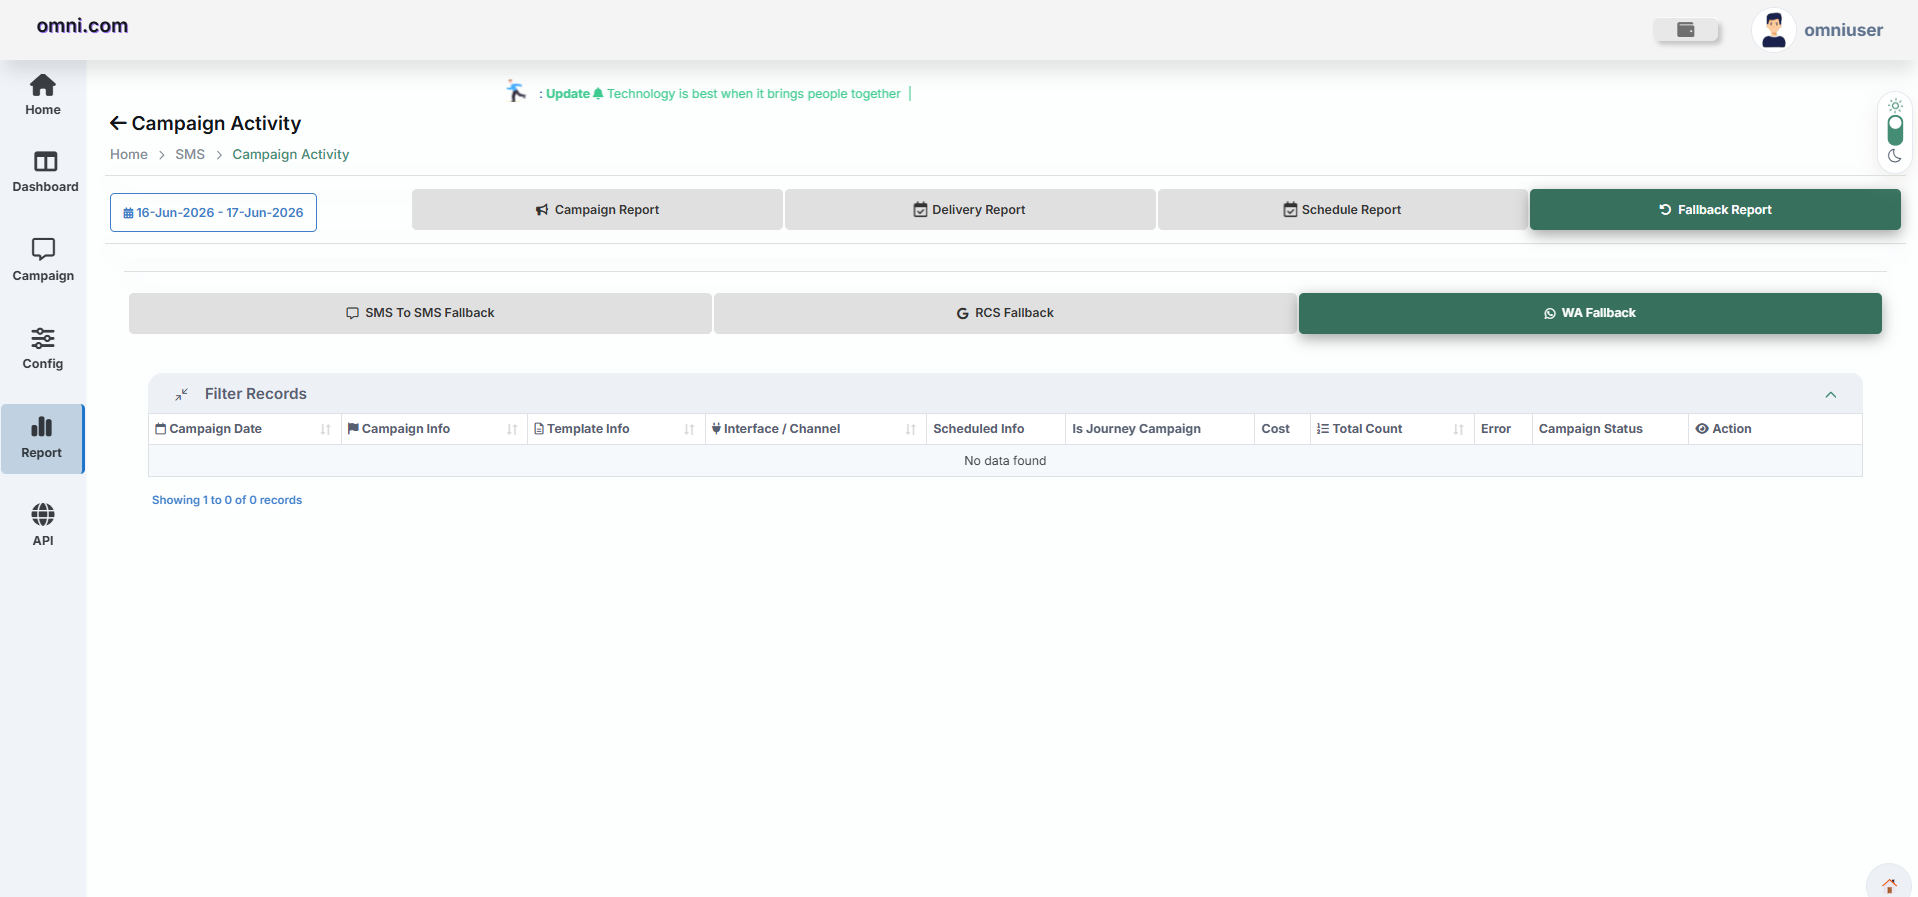
Available Information
- Campaign Date
- Campaign Name
- Template Information
- Interface / Channel
- Scheduled Information
- Campaign Status
- Total Count
- Cost
- Error Details
Delivery Statistics
The Delivery Statistics report provides a summary of SMS delivery performance for a selected date range. It helps users monitor message delivery status, identify failed messages, and analyze overall campaign performance.
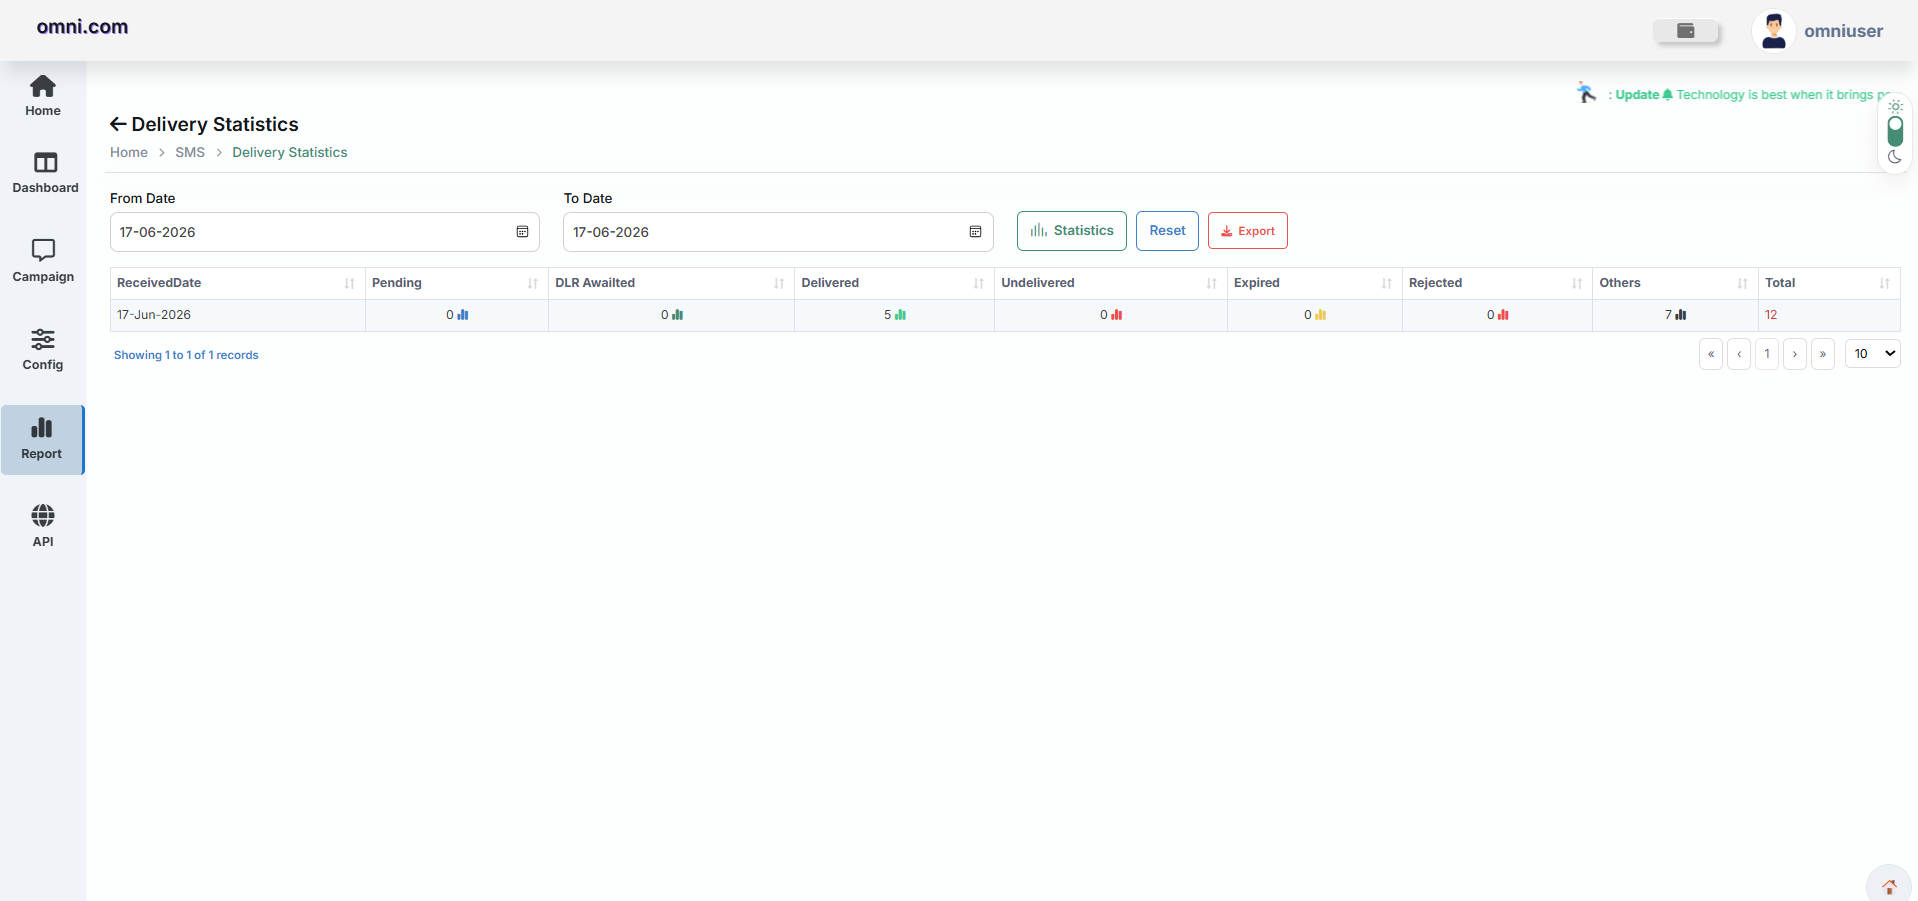
Delivery Statistics Page
| Field | Description |
|---|---|
| From Date | Start date for the report |
| To Date | End date for the report |
| Statistics | Fetch delivery statistics for the selected period |
| Reset | Clear filters and reload default values |
| Export | Download the report |
Generate Delivery Statistics
- Select the From Date.
- Select the To Date.
- Click the Statistics button.
The system will generate delivery statistics for the selected date range.
Report Columns
- Received Date
- Pending
- DLR Awaited
- Delivered
- Undelivered
- Expired
- Rejected
- Others
- Total
Archive Report
The Archive Report feature allows users to view and download historical SMS campaign data within a specified date range.
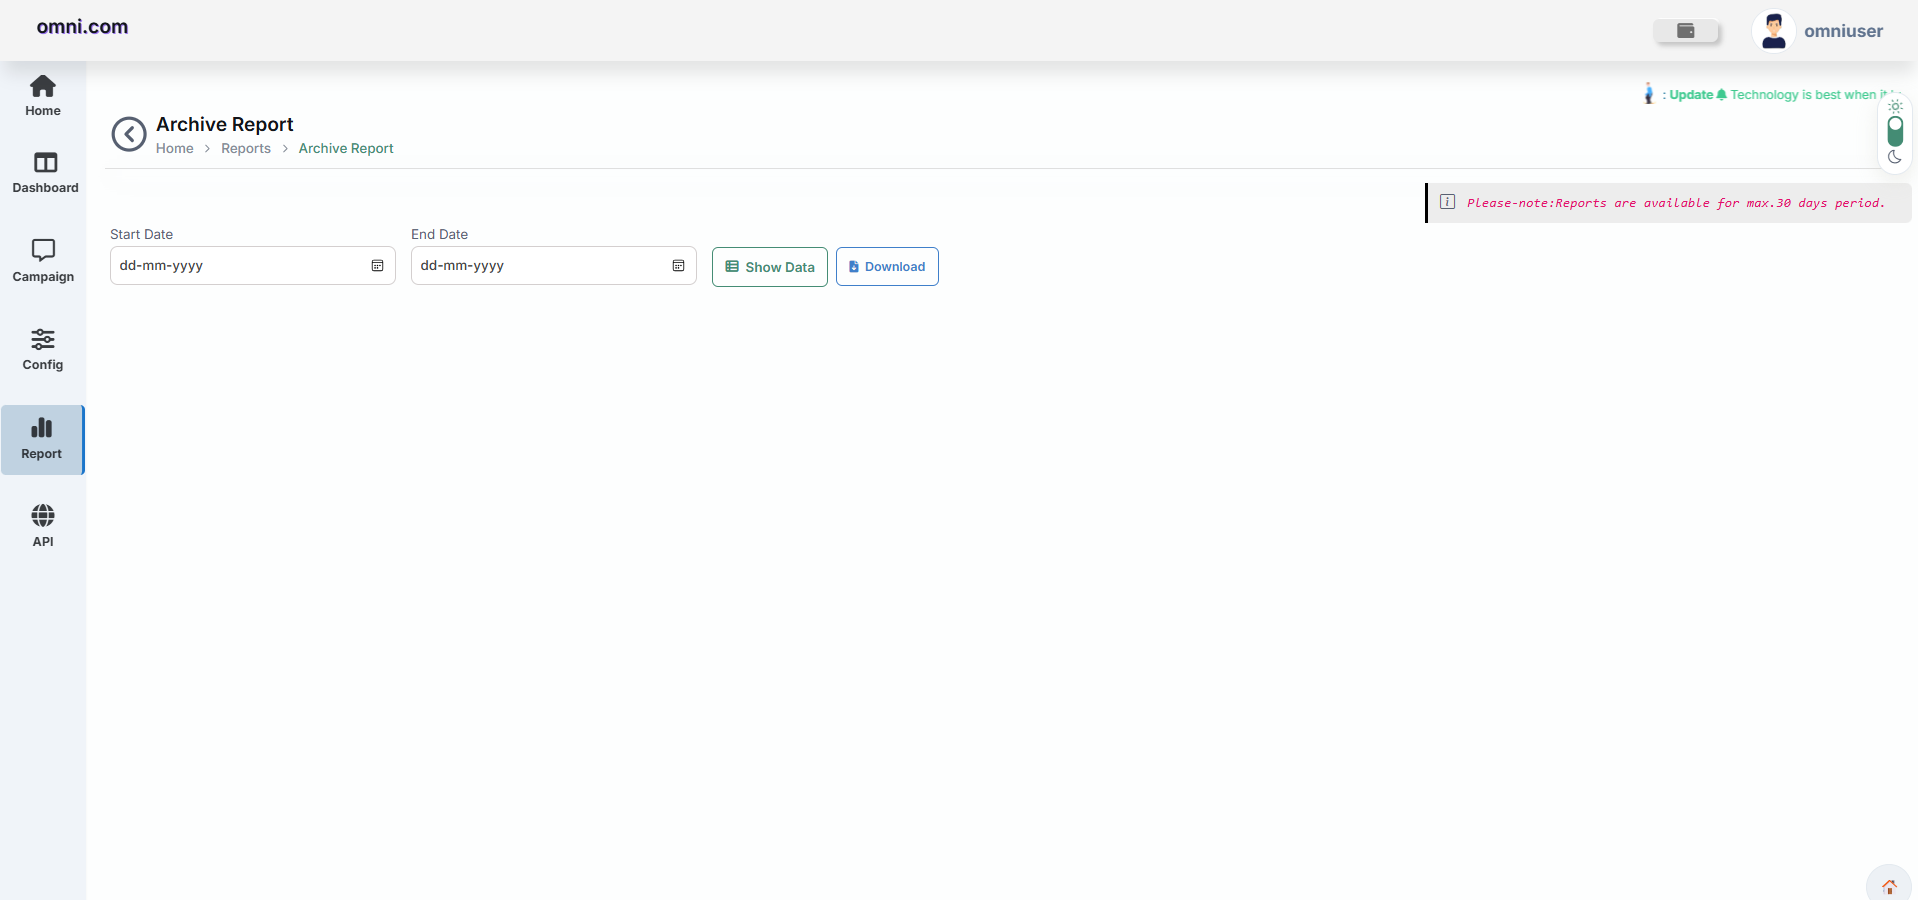
Archive Report Page
| Field | Description |
|---|---|
| Start Date | Select the starting date for the report |
| End Date | Select the ending date for the report |
| Search Username | Search reports for a specific username |
| Show Data | Display report data based on selected filters |
| Download | Download the report file |
Archive reports are available for a maximum period of 30 days. Selecting a date range beyond 30 days may not return any data.
SMS Dashboard
The SMS Dashboard provides a summary of SMS campaign performance, message delivery statistics, and status-wise analytics.
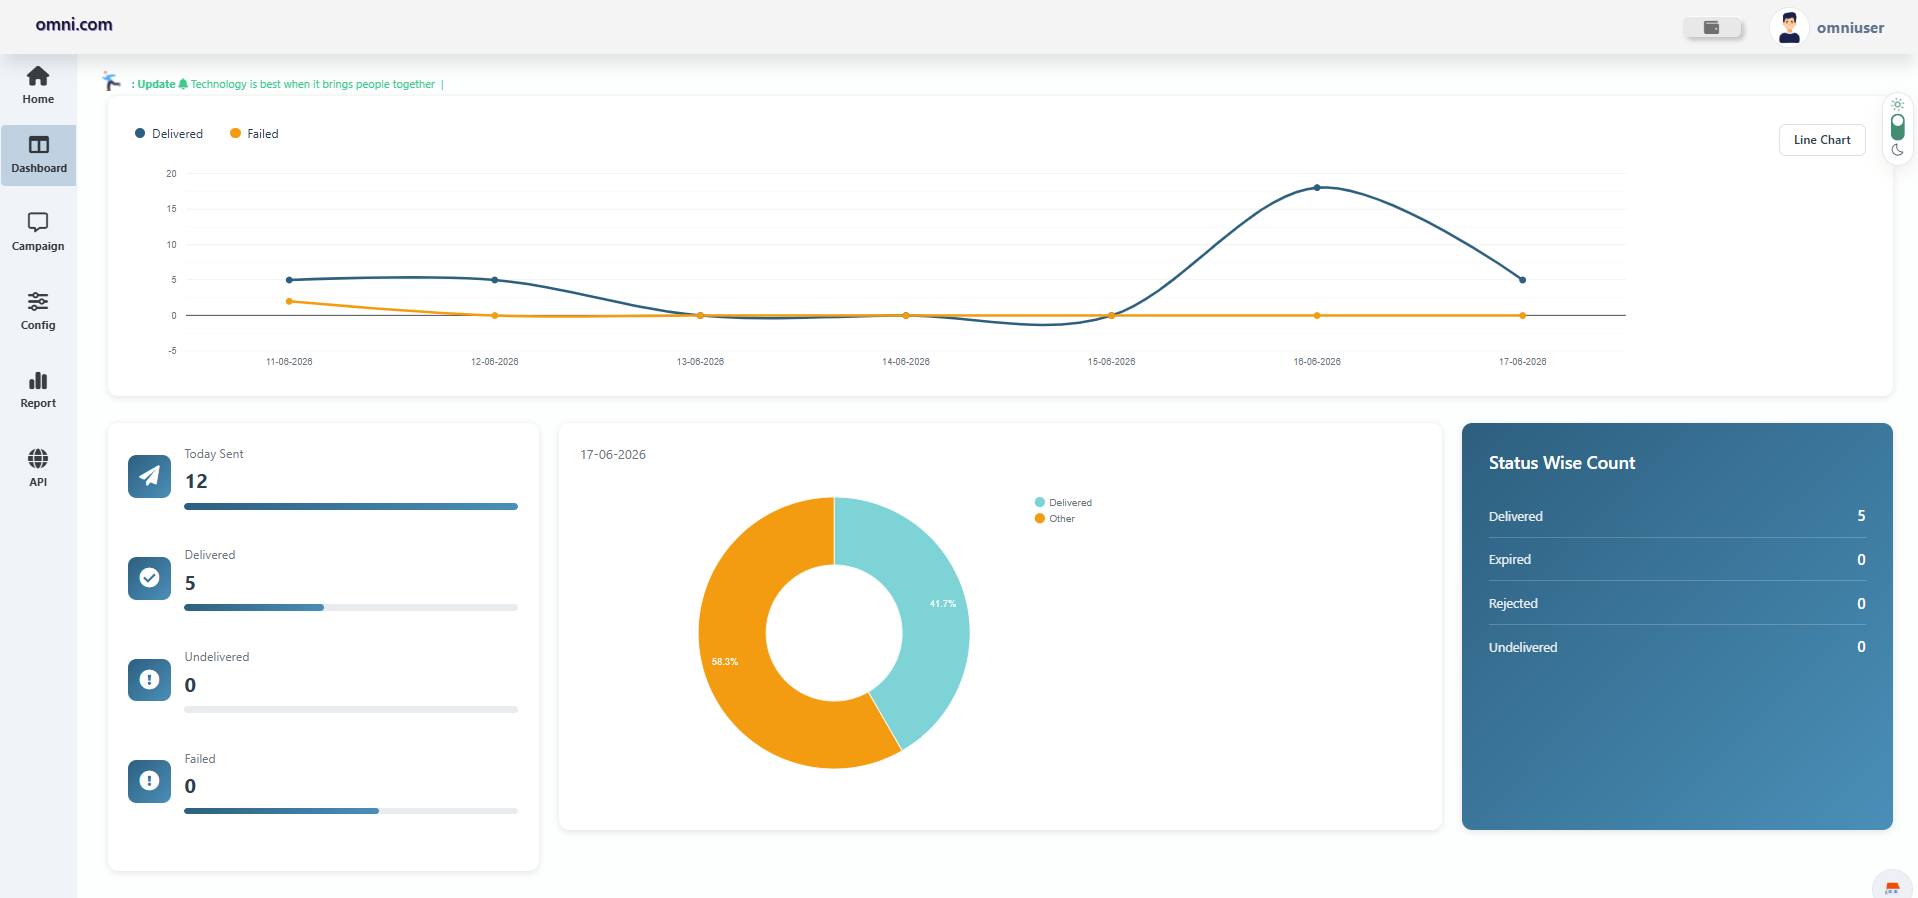
Delivery Analytics
The dashboard displays a graphical representation of SMS delivery performance over a selected period.
- Delivered Messages
- Failed Messages
Message Statistics
The dashboard provides a quick summary of SMS activity.
| Metric | Description |
|---|---|
| Today Sent | Total SMS messages sent today |
| Delivered | Successfully delivered messages |
| Undelivered | Messages not delivered |
| Failed | Messages that failed during processing |
Status Wise Count
The Status Wise Count section displays message status distribution.
Benefits
Users can quickly review SMS campaign activity and delivery performance from a single dashboard.
SMS API Integration
The SMS API Integration module allows developers to integrate SMS functionality directly into applications using REST APIs. Users can authenticate using an API Key, check wallet balance, and send SMS messages through GET and POST methods.
Overview
SMS APIs provide a secure and efficient way to send SMS messages programmatically. The API Console includes authentication, wallet balance verification, GET API, POST API, and Single SMS API operations.
Accessing the API Console
- Login to the Omni Portal.
- Navigate to the API section.
- Open the SMS API Console.
- Select Authentication to configure API access.
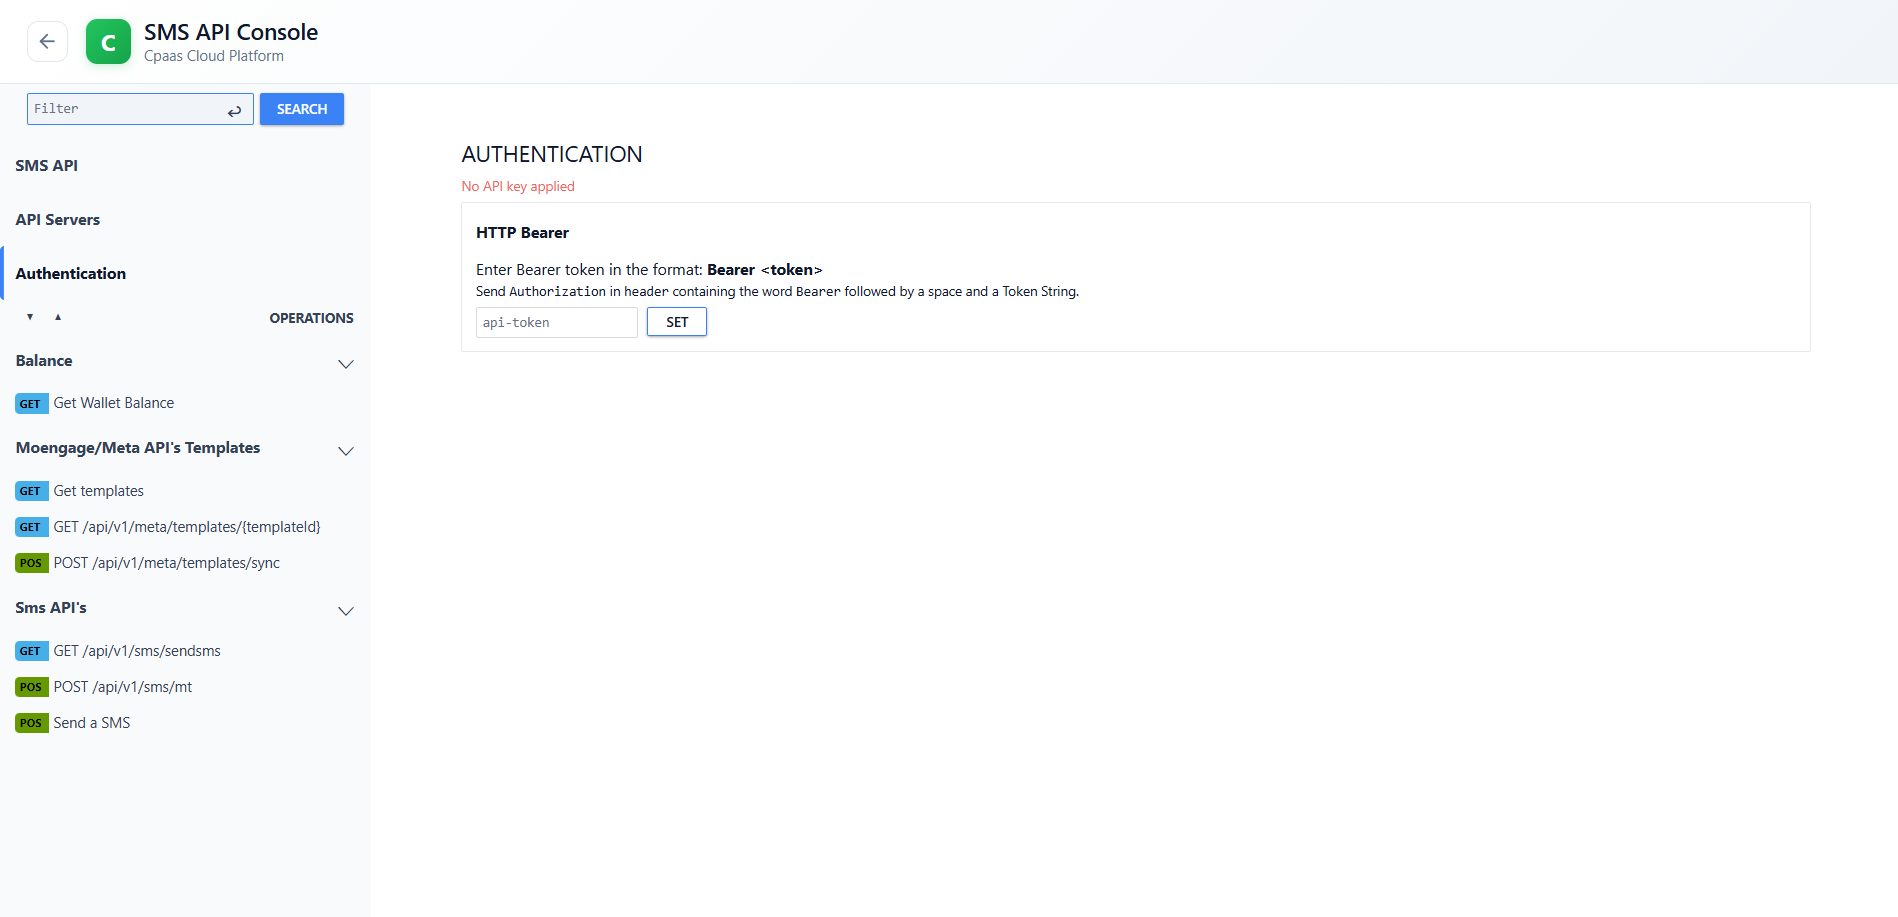
API Authentication
Authentication is required before accessing any SMS API endpoint.
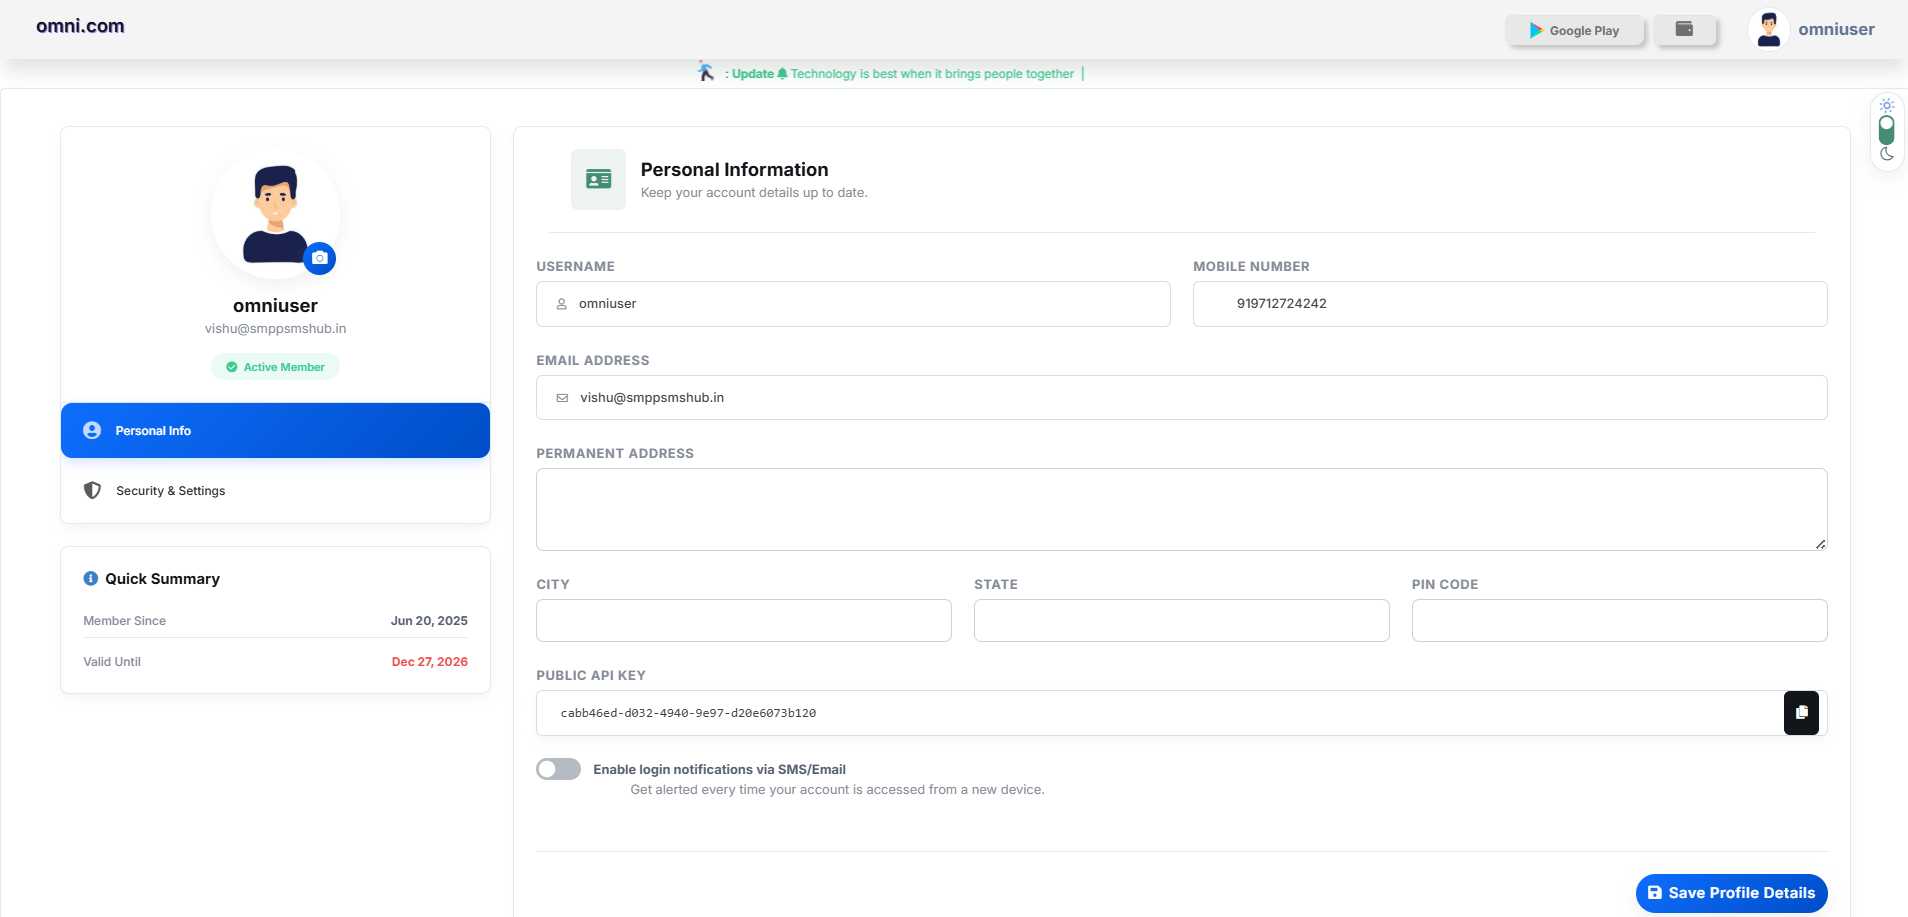
- Click the Profile icon.
- Open My Profile.
- Copy the Public API Key.
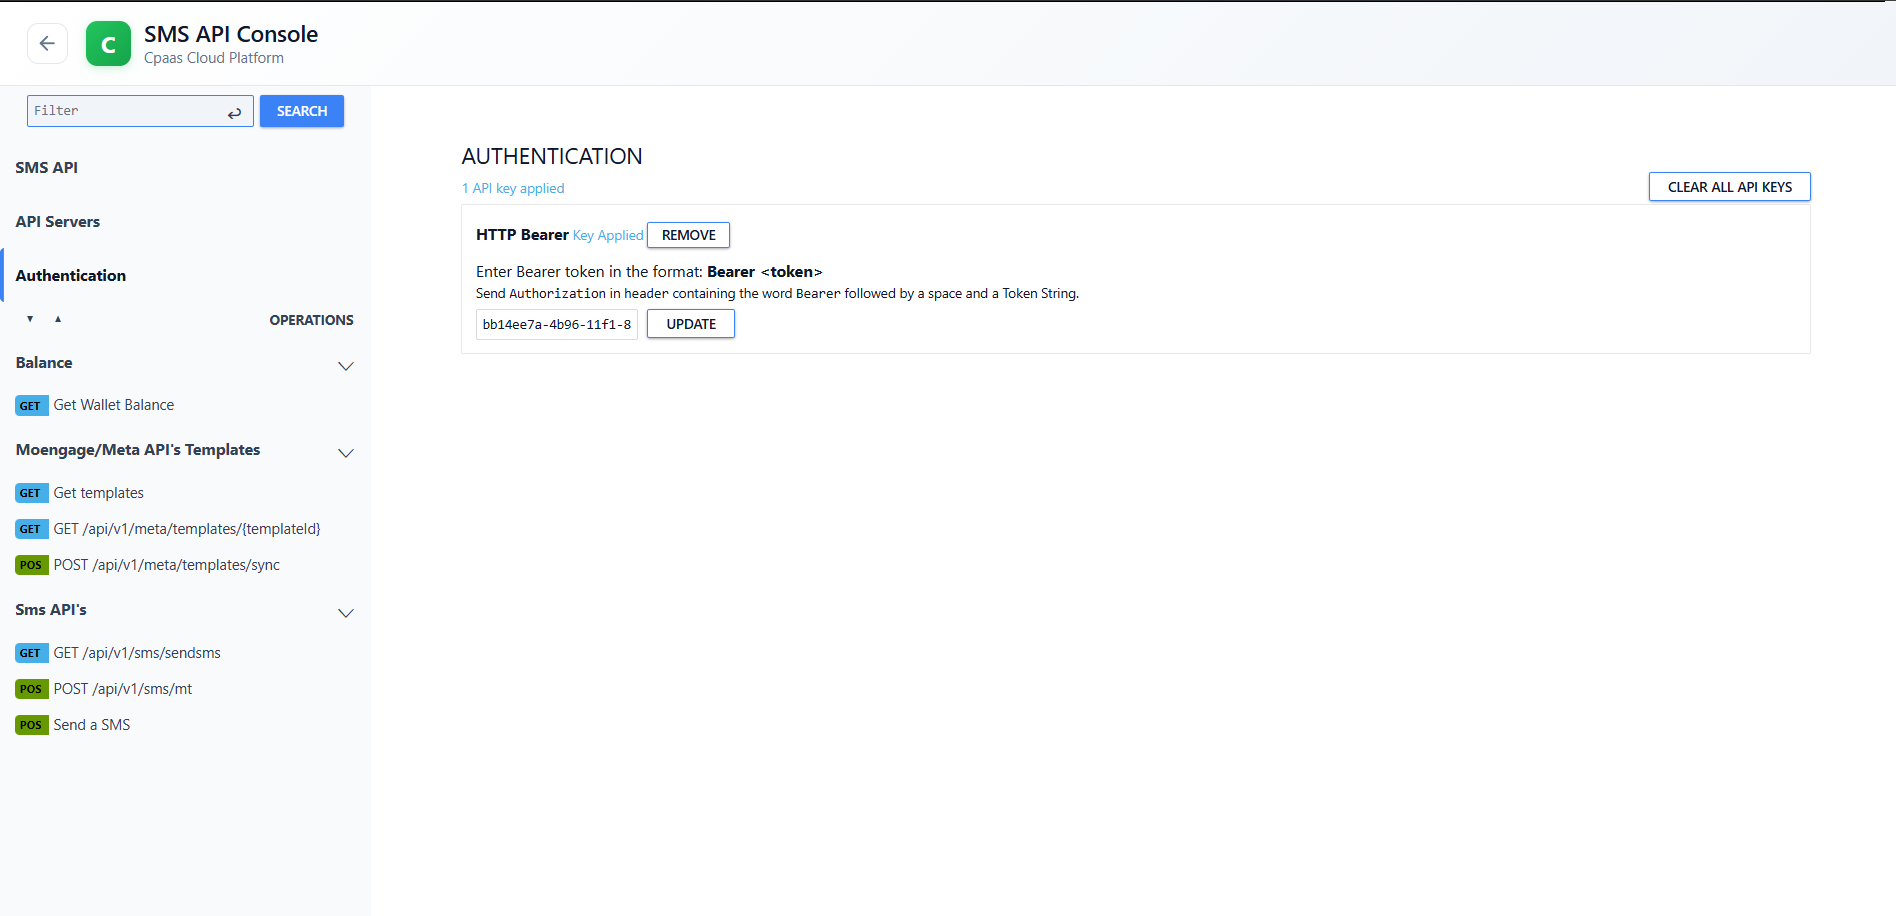
- Open Authentication page.
- Paste the API Key into API Token.
- Click SET.
Checking Wallet Balance
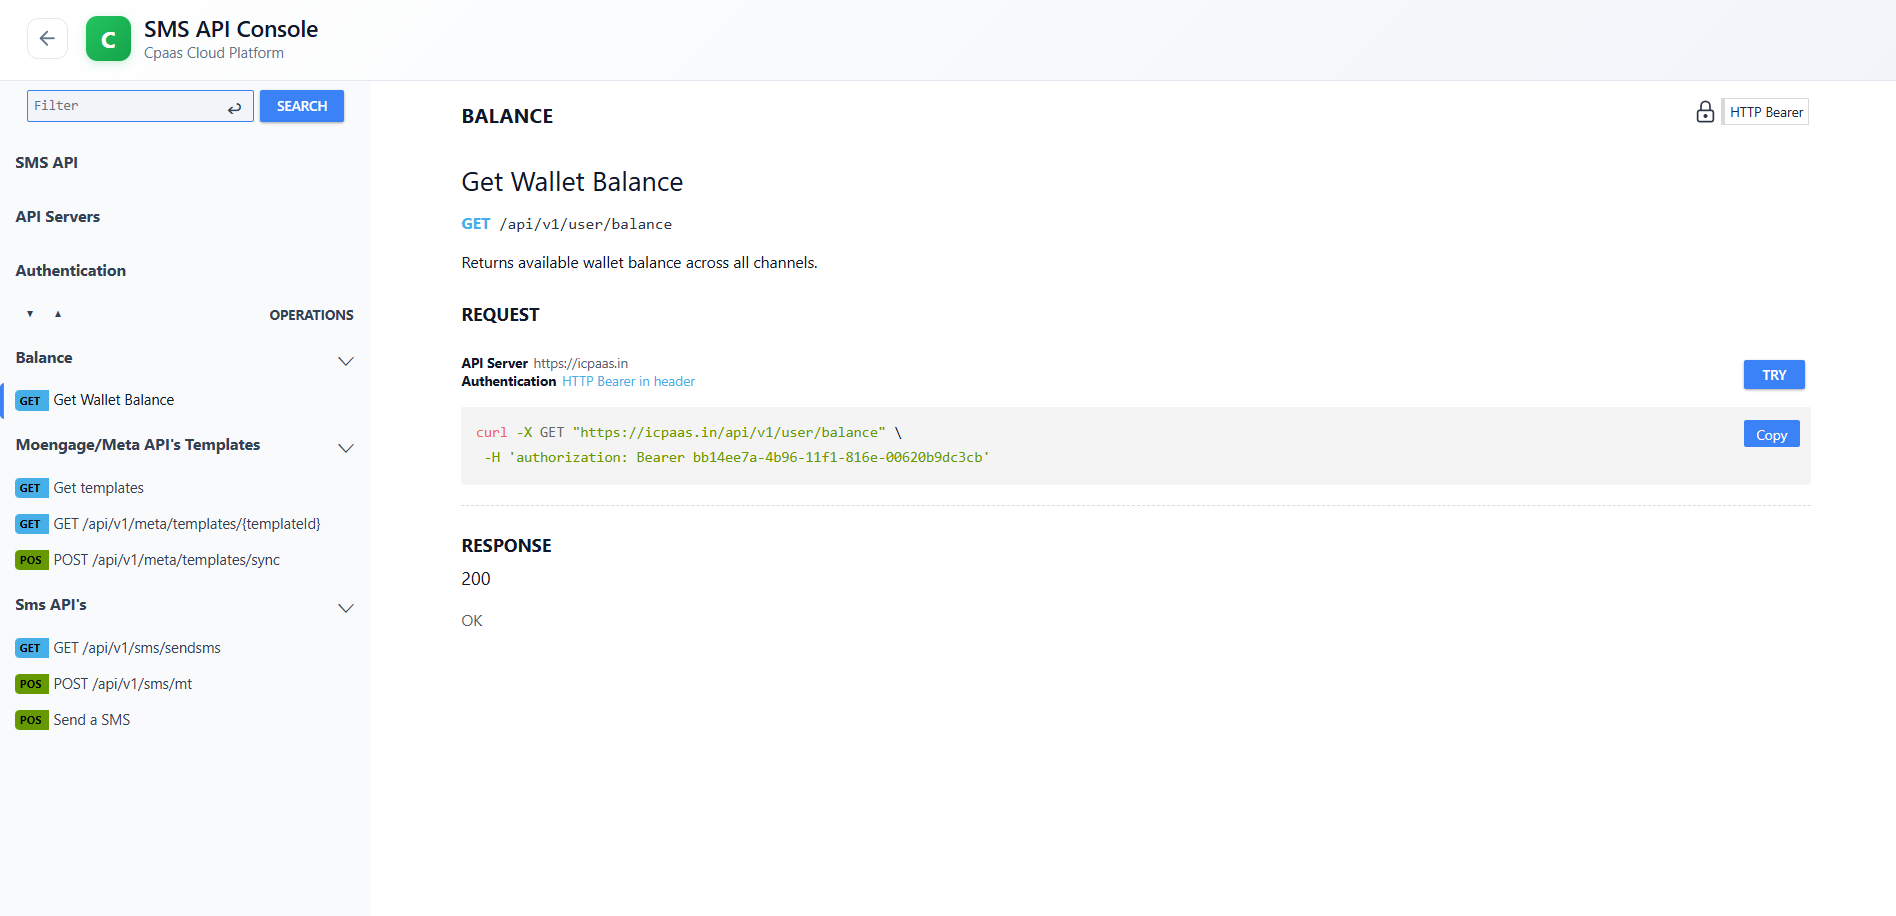
The Wallet Balance API allows users to retrieve the available SMS credit balance.
- Open Balance → Get Wallet Balance.
- Click TRY.
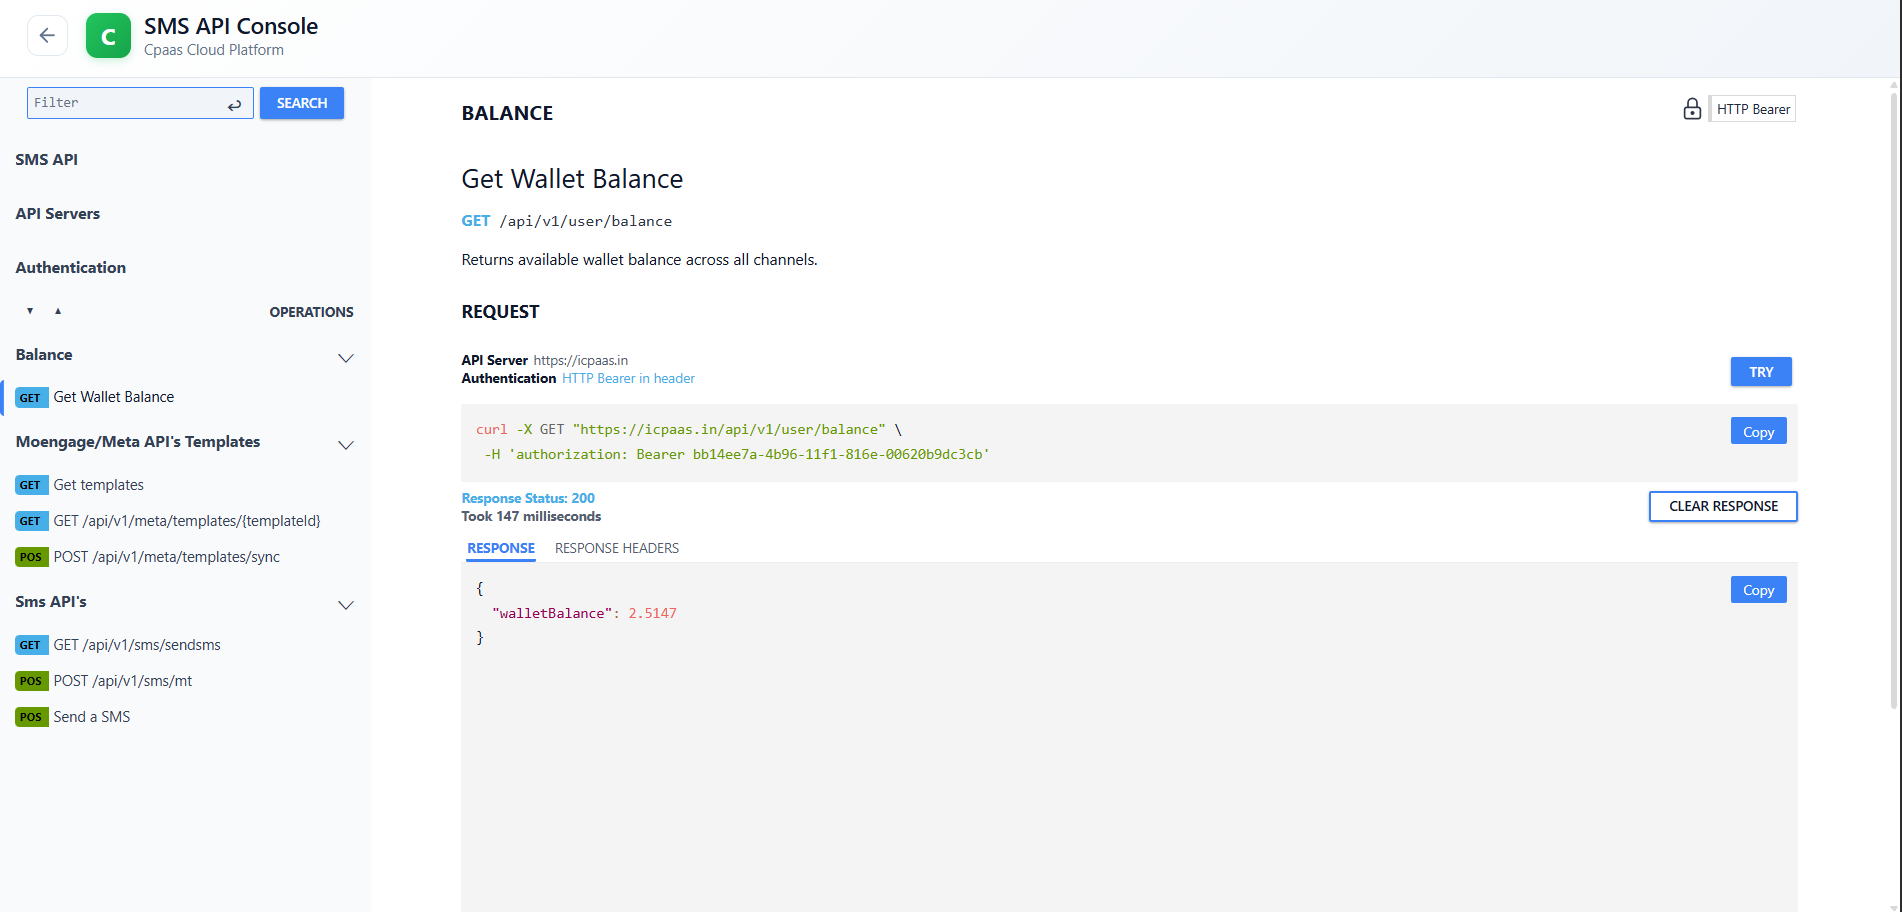
- The API request is executed.
- The current balance is returned.
Response Example
        {
          "walletBalance": 2.5147
        }
Sending SMS Using GET API
The GET API allows SMS delivery through URL parameters.
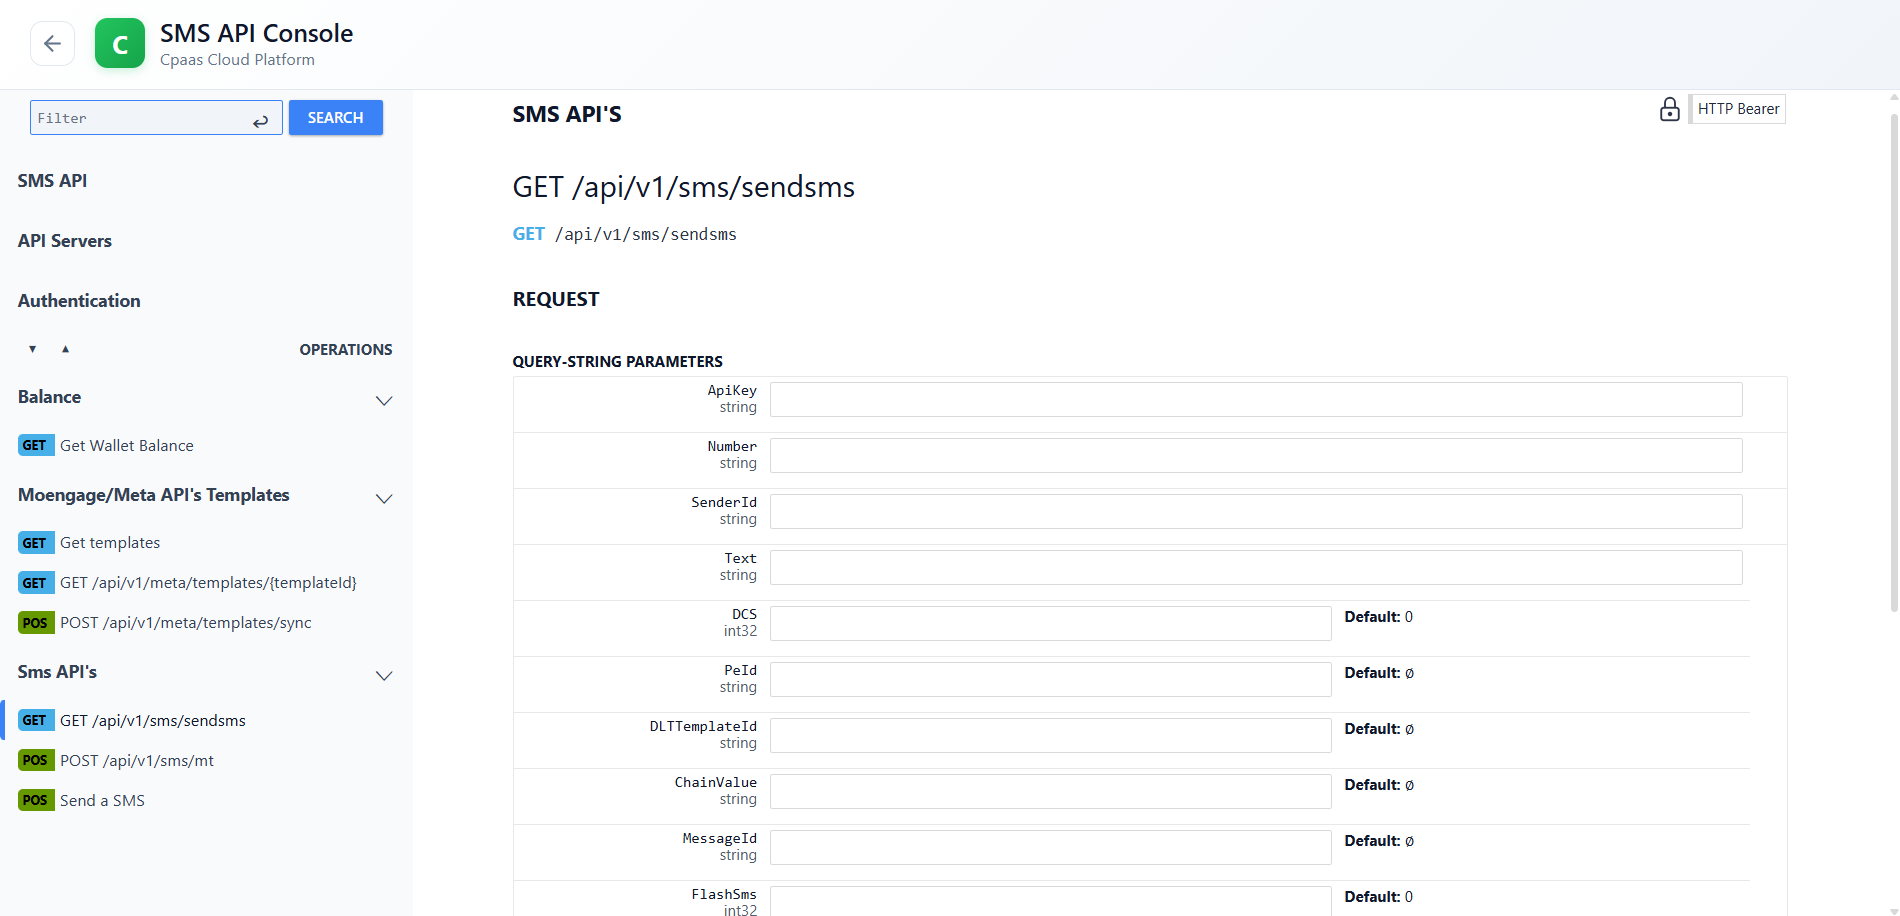
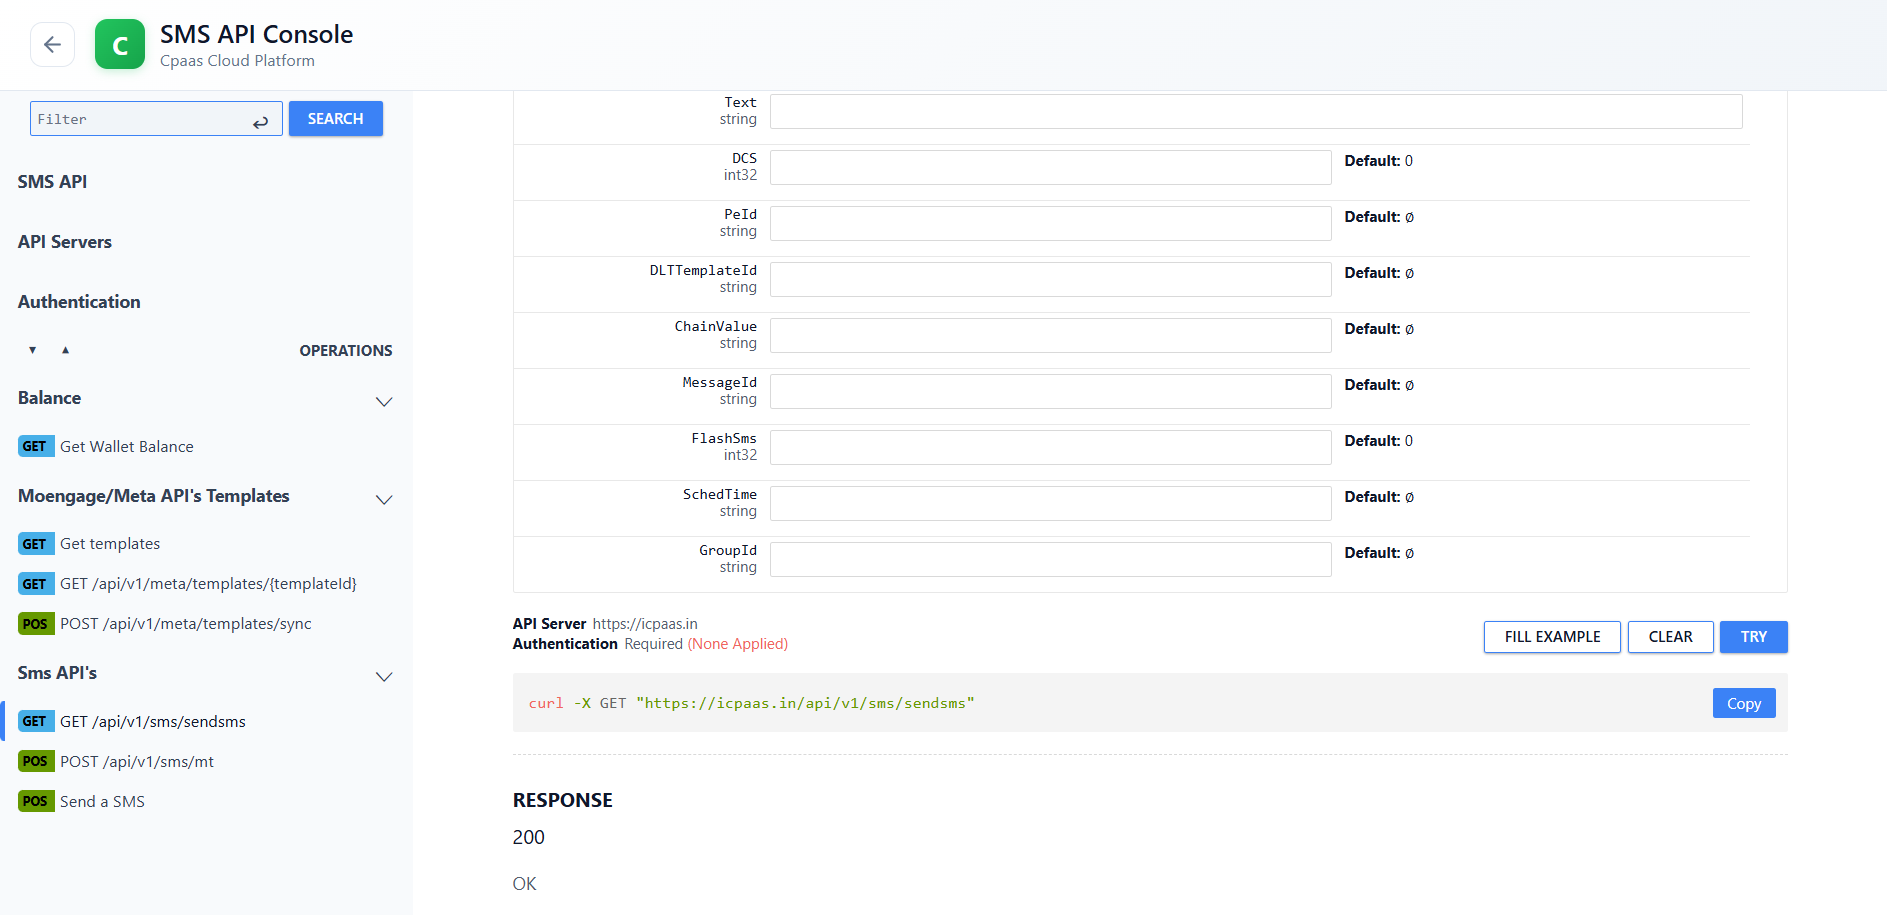
Required Parameters
| Parameter | Description |
|---|---|
| ApiKey | User API Key |
| Number | Recipient Mobile Number |
| SenderId | Approved Sender ID |
| Text | SMS Message Content |
| PEID | Principal Entity ID |
| DLTTemplateId | Approved DLT Template ID |
PEID Information
PEID (Principal Entity ID) is issued during DLT registration and must be supplied when sending DLT-compliant SMS messages.
Sending SMS Using POST API
The POST API accepts SMS data through a JSON request body and is recommended for application integrations.
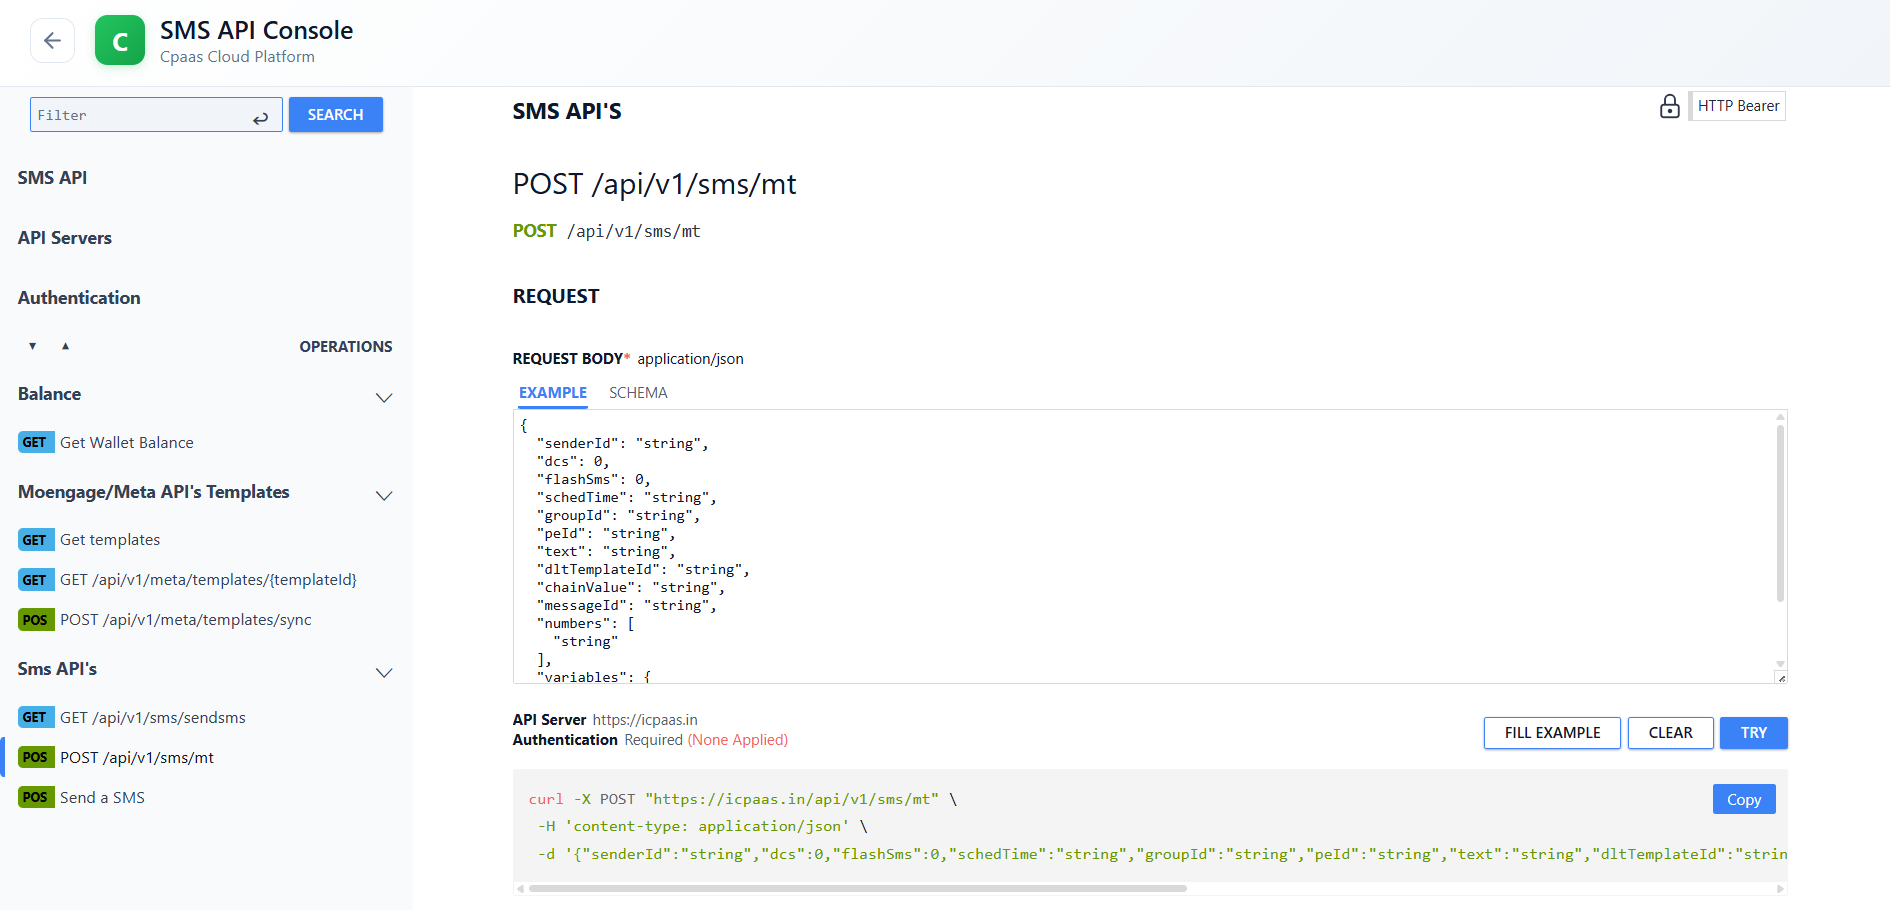
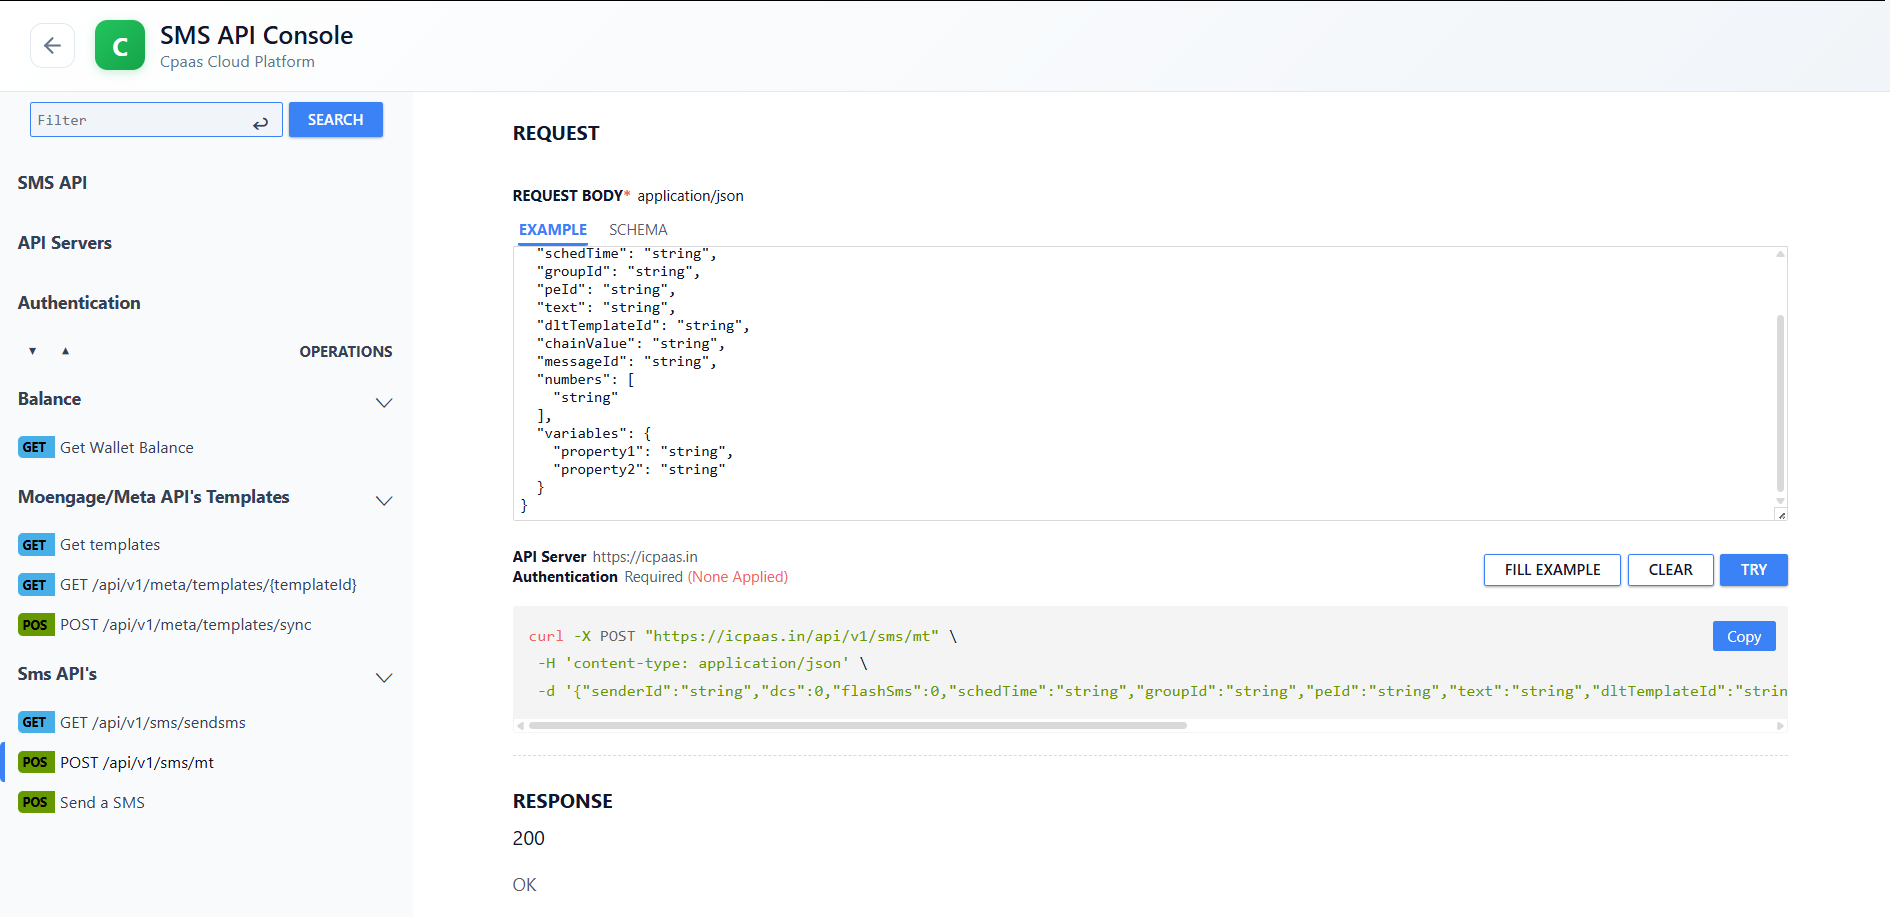
Steps
- Open POST SMS API endpoint.
- Enter Sender ID.
- Enter PEID.
- Enter DLT Template ID.
- Enter recipient numbers.
- Enter SMS message content.
- Click TRY.
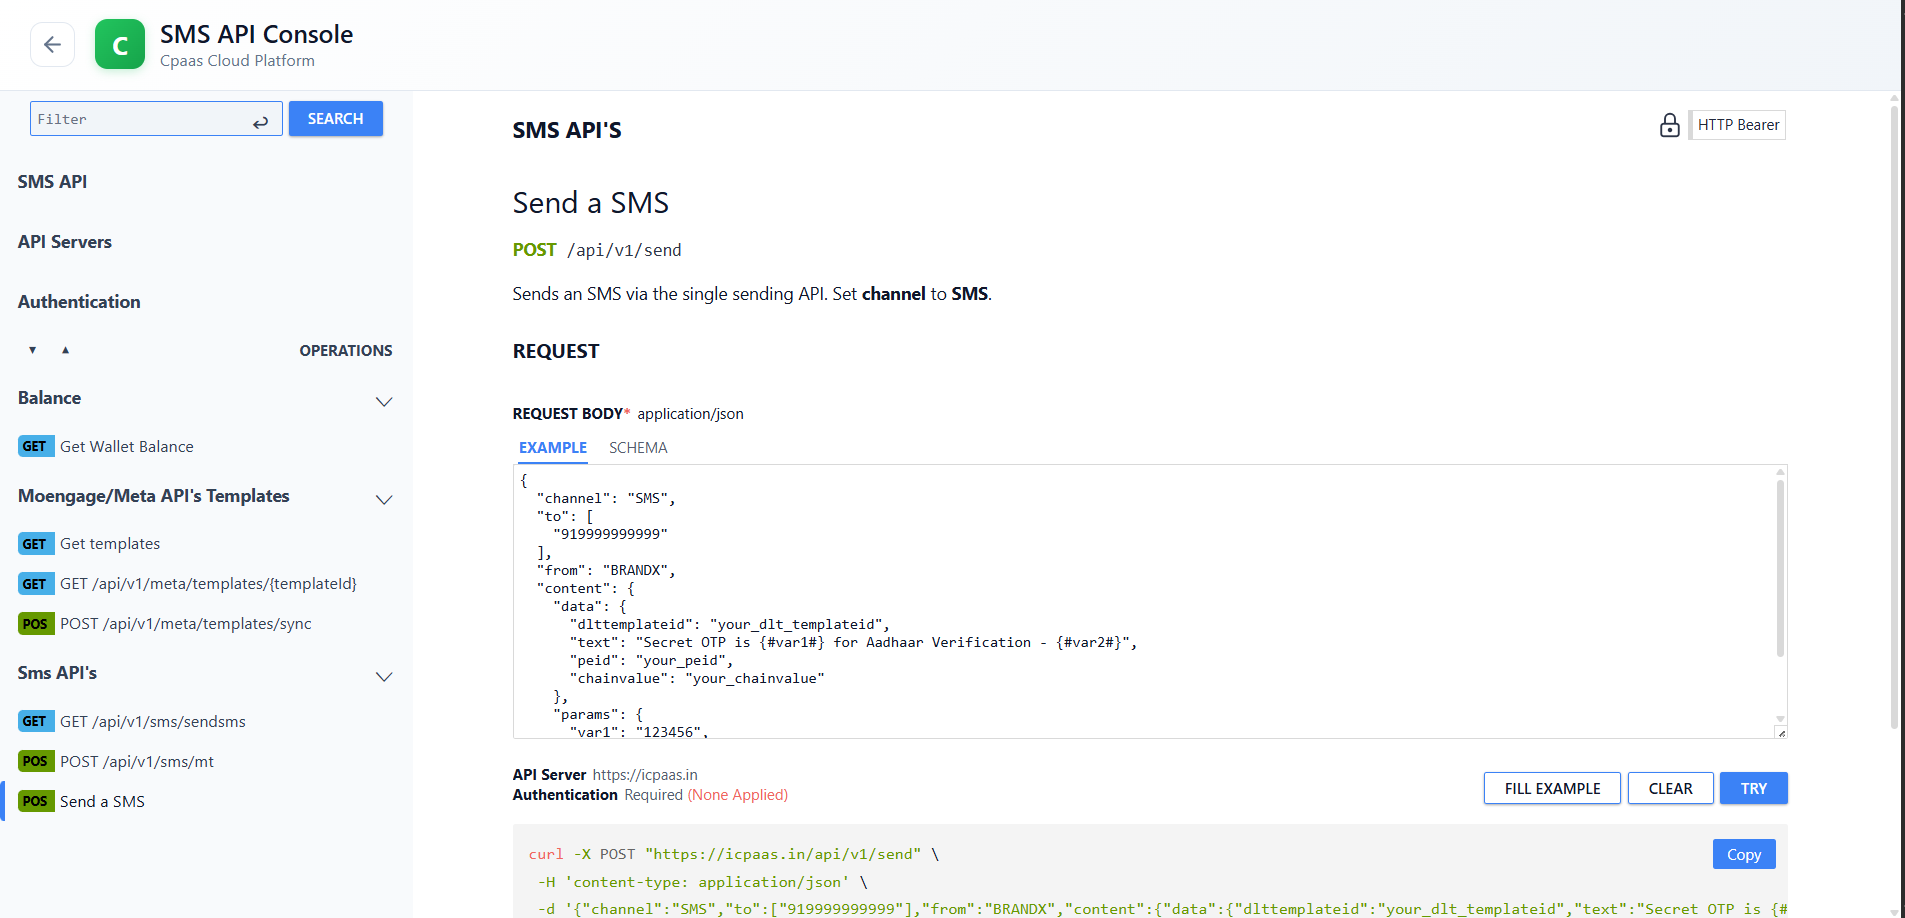
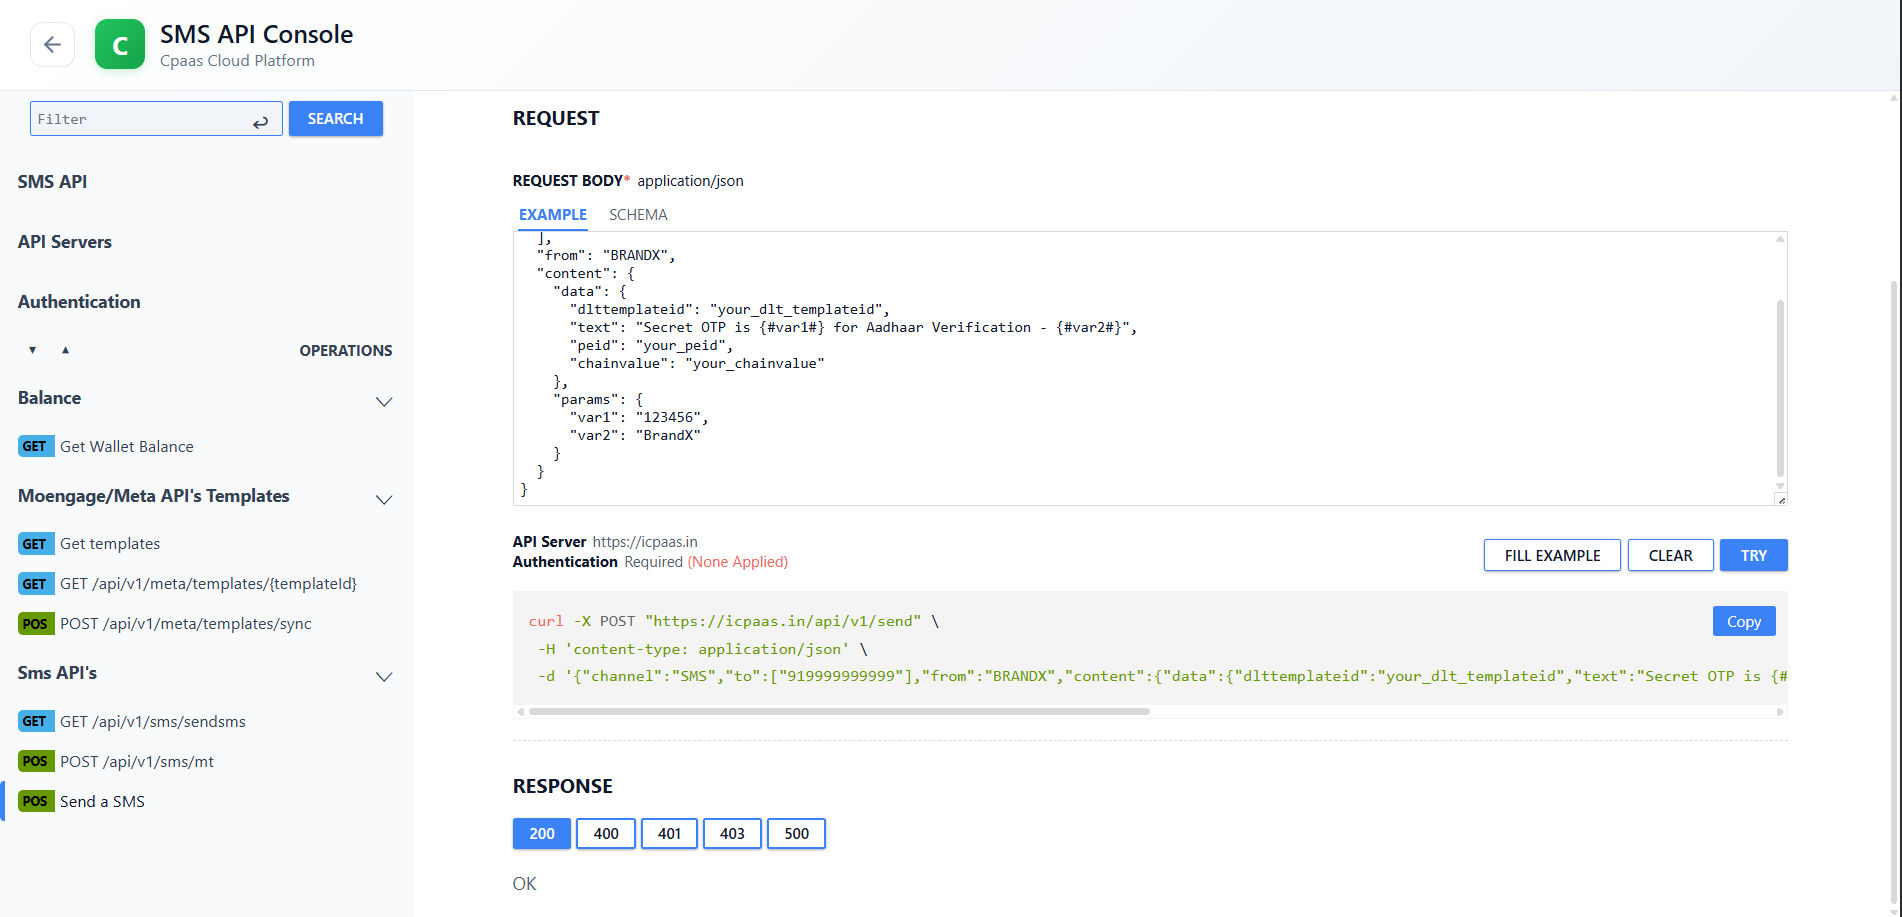
Single SMS API
The Single SMS API provides a simplified SMS submission interface.
Features
- Send SMS to single or multiple recipients.
- DLT template support.
- JSON request format.
- Fast API response.
- Secure authentication.
Steps
- Enter recipient number.
- Enter Sender ID.
- Enter PEID.
- Enter DLT Template ID.
- Enter message content.
- Click TRY.
- The SMS is processed and delivered.
Conclusion
SMS API Integration enables secure, scalable, and automated SMS communication. Using API Authentication, Wallet Balance APIs, GET APIs, POST APIs, and Single SMS APIs, developers can integrate SMS functionality into any external application or workflow.
RCS
RCS (Rich Communication Services) is an advanced messaging protocol that enables businesses to send rich and interactive messages through supported smartphone messaging applications. Unlike traditional SMS, RCS supports images, videos, PDF files, buttons, carousels and dynamic variables for a more engaging customer experience.
The RCS ecosystem is supported by Google and mobile network operators, allowing businesses to communicate with customers through verified business messaging channels. Through RCS Business Messaging, organizations can deliver promotional campaigns, notifications, customer support interactions, and other business communications using rich media and interactive elements.
The platform operates within the RCS Business Messaging ecosystem and supports communication through telecom operators such as Jio and Vodafone Idea (Vi). Operator-specific platforms, including Jio JBM and Jio CX, may be utilized for agent management, message delivery, campaign execution, and customer engagement workflows.
Key Features
RCS Workflow
RCS Agent
An RCS Agent represents the business identity that customers will see when receiving RCS messages. Every RCS campaign must be associated with a valid and approved RCS Agent.
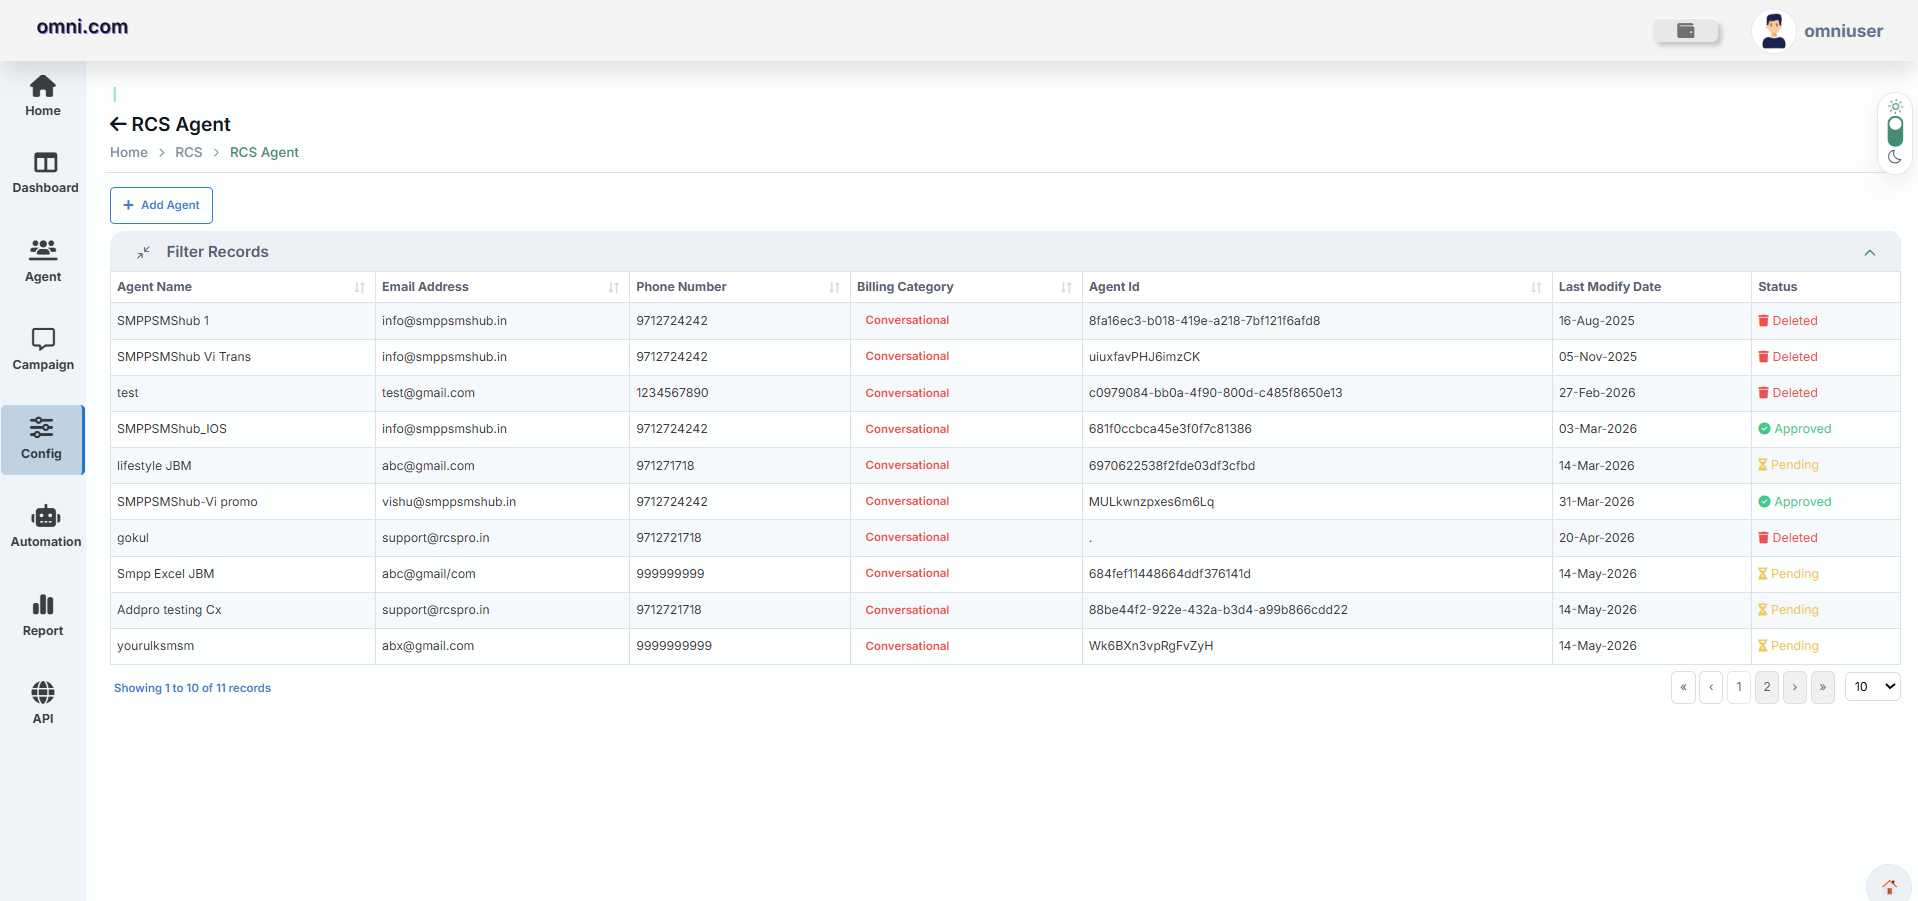
Purpose
The RCS Agent acts as the verified business profile displayed to customers during RCS conversations. It contains branding information, contact details, legal information, and communication preferences.
Create Agent
Navigation: Config → RCS Agents
- Open Config.
- Select RCS Agents.
- Click Add Agent.
- Fill all required business details.
- Click Save.
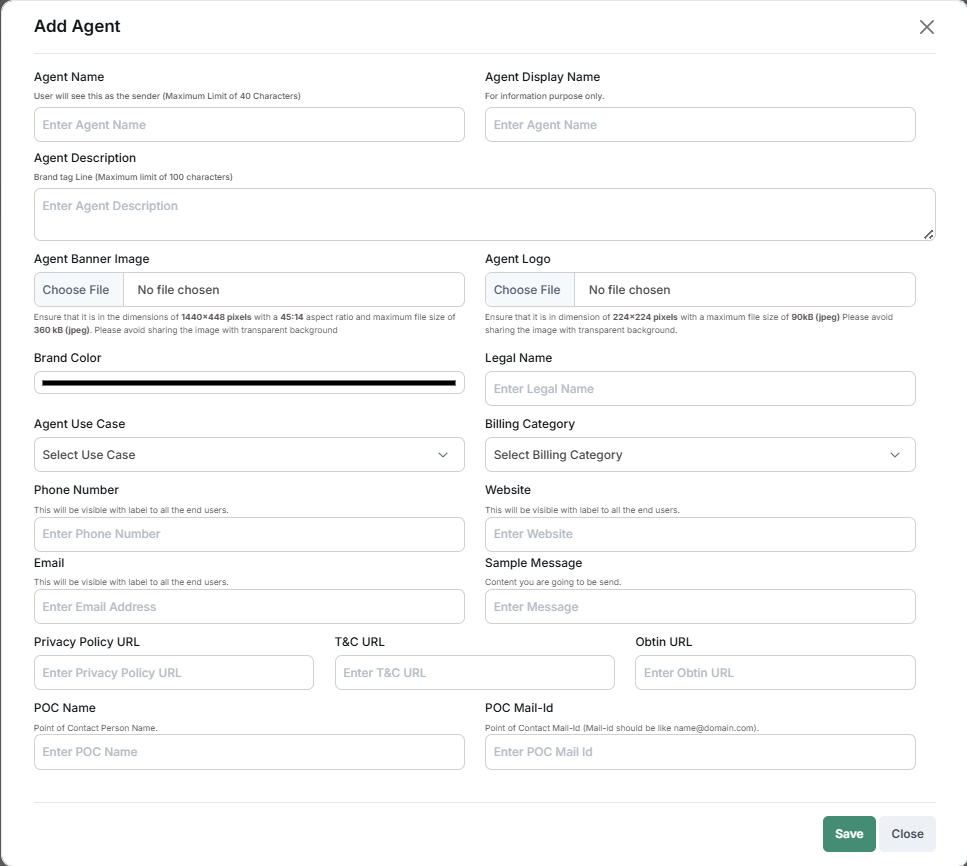
Agent Information
| Field | Description |
|---|---|
| Agent Name | Enter the unique name of the WhatsApp Agent. This name is visible to end users as the sender name and can contain up to 40 characters. |
| Agent Display Name | Specify the display name used internally within the platform for identification and management purposes. This value is not shown to customers. |
| Agent Description | Provide a short description of the business or brand. The description helps identify the purpose of the agent and supports up to 100 characters. |
| Agent Banner Image | Upload a banner image representing your business. The recommended image size is 1440 × 448 pixels with a maximum file size of 360 KB (JPEG). |
| Agent Logo | Upload the official business logo. The recommended image size is 224 × 224 pixels with a maximum file size of 90 KB (JPEG). A transparent background is recommended. |
| Brand Color | Select the primary brand color that will be associated with the WhatsApp Agent and displayed in supported interfaces. |
| Legal Name | Enter the registered legal name of the organization or business associated with the WhatsApp Agent. |
| Agent Use Case | Select the primary business use case, such as Customer Support, Marketing, Utility Notifications, Authentication, or other supported categories. |
| Billing Category | Select the billing category that determines how conversations are classified and charged by the WhatsApp Business Platform. |
| Phone Number | Enter the business contact number that will be visible to customers during WhatsApp conversations. |
| Website | Provide the official business website URL. This link may be displayed to customers as part of the business profile. |
| Email Address | Enter the official business email address that customers can use to contact your organization. |
| Sample Message | Provide an example of the type of message that will be sent through this WhatsApp Agent for review and verification purposes. |
| Privacy Policy URL | Enter the URL of your organization's Privacy Policy page so users can review how their information is collected and processed. |
| Terms & Conditions URL | Provide the URL of your organization's Terms & Conditions page applicable to WhatsApp communications. |
| Opt-in URL | Enter the URL where customers can provide consent (opt-in) to receive WhatsApp messages from your business. |
| POC Name | Specify the name of the primary Point of Contact responsible for managing the WhatsApp Agent. |
| POC Mail ID | Enter the email address of the Point of Contact. The email should be in a valid format (for example: name@domain.com). |
Agent Creation Workflow
Create Template
The Create Template module allows users to create rich and interactive RCS message templates. Templates can contain images, videos, PDF files, action buttons, dynamic variables, and carousel cards for enhanced customer engagement.
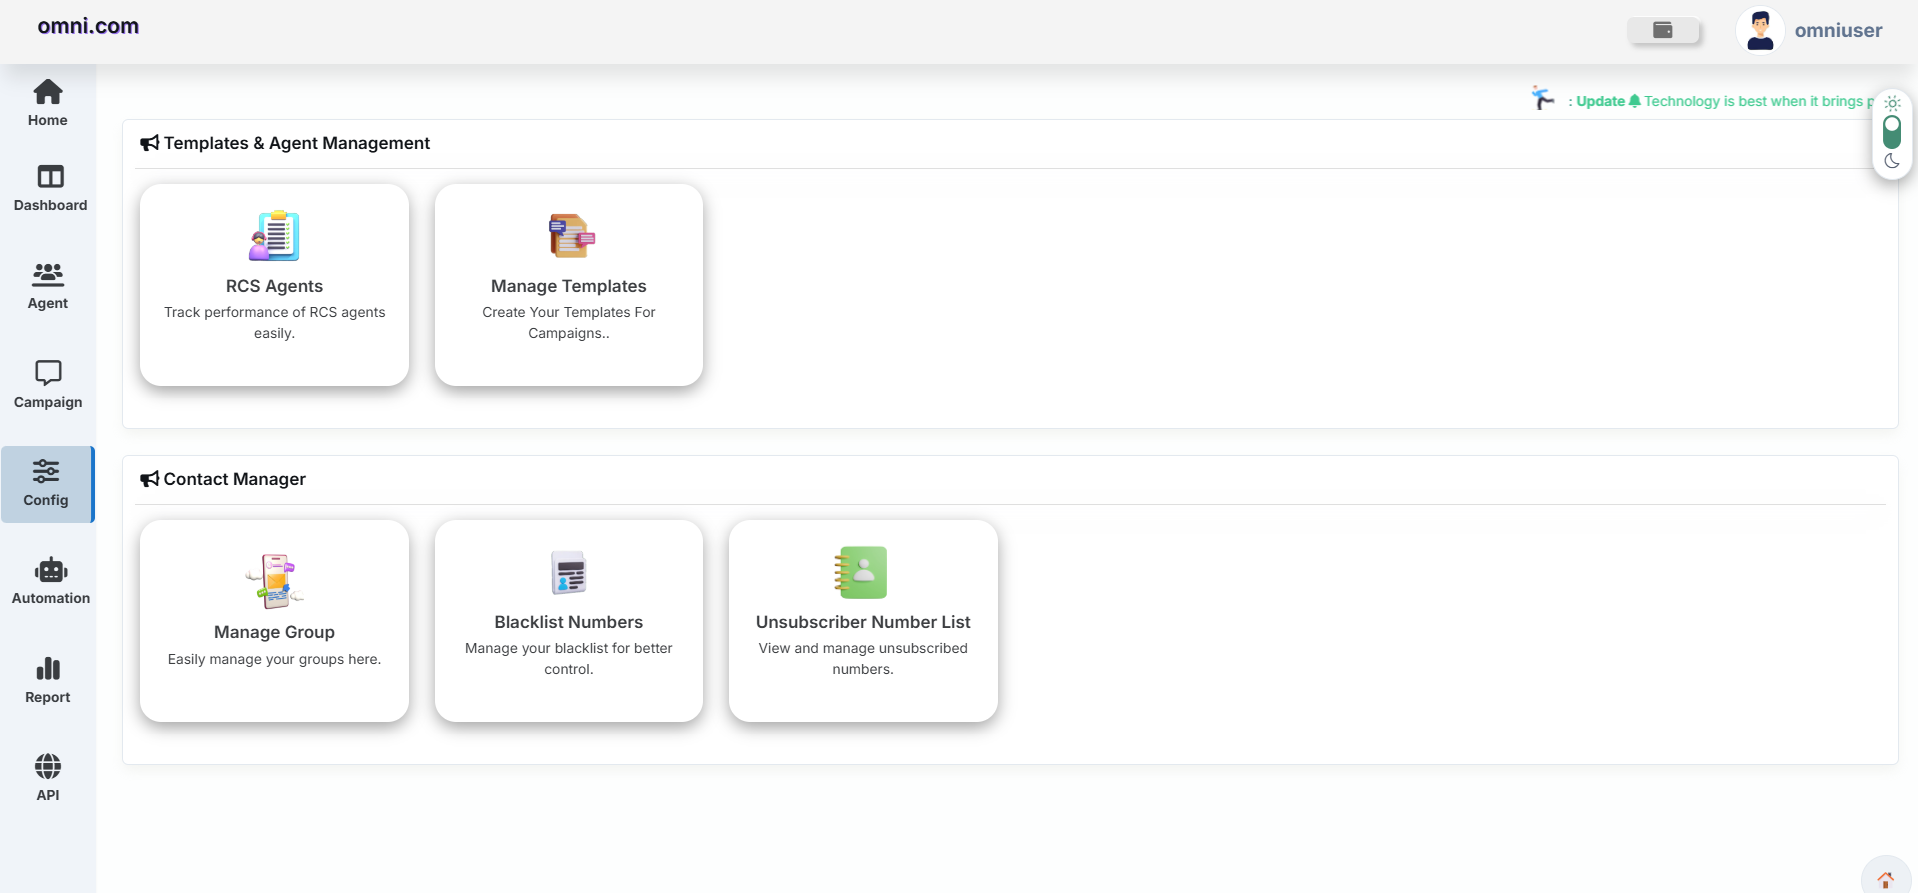
Navigation
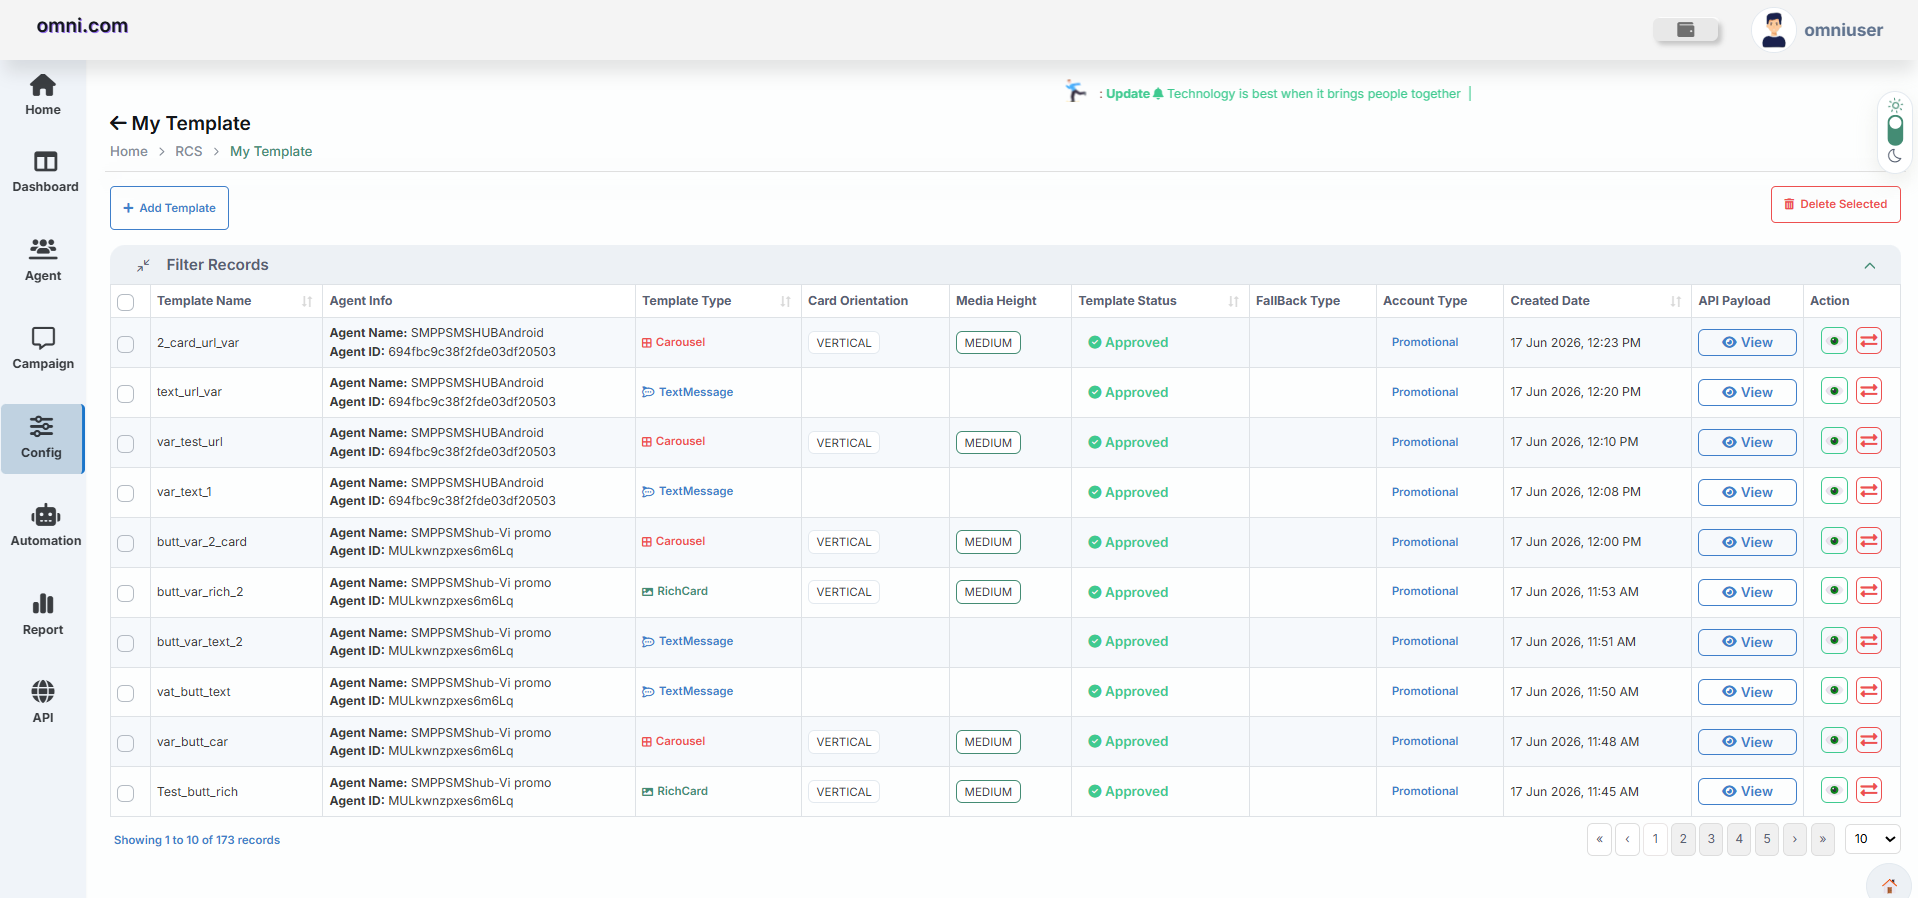
Navigate to: Config → Manage Templates

Supported Template Types
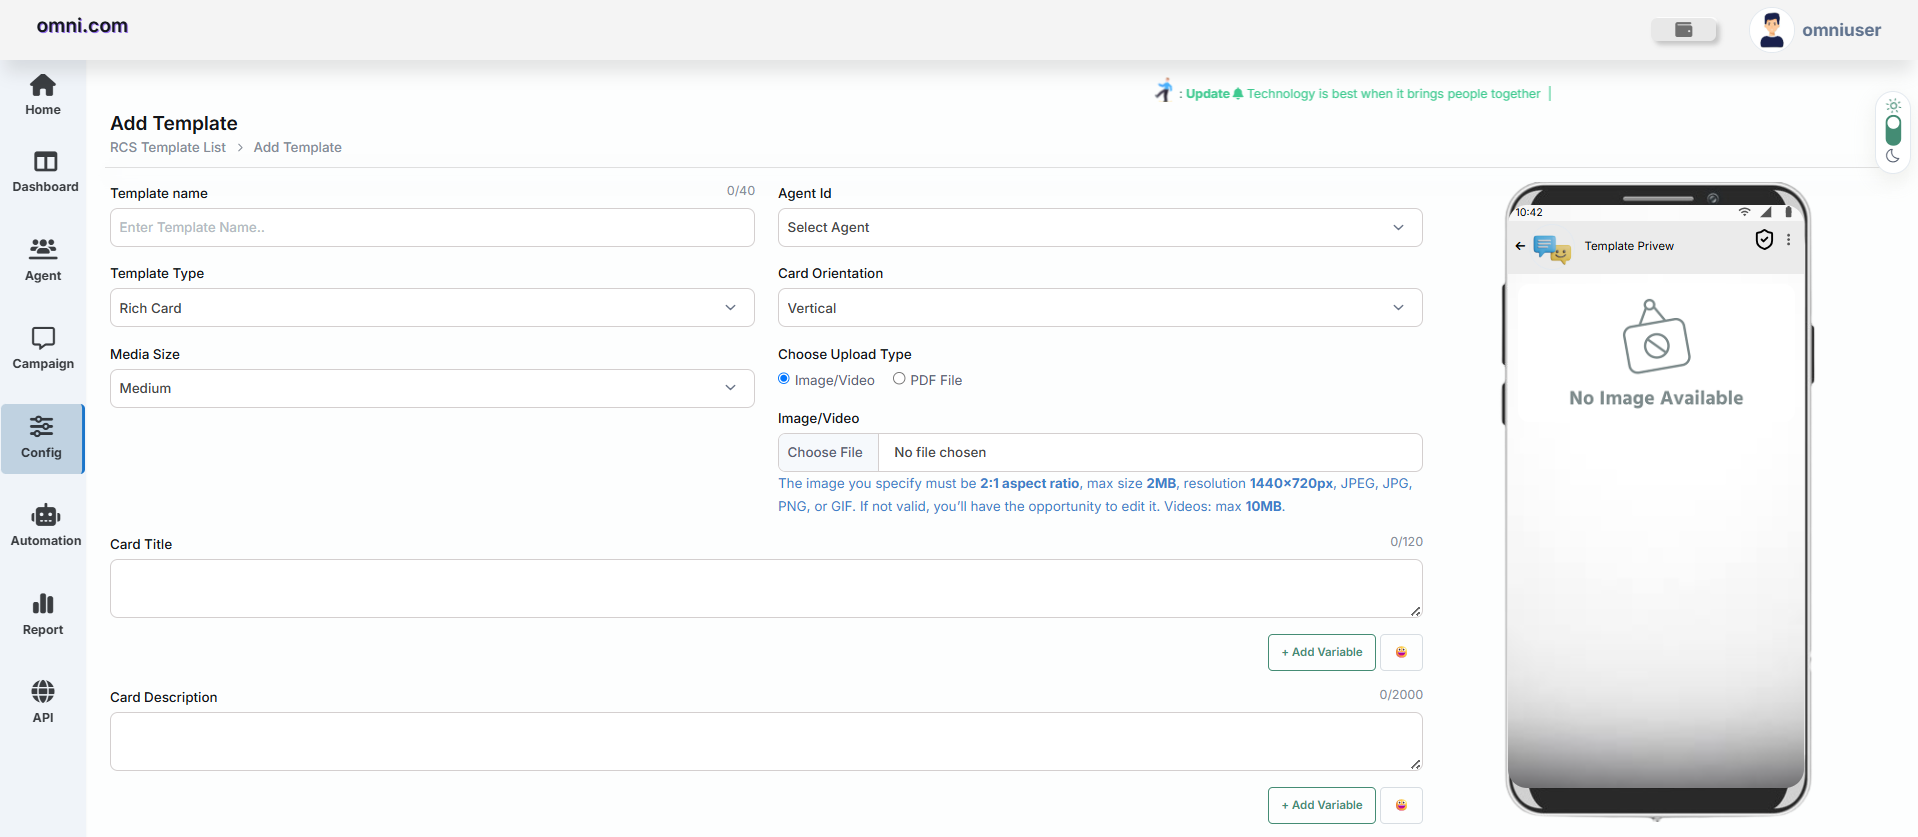
1. Rich Card Template
Rich Card messages contain rich media and text content.
| Feature | Description |
|---|---|
| Media Support | Image, Video and PDF files |
| Card Title | Maximum 120 characters |
| Card Description | Maximum 2000 characters |
| Action Buttons | Suggested action/reply buttons |
| Variables | Dynamic personalization support |
Card Orientation
Media Size
Dynamic Variables
Variables allow dynamic personalization within RCS templates. Instead of creating separate templates for each customer, you can use variables that are automatically replaced during campaign execution.
If the customer name is Amit, Rahul or Priya, the system automatically replaces the variable with the corresponding value.
2. Carousel Template
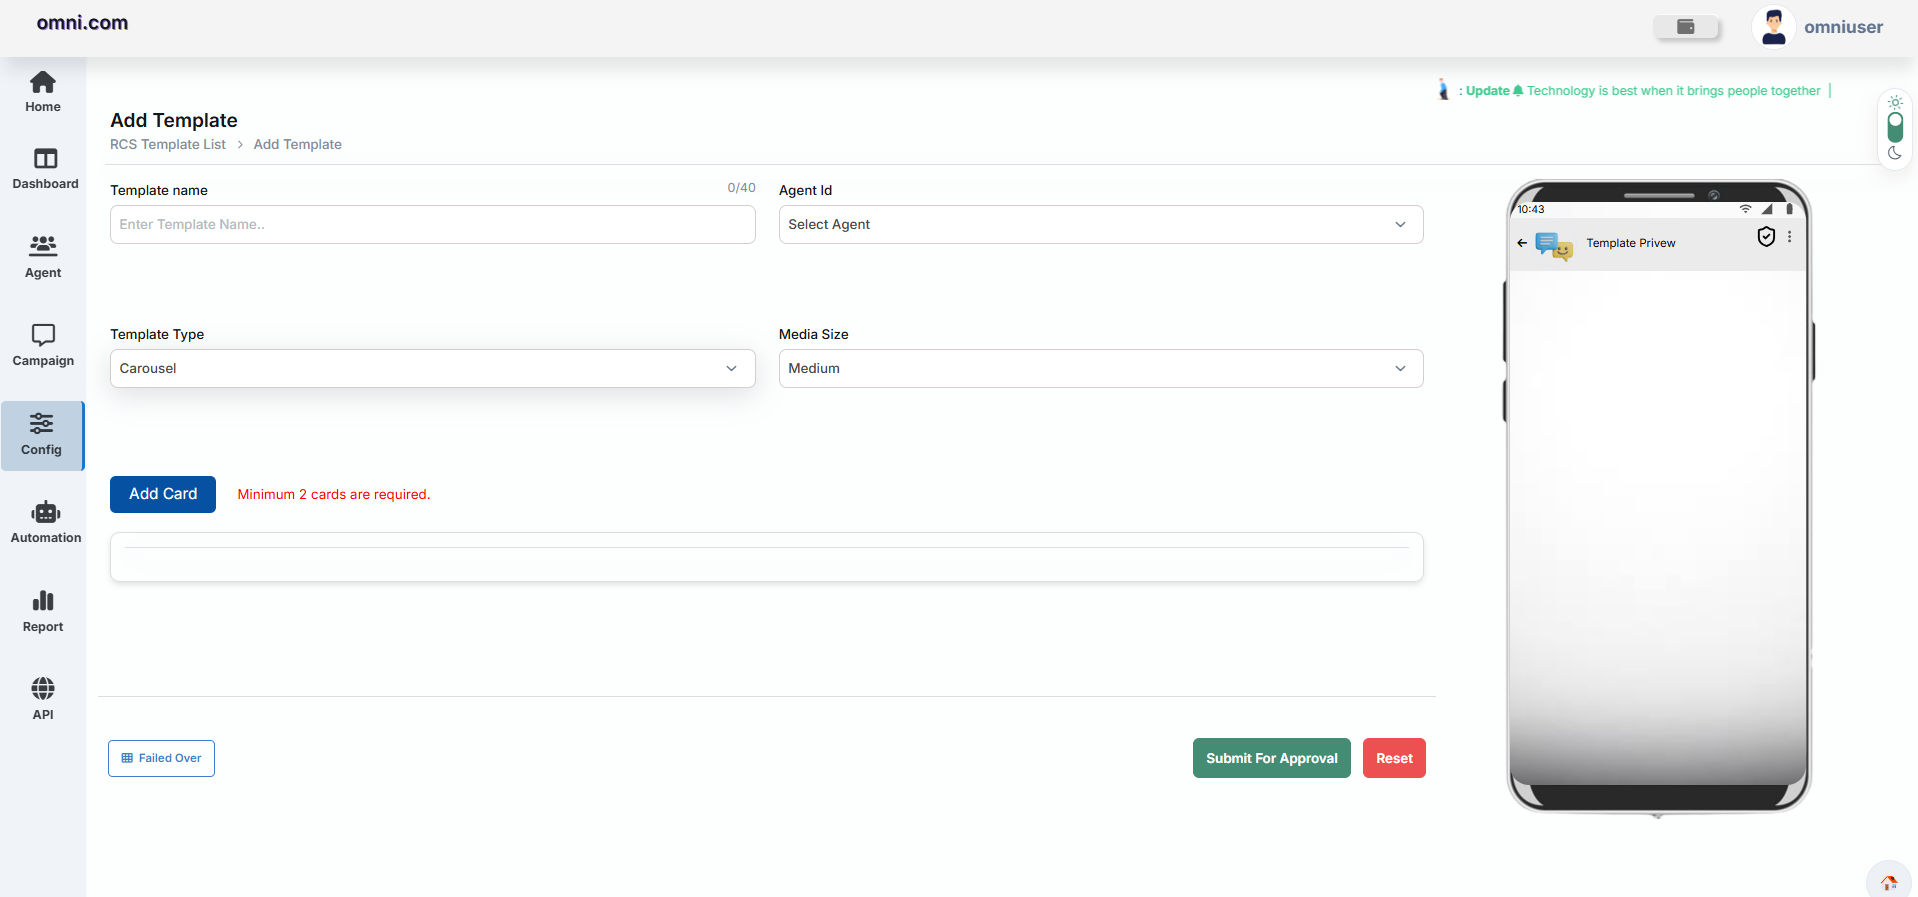
Carousel templates display multiple cards in a swipeable format. Each card can contain different content.
| Feature | Description |
|---|---|
| Minimum Cards | 2 Cards |
| Maximum Cards | 10 Cards |
| Media Support | Image, Video and PDF |
| Card Title | Maximum 120 characters |
| Card Description | Maximum 2000 characters |
| Action Buttons | Suggested action/reply buttons |
| Variables | Dynamic personalization support |
Common Use Cases
- Multiple Products
- Multiple Offers
- Service Catalogs
- Promotional Campaigns
3. Text Message Template
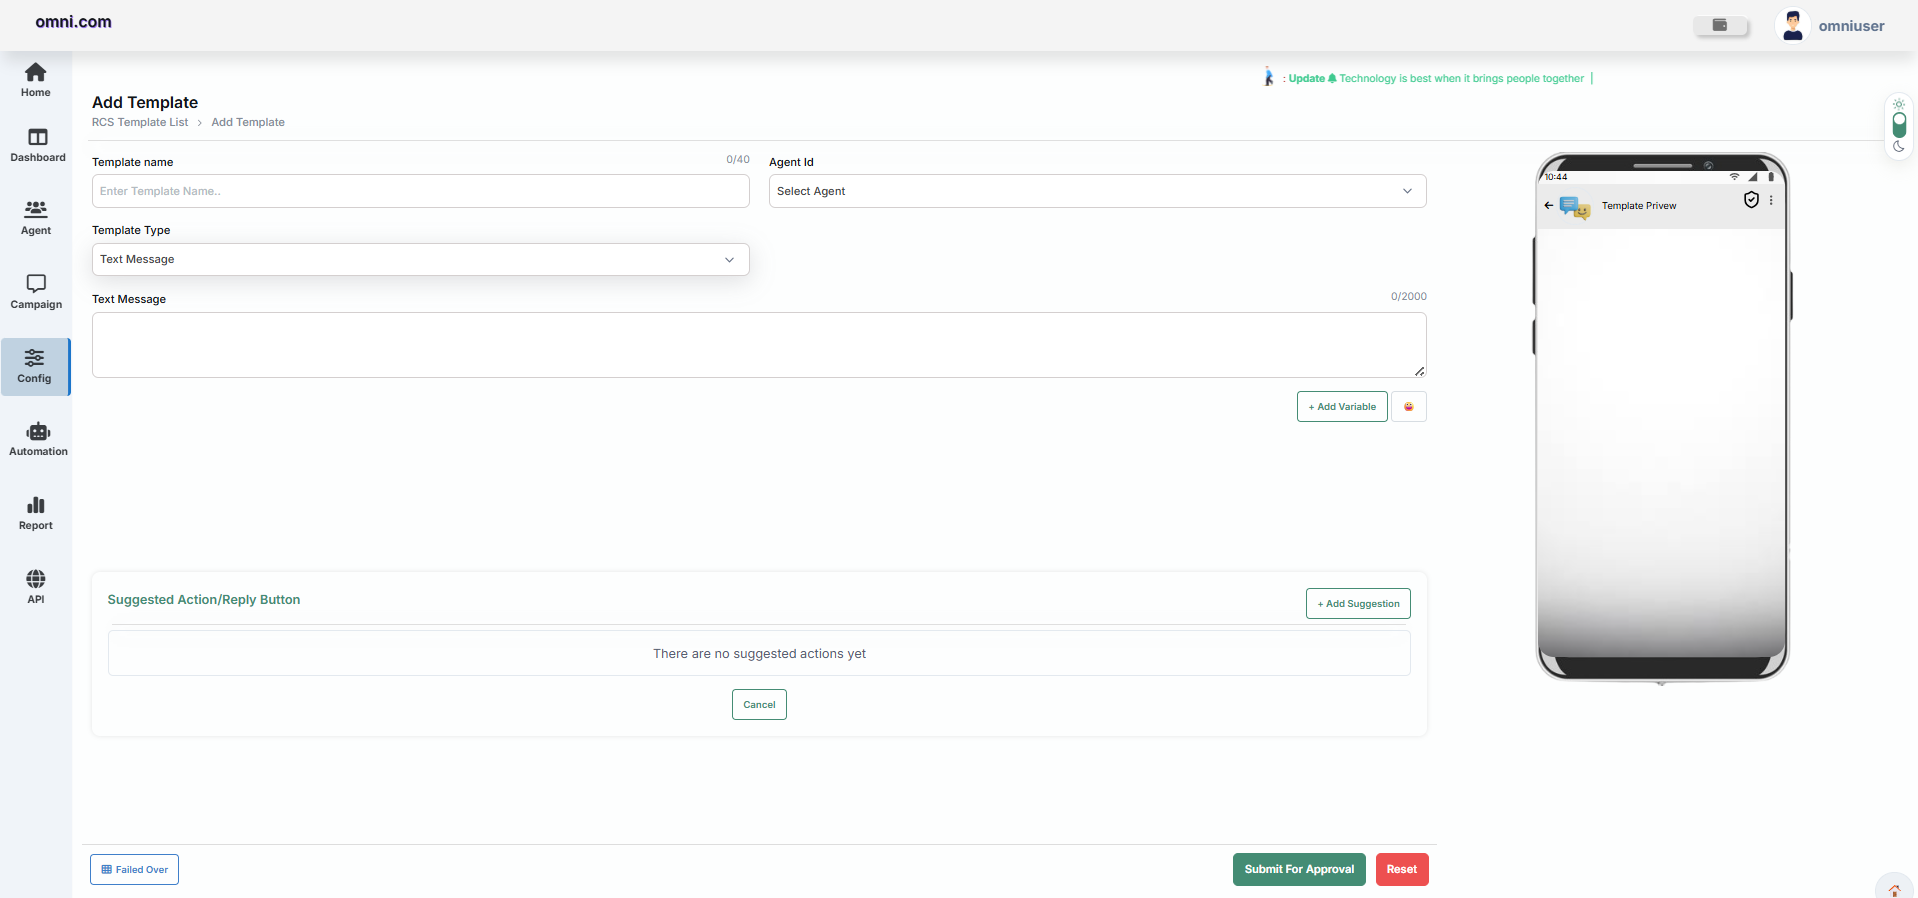
Text Message templates contain only text content.
| Feature | Description |
|---|---|
| Text Content | Up to 2000 characters |
| Variables | Dynamic personalization support |
| Action Buttons | Suggested action/reply buttons |
Button Examples
Template Approval
After approval, the template becomes available for use in RCS campaigns.
RCS Manage Group
The RCS Manage Group section allows users to create and maintain recipient groups for RCS campaigns.Groups help organize customers and simplify campaign management.
Available Information
| Field | Description |
|---|---|
| Group Name | Name of the contact group |
| Total Contacts | Total number of contacts in the group |
| Actions | Available management actions for the group |
Available Actions
Create a New Group
The new group is created successfully and appears in the group listing.
Create RCS Campaign
The Create RCS Campaign module allows users to send rich and interactive RCS messages using approved templates, rich cards, carousels, and text messages. Campaigns can be delivered to individual recipients, multiple recipients, uploaded contact files, or reusable groups.
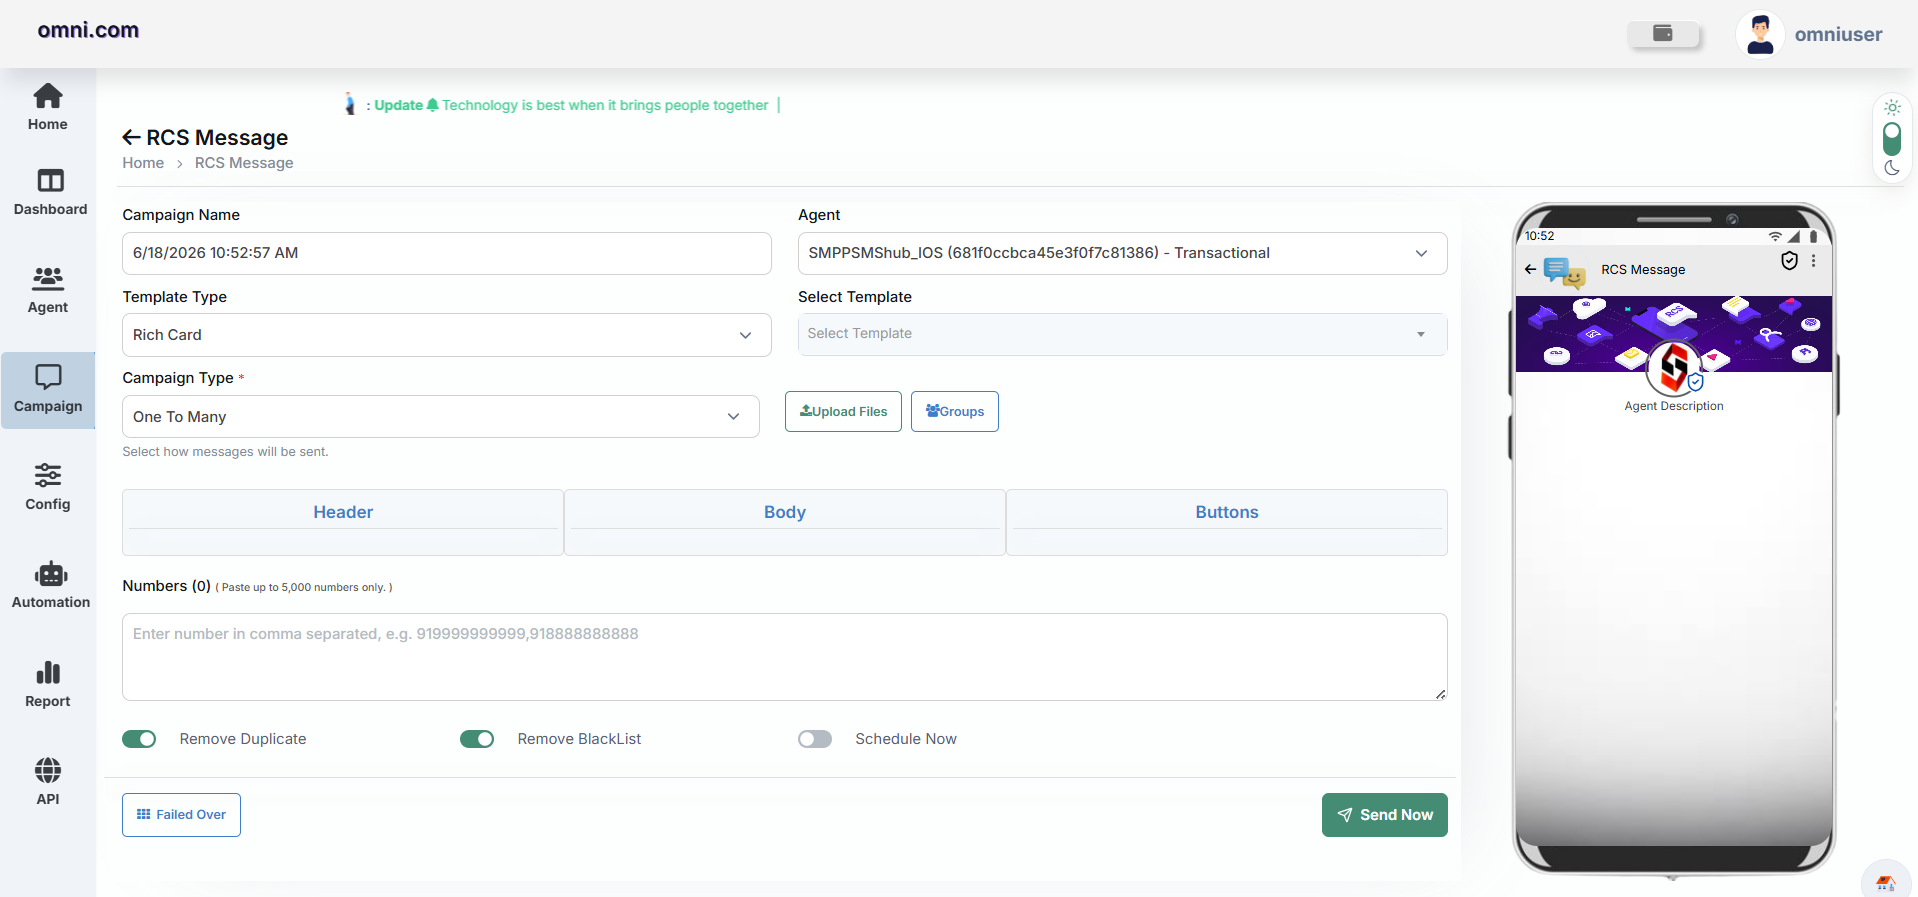
Campaign Configuration
| Field | Description |
|---|---|
| Campaign Name | Enter a unique name for the campaign. |
| Agent | Select the required RCS Agent. |
| Template Type | Select Rich Card, Carousel, or Text Message. |
| Select Template | Choose an approved template created earlier. |
| Campaign Type | Select One To Many or Many To Many campaign mode. |
Template Types
Campaign Types
Recipient Upload Methods
| Method | Description |
|---|---|
| Upload File | Upload recipient data using supported file formats. Recommended for large recipient lists. |
| Groups | Use saved contact groups for recurring campaigns without uploading files repeatedly. |
Using Groups
Additional Campaign Options
| Option | Description |
|---|---|
| Remove Duplicate | Automatically removes duplicate mobile numbers. |
| Remove Blacklist | Excludes all numbers available in the blacklist. |
| Schedule Now | Schedule campaign delivery for a future date and time. |
Blacklist Numbers
The Blacklist Numbers module is used to prevent message delivery to specific mobile numbers. Any number added to the blacklist will automatically be excluded from campaigns when the Remove Blacklist option is enabled during campaign creation.
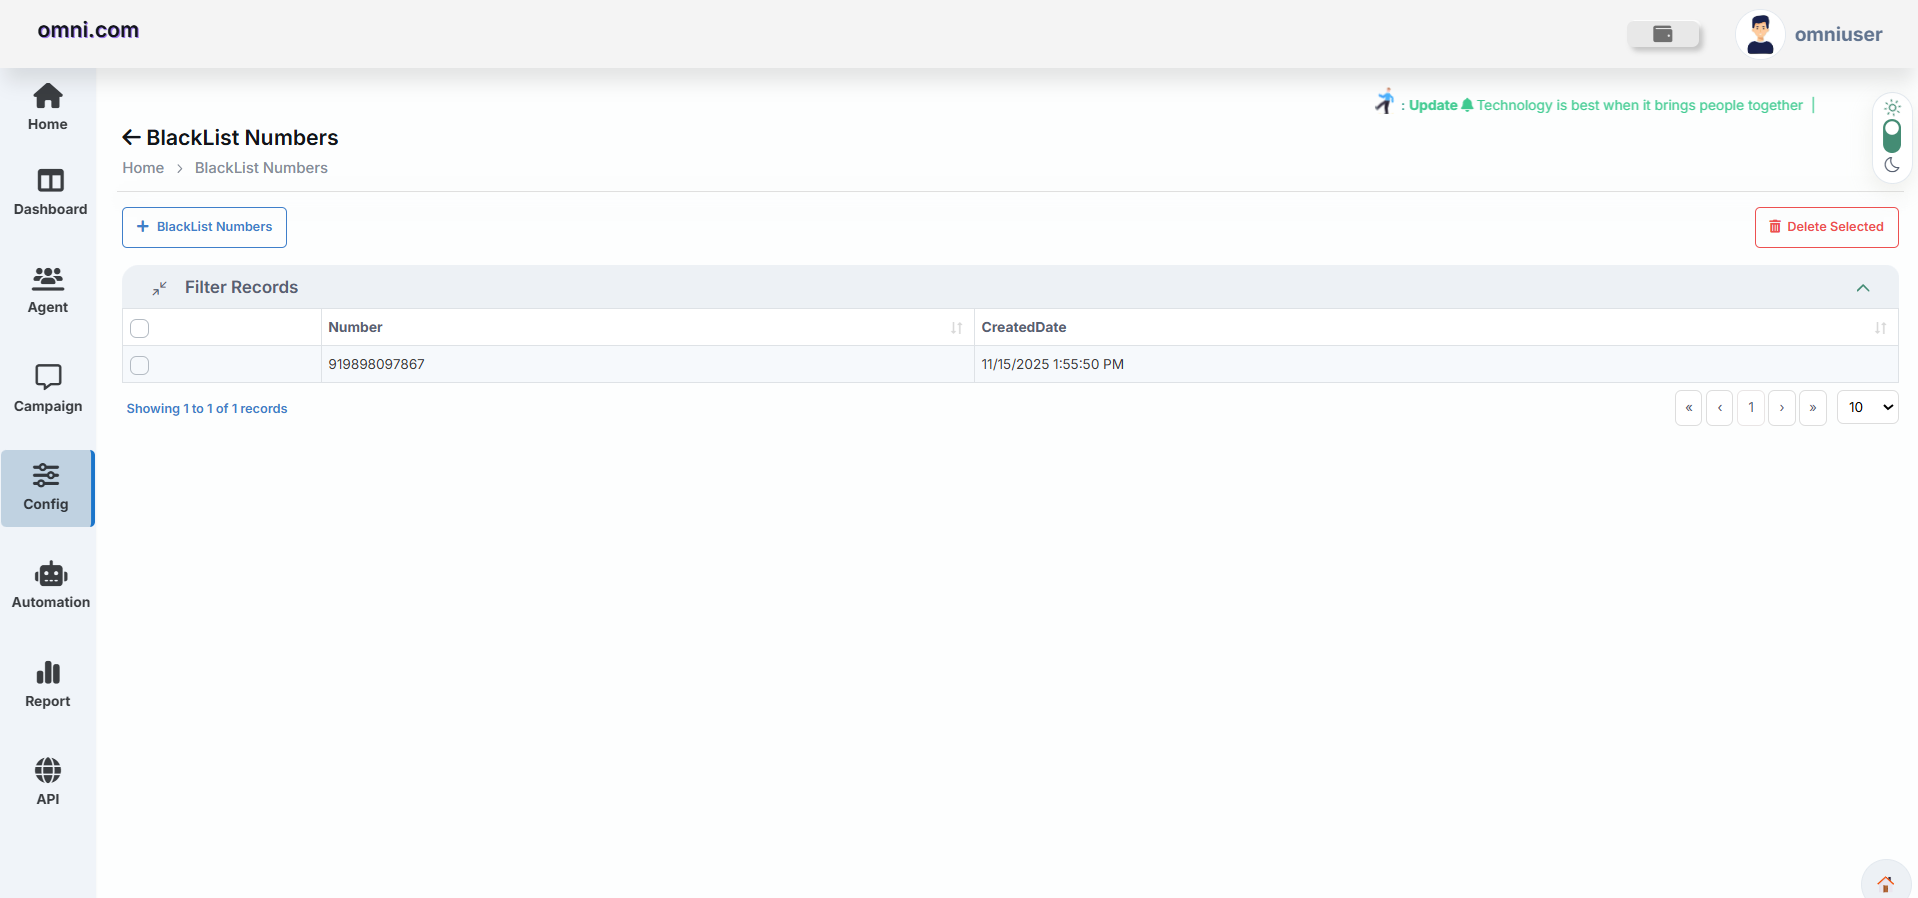
Navigation
Blacklist Number List
The Blacklist Numbers page displays all blacklisted mobile numbers and related information.
| Column | Description |
|---|---|
| Mobile Number | Blacklisted recipient number. |
| Created Date | Date and time when the number was added. |
Available Actions
Add Blacklist Numbers
Click + Blacklist Numbers to open the Blacklist Numbers popup. The popup provides two methods for adding numbers.
Method 1: Enter Numbers
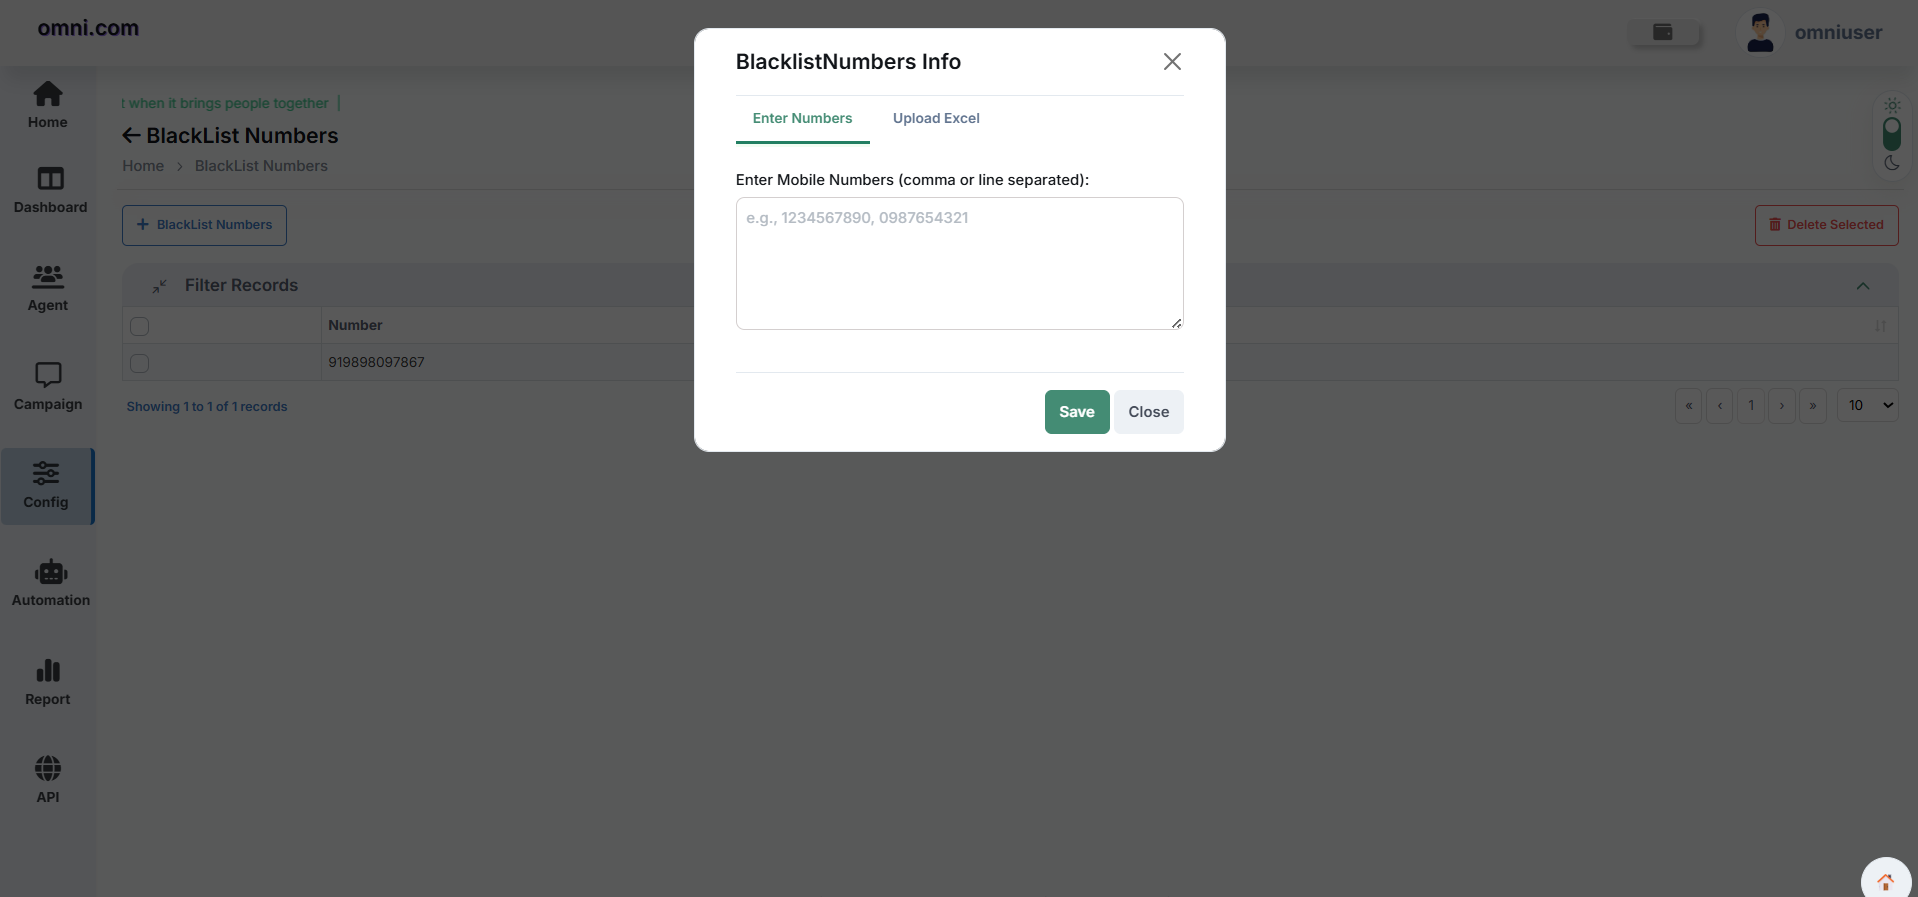
Supported Formats
| Format | Example |
|---|---|
| Comma Separated | 9876543210,9876543211,9876543212 |
| Line Separated | 9876543210 9876543211 9876543212 |
Method 2: Upload Excel
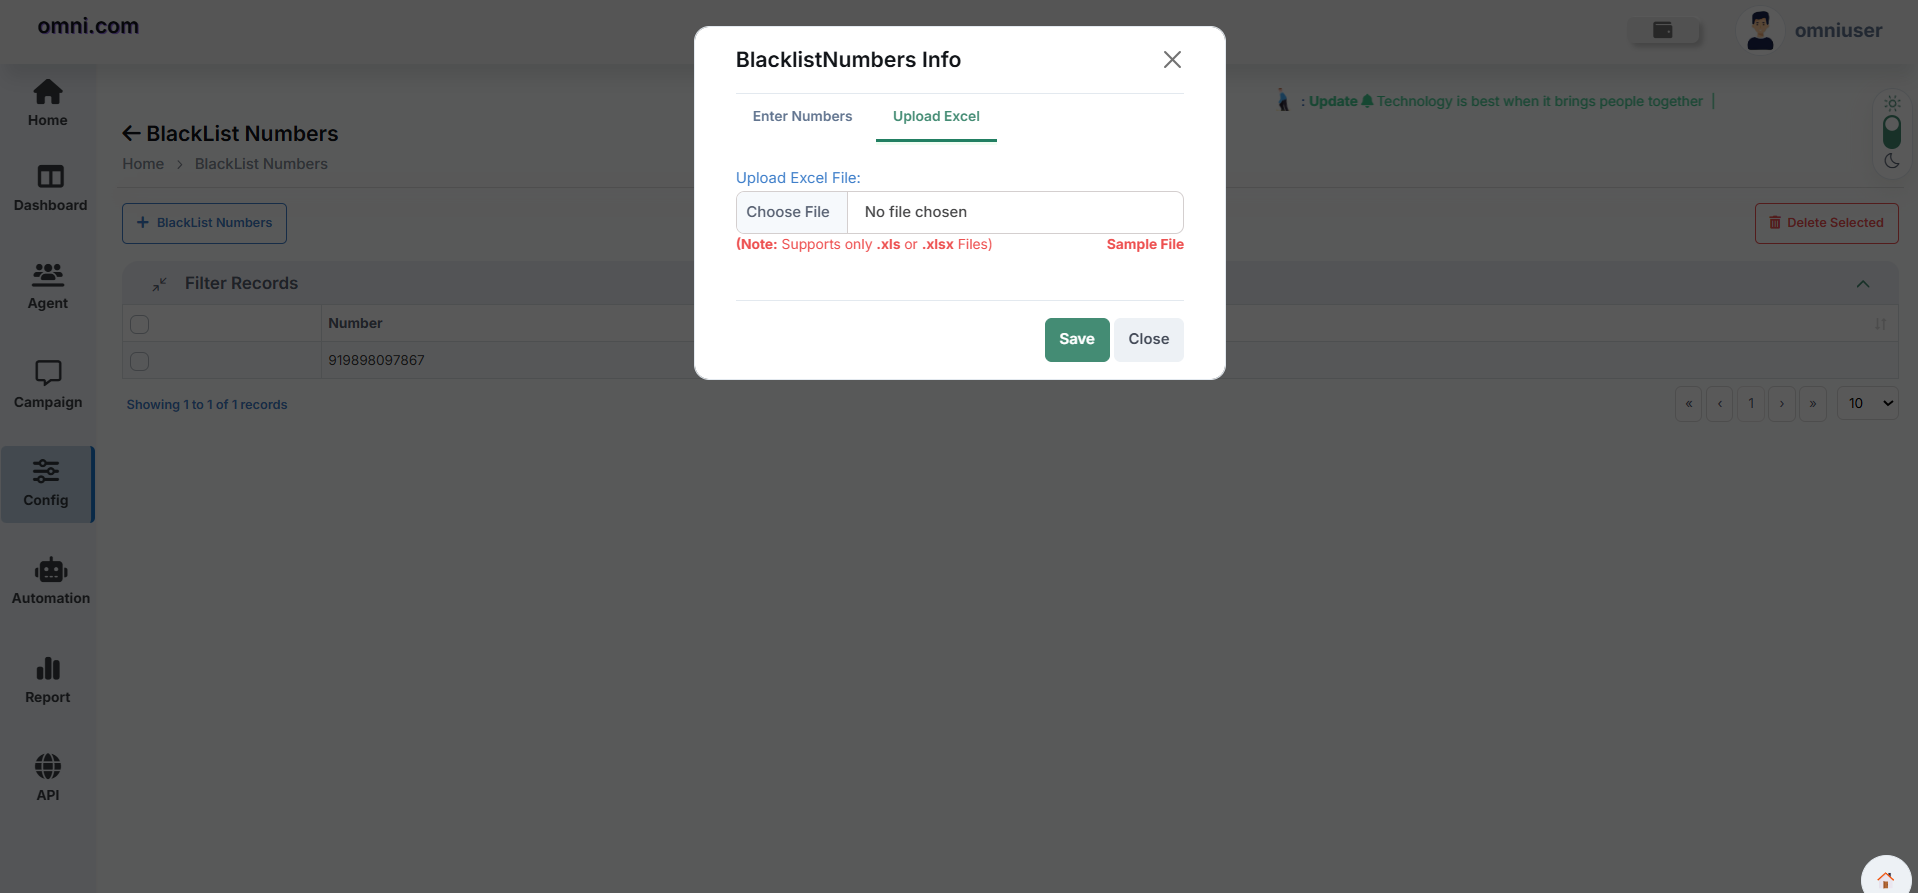
Users can upload an Excel file containing mobile numbers.
| Supported Format | Description |
|---|---|
| .xls | Microsoft Excel Spreadsheet |
| .xlsx | Modern Excel Spreadsheet Format |
Steps to Upload Excel File
Delete Blacklist Numbers
Users can remove one or multiple blacklist entries when they are no longer required.
RCS Reports
The Reports module provides insights into RCS campaign performance, delivery statistics, CTA responses, and customer engagement. Users can monitor campaign effectiveness, review delivery outcomes, and analyze customer interactions in real time.
Report Dashboard
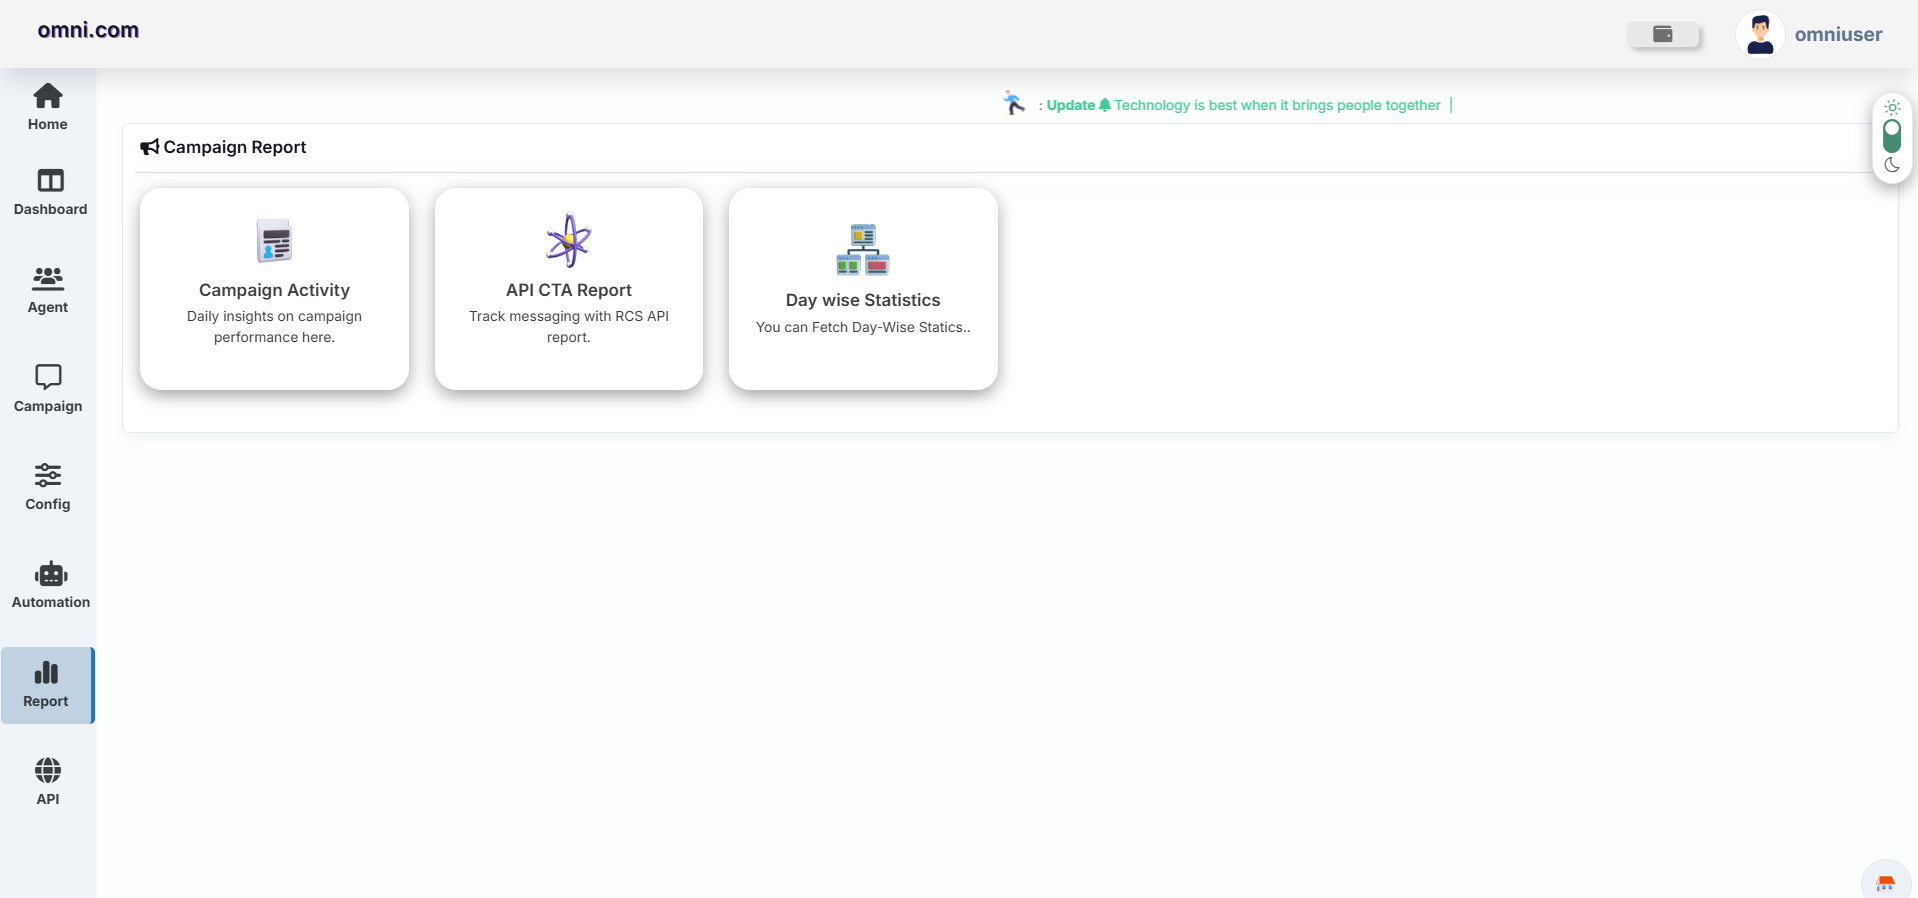
Purpose
The RCS Reports module is designed to provide comprehensive visibility into RCS campaign execution, delivery performance, CTA responses, customer engagement, and reporting records. It enables organizations to analyze communication effectiveness and monitor RCS messaging performance in real time.
Available Report Sections
| Section | Description |
|---|---|
| Campaign Activity | View campaign performance and activity details. |
| API CTA Report | Track CTA responses and customer interactions from RCS API campaigns. |
| Day Wise Statistics | View day-wise messaging statistics and delivery trends. |
Benefits
- Monitor campaign performance.
- Track RCS delivery outcomes.
- Track CTA responses and engagement.
- Analyze messaging effectiveness.
Users can access reporting tools and monitor RCS campaign performance from a centralized location.
Campaign Activity
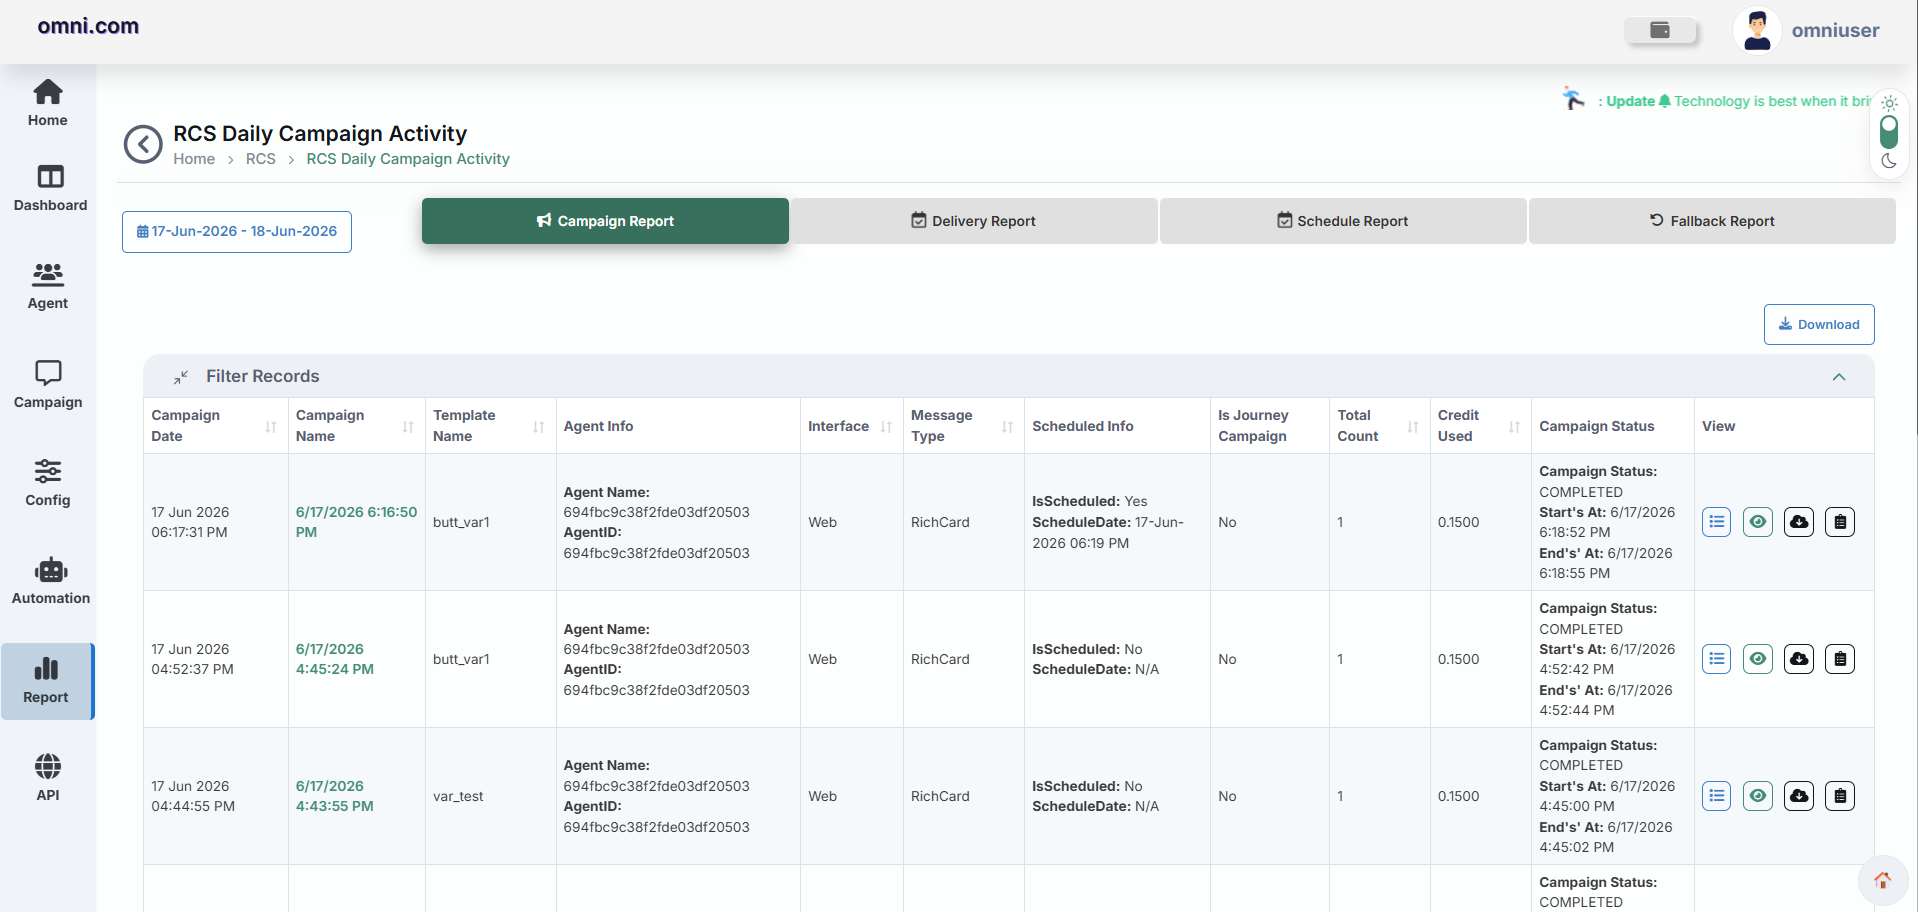
Purpose
The Campaign Activity report provides detailed information about RCS campaigns executed during a selected date range. Users can review campaign performance, delivery status, scheduled campaigns, and fallback reports.
Date Range Filter
Users can select a custom date range to view campaign records.
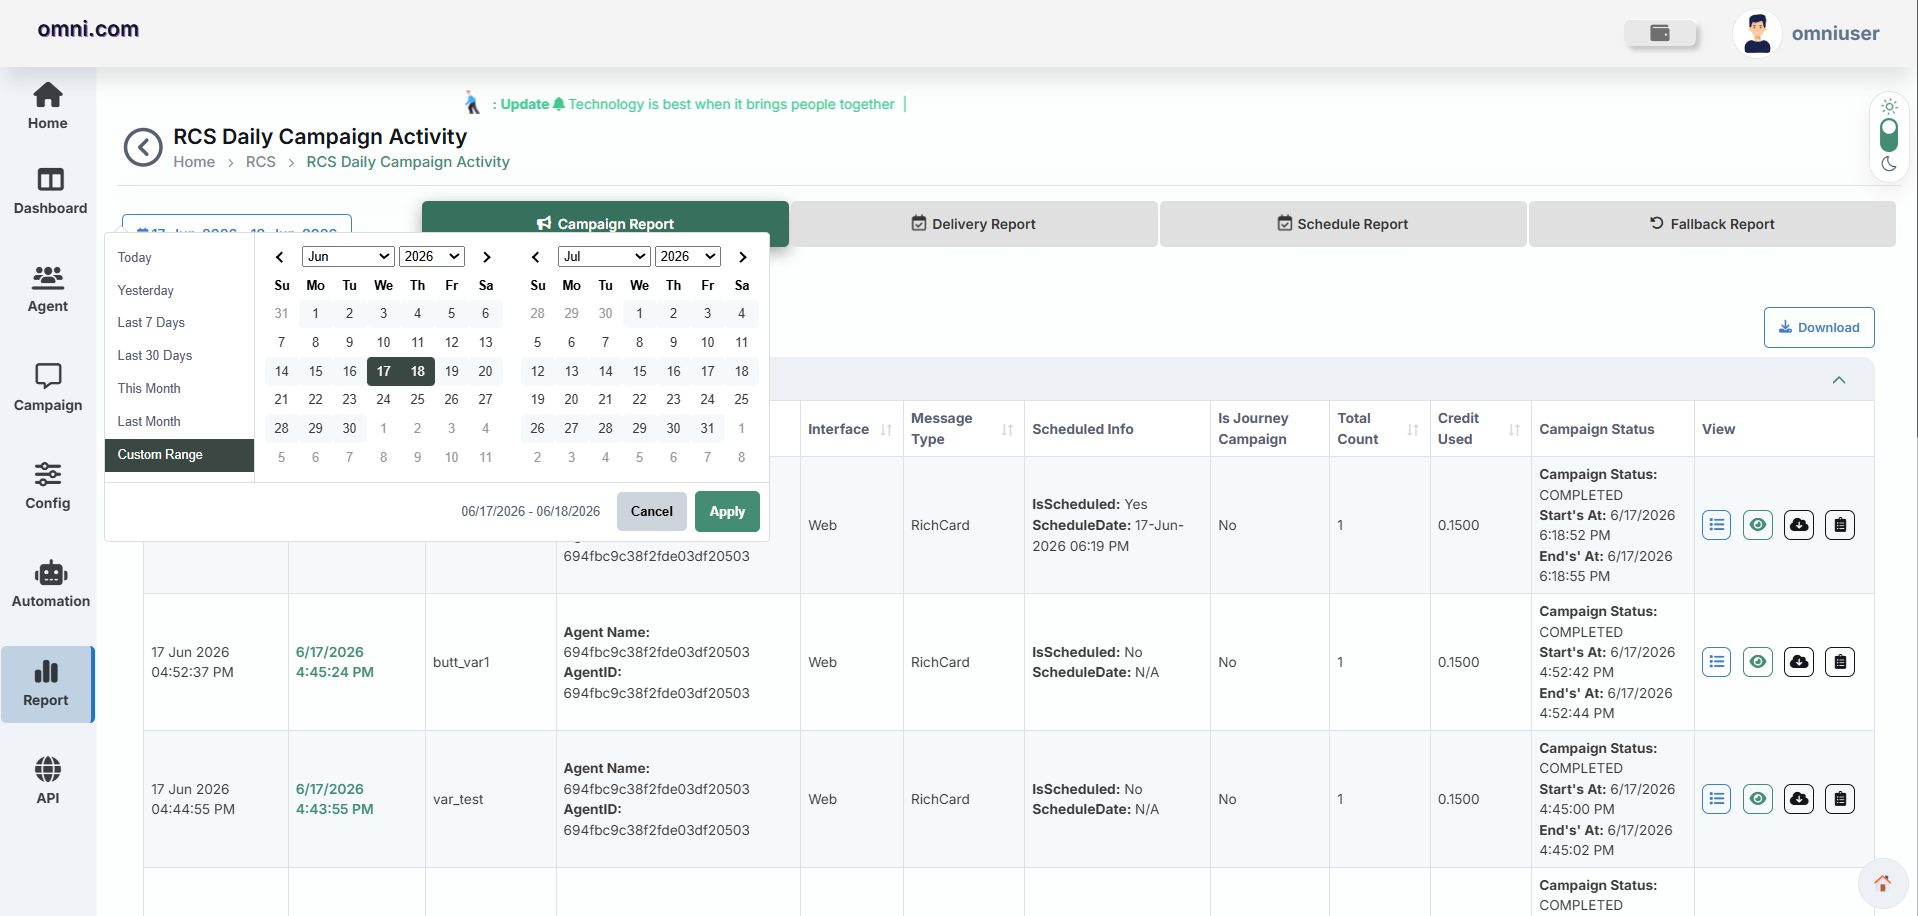
Available Options
- Today
- Yesterday
- Last 7 Days
- Last 30 Days
- This Month
- Last Month
- Custom Range
Click Apply to load campaign data for the selected period.
Campaign Report Information
| Field | Description |
|---|---|
| Campaign Date | Displays the date and time when the campaign was created. |
| Campaign Name | Displays the name of the campaign. |
| Template Name | Displays the template used in the campaign. |
| Agent Info | Displays the Agent Name and Agent ID associated with the campaign. |
| Interface | Displays the interface used to create the campaign, such as Web or HTTP. |
| Message Type | Displays the type of RCS message sent, such as RichCard. |
| Scheduled Info | Displays whether the campaign is scheduled along with the scheduled date and time. |
| Is Journey Campaign | Indicates whether the campaign is part of a Journey Campaign. |
| Total Count | Displays the total number of messages sent in the campaign. |
| Credit Used | Displays the total credits consumed by the campaign. |
| Campaign Status | Displays the current campaign status along with the start and end timestamps. |
| View | Provides options to view campaign details and related information. |
Available Actions
- View Campaign Details
- View Delivery Information
- Download Report
Delivery Report
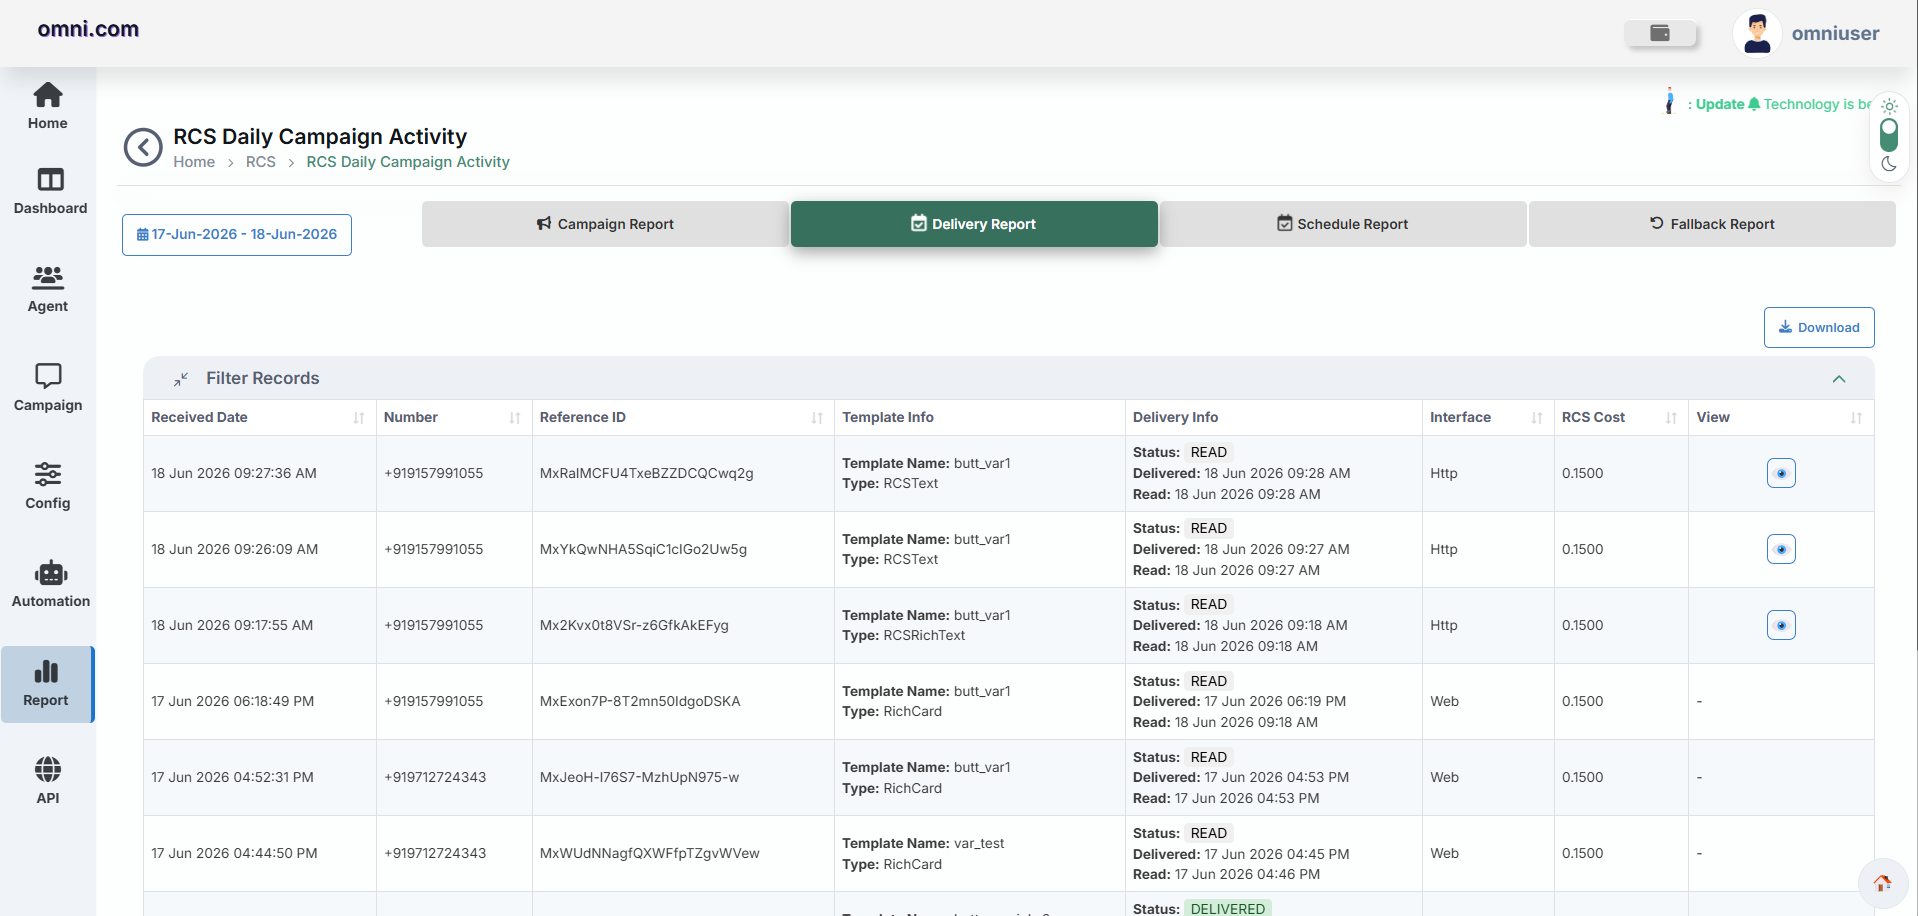
The Delivery Report displays recipient-level delivery information and helps users verify message delivery status.
| Field | Description |
|---|---|
| Received Date | Displays the date and time when the RCS message was received. |
| Number | Displays the recipient mobile number. |
| Reference ID | Unique identifier generated for the RCS message transaction. |
| Template Info | Displays the template name and message type used in the campaign. |
| Delivery Info | Displays the message status along with delivery and read timestamps. |
| Interface | Displays the interface used to send the RCS message, such as Web or HTTP. |
| RCS Cost | Displays the cost incurred for sending the RCS message. |
| View | Allows users to view detailed information about the message. |
Features
- View delivery records.
- Download delivery report.
Schedule Report
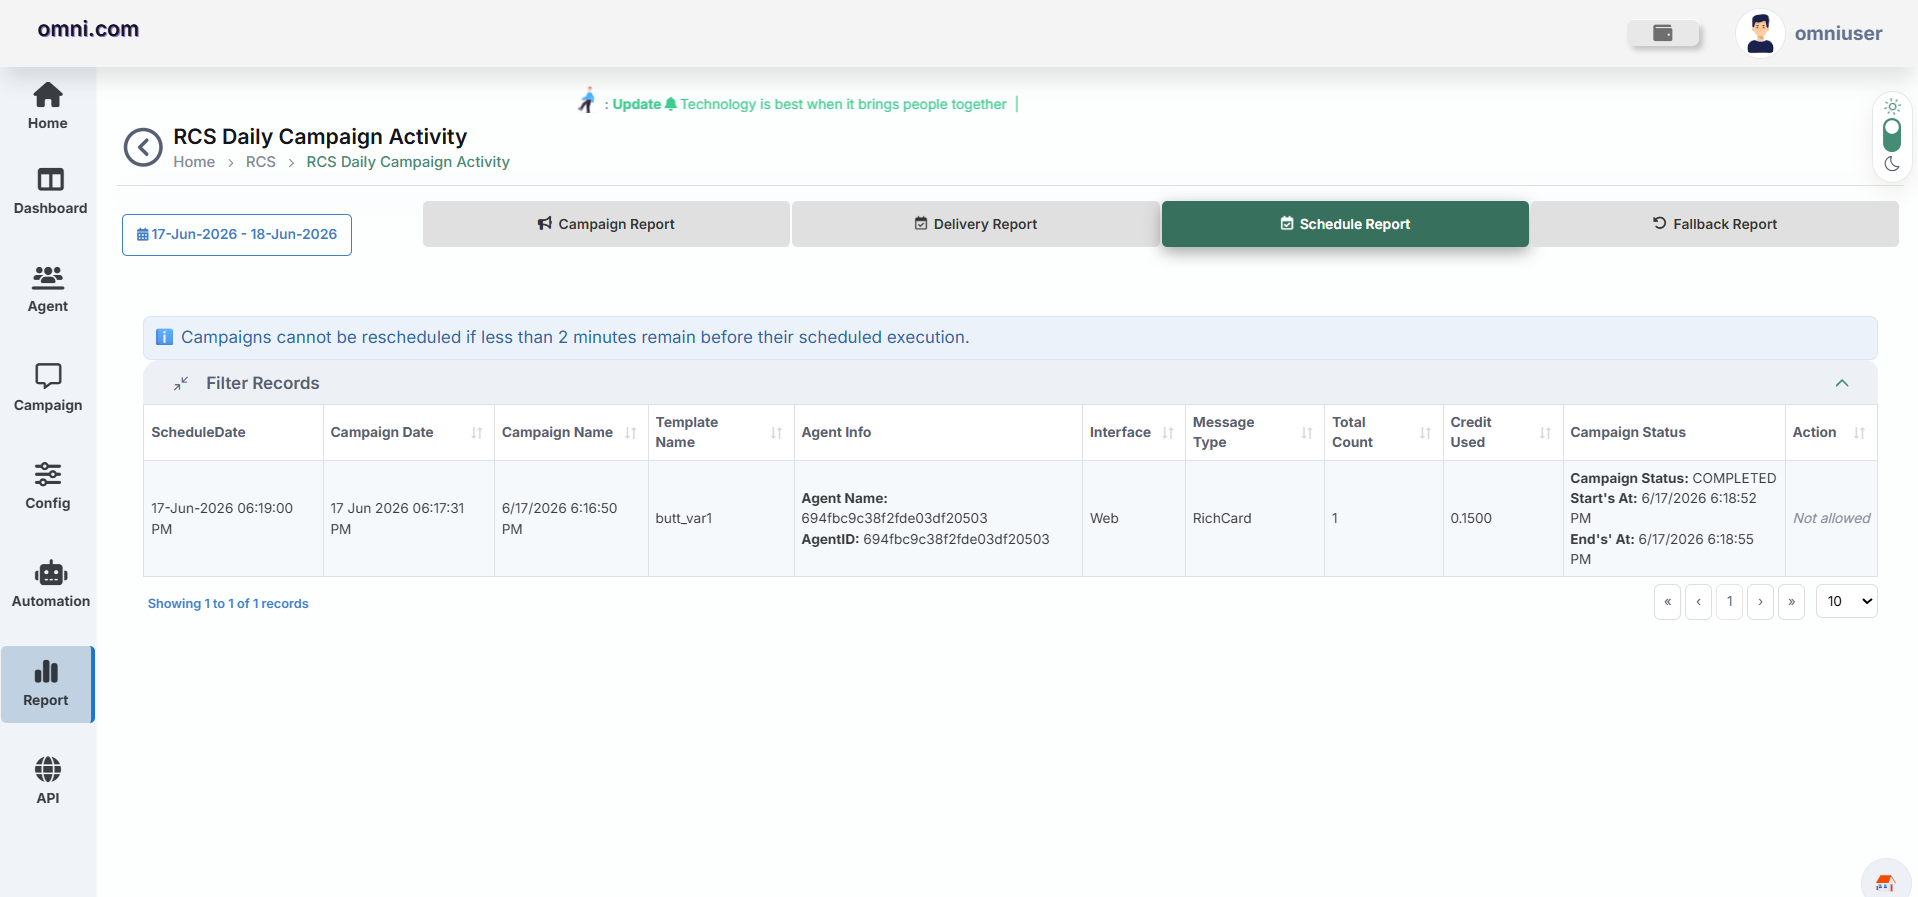
The Schedule Report displays scheduled campaigns that are pending execution.
| Field | Description |
|---|---|
| ScheduleDate | Scheduled execution date and time. |
| Campaign Date | Campaign creation date and time. |
| Campaign Name | Name of the campaign. |
| Template Name | Name of the template used in the campaign. |
| Agent Info | Displays the RCS Agent Name and Agent ID. |
| Interface | Interface used to create the campaign. |
| Message Type | Type of message sent in the campaign. |
| Total Count | Total number of recipients. |
| Credit Used | Total credits consumed by the campaign. |
| Campaign Status | Displays the current status along with start and end time. |
| Action | Displays the available actions for the campaign. |
Fallback Report
The Fallback Report displays fallback campaign activity when messages are redirected through alternate channels.
- RCS to RCS Fallback – Redirected to alternate SMS route.
- RCS Fallback – Redirected from RCS to SMS or another supported channel.
- WA Fallback – Redirected to WhatsApp channels.
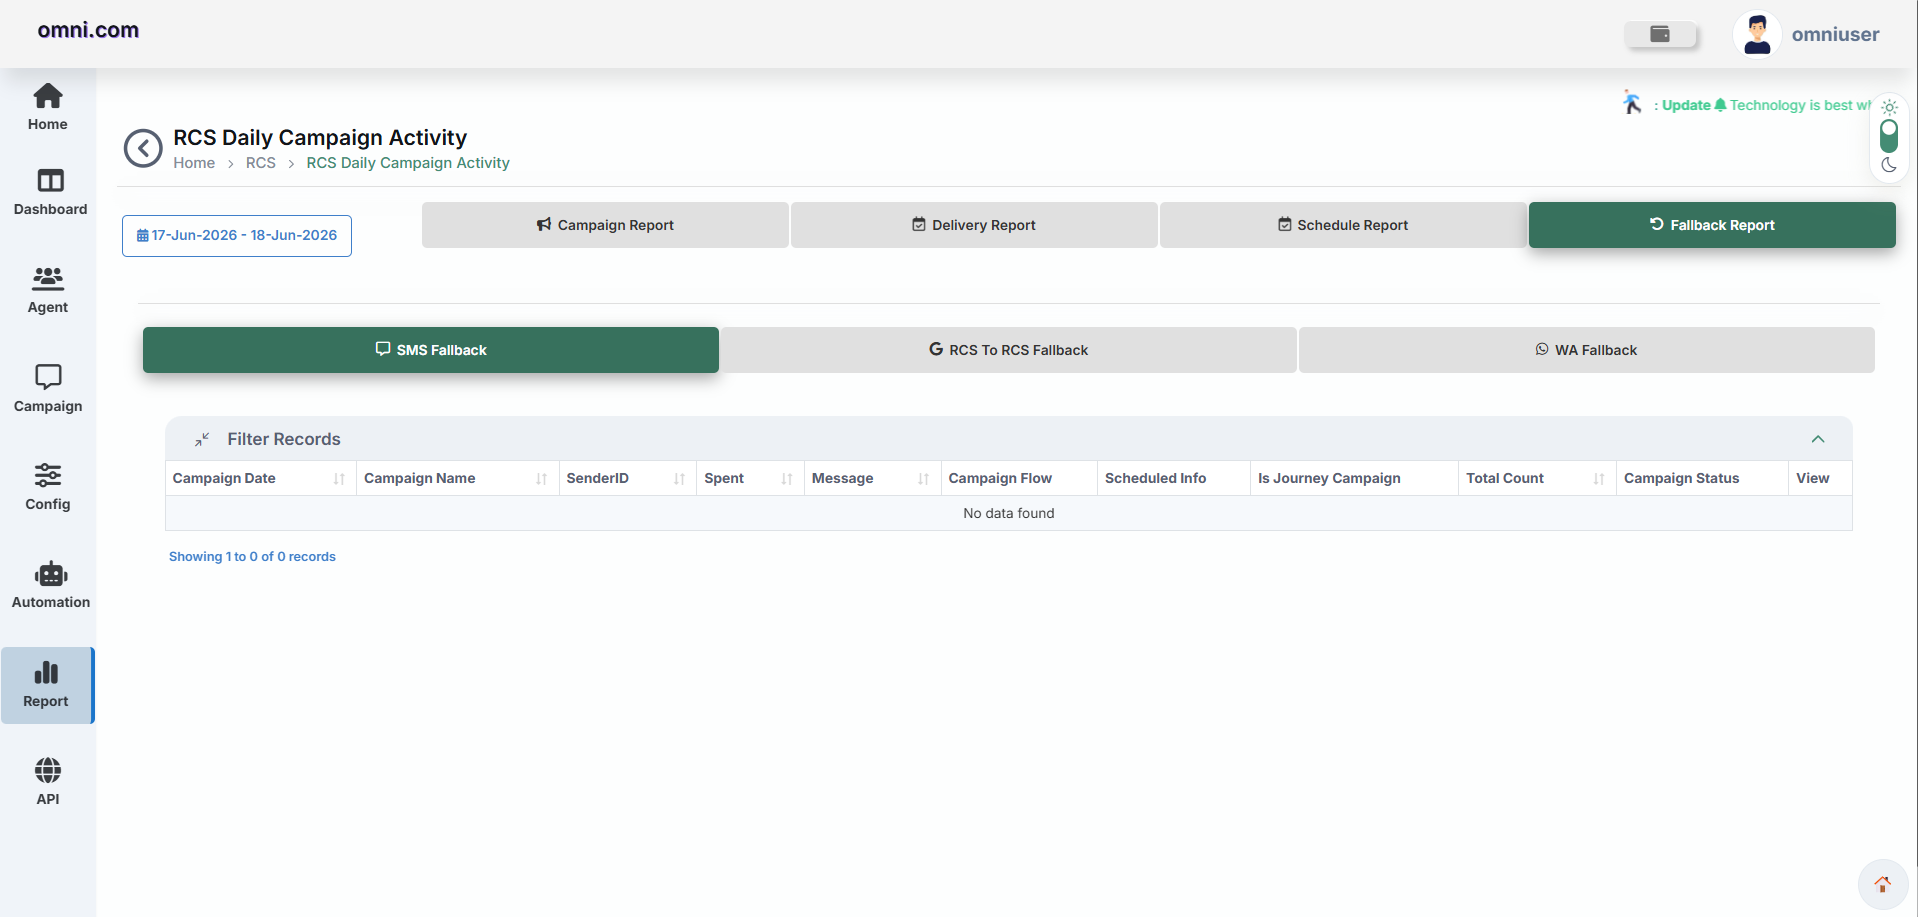
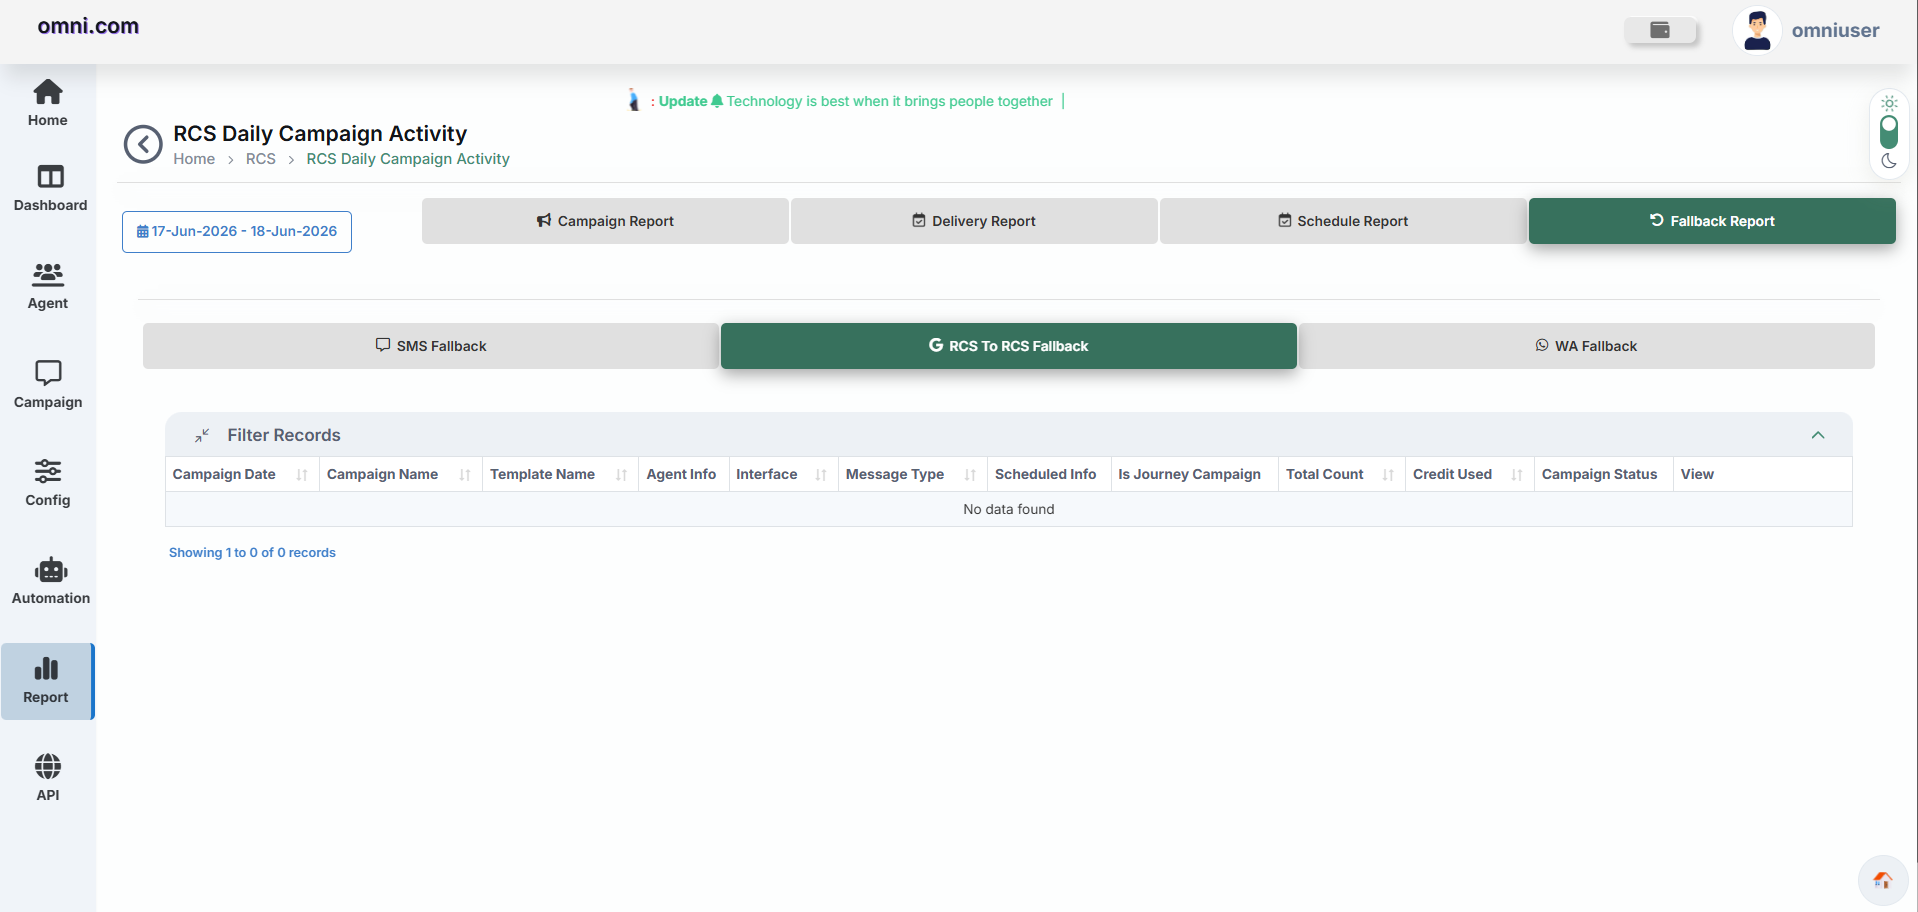
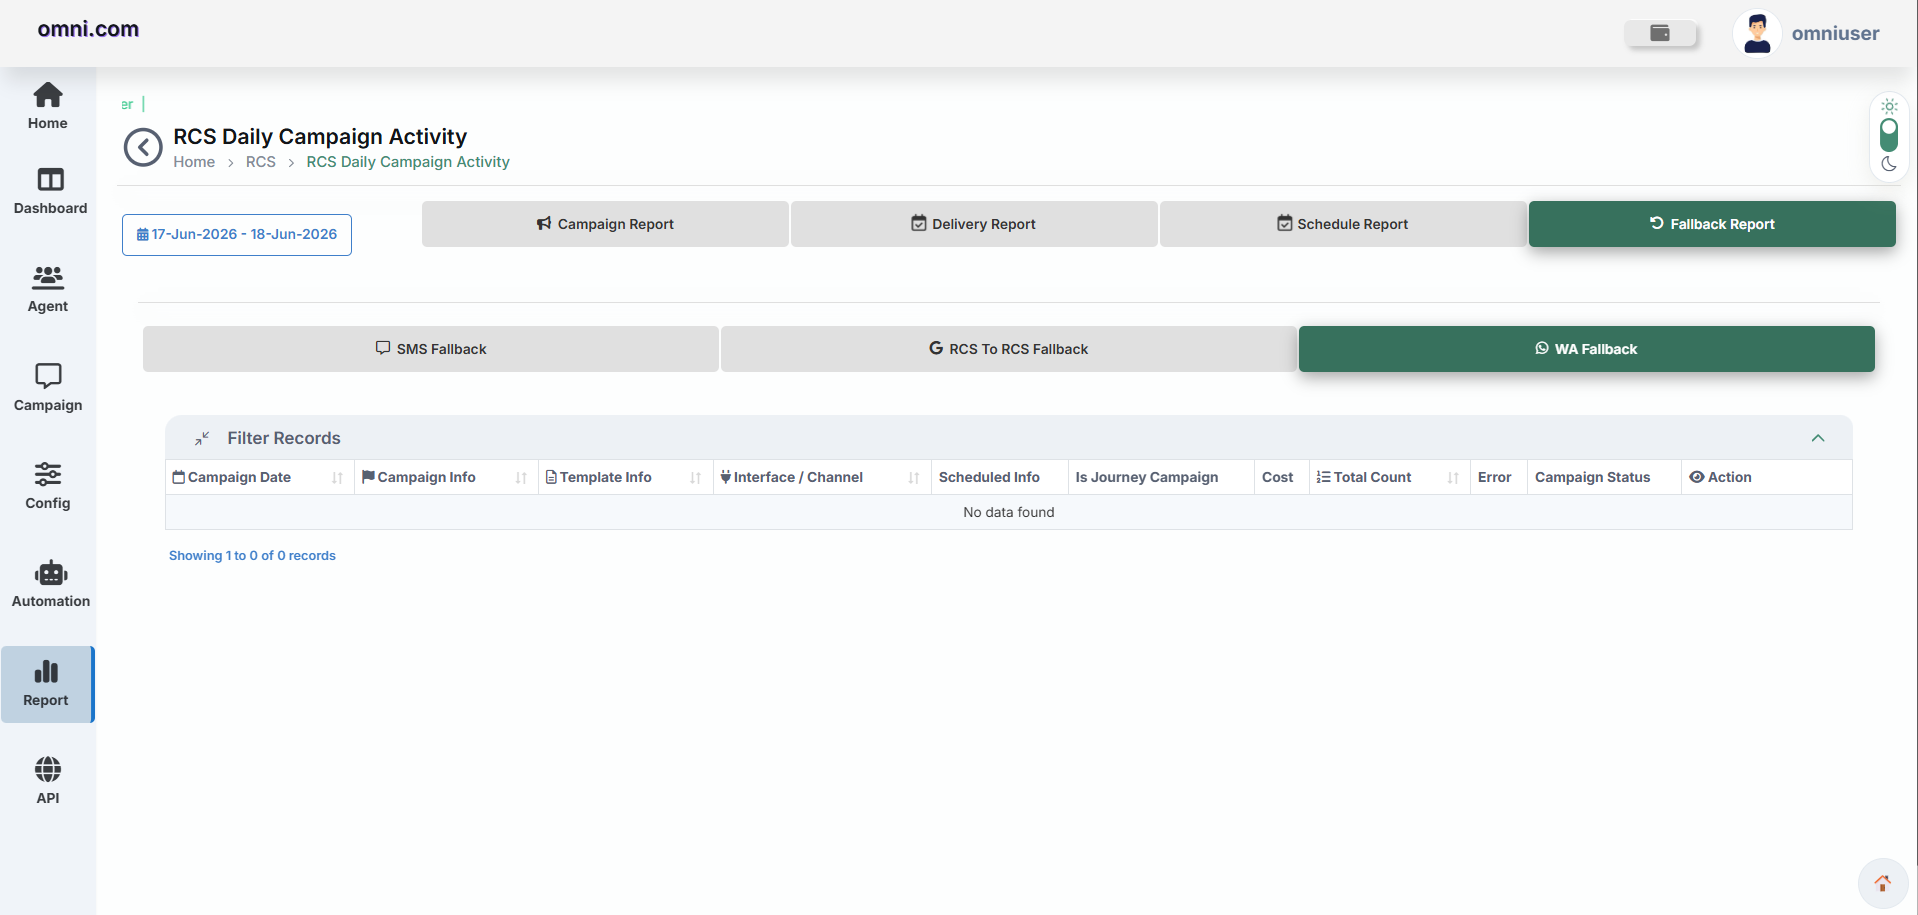
Available Information
- Campaign Date
- Campaign Name
- Template Information
- Interface / Channel
- Scheduled Information
- Campaign Status
- Total Count
- Cost
- Error Details
API CTA Report
The API CTA Report provides detailed information about CTA (Call-To-Action) responses received from RCS messages sent through API integration. This report helps users monitor customer interactions, track CTA button clicks and analyze campaign engagement.
Purpose
- Track CTA button responses.
- Monitor customer engagement.
- View Postback responses.
- Export CTA report.
- Filter records using date range.
API CTA Response Page
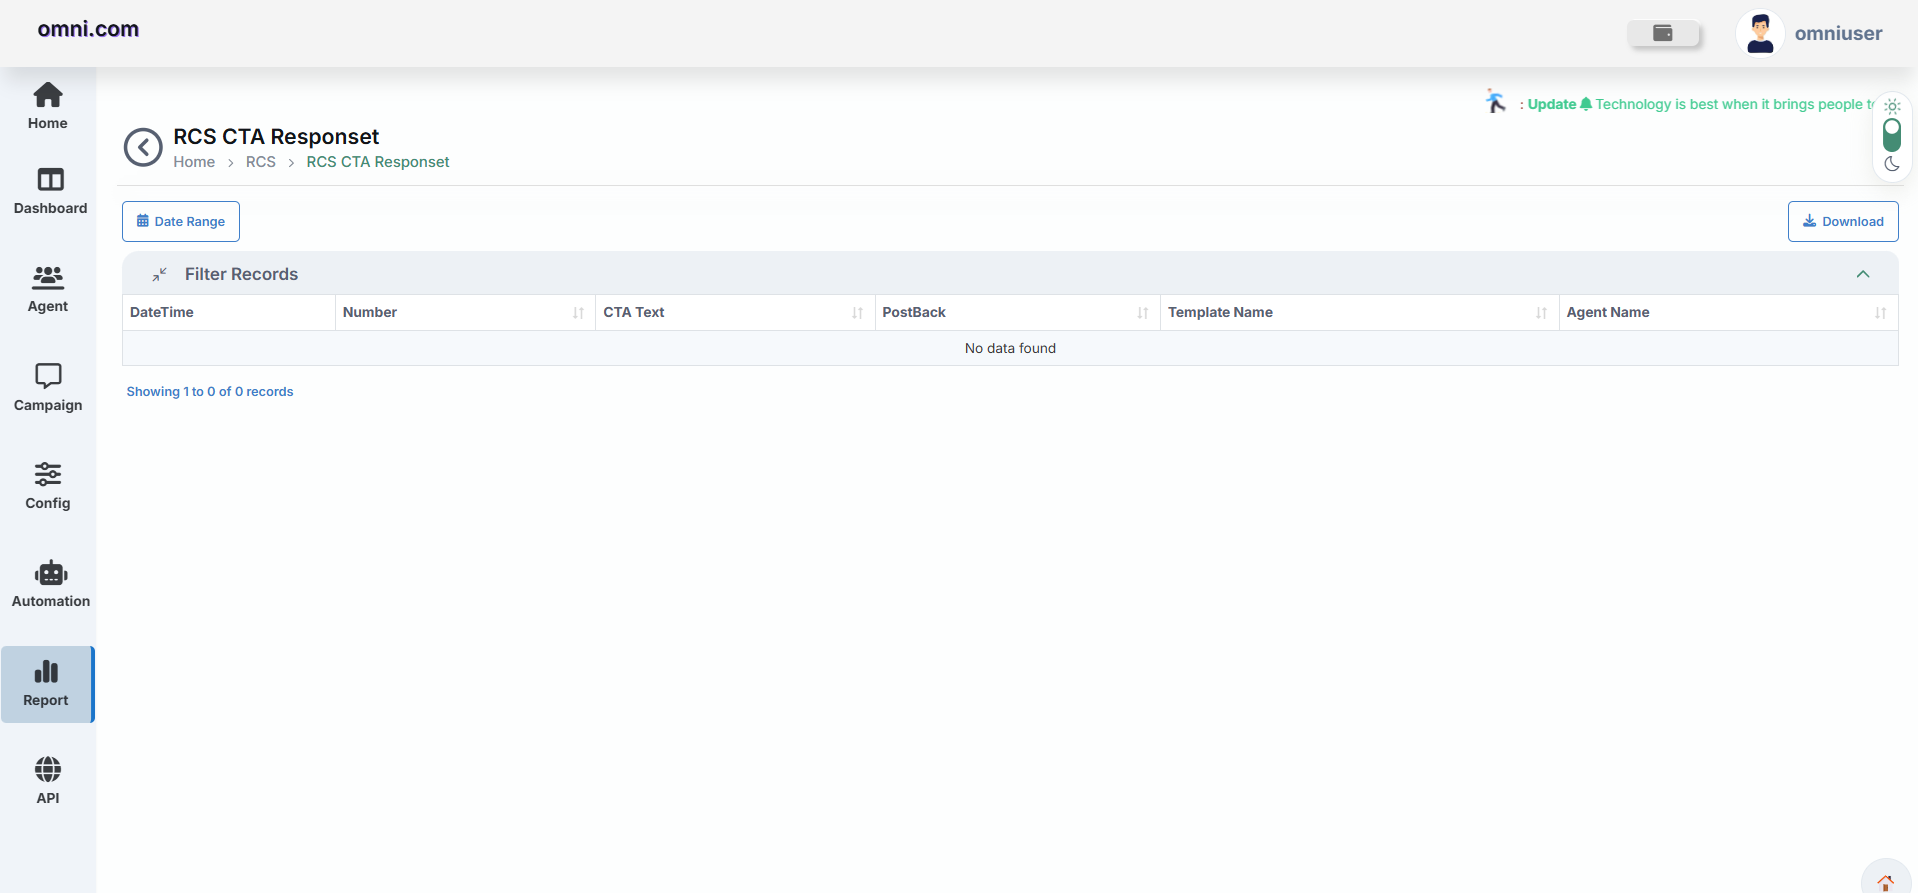
Report Columns
| Field | Description |
|---|---|
| DateTime | Date and time of CTA interaction. |
| Number | Recipient mobile number. |
| CTA Text | Text shown on CTA button. |
| PostBack | Returned postback value. |
| Template Name | RCS template name. |
| Agent Name | RCS Agent name. |
Day Wise Statistics
The Delivery Statistics report provides a summary of RCS delivery performance for a selected date range. It helps users monitor message delivery status, read counts, failed messages, and overall campaign performance.
Delivery Statistics Page
| Field | Description |
|---|---|
| From Date | Start date for the report |
| To Date | End date for the report |
| Statistics | Fetch delivery statistics for the selected period |
| Reset | Clear filters and reload default values |
| Export | Download the report |
Generate Delivery Statistics
- Select the From Date.
- Select the To Date.
- Click the Statistics button.
The system will generate delivery statistics for the selected date range.
Report Columns
- Received Date
- Pending
- DLR Awaited
- Delivered
- Undelivered
- Expired
- Rejected
- Others
- Total
RCS Dashboard
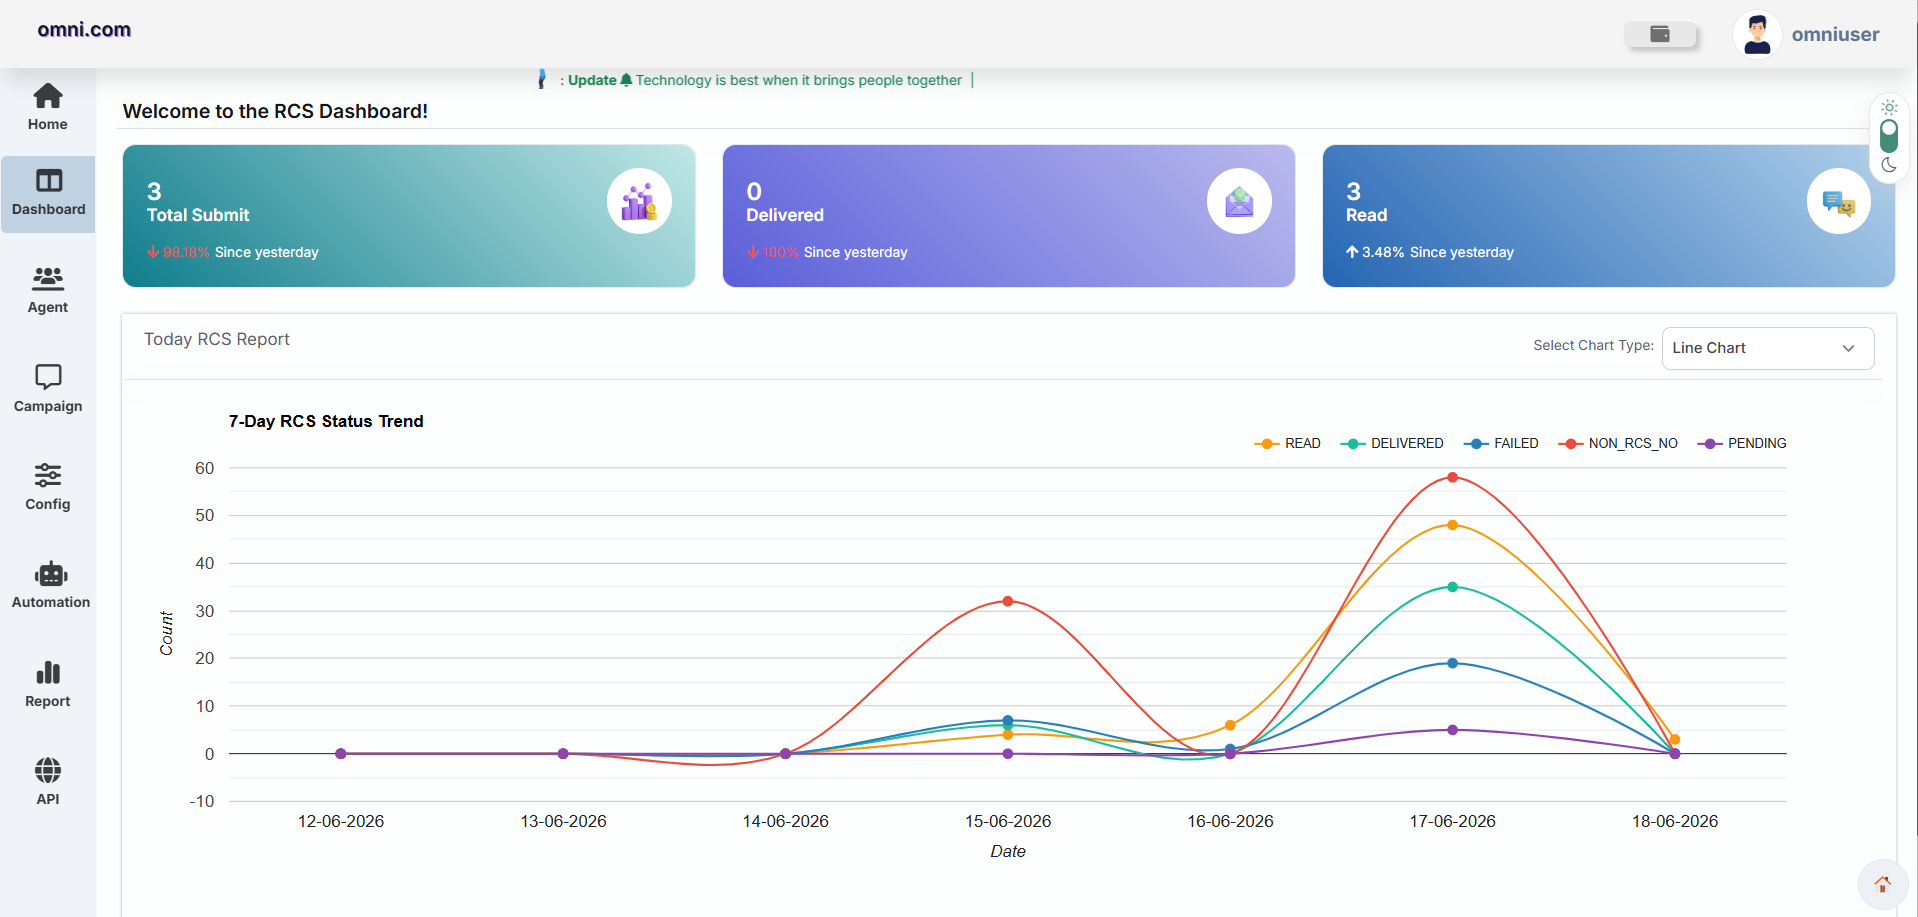
The Dashboard serves as the central overview screen of the RCS platform, providing users with a quick summary of messaging activities and performance metrics.
Features
Dashboard Widgets
🚀 Dashboard Purpose
📈 Chart Types
Line Chart View
Line Chart – Displays message trends over time using connected data points, making it easier to identify increases or decreases in activity.
Column Chart View
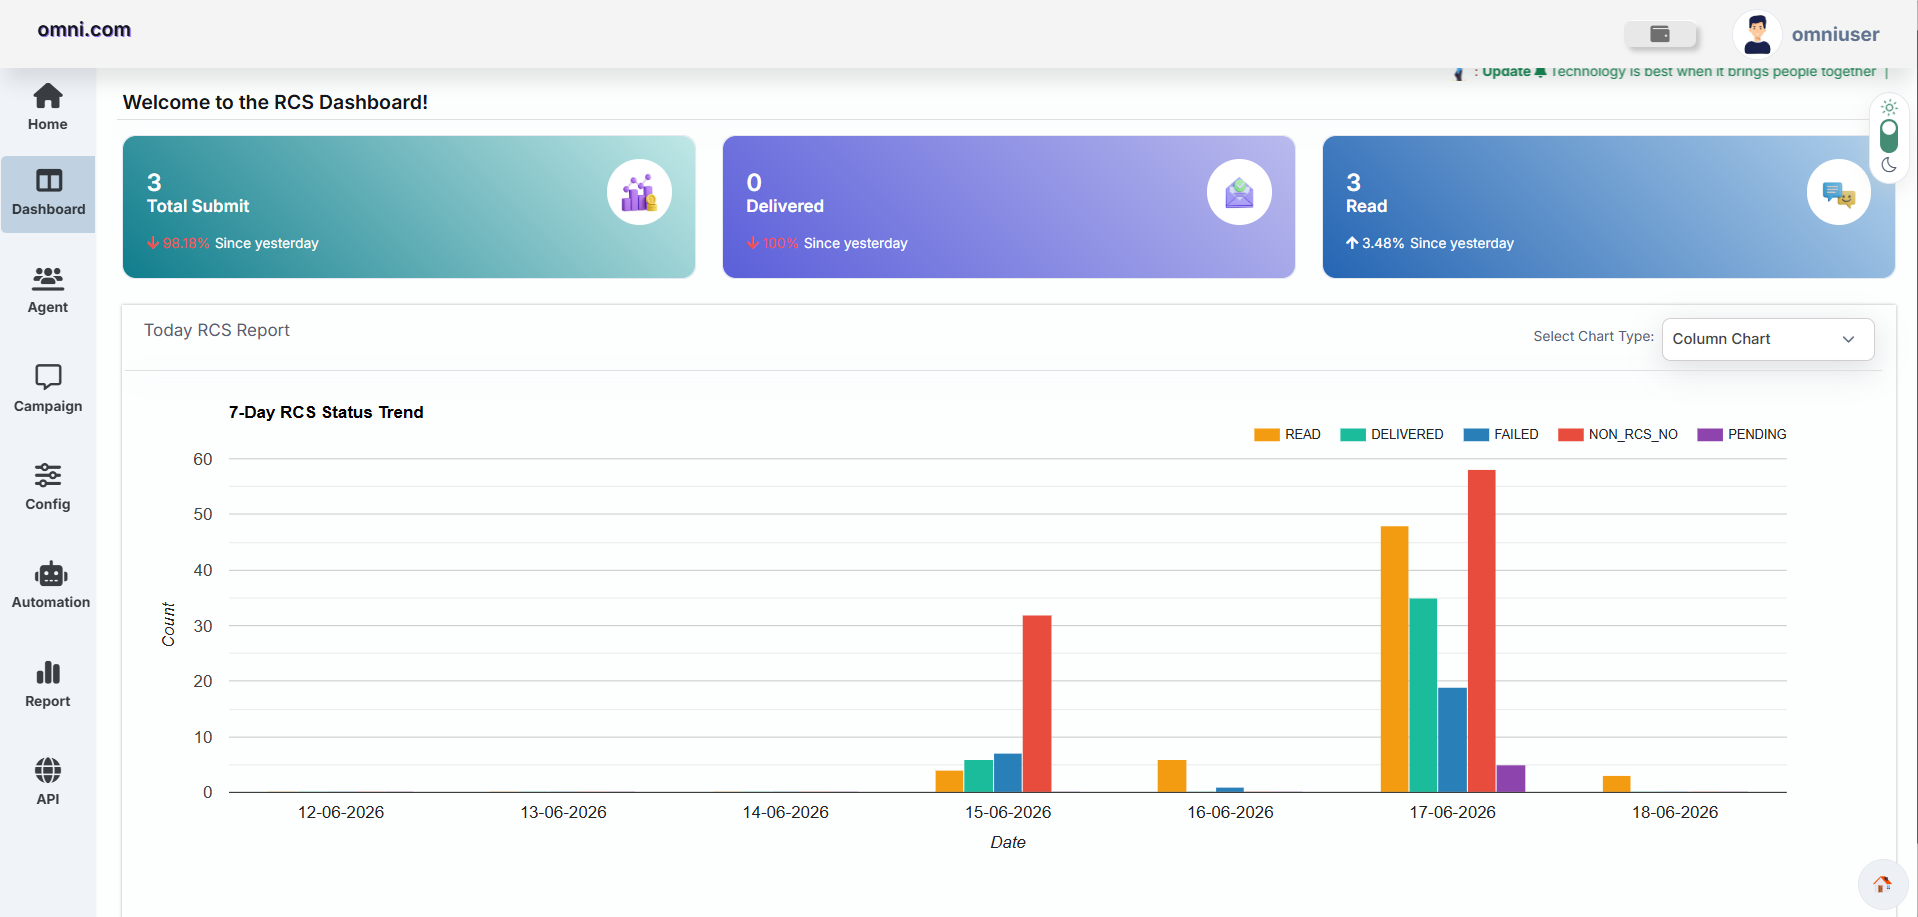
Column Chart – Displays message statistics using vertical bars, allowing users to compare message counts across different dates.
RCS Chatbot Automation Flow
Introduction
The RCS Chatbot Automation module enables businesses to create automated and interactive customer conversations using a visual drag-and-drop builder. Without writing any code, users can design chatbot workflows using triggers, text messages, quick reply buttons, rich cards, carousel cards, delay nodes, and Google Sheets integration. The platform helps businesses automate customer engagement, provide instant support, capture leads, and deliver rich conversational experiences through Google RCS Business Messaging.
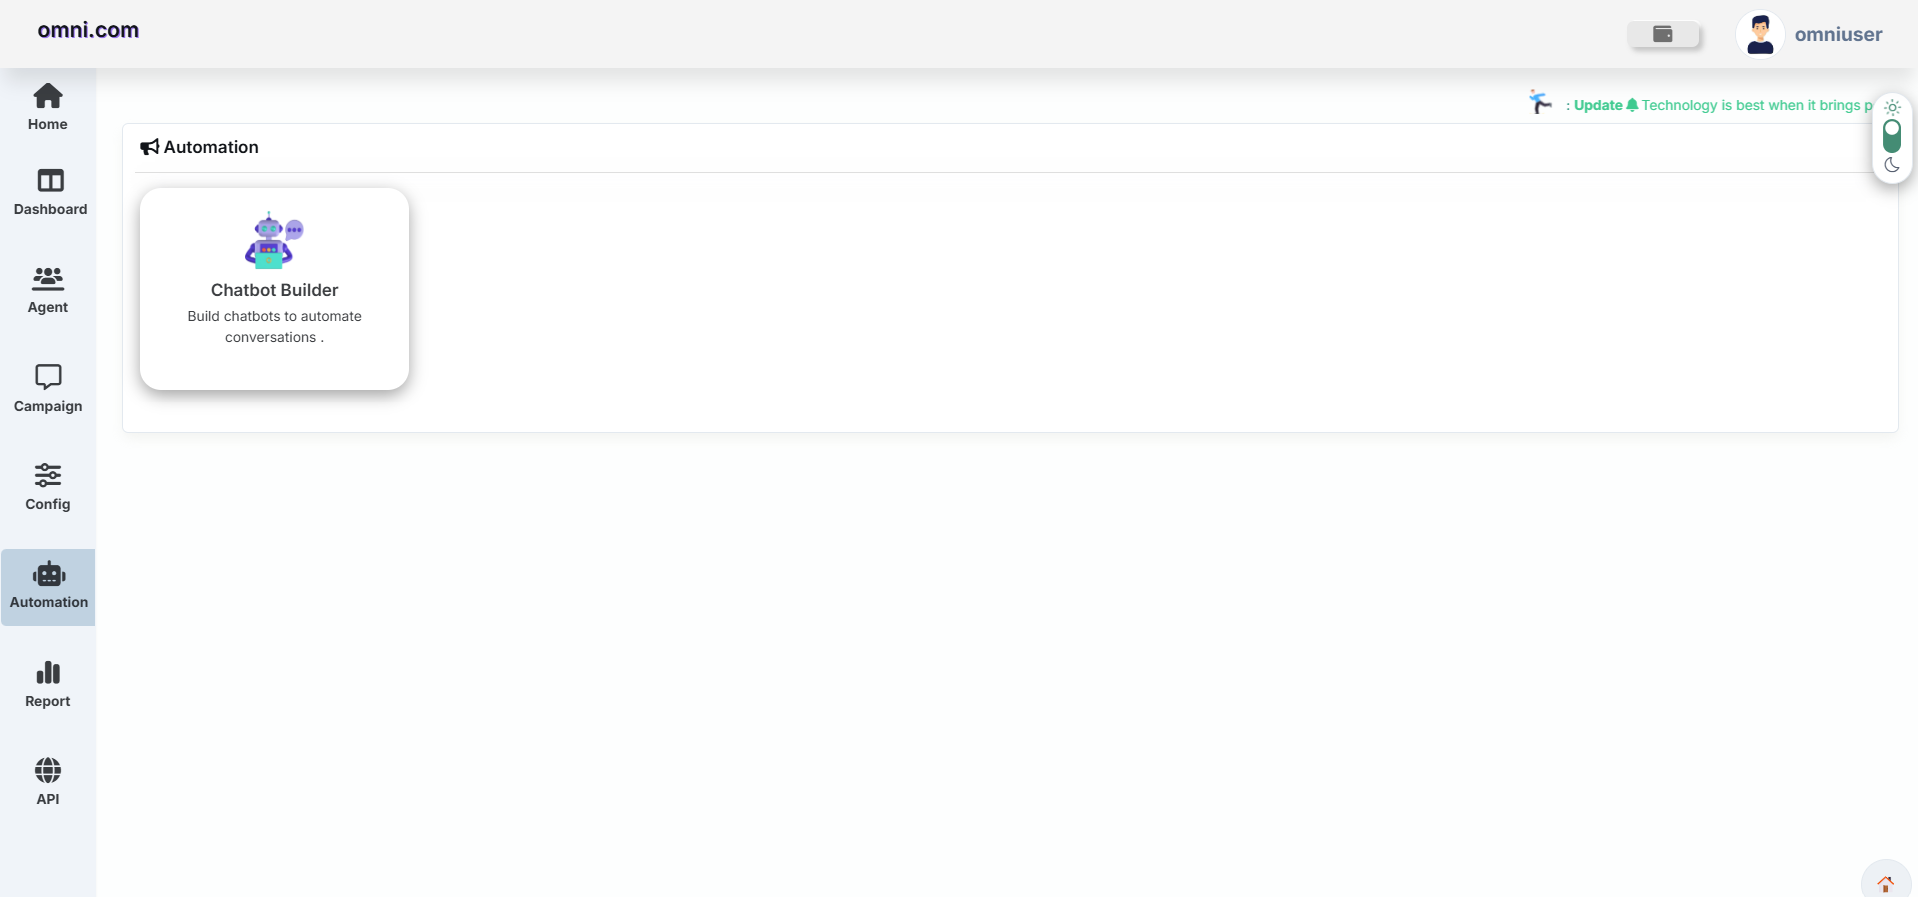
Accessing the Automation Module
Step 1: Open Automation Module
Creating a New Chatbot Flow
Step 2: Create New Chatbot
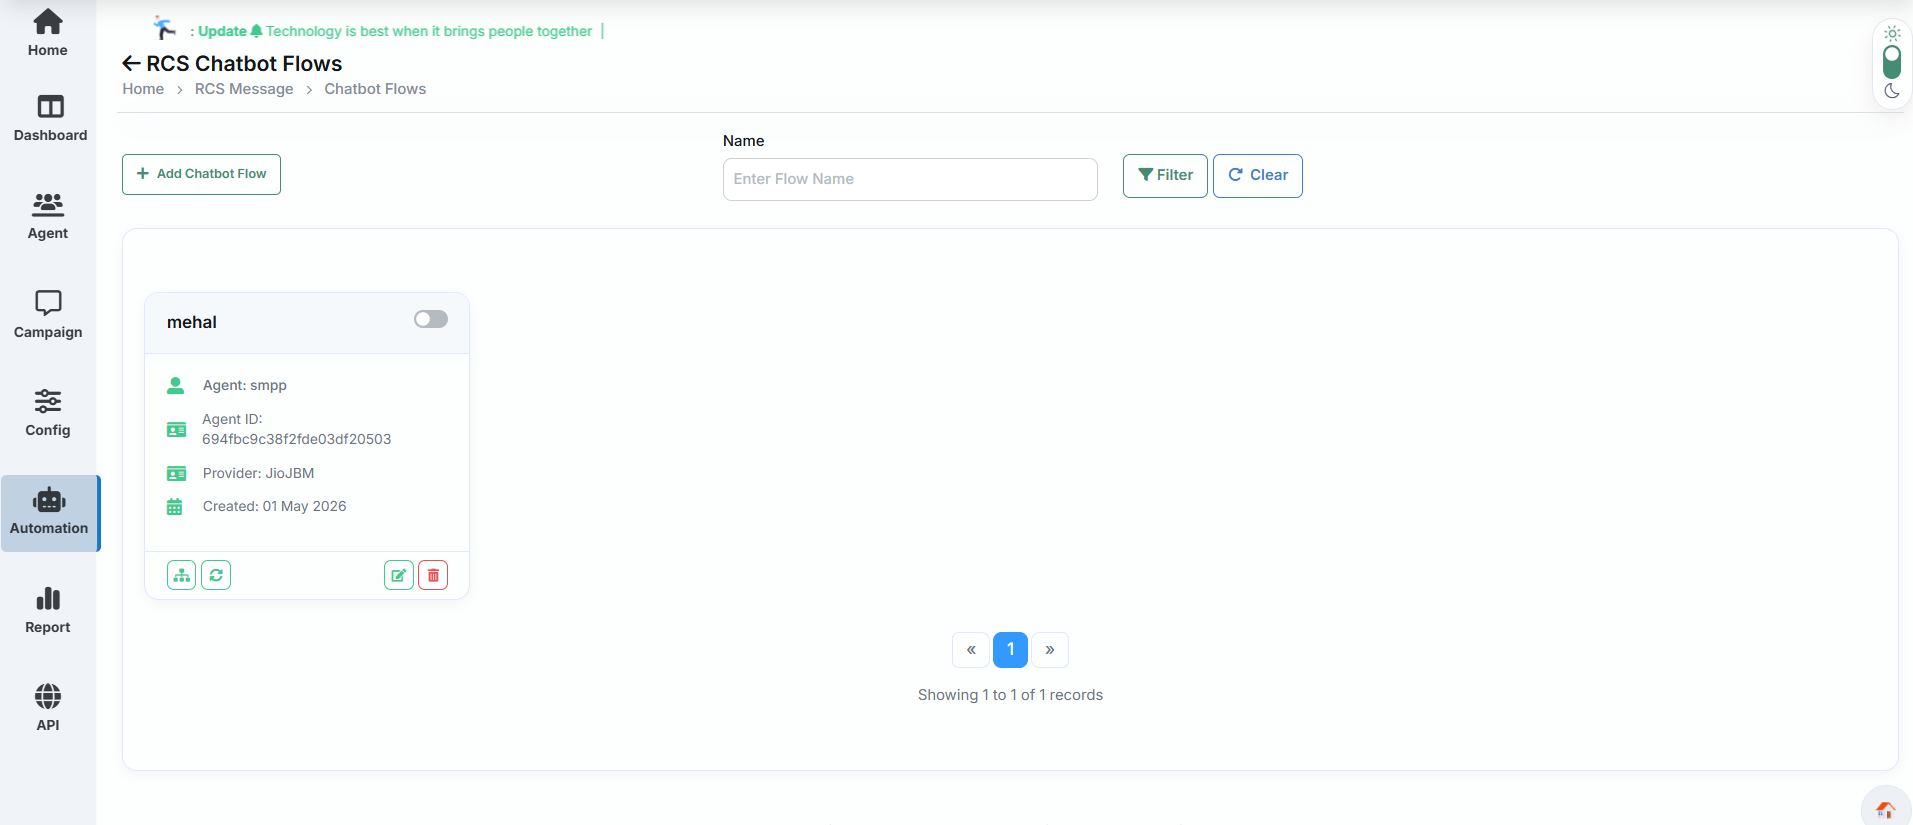
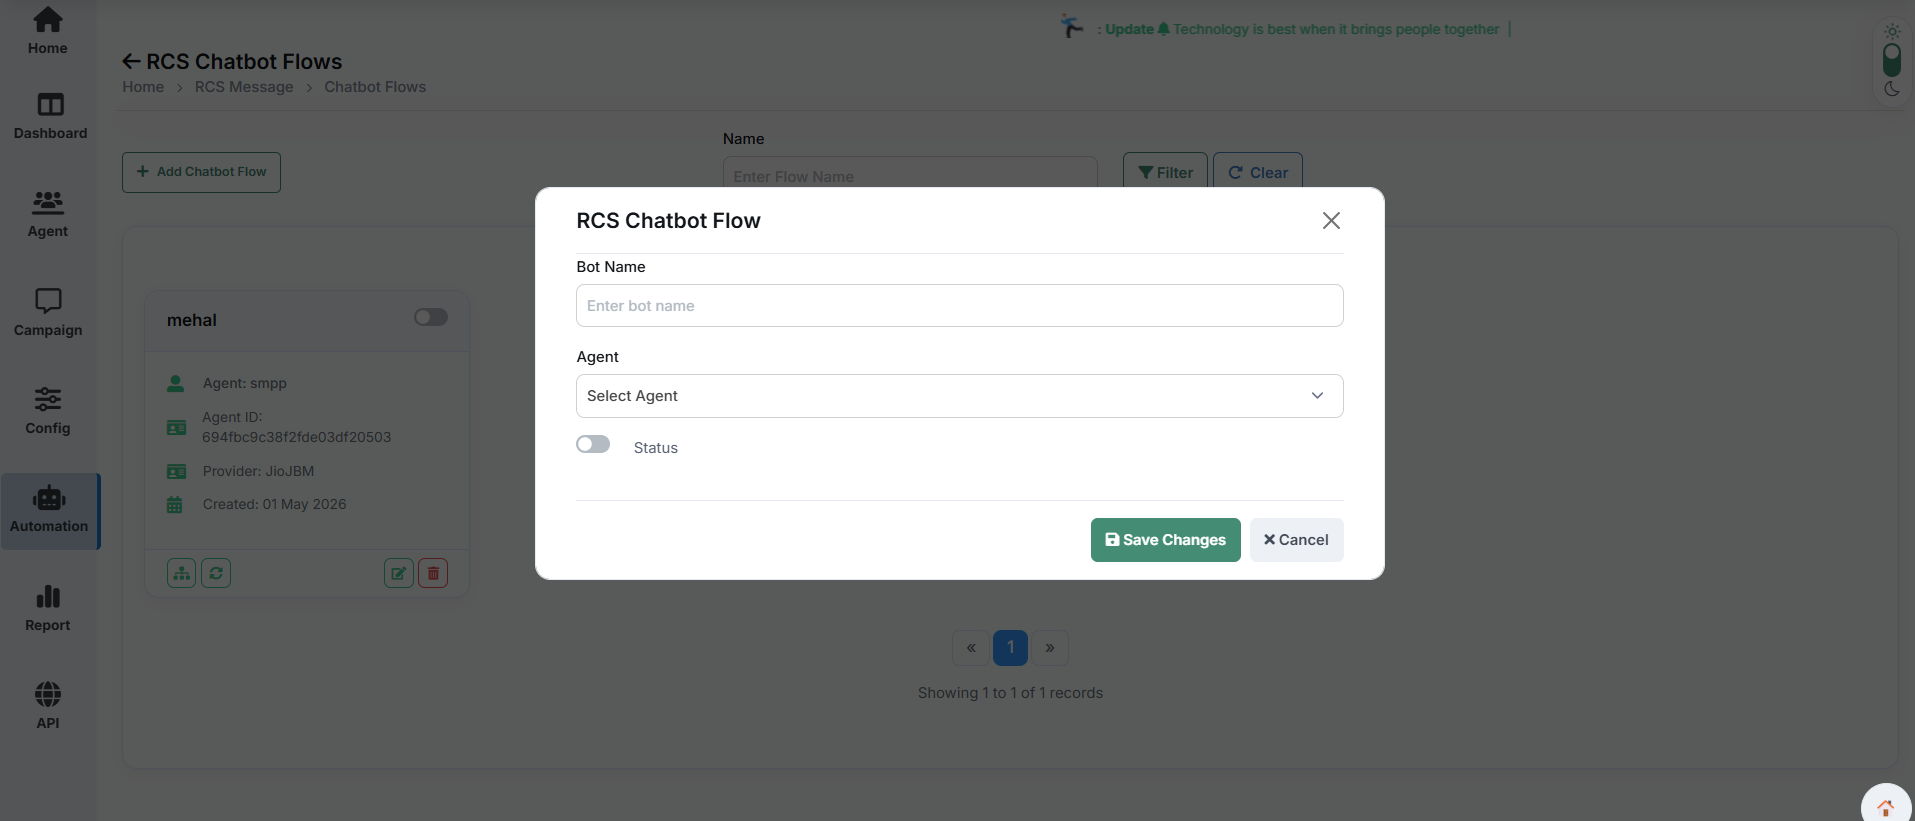
The RCS Chatbot Flow popup window appears. Enter the following information:
| Field | Description |
|---|---|
| Bot Name | Name of the chatbot. |
| Agent | Assigned chatbot agent. |
| Status | Enable or Disable chatbot. |
Chatbot Flow Management
After creating a chatbot flow, it appears in the Chatbot Flow Management list where users can manage all chatbot activities.
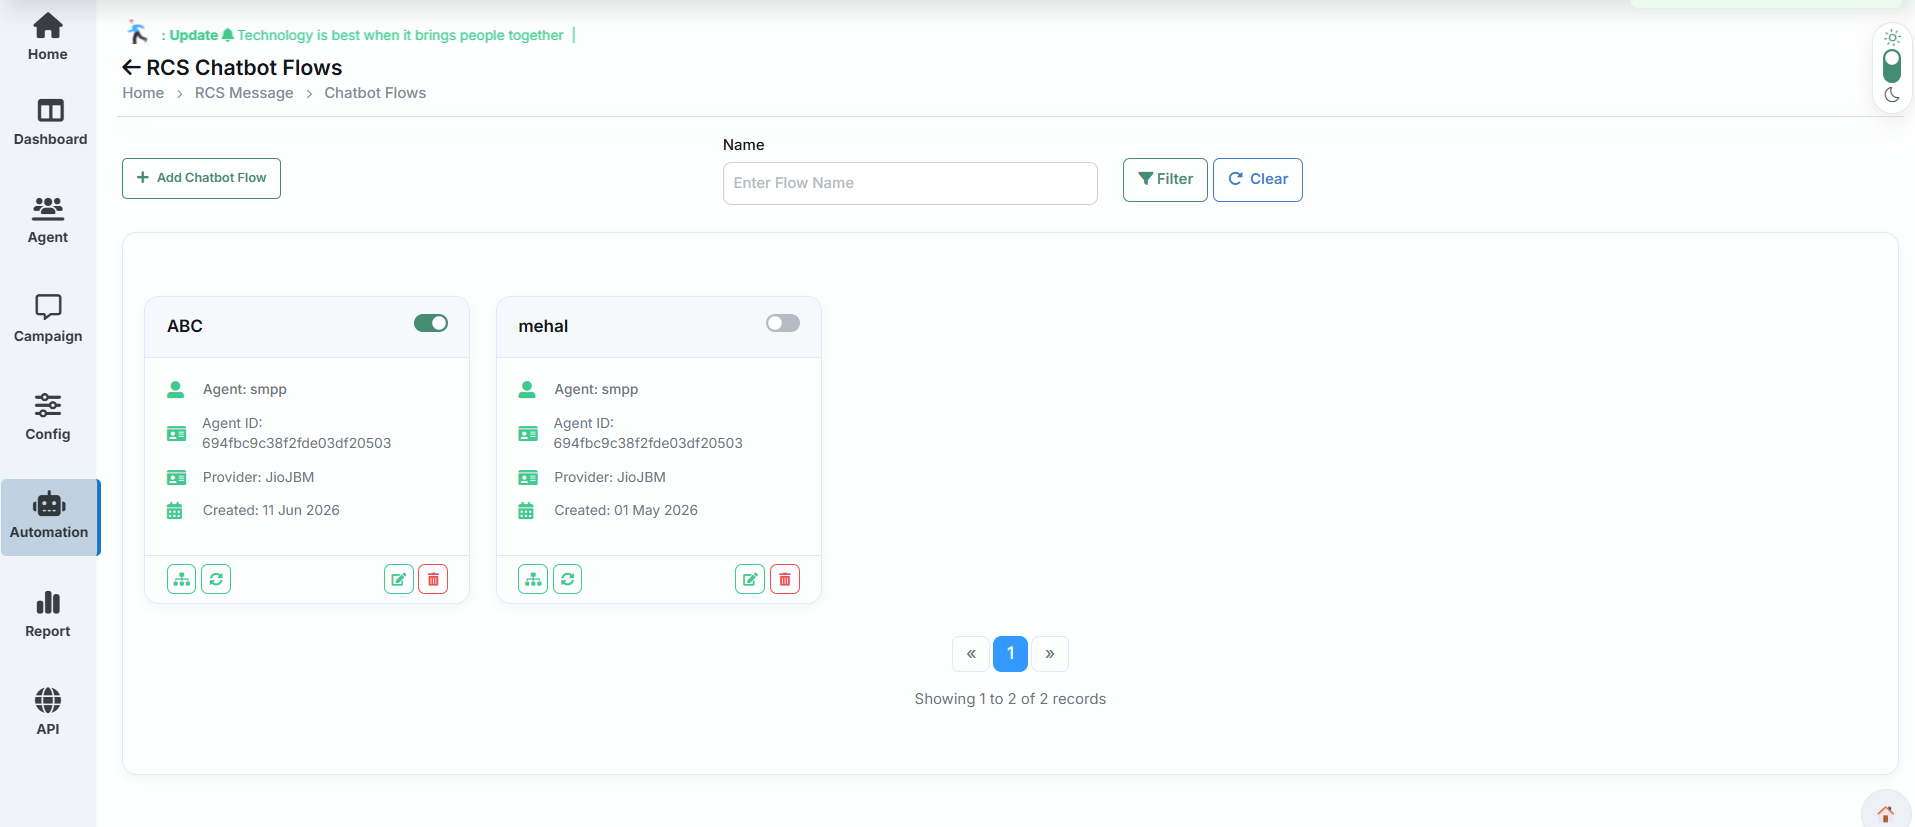
| Action | Description |
|---|---|
| Design Flow | Open the visual chatbot builder to create and manage conversation workflows using drag-and-drop nodes. |
| Edit | Modify chatbot information and settings. |
| Delete | Remove chatbot flow permanently. |
| Relaunch | Open chatbot builder to design conversation flow. |
Design Flow
The Design Flow option allows users to open the visual chatbot builder and create interactive conversation journeys using drag-and-drop nodes. Users can design chatbot workflows by connecting different nodes such as: • Start Trigger • Text Message • Question Message • Question Button • Action Button • Rich Card • Carousel Card • Google Sheets Integration • Delay Node This visual interface helps businesses build automated customer conversations without writing any code.

Edit Chatbot
Users can edit chatbot details such as Bot Name, Agent assignment, and chatbot status.

Delete Chatbot
Users can permanently remove chatbot flows that are no longer required.

Relaunch
The Relaunch option opens the visual Chatbot Builder where users can create conversation flows using drag-and-drop nodes.

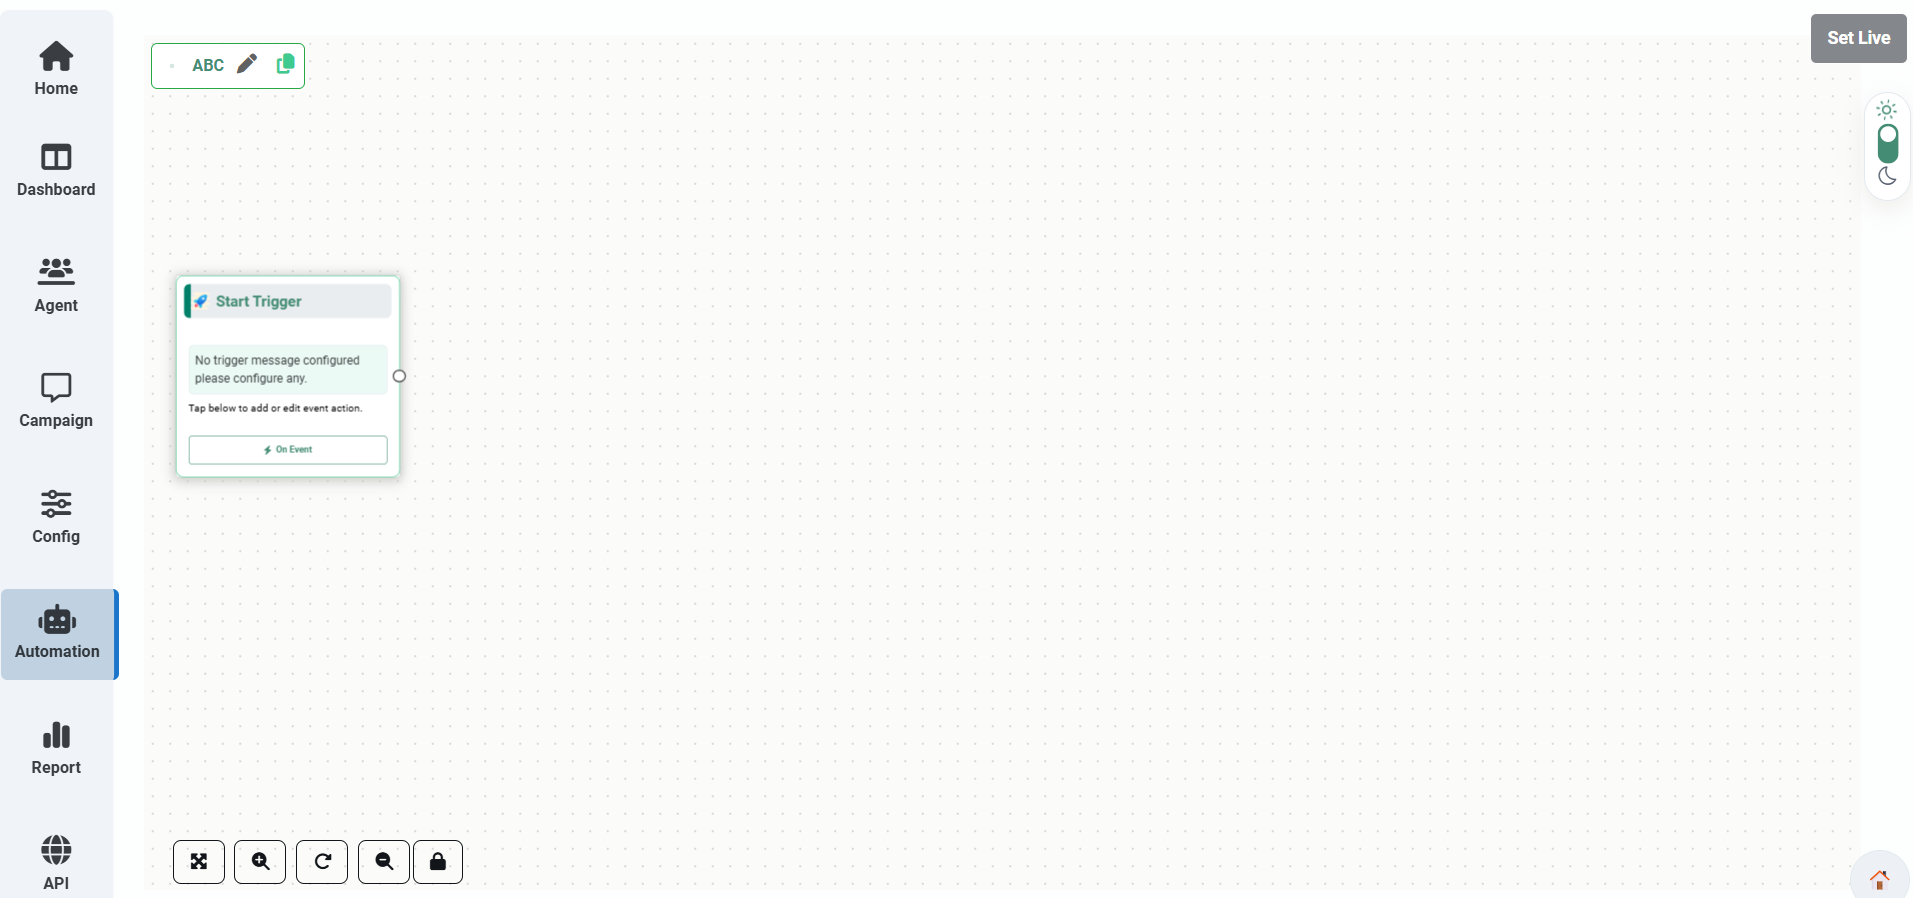
Configuring Start Trigger
The Start Trigger is the starting point of every chatbot workflow. It allows businesses to define when a conversation should begin based on customer messages or keywords. For example, when a customer sends messages like "Hello", "Hi", or "Support", the chatbot automatically starts the configured conversation flow and provides the appropriate response.
Configure Event Keyword
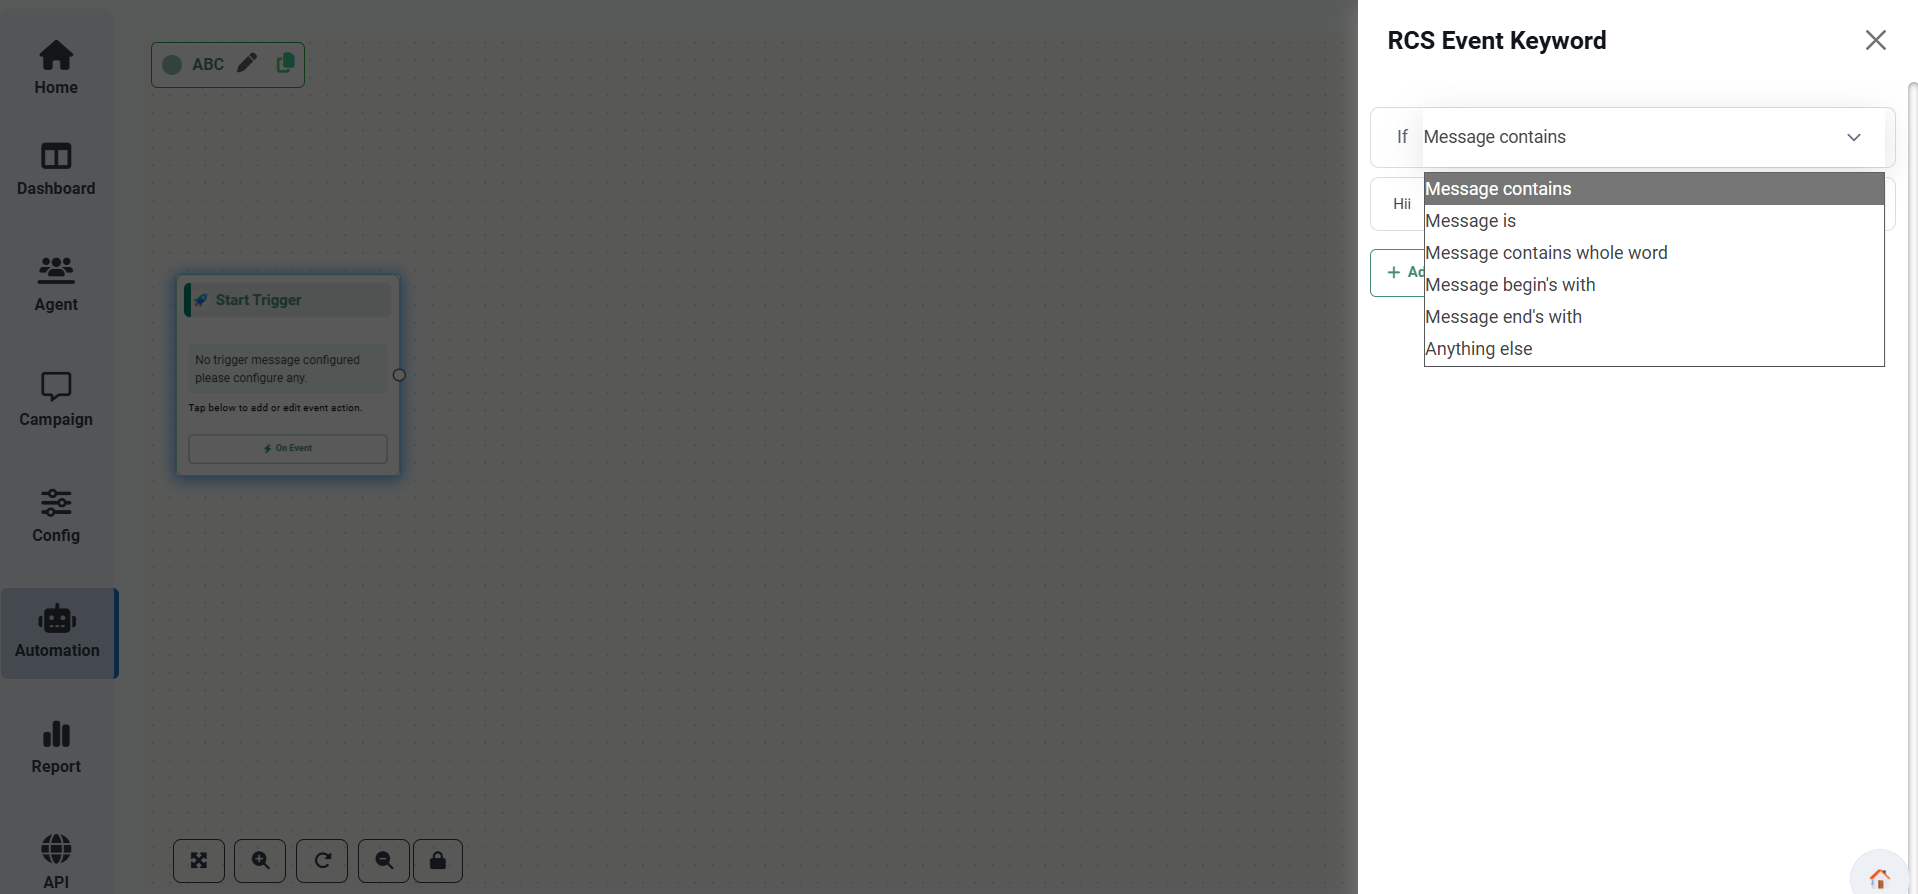
Users can define chatbot trigger conditions using different keyword matching rules.
| Condition | Description |
|---|---|
| Message contains | Triggers when entered text contains the keyword. |
| Message is | Triggers when entered text exactly matches the keyword. |
| Message contains whole word | Triggers only when the exact word is found. |
| Message begins with | Triggers when message starts with the keyword. |
| Message ends with | Triggers when message ends with the keyword. |
| Anything else | Default trigger for unmatched messages. |
Configuration Process
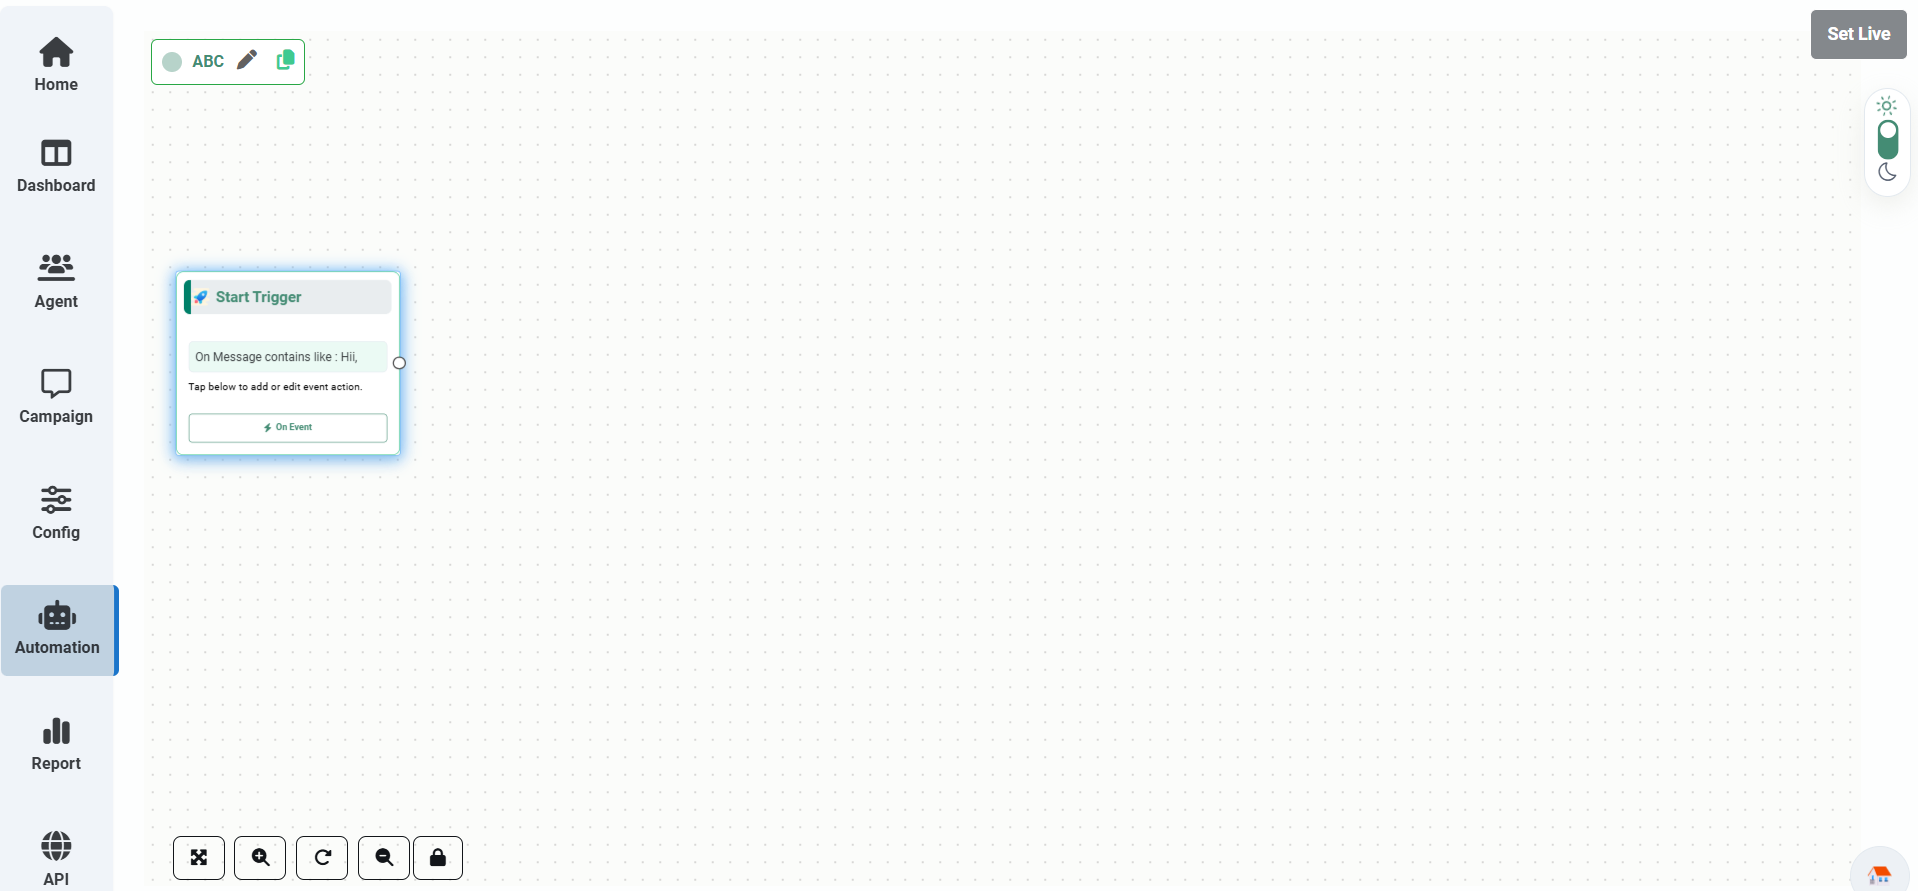
Example
| Field | Value |
|---|---|
| Condition | Message contains |
| Keyword | Hii |
Building the Conversation Flow
The Chatbot Builder provides multiple nodes that can be connected to create interactive conversation workflows using drag-and-drop functionality.
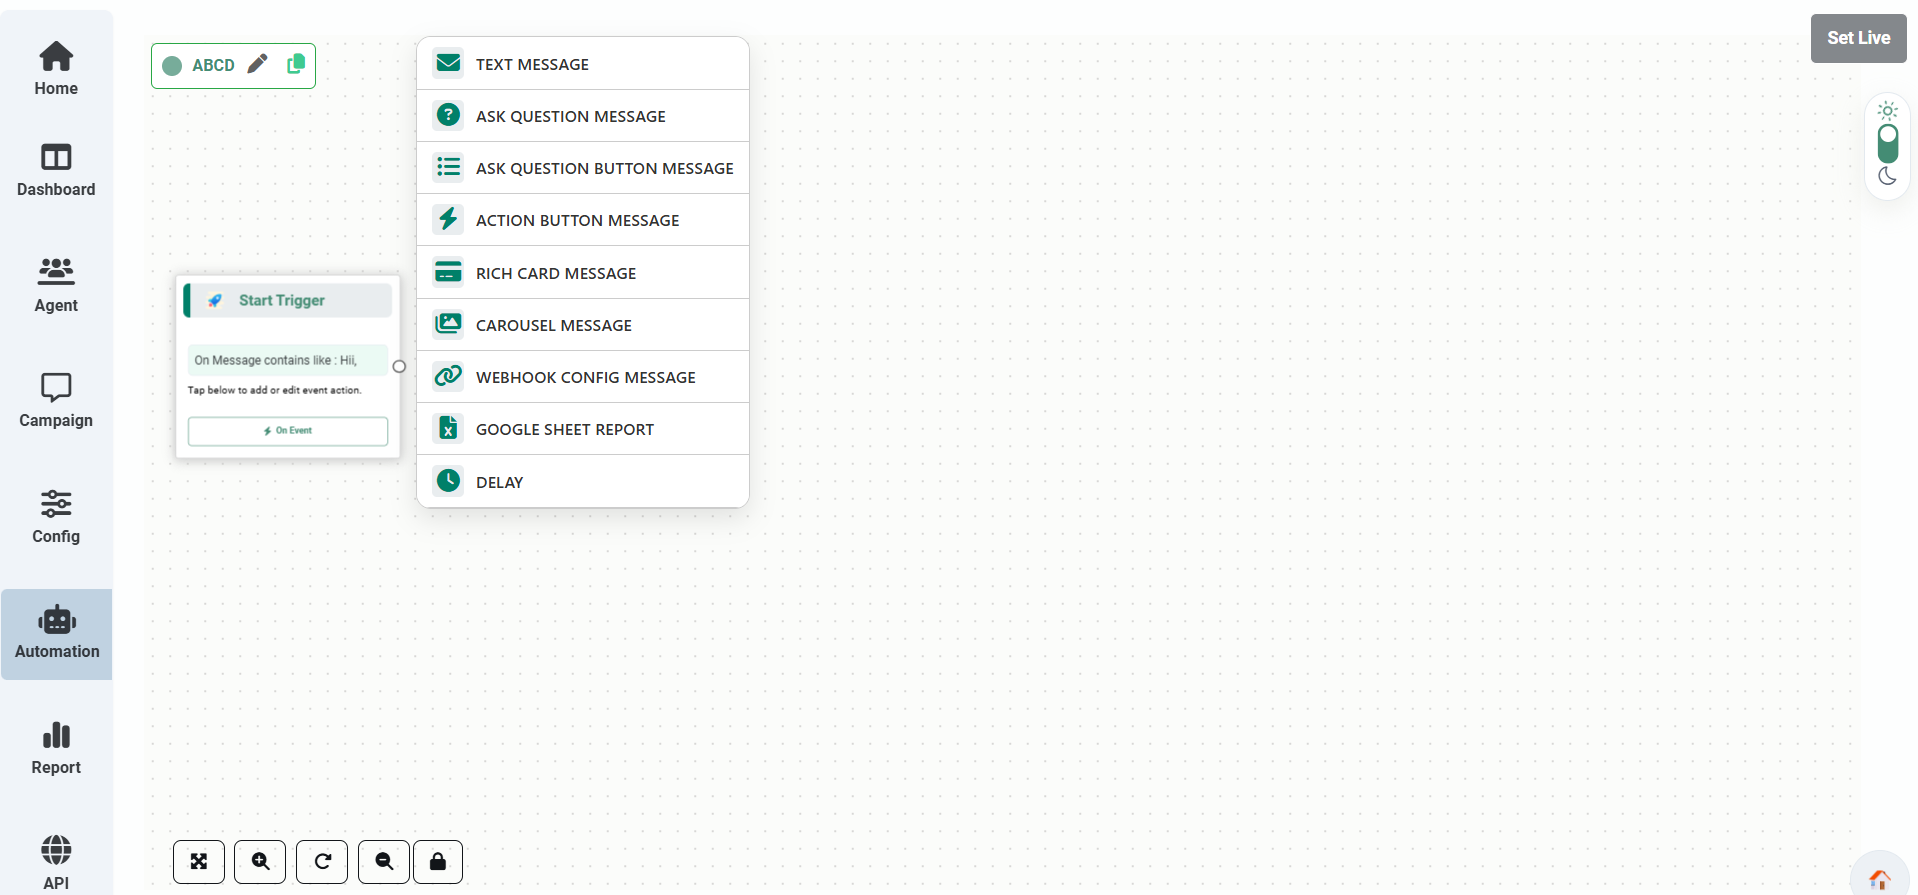
Available Chatbot Components
The Chatbot Builder provides multiple message and automation components that can be connected together to create interactive customer journeys.
Text Message Node
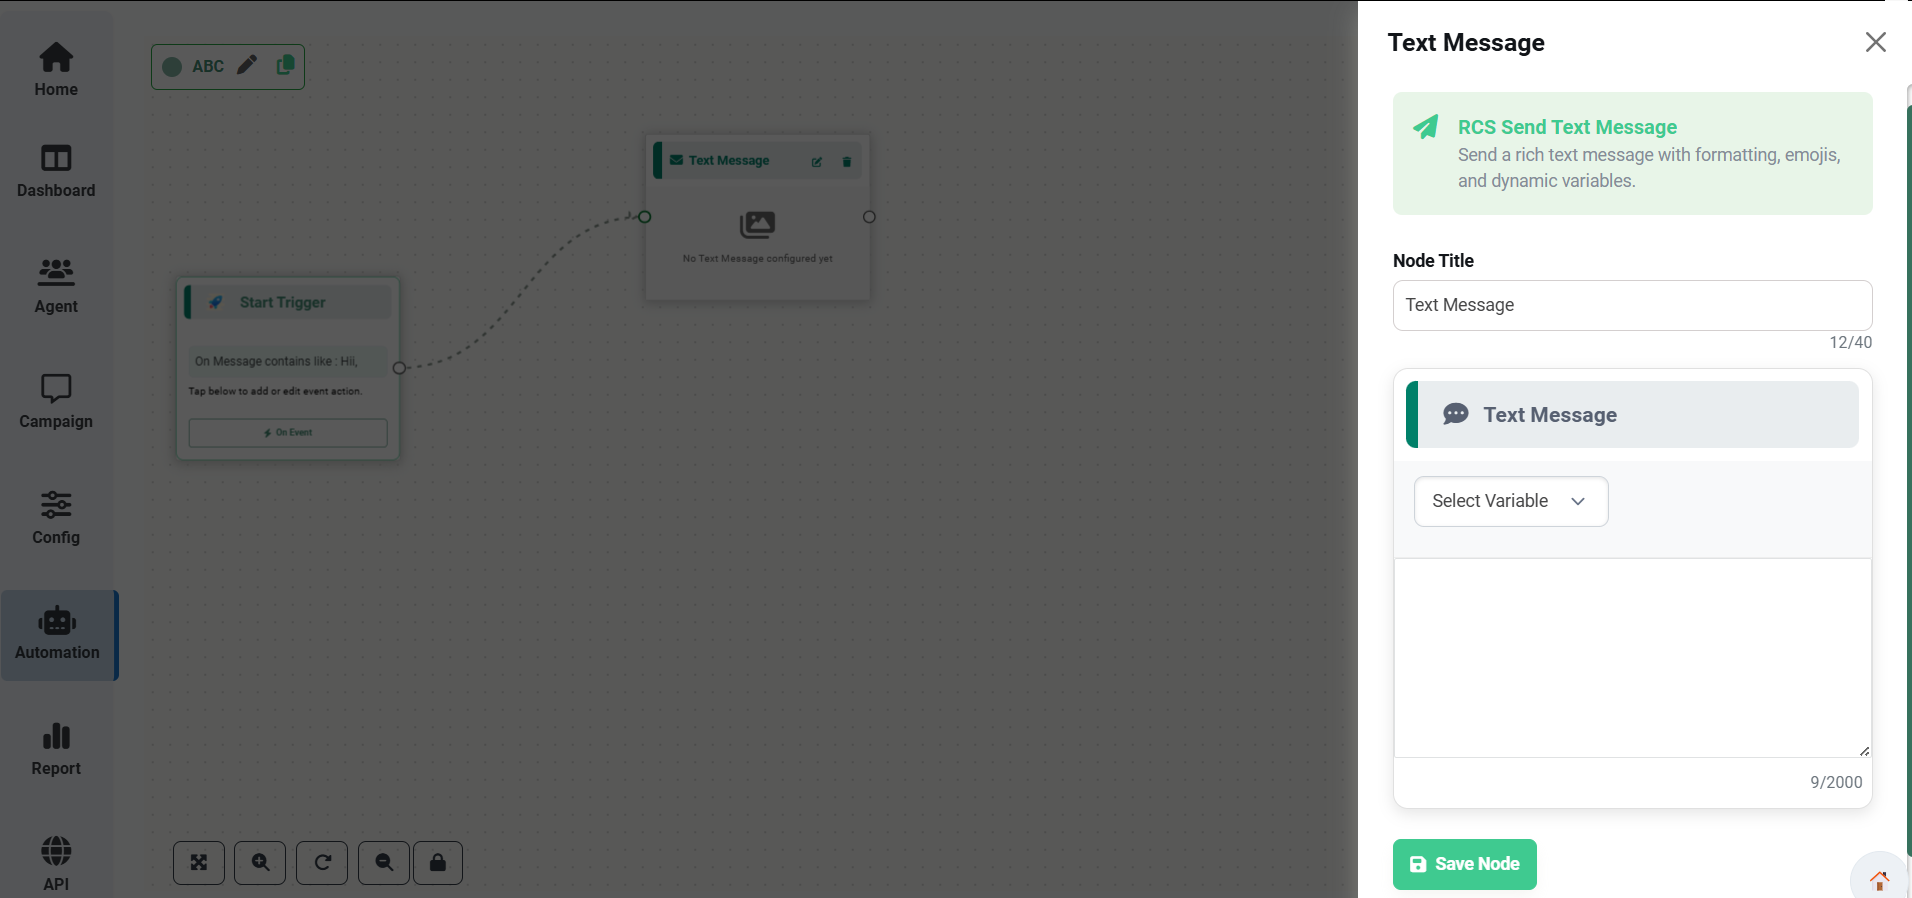
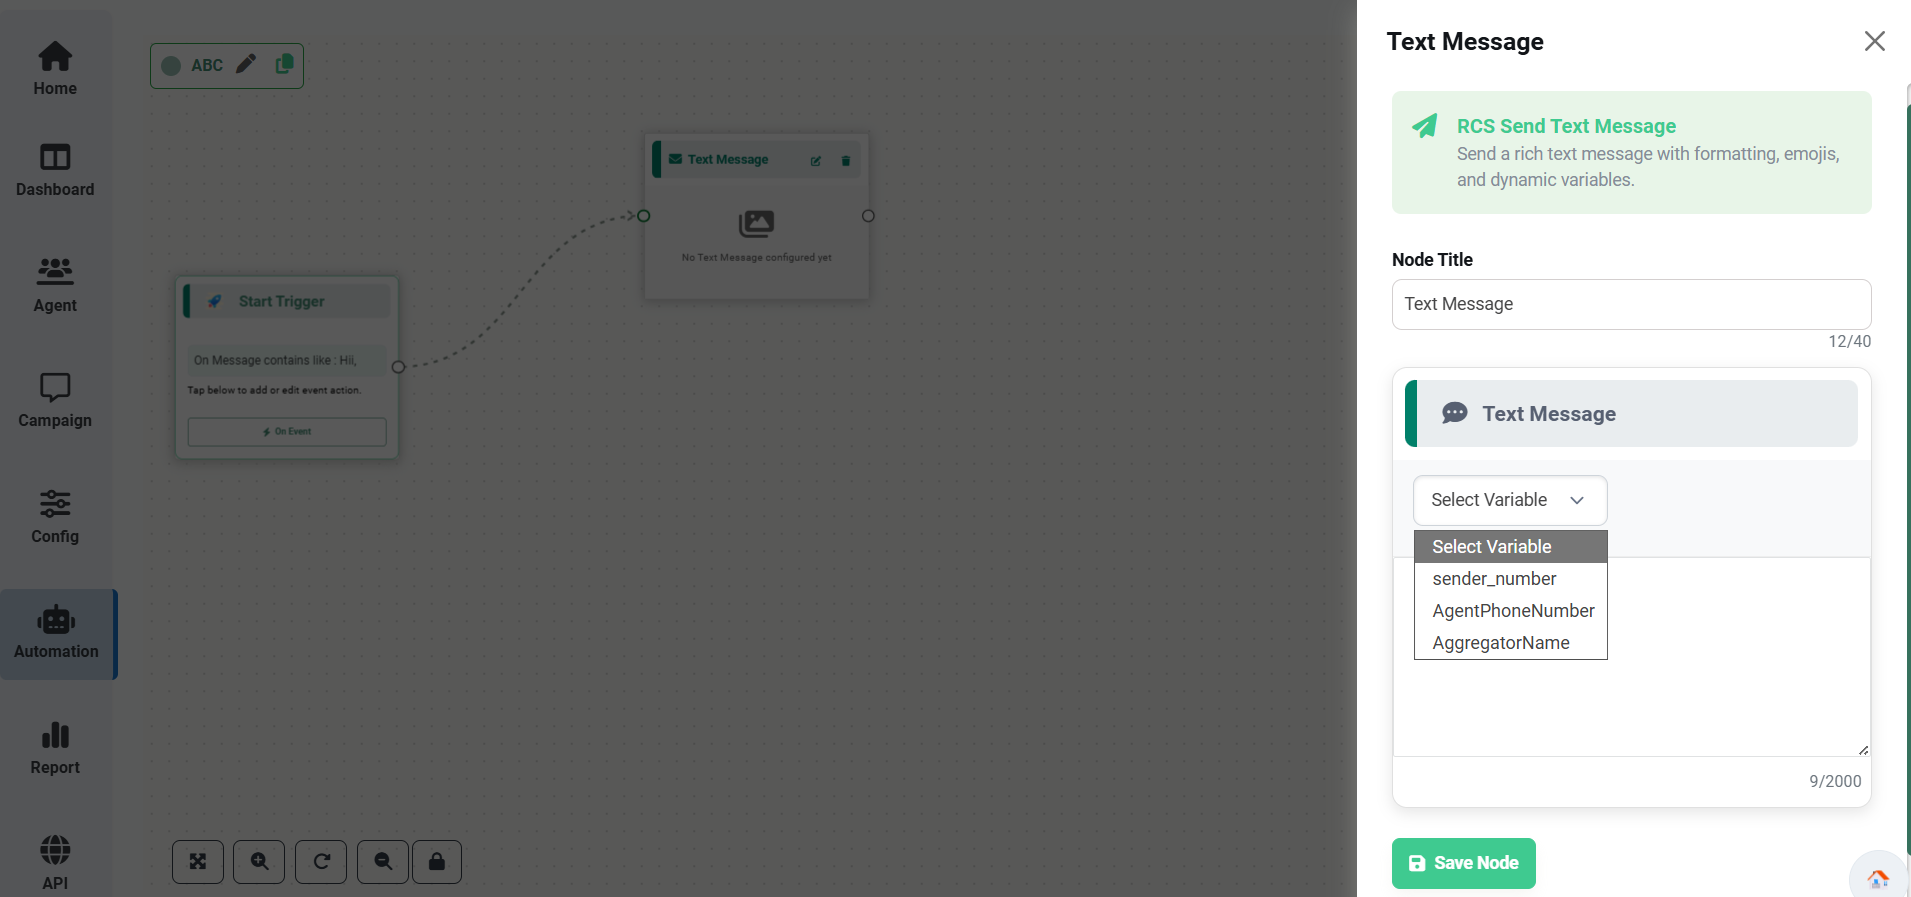
The Select Variable option allows users to use chatbot variables that are automatically populated during the conversation flow. When a customer sends a message that exact like keyword, the chatbot can access related information through these variables and use it in different chatbot nodes.
- sender_number – Displays the mobile number of the customer who initiated the conversation.
- AgentPhoneNumber – Business or agent phone number configured for the RCS agent.
- AggregatorName – Displays the company name.
The Text Message node is used to send informative and personalized messages
to customers.
It is commonly used for:
• Welcome Messages
• Order Confirmations
• Customer Support Replies
• Promotional Campaigns
• Service Notifications
Thank you for contacting us.
Your request has been received successfully.
Our support team will contact you shortly.
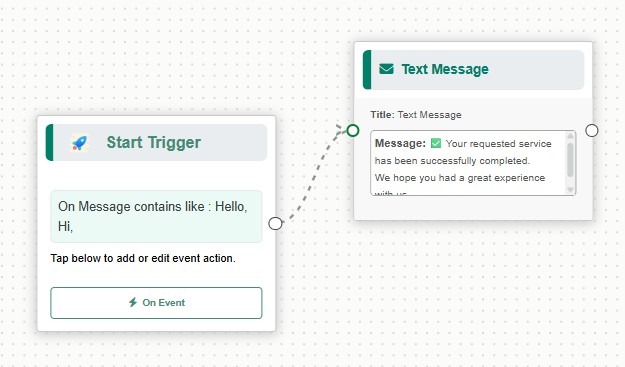
| Feature | Description |
|---|---|
| Node Title | Name of the text message node. |
| Dynamic Variables | Insert variables dynamically into messages. |
| Message Content | Main message text shown to users. |
| Save Node | Save the configured message. |
Ask Question Message
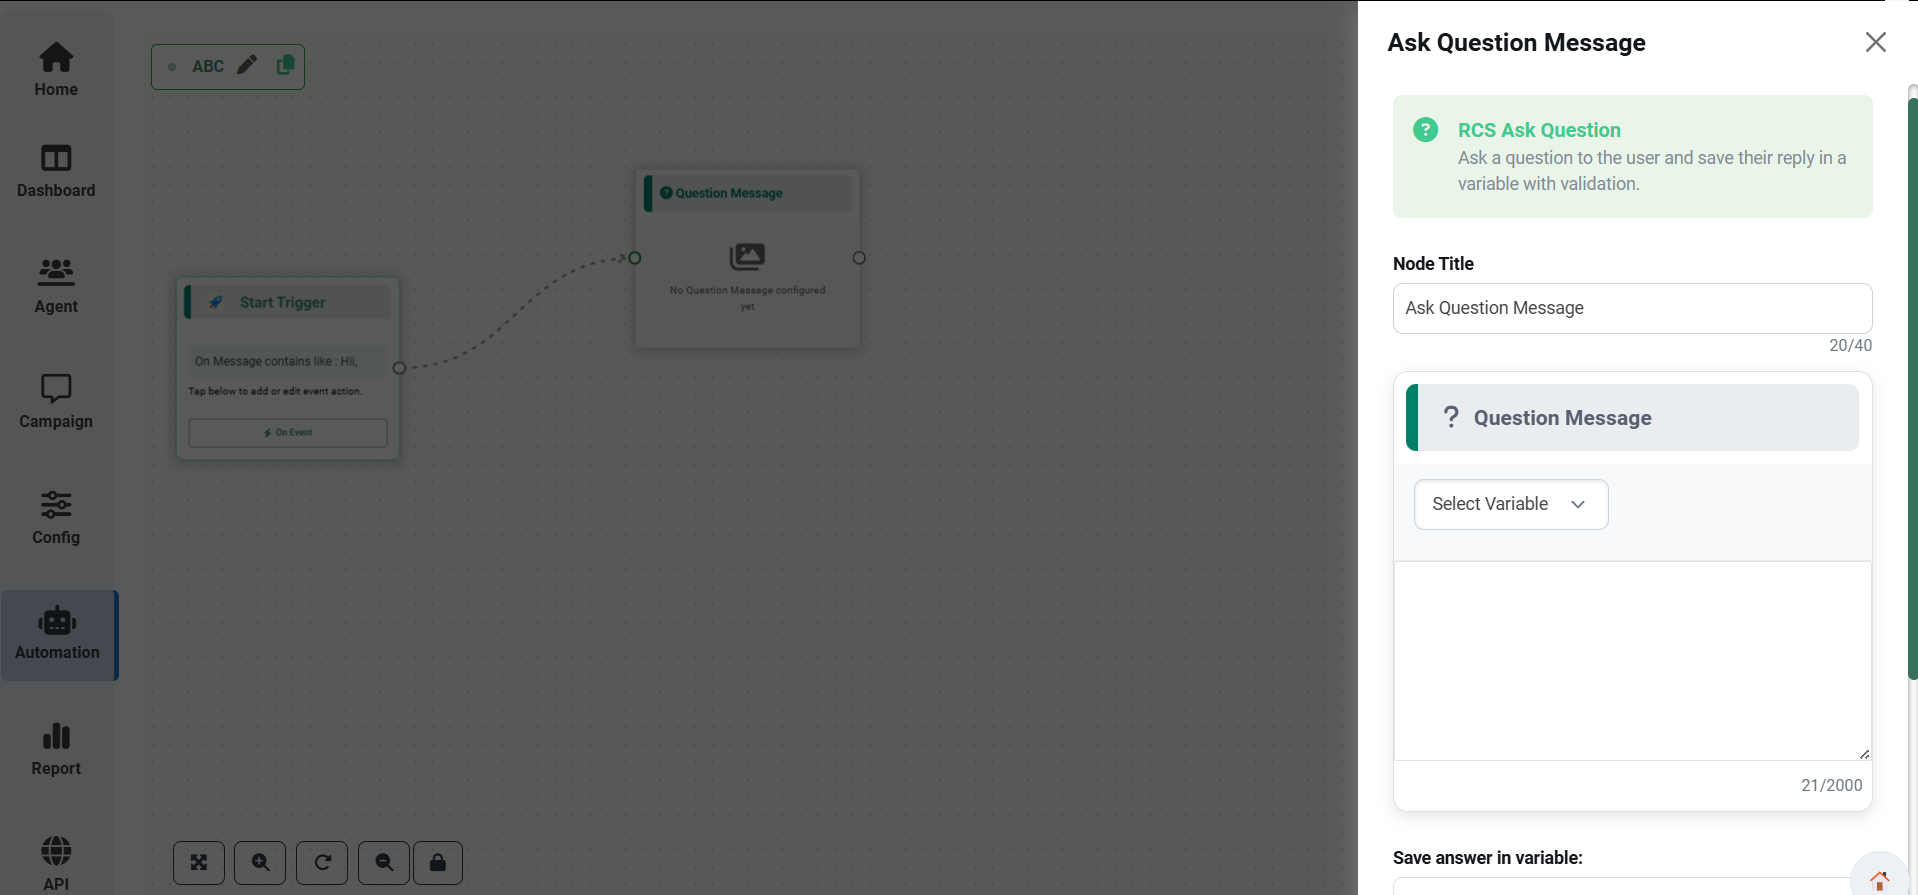
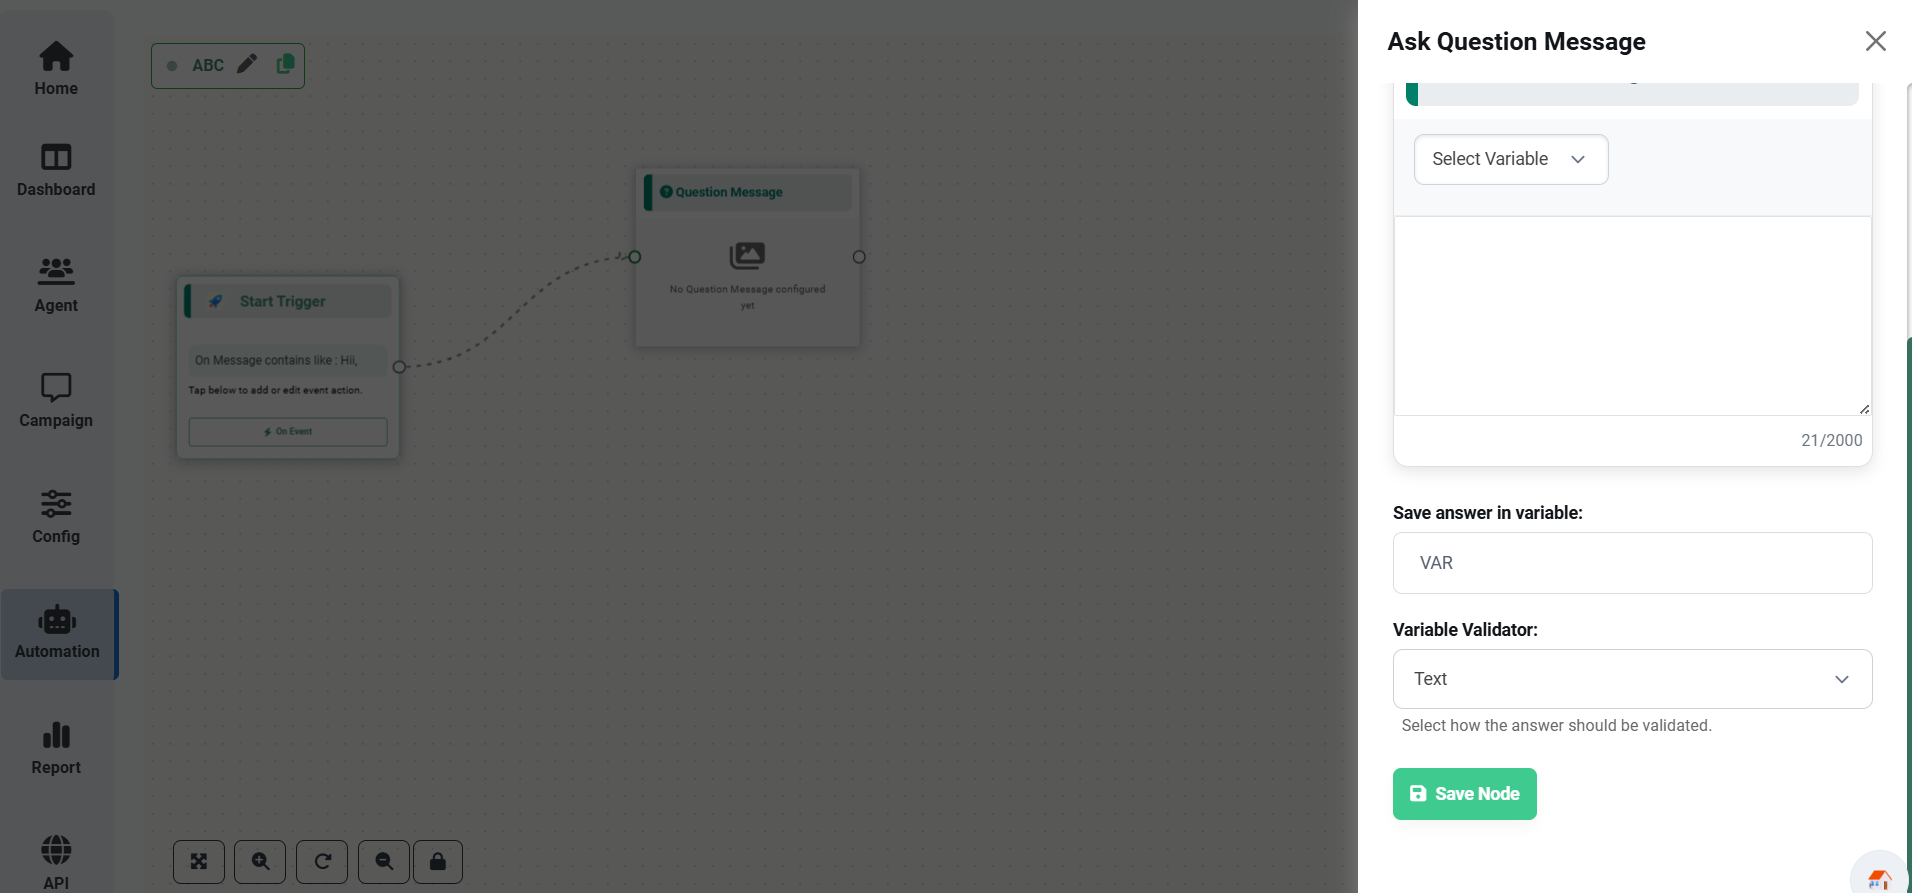
The Ask Question node enables businesses to collect information directly from customers during a conversation. For example: Which product are you interested in? Please share your requirement. The customer's response can be stored and used in future chatbot steps, reports, or lead management.
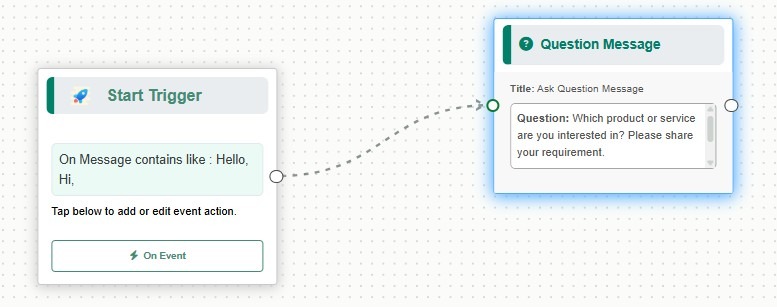
| Feature | Description |
|---|---|
| Question Text | Question shown to the user. |
| Save Response | Store customer responses for future use and reporting. |
| Text Validation | Validate text input. |
| Number Validation | Validate numeric values. |
| Email Validation | Validate email addresses. |
| Mobile Number Validation | Validate mobile numbers. |
| Save Node | Save the question node. |
Question Button Node
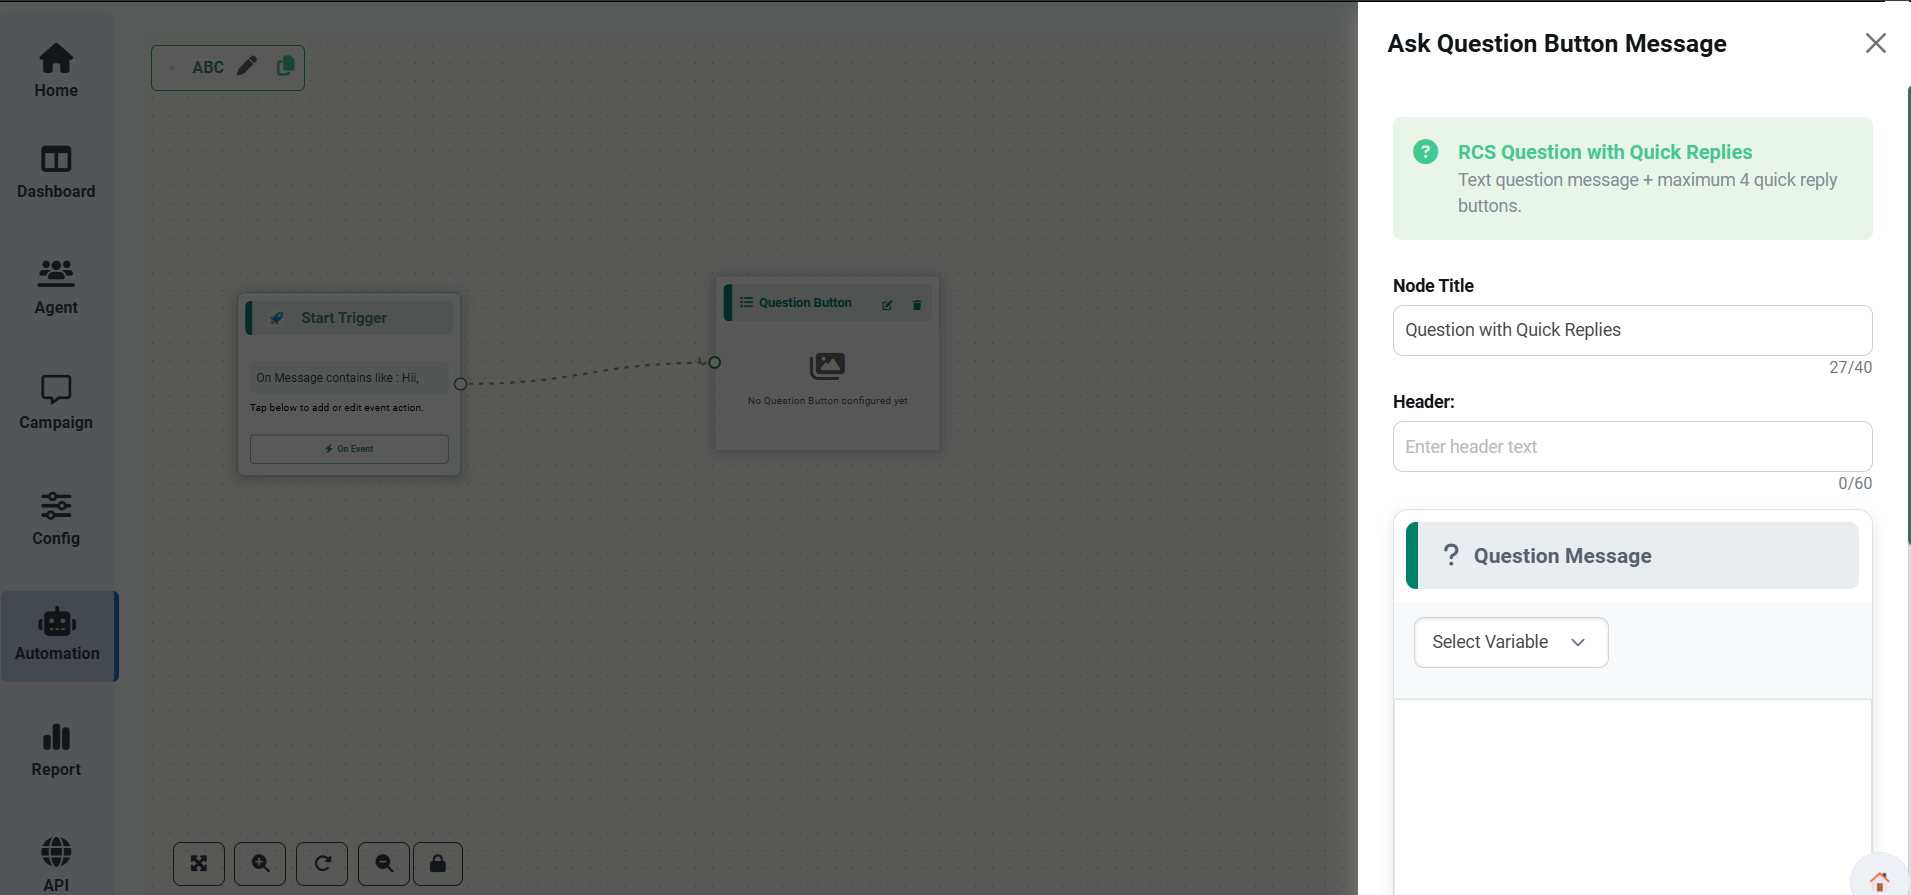
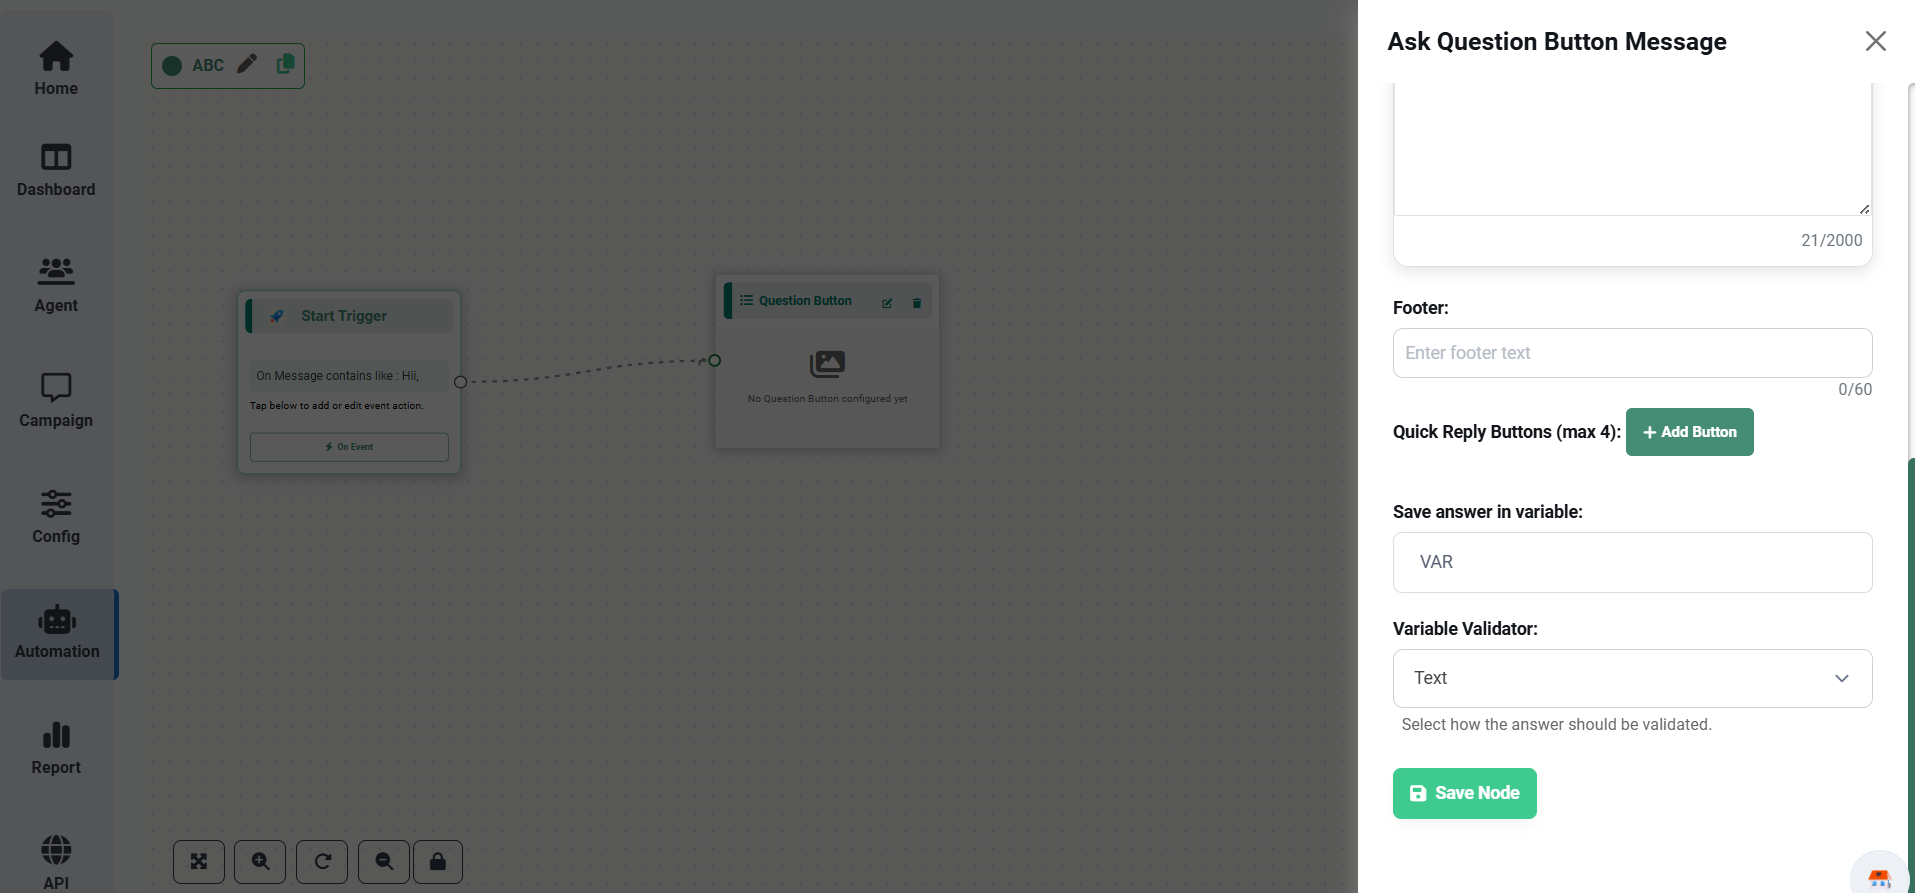
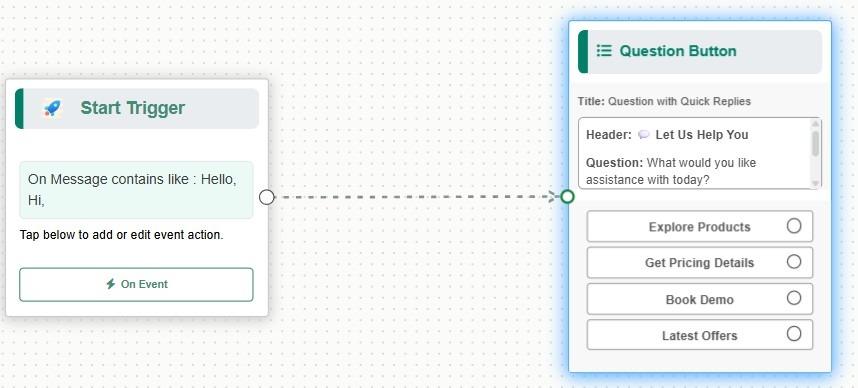
The Question Button node allows customers to choose an option from predefined quick reply buttons instead of typing manually.
Example:
What would you like assistance with?
• Explore Products
• Get Pricing Details
• Book Demo
• Latest Offers
This creates a faster and more convenient customer experience.
| Feature | Description |
|---|---|
| Header | Message header text. |
| Question Message | Main question displayed to users. |
| Footer | Footer message text. |
| Quick Reply Buttons | Maximum 4 quick reply buttons. |
| Save Answer in Variable | Store selected option. |
| Input Validation | Validate customer responses such as email, mobile number, and text values. |
| Save Node | Save the node configuration. |
Configuring Action Button Node
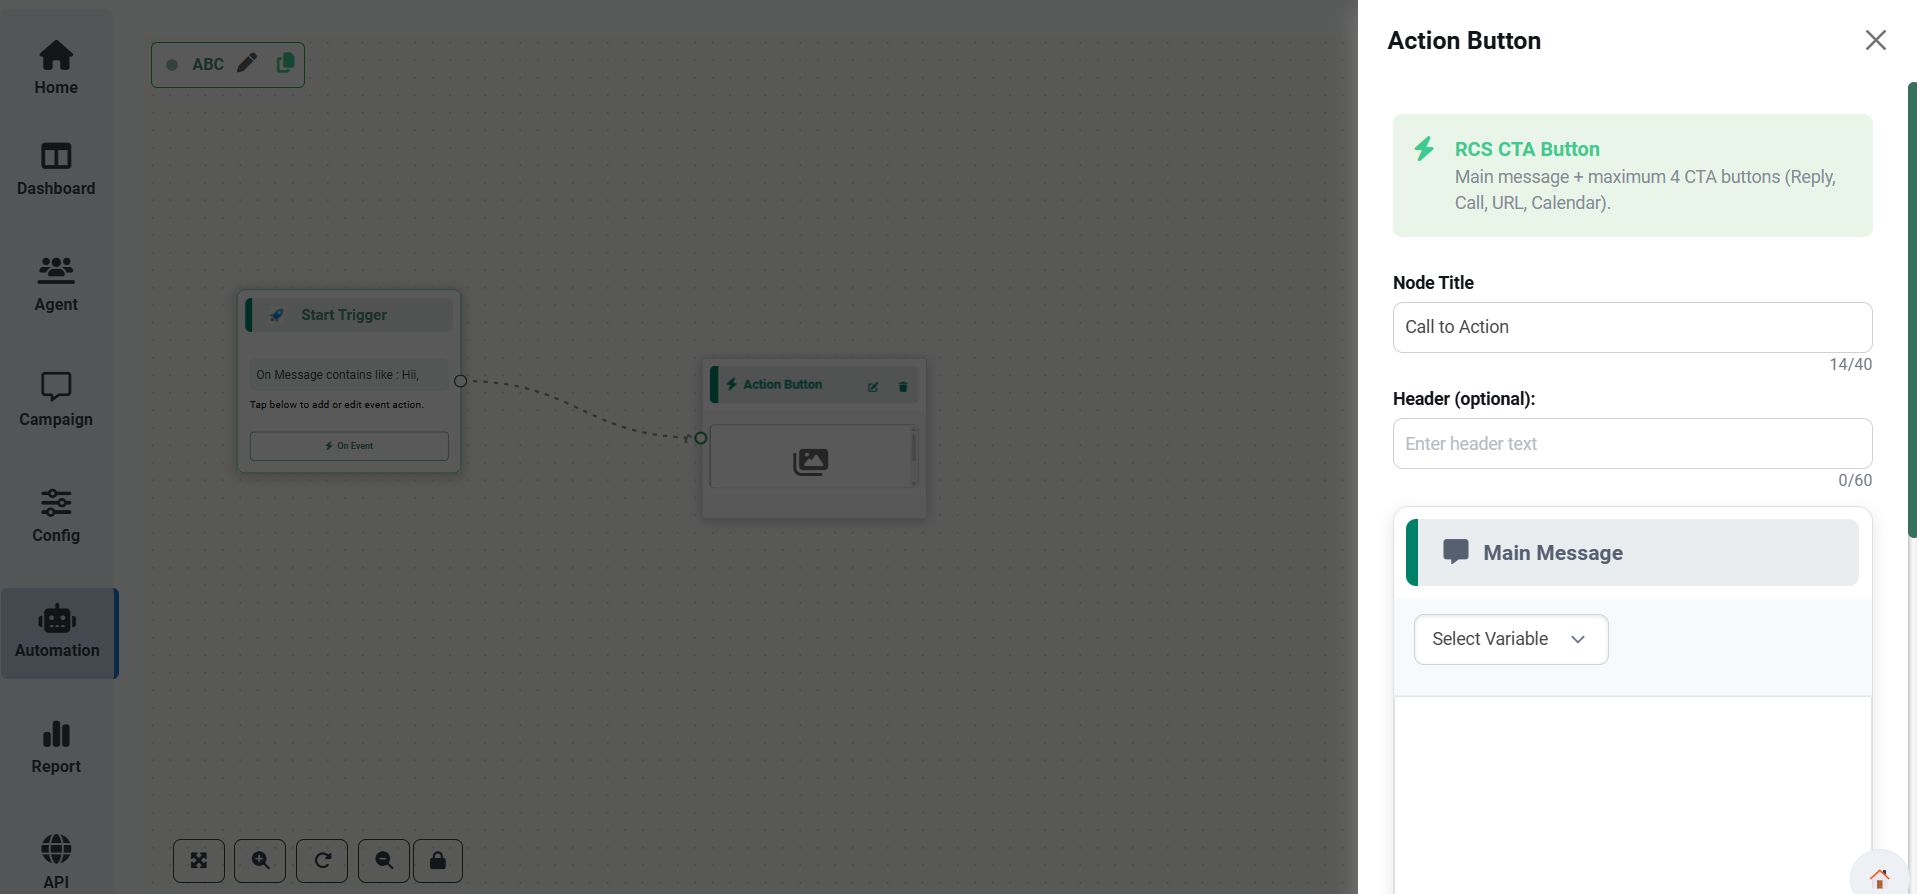
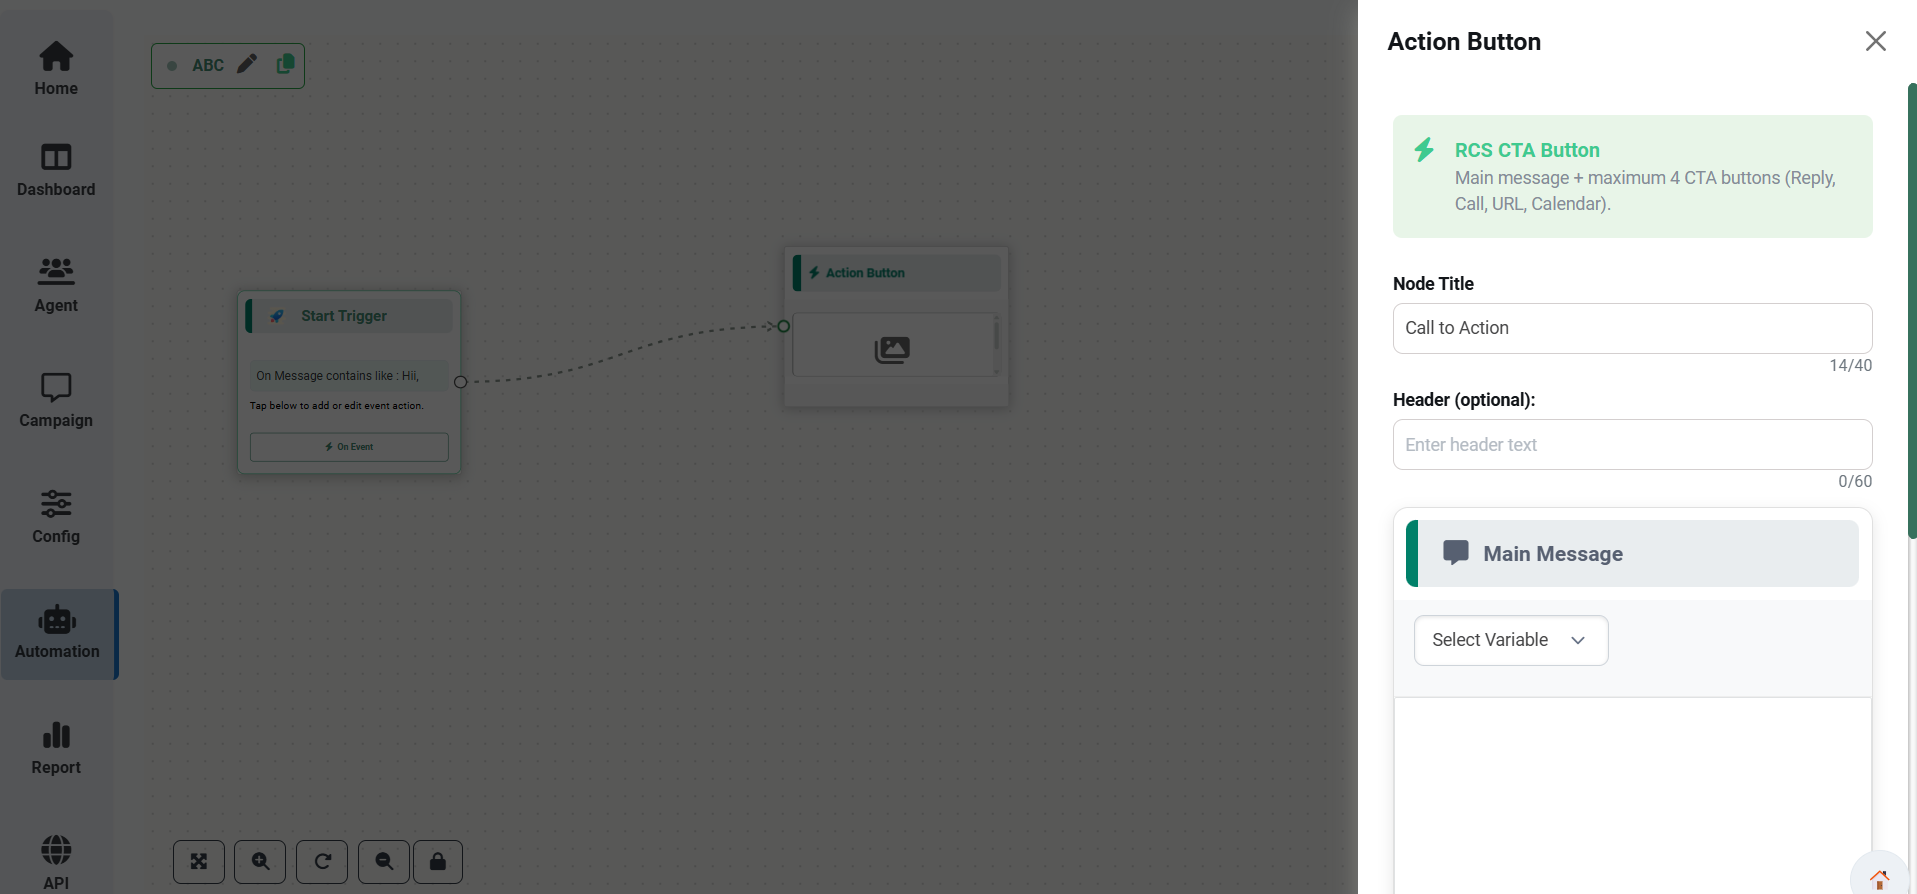
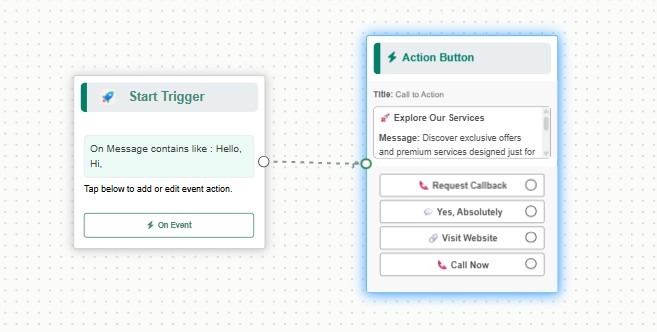
The Action Button node allows users to interact using Call-To-Action buttons inside chatbot messages.
Configuration Steps
Rich Card Node
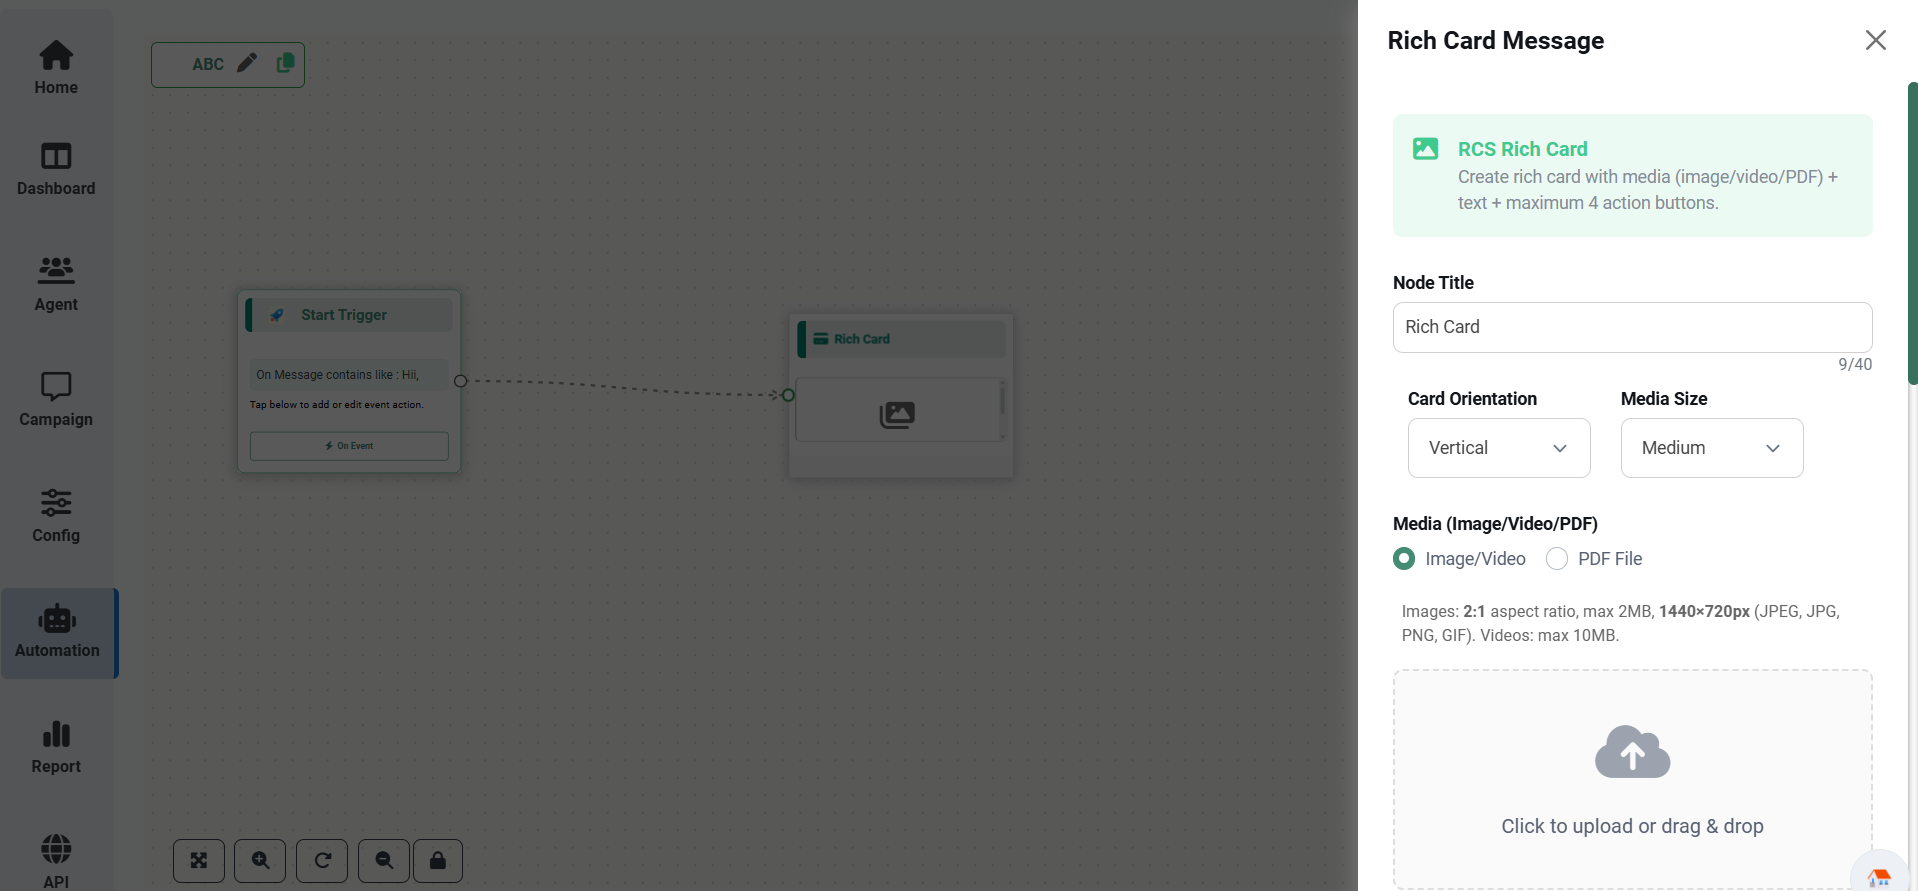
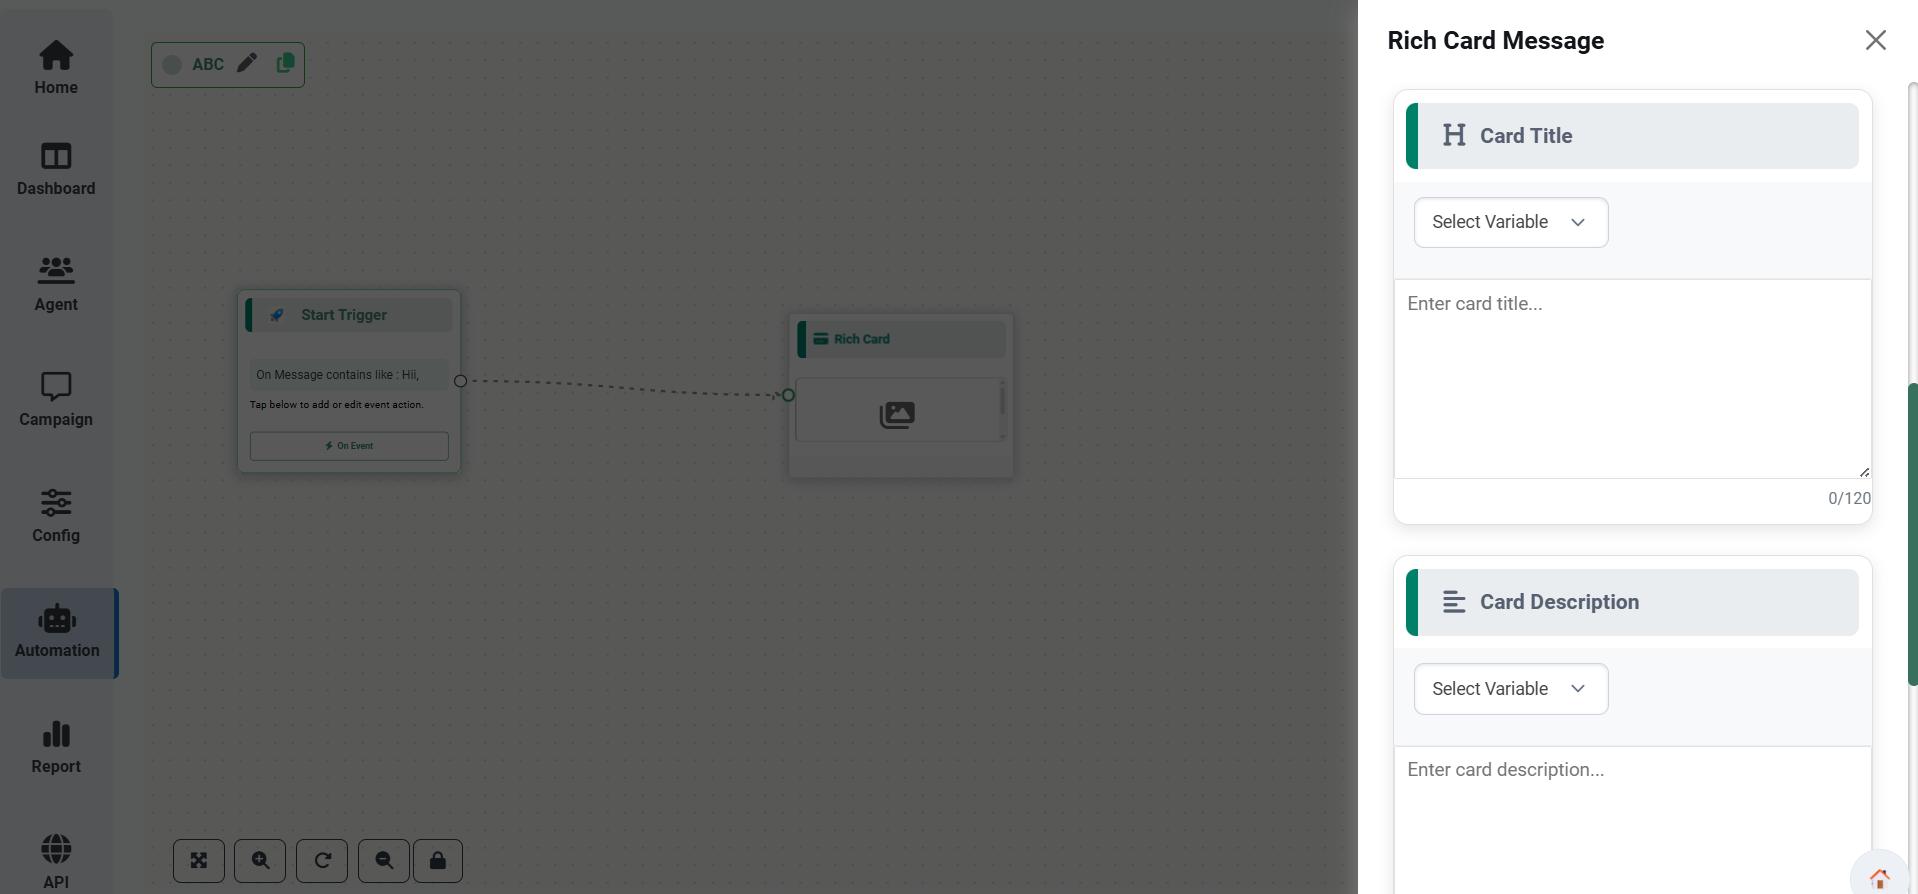
The Rich Card Node allows businesses to create visually engaging messages by combining images, descriptions, and interactive buttons within a single card. Rich Cards are commonly used to showcase products, services, promotional offers, and business information in an attractive format that encourages customer interaction.
Interactive Buttons
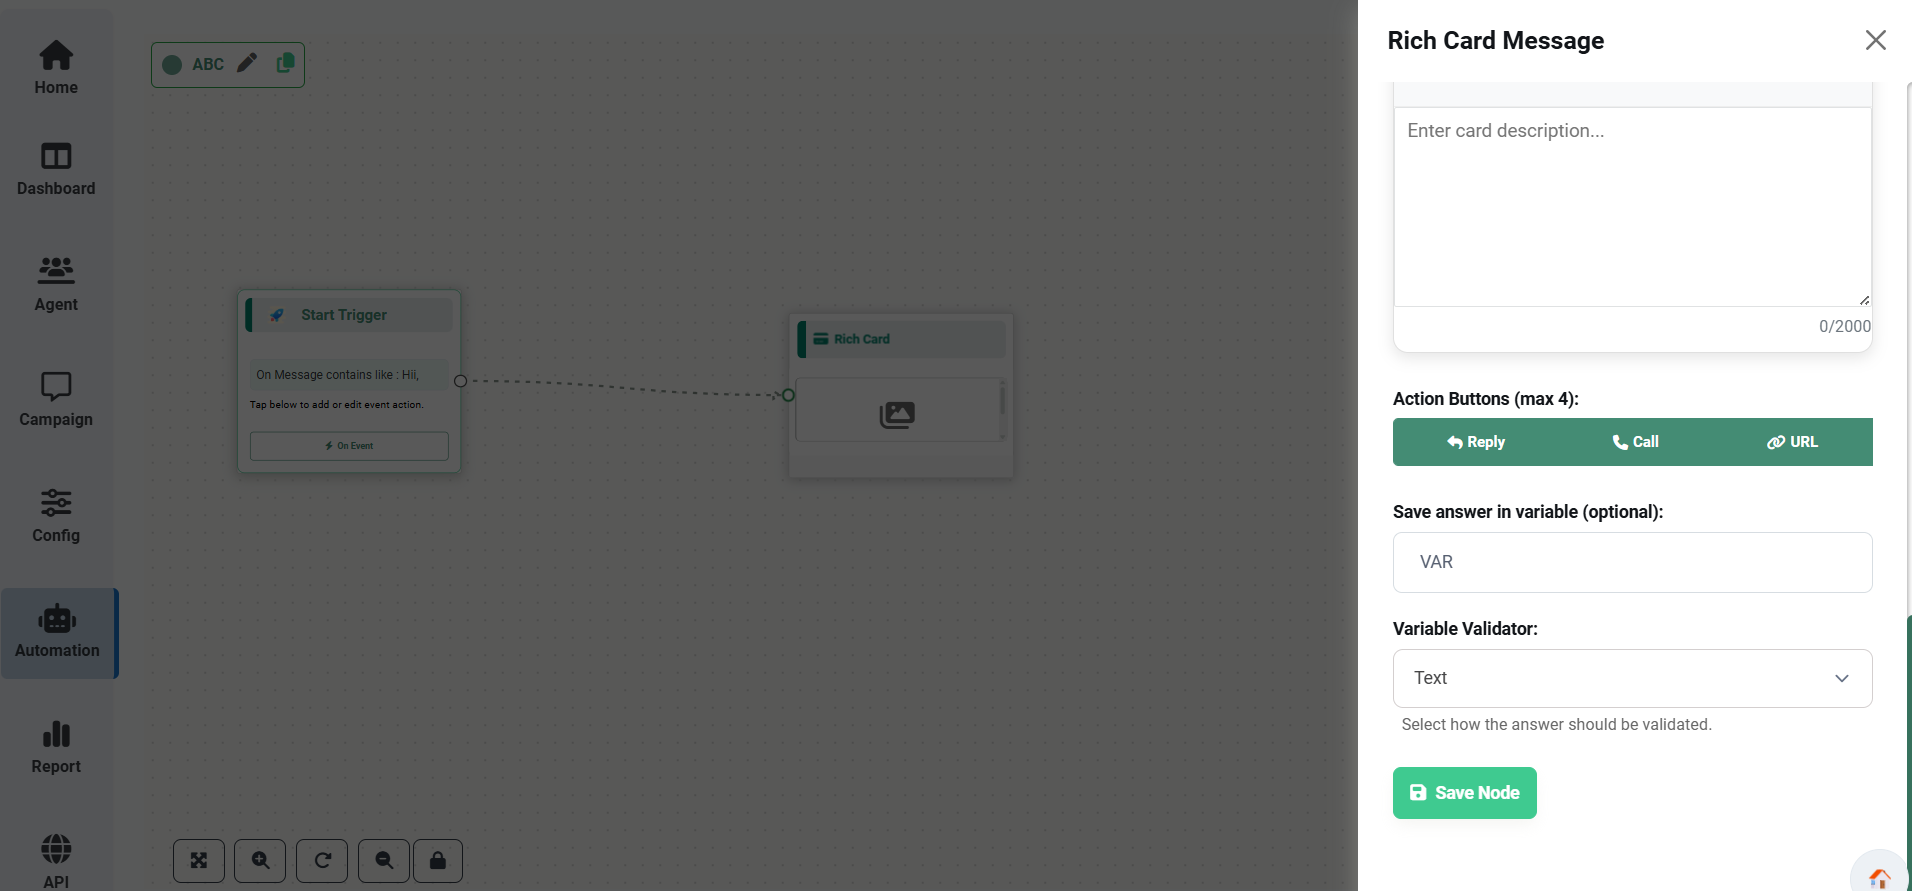
Rich Cards support different button types that allow customers to interact directly with the chatbot message.
| Button Type | Description |
|---|---|
| Reply Button | Allows customers to send a predefined response with a single tap. Example: Interested, Book Demo, Confirm. |
| Call Button | Allows customers to call the business directly from the chatbot. |
| URL Button | Allows customers to open a website, product page, or landing page directly from the chatbot. |
| Feature | Description |
|---|---|
| Card Title | Displays the title of the Rich Card. |
| Description | Displays a short description of the product or service. |
| Image | Displays an image to make the card more attractive. |
| Interactive Buttons | Add Reply, Call, and URL buttons for customer interaction. |
| Save Node | Save the Rich Card configuration. |
A restaurant can create a Rich Card with: • Restaurant Image
• Special Offers
• Reply Button → Reserve Table
• Call Button → Call Restaurant
• URL Button → View Full Menu This allows customers to interact instantly from the chatbot conversation.
Carousel Card Node
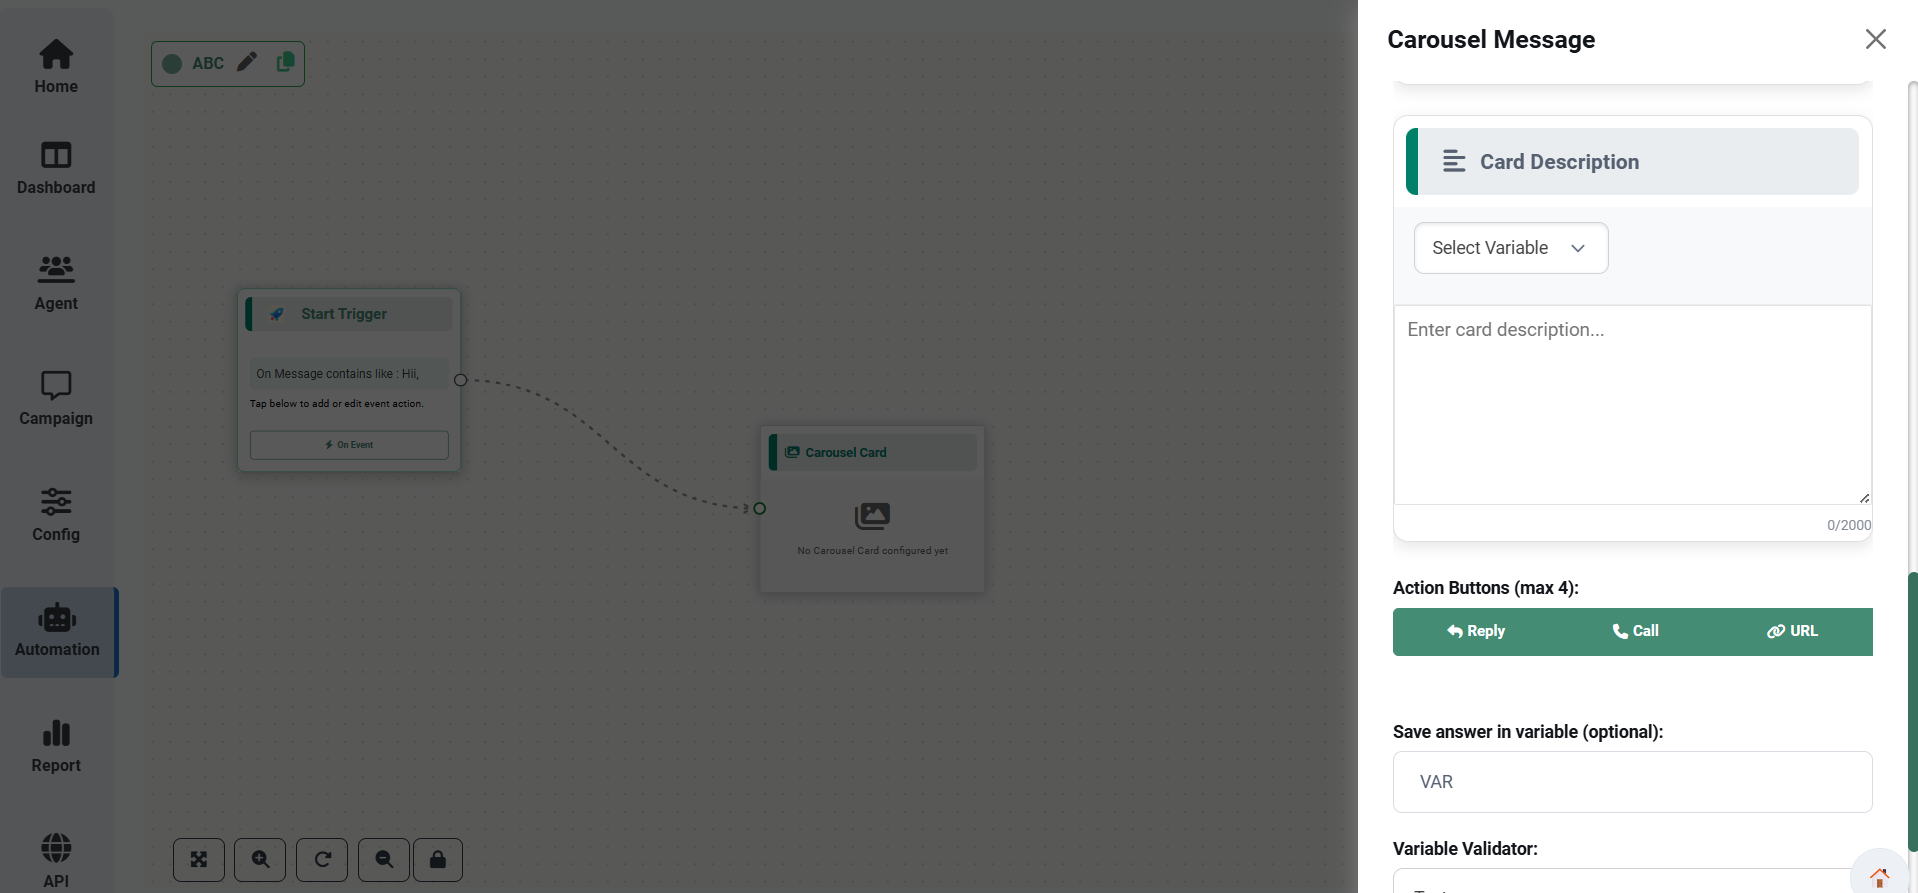
The Carousel Card Node allows businesses to display multiple cards in a single horizontally scrollable message. Each card can contain an image, title, description, and interactive buttons, allowing customers to explore multiple products, services, or offers within a single chatbot message. Customers can swipe left or right to browse through the available cards and interact with the content easily.
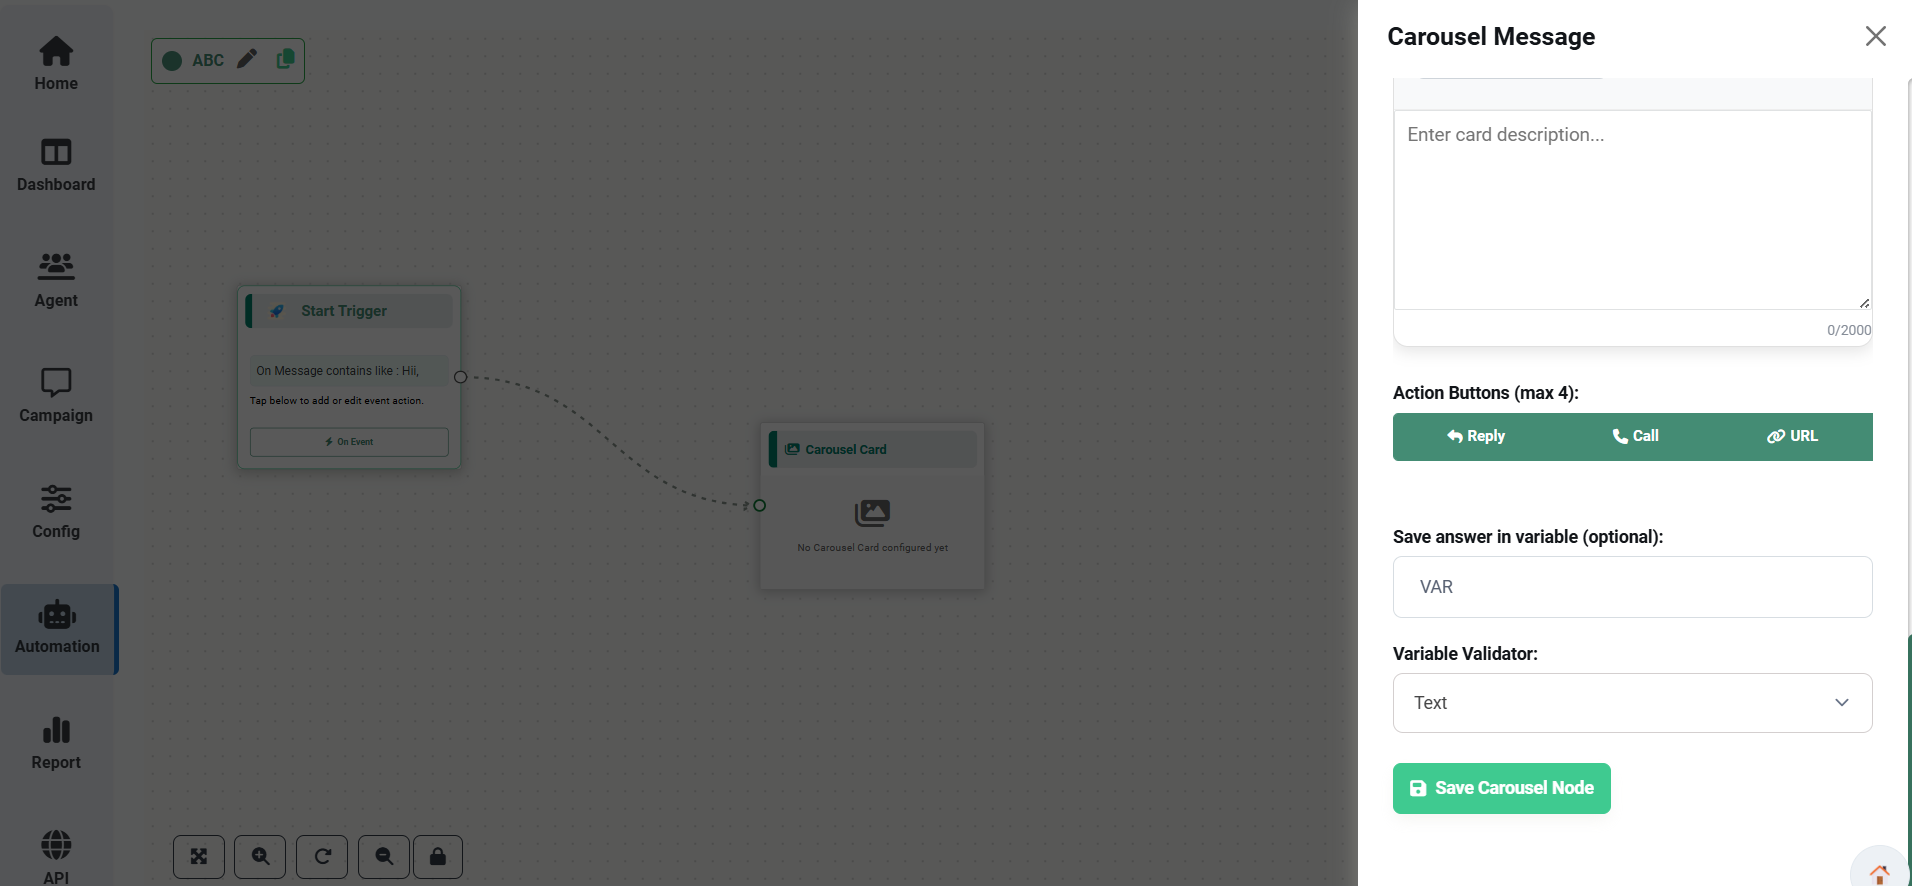
Interactive Buttons
Each card within the Carousel can include different button types that allow customers to perform actions directly from the chatbot.
| Button Type | Description |
|---|---|
| Reply Button | Allows customers to send a predefined response such as Interested, Buy Now, or Book Demo with a single tap. |
| Call Button | Allows customers to call the business directly from the selected card. |
| URL Button | Redirects customers to a website, product page, or booking page associated with the selected card. |
A travel company can use Carousel Cards to showcase multiple tour packages. Each card can contain: • Destination Image
• Package Details
• Reply Button → Interested
• Call Button → Call Now
• URL Button → View Package Customers can browse different packages and interact directly from the chatbot.
| Feature | Description |
|---|---|
| Multiple Cards | Display multiple cards in a single horizontally scrollable message. |
| Image | Add images to visually represent products or services. |
| Title | Display the title of each card. |
| Description | Display a short description for each card. |
| Interactive Buttons | Add Reply, Call, and URL buttons to each card. |
| Save Node | Save the Carousel Card configuration. |
Exporting Data to Google Sheets
The Google Sheet Integration allows chatbot responses to be automatically stored in Google Sheets.
Businesses can save:
• Customer Name
• Mobile Number
• Email Address
• Product Interest
• Feedback
This helps with lead management, reporting, and customer data organization.
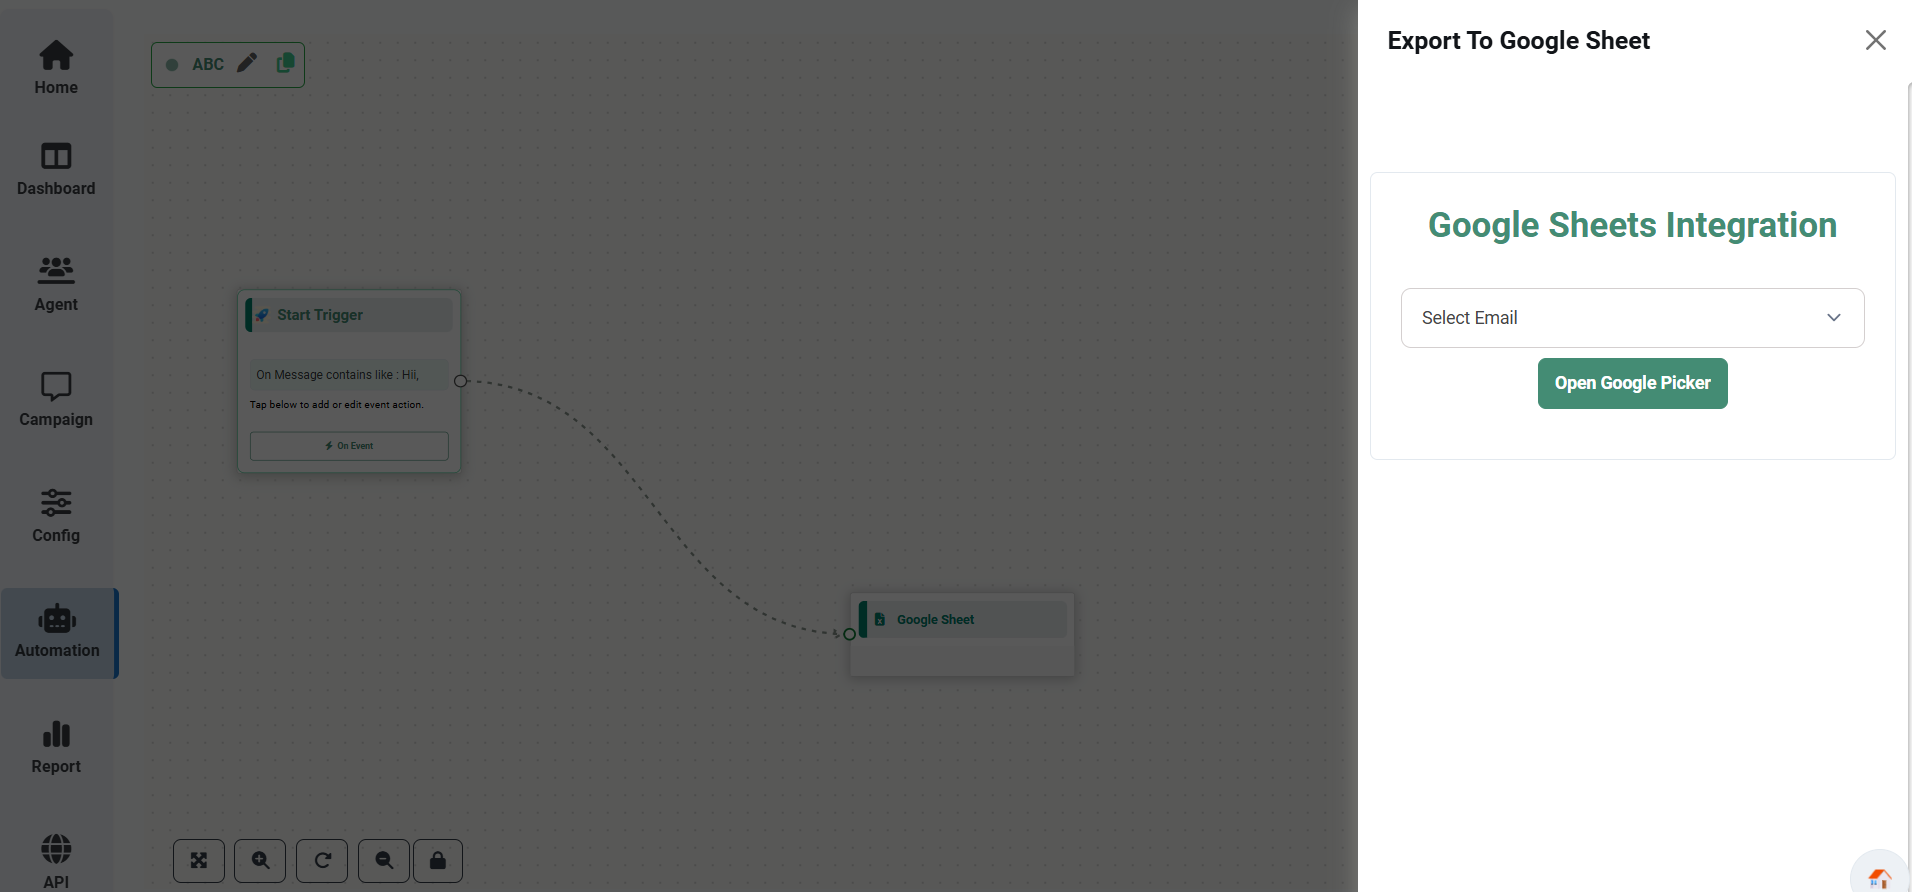
Configuration
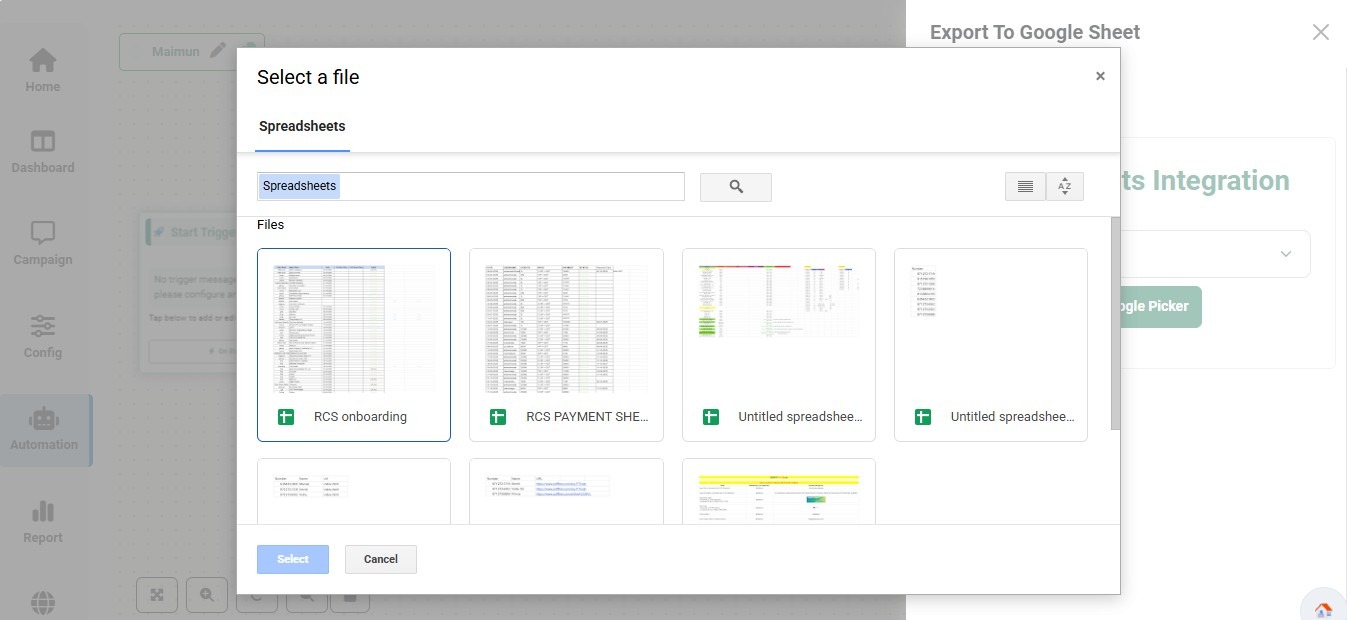
| Chatbot Variable | Google Sheet Column |
|---|---|
| Name | Name |
| Mobile | Mobile Number |
| Email Address | |
| City | City |
Delay Node
The Delay node pauses the chatbot flow for a specified duration before sending the next message.
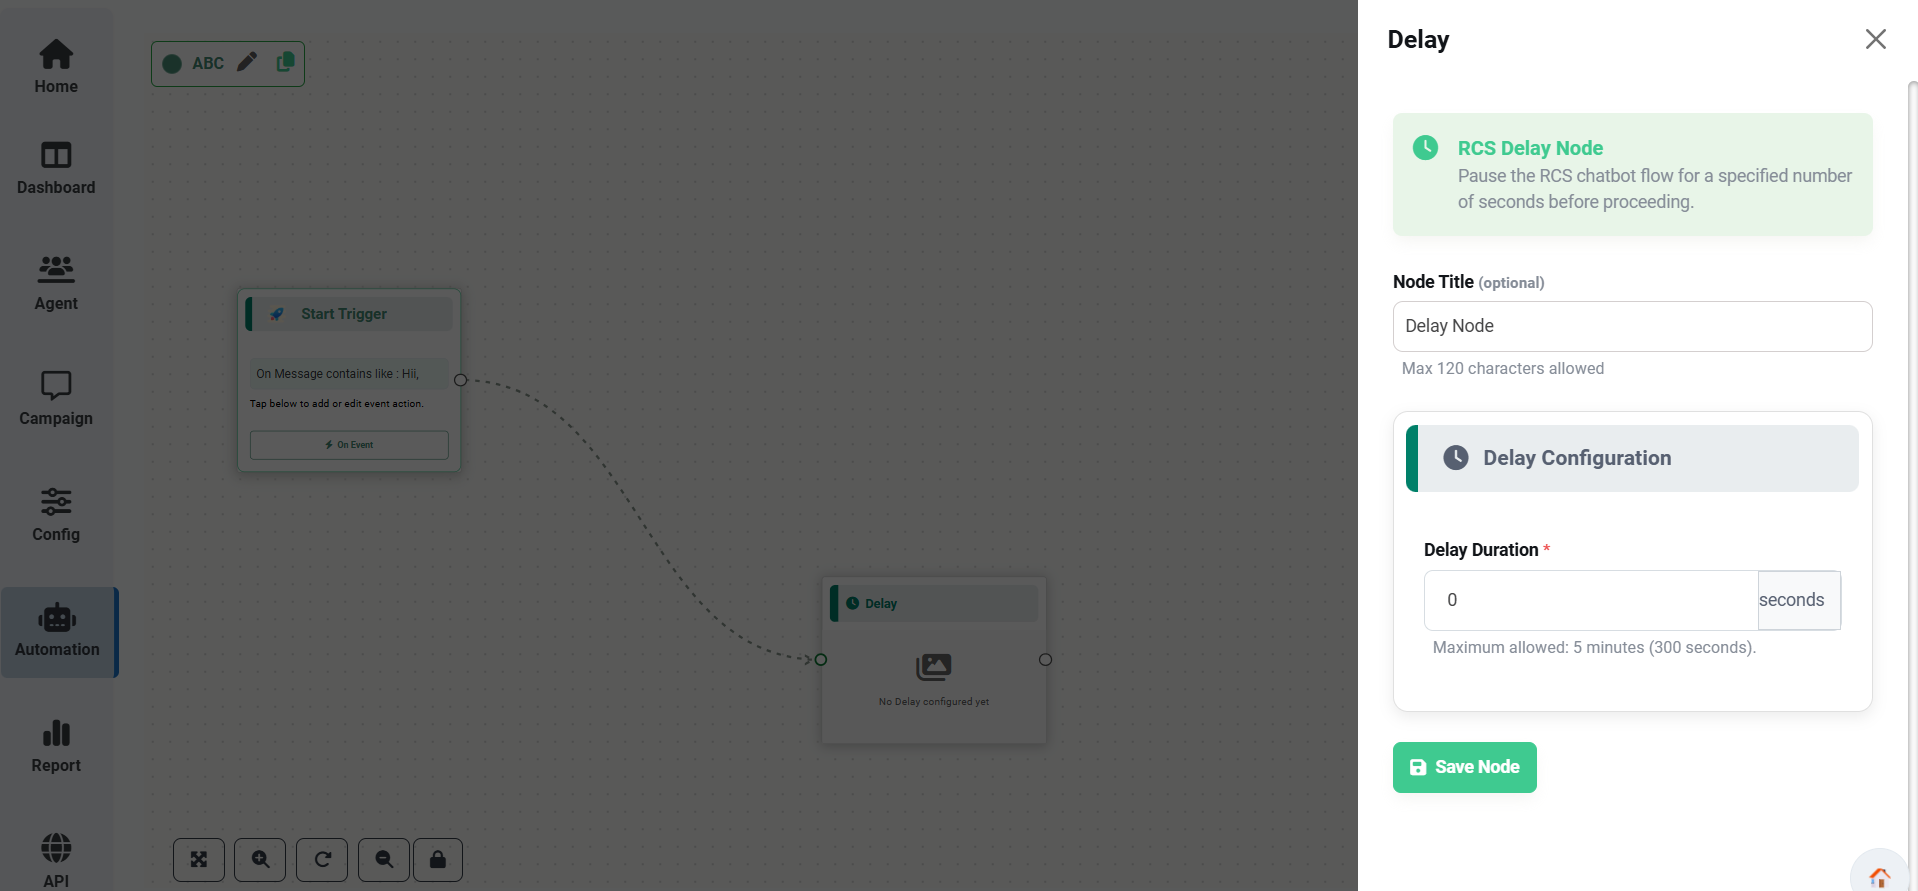
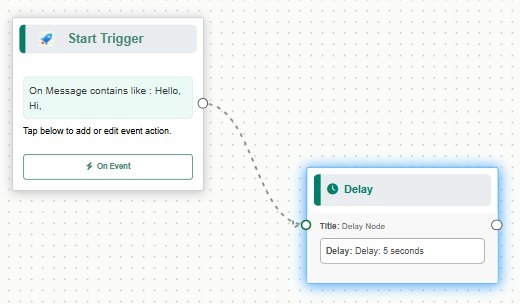
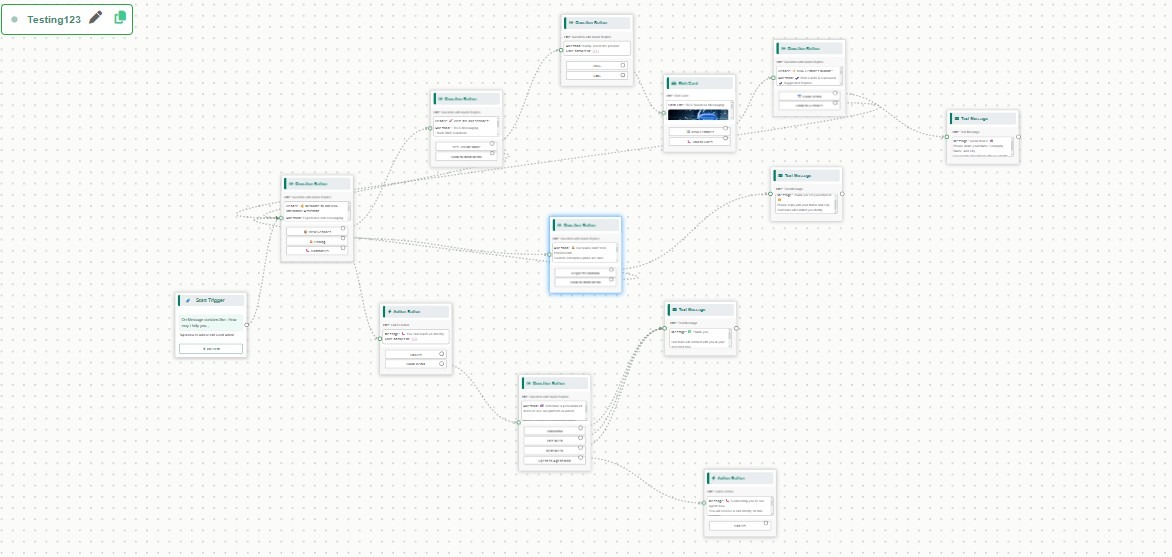
Complete Chatbot Workflow
After configuring triggers, messages, buttons, rich cards, carousel and delays, the chatbot workflow is ready for deployment.
Publishing Chatbot Flow
Before deploying the chatbot, verify all nodes and workflow connections.
Conclusion
The RCS Chatbot Automation module enables businesses to automate customer conversations using an easy-to-use visual builder. With features such as Start Triggers, Text Messages, Question Buttons, Rich Cards, Carousel Cards, Google Sheets Integration, and Delay Nodes, businesses can create engaging and scalable RCS chatbot experiences without writing any code.
The WhatsApp module enables businesses to communicate with customers using the WhatsApp Business API through a centralized platform. It provides everything required to configure and manage your WhatsApp Business Account (WABA), create and approve message templates, send campaigns, automate customer interactions, manage live chat agents, and monitor messaging performance.
Whether you're sending promotional campaigns, transactional notifications, authentication messages, or providing real-time customer support, the WhatsApp module offers the tools needed to streamline communication, improve customer engagement, and scale business conversations securely through Meta's WhatsApp Business Platform.
WhatsApp Features
Module Capabilities
Start by completing the WhatsApp Onboarding process. Once your WhatsApp Business Account (WABA) is connected and verified, you can create templates, send campaigns, automate conversations, and manage customer chats from a single platform.
WhatsApp Onboarding
WhatsApp Onboarding allows businesses to register and connect their WhatsApp Business Account with Omni Portal using Meta's official onboarding process. Once completed, you can manage messaging, templates, campaigns, reports and automation from a single platform.
Required Information
| Requirement | Description |
|---|---|
| Facebook Business Manager | Administrator access is required. |
| Phone Number | A valid phone number for WhatsApp Business. |
| Business Information | Legal business name and registered address. |
| Business Verification | Your Meta Business Account should be verified. |
| WhatsApp Business Account | Administrator permission is required. |
Set Up Your WhatsApp Business Account
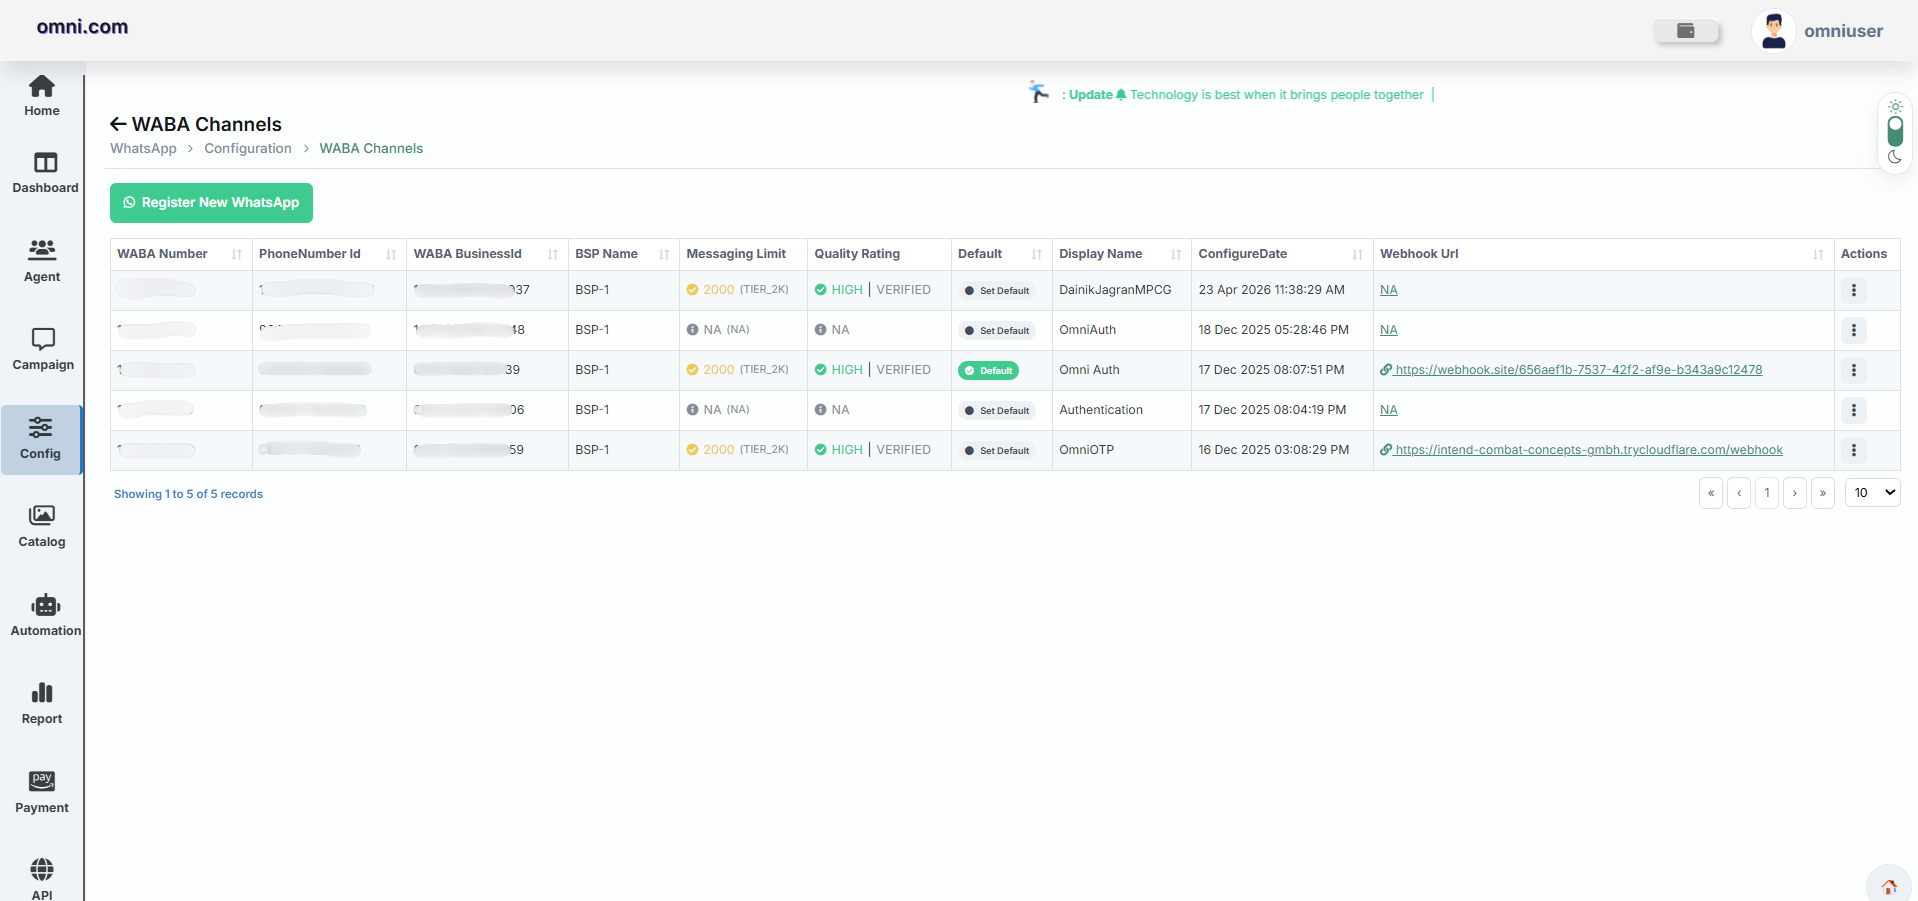
Navigate to Configuration → WABA Channels and click Register New WhatsApp. This opens Meta's onboarding window where you can connect your WhatsApp Business Account.
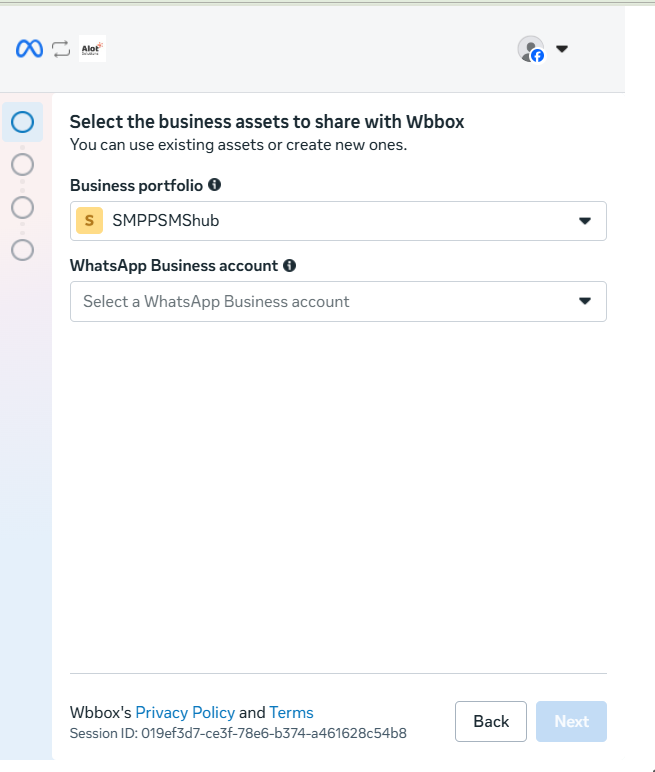
Step 1 : Select Business Portfolio
Choose the Business Portfolio associated with your organization.
Step 2 : Add WhatsApp Phone Number
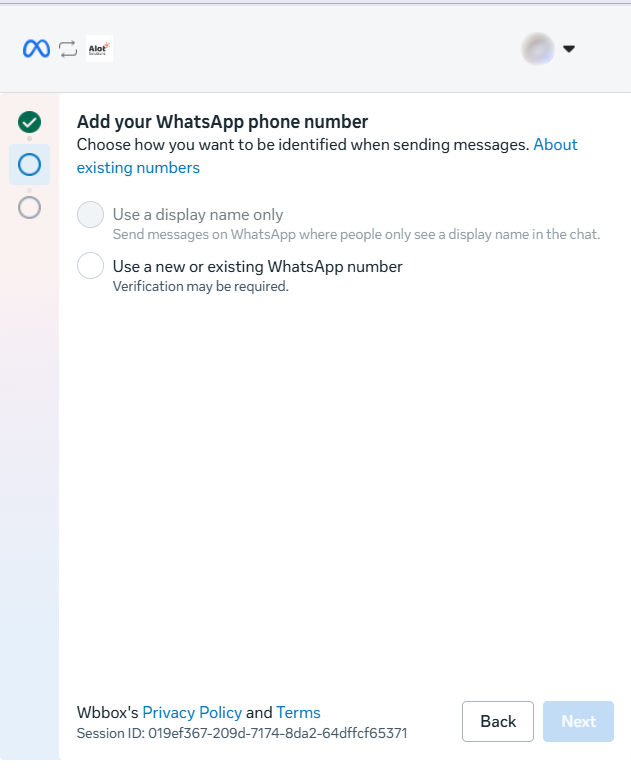
Step 3 : Review Permissions
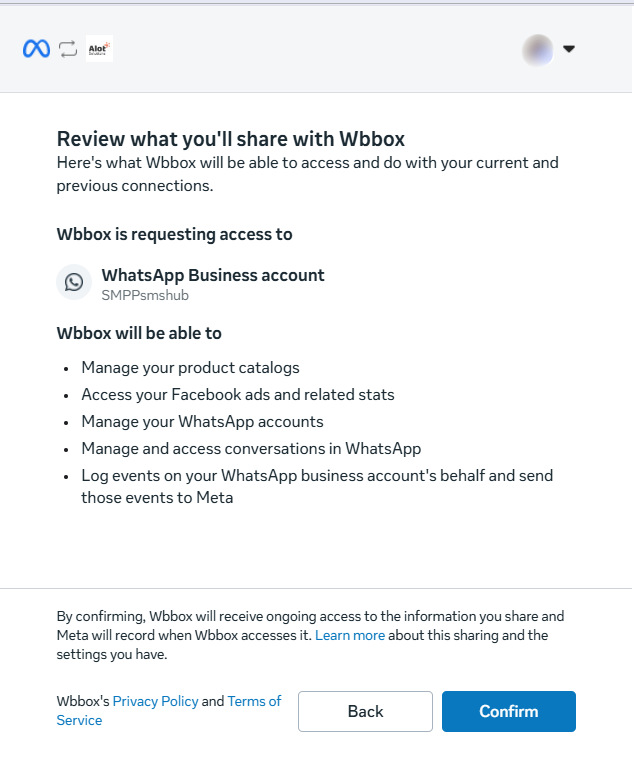
| Permission | Description |
|---|---|
| WhatsApp Business Account | Manage your WhatsApp Business Account. |
| Product Catalog | Access and manage catalog information. |
| Facebook Ads | Access advertising related data. |
| WhatsApp Conversations | Allow conversation management. |
| Business Management | Manage business assets and permissions. |
WhatsApp Coexistence
WhatsApp Coexistence allows businesses to use the same WhatsApp Business App number together with the WhatsApp Business API. This enables businesses to continue using the mobile application while also accessing advanced API features through Omni Portal.
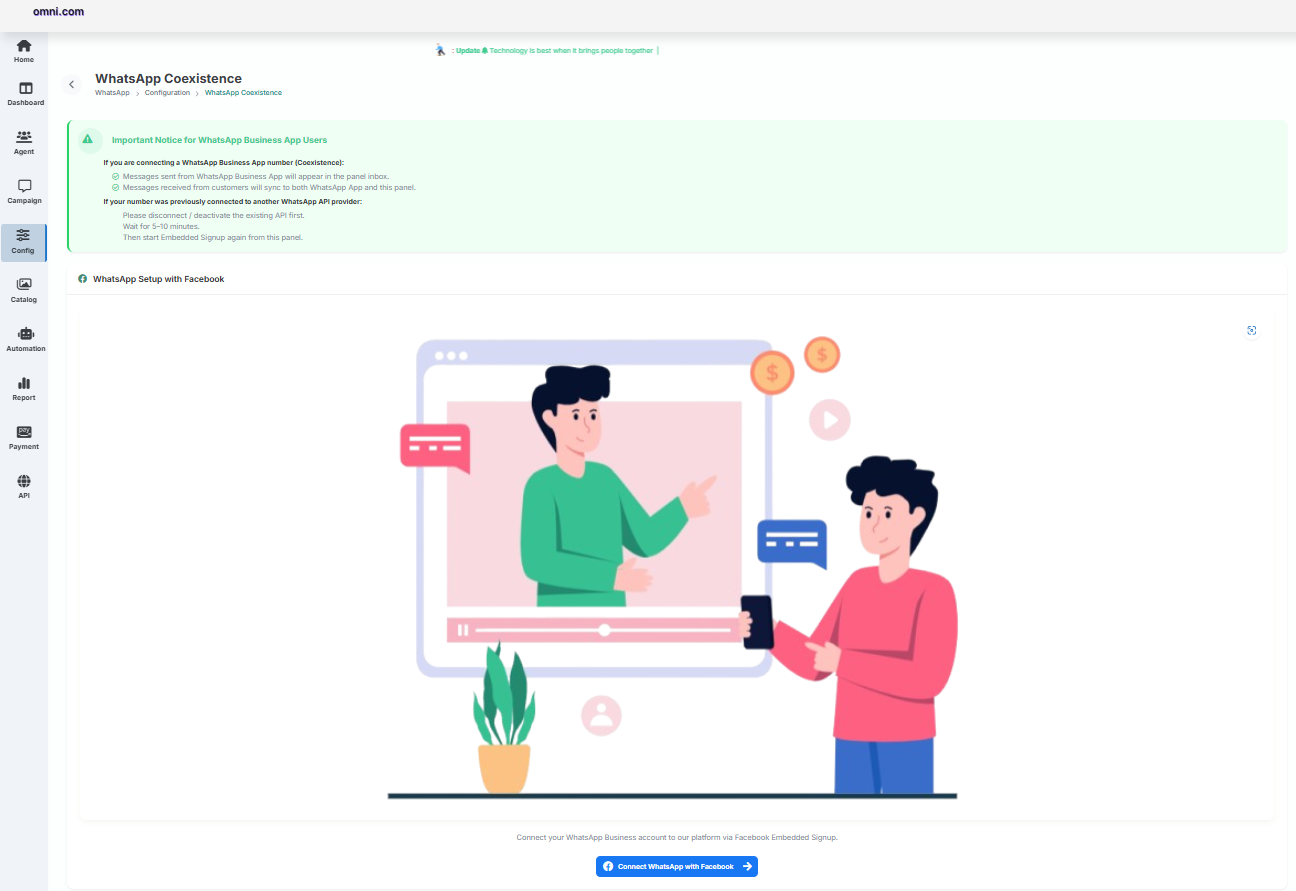
Key Advantages
Requirements
| Requirement | Description |
|---|---|
| WhatsApp Business App | Active account required. |
| Meta Business Manager | Administrator access required. |
| Business Verification | Business should be verified if requested by Meta. |
| Administrator Permission | Required for onboarding. |
Step 1 : Select Business Assets
Navigate to Configuration → Coexistence Onboarding and click Connect with Facebook.
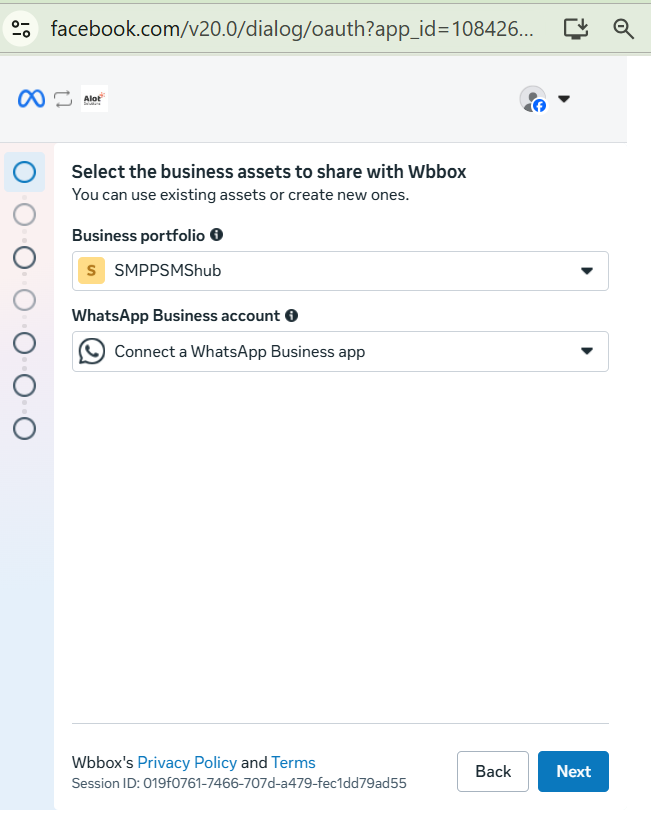
Step 2 : Verify Your Phone Number
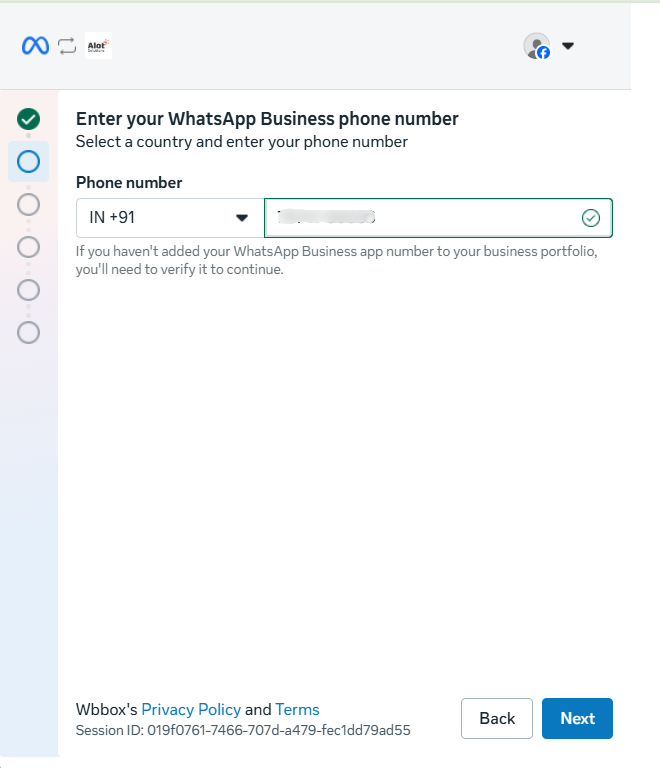
Step 3 : Import Business Data
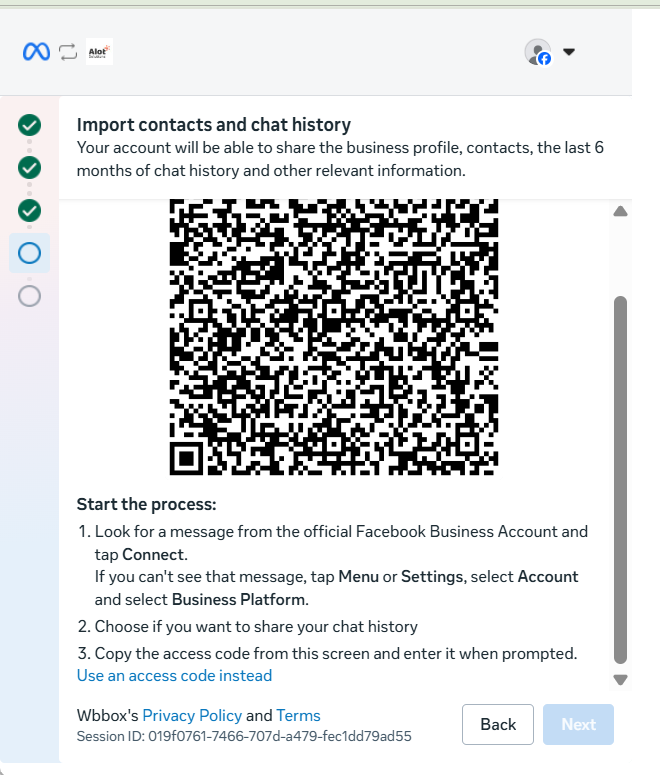
Your WhatsApp Business Account is now connected to Omni Portal. You can continue using the WhatsApp Business App while also accessing WhatsApp Business API features such as:
- Campaign Management
- Template Messaging
- Broadcast Campaigns
- Automation & Chatbots
- Reports & Analytics
- Agent Console
Best Practices
WhatsApp Templates
The WhatsApp Templates module enables businesses to create, manage, and monitor pre-approved message templates for their WhatsApp Business Account (WABA). These templates are mandatory for sending Marketing, Utility, and Authentication messages through the WhatsApp Business API.
Accessing Templates
Navigate to the following menu to access the template management screen:
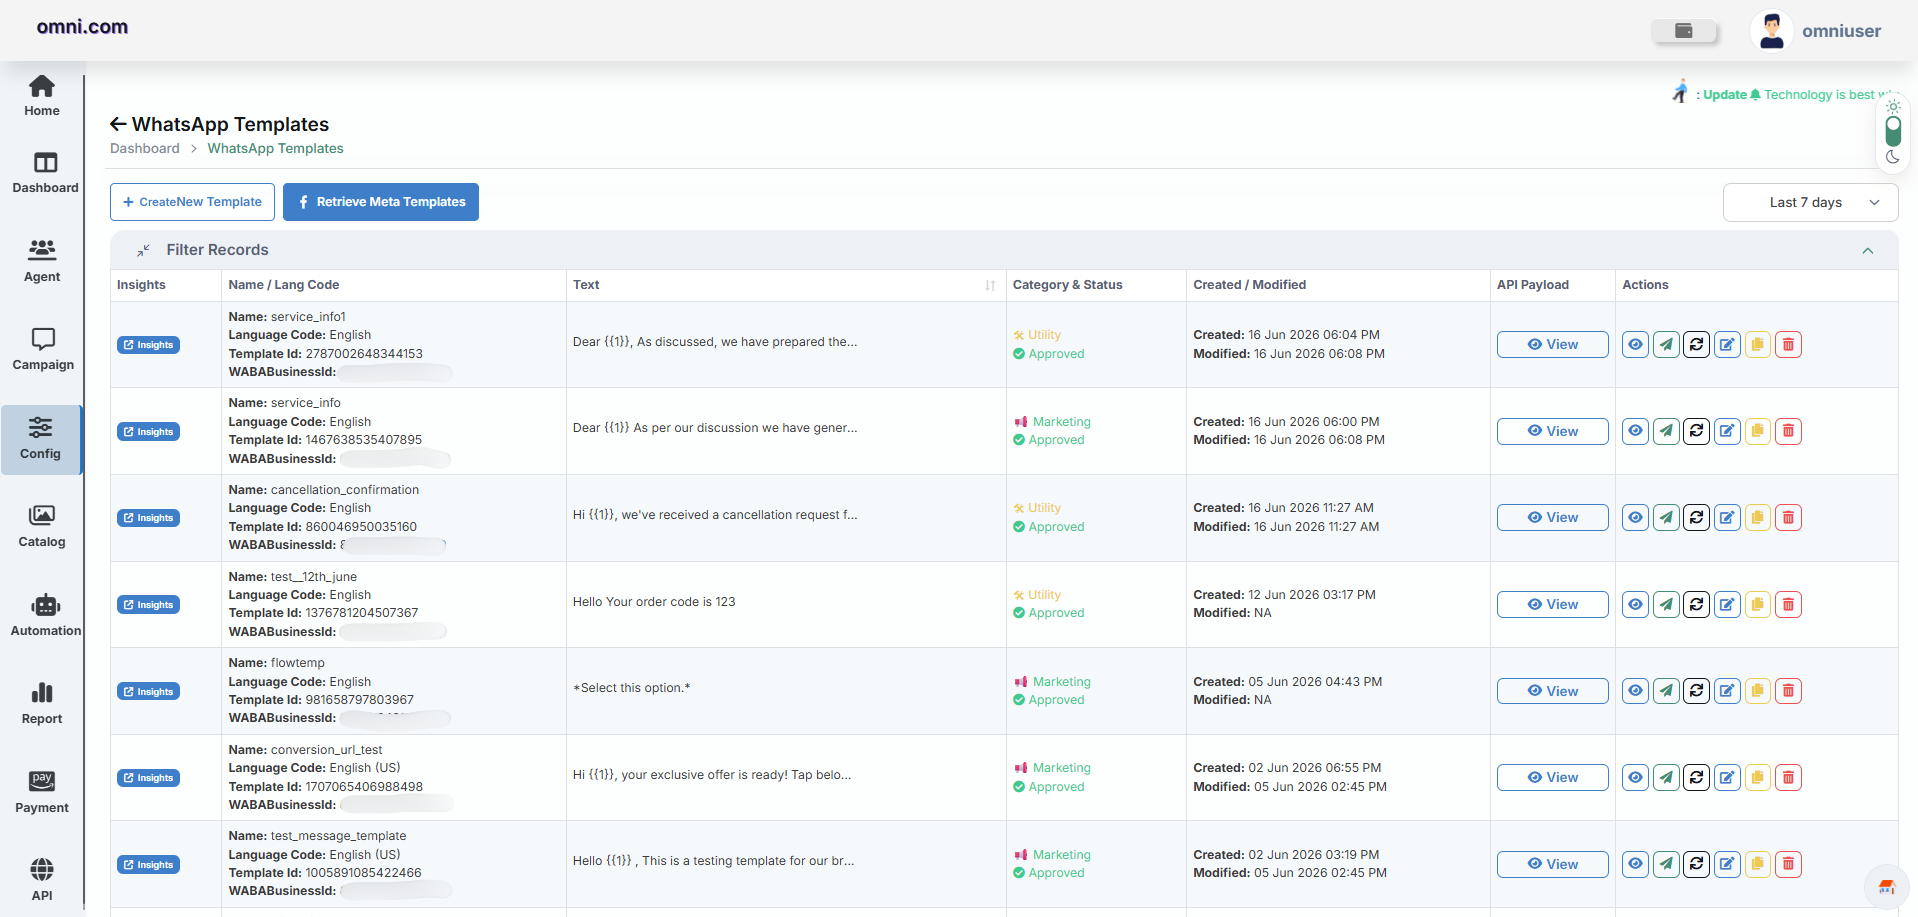
The Manage Templates page displays all templates associated with the selected WhatsApp Business Account (WABA), including their category, language, approval status, creation date, and available actions.
Create a New Template
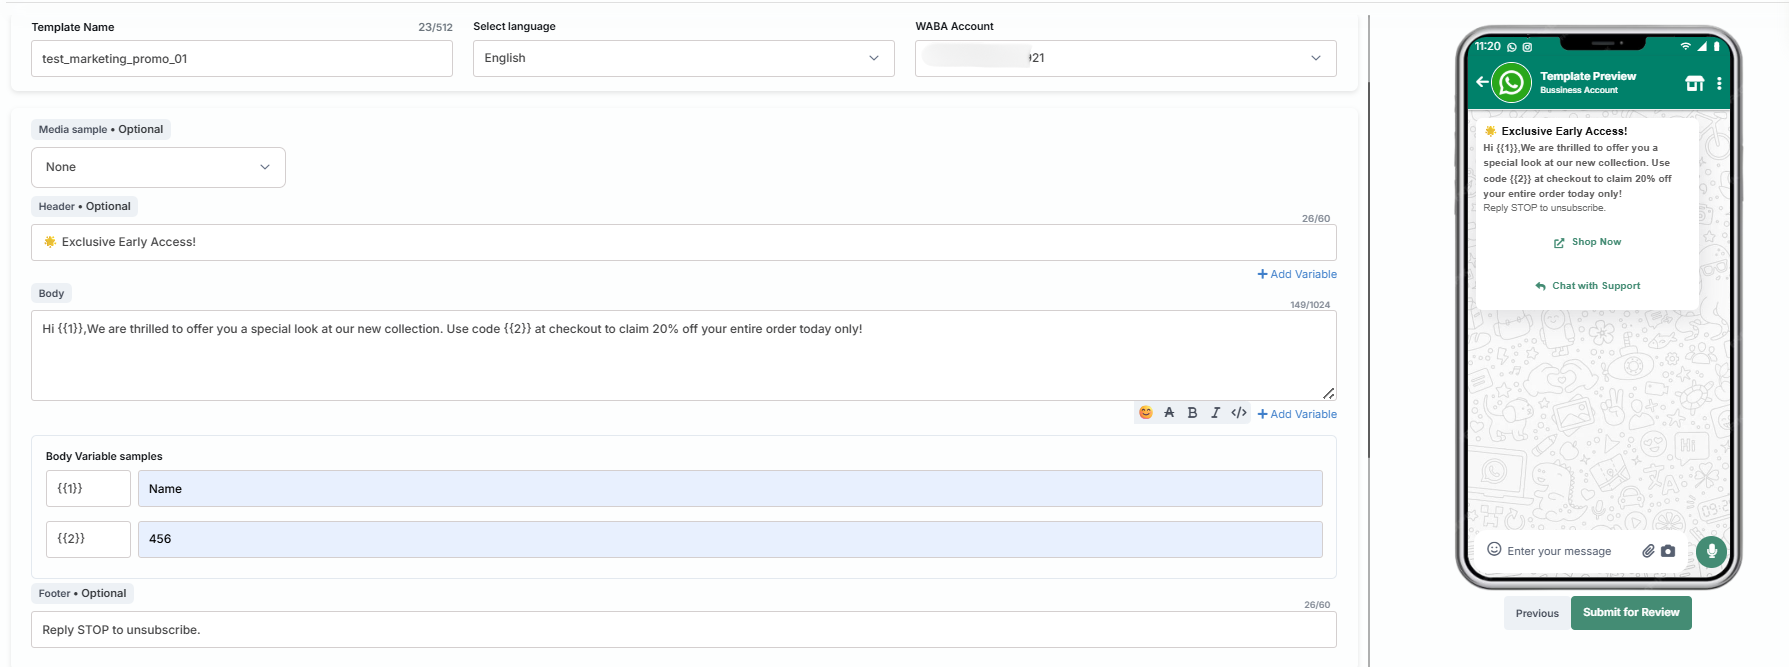
Follow these steps to create a new WhatsApp template.
Step 1 : Select a Template Category
Select the category that best matches the purpose of your message.
| Category | Purpose | Available Types |
|---|---|---|
| Marketing | Promotional offers, customer engagement, product launches and advertising campaigns. |
Default Catalogue Flows Limited Time Offer (LTO) Carousel |
| Utility | Transactional notifications, reminders, invoices and service updates. |
Default Flows |
| Authentication | One-Time Passwords (OTP) and identity verification. | One-Time Passcode (OTP) |
Step 2 : Configure Template Details
After selecting the template category and type, configure all required template information before submitting it for review.
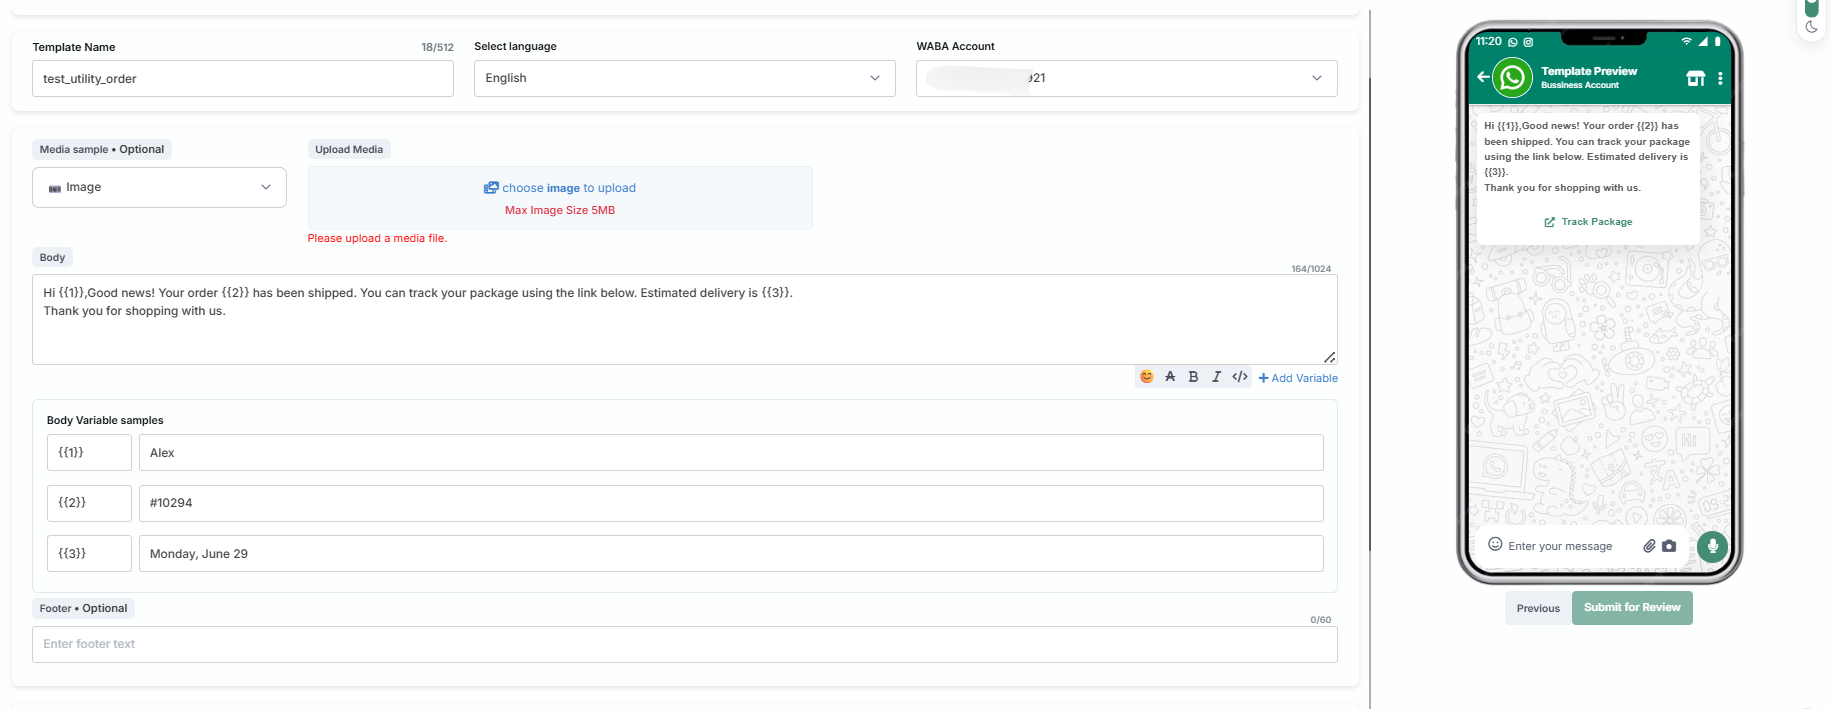
| Field | Description |
|---|---|
| Template Name | Enter a unique template name using lowercase letters and underscores. |
| Language | Select the language in which the template will be sent. |
| WABA Account | Select the WhatsApp Business Account associated with the template. |
| Template Content | Enter the primary message that customers will receive. |
| Header | Supports Text, Image, Video, Document, or Location. |
| Footer | Optional additional information such as company name or disclaimer. |
| Variables | Dynamic placeholders like {{1}}, {{2}}, and {{3}}. |
| Buttons | Add Quick Reply or Call-to-Action buttons. |
| Allow Category Change | Allow Meta to automatically change the template category if required. |
Step 3 : Configure Template Components
Depending on the selected template type, configure the following message components.
Supported Header Types
| Header Type | Description |
|---|---|
| Text | Simple text heading. |
| Image | Display an image banner. |
| Video | Attach a promotional or informational video. |
| Document | Attach PDF or document files. |
| Location | Share a business location directly. |
Supported Button Types
| Button Type | Examples |
|---|---|
| Quick Reply | Yes, No, Contact Support |
| Call To Action (CTA) | Visit Website, Call Phone Number |
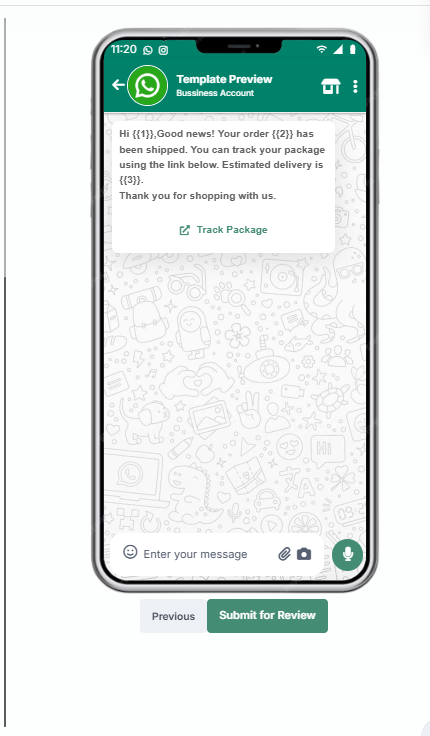
Step 4 : Preview Template
Before submitting the template for approval, use the built-in preview to verify how the message will appear in WhatsApp. Review the content, variables, media, and buttons to ensure everything is displayed correctly.
Step 5 : Submit for Approval
After completing the template configuration, submit it to Meta for review. Only approved templates can be used for campaigns and customer messaging.
Template Features
Manage Templates
The Manage Templates page displays all templates created under the selected WhatsApp Business Account (WABA).
| Information | Description |
|---|---|
| Template Name | Name of the template. |
| Category | Marketing, Utility, or Authentication. |
| Language | Selected template language. |
| Approval Status | Approved, Pending, or Rejected. |
| Created Date | Template creation date. |
| Last Modified | Latest update timestamp. |
Available Actions
| Action | Description |
|---|---|
| View | Review template details. |
| Edit | Modify editable template information. |
| Send Test Message | Send a sample message for verification. |
| Sync | Synchronize the latest template status from Meta. |
| Duplicate | Create a copy of an existing template. |
| Delete | Remove the template from the platform. |
WhatsApp Campaigns
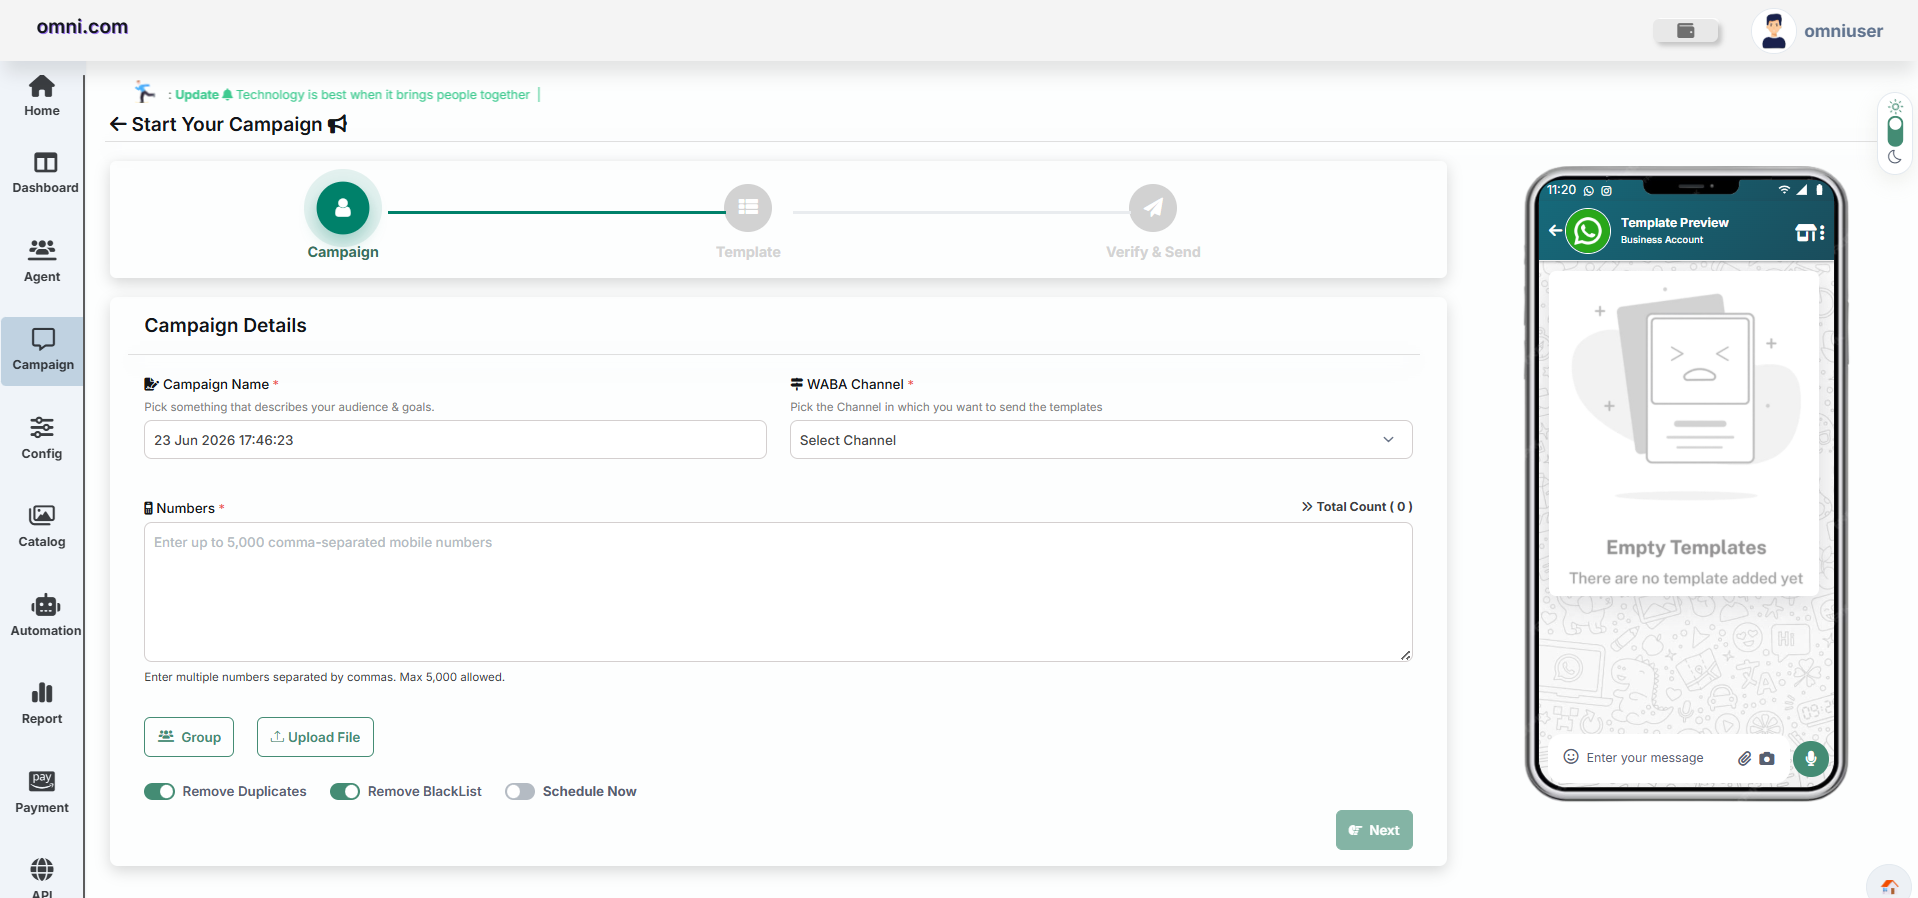
The WhatsApp Campaigns module allows you to send Marketing, Utility, and Authentication messages using Meta-approved WhatsApp templates. Campaigns can be sent immediately or scheduled for a later date and targeted to individual contacts, contact groups, or uploaded recipient lists.
Prerequisites
Before creating a campaign, ensure that:
- An active WhatsApp Business Account (WABA) is configured.
- At least one Meta-approved WhatsApp template is available.
- Recipient mobile numbers are available for messaging.
Accessing Campaigns
Navigate to:
Campaign → Start Your Campaign
The campaign creation process consists of three steps:
Step 1: Configure Campaign Details
Enter the required campaign information:
| Field | Description |
|---|---|
| Campaign Name | Enter a unique name to identify the campaign. |
| WABA Channel | Select the WhatsApp Business Account used to send messages. |
| Recipients | Choose how recipients will be added. |
Recipient Options
You can add recipients using any of the following methods:
Additional Options
The campaign module provides several options to simplify recipient management:
| Option | Description |
|---|---|
| Remove Duplicates | Automatically removes duplicate recipient numbers. |
| Exclude Blacklisted Contacts | Prevents messages from being sent to blacklisted recipients. |
| Schedule Campaign | Send the campaign immediately or schedule it for a future date and time. |
Step 2: Select a Template
Choose an approved WhatsApp template from the available list.
Templates can belong to one of the following categories:
| Template Category | Description |
|---|---|
| Marketing | Promotional campaigns and customer engagement messages. |
| Utility | Transactional and service-related notifications. |
| Authentication | OTP and verification messages. |
Select a Template
Select an approved WhatsApp template from the available template list.
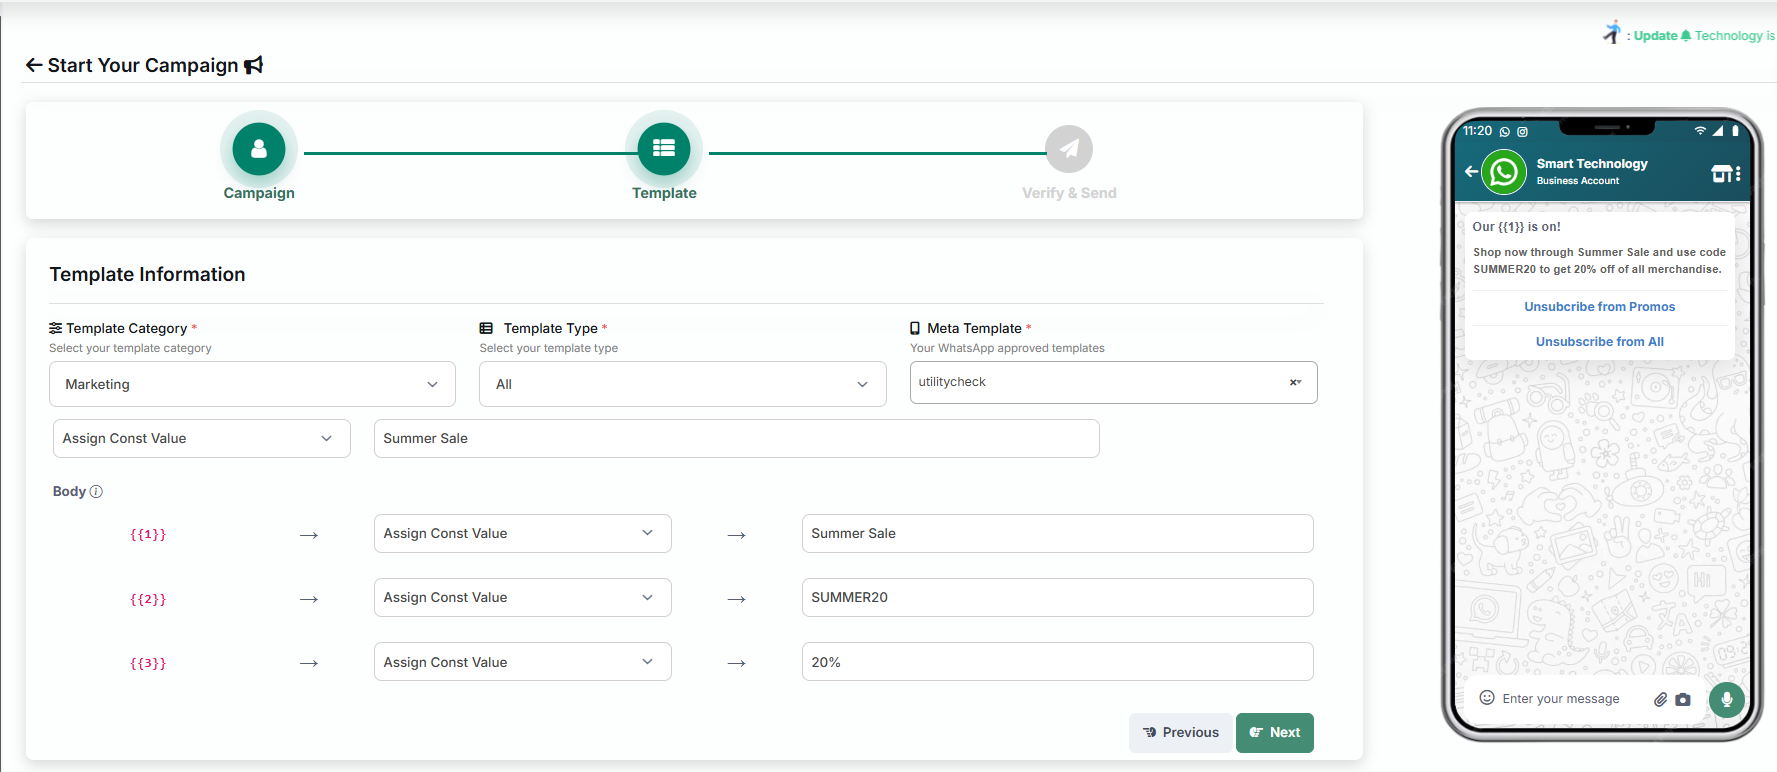
Configure Template Variables
After selecting the template:
- Configure all required template variables (for example, {{1}}, {{2}}).
- Enter the appropriate values for each variable.
- Ensure all mandatory variables are completed before proceeding.
Upload Media
If the selected template contains an Image, Video, or Document Header, upload the required media before continuing.
| Media Type | Description |
|---|---|
| Image | Upload an image supported by WhatsApp. |
| Video | Upload a supported video file. |
| Document | Upload the required document. |
Preview Message
Preview the complete WhatsApp message before proceeding. Verify:
- Template content
- Variable values
- Media attachments
- Overall message appearance
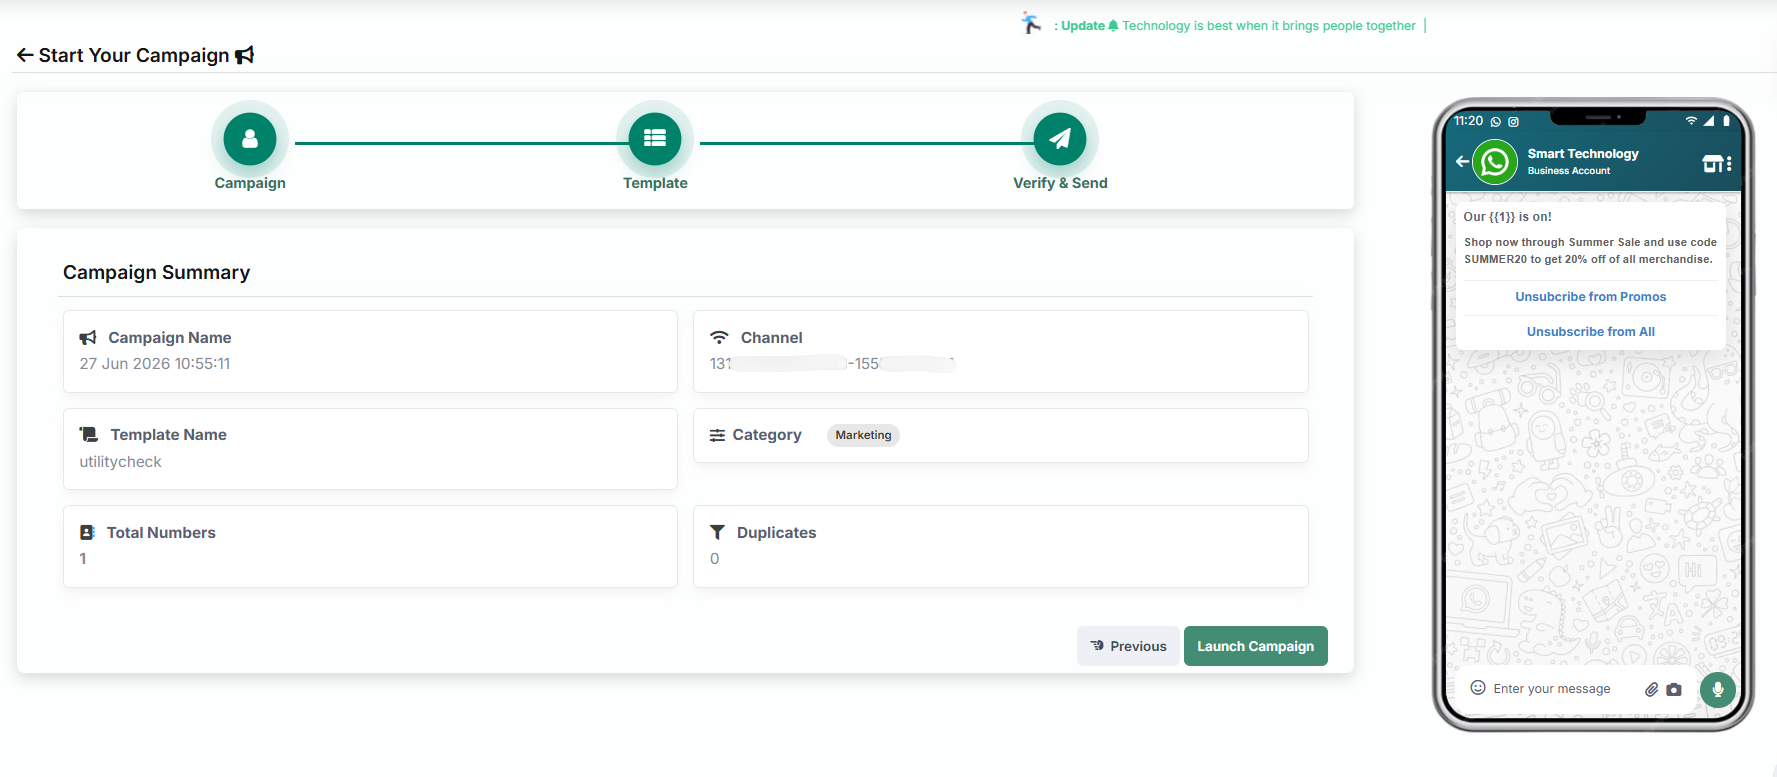
Step 3: Verify & Send
Review the campaign configuration before sending the campaign. Verify the following details carefully:
| Field | Description |
|---|---|
| Campaign Name | Verify the campaign name entered during Step 1. |
| Selected WABA Channel | Confirm the selected WhatsApp Business Account (WABA). |
| Recipient Count | Verify the total number of recipients included in the campaign. |
| Selected Template | Review the selected Meta-approved WhatsApp template. |
| Template Variables | Verify that all template variables contain the correct values. |
| Scheduled Date & Time | Review the scheduled delivery date and time (if scheduling is enabled). |
Campaign Actions
After verifying all campaign information, choose one of the following options:
| Action | Description |
|---|---|
| Launch Campaign | Immediately starts the campaign. |
| Schedule Campaign | Saves the campaign and automatically sends it on the scheduled date and time. |
WhatsApp Campaign Dashboard
The WhatsApp Campaign Dashboard provides a centralized view of campaign performance and message delivery metrics, enabling users to monitor campaign effectiveness and track message status in real time.
Accessing the Dashboard
Navigate to:
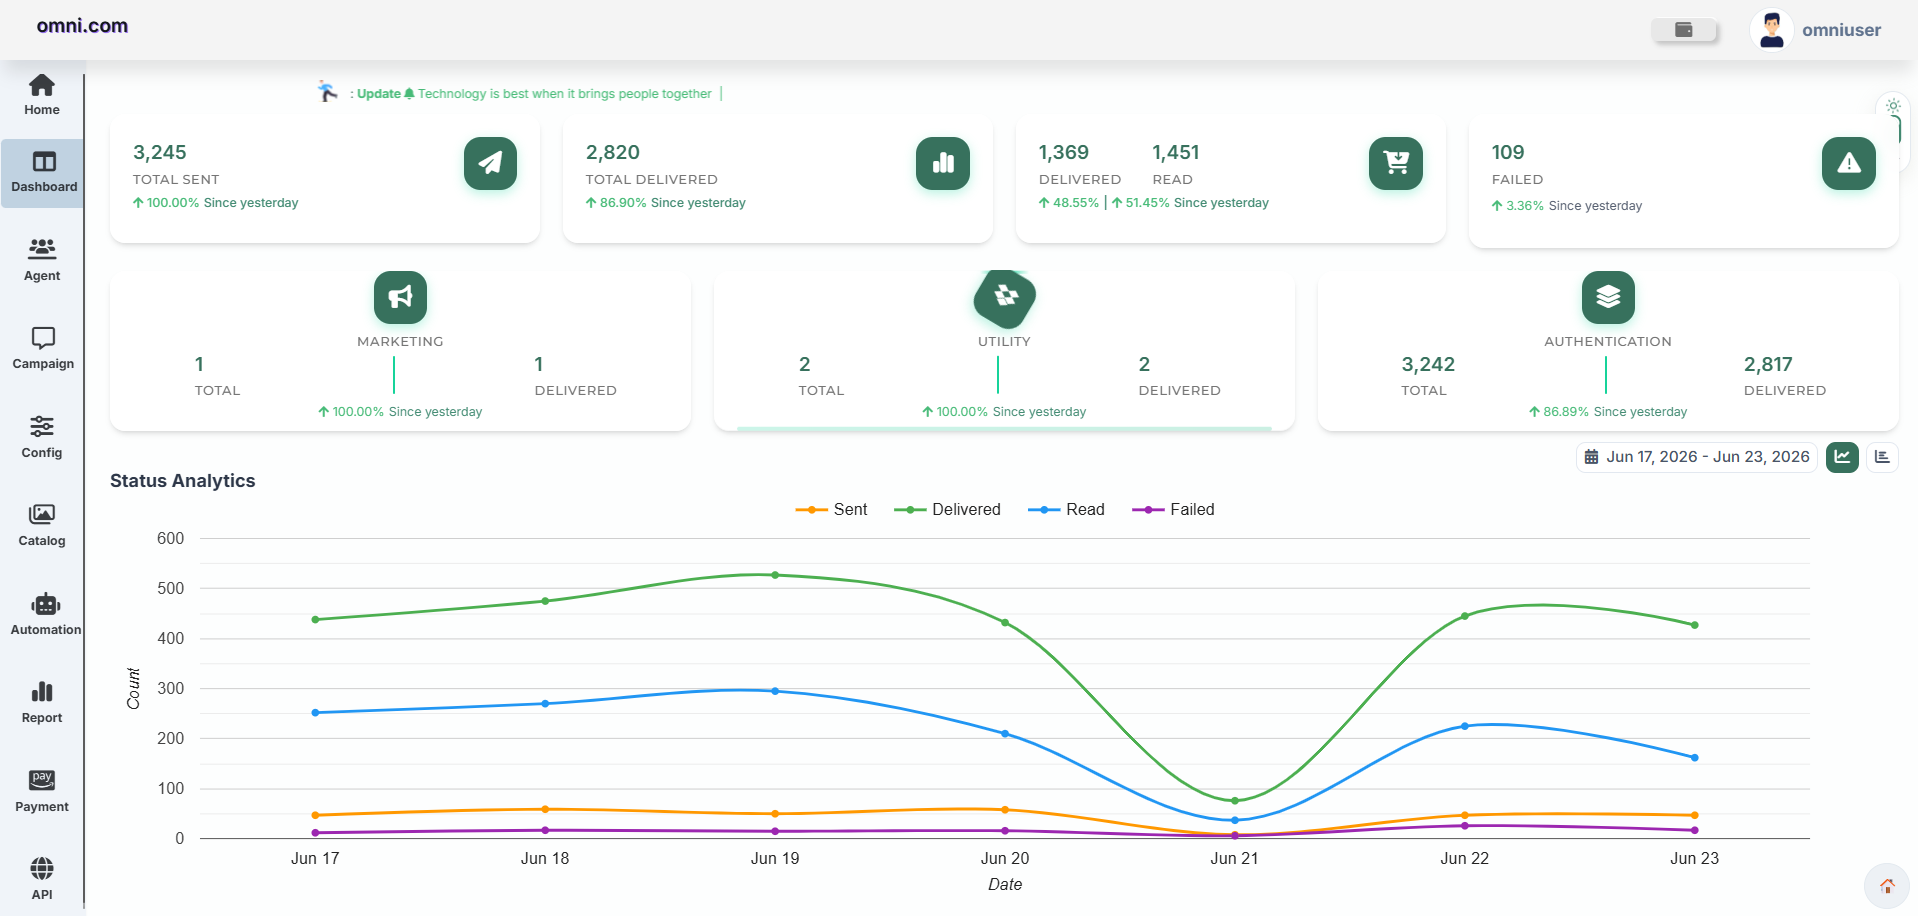
The dashboard displays key performance metrics, message analytics, and template category insights for all campaigns sent through the configured WhatsApp Business Accounts (WABA).
Key Metrics
The dashboard provides an overview of the following metrics:
| Metric | Description |
|---|---|
| Total Sent | Total number of WhatsApp messages sent. |
| Total Delivered | Messages successfully delivered to recipients. |
| Read | Messages opened and read by recipients. |
| Failed | Messages that could not be delivered. |
These metrics help you quickly evaluate campaign performance and delivery success.
Template Category Insights
Campaign statistics are grouped by template category, allowing you to compare messaging activity across different communication types.
| Category | Description |
|---|---|
| Marketing | Promotional campaigns and customer engagement messages. |
| Utility | Transactional and service-related notifications. |
| Authentication | OTP and verification messages. |
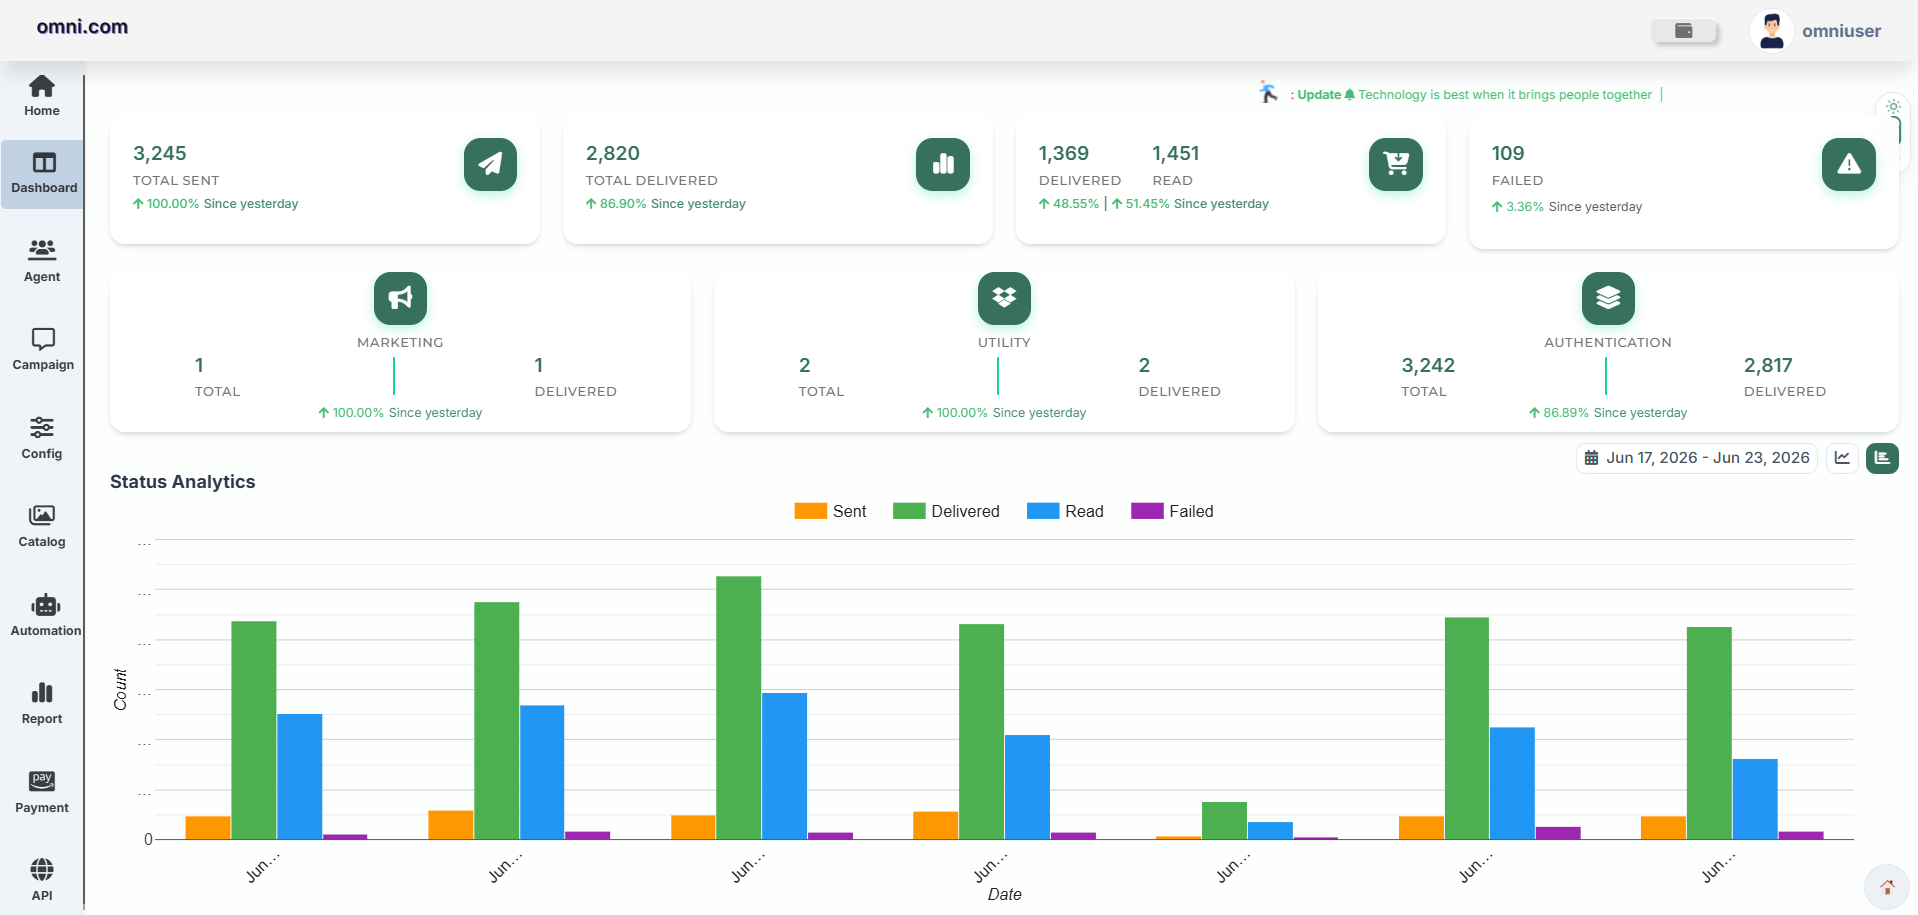
Campaign Analytics
The dashboard includes interactive charts to visualize message performance over time.
- Sent Messages
- Delivered Messages
- Read Messages
- Failed Messages
Switch between the available chart views to analyze campaign trends and compare message performance over different periods.
Filter Dashboard Data
Use the Date Range filter to view campaign statistics for a specific period.
WhatsApp Reports
The WhatsApp Reports module provides detailed insights into WhatsApp campaign performance, message delivery, customer engagement, Flow execution, Template usage, and overall messaging statistics. It enables organizations to monitor communication performance, analyze campaign success, and optimize customer interactions using Meta WhatsApp Business Platform.
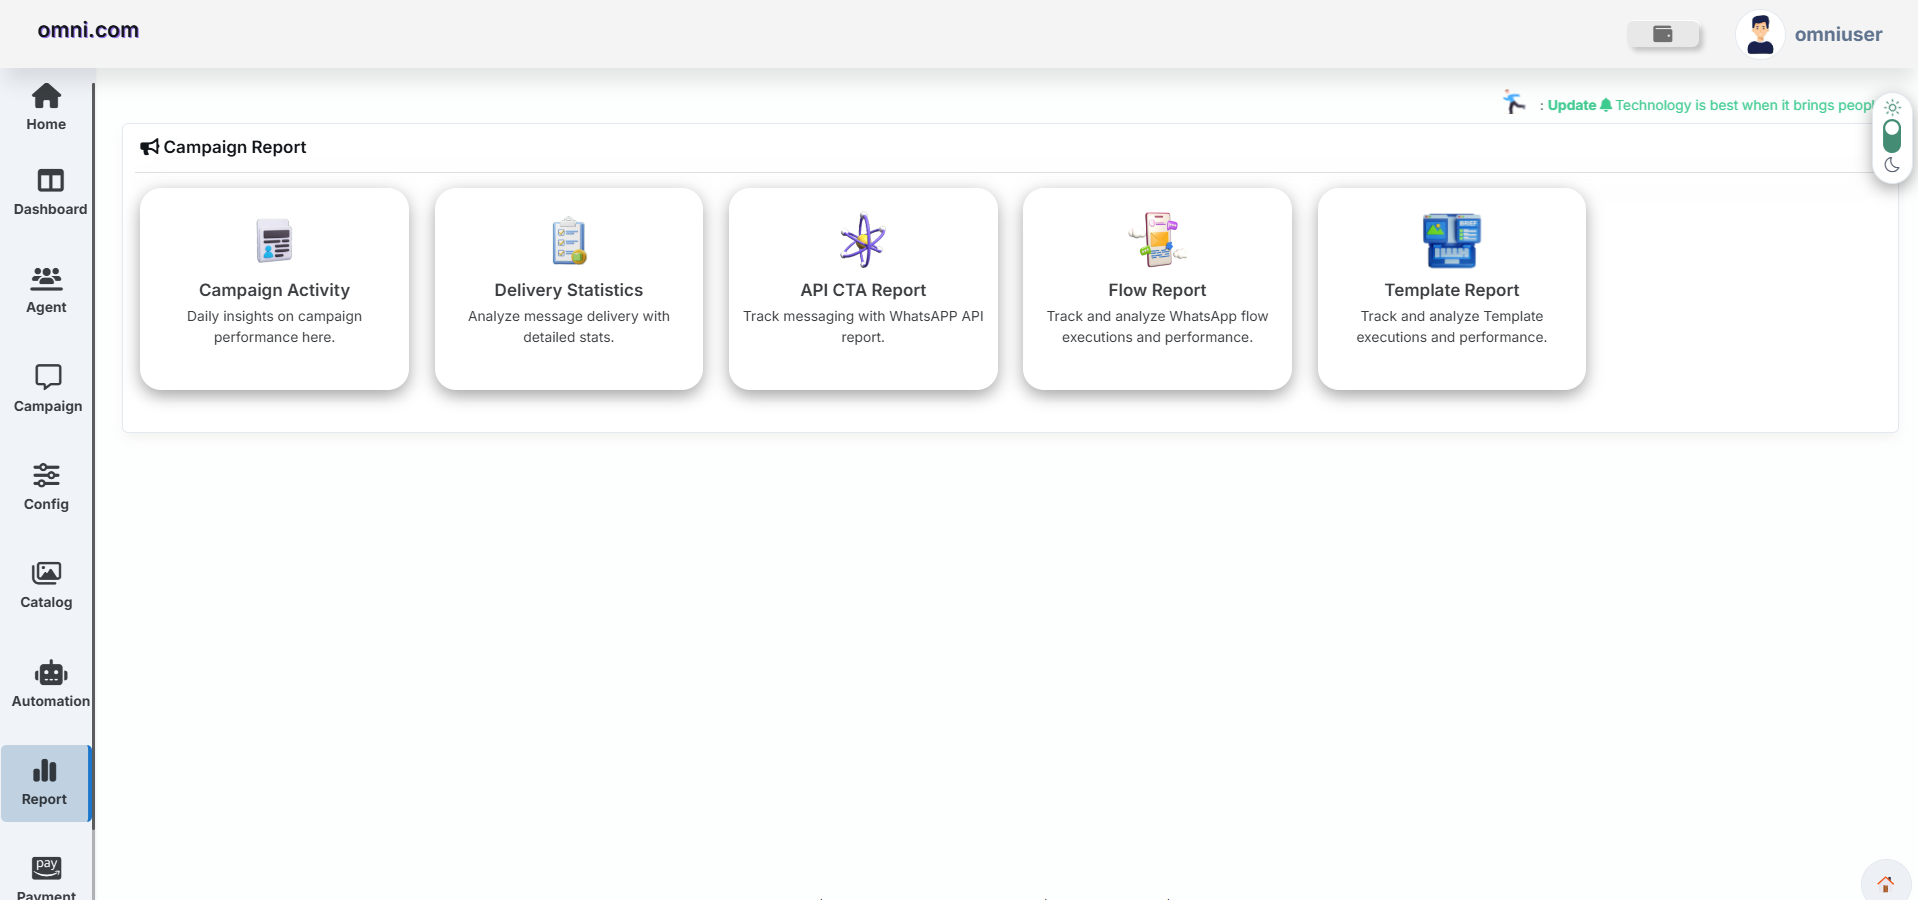
Report Dashboard
Purpose
The Reports module provides centralized reporting tools for all WhatsApp communication activities. Users can monitor campaign performance, review delivery status, analyze Flow submissions, monitor Template usage, and generate reports for business analysis.
Available Report Sections
| Section | Description |
|---|---|
| Campaign Activity | Displays campaign-wise activity, execution status, and overall performance metrics for WhatsApp campaigns. |
| Delivery Statistics | Provides detailed delivery statistics, including message delivery status and campaign performance analytics. |
| API CTA Report | Displays reports for WhatsApp API Call-to-Action (CTA) messages, allowing users to track API-triggered messaging activities. |
| Flow Report | Tracks WhatsApp Flow executions, user interactions, and flow performance statistics. |
| Template Report | Displays template usage statistics, execution details, and performance insights for WhatsApp message templates. |
Benefits
- Monitor WhatsApp campaign performance.
- Track message delivery and read status.
- Analyze customer engagement.
- Review Flow submissions.
- Monitor Template performance.
- Export reports for business analysis.
Users can access all WhatsApp reporting tools from a centralized location to monitor messaging performance and customer engagement.
Campaign Activity
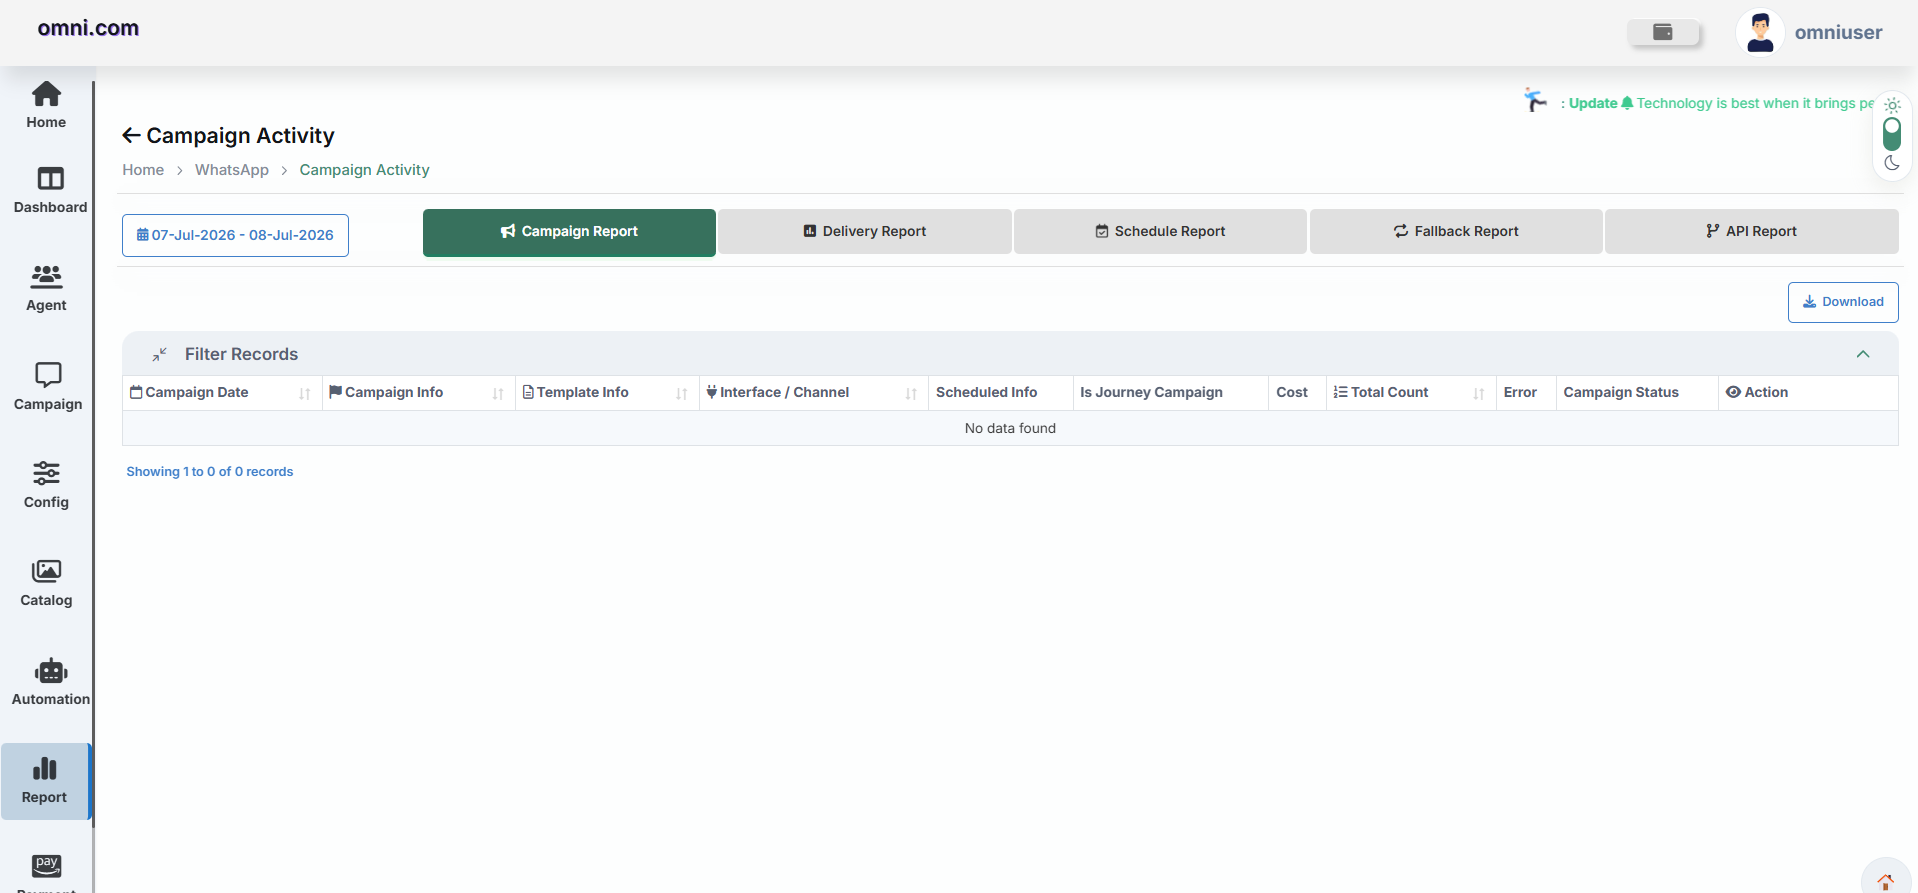
Purpose
Campaign Activity displays every WhatsApp campaign created during a selected period. It helps users review campaign performance, delivery progress, scheduled campaigns and message statistics.
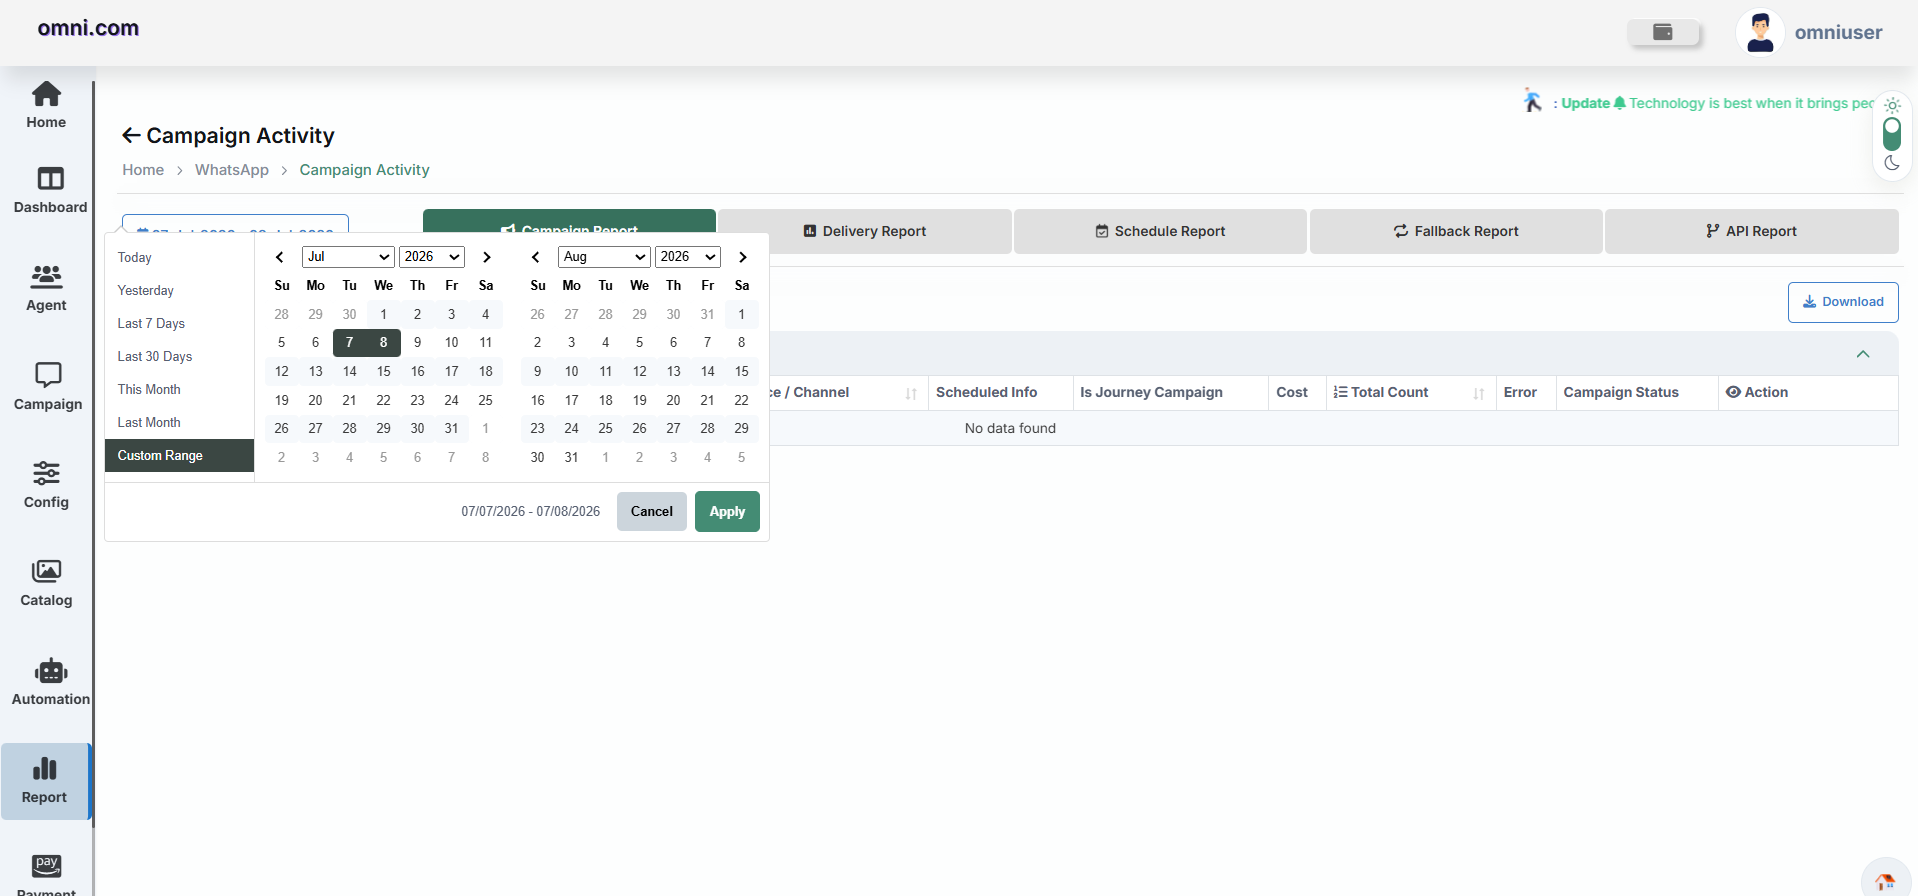
Date Range Filter
Users can filter campaign records using a custom date range.
Available Options
- Today
- Yesterday
- Last 7 Days
- Last 30 Days
- This Month
- Last Month
- Custom Range
Click Apply to load reports for the selected period.
Campaign Report Information
| Field | Description |
|---|---|
| Campaign Date | Date and time when the campaign was created. |
| Campaign Name | Name of the WhatsApp campaign. |
| Template Name | Template used for sending messages. |
| WABA Number | WhatsApp Business Account associated with the campaign. |
| Interface | Source used to create the campaign (Web/API). |
| Campaign Type | Marketing, Utility or Authentication. |
| Scheduled Info | Scheduled date and execution time. |
| Total Messages | Total recipients in the campaign. |
| Delivered | Total delivered messages. |
| Read | Total messages opened by customers. |
| Campaign Status | Running, Scheduled, Completed or Failed. |
| Action | View campaign details or download reports. |
Available Actions
- View Campaign Details
- View Delivery Report
- Export Campaign Report
Delivery Report
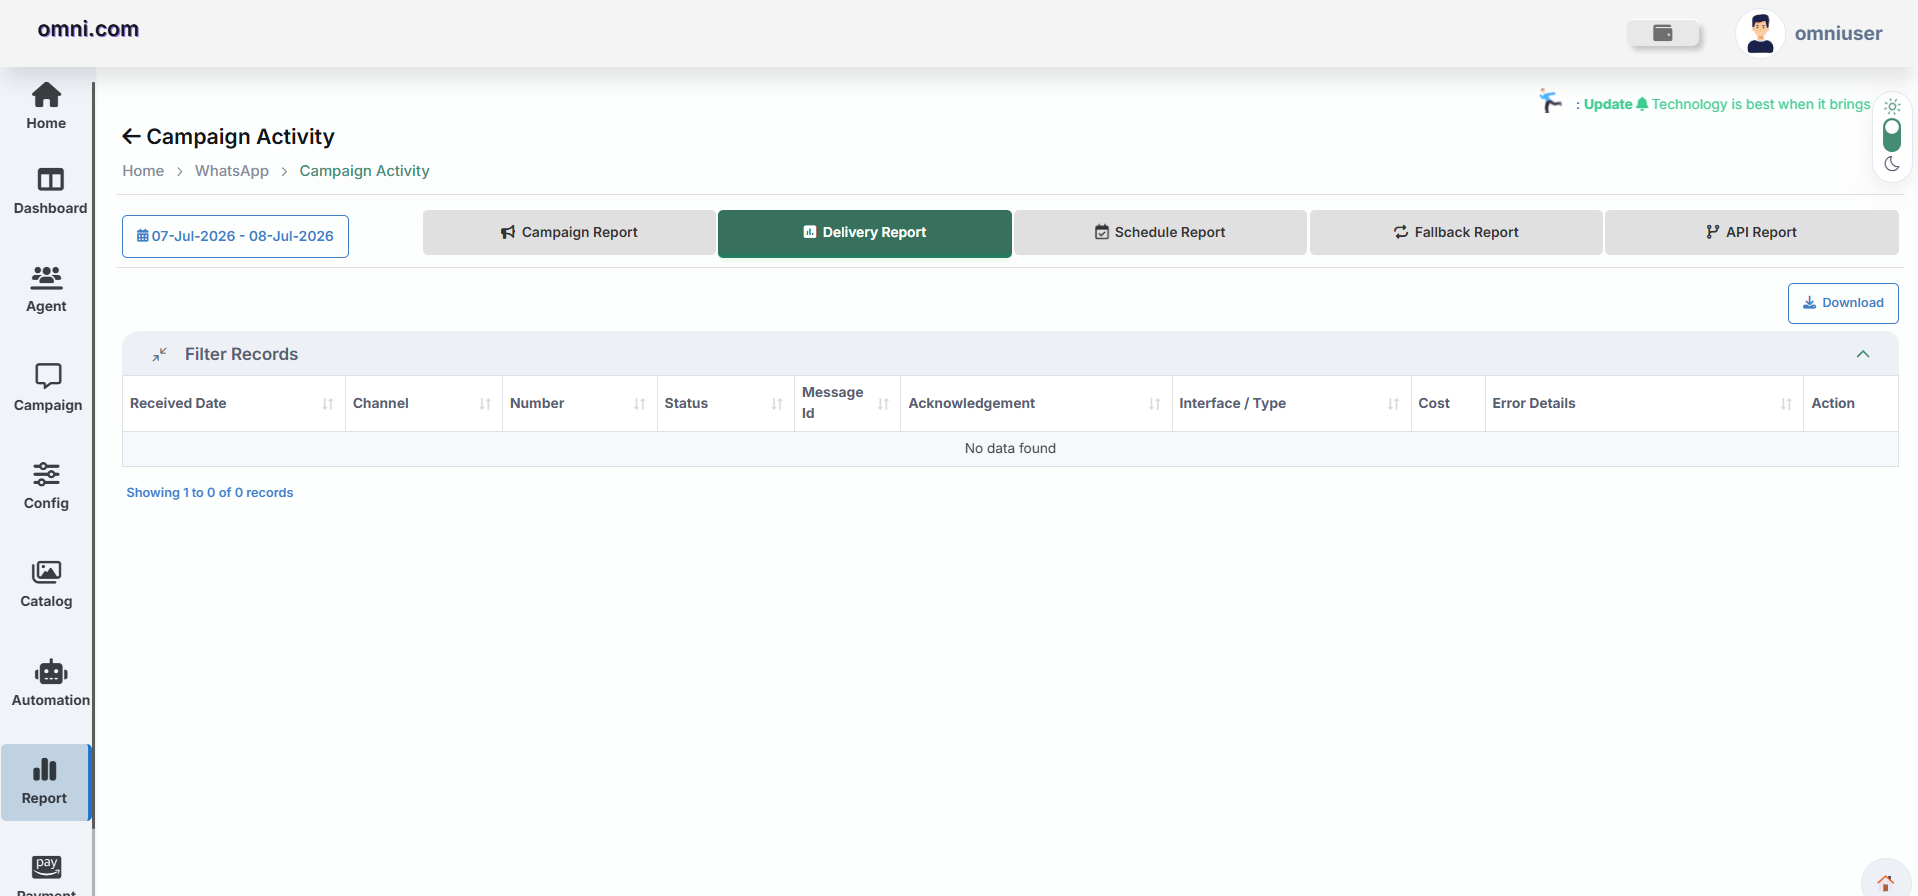
The Delivery Report provides recipient-level delivery information for every WhatsApp message sent. It helps administrators verify whether messages were delivered, read, failed, or pending.
| Field | Description |
|---|---|
| Message Date | Date and time when the message was processed. |
| Recipient Number | Customer mobile number. |
| Reference ID | Unique WhatsApp message identifier. |
| Template | Template used for the message. |
| Delivery Status | Delivered, Read, Failed or Pending. |
| Read Time | Time when the customer opened the message. |
| Interface | Web Portal or API. |
| View | Open detailed delivery information. |
Features
- View delivery status.
- Track read receipts.
- Monitor failed messages.
- Export delivery report.
Schedule Report
The Schedule Report displays all WhatsApp campaigns that are scheduled for future delivery. It enables administrators to review, monitor and manage pending campaigns before execution.
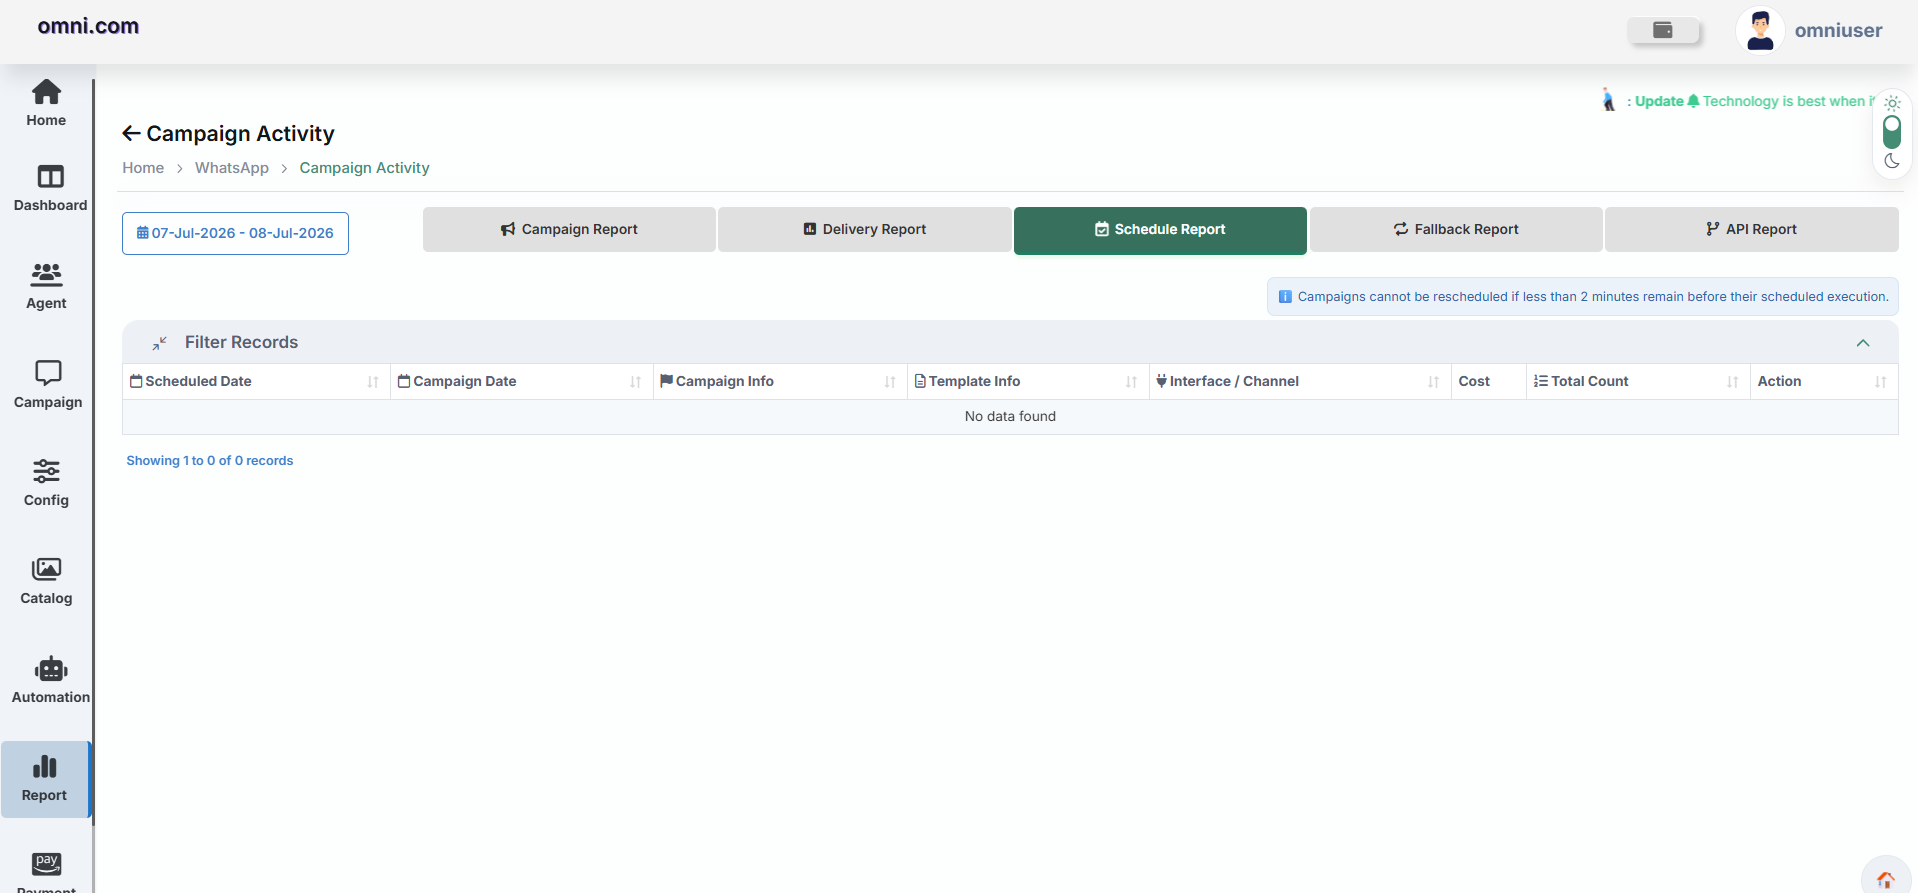
Purpose
The Schedule Report helps users verify campaign schedules, review execution time, and monitor pending campaigns before they are processed.
Report Details
| Field | Description |
|---|---|
| Schedule Date | Scheduled date and time of campaign execution. |
| Campaign Name | Name of the scheduled campaign. |
| Template Name | Template selected for the campaign. |
| Campaign Type | Marketing, Utility or Authentication. |
| WABA Number | WhatsApp Business Account used. |
| Total Recipients | Total customers who will receive the message. |
| Status | Scheduled, Running or Completed. |
| Action | View or manage campaign. |
Fallback Report
The Fallback Report displays WhatsApp campaign activity that has been redirected to alternate messaging channels when WhatsApp message delivery is unsuccessful or when fallback routing has been configured.
- WhatsApp to SMS Fallback – Messages that could not be delivered through WhatsApp are automatically redirected to SMS.
- WhatsApp Retry – Displays messages that were retried after temporary delivery failures.
- Fallback Delivery Report – Displays the final delivery status after fallback routing has been completed.
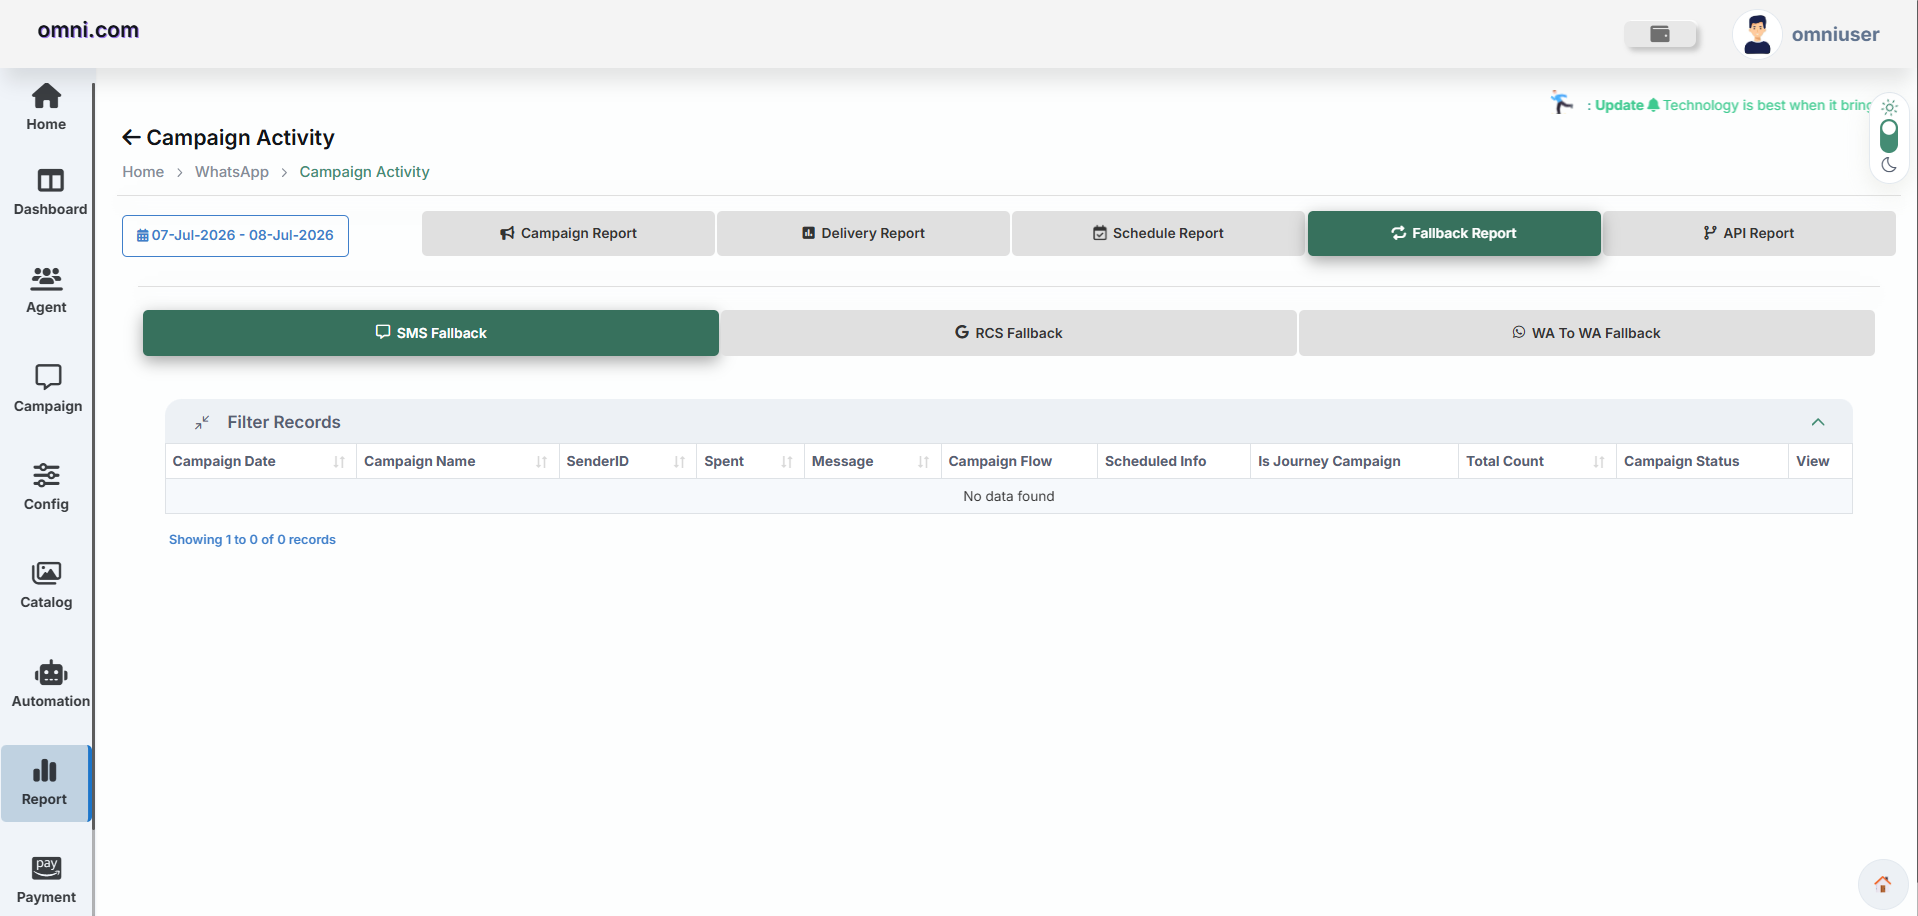
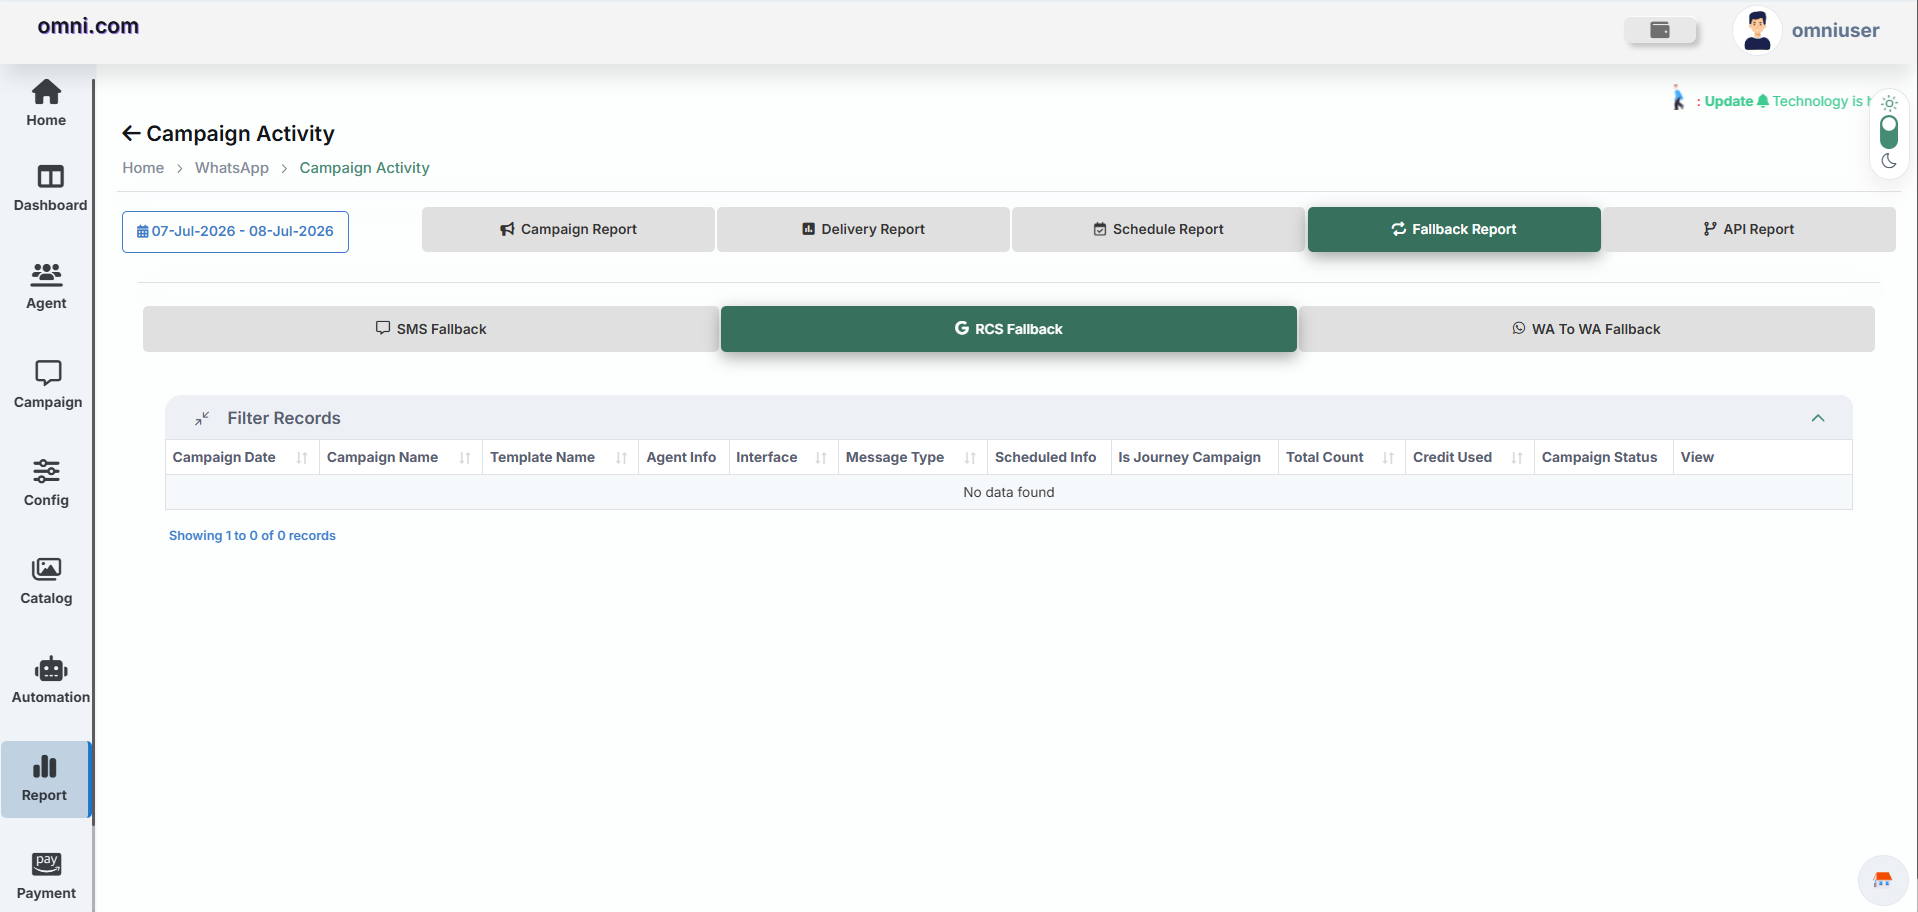
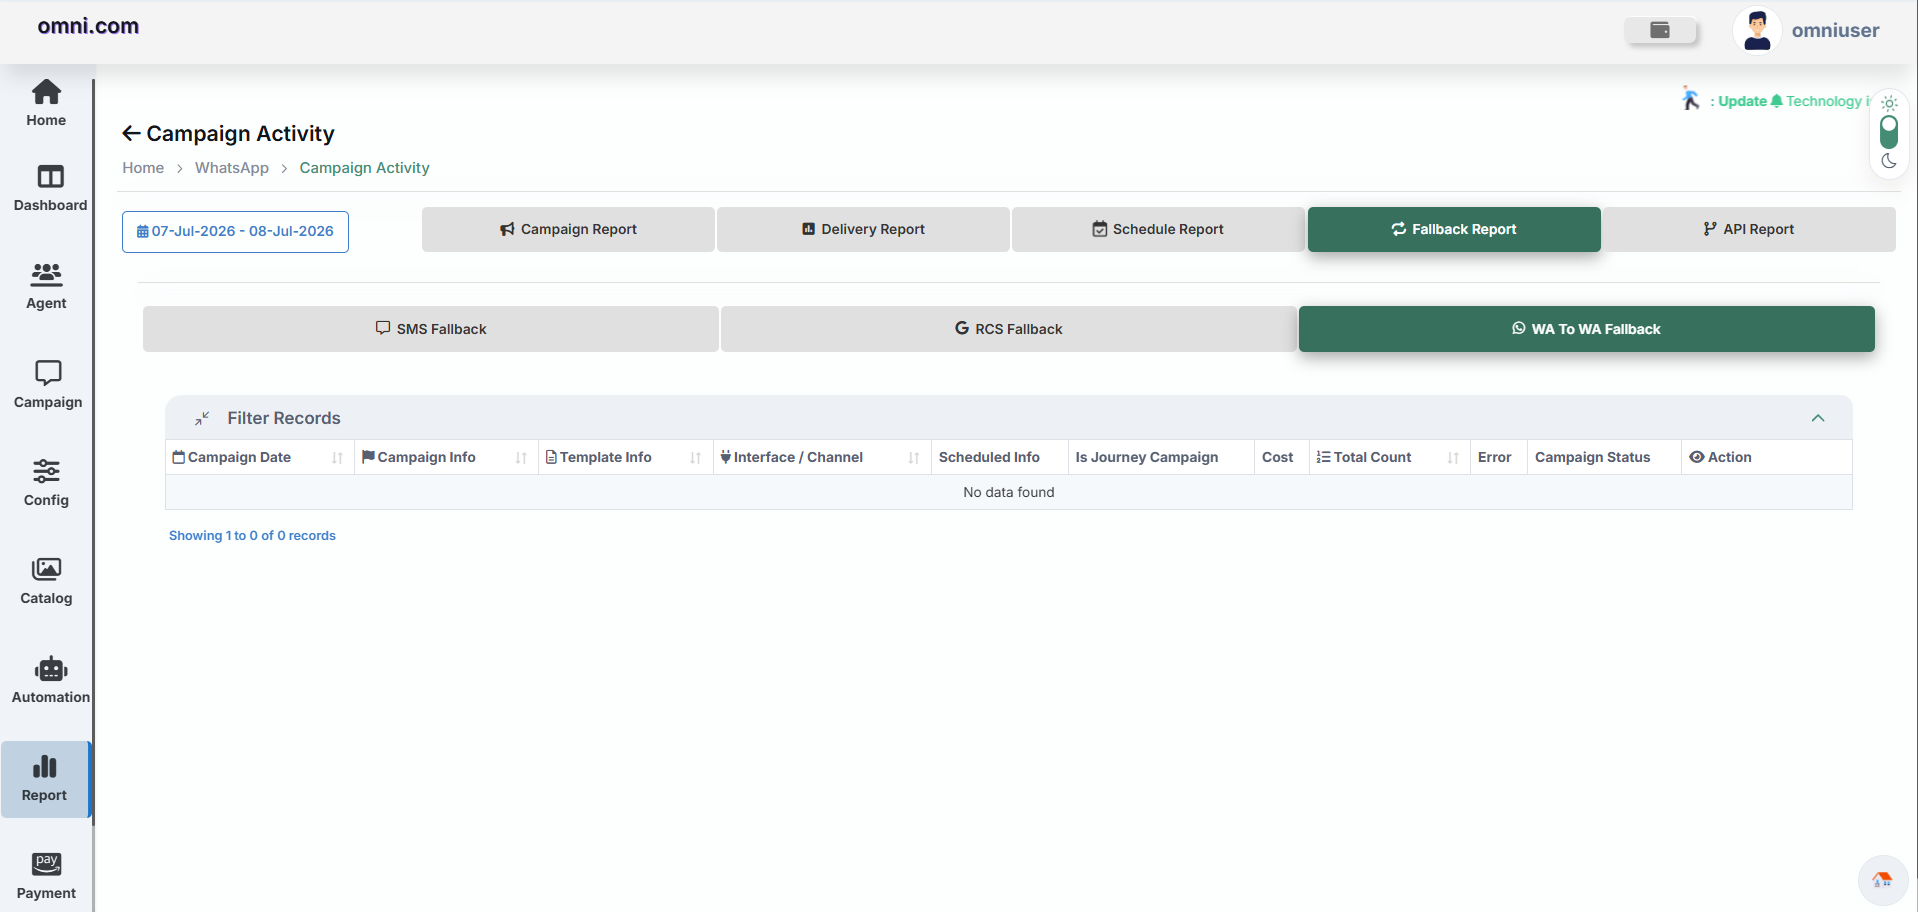
Available Information
- Campaign Date
- Campaign Name
- Template Name
- WABA Number
- Recipient Number
- Fallback Channel
- Delivery Status
- Failure Reason
- Scheduled Information
- Campaign Status
- Total Messages
- Successful Fallback Count
- Failed Fallback Count
- Error Details
The Fallback Report helps administrators identify WhatsApp messages that were not delivered successfully and verify whether they were delivered through the configured fallback channel.
API Report
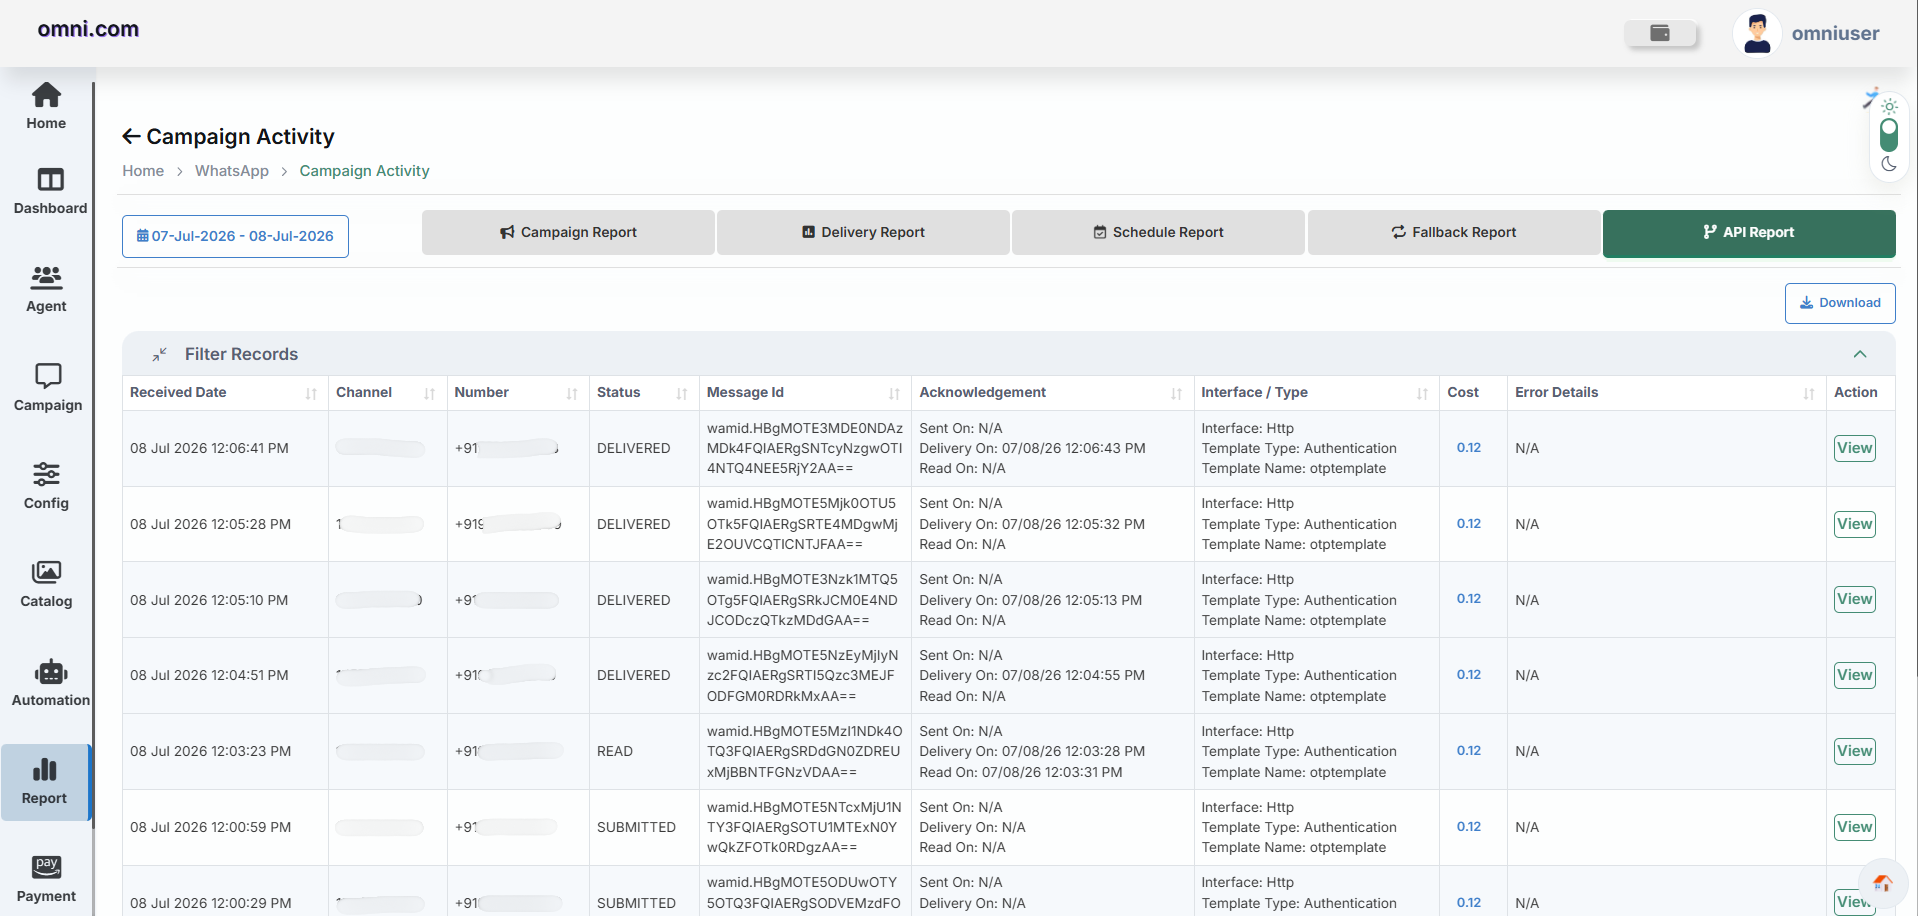
The API Report provides recipient-level information for WhatsApp messages sent through HTTP/API integration. It allows users to monitor delivery status, acknowledgements, interface details, message cost, and any delivery errors generated during API-based communication.
Purpose
The API Report helps administrators verify message delivery, monitor API transactions, review acknowledgement information, and troubleshoot delivery failures from WhatsApp API campaigns.
How to Access
Report Information
| Field | Description |
|---|---|
| Received Date | Date and time when the API request was processed. |
| Channel | WhatsApp Business Account (WABA) number. |
| Number | Recipient mobile number. |
| Status | Submitted, Delivered, Read or Failed. |
| Message ID | Unique WhatsApp message identifier. |
| Acknowledgement | Displays Sent, Delivered and Read timestamps. |
| Interface / Type | API Interface, Template Type and Template Name. |
| Cost | Cost charged for the WhatsApp message. |
| Error Details | Displays delivery failure information if available. |
| Action | View complete API transaction details. |
Available Actions
- Search Records
- Filter by Date
- View Details
- Download Report
- Export Report
The API Report provides complete visibility into WhatsApp API transactions, allowing administrators to monitor delivery, acknowledgements, message costs and delivery failures from a single dashboard.
Delivery Statistics
Day Wise Statistics provides a summarized view of WhatsApp message delivery performance over a selected date range.
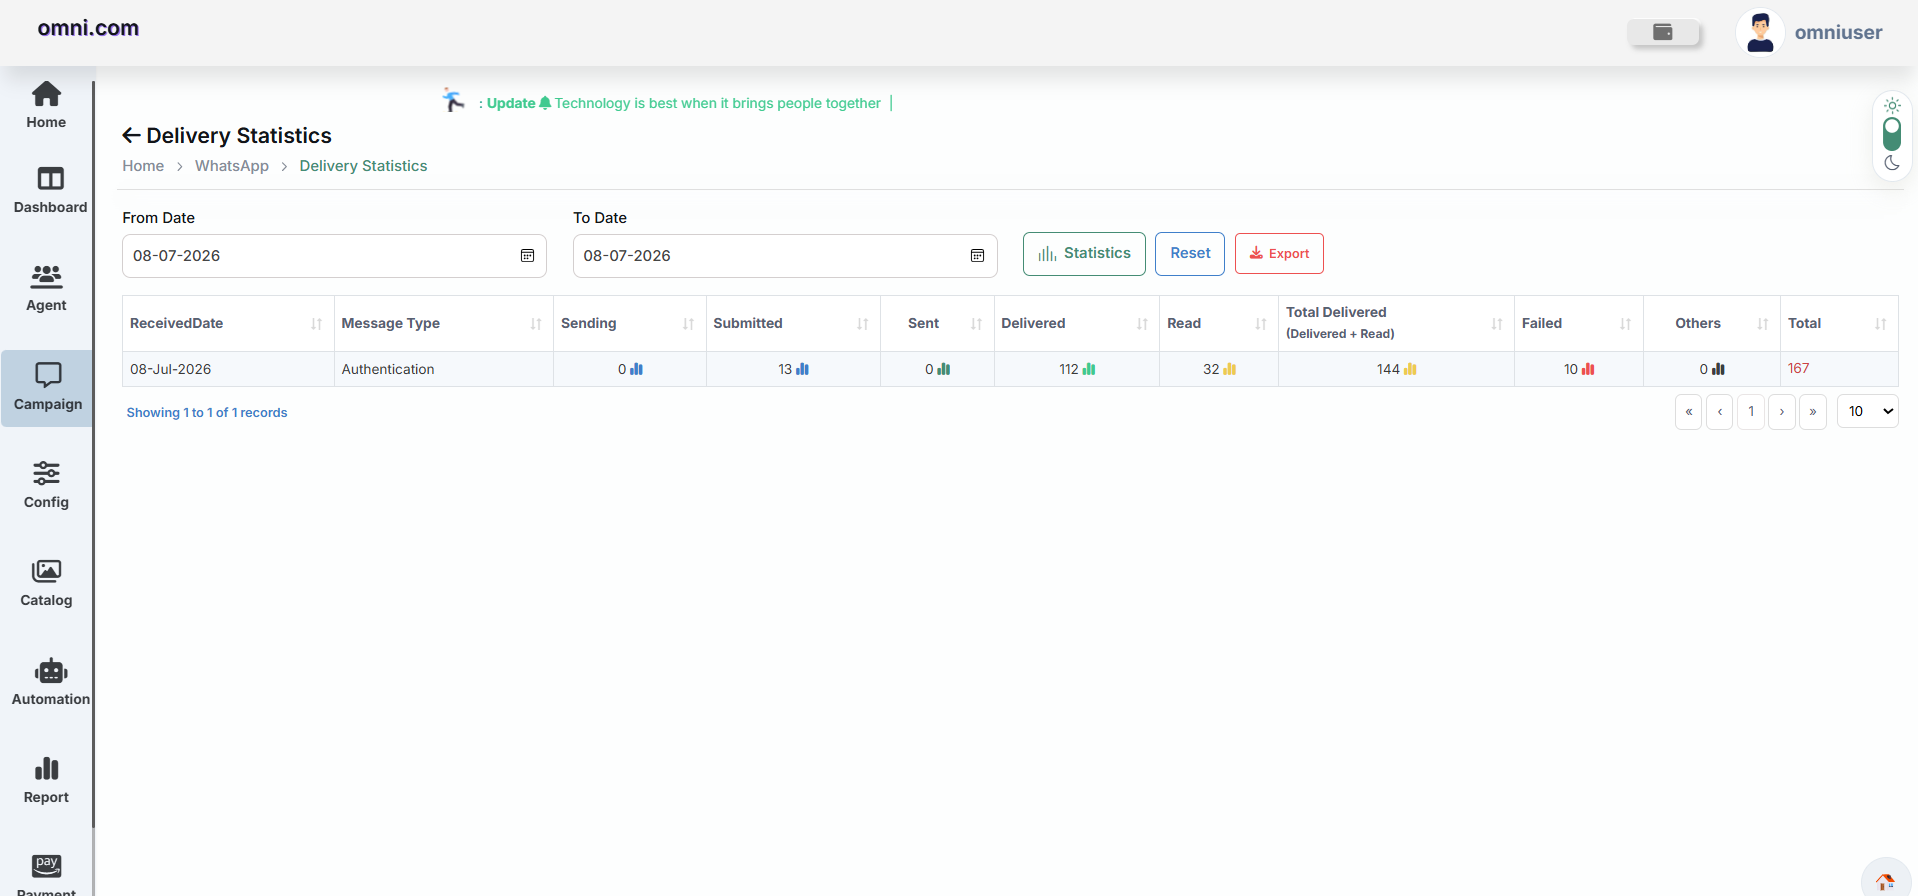
Purpose
This report helps administrators analyze daily messaging activity and identify delivery trends.
Generate Statistics
Statistics Fields
| Field | Description |
|---|---|
| Date | Report date. |
| Submitted | Total submitted messages. |
| Sent | Total sent messages. |
| Delivered | Total delivered messages. |
| Read | Total read messages. |
| Failed | Total failed messages. |
| Pending | Messages waiting for delivery. |
| Total | Total processed messages. |
Export Reports
All WhatsApp reports can be exported for offline analysis.
Key Benefits
- Monitor WhatsApp campaign performance.
- Track message delivery and read receipts.
- Analyze customer engagement.
- Review Flow and Template performance.
- Monitor scheduled campaigns.
- Generate daily statistics.
- Export reports in multiple formats.
- Improve campaign effectiveness using analytics.
Flow Report
The Flow Report provides complete visibility into WhatsApp Flows created within the Omni Portal. It helps administrators monitor Flow execution, customer responses, completion status and overall Flow performance.
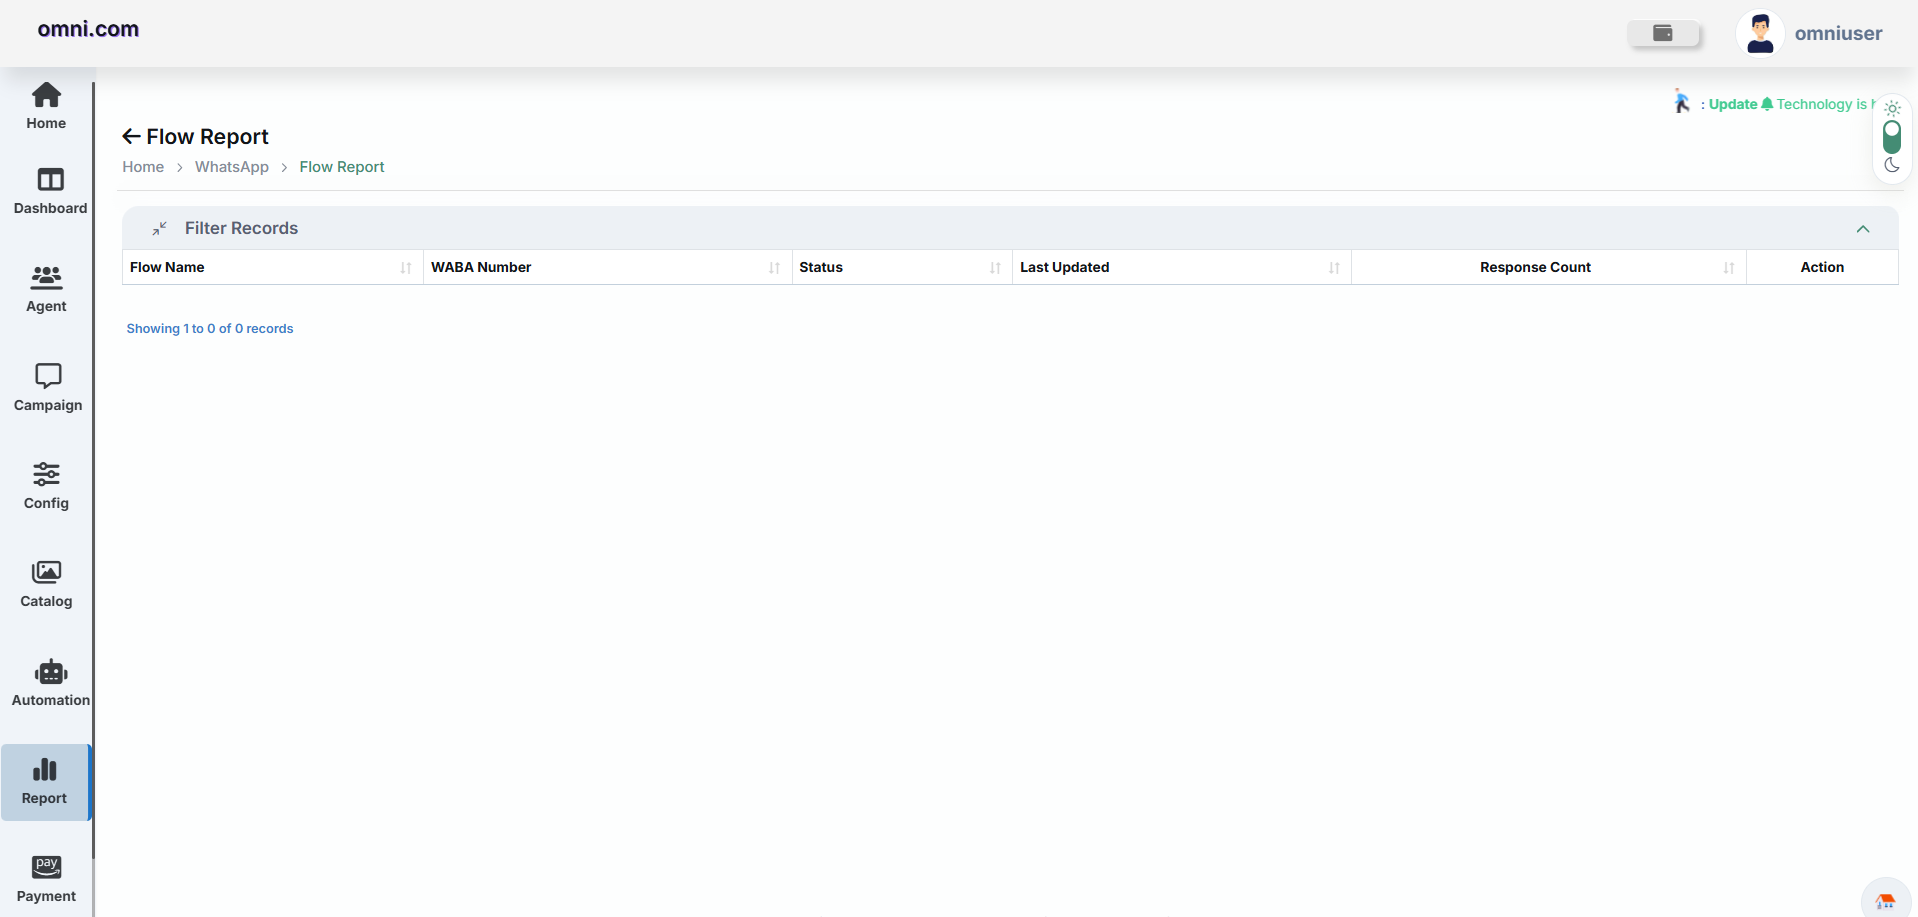
Purpose
The Flow Report enables organizations to analyze customer interactions inside WhatsApp Flows. It records how users respond to Flow forms, tracks submission status, and provides statistics that help improve customer engagement.
How to Access
The dashboard lists every WhatsApp Flow created within the selected date range along with execution details.
Report Information
| Field | Description |
|---|---|
| Flow Name | Name of the WhatsApp Flow. |
| WABA Number | WhatsApp Business Account associated with the Flow. |
| Status | Current Flow status such as Draft, Published or Active. | Last Updated | Date and time of the latest Flow modification. |
| Created By | User who created the Flow. |
| Action | View complete Flow information. |
Flow Performance Metrics
Available Actions
- View Flow Details
- View Customer Responses
- Filter by Date
- Export Flow Report
- Refresh Report
Use the Flow Report regularly to identify customer drop-off points, measure completion rates and improve your WhatsApp Flow experience.
Template Report
The Template Report provides detailed analytics for WhatsApp message templates used within the Omni Portal. It enables users to monitor template performance, delivery statistics, customer engagement, and overall messaging effectiveness.
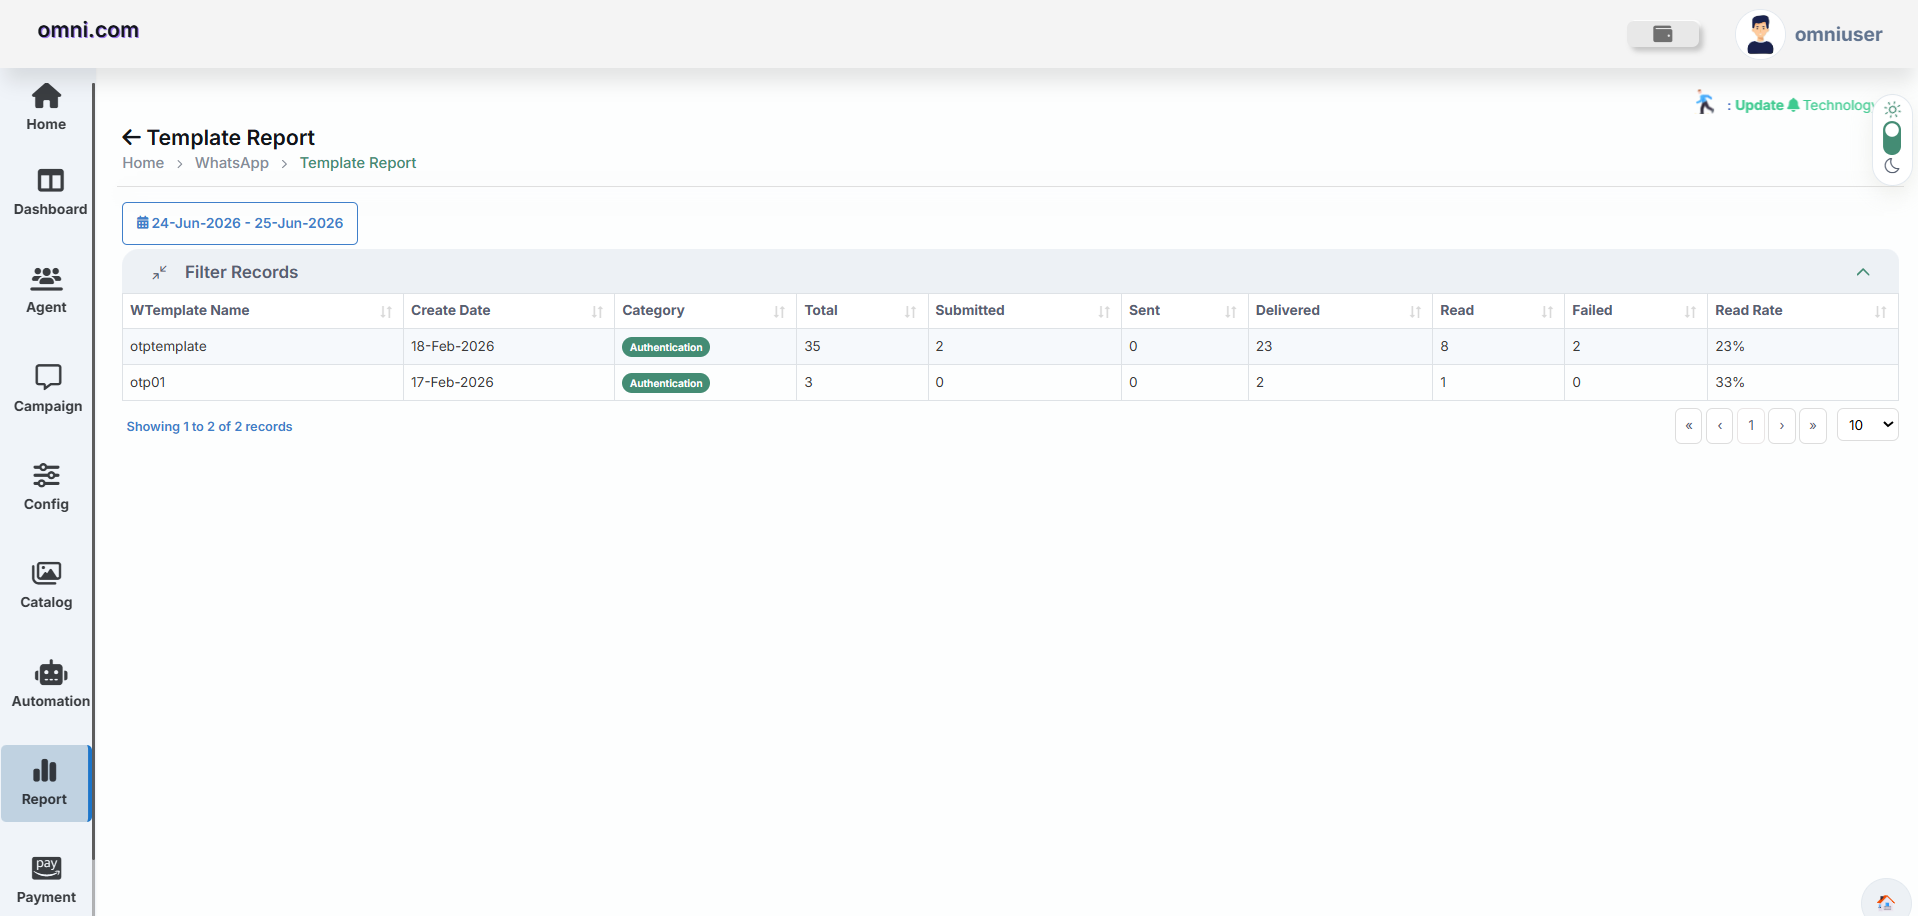
Purpose
The Template Report helps administrators evaluate the performance of approved WhatsApp templates by displaying message statistics, delivery information, read rates, and customer engagement metrics.
How to Access
The dashboard displays all approved WhatsApp templates together with their delivery statistics.
Template Statistics
Report Details
| Field | Description |
|---|---|
| Template Name | Name of the approved WhatsApp template. |
| Created Date | Date when the template was created. |
| Category | Authentication, Utility or Marketing. |
| Language | Language used by the template. |
| Status | Approved, Pending or Rejected. |
| Total Messages | Total messages processed. |
| Submitted | Total messages submitted. |
| Sent | Total messages sent successfully. |
| Delivered | Total messages delivered. |
| Read | Total messages opened by customers. |
| Failed | Total failed messages. |
| Read Rate | Percentage of delivered messages that were read. |
| Action | View detailed statistics. |
Available Actions
- View Template Details
- Filter by Date
- Export Template Report
- Download Excel Report
- Refresh Statistics
Benefits
- Monitor template performance.
- Track delivery statistics.
- Measure customer engagement.
- Analyze read rate.
- Identify failed messages.
- Improve campaign performance.
Compare template performance across different time periods to identify the best-performing templates and improve future WhatsApp campaigns.
Regularly review WhatsApp Reports to measure campaign success, monitor customer engagement, optimize template performance, and improve overall communication strategy.
WhatsApp Agent
The WhatsApp Agent module enables administrators to create and manage support agents, configure automated chat settings, and manage customer conversations through the Live Agent interface.
- Agent List
- Chat Message Configuration
- Live Agent
- Live Agent History
- Agent Campaigns
Agent Management
The Agent Management module enables administrators to create and manage support agents for WhatsApp Live Chat. Each agent can be assigned conversations, access configured WhatsApp channels, and handle customer interactions in real time.
Accessing Agent Management
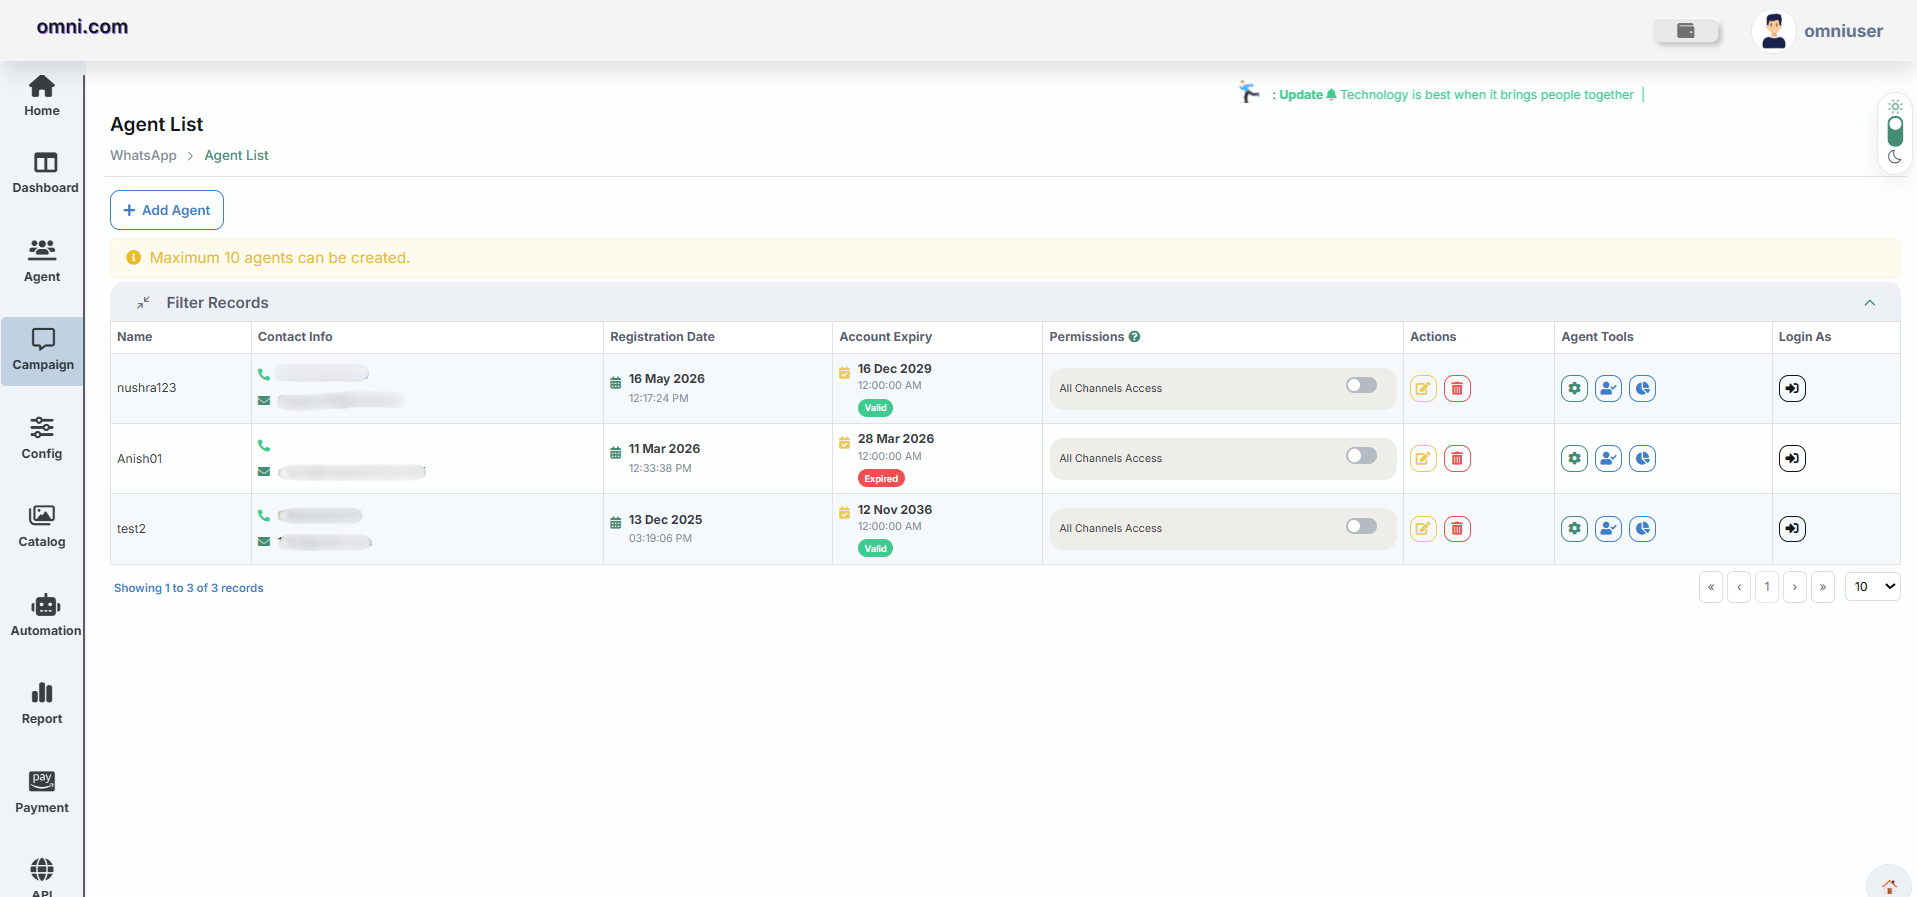
The page displays all configured agents along with their contact details, account status, permissions and available actions.
Agent List
The Agent List page is used to create and manage customer support agents for WhatsApp Live Chat. Administrators can add new agents, assign permissions, configure chat settings and manage agent access from this screen.
Overview
The page displays all registered agents along with their account and communication details.
Information Available
| Field | Description |
|---|---|
| Name | Displays the unique name of the agent. |
| Contact Info | Shows the registered mobile number and email address of the agent. |
| Registration Date | Displays the date and time when the agent account was created. |
| Account Expiry | Shows the expiry date of the agent account. |
| Permissions | Enables or disables access to channels for the selected agent. |
| Actions | Allows editing or deleting an agent. |
| Agent Tools | Provides additional configurations such as chat settings and other features. |
| Login As | Allows the administrator to log in as the selected agent. |
Creating a New Agent
To create a new agent:
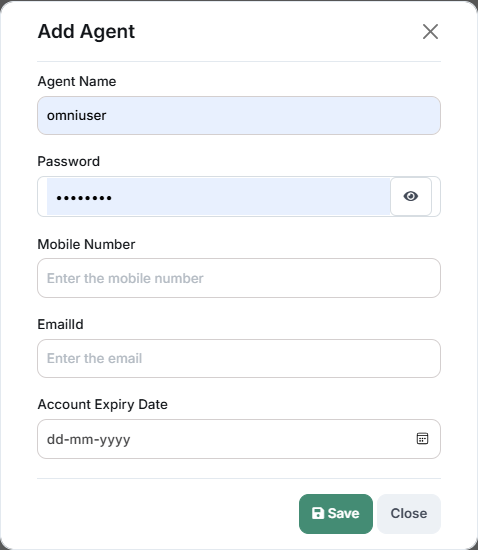
Enter the Required Information
| Field | Description |
|---|---|
| Agent Name | Unique name for the agent. |
| Password | Login password for the agent. |
| Mobile Number | Agent's contact number. |
| Email ID | Agent's email address. |
| Account Expiry Date | Date until which the account remains active. |
Chat Message Configuration
Once an agent is successfully created, chat automation can be configured through Chat Message Config.
Navigation
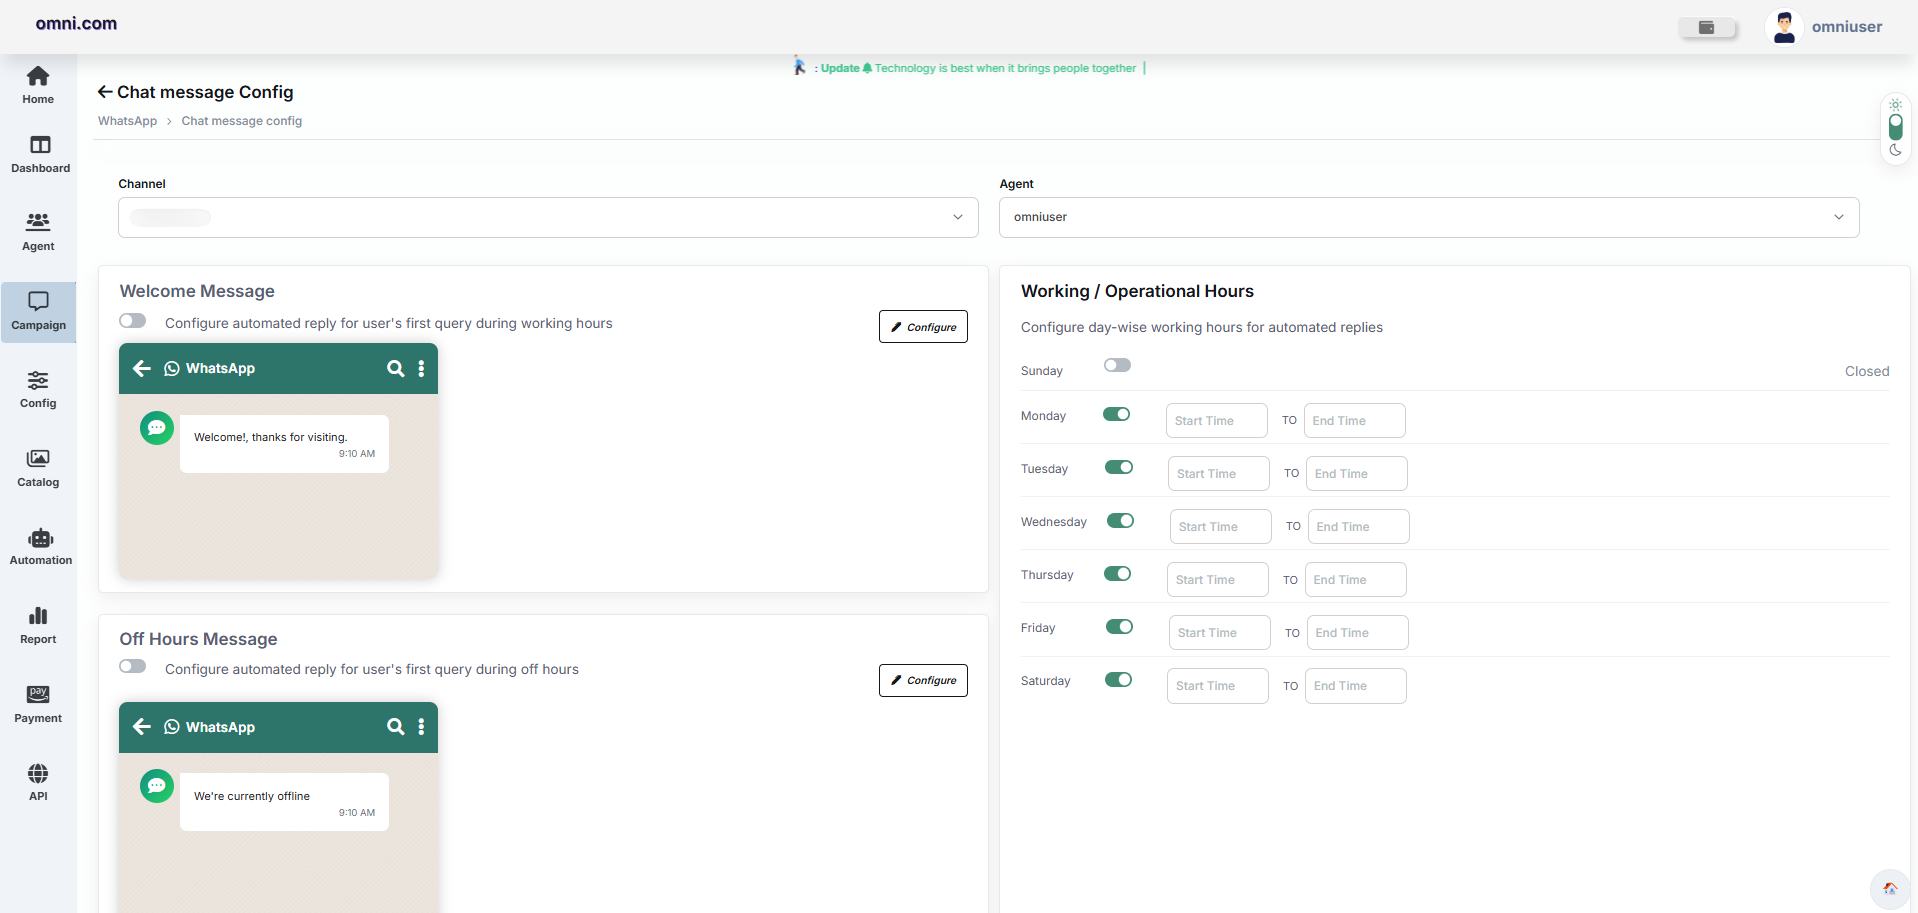
Select:
- Channel – Choose the WhatsApp channel.
- Agent – Select the agent created from the Agent List.
The Chat Message Config page provides the following settings:
- Welcome Message
- Working / Operational Hours
- Off Hours Message
Welcome Message
The Welcome Message is an automated message sent when a customer sends their first message during operational hours.
Configuration Steps
- Enable the Welcome Message toggle.
- Click Configure.
- Enter the desired welcome message.
- Save the configuration.
Welcome! Thanks for visiting.
How may we assist you today?
Working / Operational Hours
Administrators can configure operational hours on a day-wise basis for automated replies.
Configuration
- Enable the toggle for the required days.
- Specify the Start Time and End Time.
- Save the settings.
Example Schedule
| Day | Start Time | End Time |
|---|---|---|
| Monday | 09:00 AM | 06:00 PM |
| Tuesday | 09:00 AM | 06:00 PM |
| Wednesday | 09:00 AM | 06:00 PM |
| Thursday | 09:00 AM | 06:00 PM |
| Friday | 09:00 AM | 06:00 PM |
| Saturday | 09:00 AM | 02:00 PM |
| Sunday | Closed | Closed |
Off Hours Message
The Off Hours Message is automatically sent when a customer sends a message outside the configured working hours.
Configuration Steps
- Enable the Off Hours Message option.
- Click Configure.
- Enter the message to be sent during non-working hours.
- Save the configuration.
We're currently offline.
Our team will respond during business hours.
Thank you for your patience.
Live Agent
The Live Agent module enables agents to manage customer conversations in real time through WhatsApp. It provides a unified chat interface where agents can view conversations, send messages, assign chats, update chat status and manage customer details.
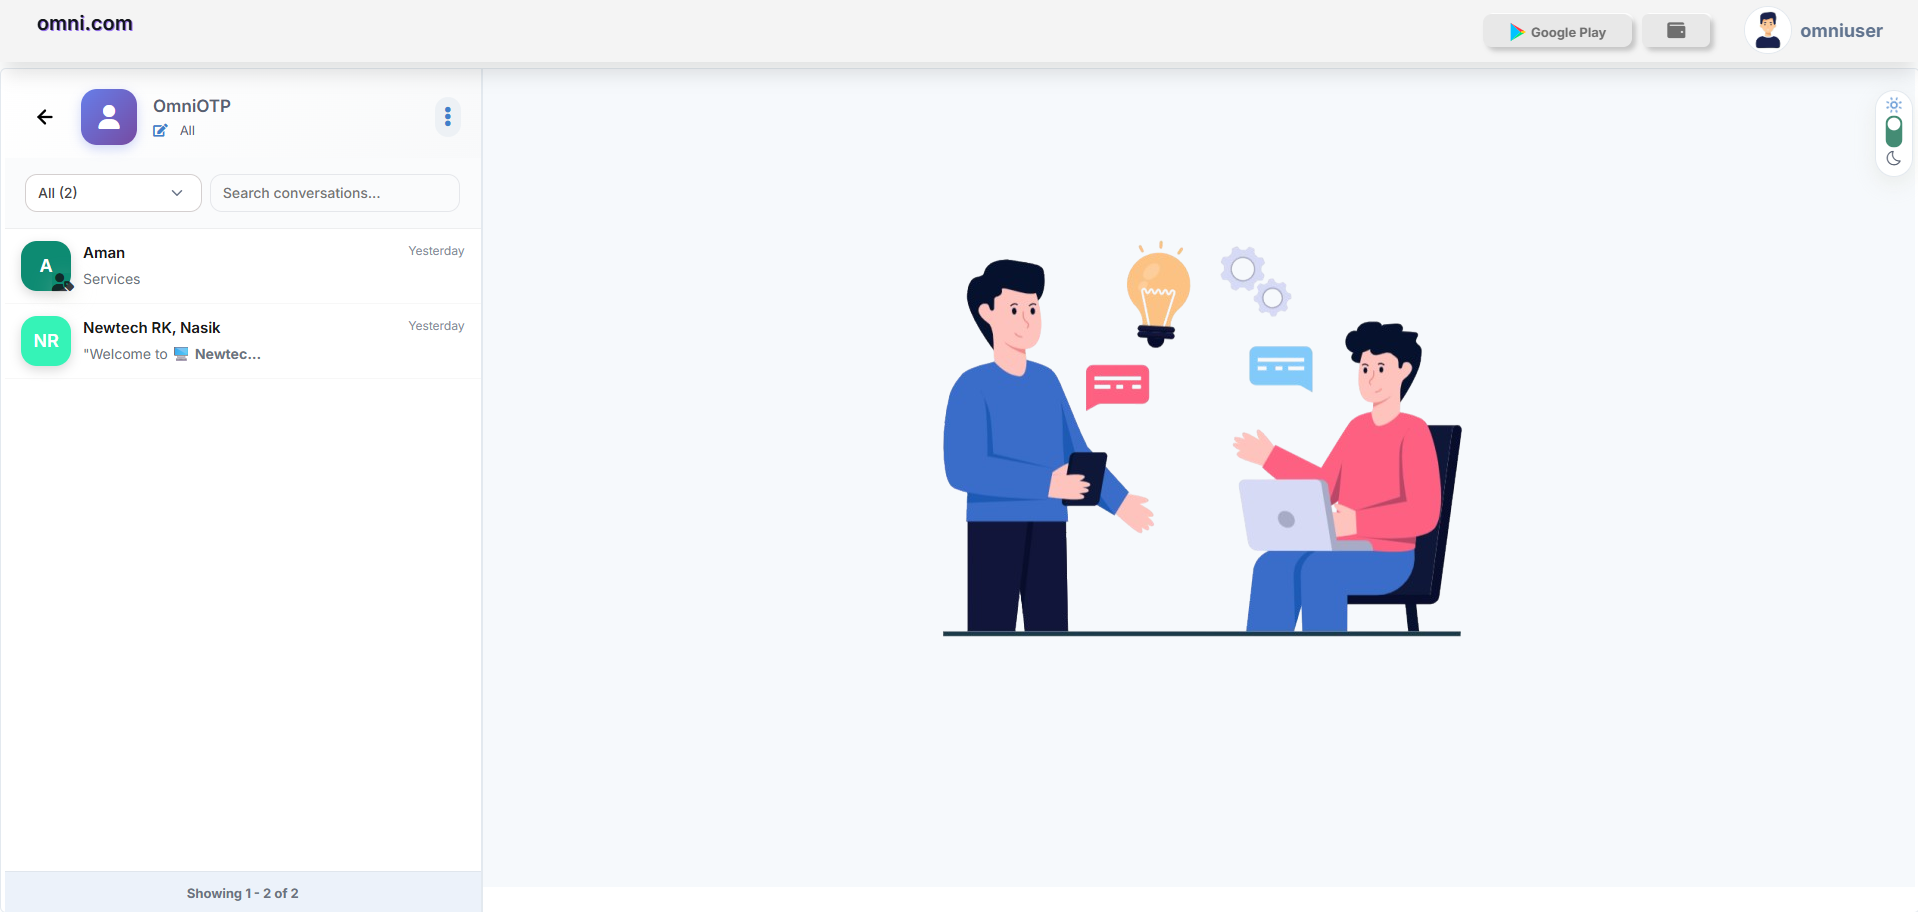
Accessing Live Agent
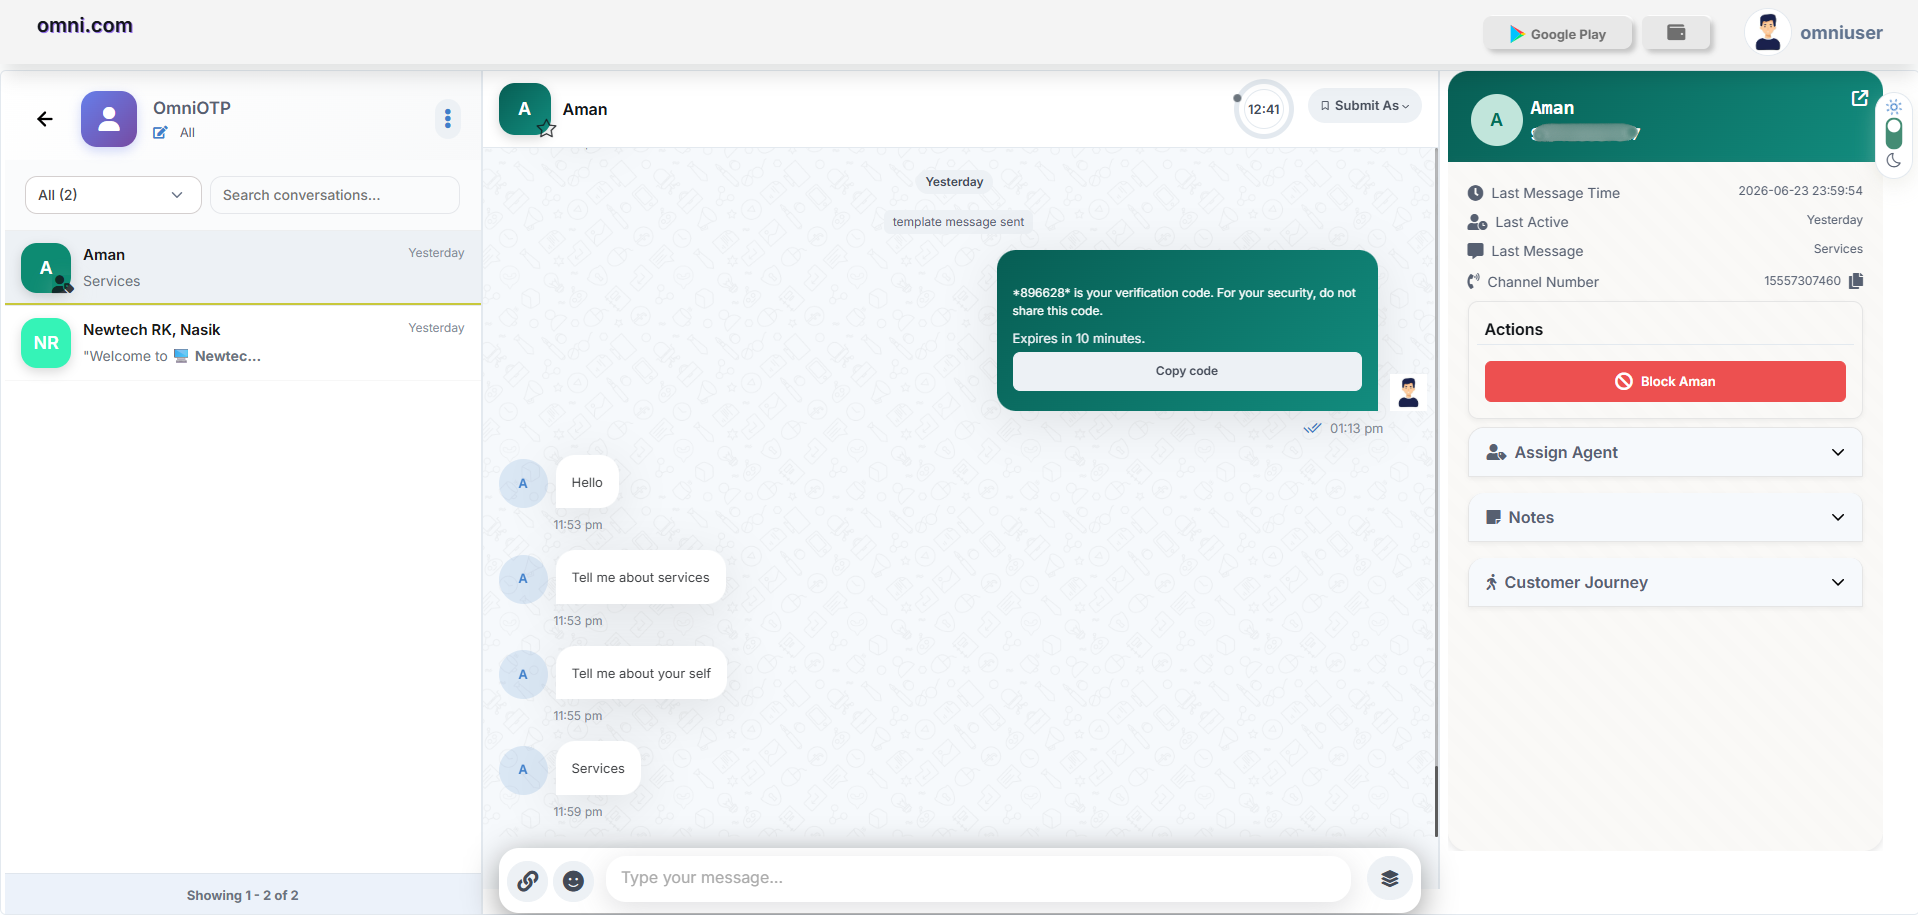
The screen is divided into three major sections:
- Conversation Panel
- Chat Window
- Customer Information Panel
1. Conversation Panel
The left panel displays all customer conversations.
Features
Search Conversations
Search customers using their name or phone number.
Conversation Filter
Filter chats based on available categories.
Conversation List
The conversation list displays:
- Customer Name
- Last Message
- Last Activity Time
- Unread Messages
2. Chat Window
The center section displays the complete conversation between the customer and the agent.
Features
Chat History
Agents can:
- View previous messages.
- Review customer interactions.
- Track message timestamps.
Send Messages
At the bottom of the chat window, agents can type and send messages.
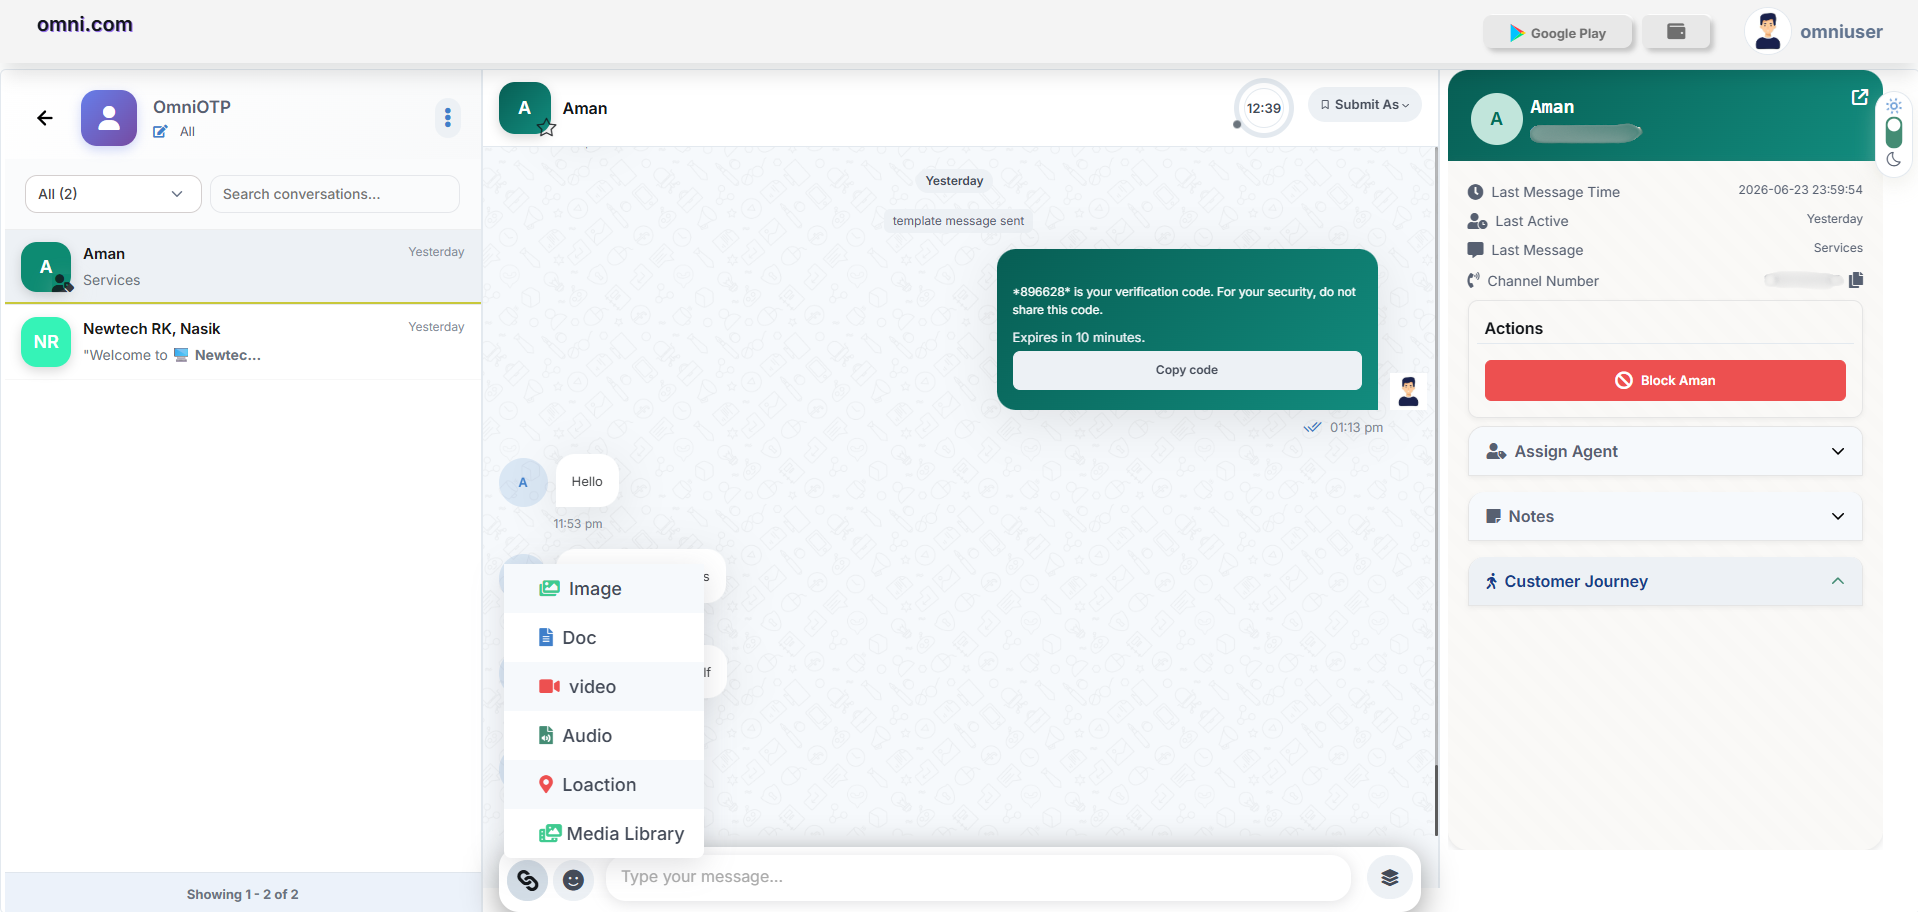
Supported message types include:
- Text Messages
- Images
- Documents
- Videos
- Audio Files
- Location Information
Attachment Options
Click the Attachment icon beside the message box.
The following options are available:
| Option | Description |
|---|---|
| Image | Send images to customers. |
| Doc | Share PDF or document files. |
| Video | Send video files. |
| Audio | Share audio recordings. |
| Location | Share geographical location. |
| Media Library | Select files from uploaded media. |
Template Messages
Agents can send pre-approved WhatsApp templates directly from the chat window.
Click the Template icon beside the message box.
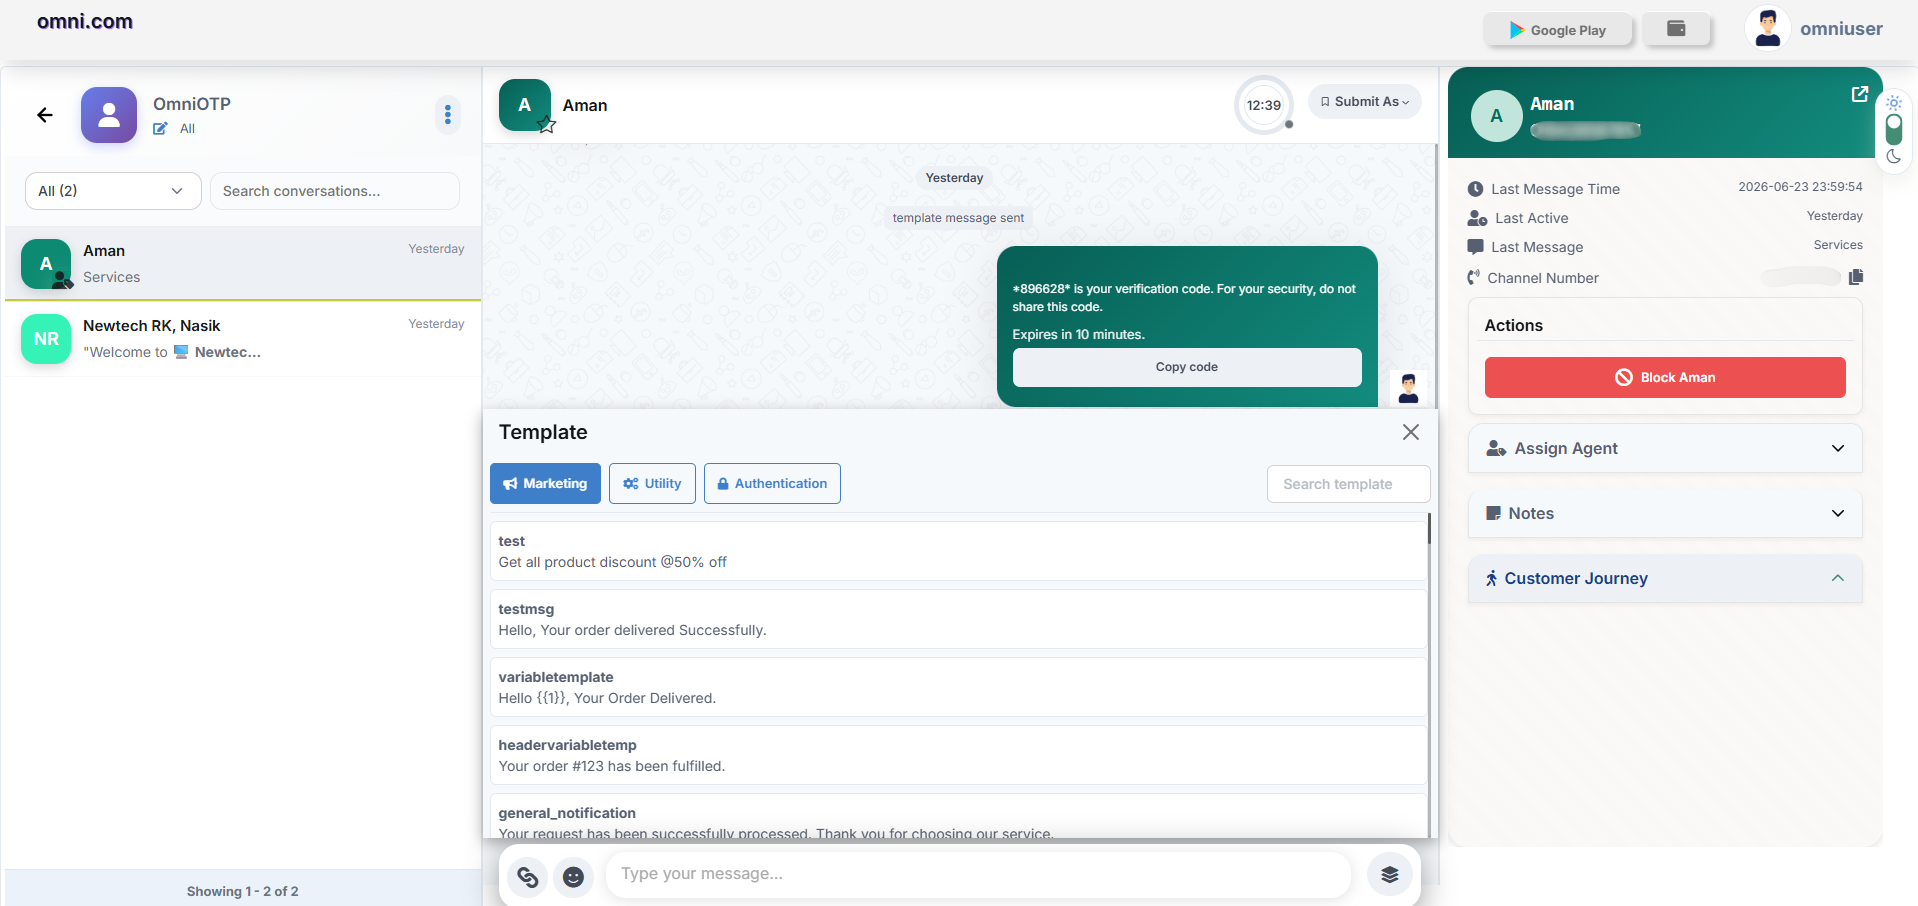
The Template popup contains three categories of templates:
- Marketing Templates
- Utility Templates
- Authentication Templates
Marketing Templates
Marketing templates are used for:
- Promotional offers
- Discounts
- Campaign messages
Get all product discounts up to 50% OFF.
Utility Templates
Utility templates are used for:
- Order updates
- Service notifications
- Transaction alerts
Hello,
Your order has been delivered successfully.
Authentication Templates
Authentication templates are used for:
- OTP verification
- Login authentication
- Security verification
896628 is your verification code.
Expires in 10 minutes.
Add to Favourite
Agents can mark important conversations as Favourite for quick access and easy tracking.
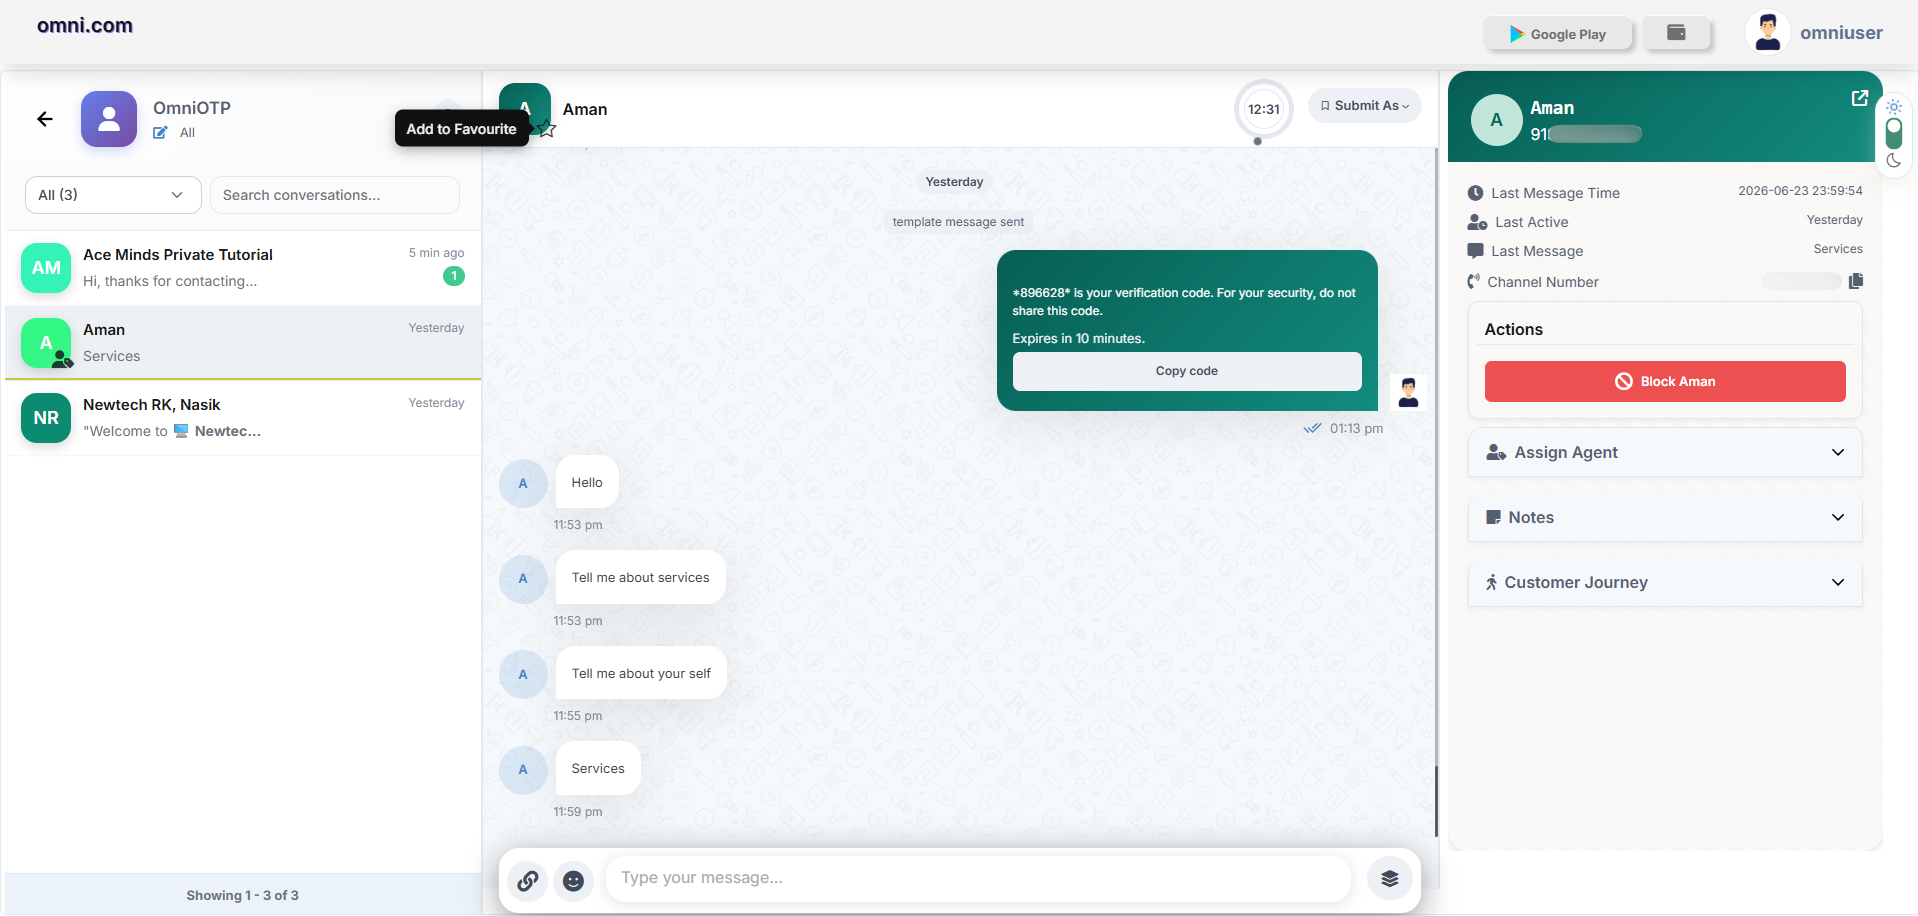
How to Add a Conversation to Favourite
Benefits
- Quickly access important customer conversations.
- Prioritize VIP or frequently contacted customers.
- Organize active chats efficiently.
- Reduce the time required to search for important conversations.
Customer Name : Aman
☆ Add to Favourite
Submit As Status
At the top of the chat window, agents can update the conversation status.
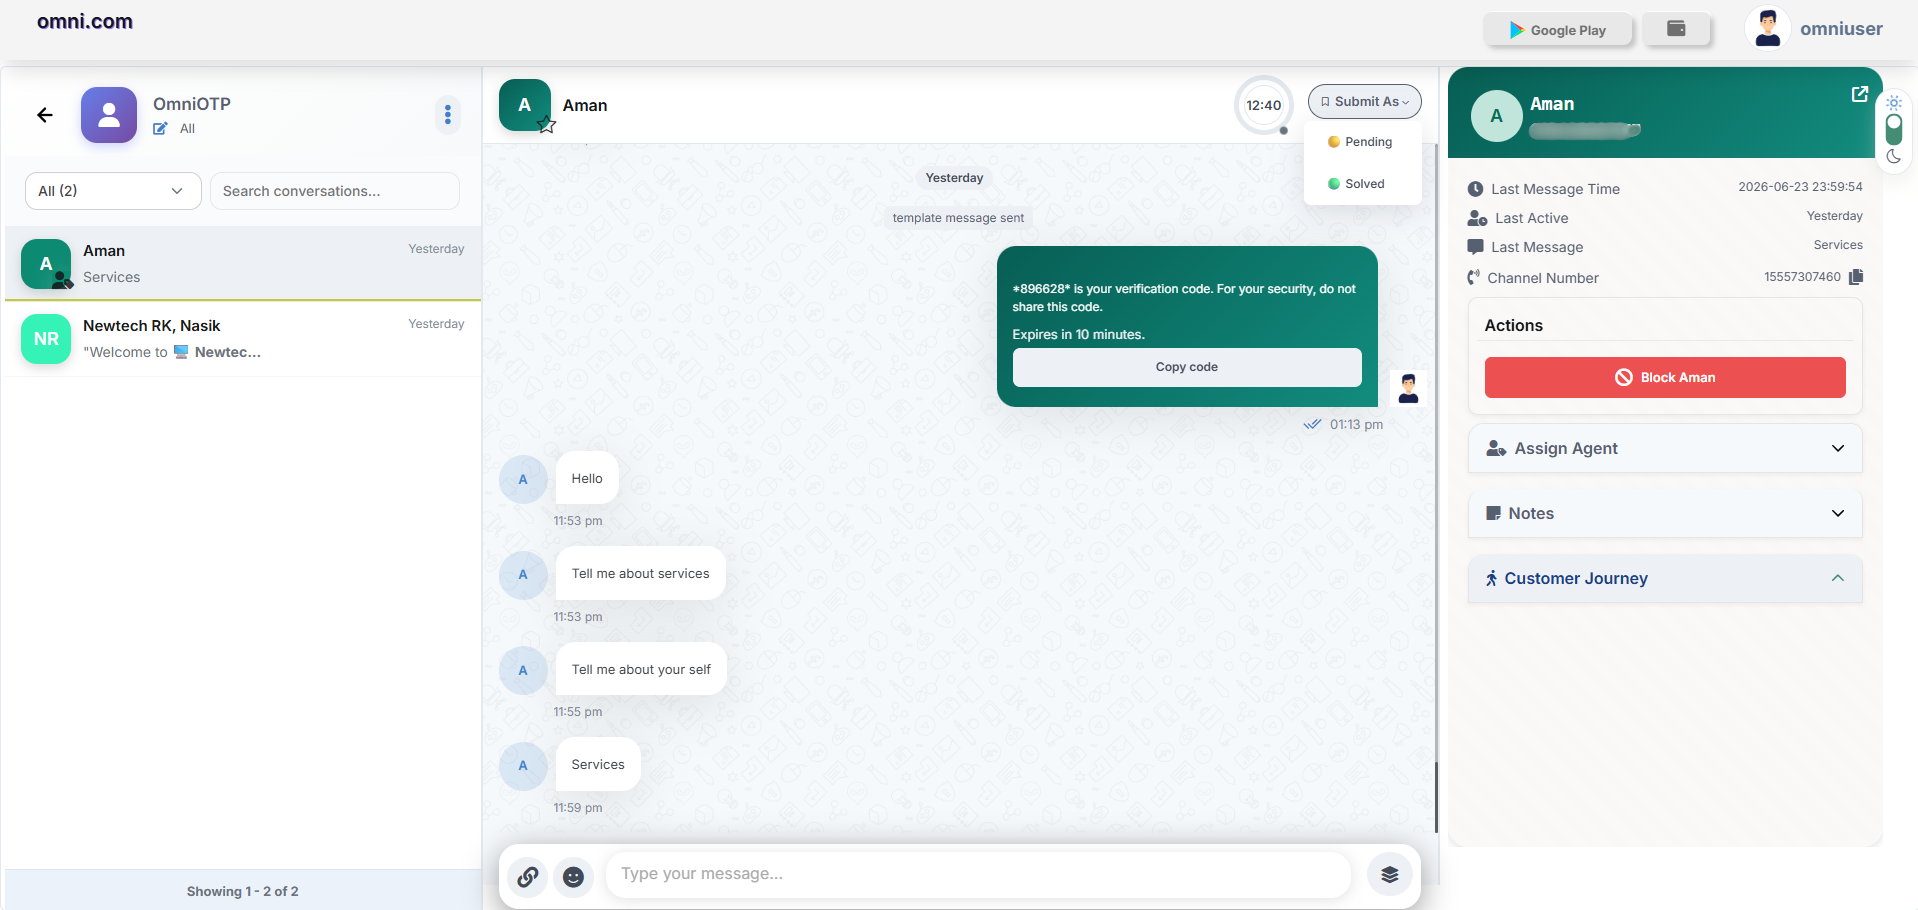
Available Statuses
| Status | Description |
|---|---|
| Pending | Customer query is under review and action is still pending. |
| Solved | Customer issue has been resolved and no further action is required. |
3. Customer Information Panel
The right panel displays customer information.
Available Details
| Field | Description |
|---|---|
| Customer Name | Name of the customer. |
| Mobile Number | Customer's WhatsApp number. |
| Last Message Time | Time of last interaction. |
| Last Active | Last active status. |
| Last Message | Preview of latest message. |
| Channel Number | WhatsApp Business number used. |
Actions
Administrators and agents can perform the following actions from the Customer Information Panel.
Block Customer
Click Block Customer to prevent the customer from sending further WhatsApp messages.
Blocked customers:
- Cannot initiate chats.
- Cannot send messages to the channel.
Assign Agent
The Assign Agent section allows conversations to be transferred to another support agent.
Example Available Agents:
- test2
- Anish01
- nushra123
Notes
The Notes section allows agents to record internal information related to a customer conversation.
Agents can:
- Add internal notes.
- Record customer preferences.
- Store follow-up information.
Customer Journey
The Customer Journey section provides the customer's interaction history with the business.
>This information helps agents understand:
- Previous conversations.
- Campaign interactions.
- Order or service history.
- Customer engagement timeline.
Export Conversation
Click the three-dot menu available beside the account name to export customer conversations.
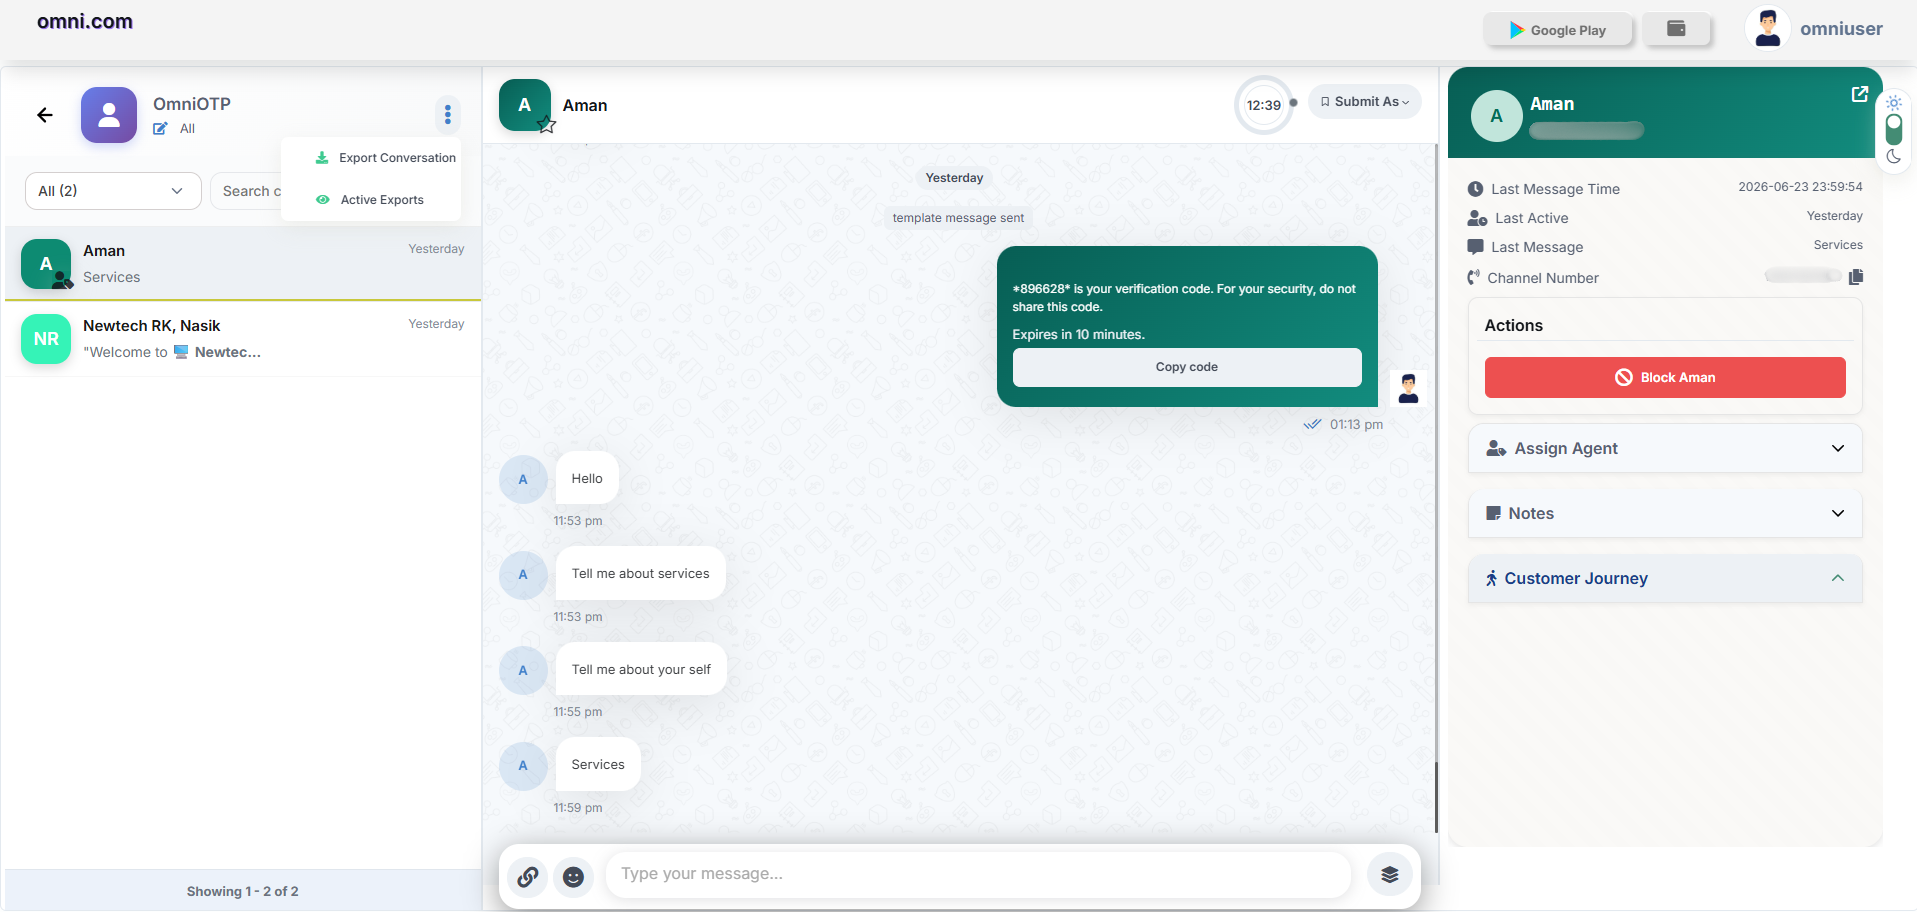
Available options:
- Export Conversation
- Active Exports
This feature allows administrators to download chat history for:
- Reporting
- Auditing
- Customer Support Records
Live Agent History
The Live Agent History module allows users to view all previous conversations handled by Live Agents. Users can search conversations, review chat history and access customer interactions from a single screen.
This feature helps users track communication records and quickly reopen previous conversations whenever required.
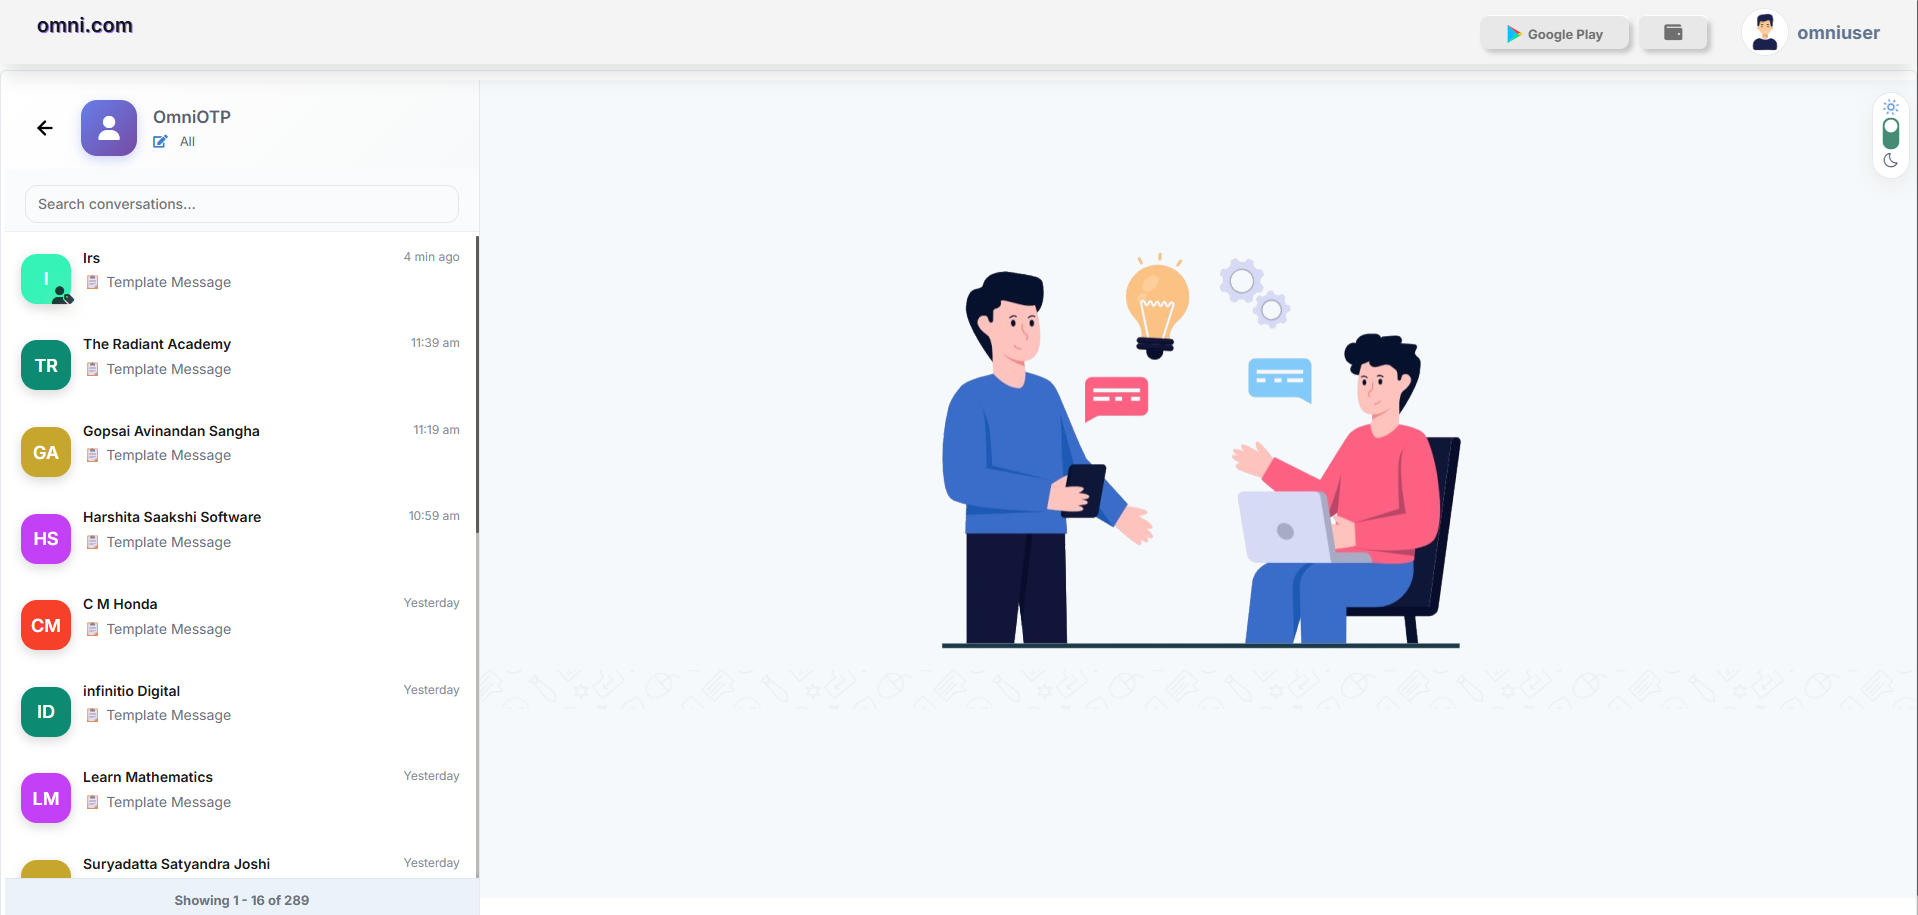
Accessing Live Agent History
Conversation List
The left panel displays a list of customer conversations.
For each conversation, users can view:
- Customer Name
- Customer Profile Icon
- Last Message
- Time of Last Message
- Conversation Preview
Search Conversations
At the top of the conversation panel, a Search Conversations field is available.
Users can:
- Search chats by customer name.
- Quickly locate previous conversations.
- Filter conversations without scrolling through the list.
Steps
- Click the Search Conversations box.
- Enter the customer name.
- Matching conversations appear automatically.
Open a Conversation
To review any previous conversation:
- Click any customer from the conversation list.
- The selected conversation opens on the right side.
- Review the complete chat history.
View Chat History
The chat window displays:
- Customer messages
- Agent replies
- Template messages
- Date and time of messages
- Previous conversation history
Customer Information
At the top of the conversation window, users can view:
- Customer Name
- Channel Information
- Conversation Category
This information helps users identify the customer and the communication channel being used.
Benefits
- Access previous customer conversations.
- Search chats quickly.
- Review complete interaction history.
- Verify template messages sent to customers.
- Continue conversations without losing previous records.
Agent Campaign
The Agent Campaign module allows users to view and manage campaigns created through Live Agents. Users can track campaign activities, monitor campaign status, and review campaign details such as template information, scheduled time, total recipients, and delivery status.
This page provides a centralized view of all Agent Campaign records.
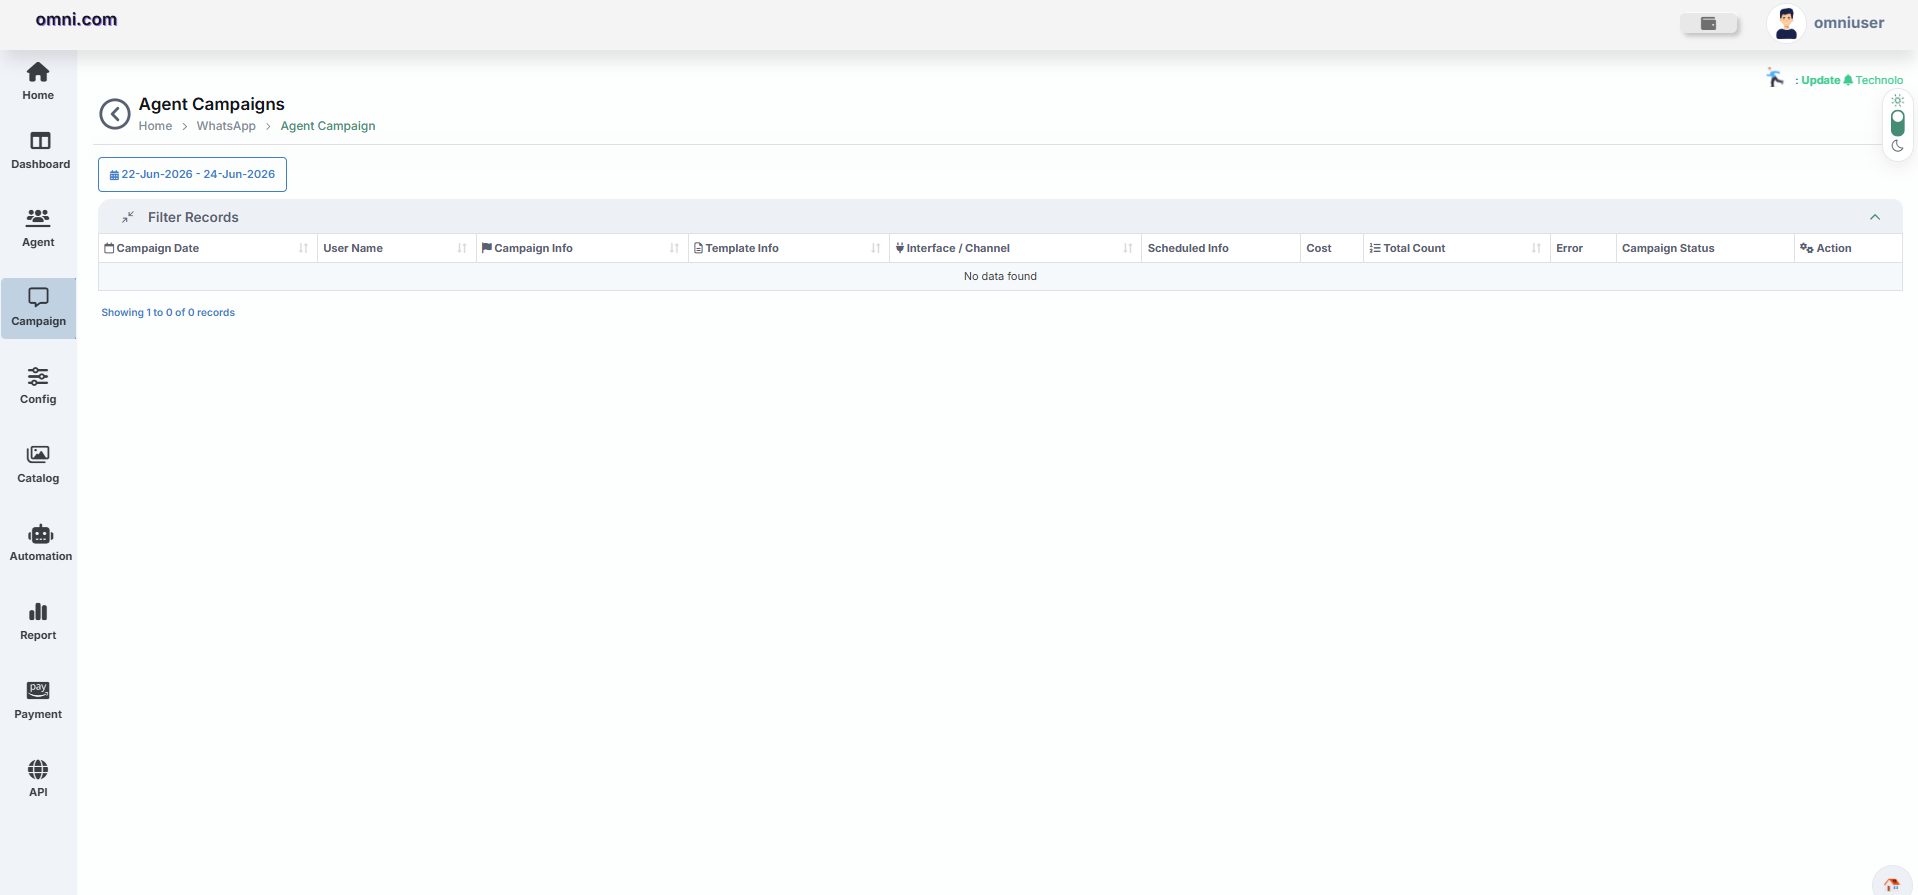
How to Access
Agent Campaign Dashboard
The Agent Campaign dashboard provides the following sections:
- Date Range Filter
- Campaign Records Table
- Campaign Status Information
- Scheduled Campaign Details
- Campaign Actions
Filter Campaign Records
Users can filter campaign records using a custom date range.
Steps
- Click the Date Range field.
- Select the required start and end dates.
- The system displays campaigns created within the selected period.
Campaign Records Table
The table displays all campaign records with the following information.
| Column | Description |
|---|---|
| Campaign Date | Date when the campaign was created or scheduled. |
| User Name | Name of the user who created the campaign. |
| Campaign Info | Displays campaign details. |
| Template Info | Shows the WhatsApp template used. |
| Interface / Channel | Displays the communication channel used. |
| Scheduled Info | Shows scheduled campaign date and time. |
| Cost | Displays campaign cost. |
| Total Count | Total number of recipients. |
| Error | Displays errors encountered during execution. |
| Campaign Status | Current campaign status. |
| Action | Available actions for the selected campaign. |
Campaign Status
Users can monitor the current status of each campaign.
| Status | Description |
|---|---|
| Scheduled | The campaign is scheduled for future delivery. |
| Processing | The campaign is currently being processed. |
| Completed | The campaign has been successfully delivered. |
| Failed | The campaign failed during execution. |
| Cancelled | The campaign was cancelled before completion. |
Search and Review Campaigns
Users can perform the following actions from the Agent Campaign page:
- Filter campaigns using a date range.
- Review campaign details.
- Check templates used in campaigns.
- View campaign status and delivery information.
- Monitor campaign performance.
Benefits
- View all Live Agent campaigns from a single screen.
- Monitor campaign execution status.
- Track scheduled campaigns.
- Review templates and communication channels.
- Access campaign statistics and historical records.
Chatbot Builder
The Chatbot Builder allows users to create, design, and automate WhatsApp chatbot conversations using an intuitive drag-and-drop flow builder. Users can configure triggers, design conversation flows, integrate APIs, automate notifications, and publish chatbot workflows without writing code.
Overview
The Chatbot Builder provides a visual interface for creating conversational workflows. Each chatbot flow consists of connected nodes representing messages, questions, actions, delays, integrations, and automation logic.
Access Chatbot Builder
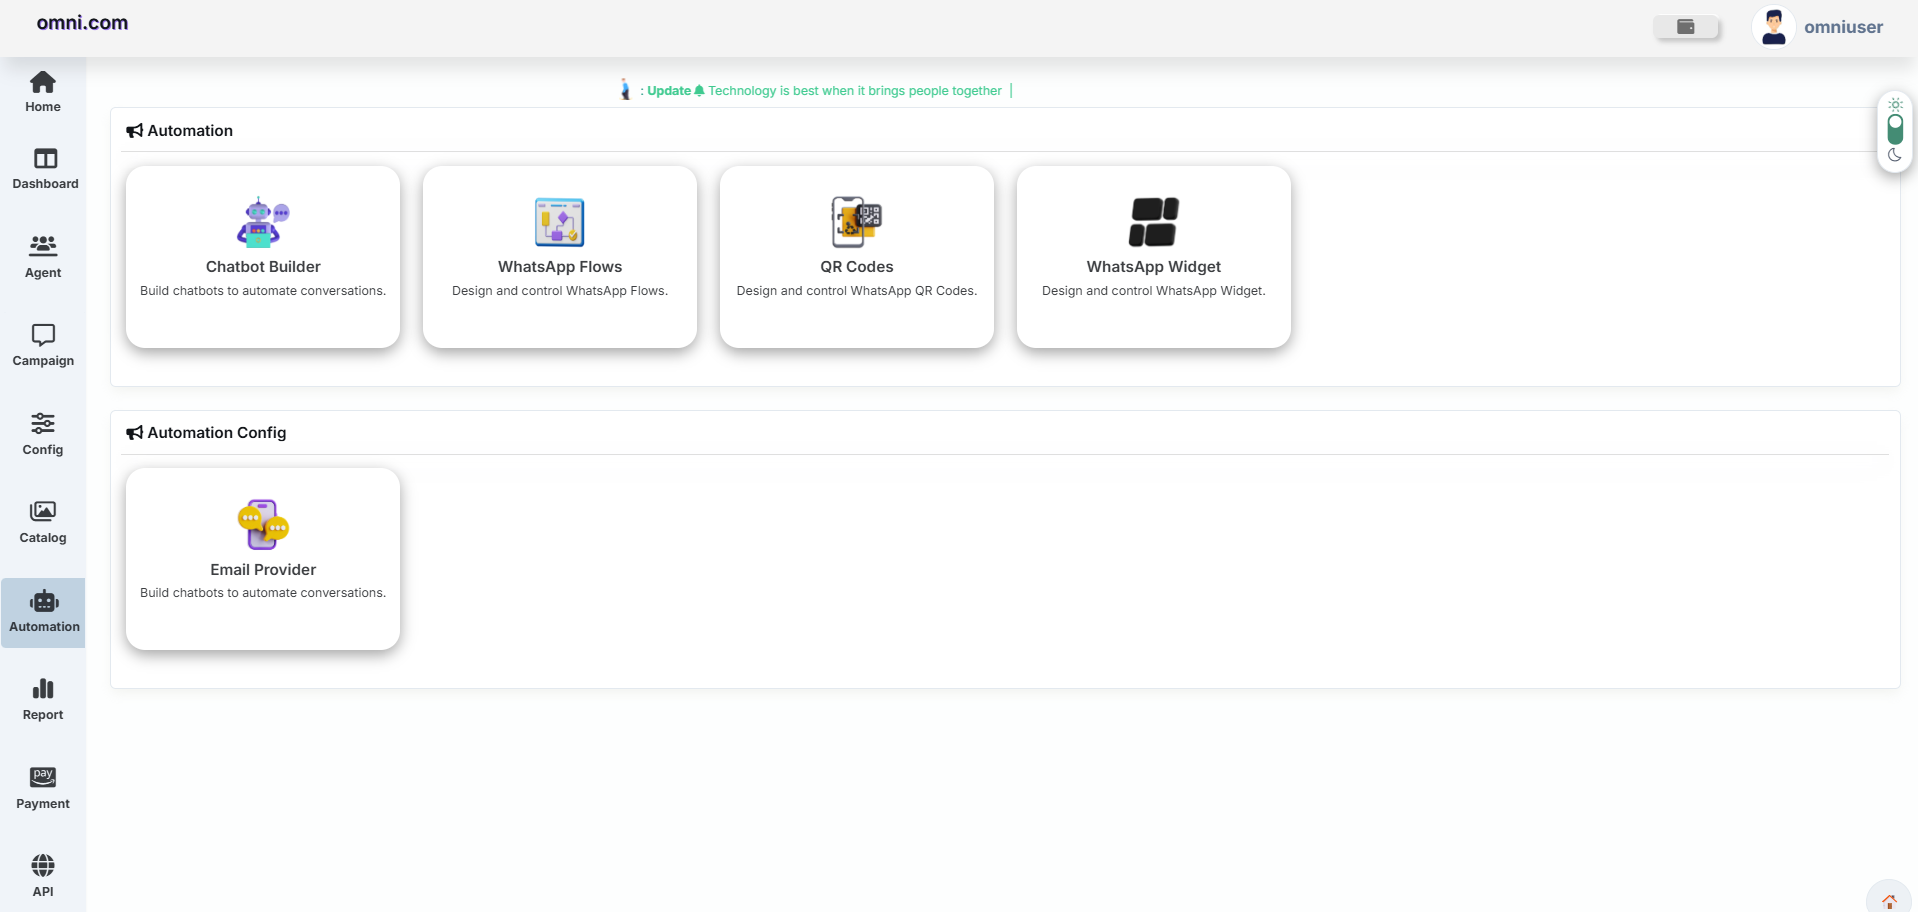
WhatsApp Chatbot Flows
The WhatsApp Chatbot Flows page displays every chatbot created for your connected WhatsApp Business channels.
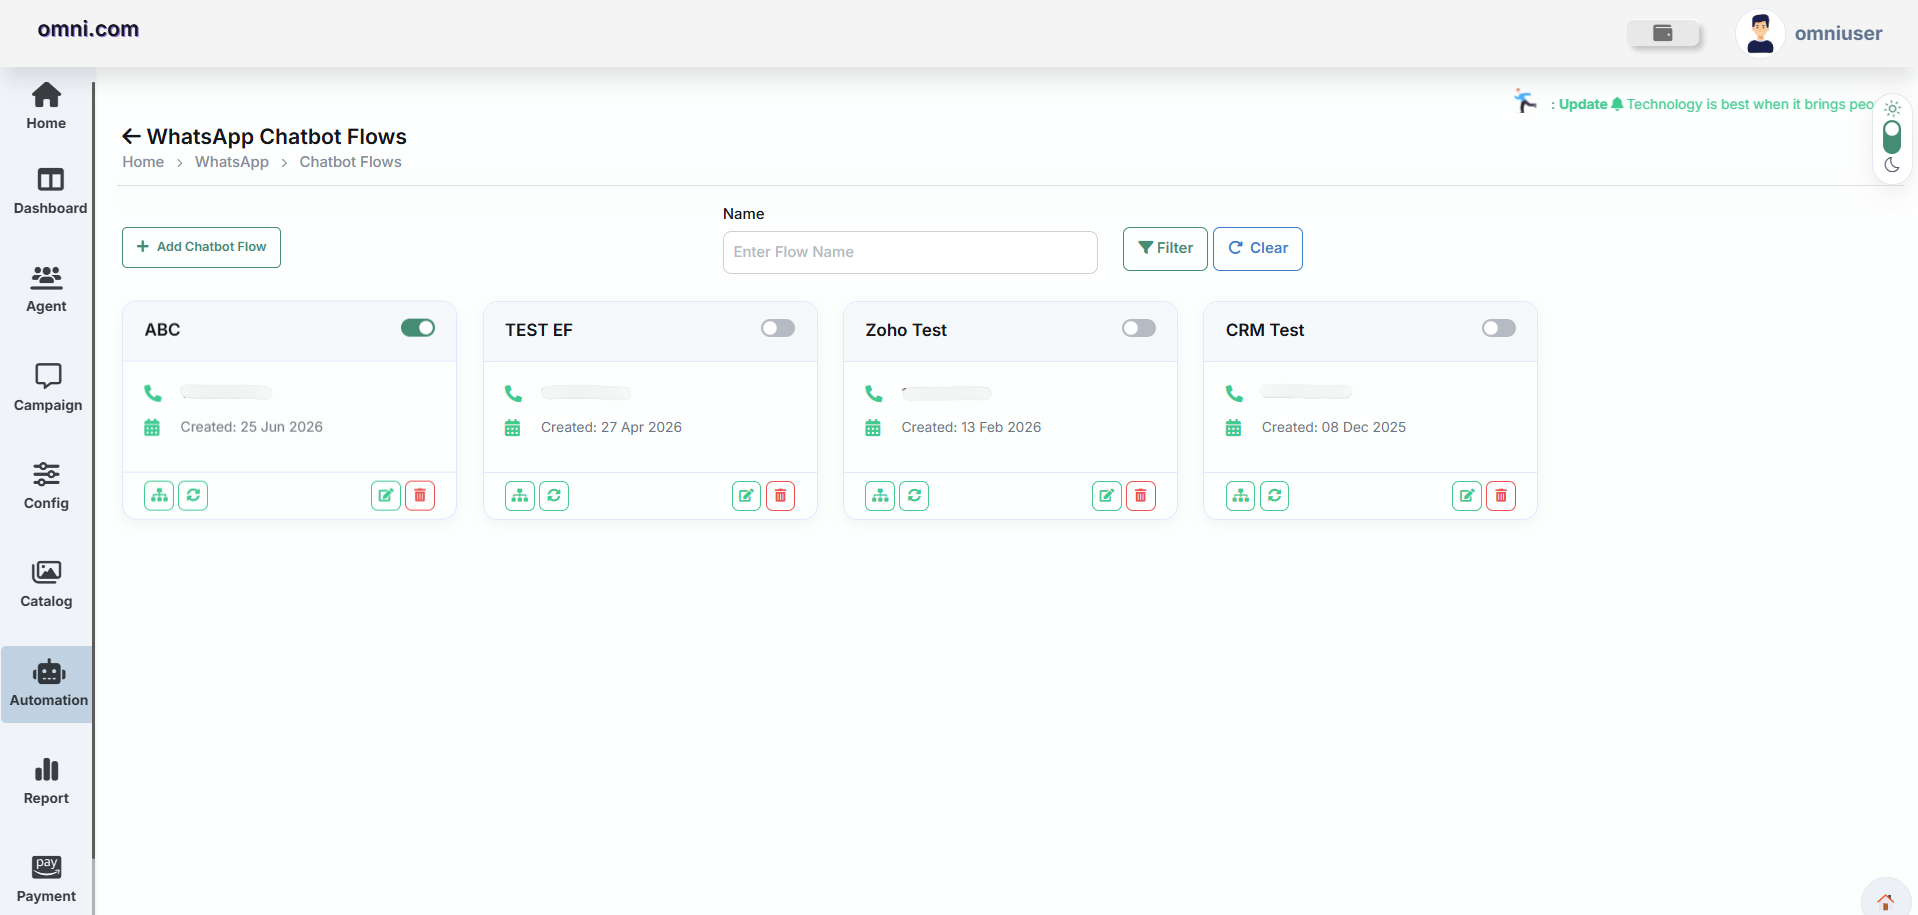
Available Features
- View chatbot flows
- Create a new chatbot
- Search chatbot flows
- Enable or disable flows
- Edit chatbot flows
- Duplicate chatbot flows
- Delete chatbot flows
Create a New Chatbot Flow
Click Add Chatbot Flow to create a new chatbot.
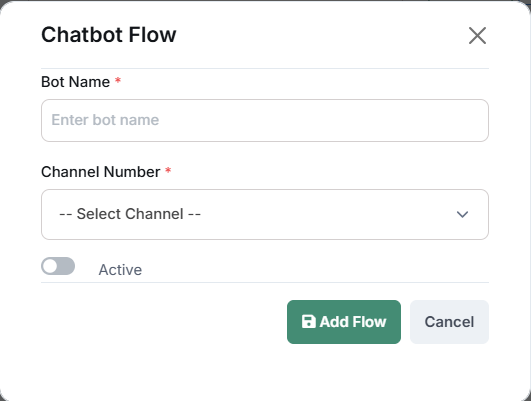
| Field | Description |
|---|---|
| Bot Name | Unique name of the chatbot. |
| Channel Number | Select the WhatsApp Business Number. |
| Active | Enable to activate the chatbot immediately after publishing. |
Chatbot Flow Builder
The Chatbot Flow Builder is a visual drag-and-drop workspace used to create WhatsApp chatbot conversations. Users can connect different nodes together to automate customer interactions without writing code.
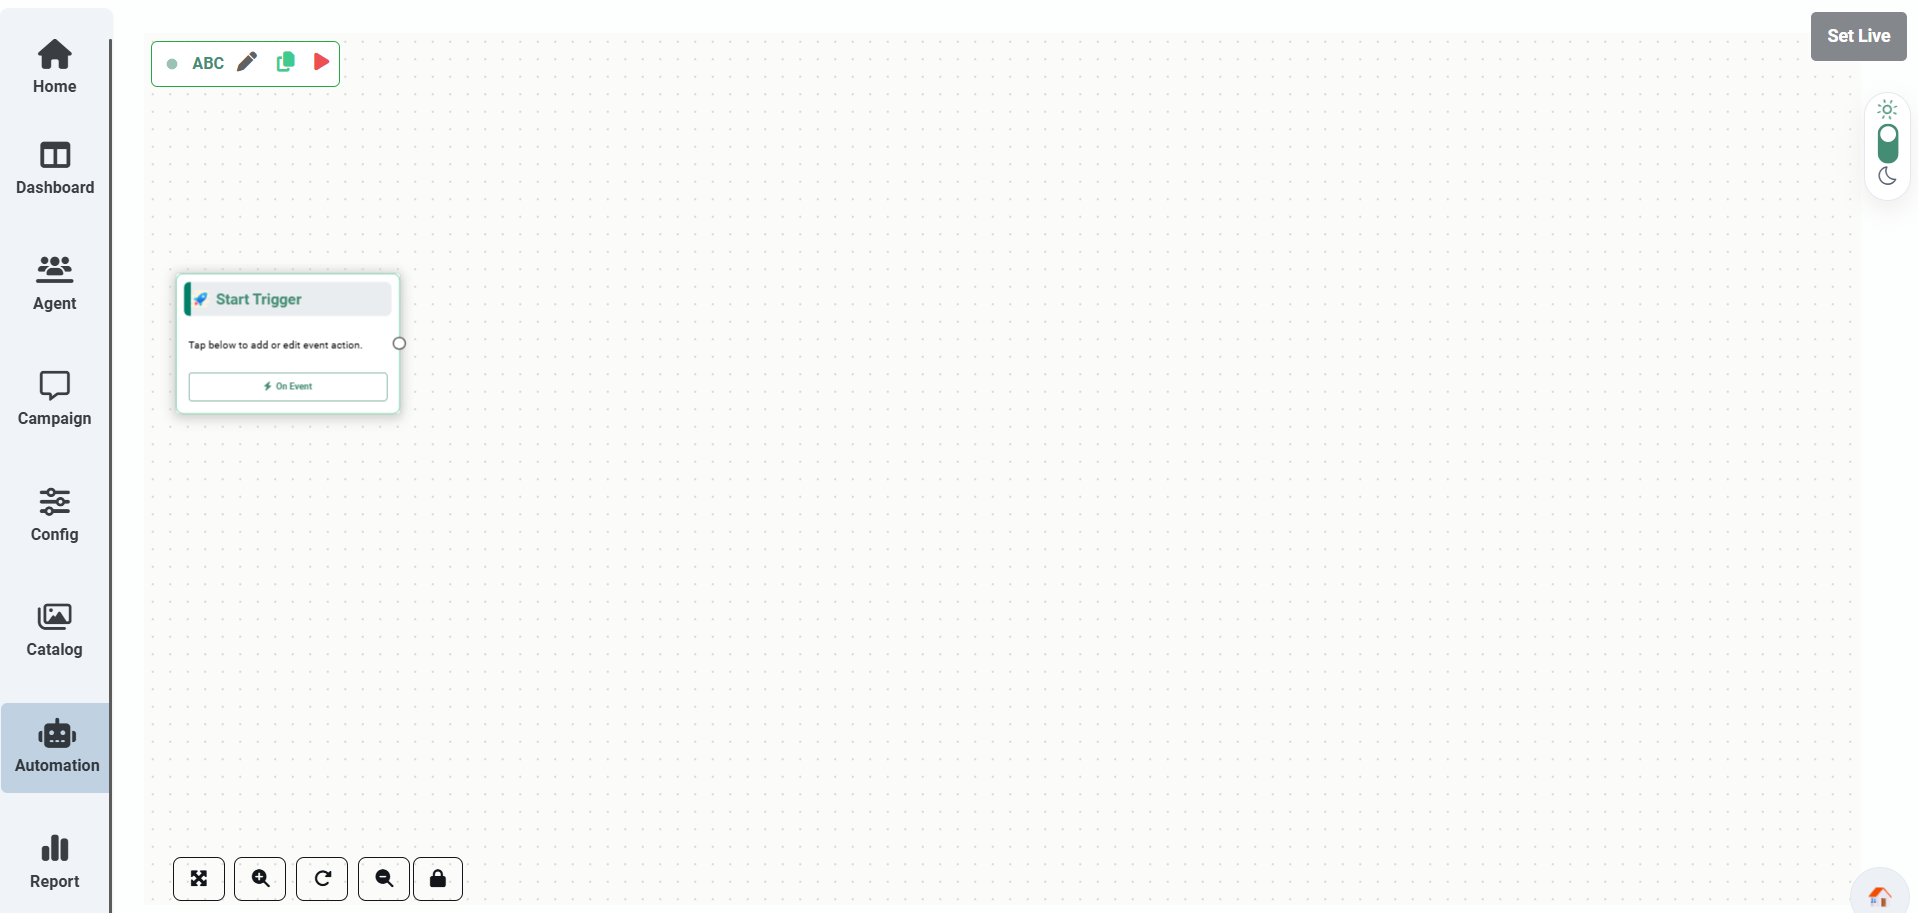
Builder Components
| Component | Description |
|---|---|
| Start Trigger | Beginning point of every chatbot conversation. |
| Conversation Nodes | Different actions such as messages, questions, templates, delays, and integrations. |
| Connection Lines | Connect nodes together to define the conversation flow. |
| Zoom Controls | Zoom in, zoom out, fit screen, and reset zoom. |
| Flow Controls | Rename, duplicate, publish, and activate chatbot flows. |
| Publish | Deploy the chatbot to the selected WhatsApp Business number. |
Flow Controls
The top toolbar contains several controls for managing the chatbot flow.
| Control | Description |
|---|---|
| Status Indicator | Shows whether the chatbot is currently Active or Inactive. |
| Flow Name | Displays the current chatbot name. |
| Edit | Rename the chatbot flow. |
| Duplicate | Create an exact copy of the chatbot. |
| Publish | Deploy the chatbot after completing the flow. |
| Set Live | Republishes the chatbot and updates all node positions. |
Canvas Controls
The canvas controls help users navigate large chatbot workflows.
Start Trigger
Every chatbot flow begins with a Start Trigger. It defines when the chatbot conversation should start.
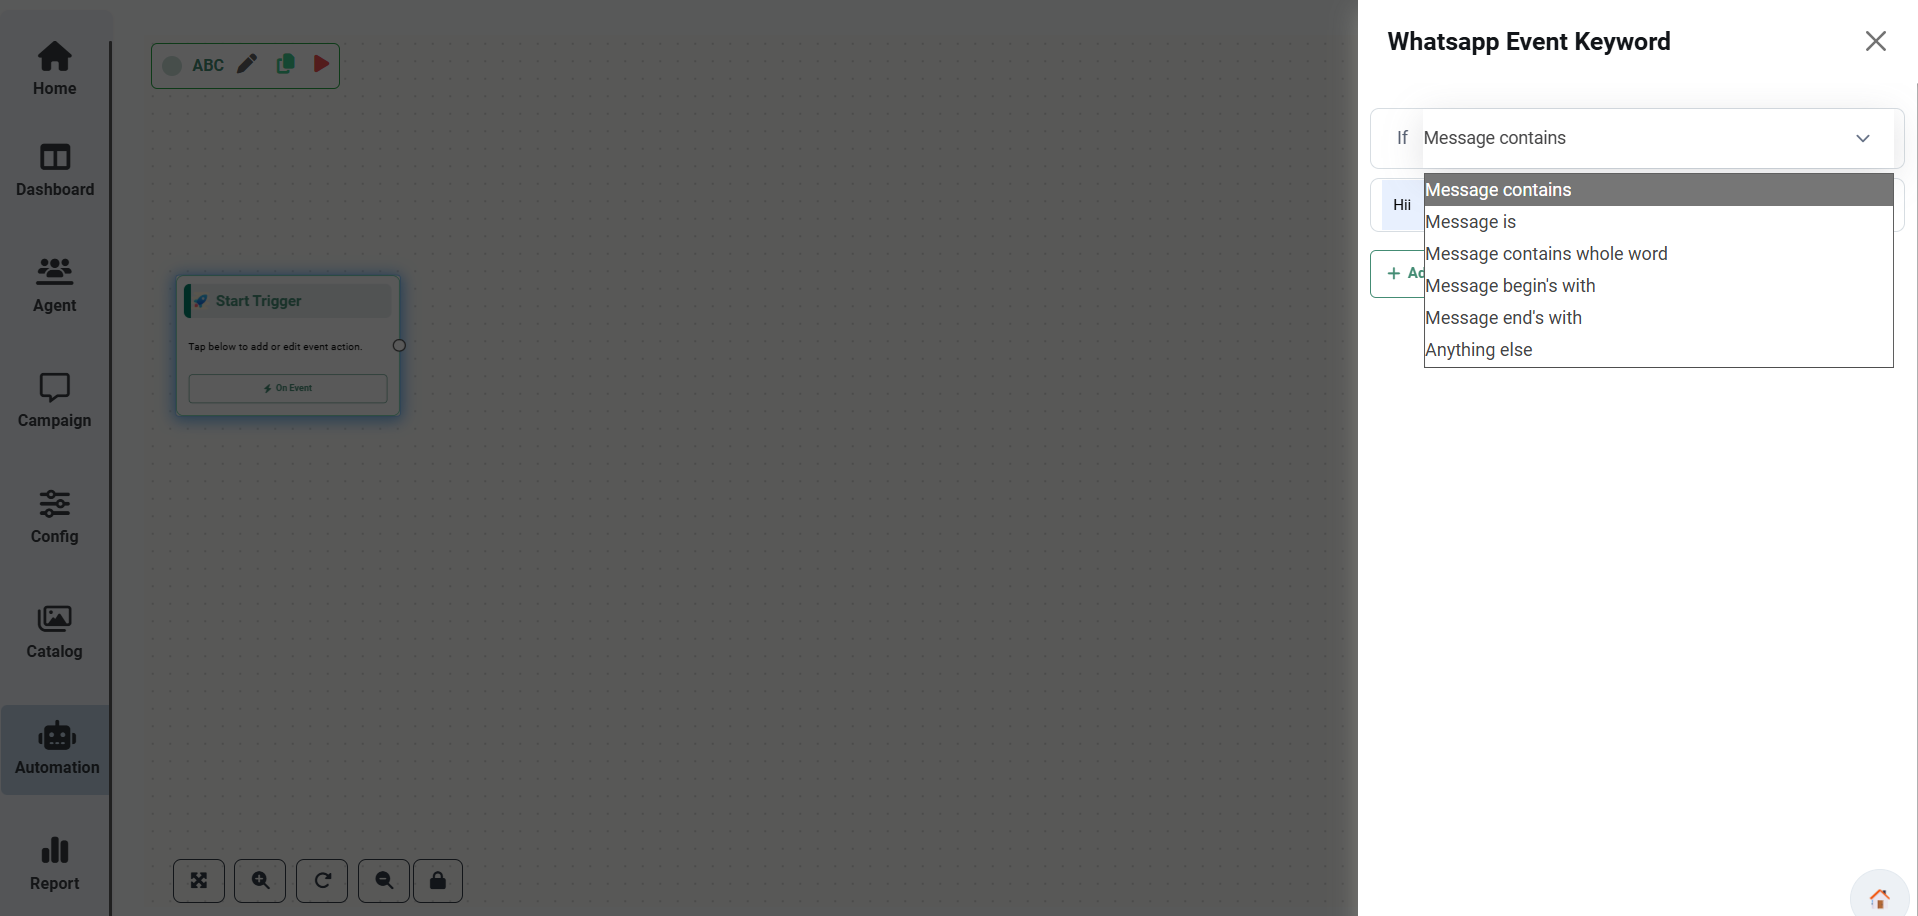
Trigger Conditions
| Condition | Description |
|---|---|
| Message Contains | Starts when the incoming message contains specific text. |
| Message Is | Starts only when the incoming message exactly matches the configured keyword. |
| Message Contains Whole Word | Triggers only when the complete word matches. |
| Message Begins With | Starts when the message begins with the configured keyword. |
| Message Ends With | Starts when the message ends with the configured keyword. |
| Anything Else | Acts as the default trigger when no other conditions match. |
Add Conversation Nodes
Click the connection point on any node to display the list of available chatbot actions. Each node performs a specific function within the chatbot conversation.
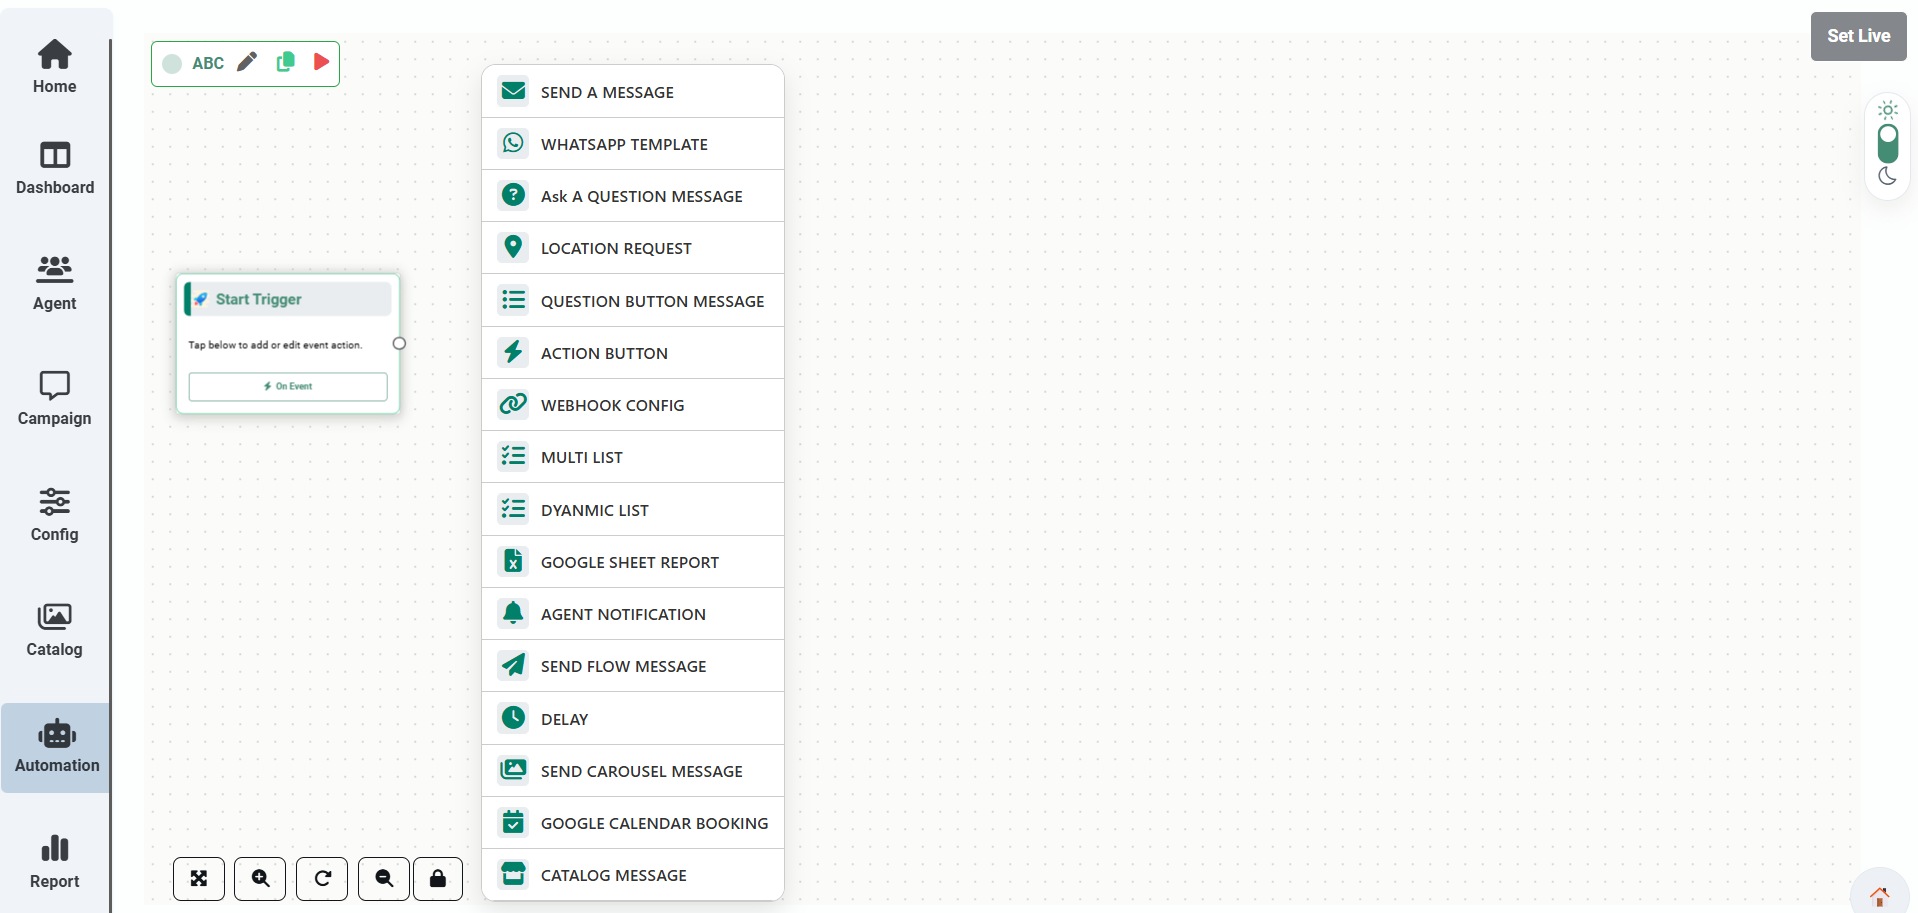
Send Message
The Send Message node is used to send a standard WhatsApp message to the customer. It supports text as well as different media types, allowing businesses to create rich and engaging conversations.
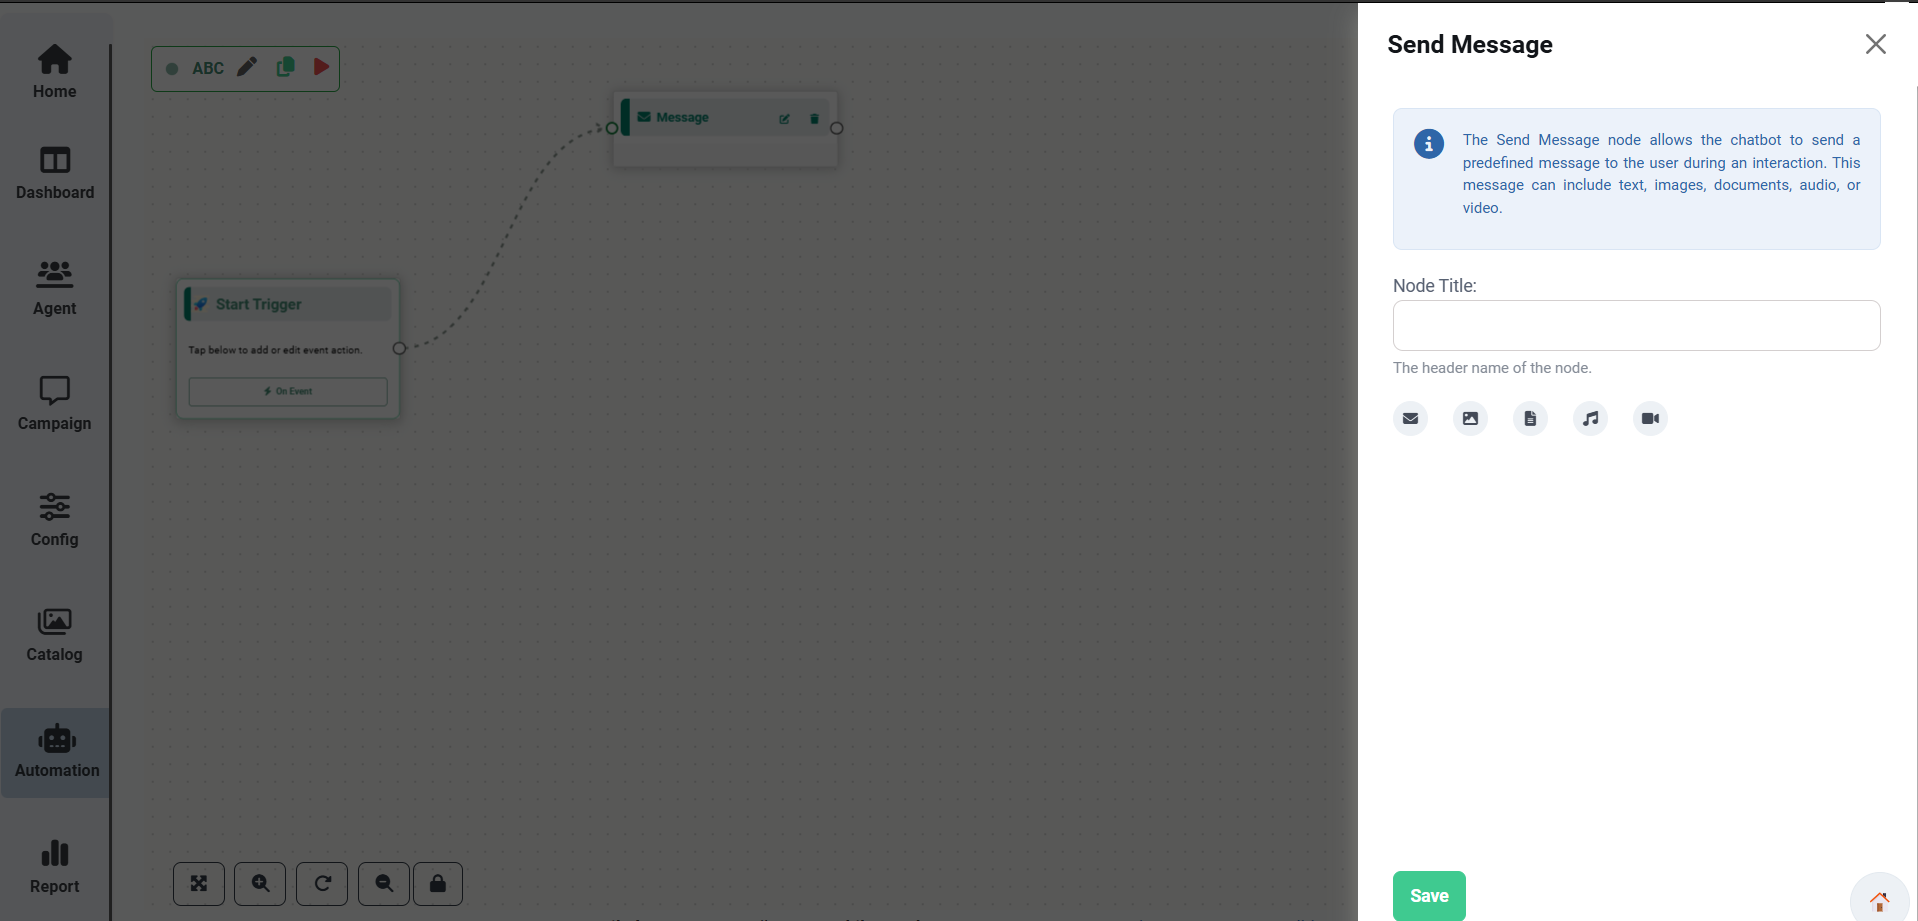
Supported Message Types
Media Source
Media files can be selected in two different ways:
- Upload the media directly.
- Use a workflow variable containing the media URL.
WhatsApp Template
The WhatsApp Template node is used to send an approved Meta WhatsApp template. This node allows you to select and configure an existing template before sending it to customers.
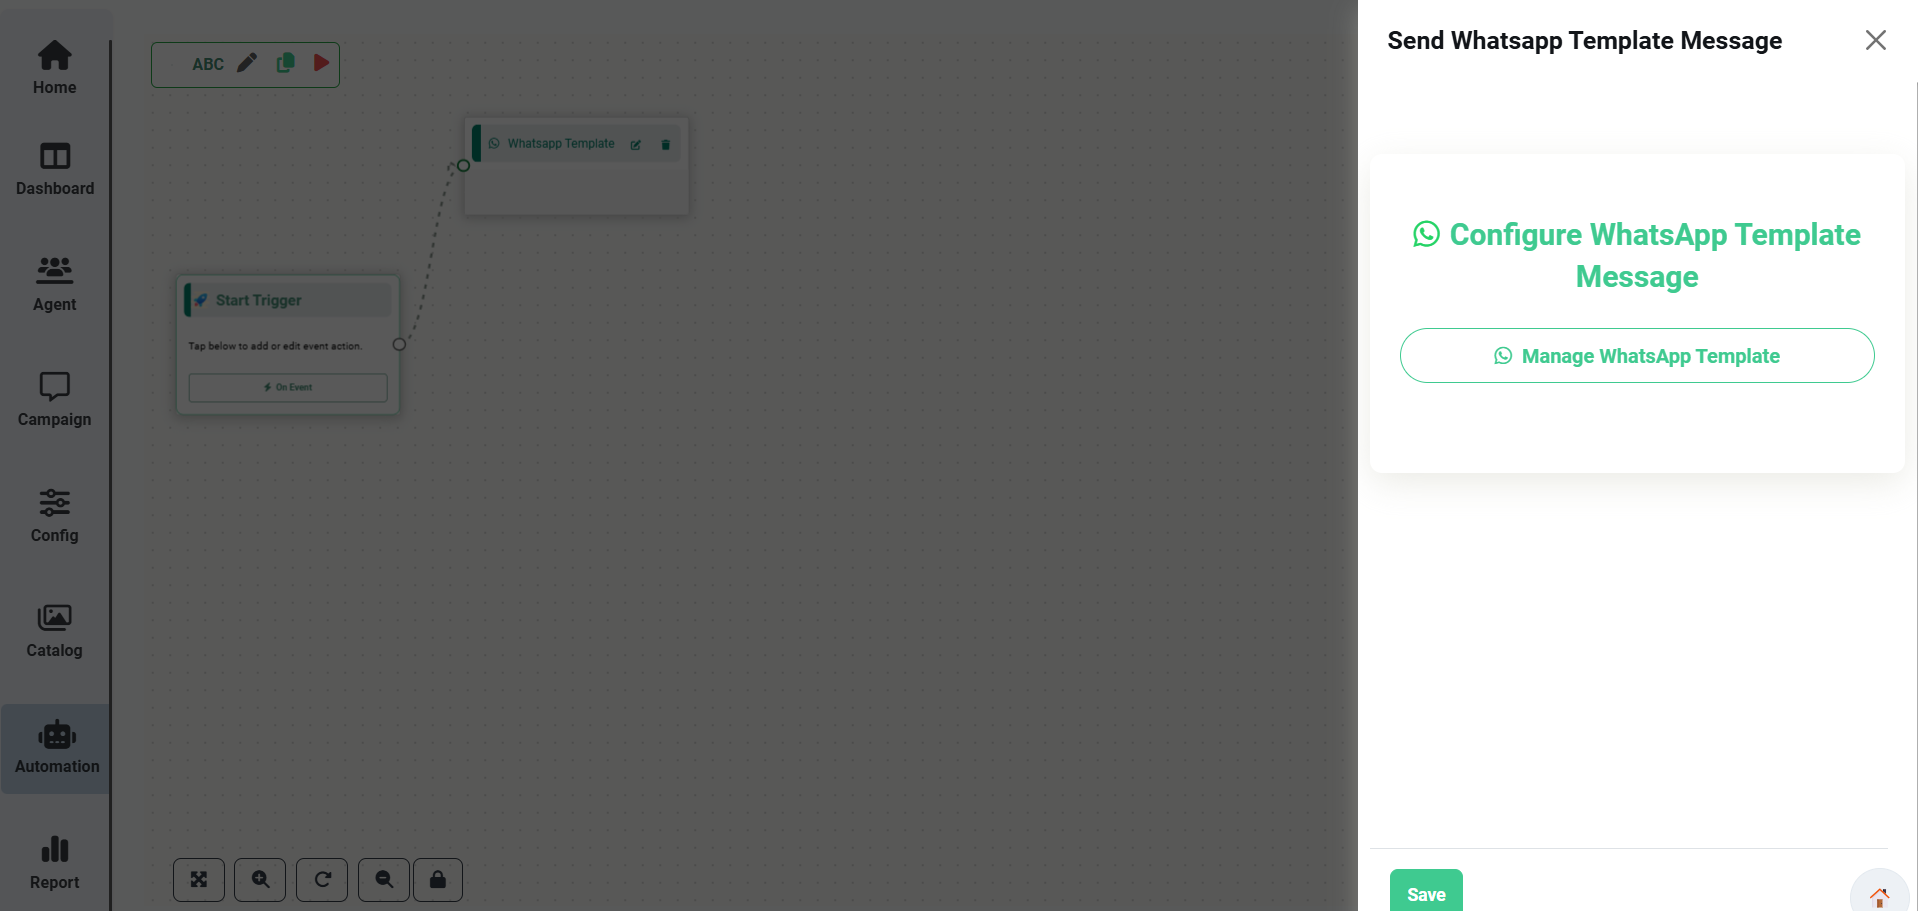
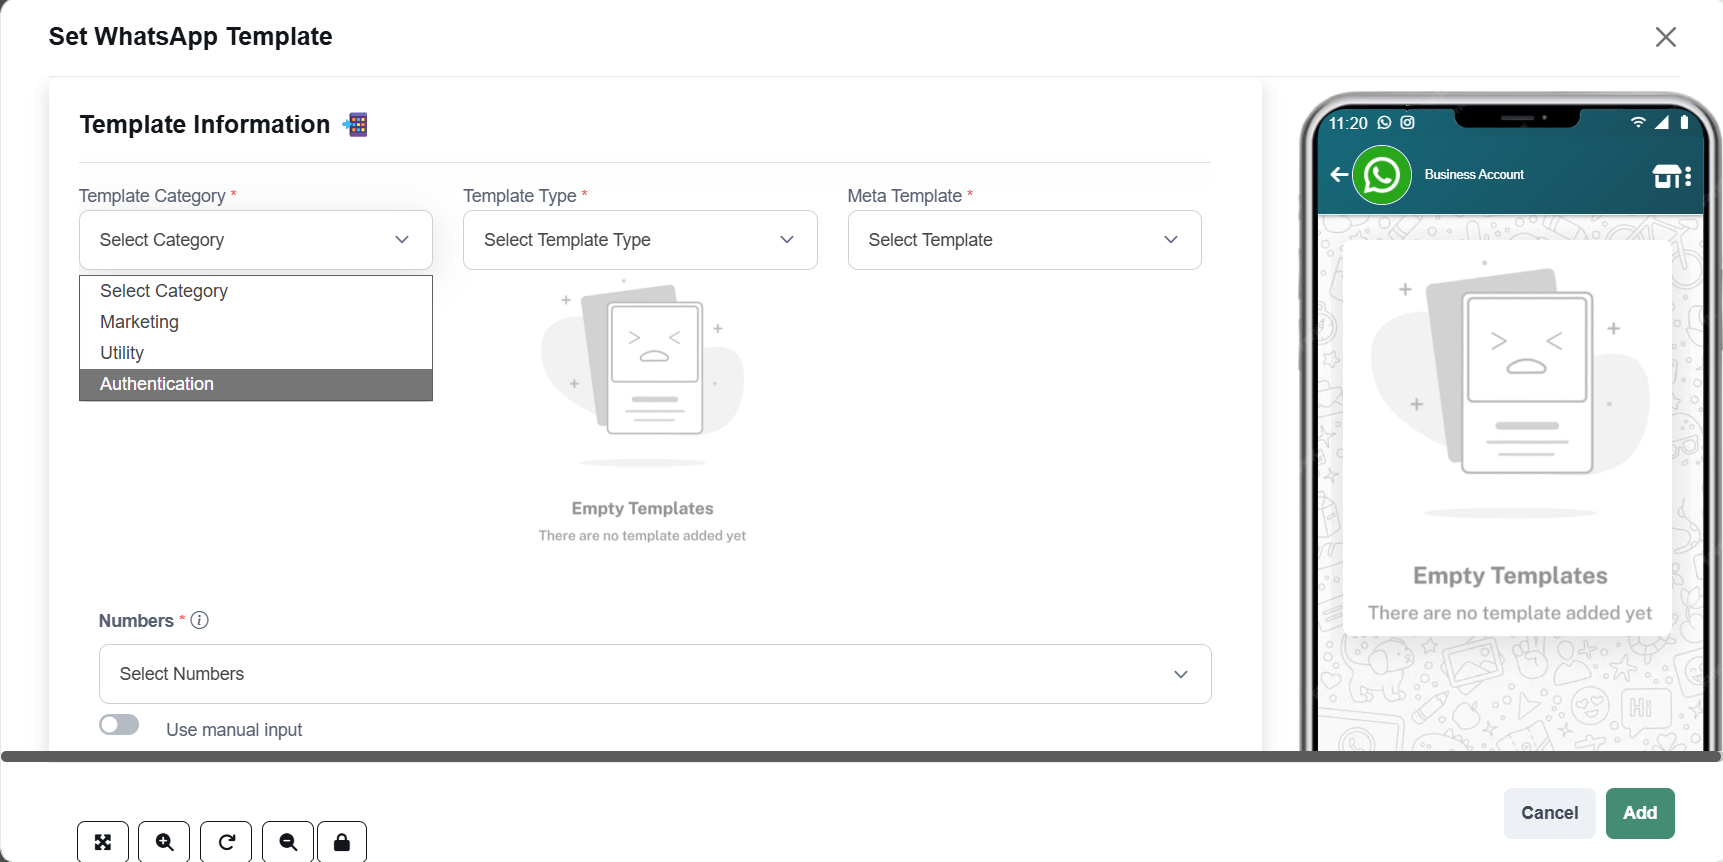
Overview
This node sends an approved Meta WhatsApp template. Click Manage WhatsApp Template to configure and attach a template to the chatbot flow.
Template Configuration
Configure the following fields before attaching the template.
| Field | Description |
|---|---|
| Template Category | Select the category of the WhatsApp template (Utility, Marketing, Authentication, etc.). |
| Template Type | Select the type of template available for the selected category. |
| Meta Template | Select the approved Meta WhatsApp template. |
| WhatsApp Number | Select the WhatsApp Business number from which the template will be sent. |
| Number Selection | The template will be sent to the phone number stored in the selected workflow variable. |
| Manual Input | Enable this option to manually enter one or more phone numbers. The template will be sent to all specified numbers. |
Steps to Configure a WhatsApp Template
Ask Question Message
The Ask Question Message node allows the chatbot to ask a question and wait for the customer's response before continuing the conversation.
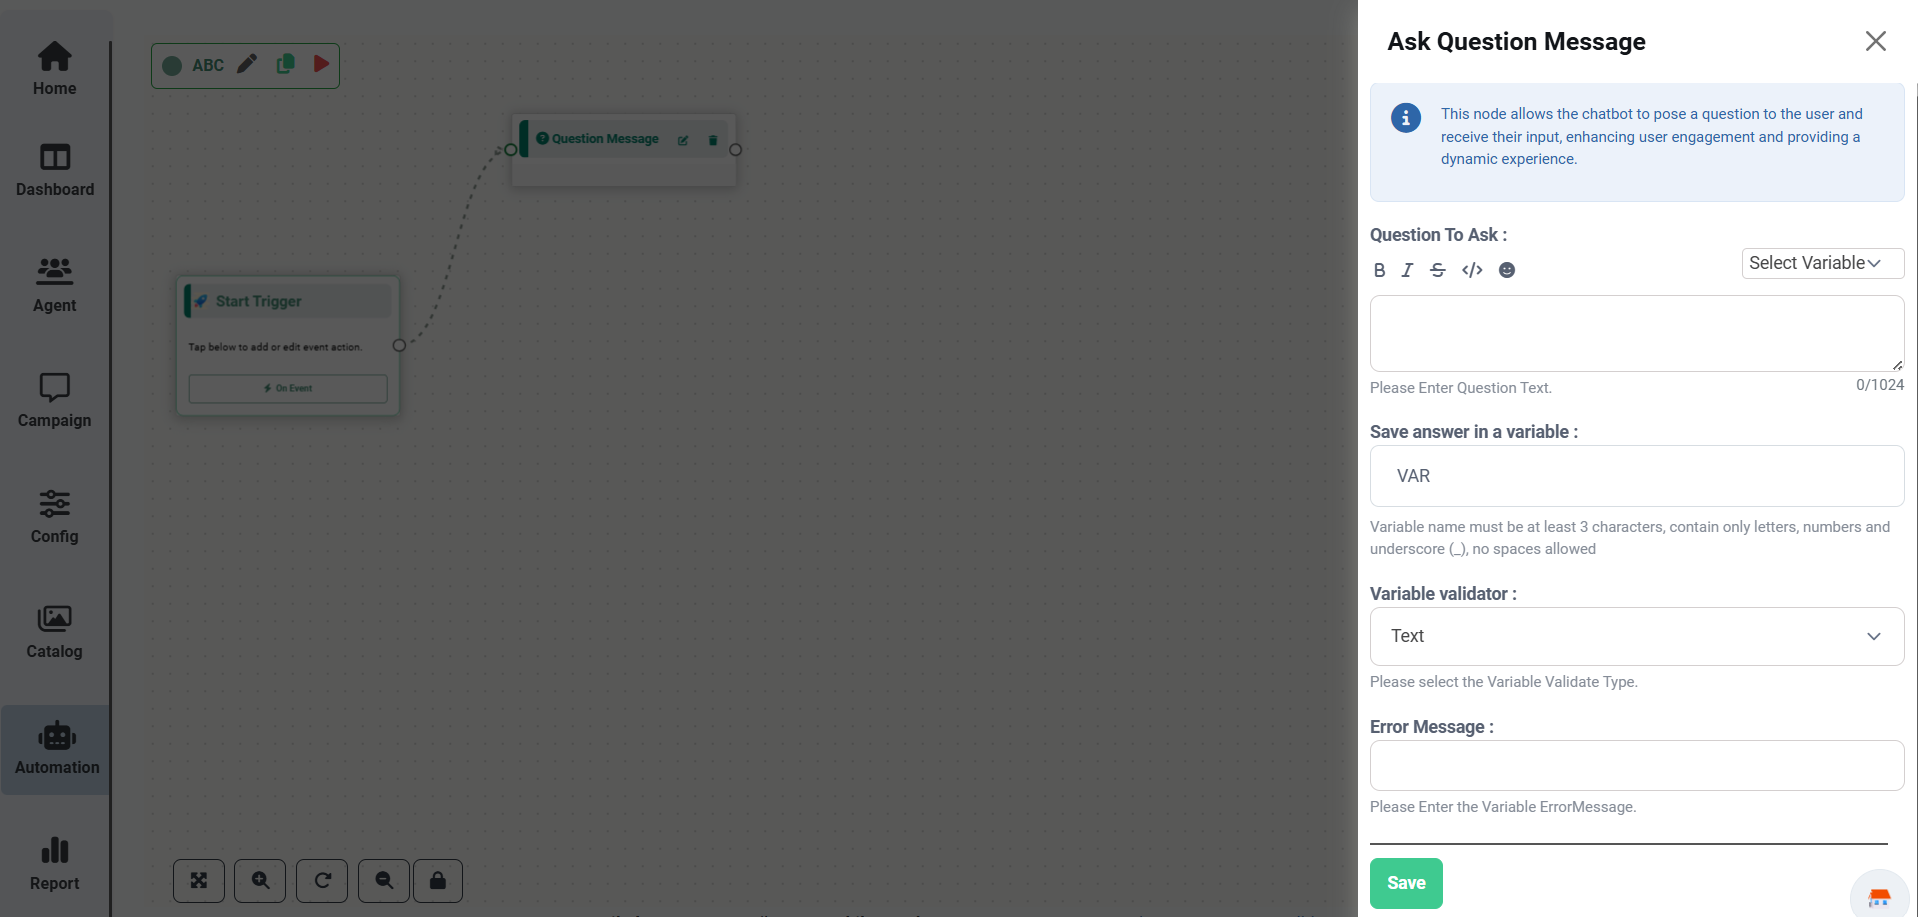
Features
- Ask open-ended questions.
- Store user responses into workflow variables.
- Validate user input.
- Continue the conversation using captured data.
| Option | Description |
|---|---|
| Question Text | Message displayed to the customer. |
| Variable Name | Stores the customer's reply. |
| Validation | Checks whether the entered value is valid. |
| Retry Message | Message shown if validation fails. |
Location Request
The Location Request node asks customers to share their live location through WhatsApp.
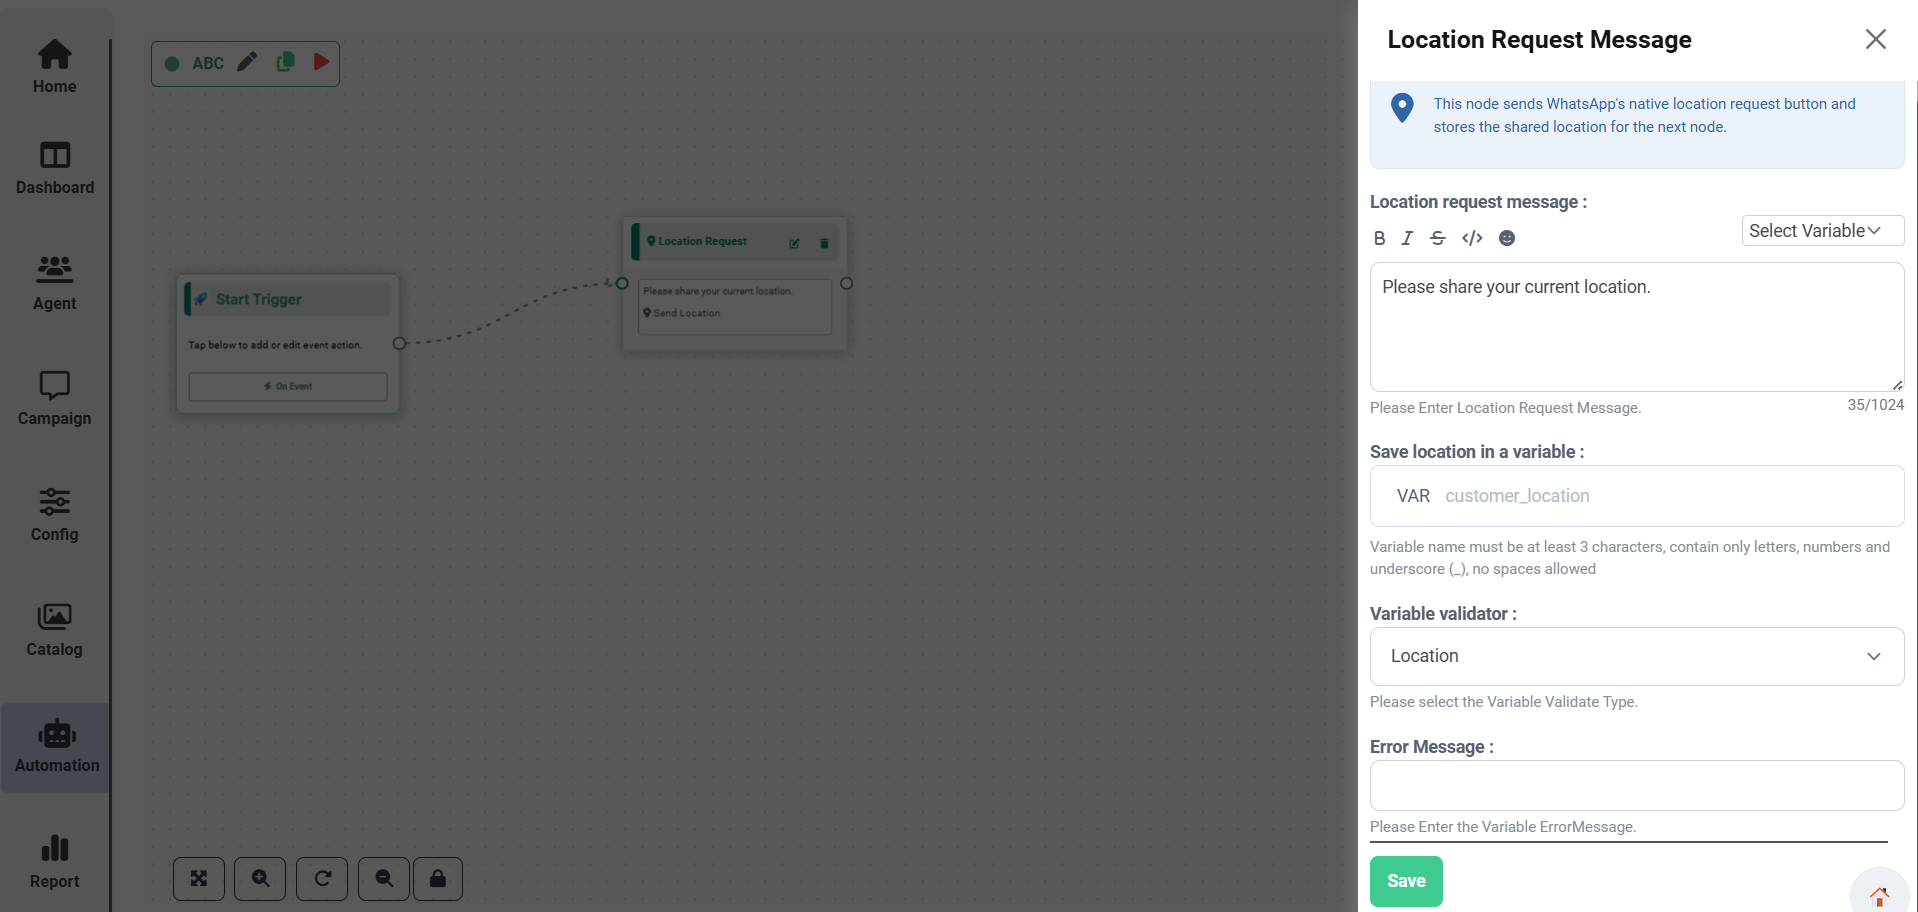
Purpose
Question Button
The Question Button node creates interactive reply buttons that allow users to select one of the predefined options. The selected button value is stored and can be used in subsequent chatbot nodes.
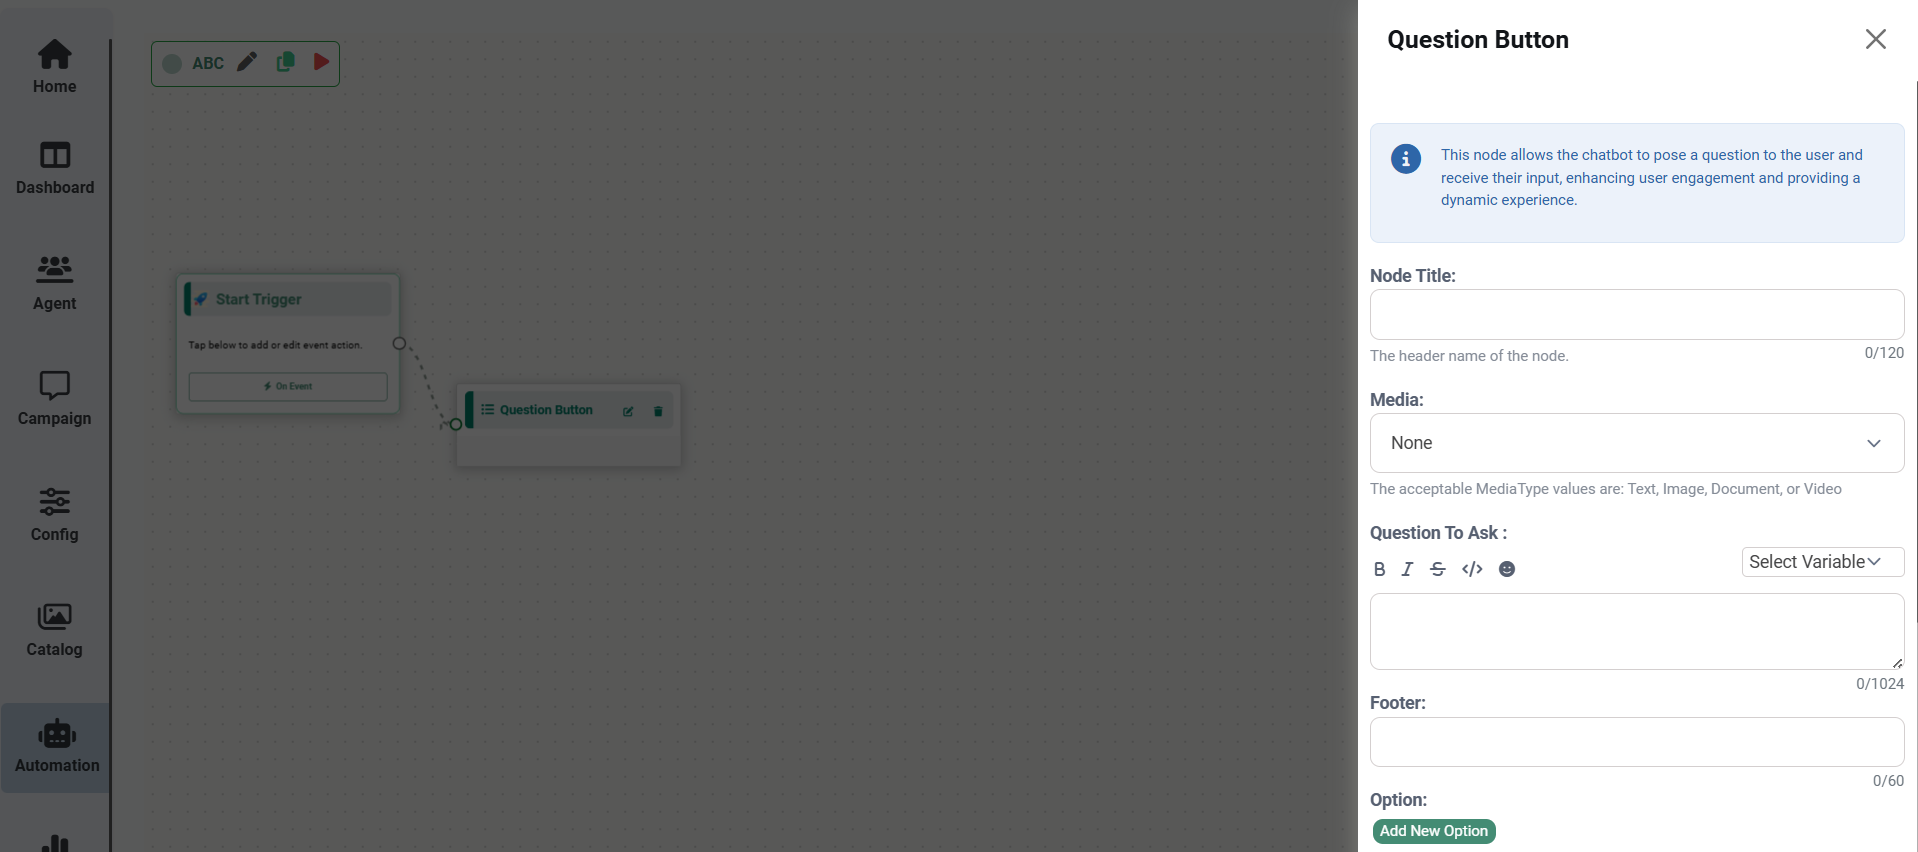
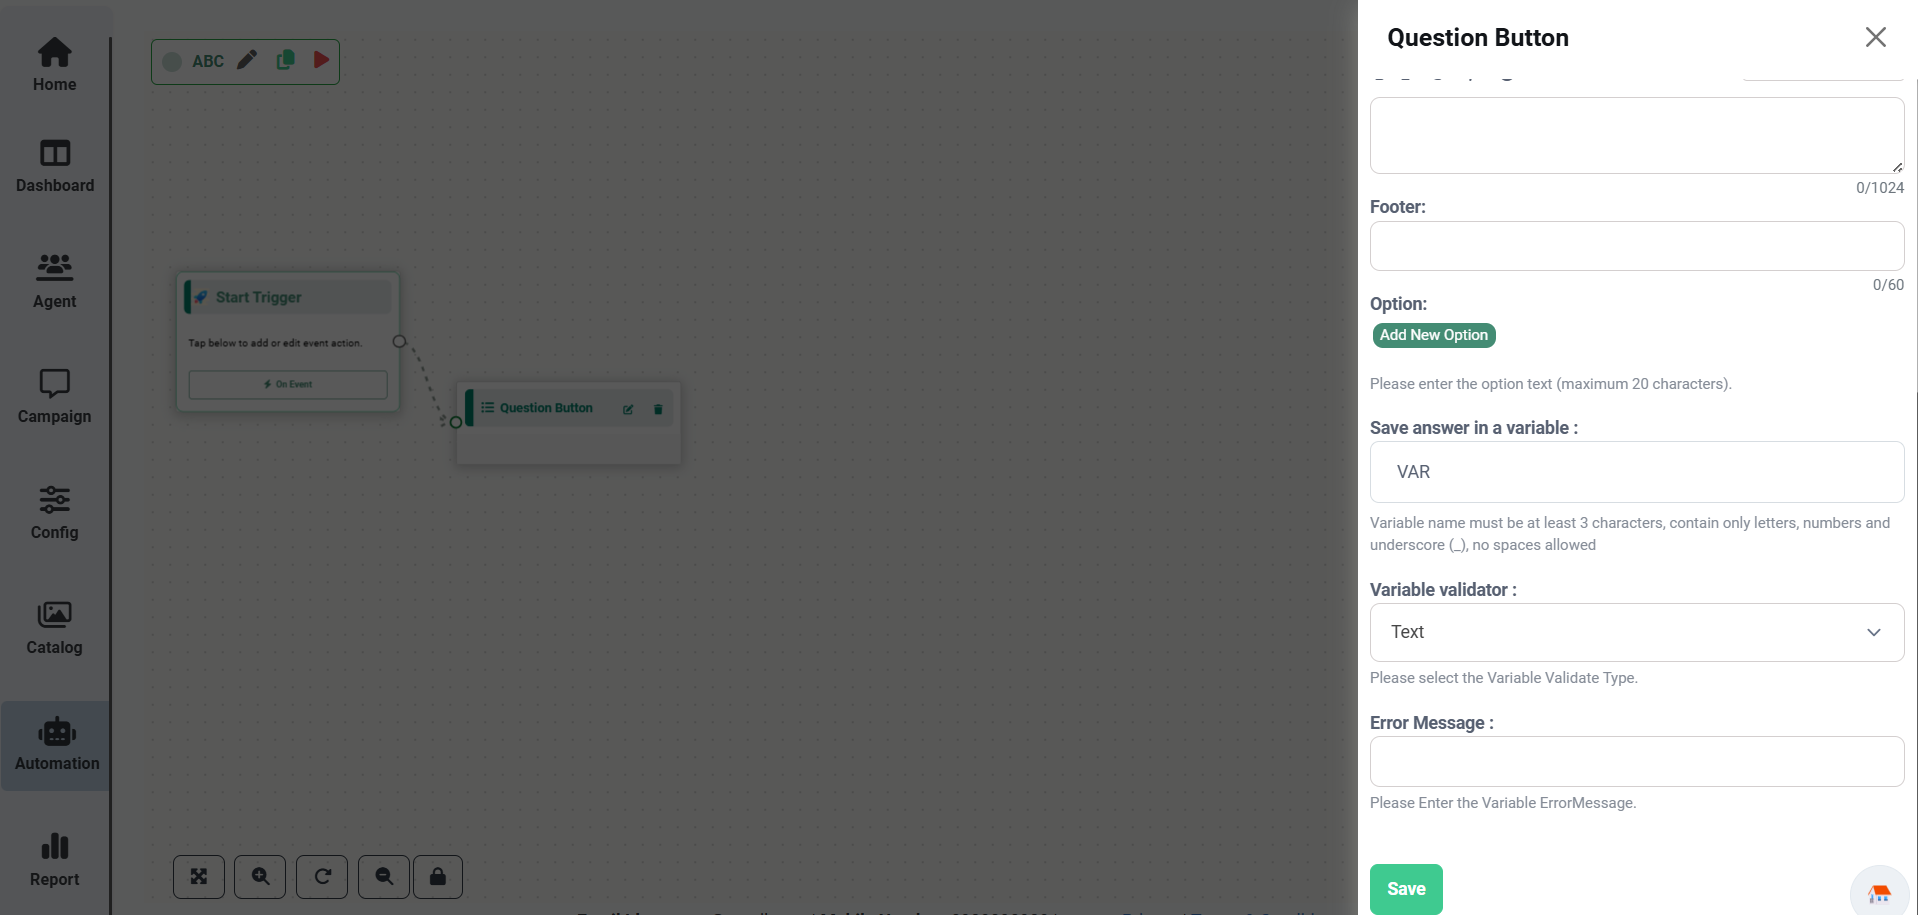
Overview
The Question Button node provides an interactive way for users to respond without typing. It displays reply buttons below the message, allowing customers to quickly select one of the available options.
Configuration
Configure the following options while creating a Question Button node.
| Option | Description |
|---|---|
| Node Title | Enter a name to identify the Question Button node. |
| Media | Select the header type for the message. |
| Question To Ask | Enter the question that will be displayed to the user. |
| Footer | Optional footer text displayed below the message. |
| Options | Add reply buttons that users can select. |
| Save Answer In Variable | Select the workflow variable where the selected button value will be stored. |
| Variable Validator | Select the validation type for the stored value. |
| Error Message | Configure the message shown when validation fails. |
Header Types
The Question Button node supports the following header types.
| Header Type | Description |
|---|---|
| None | No header is displayed. |
| Text | Displays a text header above the question. |
| Image | Displays an image above the question. |
| Document (PDF) | Displays a PDF document as the message header. |
| Video | Displays a video above the question. |
Steps to Configure
Action Button
The Action Button node creates WhatsApp Call-to-Action (CTA) buttons. These buttons allow users to either open a website or make a phone call directly from the WhatsApp conversation.
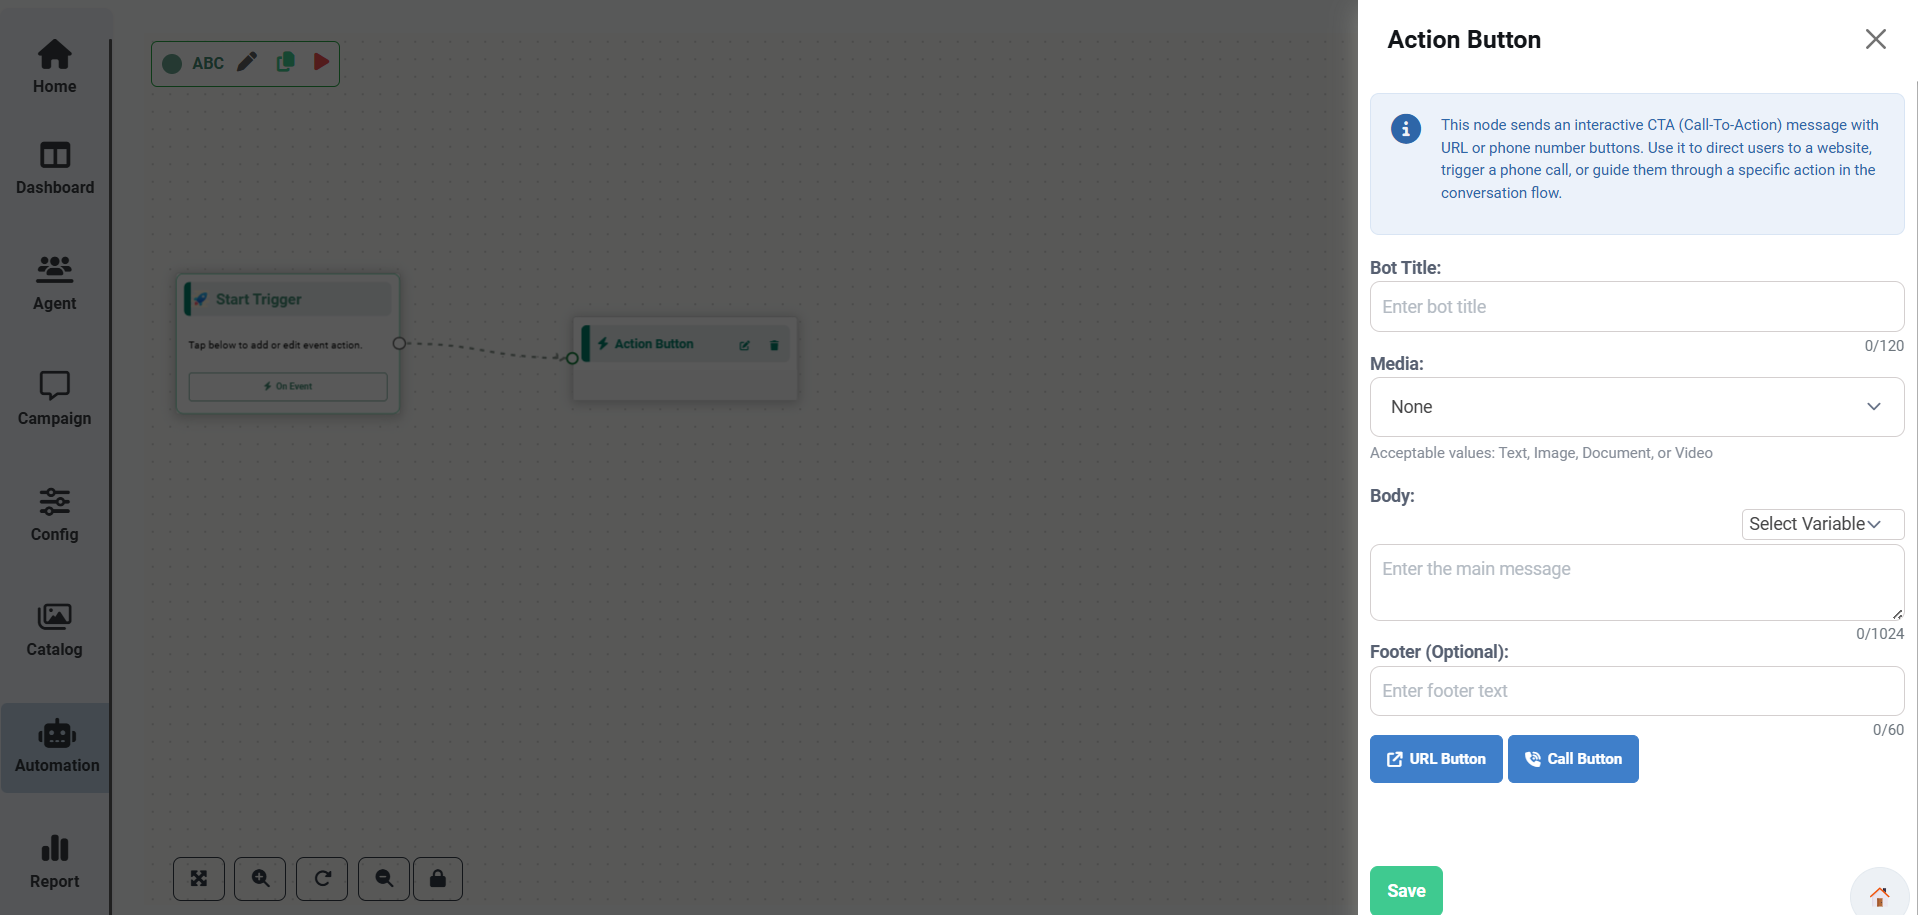
Overview
The Action Button node is commonly used to direct users to external websites or enable one-tap phone calls. It supports two Call-to-Action button types.
Supported Button Types
| Button Type | Description |
|---|---|
| URL Button | Opens the configured website URL when clicked. |
| Call Button | Initiates a phone call to the configured phone number. |
Configuration
Configure the following options before saving the Action Button node.
| Option | Description |
|---|---|
| Node Title | Enter a name to identify the Action Button node. |
| Media | Select the header type for the message. |
| Body | Enter the main message displayed to the customer. |
| Footer (Optional) | Enter optional footer text displayed below the message. |
| Button Type | Select either URL Button or Call Button. |
Available Header Types
| Header Type | Description |
|---|---|
| None | No header is displayed. |
| Text | Displays a text header. |
| Image | Displays an image above the message. |
| Document (PDF) | Displays a PDF document as the header. |
| Video | Displays a video above the message. |
Steps to Configure
Webhook Configuration
The Webhook Configuration node connects the chatbot with external applications or APIs. It enables the chatbot to exchange data with external systems and process responses during workflow execution.
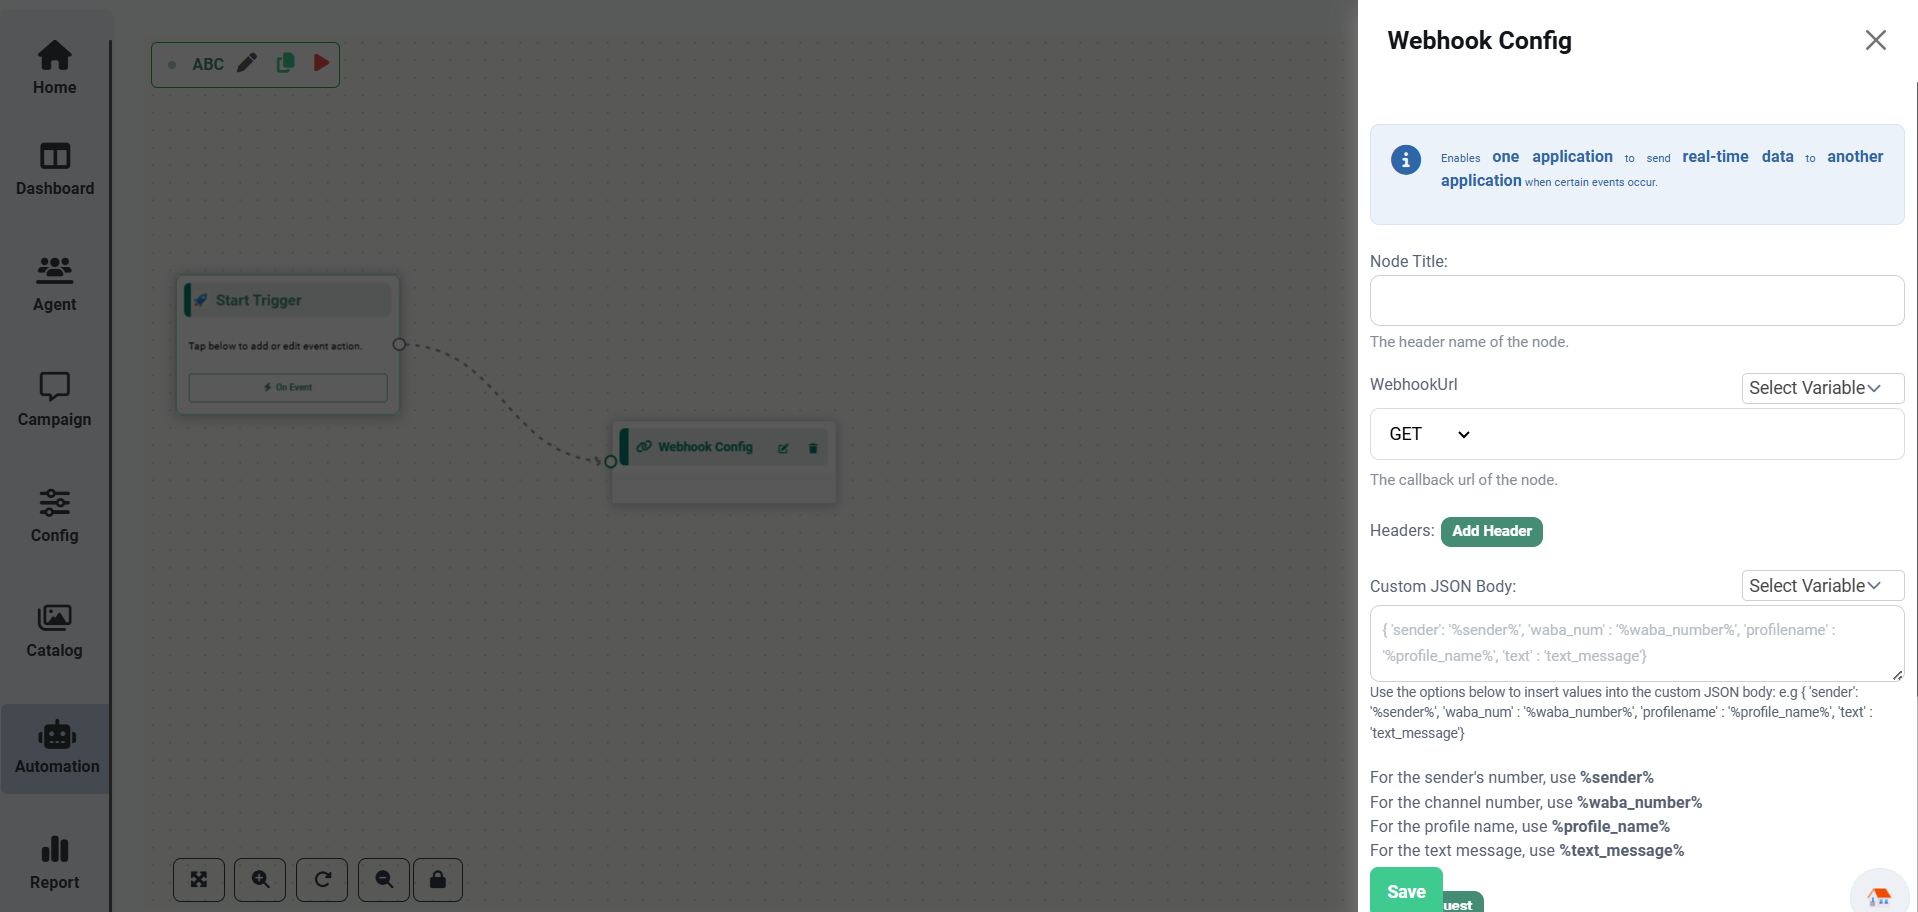
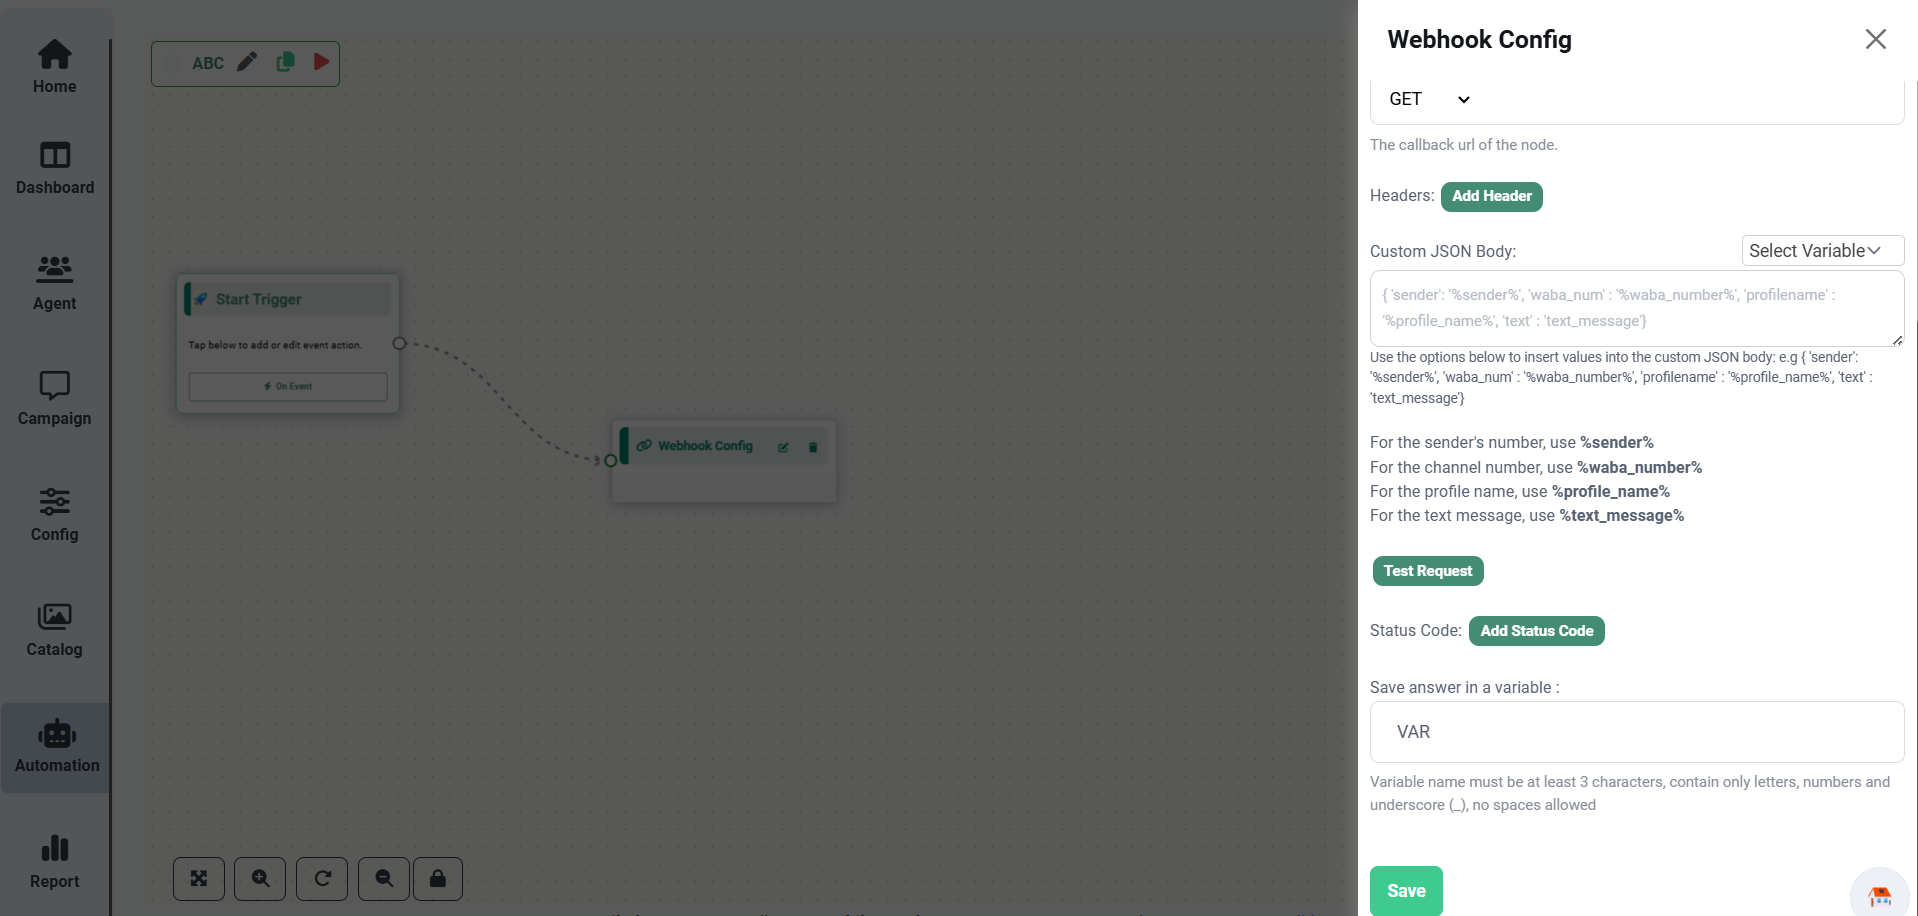
Overview
Webhook nodes are used to integrate chatbot workflows with external applications, REST APIs, CRM systems, databases, third-party services, and custom applications.
Configuration Options
Configure the following options before saving the Webhook node.
| Option | Description |
|---|---|
| Node Title | Enter a unique name to identify the Webhook node. |
| Request Method | Select the HTTP request method (GET or POST). |
| Webhook URL | Enter the endpoint URL of the external API. |
| HTTP Headers | Add request headers such as Authorization, Content-Type, or custom headers. |
| Custom JSON Body | Configure the JSON payload to be sent with the request. |
| Test Request | Send a test request to verify the webhook configuration before saving. |
| Response Status Codes | Configure status codes returned by the API to determine workflow behavior. |
| Save Response Variable | Select the workflow variable where the API response will be stored. |
Steps to Configure
Use Cases
- Connect chatbot workflows with CRM systems.
- Retrieve customer information from external databases.
- Integrate with third-party services and REST APIs.
- Exchange data with custom business applications.
Multi List
The Multi List node displays a WhatsApp interactive list with multiple selectable options. Users can choose an option from the list, and the selected value is stored for further processing within the chatbot workflow.
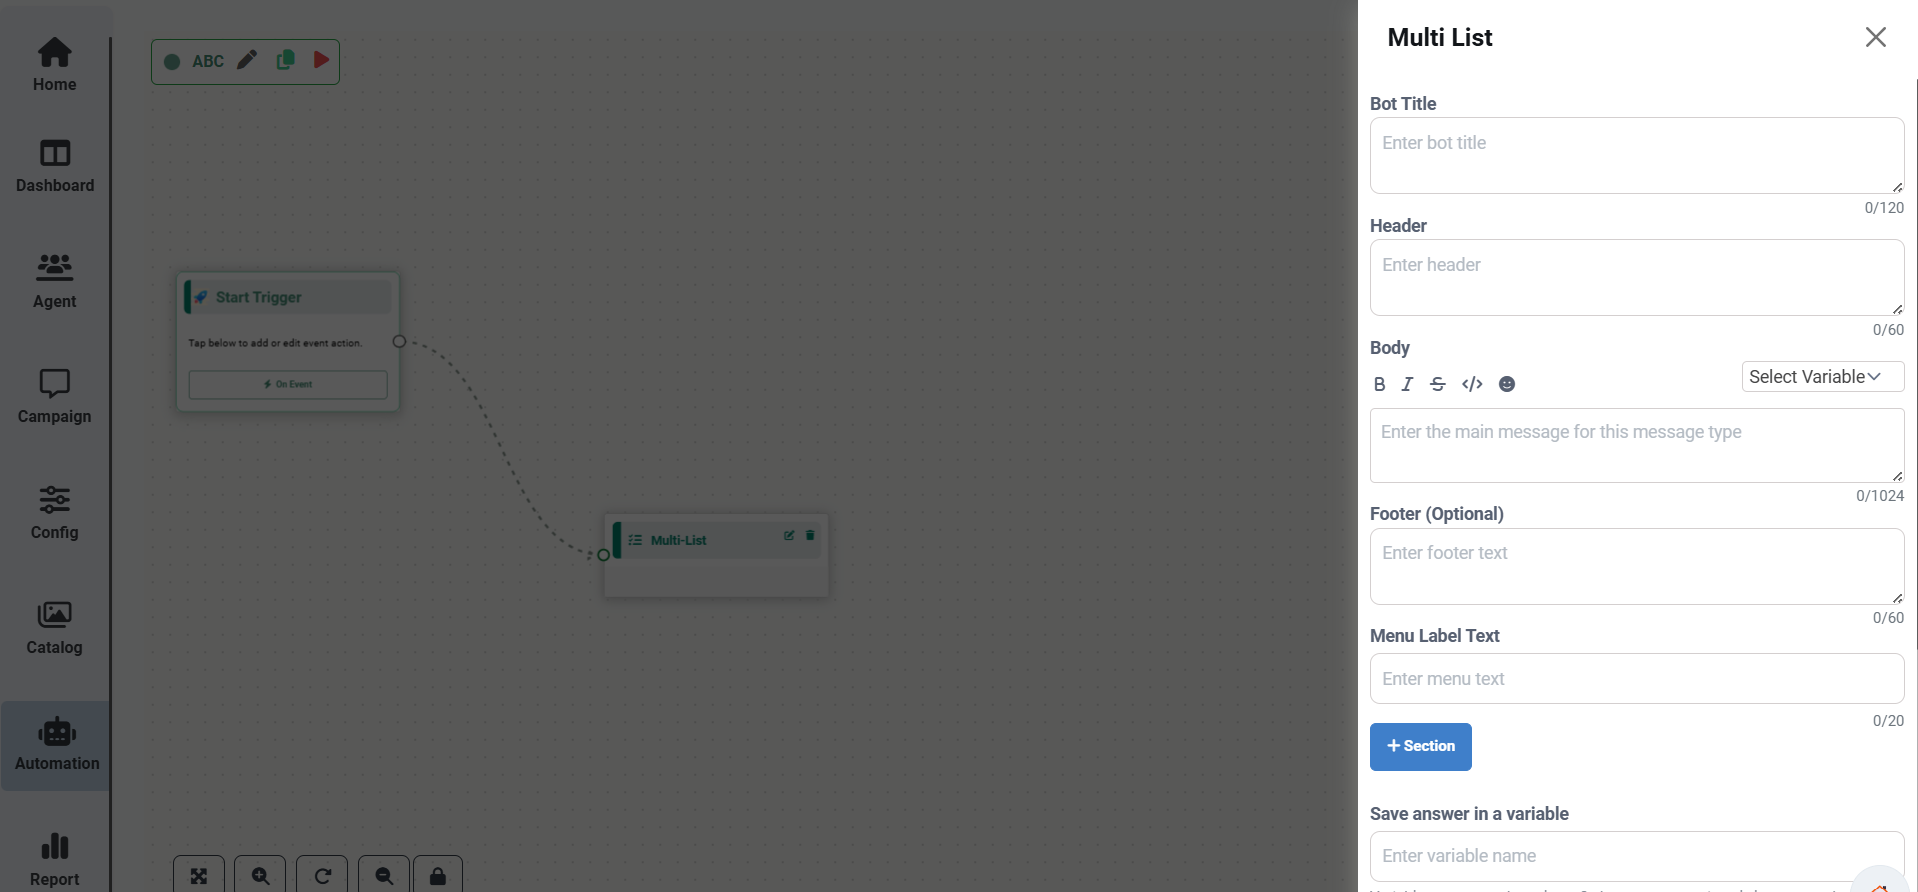
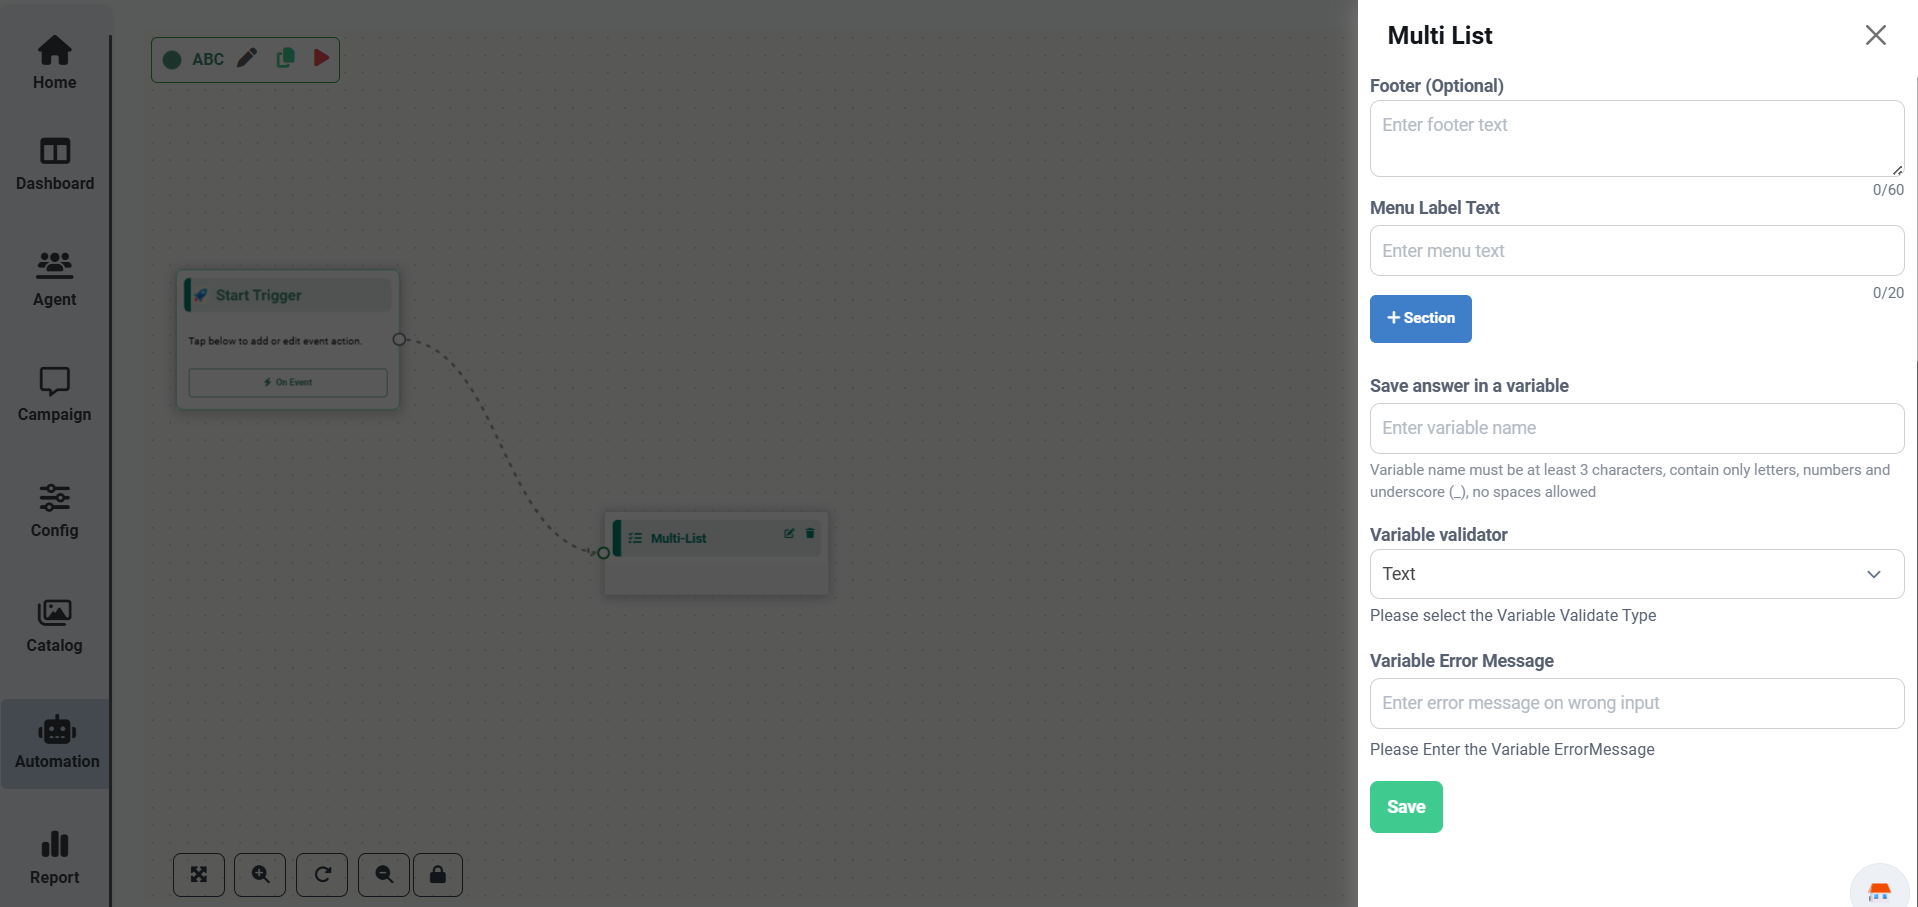
Overview
The Multi List node is used to create interactive WhatsApp list messages. It organizes multiple options into sections, making it easier for users to select the required option from a structured menu.
Configuration Options
Configure the following fields before saving the Multi List node.
| Option | Description |
|---|---|
| Bot Title | Enter a name to identify the Multi List node. |
| Header | Enter the header text displayed at the top of the list message. |
| Body | Enter the main message displayed to the user. |
| Footer | Enter optional footer text displayed below the list. |
| Menu Label | Specify the text displayed on the button that opens the list. |
| Sections | Create one or more sections to organize list items. |
| List Items | Add selectable options under each section. |
| Variable Name | Select the workflow variable where the selected value will be stored. |
| Validation | Select the validation type for the stored value. |
| Error Message | Enter the message displayed if validation fails. |
Steps to Configure
Dynamic List
The Dynamic List node allows you to display a WhatsApp Interactive List using dynamic data received from an API, Webhook, or stored variable. Instead of manually creating list items, the node automatically generates them from JSON data.
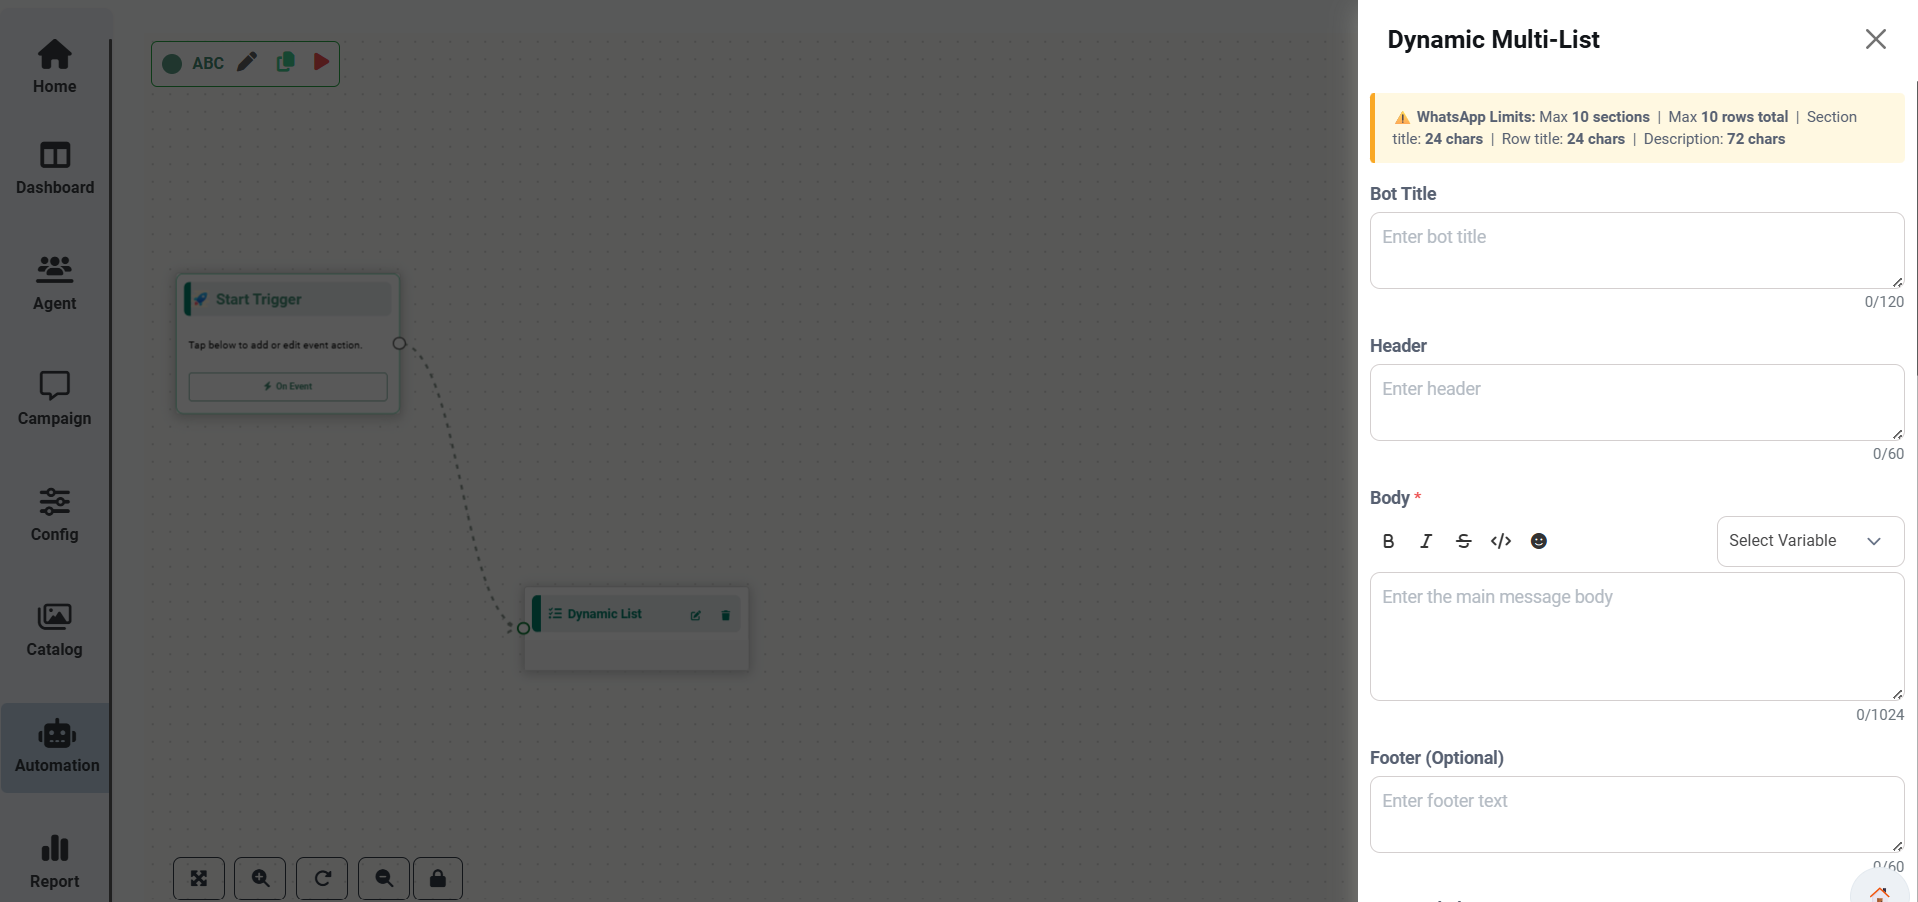
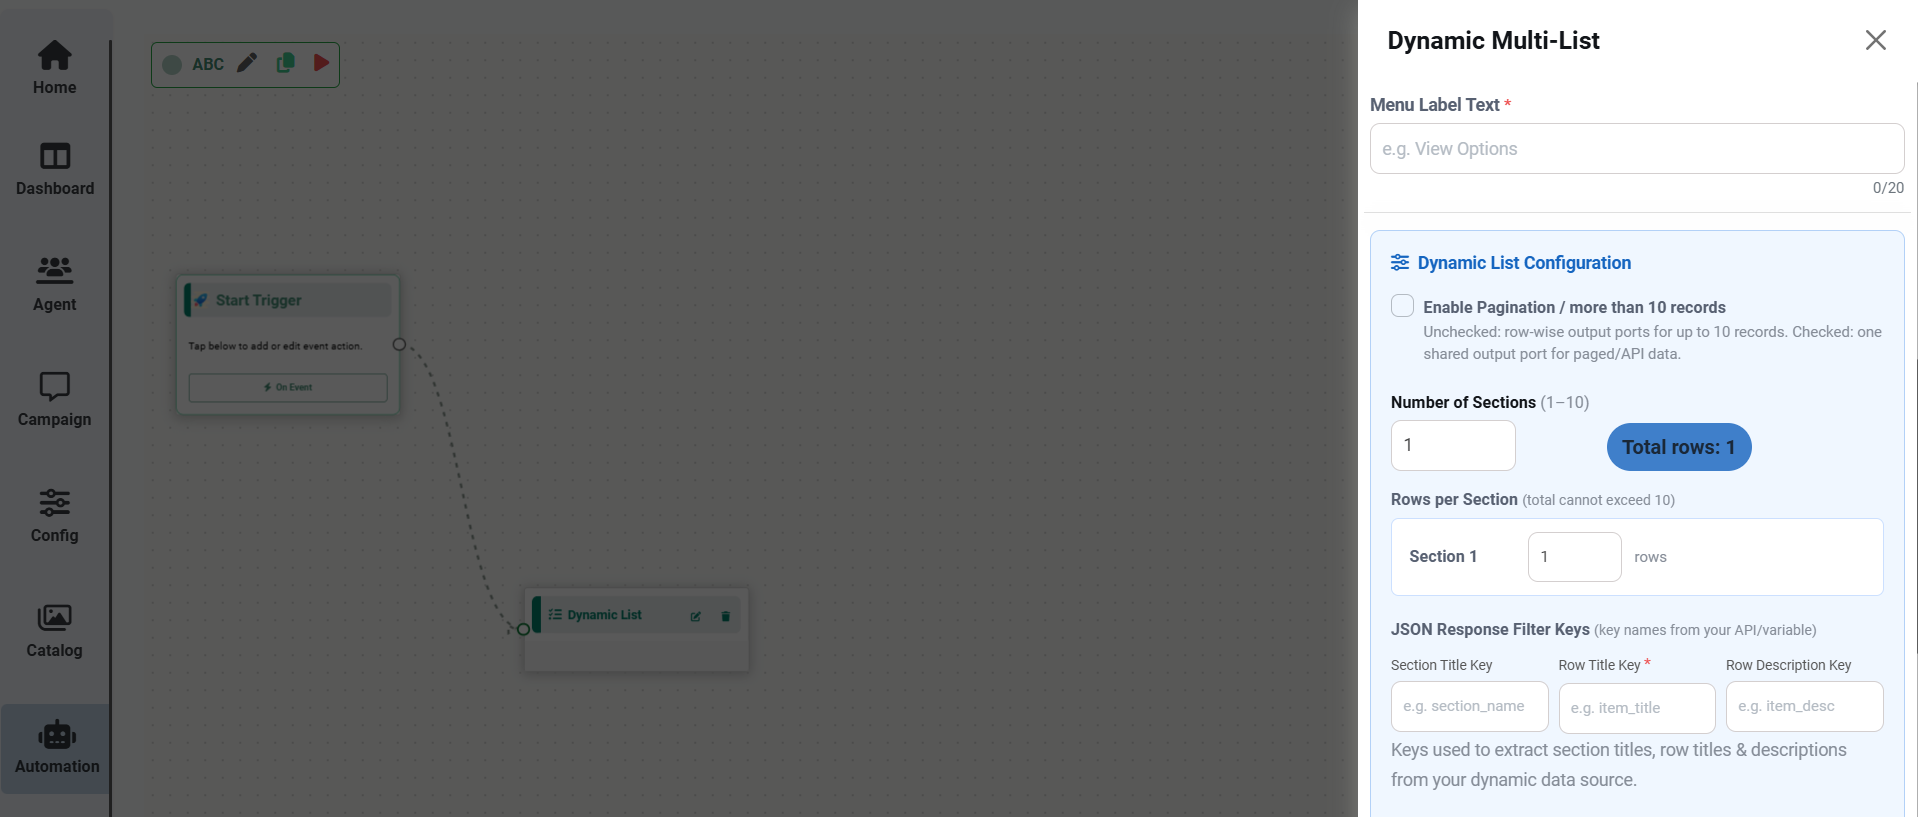
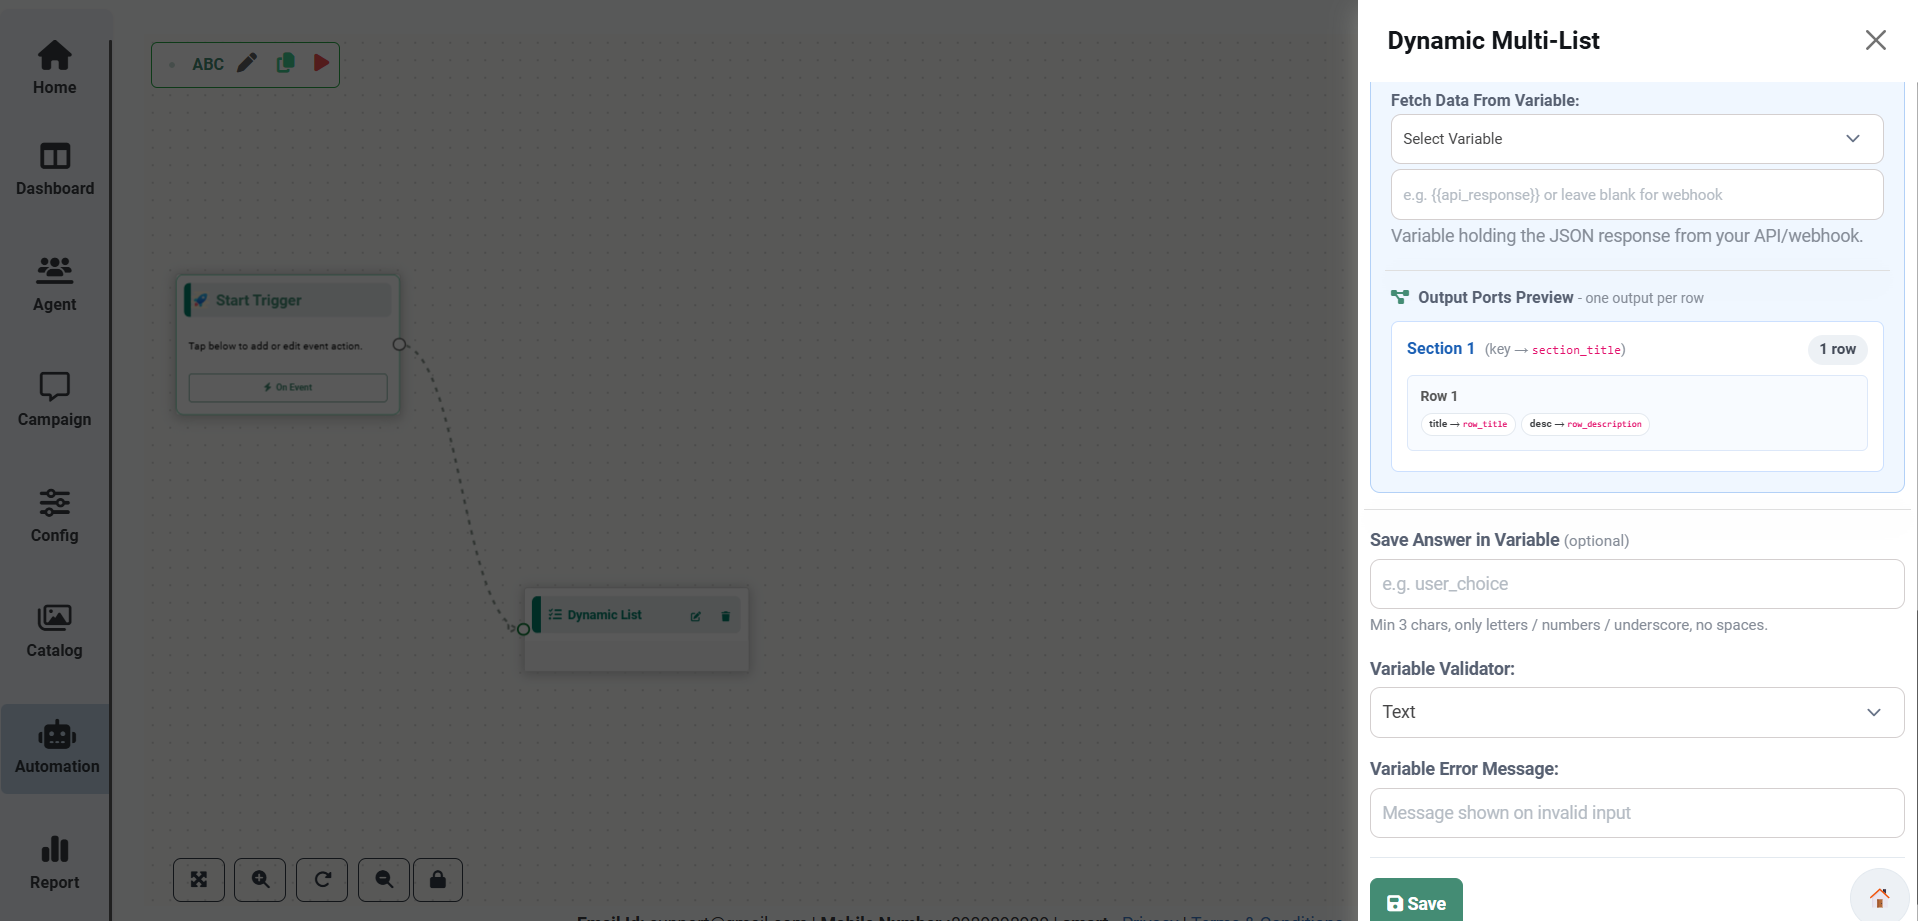
Overview
The Dynamic List node automatically generates WhatsApp Interactive Lists using dynamic JSON data. It is useful for displaying products, categories, services, appointments, store locations, or any dynamic records returned by an API or Webhook.
Configuration Options
| Option | Description |
|---|---|
| Bot Title | Enter a name to identify the Dynamic List node. |
| Header | Enter the header displayed at the top of the WhatsApp list. |
| Body | Enter the main message body displayed to the user. |
| Footer | Optional footer text displayed below the message. |
| Menu Label Text | Enter the label displayed on the WhatsApp button that opens the list (Example: View Products). |
| Enable Pagination | Enable pagination when the API returns more than 10 records. |
| Number of Sections | Specify how many sections should appear in the WhatsApp list (Minimum: 1, Maximum: 10). |
| Rows per Section | Specify how many rows each section contains. The total number of rows across all sections cannot exceed 10. |
| JSON Response Filter Keys | Map JSON fields returned by the API. |
| Fetch Data From Variable | Select the workflow variable that contains the API or Webhook response. |
| Output Ports Preview | Preview the generated sections and rows before saving. |
| Save Answer in Variable | Store the user's selected list option. |
| Variable Validator | Select the validation type for the stored value. |
| Variable Error Message | Displayed when the received value fails validation. |
JSON Response Filter Keys
Map the JSON response fields returned by your API or Webhook.
| JSON Key | Description |
|---|---|
| Section Title Key | JSON key containing the section name. |
| Row Title Key | JSON key containing the row title. |
| Row Description Key | JSON key containing the row description. |
Example JSON Response
        {
          "section_title": "Electronics",
          "row_title": "iPhone 16",
          "row_description": "Available in stock"
        }
Pagination
| Mode | Description |
|---|---|
| Disabled | Creates one output port for each row (maximum 10 rows). |
| Enabled | Uses a shared output port for paginated API results. |
Steps to Configure
Use Cases
- Product List
- Service Selection
- Appointment Slots
- Store Locations
- Category Selection
Google Sheet Report
The Google Sheet Report node automatically stores chatbot responses in a Google Sheet. This helps businesses maintain customer records, generate reports, and analyze chatbot interactions without manual data entry.
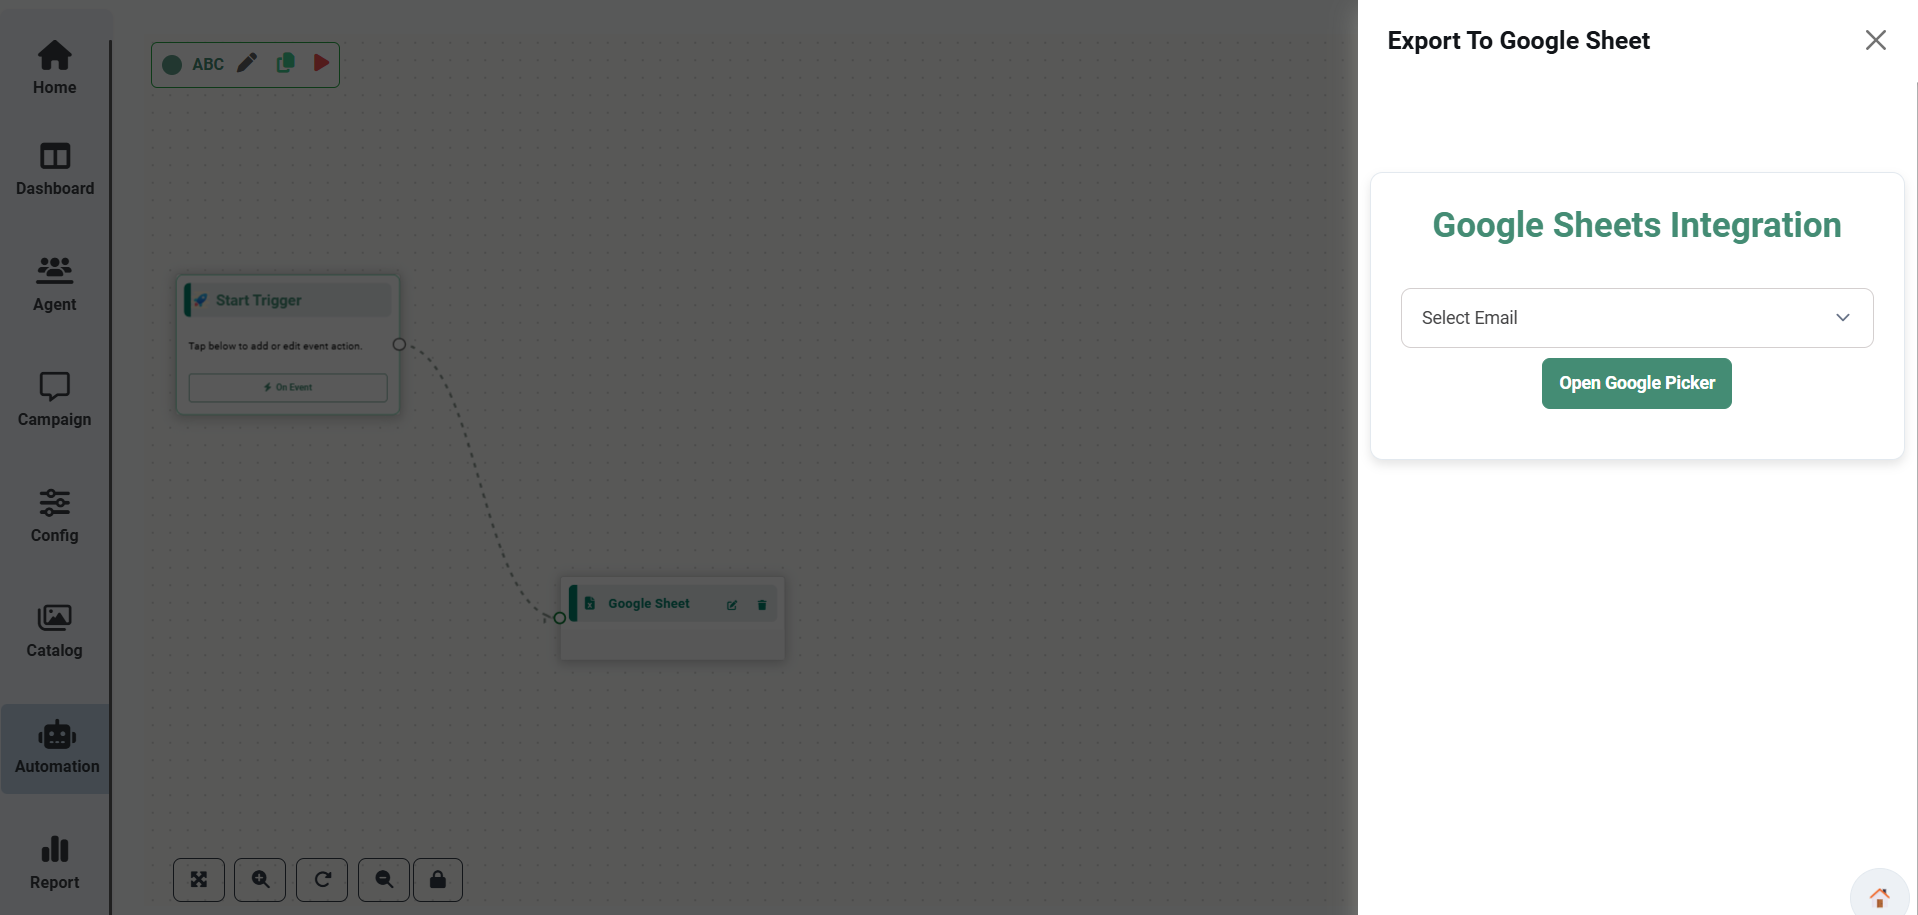
Configuration
| Field | Description |
|---|---|
| Google Account | Select the connected Google account. |
| Spreadsheet | Select the destination Google Sheet. |
| Worksheet | Select the worksheet where data will be stored. |
| Column Mapping | Map chatbot variables to Google Sheet columns. |
| Save | Save the configuration and connect the node. |
Agent Notification
The Agent Notification node is used to send automated notifications to agents whenever the workflow reaches this step. Notifications can be be delivered through supported communication channels such as Email or WhatsApp (depending on the configured provider).
This node helps ensure that agents receive important information, customer details, or workflow updates instantly without requiring manual intervention.
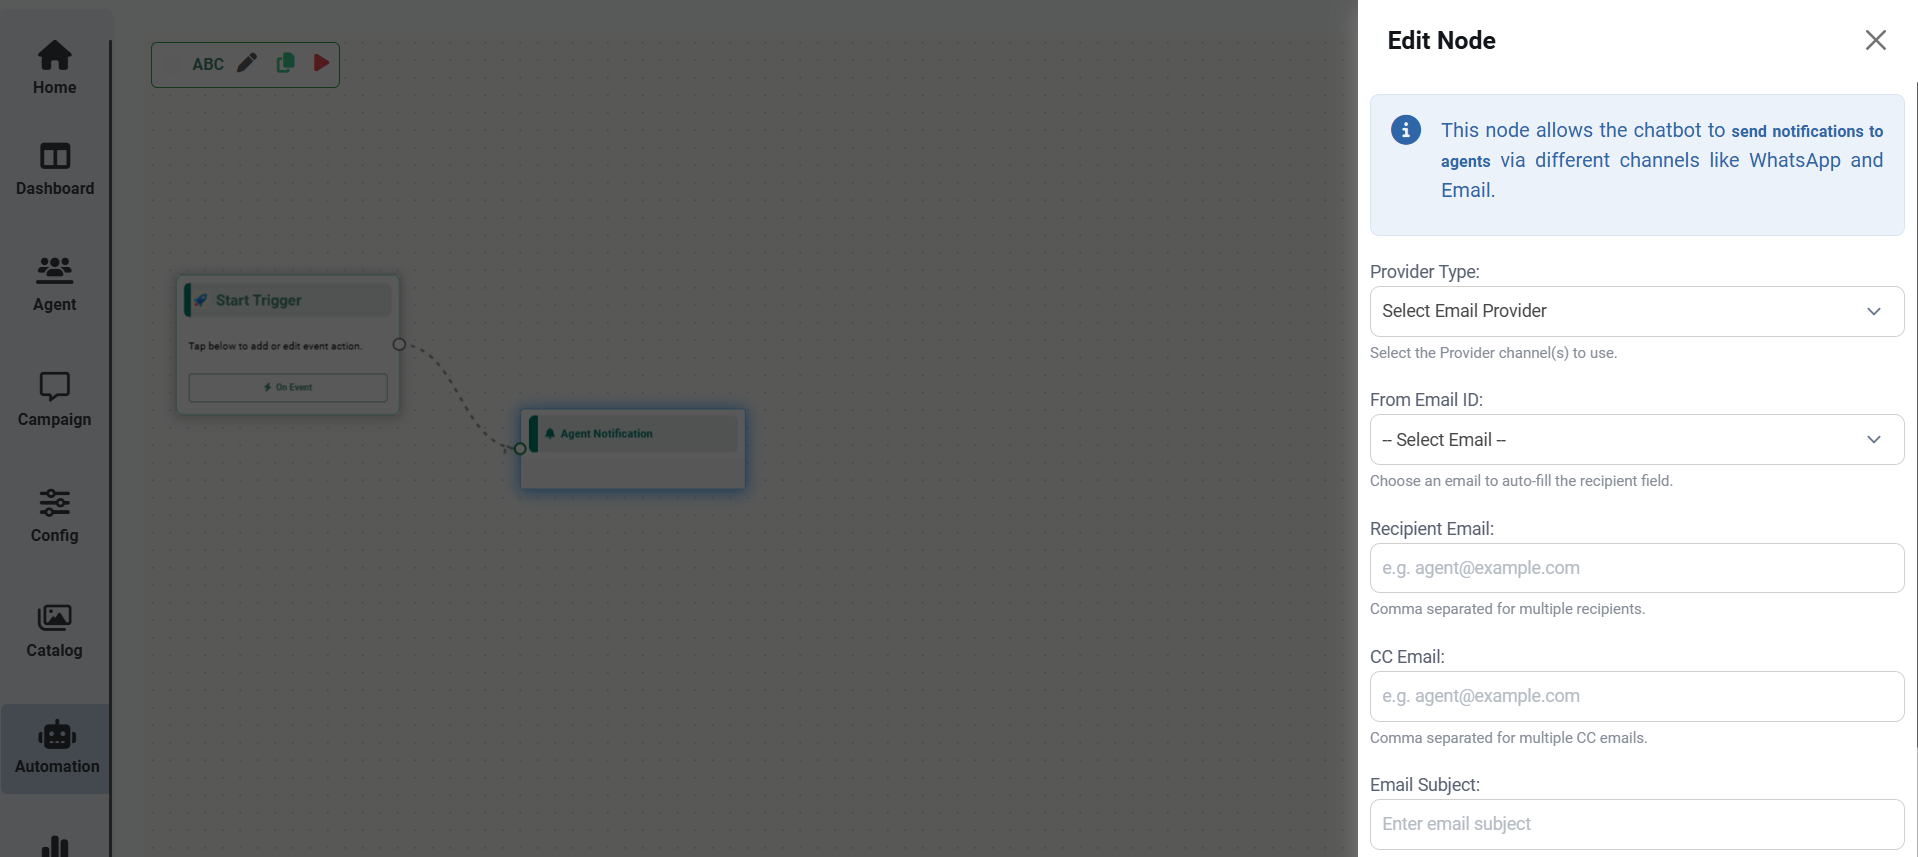

Configuration
Configure the following fields to define how the notification should be sent.
| Field | Description |
|---|---|
| Provider Type | Select the communication provider that will be used to send the notification (for example, an Email provider). |
| From Email ID | Select the sender email address configured in the system. This email address will appear as the sender of the notification. |
| Recipient Email | Enter one or more recipient email addresses. Multiple email addresses can be added by separating them with commas. |
| CC Email | Enter additional email addresses that should receive a copy of the notification. Multiple email addresses can be separated with commas. |
| Email Subject | Enter the subject line of the email that recipients will see in their inbox. |
| Email Body | Compose the email message that will be delivered to the recipient. Dynamic variables can be inserted using the Select Variable option. |
Using Dynamic Variables
The Select Variable option allows you to insert workflow variables directly into the email content. Variables are automatically replaced with actual values when the workflow is executed.
Example
Email Subject
New Customer Inquiry - {{CustomerName}}
Email Body
Hello Team,

        A new inquiry has been received.

        Customer Name: {{CustomerName}}
        Phone Number: {{PhoneNumber}}
        Email: {{Email}}

        Please follow up with the customer as soon as possible.

        Thank you.
When the workflow runs, the placeholders are automatically replaced with the corresponding customer information.
How It Works
Best Practices
- Select a valid and active email provider before configuring the node.
- Verify recipient email addresses to prevent delivery failures.
- Use a clear and descriptive email subject.
- Use dynamic variables to personalize notifications.
- Keep the email content concise and easy to understand.
- Test the workflow before publishing it to ensure notifications are delivered successfully.
- Multiple recipients and CC email addresses must be separated using commas.
- The From Email ID must already be configured within the system.
- Variables are resolved automatically during workflow execution.
- If a required field is left empty, the notification may not be sent successfully.
Send Flow Message
The Send Flow Message node sends a WhatsApp Flow to users. WhatsApp Flows provide interactive forms that allow users to enter information without leaving the chat.
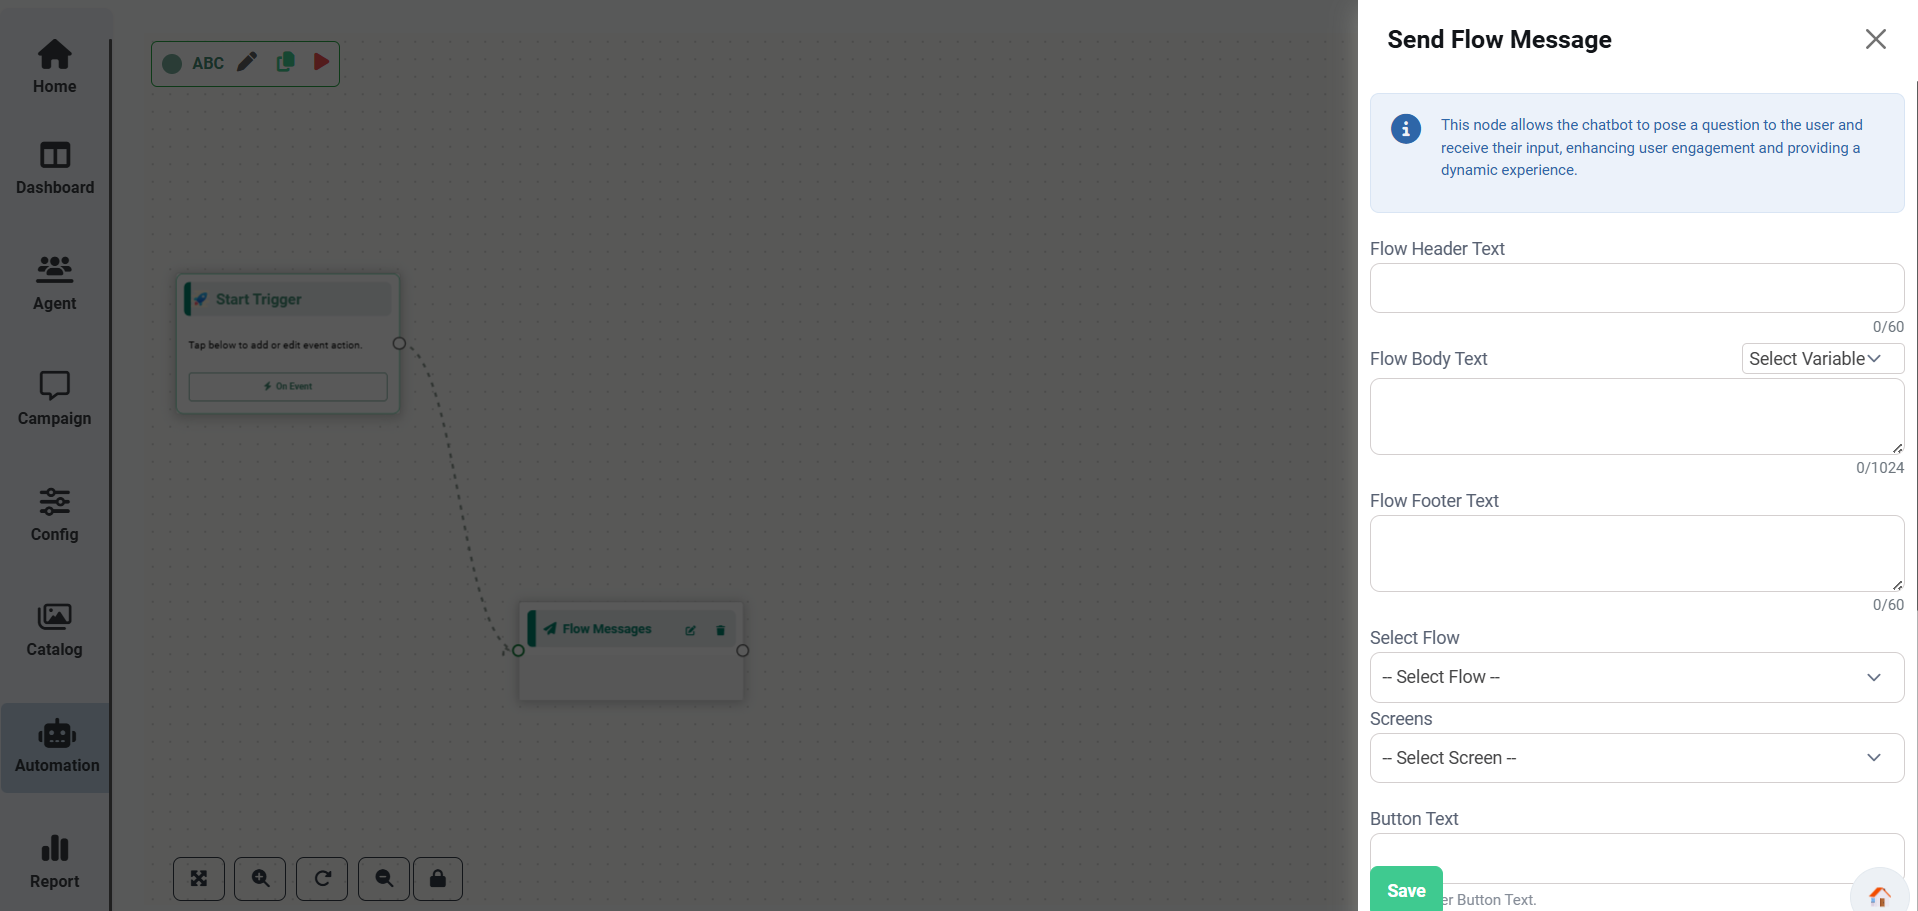
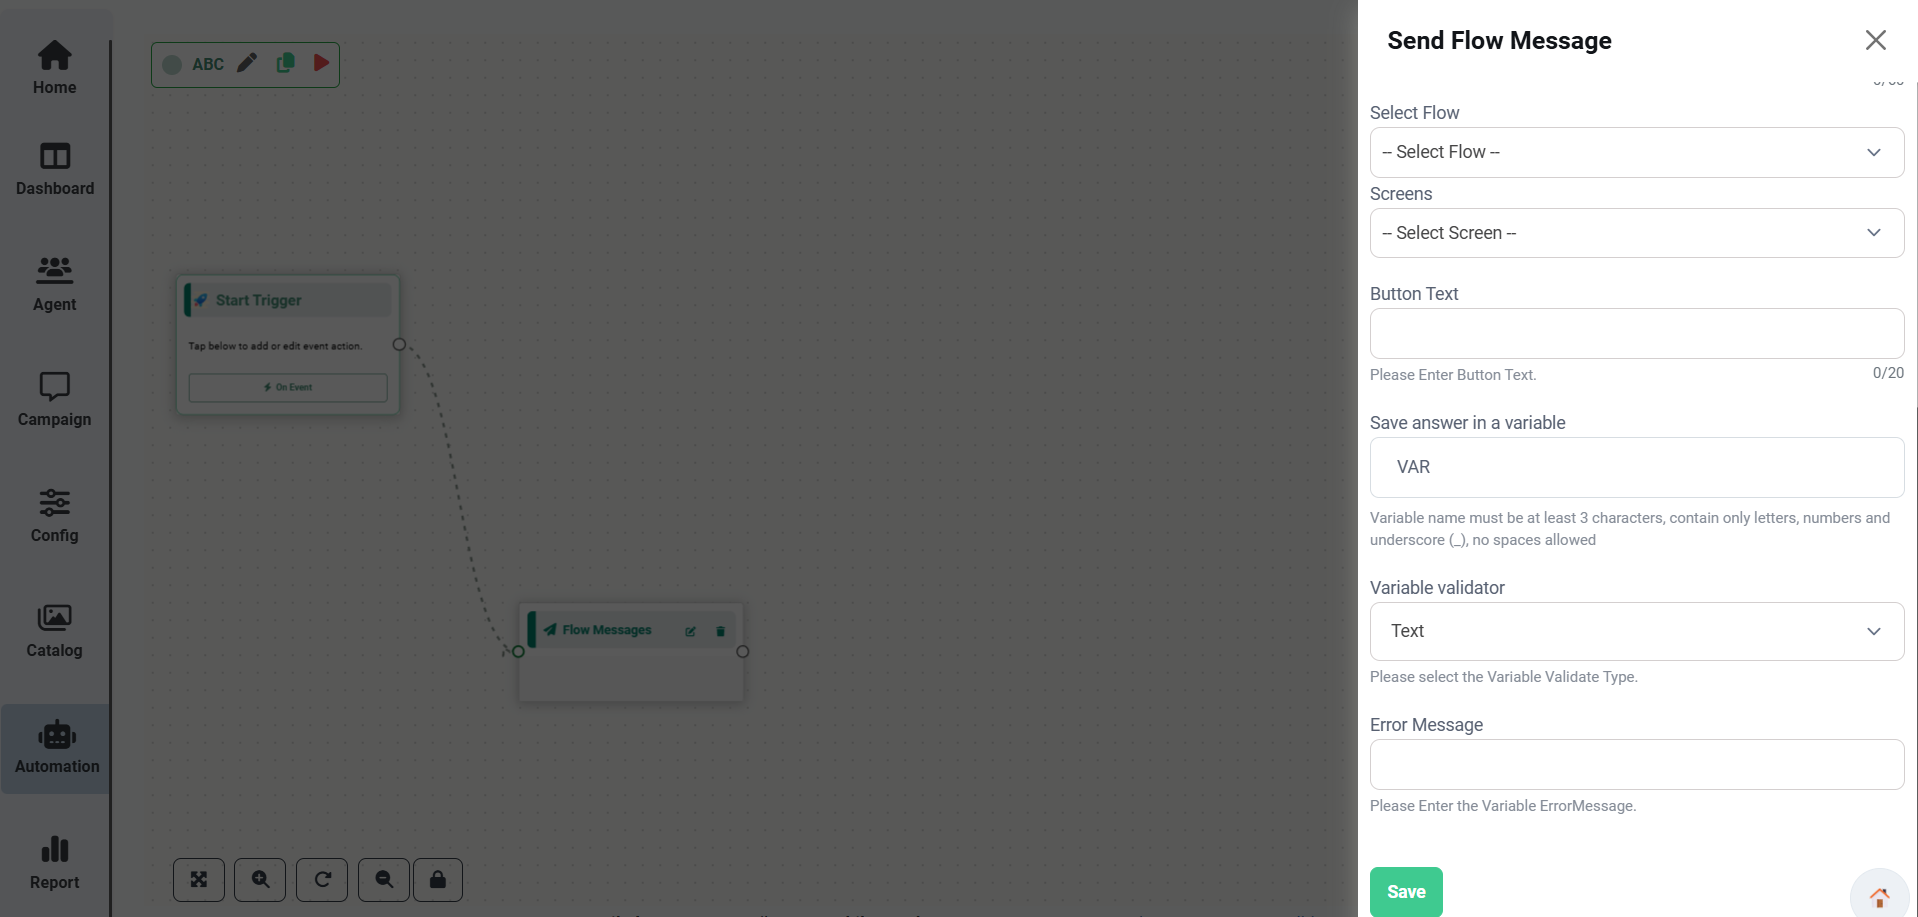
Overview
The Send Flow Message node enables businesses to launch interactive WhatsApp Flows directly from the chatbot. Users can complete forms, provide information, and perform guided actions without leaving the WhatsApp conversation.
Configuration
Configure the following options before saving the Send Flow Message node.
| Field | Description |
|---|---|
| Flow Header Text | Optional heading displayed above the flow. |
| Flow Body Text | Main message explaining the purpose of the flow. Variables may also be inserted. |
| Flow Footer Text | Optional footer displayed below the message. |
| Select Flow | Choose the WhatsApp Flow that should open. |
| Screens | Select the screen that users will see first. |
| Button Text | Enter the text displayed on the flow button (for example: Book Now). |
| Save Answer in Variable | Store the flow submission in a workflow variable. |
| Variable Validator | Select the validation type for the stored value. |
| Error Message | Displayed when validation fails. |
Steps to Configure
Common Uses
- Booking Forms
- Registration
- Feedback Collection
- Customer Information
- Appointment Scheduling
Delay
The Delay node pauses the chatbot flow before continuing to the next step. It is useful for making conversations appear more natural or waiting before sending follow-up messages.
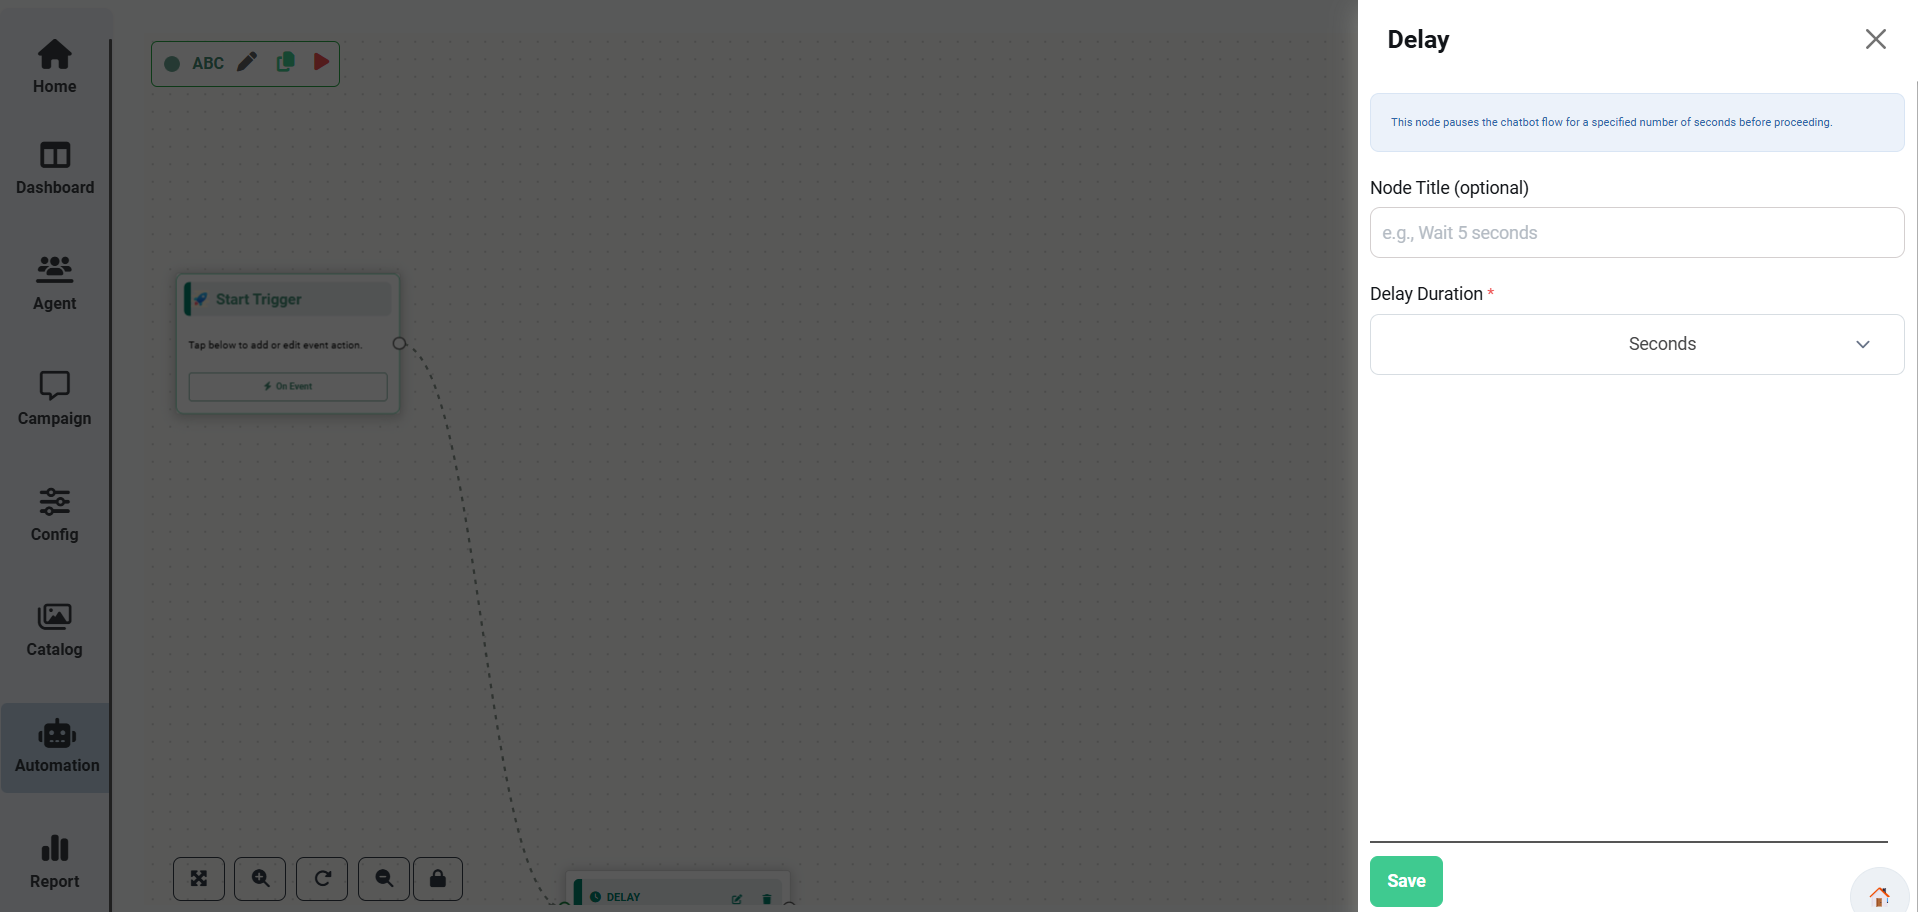
Overview
The Delay node temporarily pauses the chatbot workflow for a specified period before executing the next connected node. This helps create a more natural conversation experience by preventing messages from being sent instantly.
Configuration
Configure the following fields before saving the Delay node.
| Field | Description |
|---|---|
| Node Title | Optional internal name used to identify the Delay node. |
| Delay Duration | Specify how long the chatbot should wait before continuing to the next node. |
| Time Unit | Select the delay unit: Seconds, Minutes, or Hours. |
Example
You can assign a descriptive name to the node for easier identification.
| Example | Description |
|---|---|
| Wait 5 Seconds | Pauses the chatbot for five seconds before executing the next node. |
Supported Time Units
- Seconds
- Minutes
- Hours
Use Cases
- Simulate typing delay.
- Wait before sending follow-up messages.
- Improve the overall conversation flow.
Send Carousel Message
The Carousel Message node sends multiple interactive cards in a horizontally scrollable carousel. Each card can contain media, text, and action buttons.
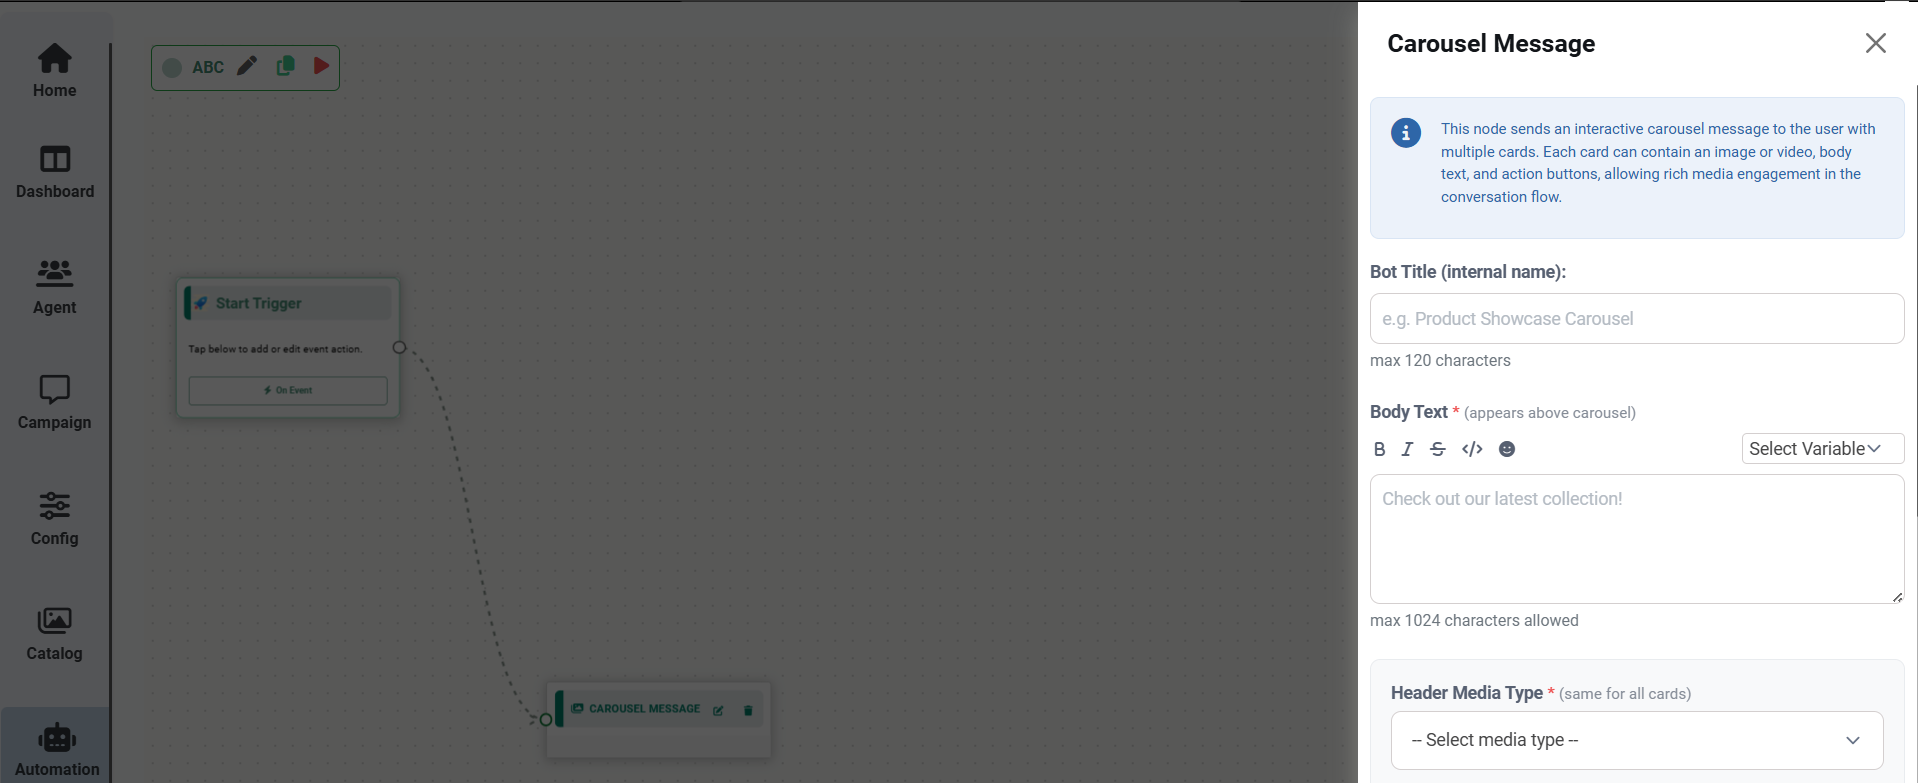
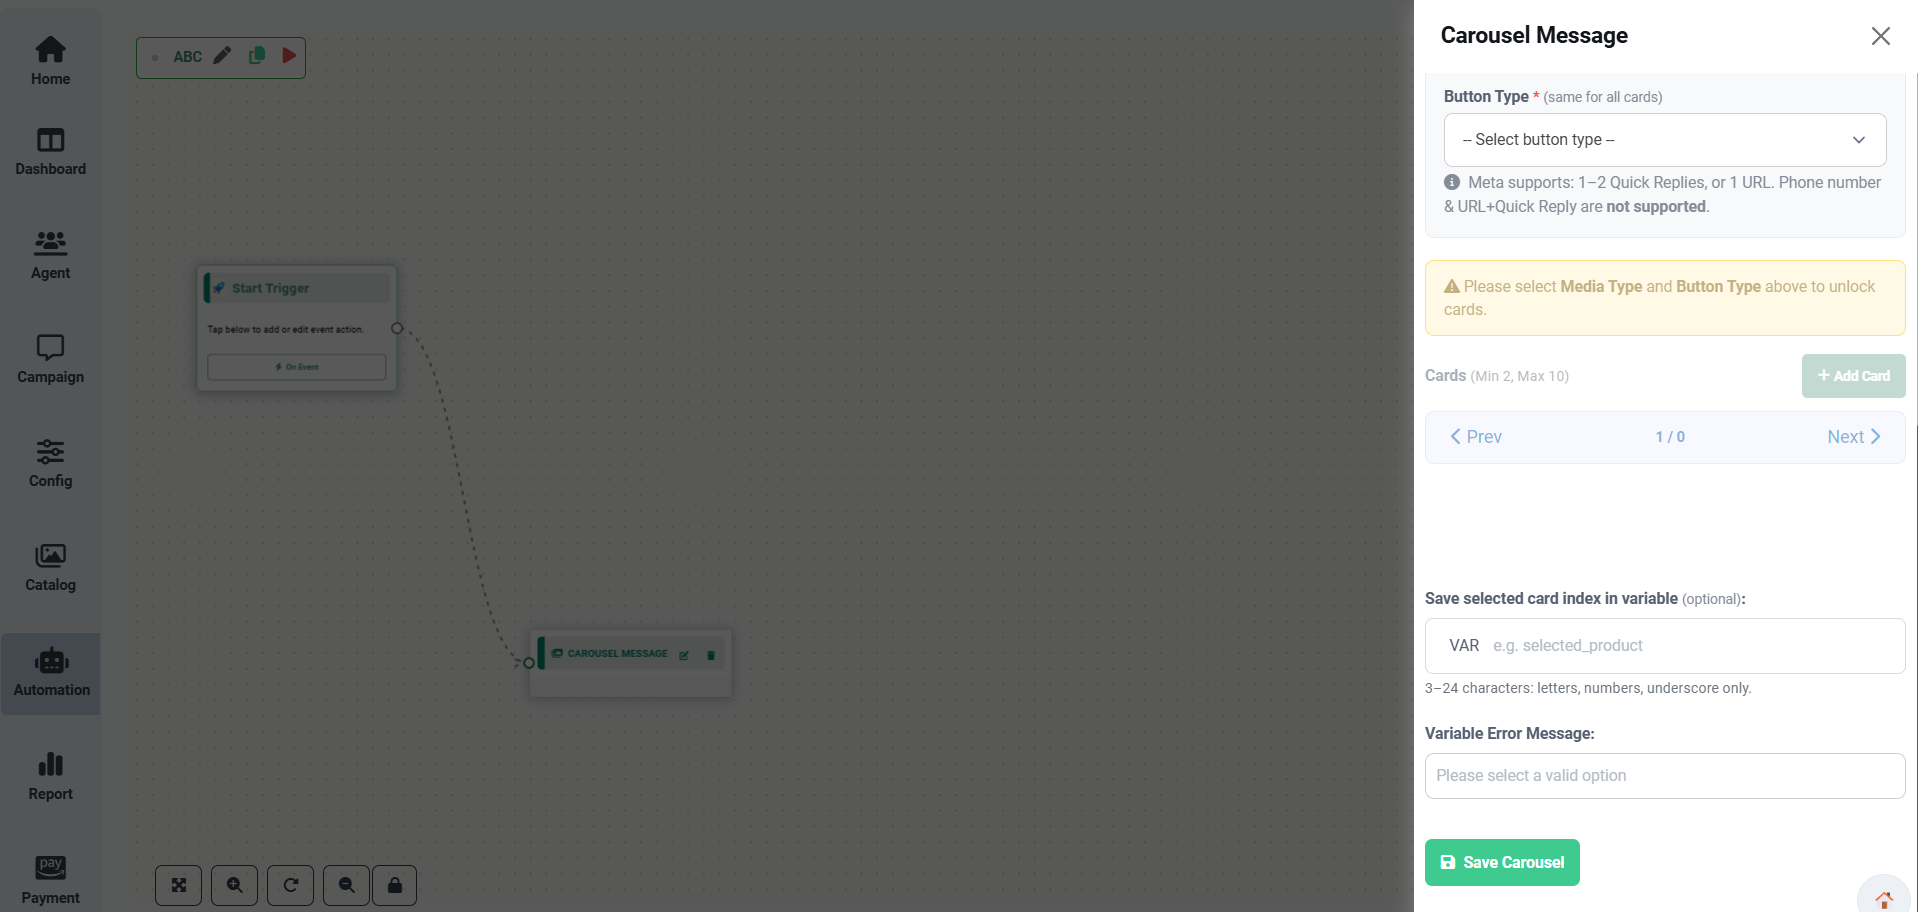
Overview
The Carousel Message node allows you to present multiple cards in a single WhatsApp message. Each card can contain media, descriptive text, and an action button, enabling users to browse information without leaving the conversation.
Configuration
Configure the following fields before saving the Carousel Message node.
| Field | Description |
|---|---|
| Bot Title | Internal name used to identify the Carousel Message node. |
| Body Text | Main message displayed above the carousel. Workflow variables are supported. |
| Header Media Type | Select the media displayed on every card. Supported types are Image and Video. |
| Button Type | Select the action button available on every card. Supported options depend on WhatsApp limitations. |
| Add Cards | Create between 2 and 10 cards for the carousel. |
| Save Selected Card Index | Store the card selected by the user in a workflow variable. |
| Variable Error Message | Displayed when an invalid selection is received. |
Card Components
Each carousel card can include the following components.
| Component | Description |
|---|---|
| Media | Displays an image or video on the card. |
| Title | Heading displayed on the card. |
| Description | Additional information displayed below the title. |
| Button | Interactive action button for the card. |
Supported Header Media Types
- Image
- Video
Steps to Configure
Common Uses
- Product Showcase
- Hotel Listings
- Travel Packages
- Real Estate
- Promotions
Google Calendar Booking
The Google Calendar node creates calendar events automatically from chatbot responses. It can also send calendar invitations and optionally generate Google Meet links for online meetings.
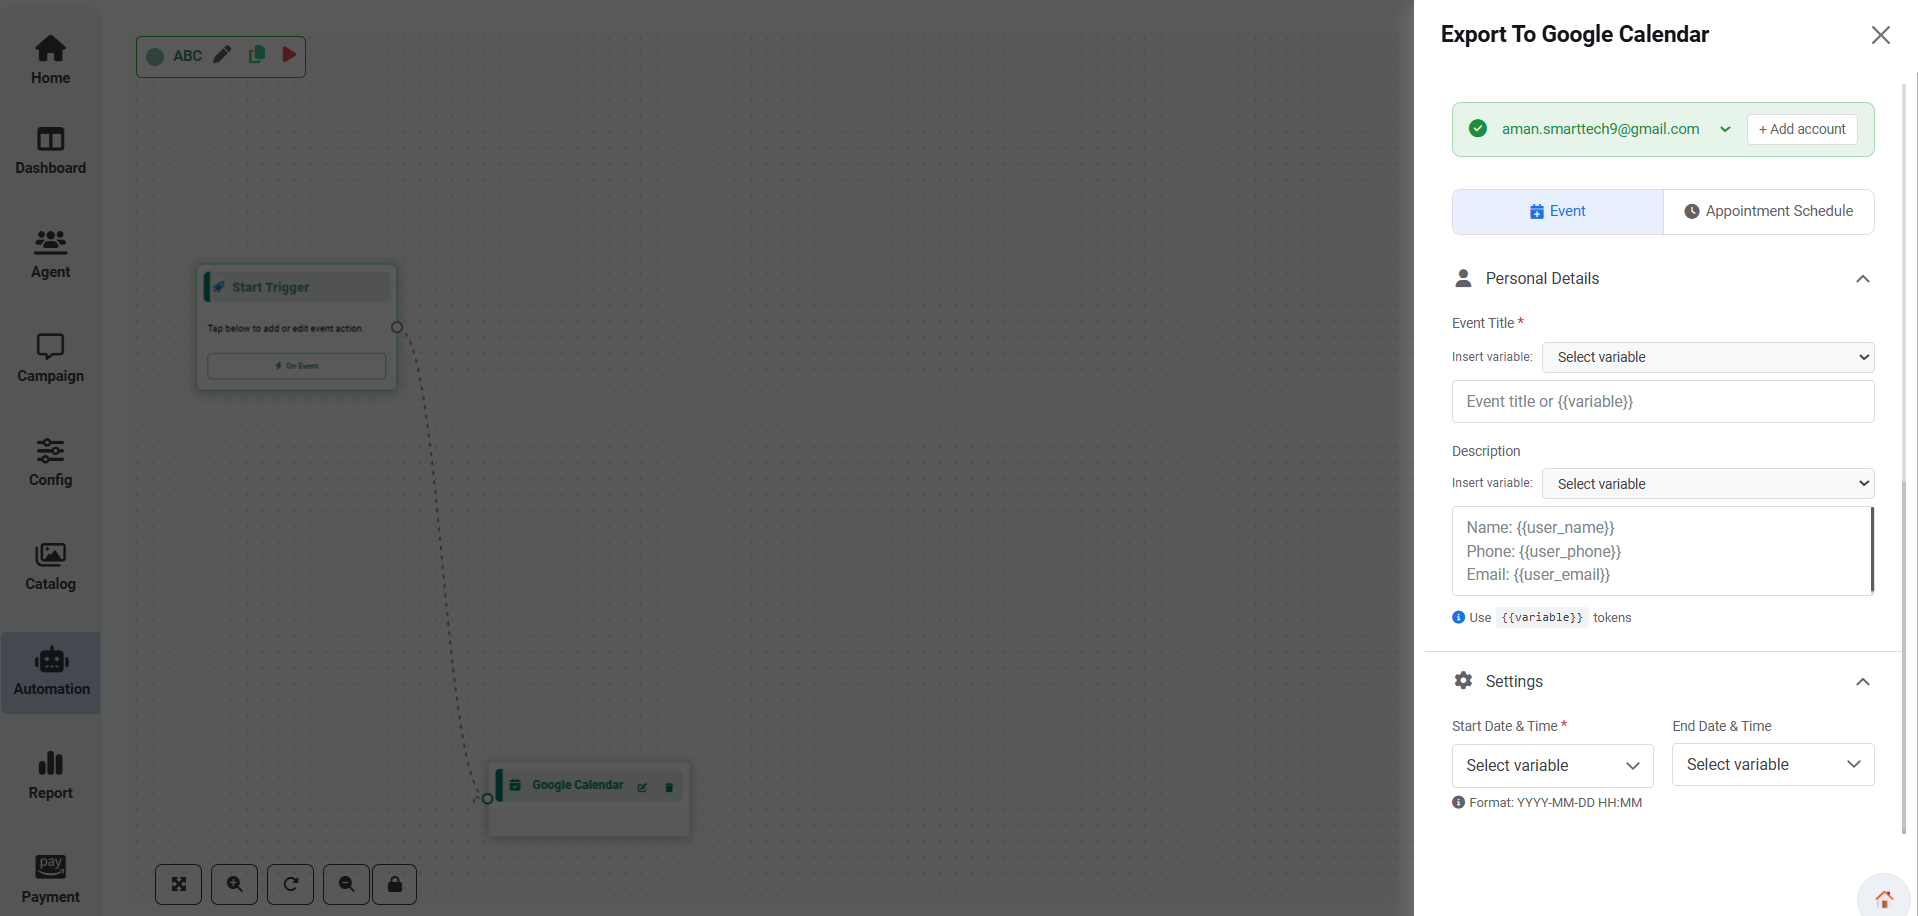
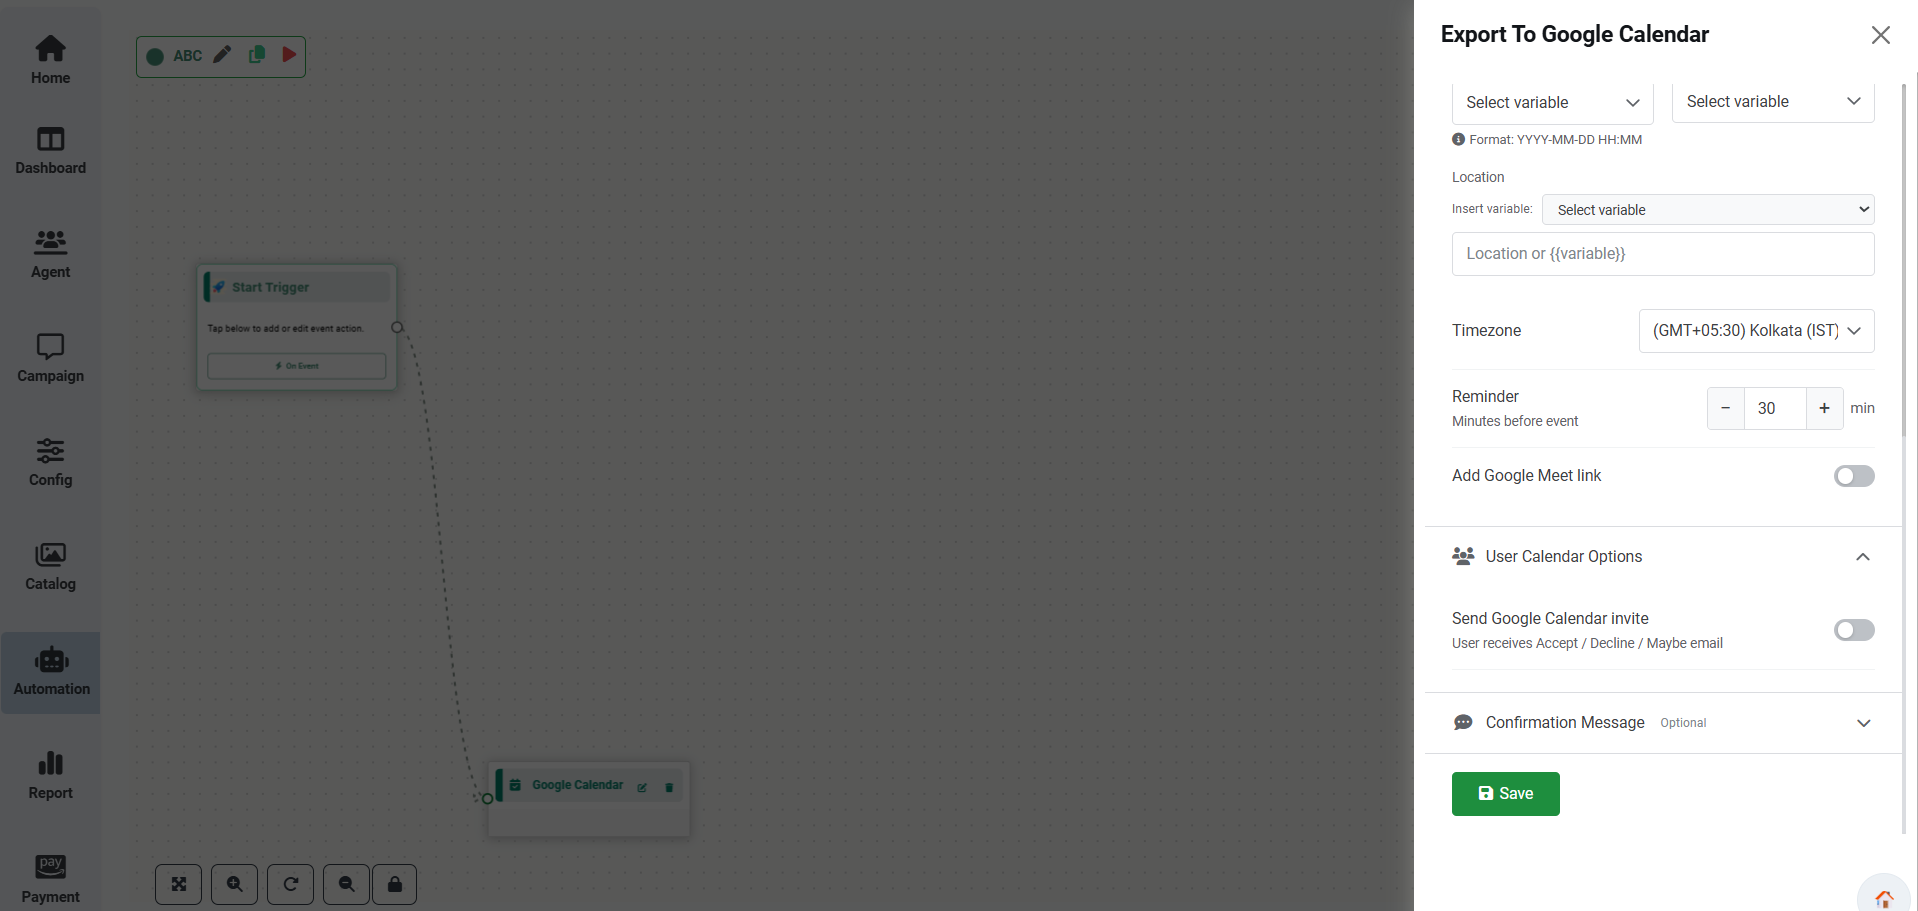
Overview
The Google Calendar node allows chatbot workflows to automatically schedule events in Google Calendar using information collected from customers. This is useful for appointment booking, consultations, interviews, demos, and business meetings.
Connect Google Account
Choose an existing Google account or add a new Google account before configuring the calendar event.
Configuration
| Field | Description |
|---|---|
| Google Account | Select the Google account used to create calendar events. |
| Event Title | Enter the calendar event title. Workflow variables are supported. |
| Description | Provide additional event details. Workflow variables may also be inserted. |
| Start Date & Time | Select the variable containing the event start date and time using the format YYYY-MM-DD HH:MM. |
| End Date & Time | Optional end date and time for the event. |
| Location | Specify the meeting location. Workflow variables are supported. |
| Timezone | Select the appropriate timezone (Example: (GMT+05:30) Kolkata (IST)). |
| Reminder | Specify how many minutes before the event attendees should receive a reminder. |
| Add Google Meet Link | Enable this option to automatically generate a Google Meet meeting link. |
| Send Google Calendar Invite | Send an invitation email so attendees can Accept, Decline, or mark Maybe. |
| Confirmation Message | Optional message displayed after the calendar event is successfully created. |
Steps to Configure
Common Uses
- Appointment Booking
- Doctor Consultation
- Demo Scheduling
- Business Meetings
- Interviews
- Customer Visits
Catalog Message
The Catalog Message node allows you to send WhatsApp Catalog products directly within the chatbot conversation. Customers can browse products without leaving WhatsApp.
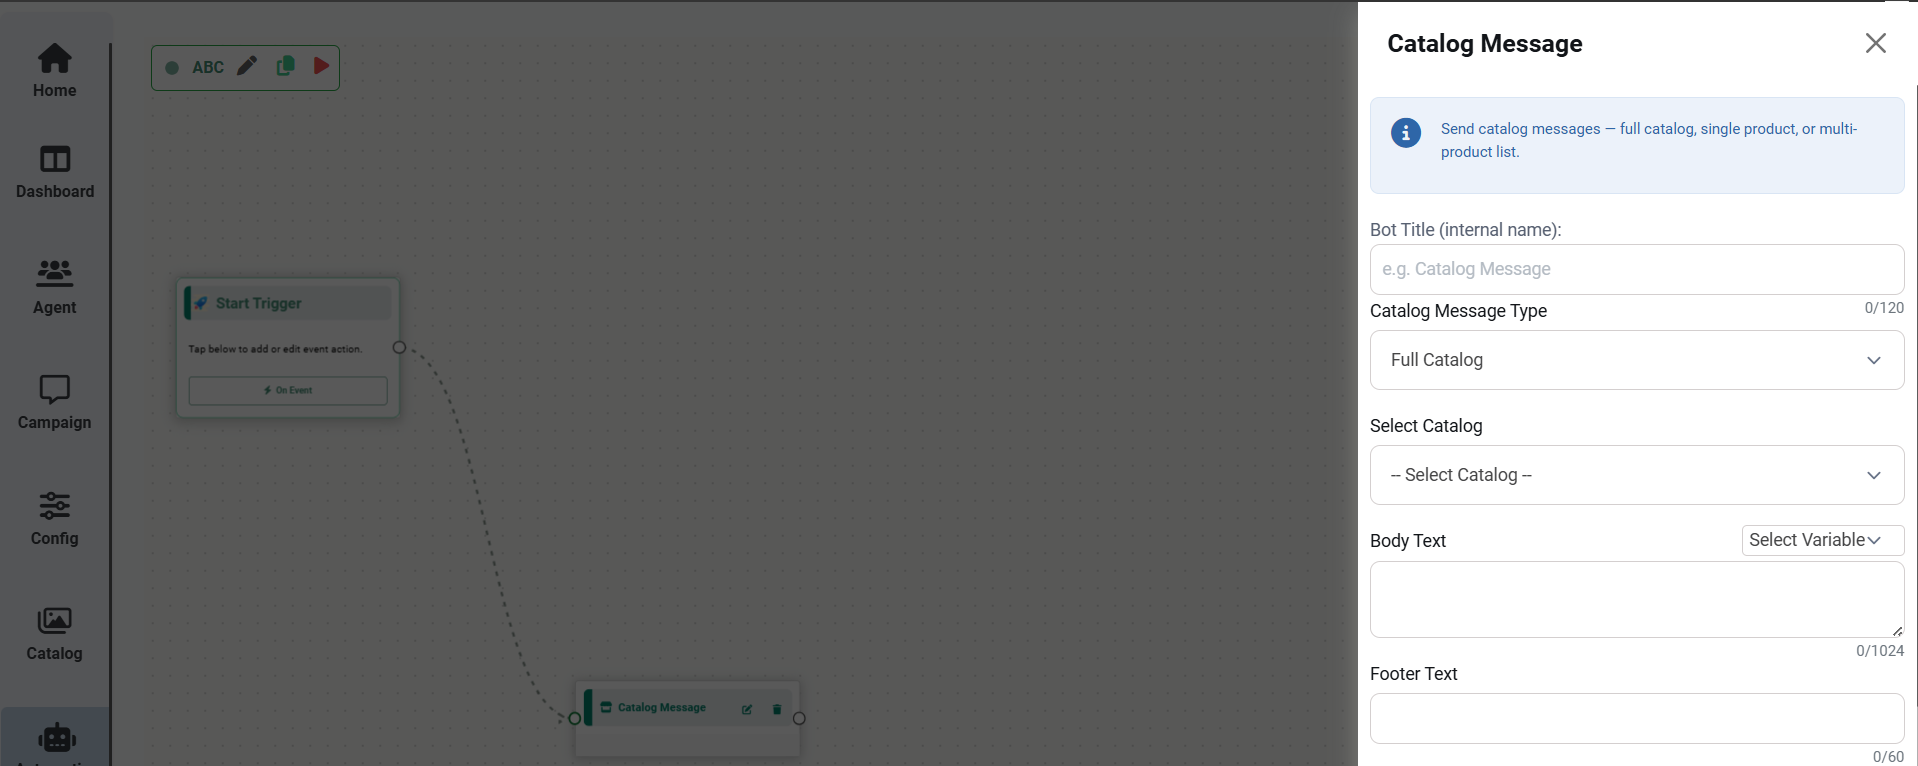
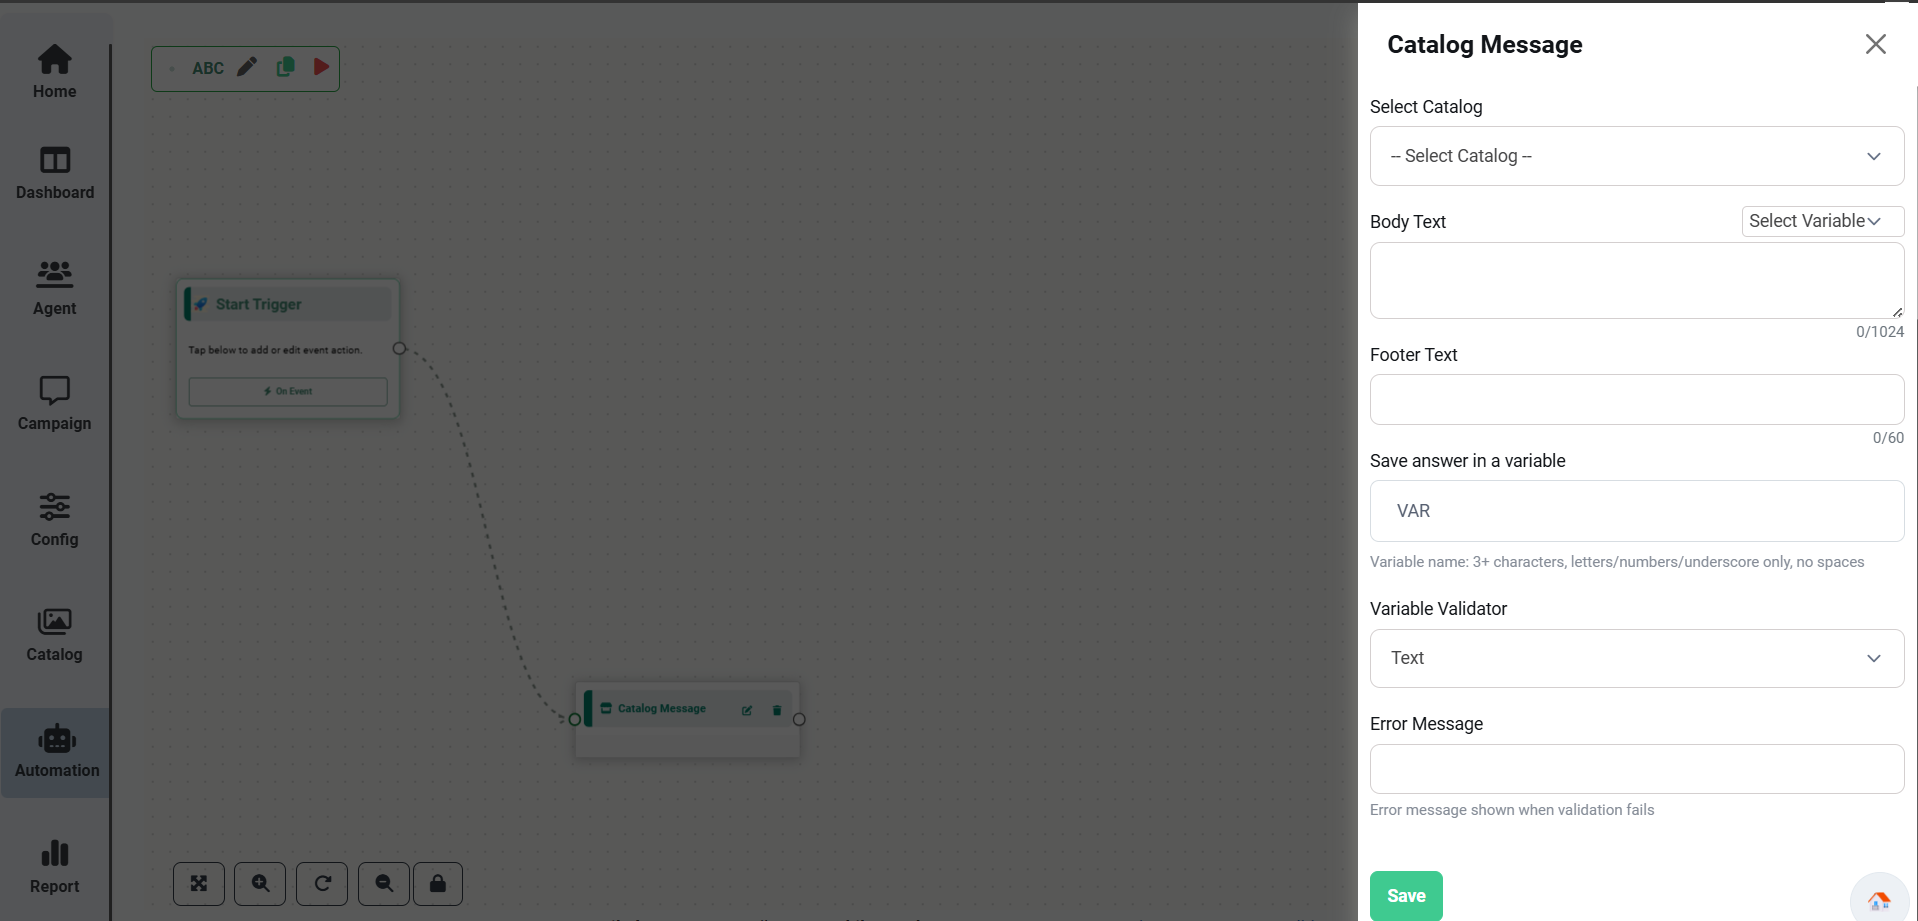
Overview
The Catalog Message node enables businesses to showcase products from their WhatsApp Business Catalog. Customers can browse product listings, view details, and interact with catalog items directly within the WhatsApp chat.
Configuration
Configure the following fields before saving the Catalog Message node.
| Field | Description |
|---|---|
| Bot Title | Internal name used to identify the Catalog Message node. |
| Catalog Message Type | Select how products should be displayed. |
| Select Catalog | Choose the WhatsApp Catalog that will be displayed. |
| Body Text | Main message displayed above the catalog. Workflow variables are supported. |
| Footer Text | Optional footer displayed below the catalog. |
| Save Answer in Variable | Store the selected product or catalog response in a workflow variable. |
| Variable Validator | Select the validation type for the stored value. |
| Error Message | Displayed when validation fails. |
Catalog Message Types
Choose how products should be displayed to customers.
| Catalog Type | Description |
|---|---|
| Full Catalog | Displays the complete WhatsApp Business Catalog. |
| Single Product | Displays one specific product from the catalog. |
| Multi Product List | Displays multiple selected products in a single catalog message. |
Steps to Configure
Common Uses
- Product Catalog
- E-commerce
- Fashion Store
- Electronics
- Grocery
- Restaurant Menus
- Product Recommendations
WhatsApp Flows
The WhatsApp Flows module allows businesses to create interactive WhatsApp forms that collect customer information, automate workflows, and improve customer engagement directly within WhatsApp conversations.
Overview
The WhatsApp Flows module enables administrators to design interactive forms that customers can complete directly inside WhatsApp. These flows can capture customer information, automate business processes, and improve engagement without redirecting users to external websites.
Accessing WhatsApp Flows
Follow the steps below to open the WhatsApp Flows module.
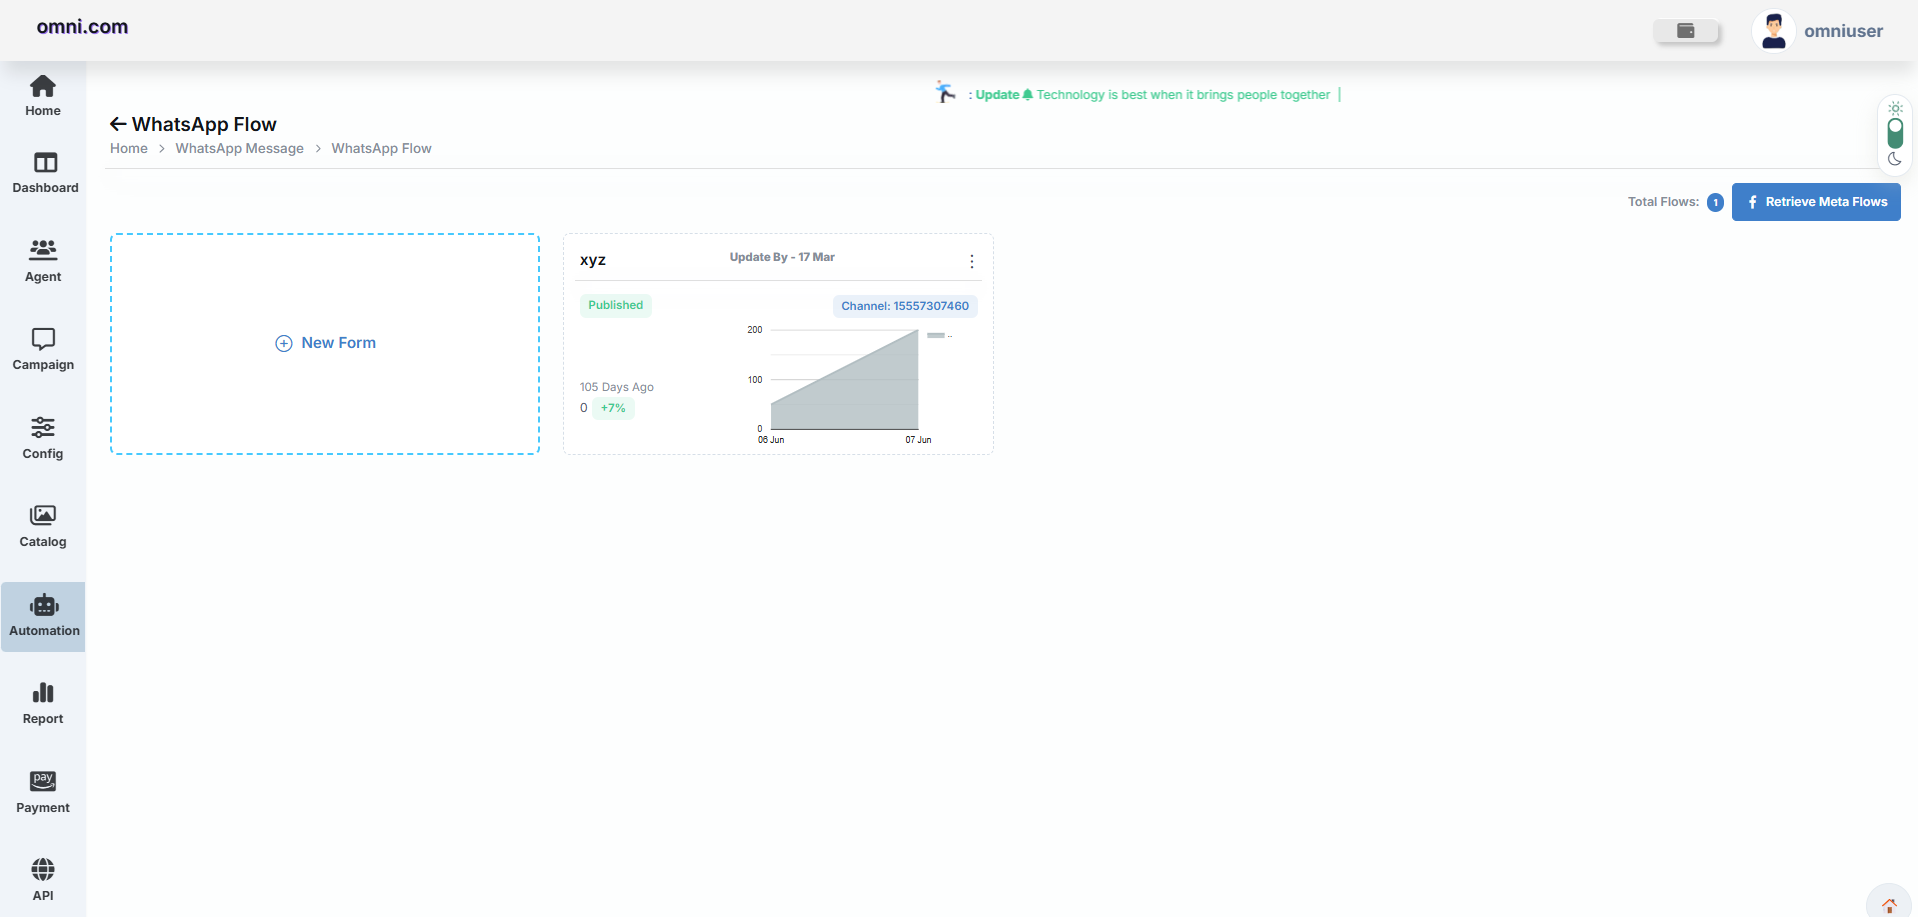
Available Options
| Option | Description |
|---|---|
| New Form | Create a brand-new WhatsApp Flow. |
| Existing Flows | View and manage previously created WhatsApp Flows. |
| Retrieve Meta Flows | Synchronize flows from the connected Meta (WhatsApp Business) account. |
| Flow Count | Displays the total number of available WhatsApp Flows. |
Creating a New WhatsApp Flow
To create a new WhatsApp Flow, open the WhatsApp Flows page and click the New Form card. The Flow Builder opens where you can design interactive WhatsApp forms.
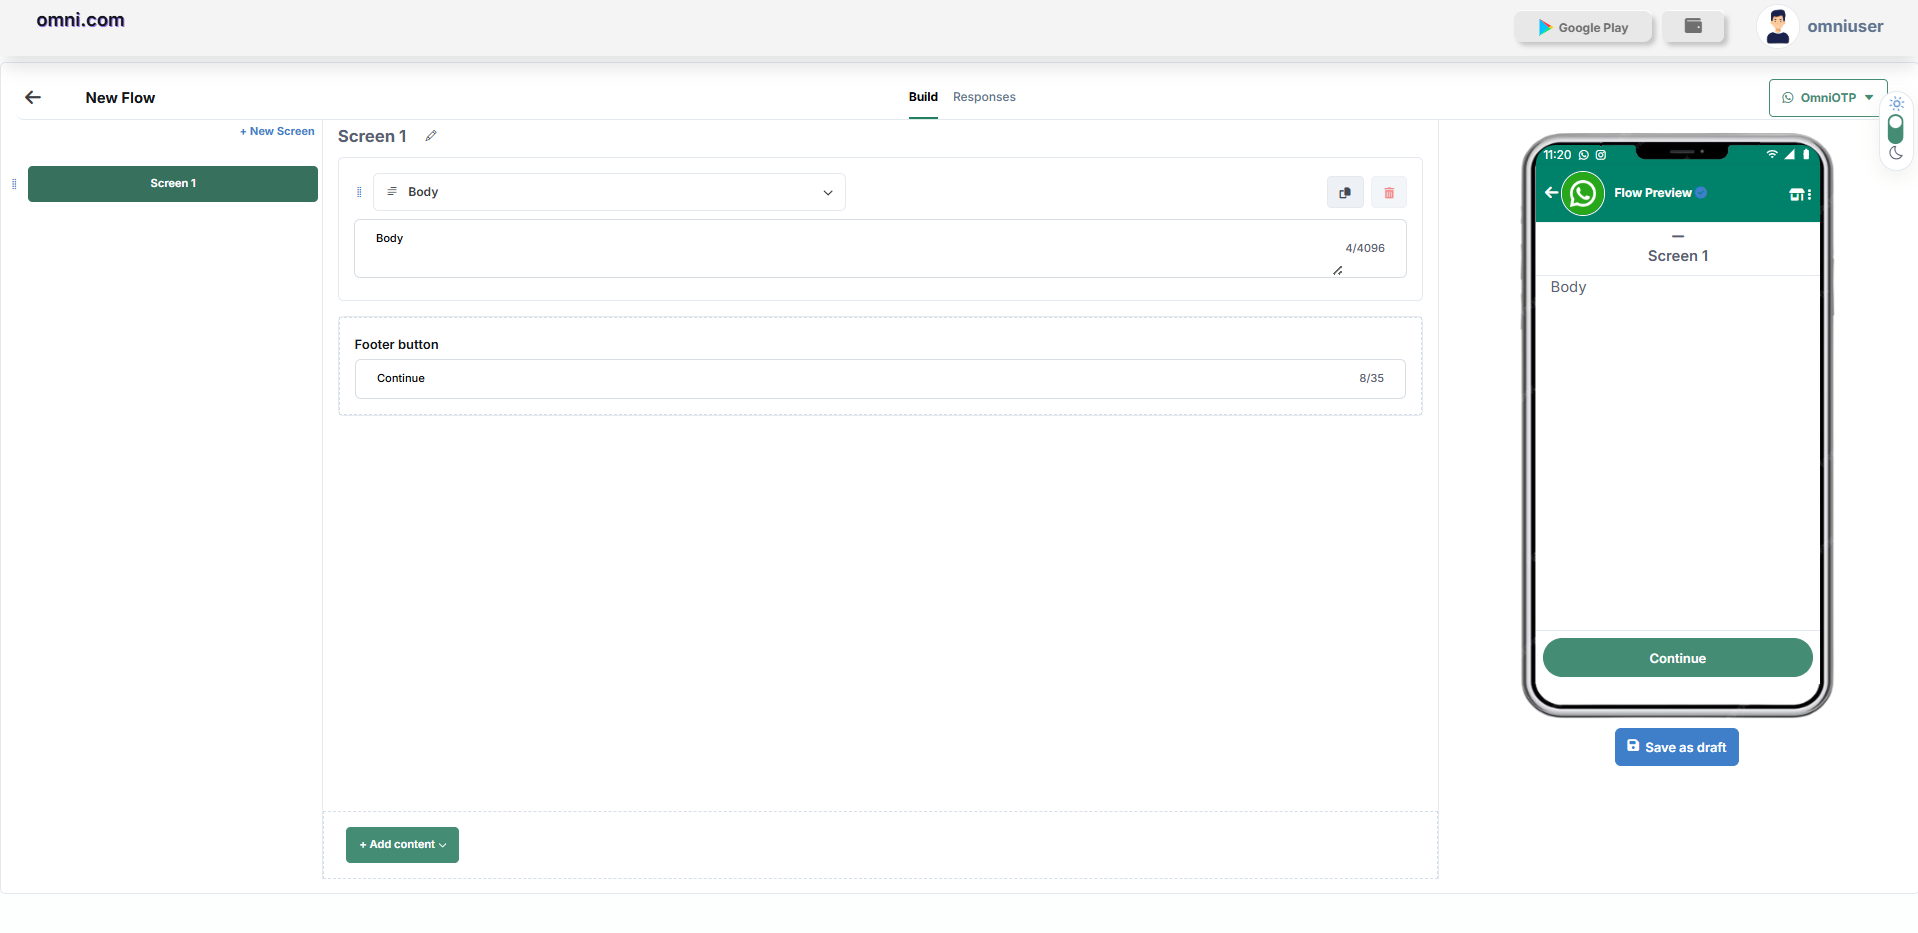
Flow Builder Overview
The Flow Builder provides all the tools required to create interactive multi-step WhatsApp forms.
| Section | Description |
|---|---|
| Screen Panel | Displays every screen available in the flow. New screens can be added for multi-step forms. |
| Build Tab | Used to design and configure the WhatsApp Flow. |
| Responses Tab | Displays all responses submitted by customers after publishing. |
| Content Area | Add and configure components displayed inside each screen. |
| Live Mobile Preview | Shows a real-time preview of how the flow will appear on mobile devices. |
Screen Panel
- Displays all screens added to the flow.
- By default, Screen 1 is created automatically.
- Click + New Screen to create additional screens.
- Multi-screen flows are useful for long forms and guided customer journeys.
Build & Responses Tabs
| Tab | Purpose |
|---|---|
| Build | Design and configure the WhatsApp Flow. |
| Responses | View all customer responses after publishing. |
Screen Title
Each screen can be renamed by clicking the Edit (✏️) icon beside the screen name. Using meaningful screen names makes multi-step flows easier to manage.
Content Area
The Content Area is the primary workspace where you build each screen of the WhatsApp Flow. Components added here are displayed to users inside the WhatsApp conversation.
By default, every new screen contains the following components:
| Component | Description |
|---|---|
| Body | The main text displayed to the customer on the current screen. |
| Footer Button | An action button (such as Continue) used to move to the next screen. |
Live Mobile Preview
A live mobile preview is displayed on the right side of the Flow Builder. It instantly reflects every change made while designing the flow, allowing you to verify the appearance before publishing.
Editing Text Components
Every text component includes formatting options that help organize information and improve readability.
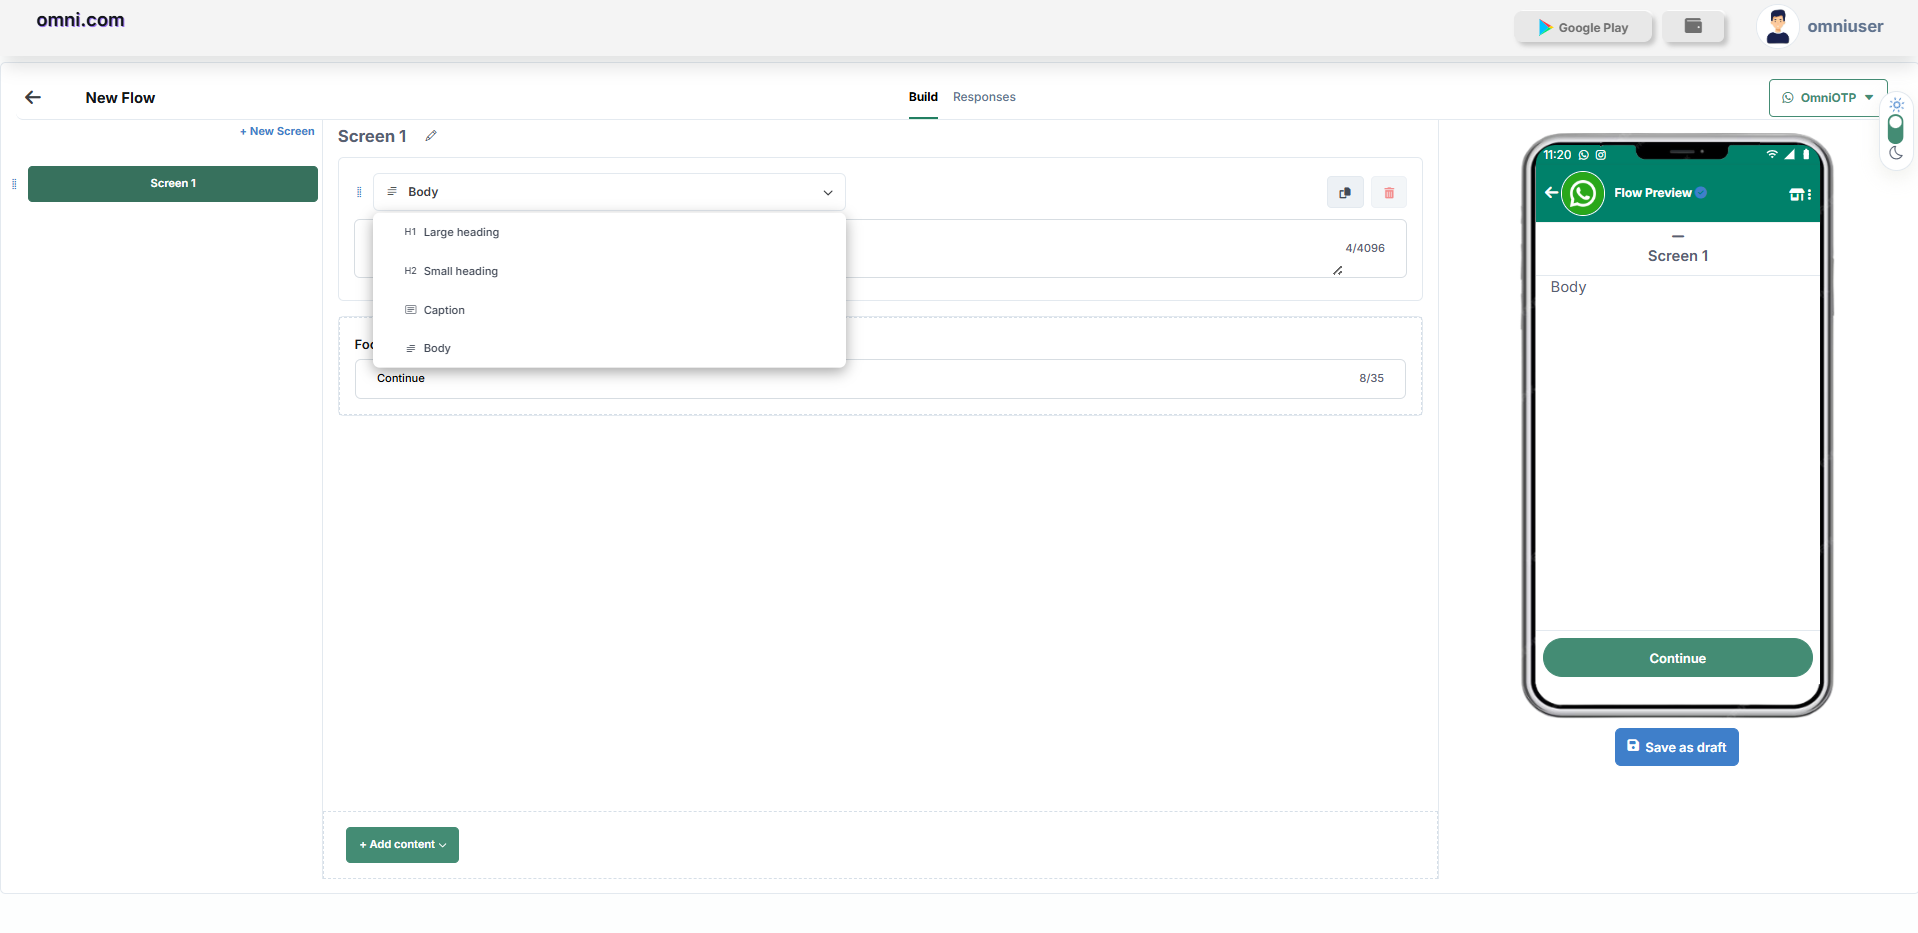
Each text component provides a drop-down menu where you can change its display style.
| Text Style | Description |
|---|---|
| H1 | Large heading used for screen titles. |
| H2 | Small heading used for section titles. |
| Caption | Short descriptive text displayed below headings. |
| Body | Standard paragraph text shown to customers. |
Adding New Components
Click + Add Content to insert additional components into the current screen.
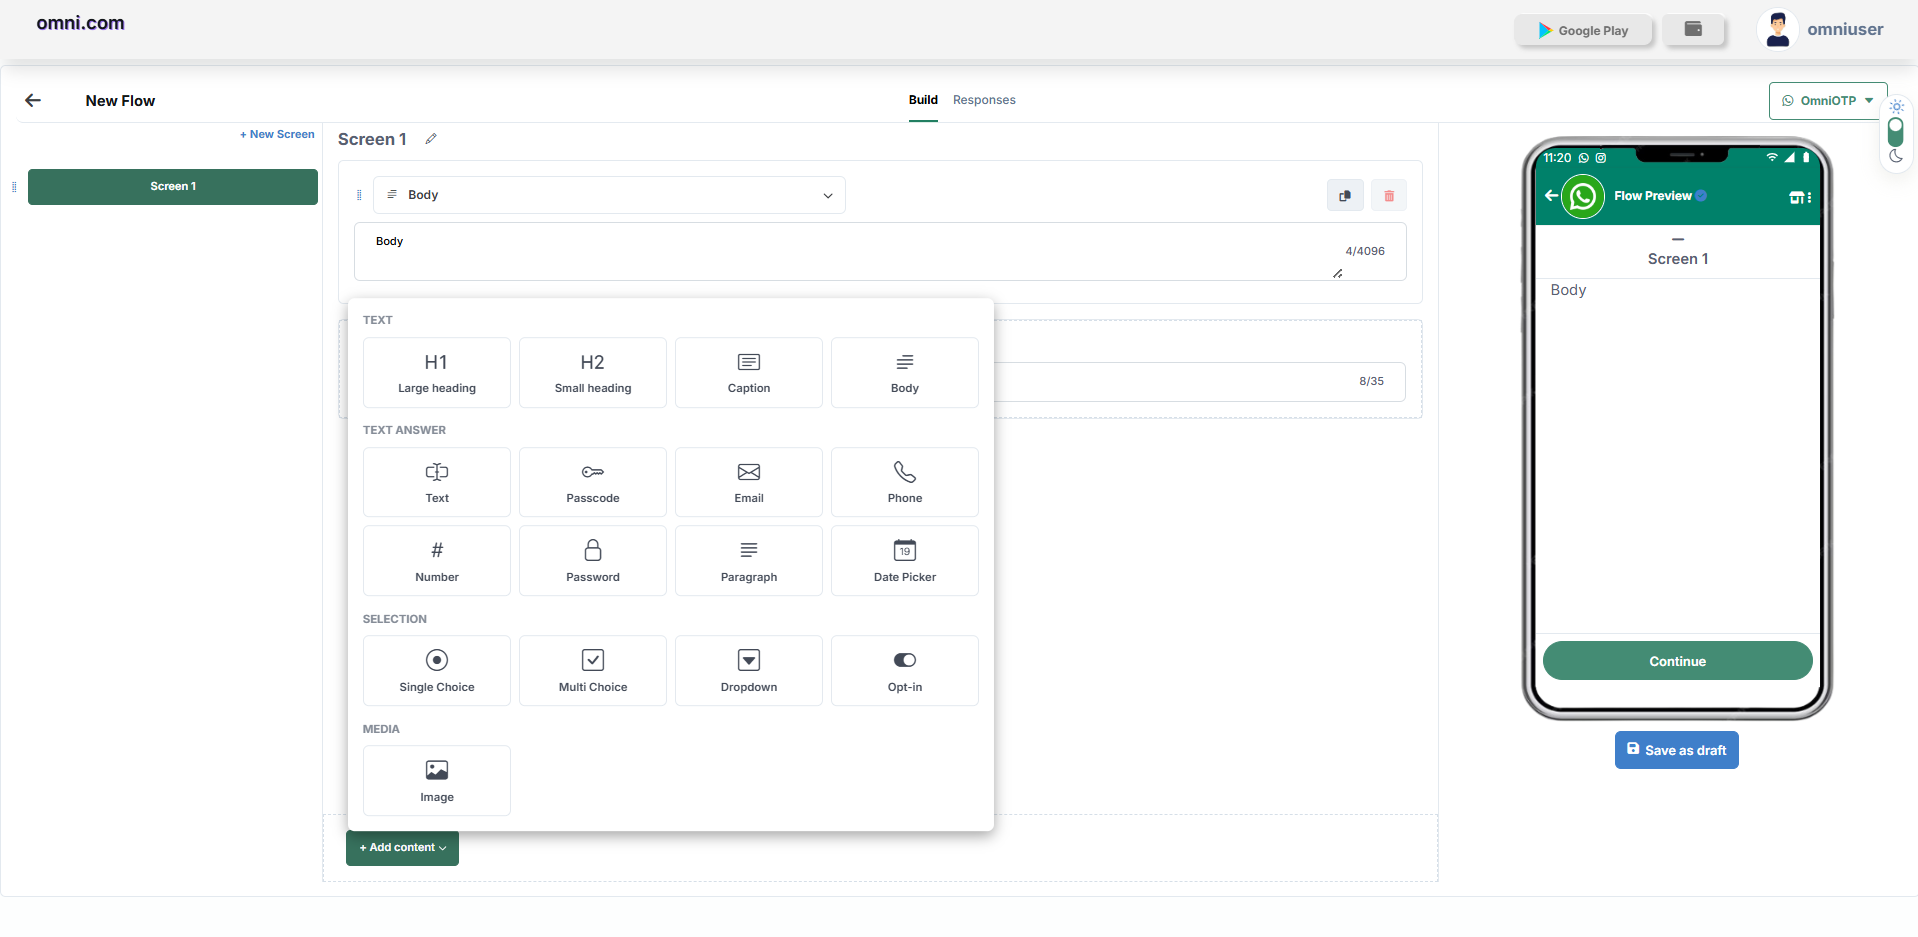
The Flow Builder supports multiple component types for collecting different kinds of customer information.
Text Components
- H1 (Large Heading)
- H2 (Small Heading)
- Caption
- Body
Text Answer Components
- Text
- Passcode
- Phone Number
- Number
- Password
- Paragraph
- Date Picker
Selection Components
- Single Choice
- Multiple Choice
- Dropdown
- Opt-in Toggle
Media Components
- Image
Saving the Flow
Once the design is complete, save the flow so you can continue editing or publish it later.
Managing Existing Flows
Every existing flow contains a More Options (⋮) menu that provides additional management actions.
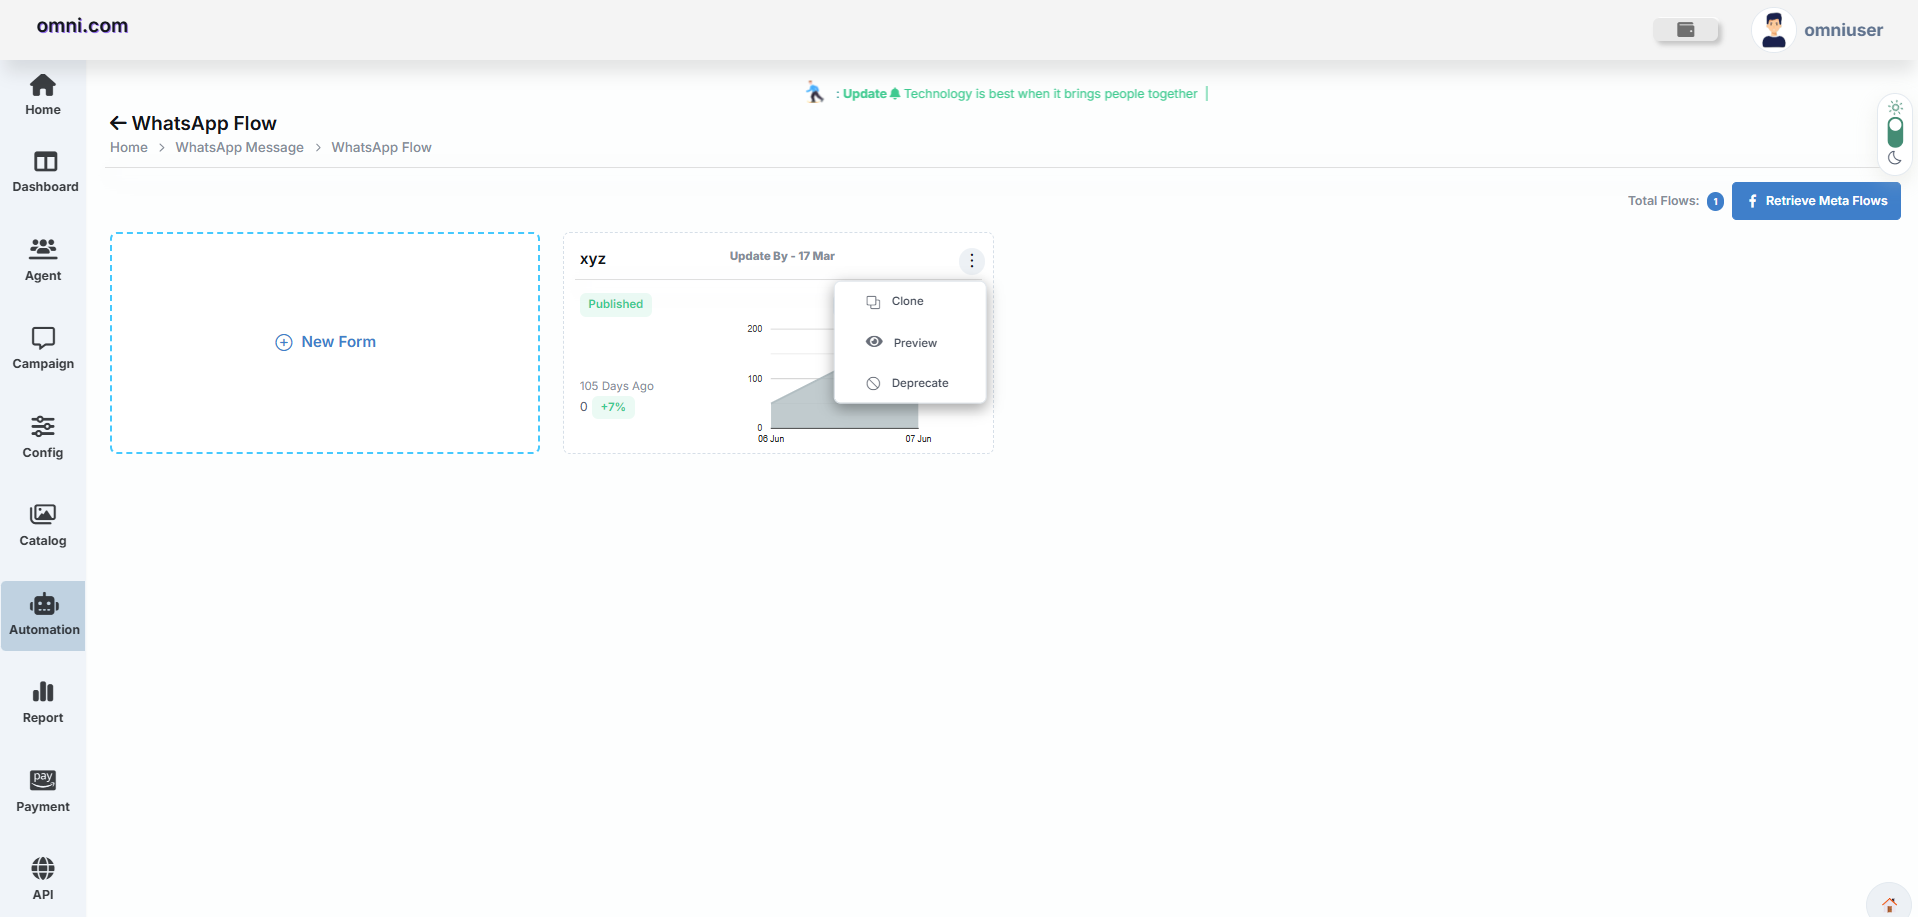
| Action | Description |
|---|---|
| Clone | Create a duplicate copy of the selected WhatsApp Flow. |
| Preview | Review the flow before publishing it. |
| Deprecate | Mark the flow as inactive so it can no longer be used. |
QR Codes
The QR Codes module allows businesses to create and manage WhatsApp QR Codes that customers can scan to instantly start a conversation with a predefined message.
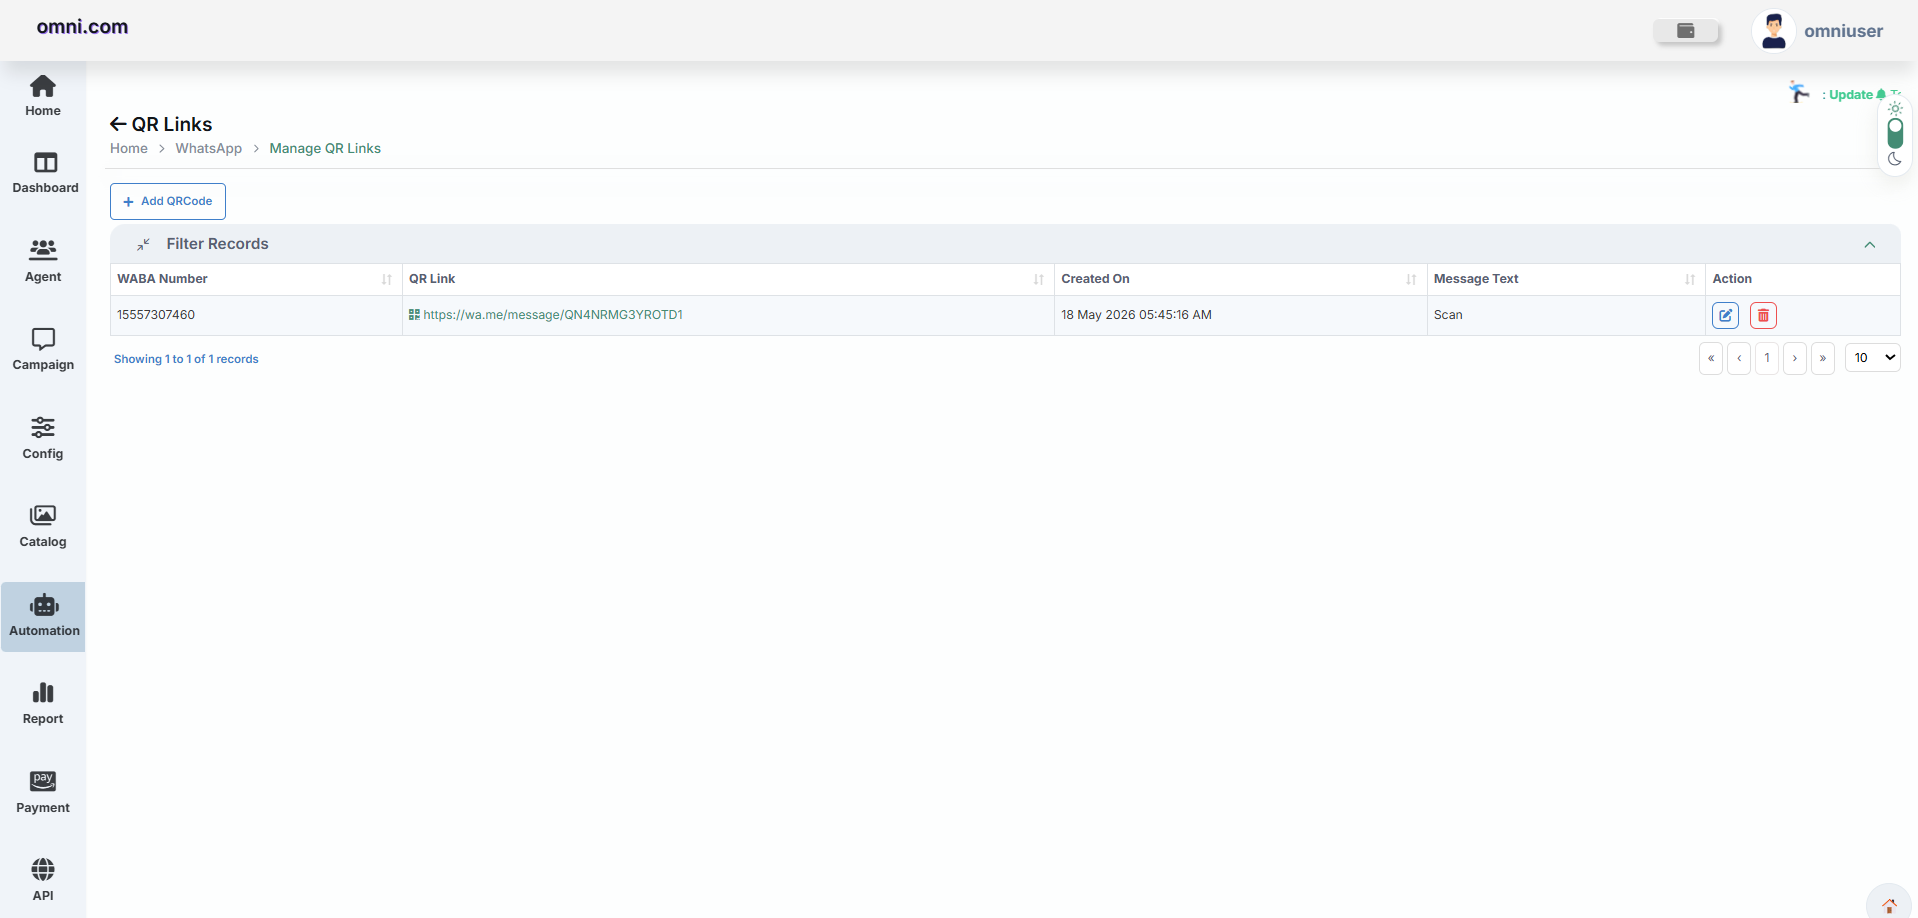
Overview
The QR Codes module enables administrators to generate QR Codes linked to a WhatsApp Business Account. When customers scan the QR Code, WhatsApp automatically opens with a predefined message, making communication faster and more convenient.
Accessing QR Codes
Follow the steps below to access the QR Codes module.
QR Links Page
| Section | Description |
|---|---|
| Add QRCode | Create a new WhatsApp QR Code. |
| QR Code List | Displays every generated QR Code. |
| WABA Number | Shows the connected WhatsApp Business Account. |
| QR Link | Generated WhatsApp QR Link. |
| Created Date | Date and time the QR Code was created. |
| Message Text | Displays the predefined WhatsApp message. |
| Actions | Edit or Delete QR Codes. |
Create a QR Code
Click the Add QRCode button to open the Add/Edit QR Code window.
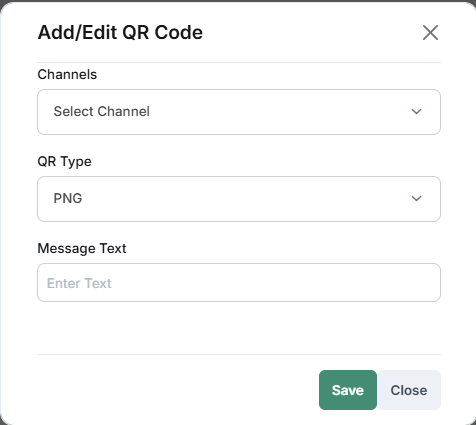
Configuration
| Field | Description |
|---|---|
| Channel | Select the WhatsApp Business Channel used for generating the QR Code. |
| QR Type | Select the output format for the generated QR Code. |
| Message Text | Enter the predefined WhatsApp message automatically sent after scanning. |
QR Types
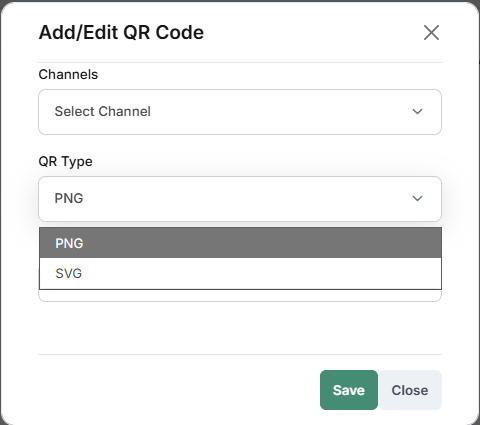
| Type | Description |
|---|---|
| PNG | Generates a high-quality PNG image suitable for websites, presentations, digital sharing and printed documents. |
| SVG | Generates a scalable SVG file that can be resized without losing quality, making it ideal for banners, posters and professional printing. |
Message Text
The Message Text field defines the default WhatsApp message that appears automatically after the QR Code is scanned.
| Example | Description |
|---|---|
| Hello, I would like to know more about your services. | The predefined message automatically appears inside WhatsApp after scanning the QR Code. |
Saving the QR Code
Managing QR Codes
Each QR Code provides management actions through the Actions column.
| Action | Description |
|---|---|
| Edit | Modify the Channel, QR Type or predefined Message Text. |
| Delete | Permanently remove the selected QR Code from the system. |
WhatsApp Widget
The WhatsApp Widget module allows you to create a customizable WhatsApp chat widget that can be embedded on your website. Visitors can instantly start a conversation with your business without manually searching for your WhatsApp number.
Overview
The WhatsApp Widget can be embedded into any website using a generated HTML/JavaScript snippet. After configuration, a floating WhatsApp button appears on your website and opens a customizable chat window.
Accessing WhatsApp Widget
Follow the steps below to open the WhatsApp Widget module.
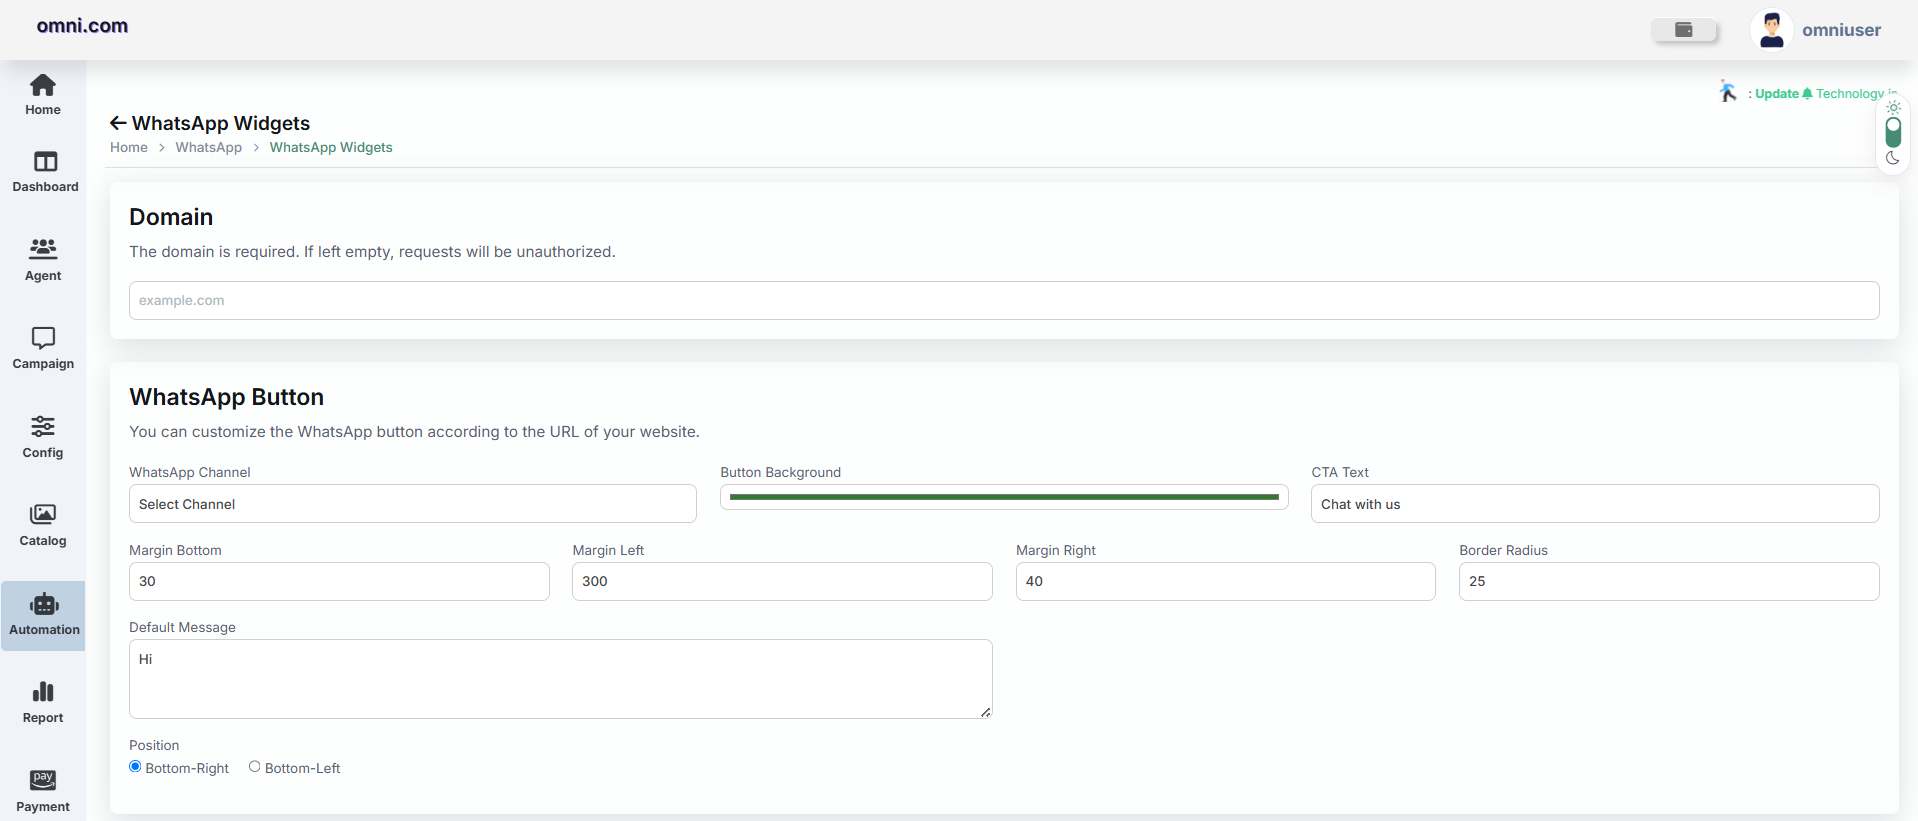
Domain Configuration
The Domain field specifies the website where the widget is authorized to run.
| Field | Description |
|---|---|
| Domain | Enter your website domain (Example: example.com) where the widget will be installed. |
WhatsApp Button
The WhatsApp Button section controls the appearance and behavior of the floating WhatsApp button displayed on your website.
Configuration
| Field | Description |
|---|---|
| WhatsApp Channel | Select the WhatsApp Business channel that will receive customer conversations. |
| Button Background | Select the background color of the floating WhatsApp button. |
| CTA Text | Enter the text displayed on the button (Example: Chat with us). |
| Margin Bottom | Defines the distance between the button and the bottom of the webpage. |
| Margin Left | Defines the distance between the button and the left side of the webpage. |
| Margin Right | Defines the distance between the button and the right side of the webpage. |
| Border Radius | Controls how rounded the floating button appears. |
| Default Message | Specify the default WhatsApp message displayed after opening the chat. |
| Position | Select whether the button appears on the Bottom-Right or Bottom-Left of the webpage. |
Button Position
WhatsApp Widget
The WhatsApp Widget section allows you to customize the chat popup displayed after a visitor clicks the floating WhatsApp button.
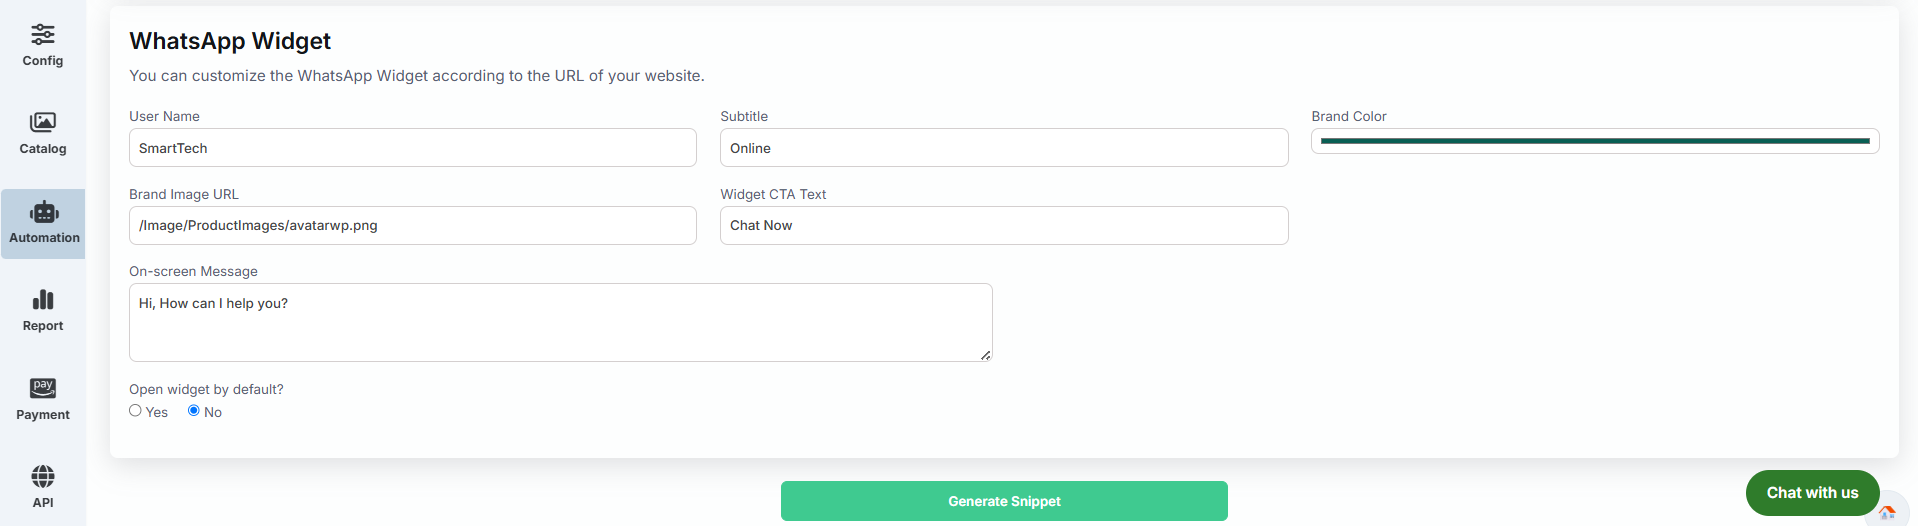
Widget Configuration
Configure the following settings to customize the appearance and behavior of the WhatsApp chat window.
| Field | Description |
|---|---|
| User Name | Enter the business or support representative name displayed in the widget header. |
| Subtitle | Enter a short status such as Online, Customer Support, or Available. |
| Brand Color | Select the primary color used for the widget header and action button. |
| Brand Image URL | Provide the URL of the profile image displayed inside the widget. |
| Widget CTA Text | Specify the text shown on the action button (Example: Chat Now). |
| On-screen Message | Enter the welcome message displayed when the widget opens. |
| Open Widget by Default | Choose whether the widget opens automatically when visitors load the website. |
Subtitle Examples
Open Widget by Default
| Option | Description |
|---|---|
| Yes | The widget automatically opens when visitors load the website. |
| No | The widget opens only after visitors click the floating WhatsApp button. |
Generate Snippet
After configuring all widget settings, click Generate Snippet.
Widget Preview
The preview section allows you to verify the appearance of the WhatsApp Widget before embedding it on your website.
Example
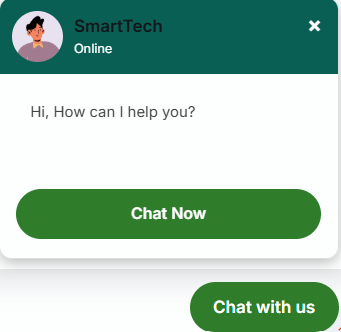
In the example shown below, the floating button displays Chat with us. After clicking it, the visitor sees the business profile, online status, welcome message, and a Chat Now button that redirects directly to WhatsApp.
| Example Setting | Value |
|---|---|
| Button Text | Chat with us |
| Business Name | SmartTech |
| Subtitle | Online |
| Welcome Message | Hi, How can I help you? |
| Action Button | Chat Now |
Email Provider
The Email Provider module allows administrators to configure email service providers used by the application to send notifications, alerts, OTPs, transactional emails, and other system-generated messages. The system supports both SMTP and SendGrid.
Overview
The Email Provider module centralizes email configuration so that all outgoing emails are sent through a secure and reliable provider. Administrators can configure SMTP servers or integrate SendGrid based on business requirements.
Accessing Email Provider
Follow these steps to open the Email Provider module.
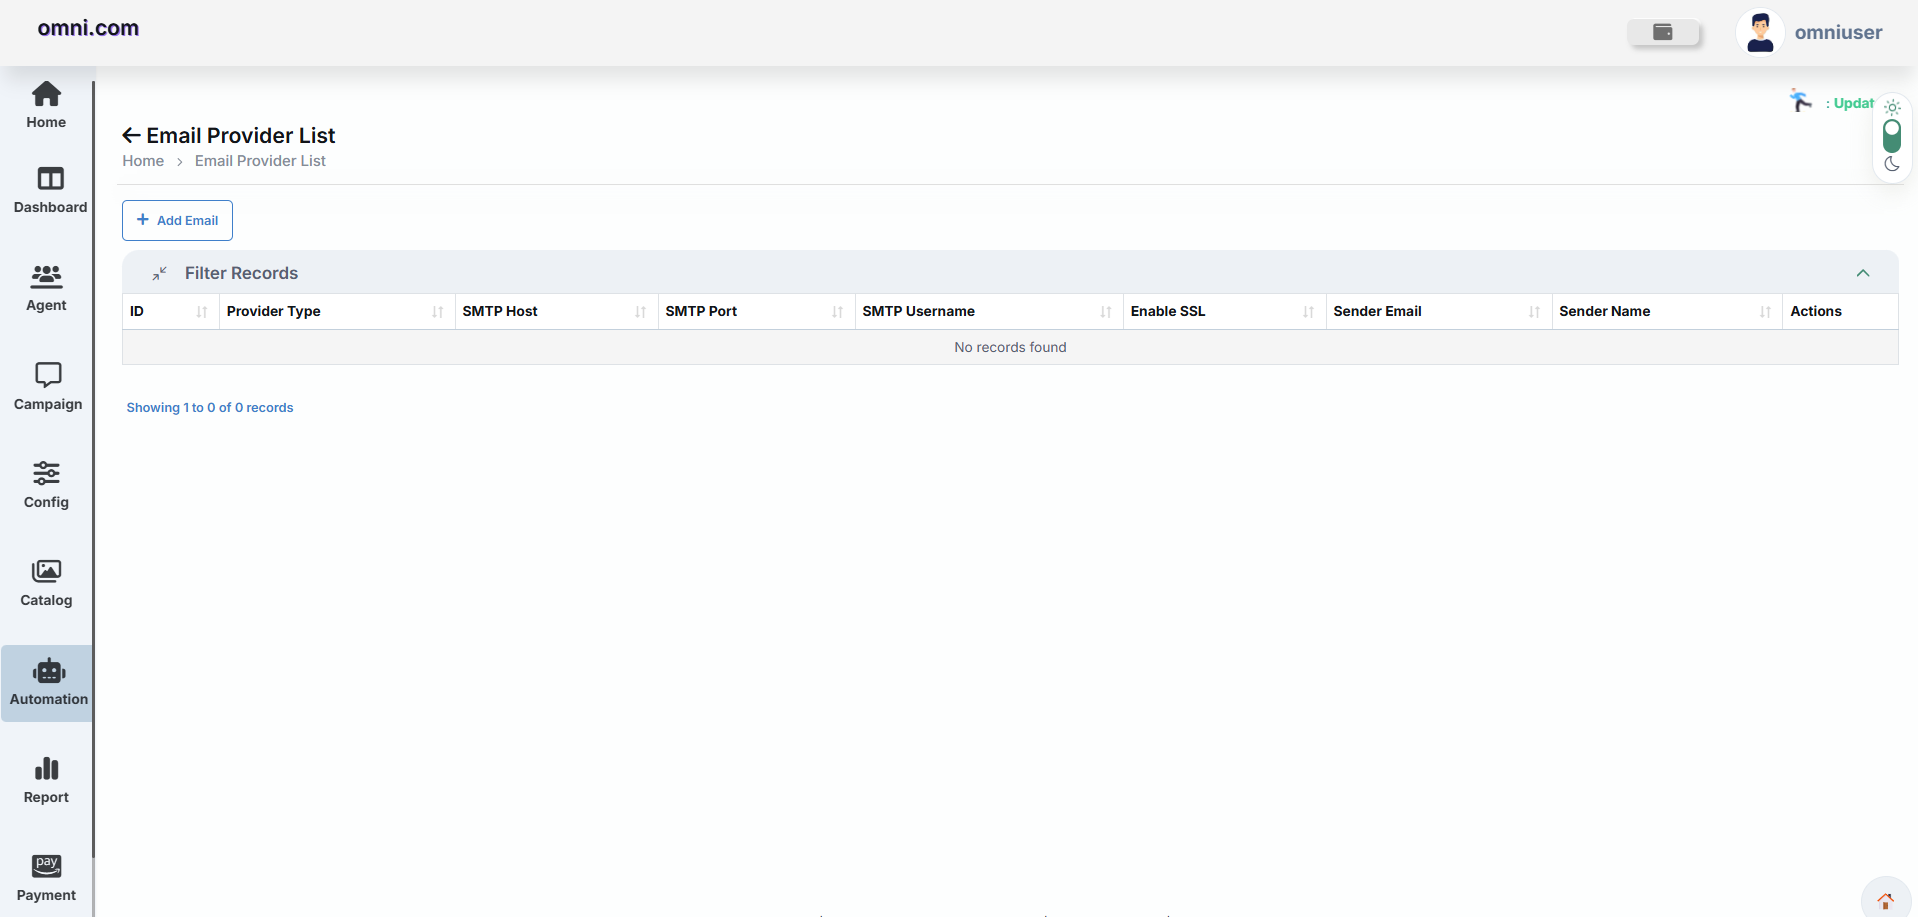
Email Provider List
The Email Provider List displays all configured email providers and their configuration details.
| Column | Description |
|---|---|
| ID | Unique identification number assigned to the Email Provider. |
| Provider Type | Displays the configured provider such as SMTP or SendGrid. |
| SMTP Host | SMTP server configured for the provider. |
| SMTP Port | Port used for SMTP communication. |
| SMTP Username | Email address or username used for authentication. |
| Enable SSL | Indicates whether SSL/TLS encryption is enabled. |
| Sender Email | Email address used for sending outgoing emails. |
| Sender Name | Name displayed as the sender. |
| Actions | Edit or Delete an Email Provider. |
Add Email Provider
Click the Add Email button to configure a new email service provider.
The Create Email Provider dialog provides two supported configuration methods.
| Configuration | Description |
|---|---|
| SMTP | Configure a standard SMTP server. |
| SendGrid | Configure SendGrid using an API Key. |
SMTP Configuration
Select the SMTP tab to configure your SMTP email server.
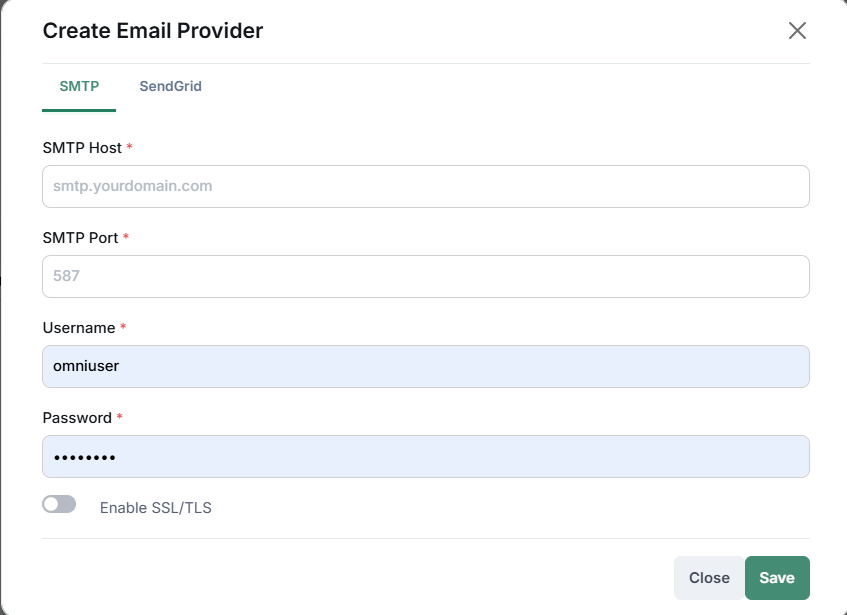
| Field | Description |
|---|---|
| SMTP Host | Enter the SMTP server address provided by your email provider (Example: smtp.yourdomain.com). |
| SMTP Port | Specify the SMTP port number. Common ports include 25, 465, and 587. |
| Username | Enter the username or email address used for SMTP authentication. |
| Password | Enter the password associated with the SMTP account. |
| Enable SSL/TLS | Enable this option if the SMTP server requires a secure SSL/TLS connection. |
| Save | Save the SMTP configuration. |
| Close | Exit the dialog without saving. |
SendGrid Configuration
The SendGrid configuration allows you to use Twilio SendGrid as your email delivery provider. It is recommended for reliable and scalable transactional email delivery.
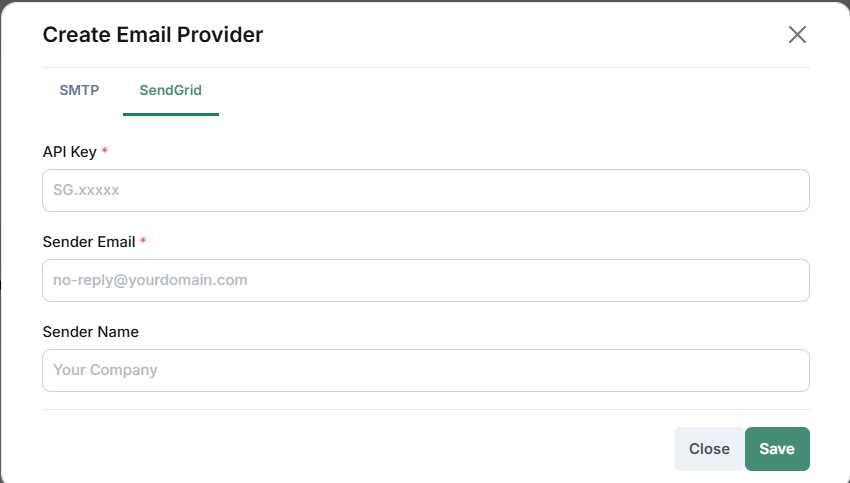
| Field | Description |
|---|---|
| API Key | Enter your SendGrid API Key (Example: SG.xxxxxx). |
| Sender Email | Enter the verified sender email address registered in your SendGrid account. |
| Sender Name | Specify the display name shown to recipients. |
| Save | Click Save to store the SendGrid configuration. |
| Close | Exit the dialog without saving any changes. |
Managing Email Providers
After saving an Email Provider, it appears in the Email Provider List. Administrators can manage providers directly from the Actions column.
| Action | Description |
|---|---|
| Edit | Modify the existing Email Provider configuration. |
| Delete | Permanently remove an Email Provider that is no longer required. |
Example Configuration
Suppose your organization wants to use Gmail SMTP for sending system-generated emails.
Best Practices
Troubleshooting
| Issue | Possible Solution |
|---|---|
| Unable to send emails | Verify the SMTP Host, Port, Username, Password, and SSL/TLS settings. |
| Authentication Failed | Confirm that the SMTP credentials or SendGrid API Key are valid. |
| Emails marked as Spam | Use a verified sender domain and configure SPF, DKIM, and DMARC records. |
| Connection Timeout | Check firewall rules, network connectivity, and SMTP port accessibility. |
| Invalid Sender Email | Ensure the sender email is verified and authorized by the selected provider. |
Best Practices
Troubleshooting
| Issue | Possible Solution |
|---|---|
| Chatbot does not start | Verify the Start Trigger configuration and publish the chatbot. |
| Template message is not delivered | Ensure the selected WhatsApp template has been approved by Meta. |
| Webhook is not returning data | Verify the API URL, request method, authentication, and response format. |
| Variables are empty | Confirm that the required workflow variables are populated before they are used. |
| Email notification not received | Verify the provider configuration, recipient email address, and notification settings. |
| Google Sheet is not updated | Check the Google account authorization and column mapping configuration. |
Frequently Asked Questions (FAQ)
Can I create multiple chatbot flows?
Yes. You can create and manage multiple chatbot flows for different business use cases and WhatsApp channels.
Can chatbot flows call external APIs?
Yes. The Webhook Config node allows chatbot flows to integrate with external APIs and third-party applications.
Can I schedule appointments?
Yes. The Google Calendar Booking node enables customers to schedule appointments directly through WhatsApp.
Can I collect customer information?
Yes. Nodes such as Ask Question Message, Question Button, Dynamic List, and Multi List can capture customer responses and store them in workflow variables.
Can I notify support agents automatically?
Yes. The Agent Notification node can automatically send notifications to configured agents whenever required.
Summary
The WhatsApp Chatbot Builder provides a powerful visual platform for creating automated customer conversations without coding. Using drag-and-drop nodes, businesses can design complete customer journeys, integrate external services, collect customer information, send interactive messages, schedule appointments, and automate notifications—all within a single workflow.
Payment
The Payment module allows users to configure payment gateways and monitor payment transactions. It supports multiple payment providers, enabling businesses to securely collect payments through WhatsApp and other integrated services.
Payment Module
The Payment module consists of two major sections that help businesses configure payment gateways and monitor customer payment activity.
Payment Configurations
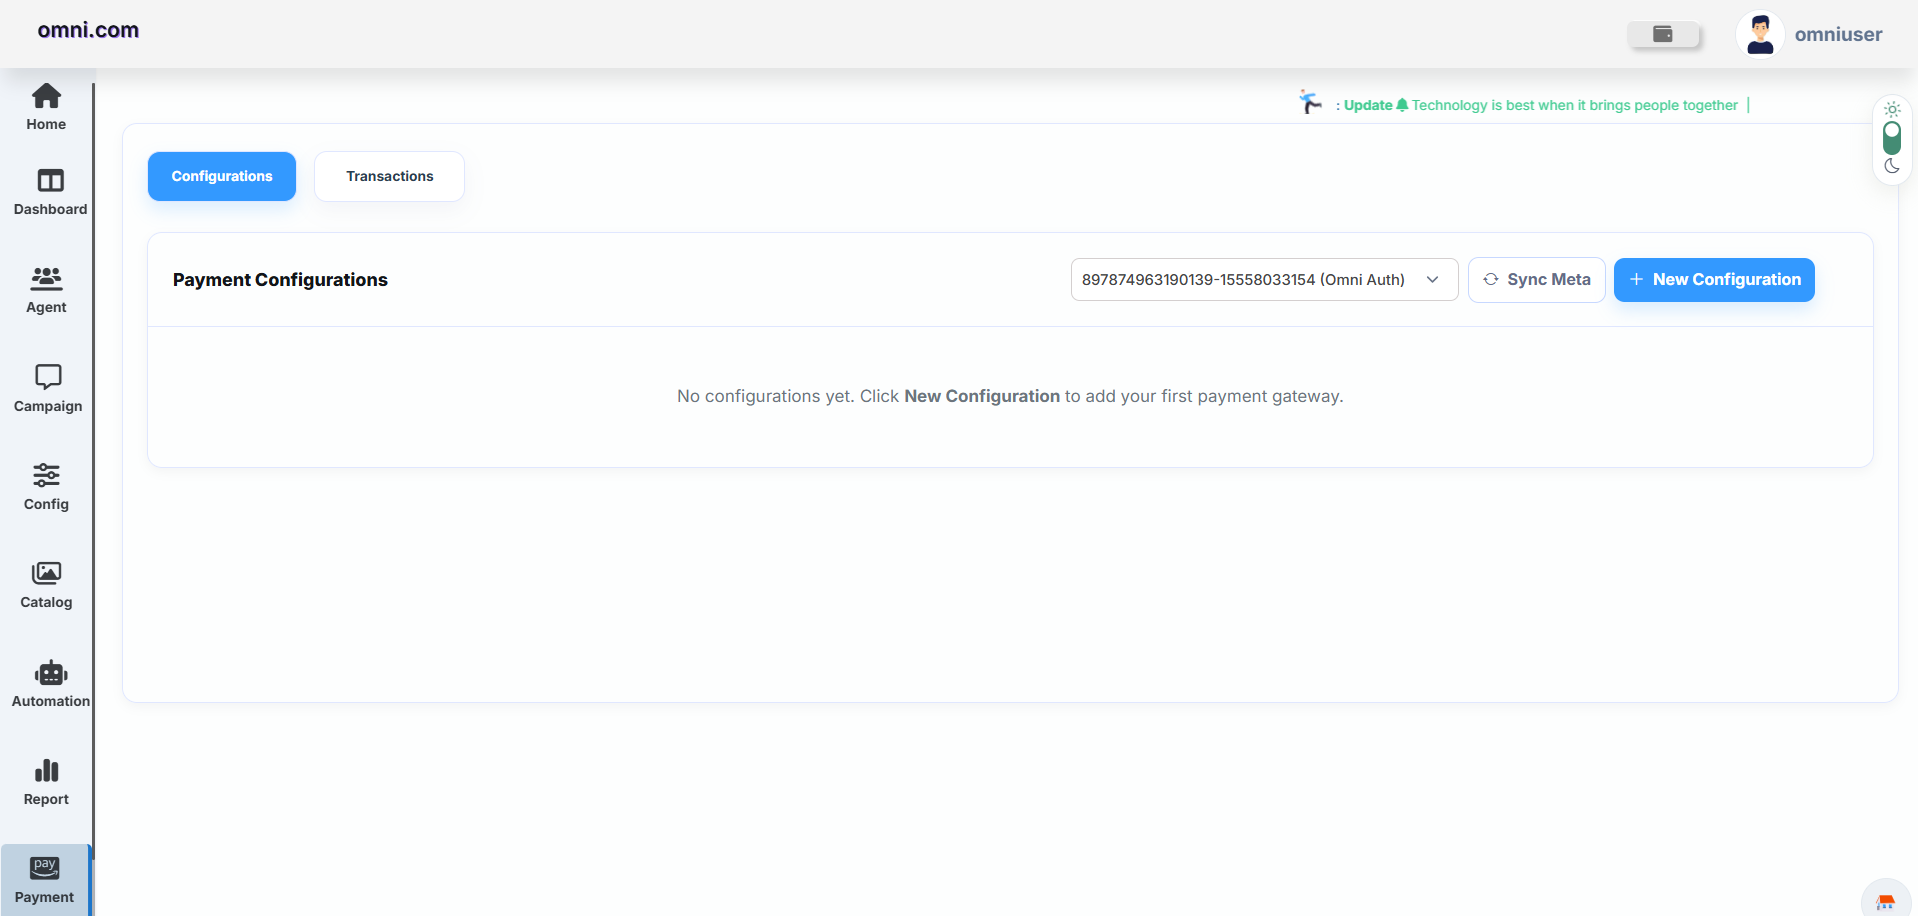
By default, the Configurations tab opens when you navigate to the Payment module.
This page displays all configured payment gateways associated with the selected WhatsApp Business Account (WABA).
Available Options
| Option | Description |
|---|---|
| Channel Selector | Select the WhatsApp Business Account for which payment configurations are managed. |
| Sync Meta | Synchronizes payment configuration details from Meta. |
| New Configuration | Creates a new payment gateway configuration. |
Creating a Payment Configuration
To configure a new payment gateway, click the New Configuration button available on the Payment Configurations page.
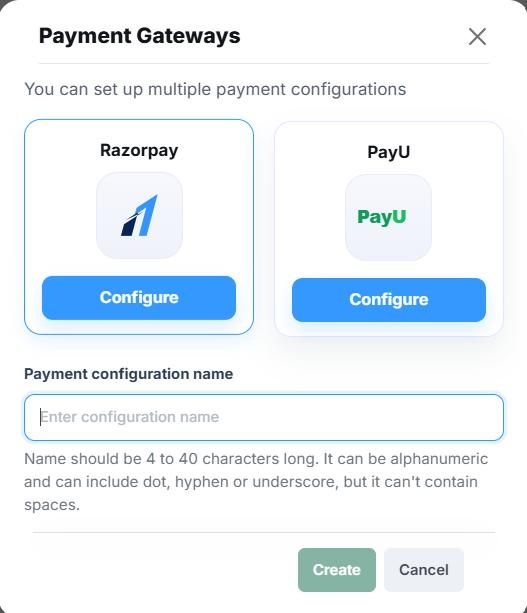
Payment Gateways
After clicking New Configuration, the Payment Gateways dialog box appears.
The system currently supports multiple payment providers that can be connected with your WhatsApp Business Account.
Payment Configuration Name
After selecting the payment gateway, enter a unique Payment Configuration Name.
Guidelines
| Requirement | Description |
|---|---|
| Length | Must contain 4 to 40 characters. |
| Allowed Characters | Letters, Numbers, Dot (.), Hyphen (-), Underscore (_). |
| Spaces | Spaces are not allowed. |
| Example | Razorpay_Main |
Actions
Transactions
The Transactions tab provides a complete overview of payment activity. Users can monitor payment status, revenue, successful payments, failed payments, and pending transactions.
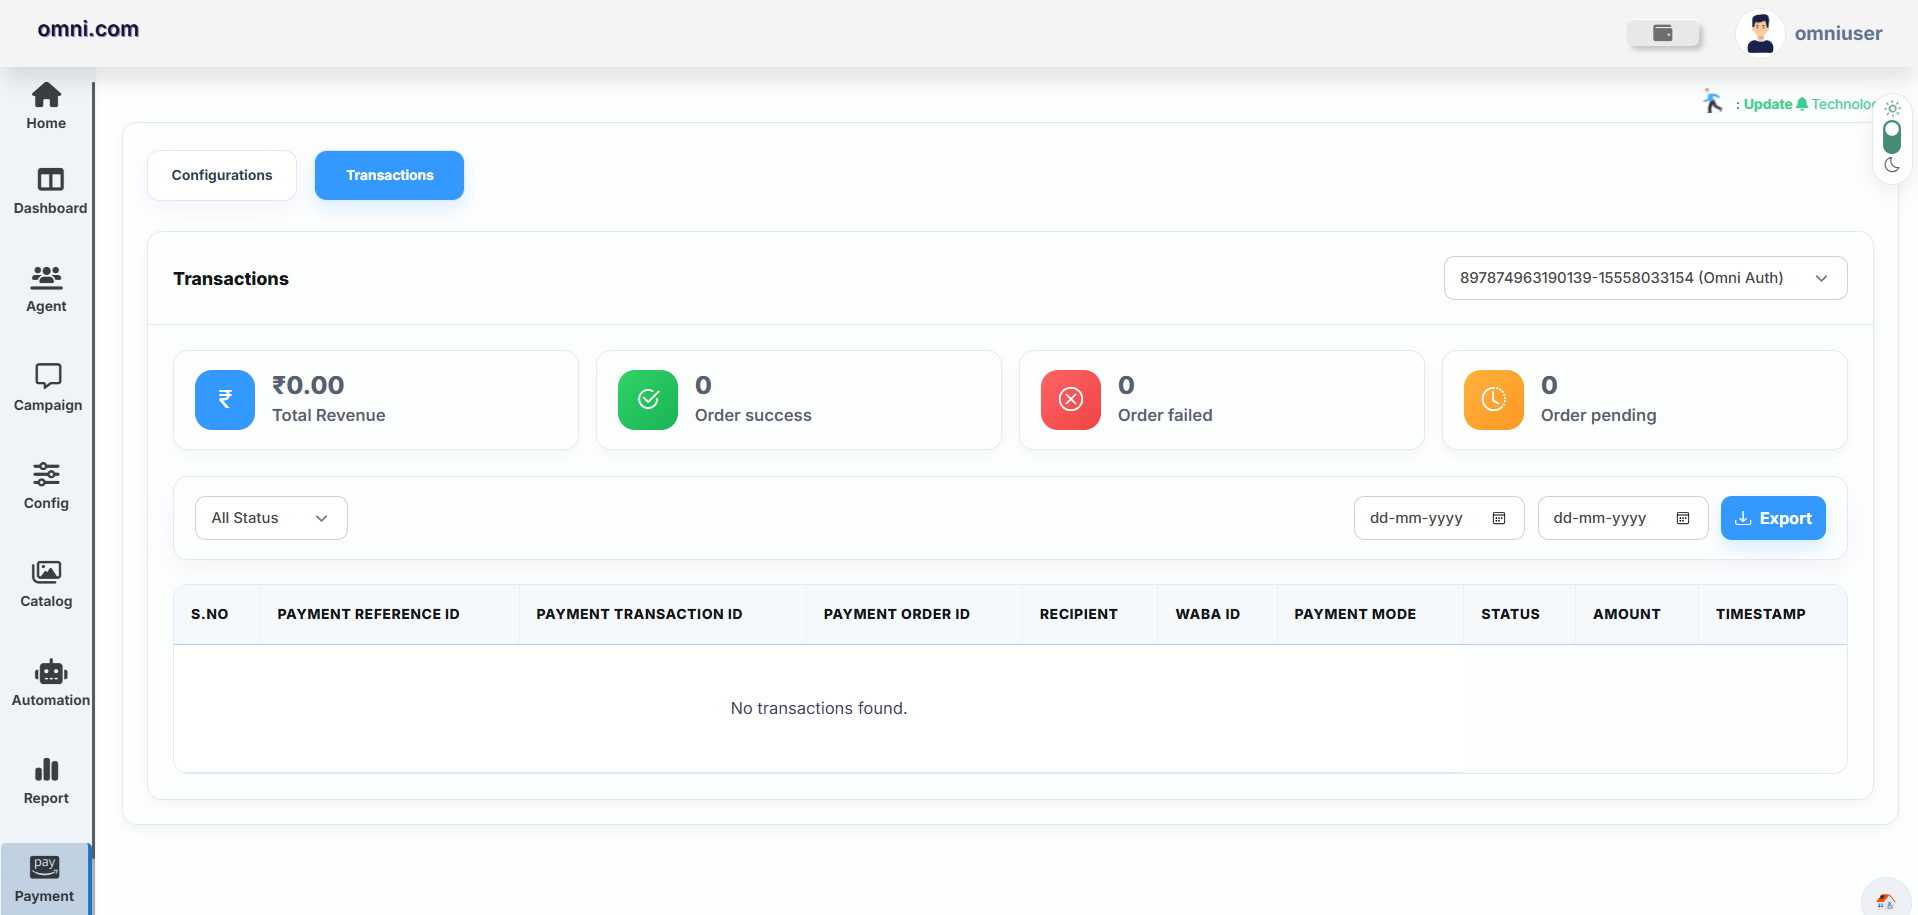
Transaction Summary
The dashboard displays important payment statistics that help users monitor the overall payment performance of the selected WhatsApp Business Account.
| Card | Description |
|---|---|
| Total Revenue | Displays the total revenue generated through successful payments. |
| Order Success | Shows the total number of successfully completed payment orders. |
| Order Failed | Displays the total number of failed payment attempts. |
| Order Pending | Shows the number of payment orders that are currently pending. |
Dashboard Cards
Filters
Users can filter transaction records using the available filters to quickly locate specific payment information.
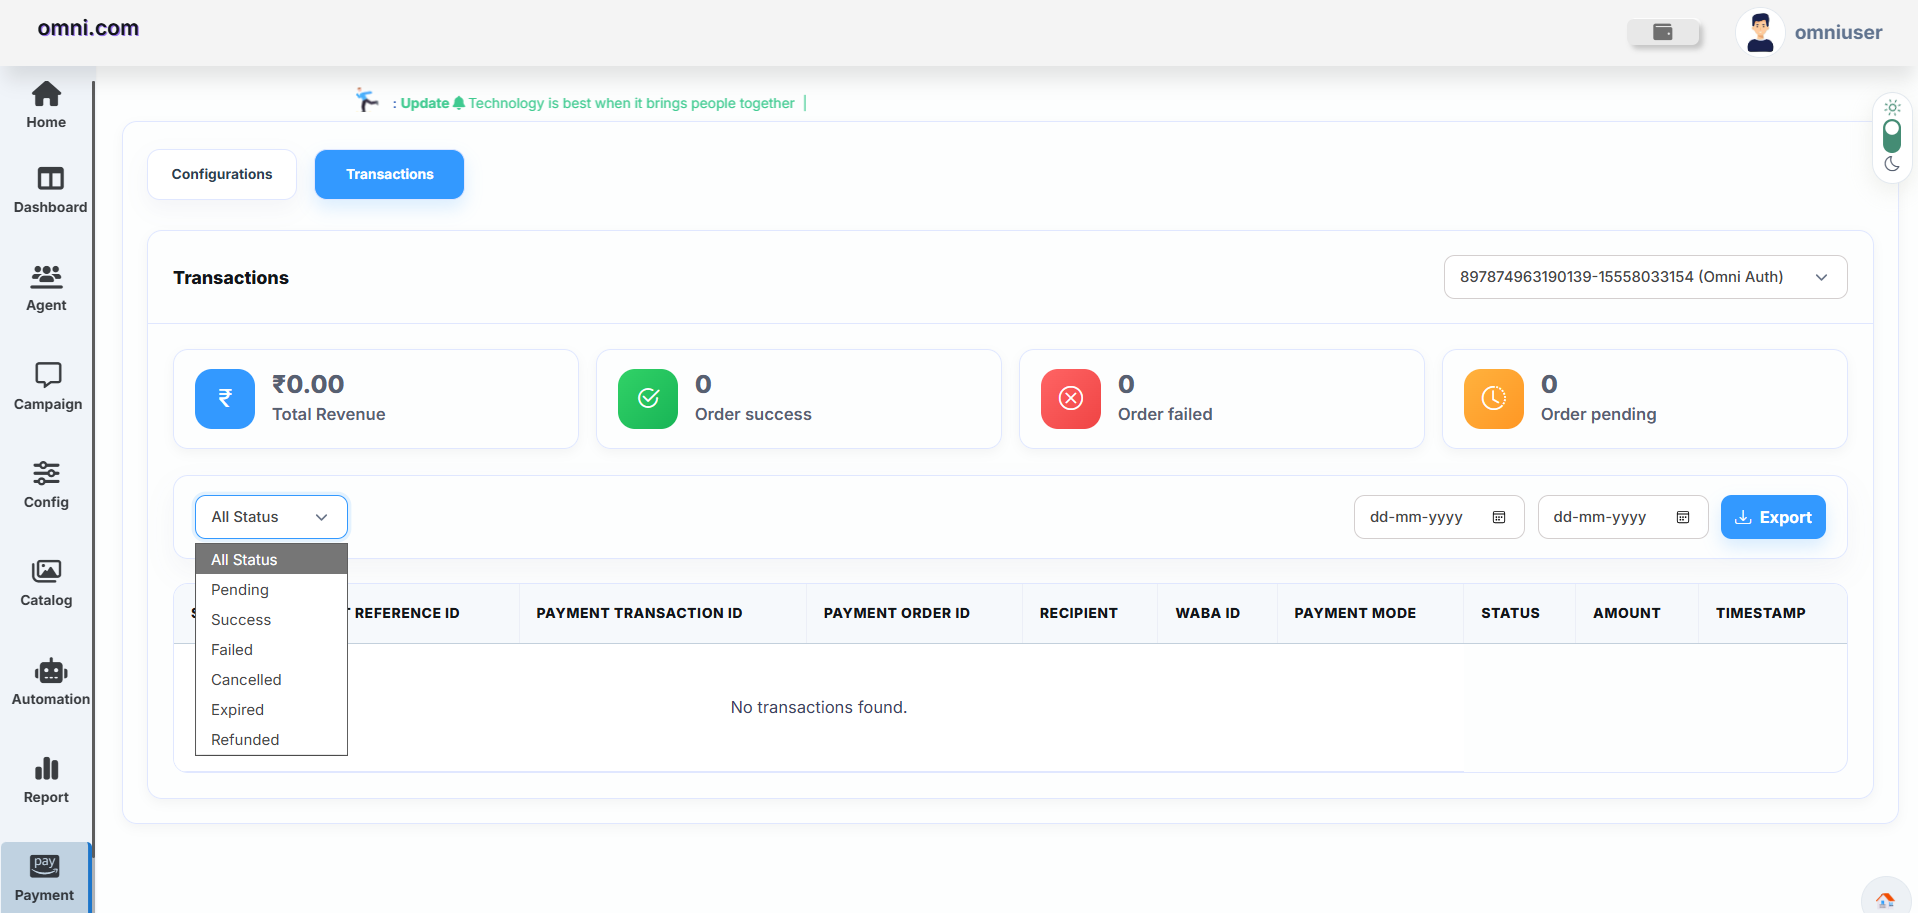
| Filter | Description |
|---|---|
| Status Filter | Filter transactions based on payment status. |
| Date Range | Select the From Date and To Date to view transactions within a specific period. |
| Export | Download the filtered transaction report for offline analysis and record keeping. |
Available Status
Transaction List
The Transaction List displays complete information for every payment processed through the configured payment gateway.
| Column | Description |
|---|---|
| S.No | Displays the serial number of the transaction. |
| Payment Reference ID | Unique reference ID generated for the payment. |
| Payment Transaction ID | Transaction ID provided by the payment gateway. |
| Payment Order ID | Unique order ID associated with the payment request. |
| Recipient | Displays the customer associated with the transaction. |
| WABA ID | Shows the WhatsApp Business Account linked to the payment. |
| Payment Mode | Displays the payment method or gateway used. |
| Status | Shows the current payment status. |
| Amount | Displays the transaction amount. |
| Timestamp | Shows the payment date and time. |
Example
To monitor payment activity, open the Transactions tab, apply filters if required, and export transaction reports whenever needed.
WA Catalogue
The WA Catalogue module enables businesses to integrate their Facebook Commerce Catalogue with their WhatsApp Business Account (WABA). This integration allows businesses to centrally manage product catalogues, synchronize product information, and share products directly with customers during WhatsApp conversations.
Overview
The WA Catalogue module provides a centralized interface for managing Facebook Commerce catalogues connected to a WhatsApp Business Account. Businesses can upload products, maintain inventory, organize catalogue items, and instantly share products with customers while chatting on WhatsApp.
Accessing WA Catalogue
Navigate to:
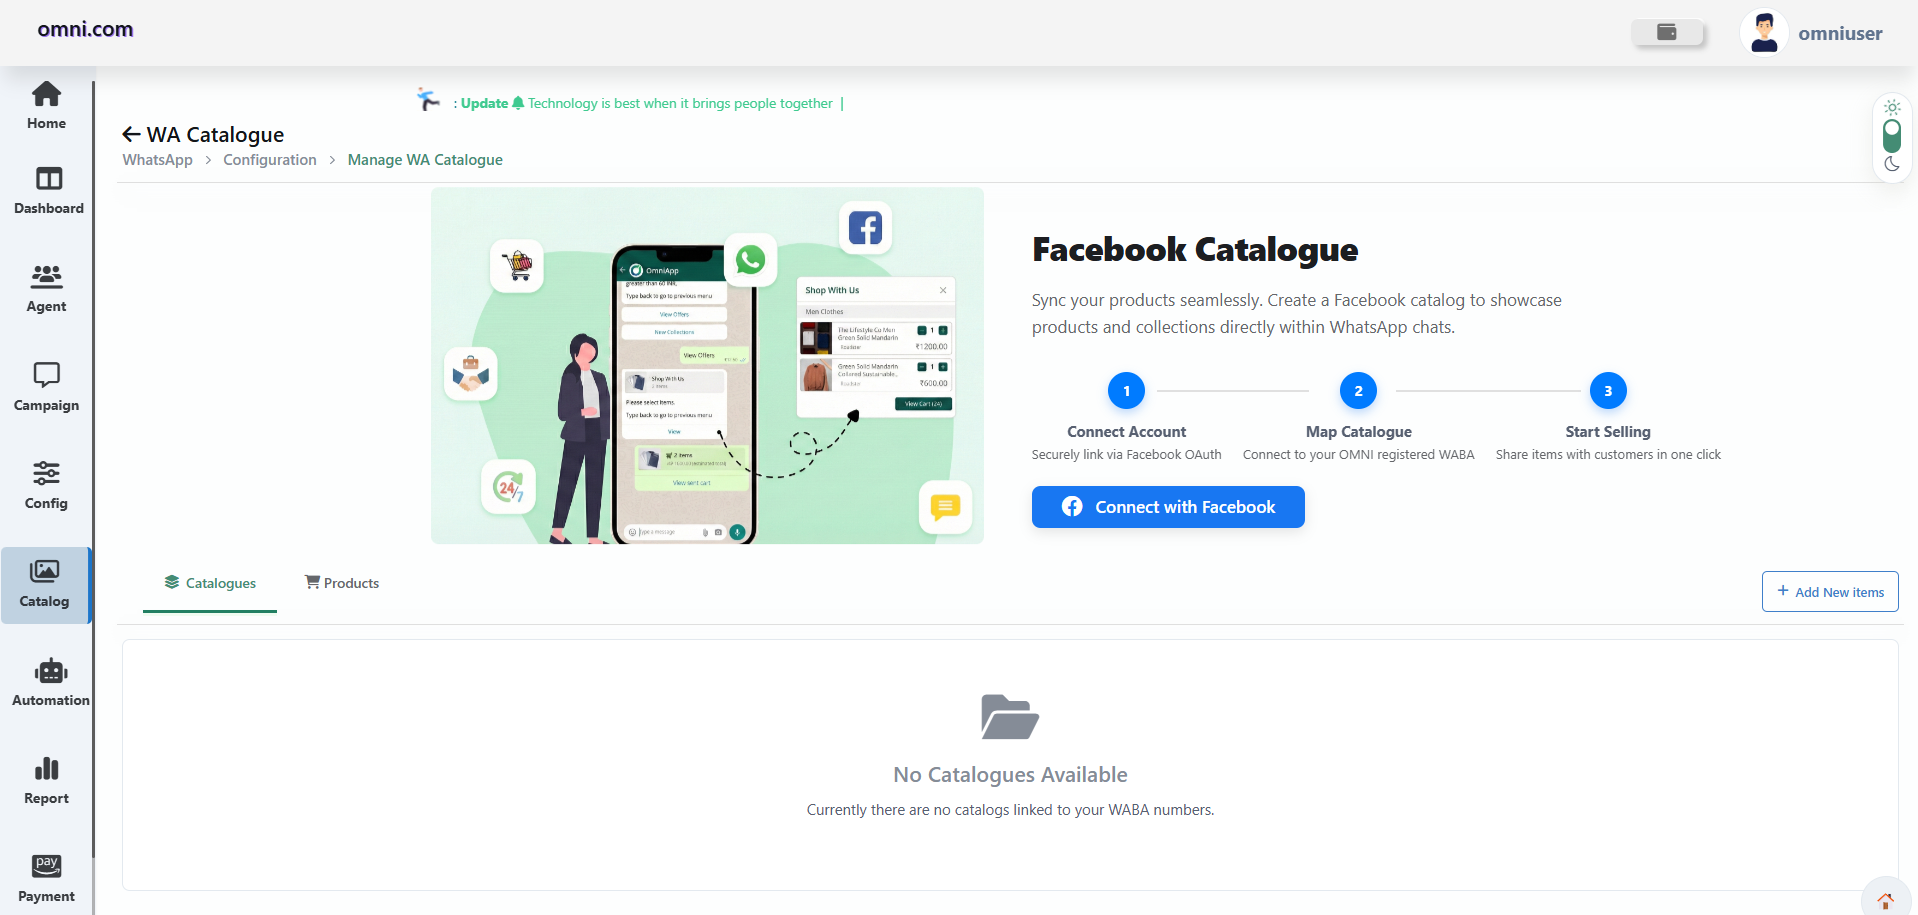
The Manage Catalogue page is the central location for connecting Facebook Commerce, managing catalogues, maintaining products, and synchronizing data with your WhatsApp Business Account.
When no catalogue is connected, the system displays the Facebook Catalogue integration page together with the option to establish a new connection.
Manage Catalogue
The Manage Catalogue page allows users to connect their Facebook Business account and synchronize product catalogues with WhatsApp Business.
| Section | Description |
|---|---|
| Facebook Catalogue Banner | Displays information about Facebook Commerce integration. |
| Connection Steps | Shows the three-step process required to activate the catalogue. |
| Connect with Facebook | Starts the Facebook Business authentication process. |
| Catalogues Tab | Displays all linked product catalogues. |
| Products Tab | Displays products available inside the selected catalogue. |
| Add New Items | Opens the Add Catalog Item page for creating new products. |
Connect with Facebook
To synchronize your WhatsApp product catalogue, you must first connect your Facebook Business account with Omni Portal.
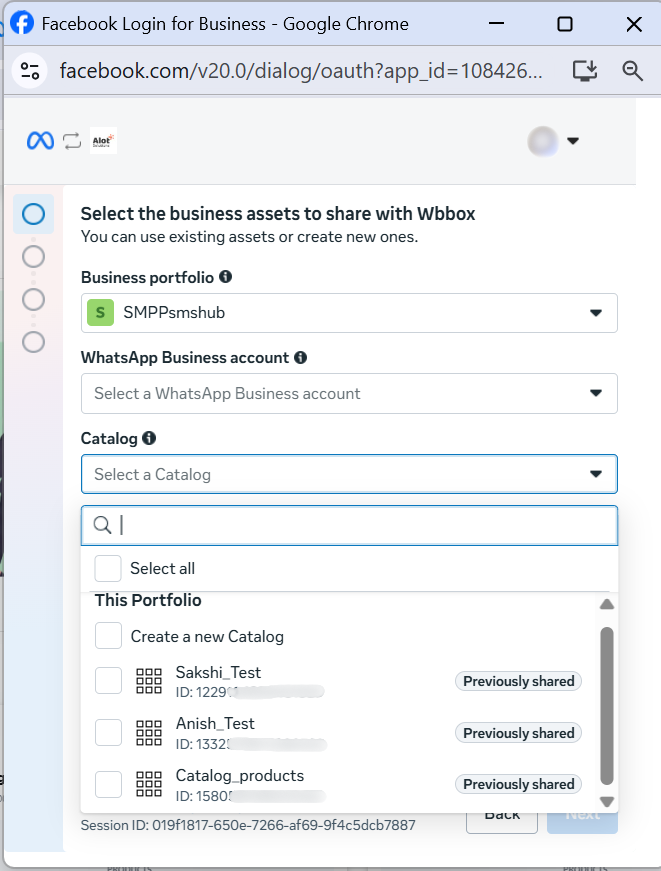
During this process, Facebook verifies your business account and allows Omni Portal to access the selected WhatsApp Business Account and Commerce Catalogue.
Connection Process
Facebook Authorization
During authorization, Facebook requests permission to access business assets associated with the selected account.
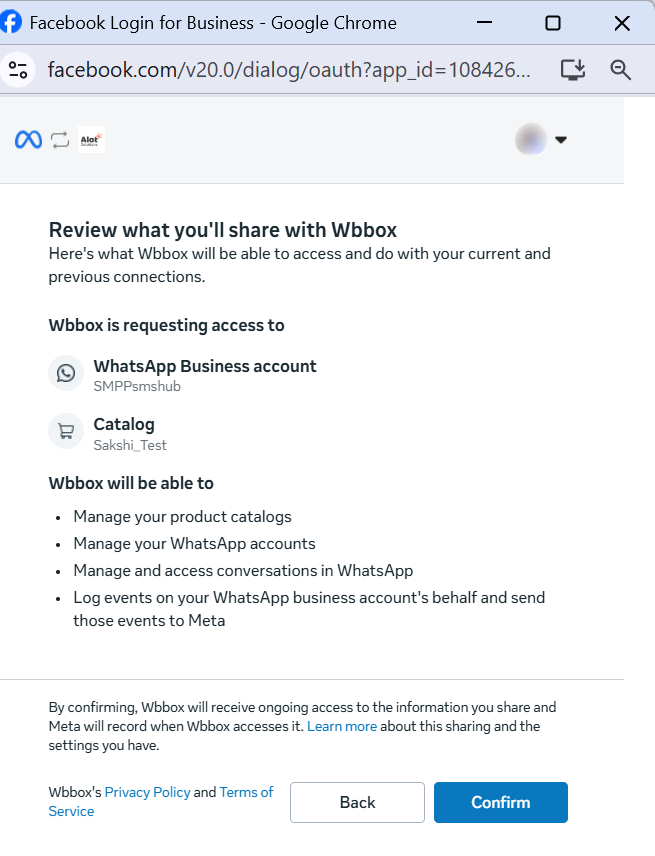
Business Assets Shared
Permissions Required
| Permission | Purpose |
|---|---|
| Manage Product Catalogues | Create, update and maintain Facebook Commerce catalogues. |
| Synchronize Products | Keep products updated between Facebook and Omni Portal. |
| Link Catalogue with WhatsApp | Allow products to be shared in WhatsApp conversations. |
| Publish Products | Enable businesses to send catalogue products directly to customers. |
Catalogue Dashboard
The Catalogue Dashboard becomes available after successfully connecting Facebook Commerce with your WhatsApp Business Account. From this page, users can manage catalogues, browse products, add new catalogue items, and synchronize product information.
Add New Item
The Add New Item feature allows users to create new products inside the connected Facebook Commerce Catalogue.
Add Catalog Item
The Add Catalog Item page allows users to enter complete product information before publishing products to Facebook Commerce.
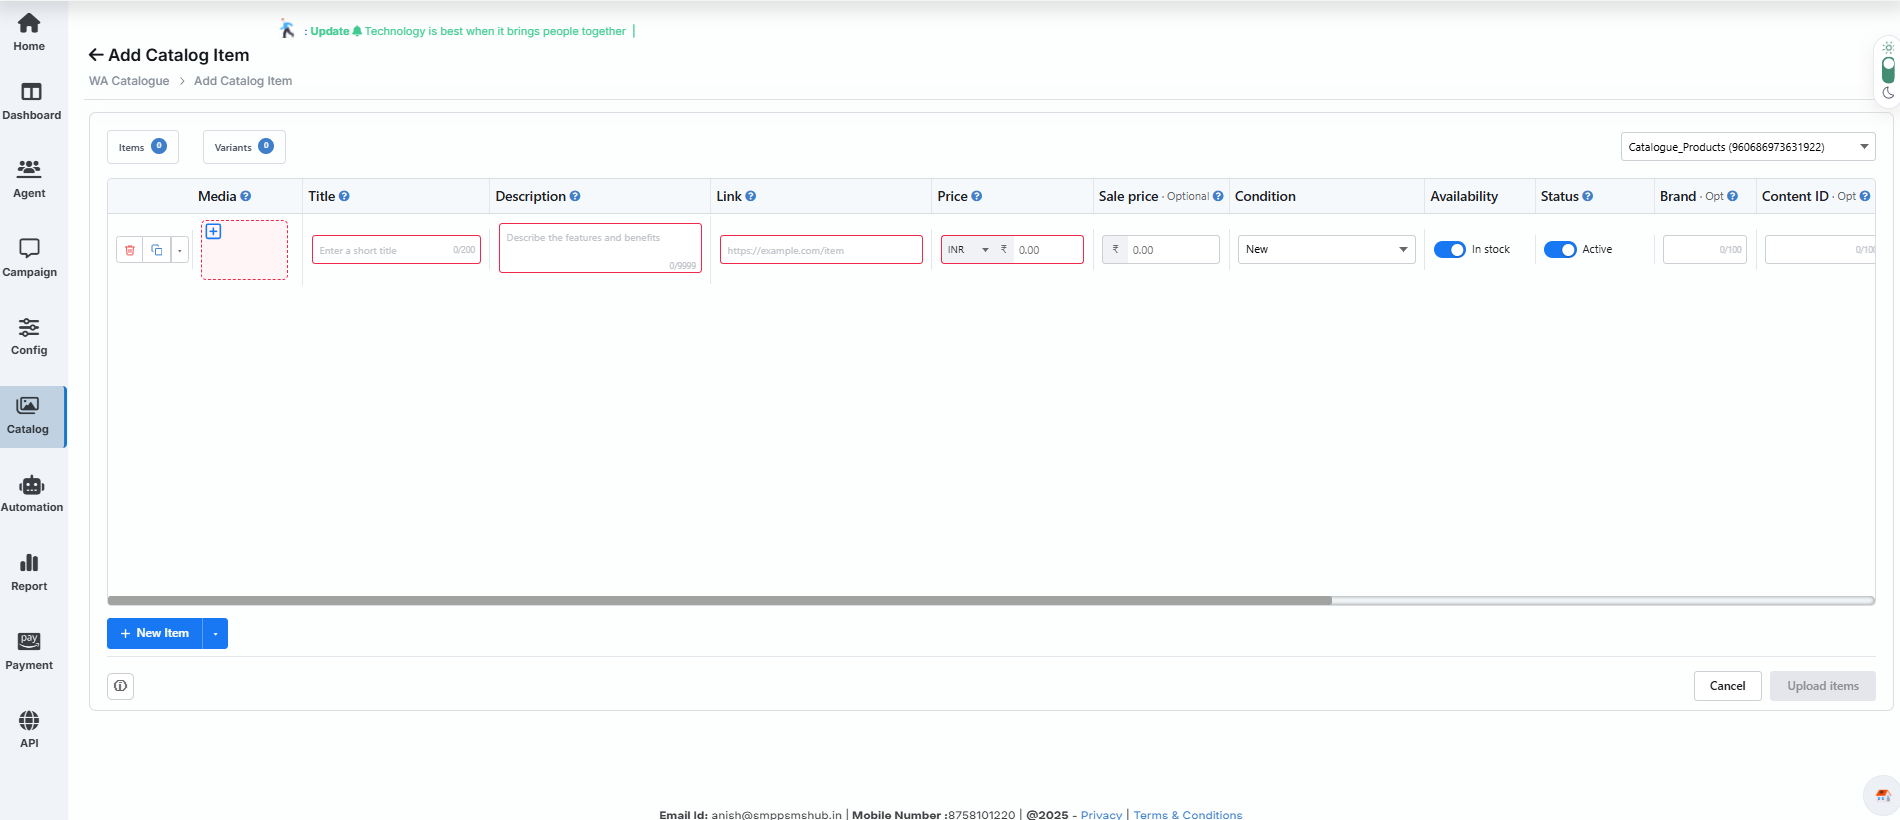
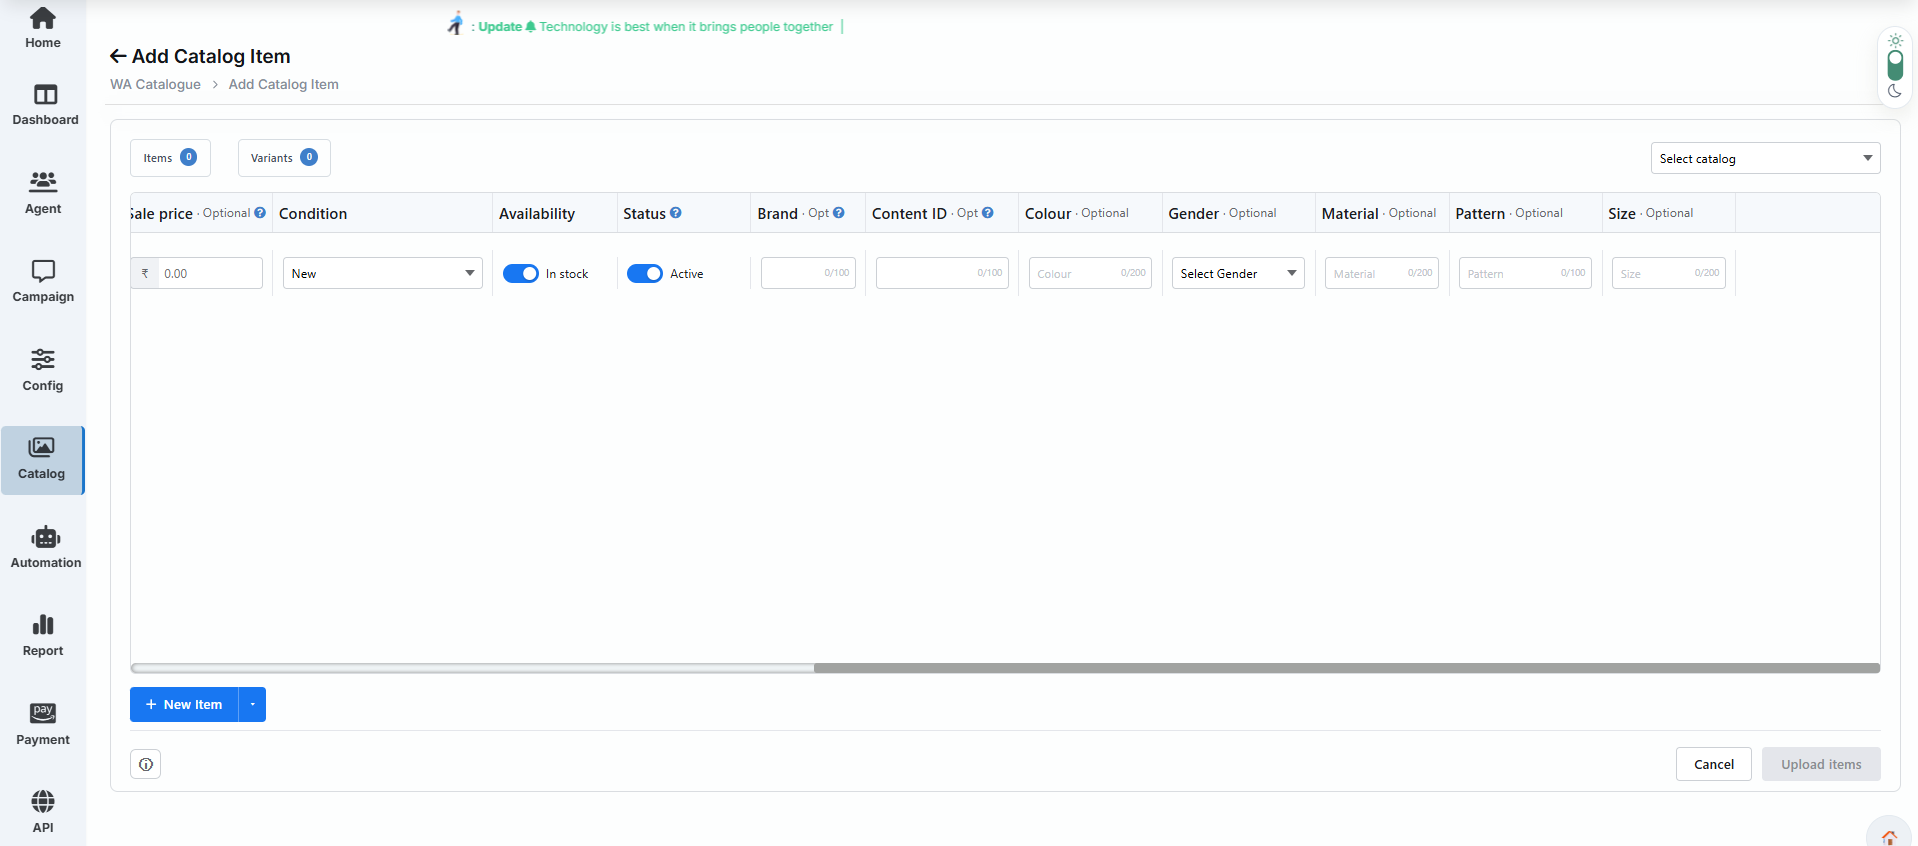
Product Information
Each catalogue item contains product details that help customers identify and purchase products through WhatsApp.
| Field | Description | Required |
|---|---|---|
| Media | Upload product images or videos. | ✔ |
| Title | Product name. | ✔ |
| Description | Detailed product description. | ✔ |
| Link | Product website URL. | ✔ |
| Price | Selling price. | ✔ |
| Sale Price | Discounted selling price. | Optional |
| Condition | New, Used or Refurbished. | ✔ |
| Availability | In Stock or Out of Stock. | ✔ |
| Status | Enable or Disable product. | ✔ |
Additional Product Information
Along with the mandatory product information, businesses can optionally provide additional product attributes to improve product discovery and customer experience. These fields help organize products more effectively within Facebook Commerce and WhatsApp Catalogue.
| Field | Description | Required |
|---|---|---|
| Brand | Product manufacturer or brand name. | Optional |
| Content ID | External identifier used for product management. | Optional |
| Colour | Specify the product colour. | Optional |
| Gender | Target customer category (Male, Female, Unisex). | Optional |
| Material | Material used to manufacture the product. | Optional |
| Pattern | Pattern or design of the product. | Optional |
| Size | Product size information. | Optional |
Supported File Size
The WA Catalogue module supports uploading both product images and videos. Ensure that uploaded files are within the supported size limits.
| Media Type | Maximum Size |
|---|---|
| Image | Up to 8 MB |
| Video | Up to 100 MB |
Product Listing
The Products tab displays every product associated with the selected catalogue. Each row represents an individual catalogue item and provides quick access to product information and management actions.
Product Actions
| Action | Description |
|---|---|
| View | Opens the selected product in read-only mode. |
| Edit | Allows modification of existing product information. |
| Delete | Permanently removes the selected product from the catalogue. |
Catalog Activity
The Catalog Activity module provides a centralized view of the performance and activity of all connected WhatsApp Catalogues. It enables businesses to monitor customer orders, generated revenue, recent purchasing activity and overall catalogue performance.
Accessing Catalog Activity
Navigate to:
The Catalog Activity page displays all catalogue activity records in a tabular format. If no records are available, an empty state is shown.
Catalog Activity Dashboard
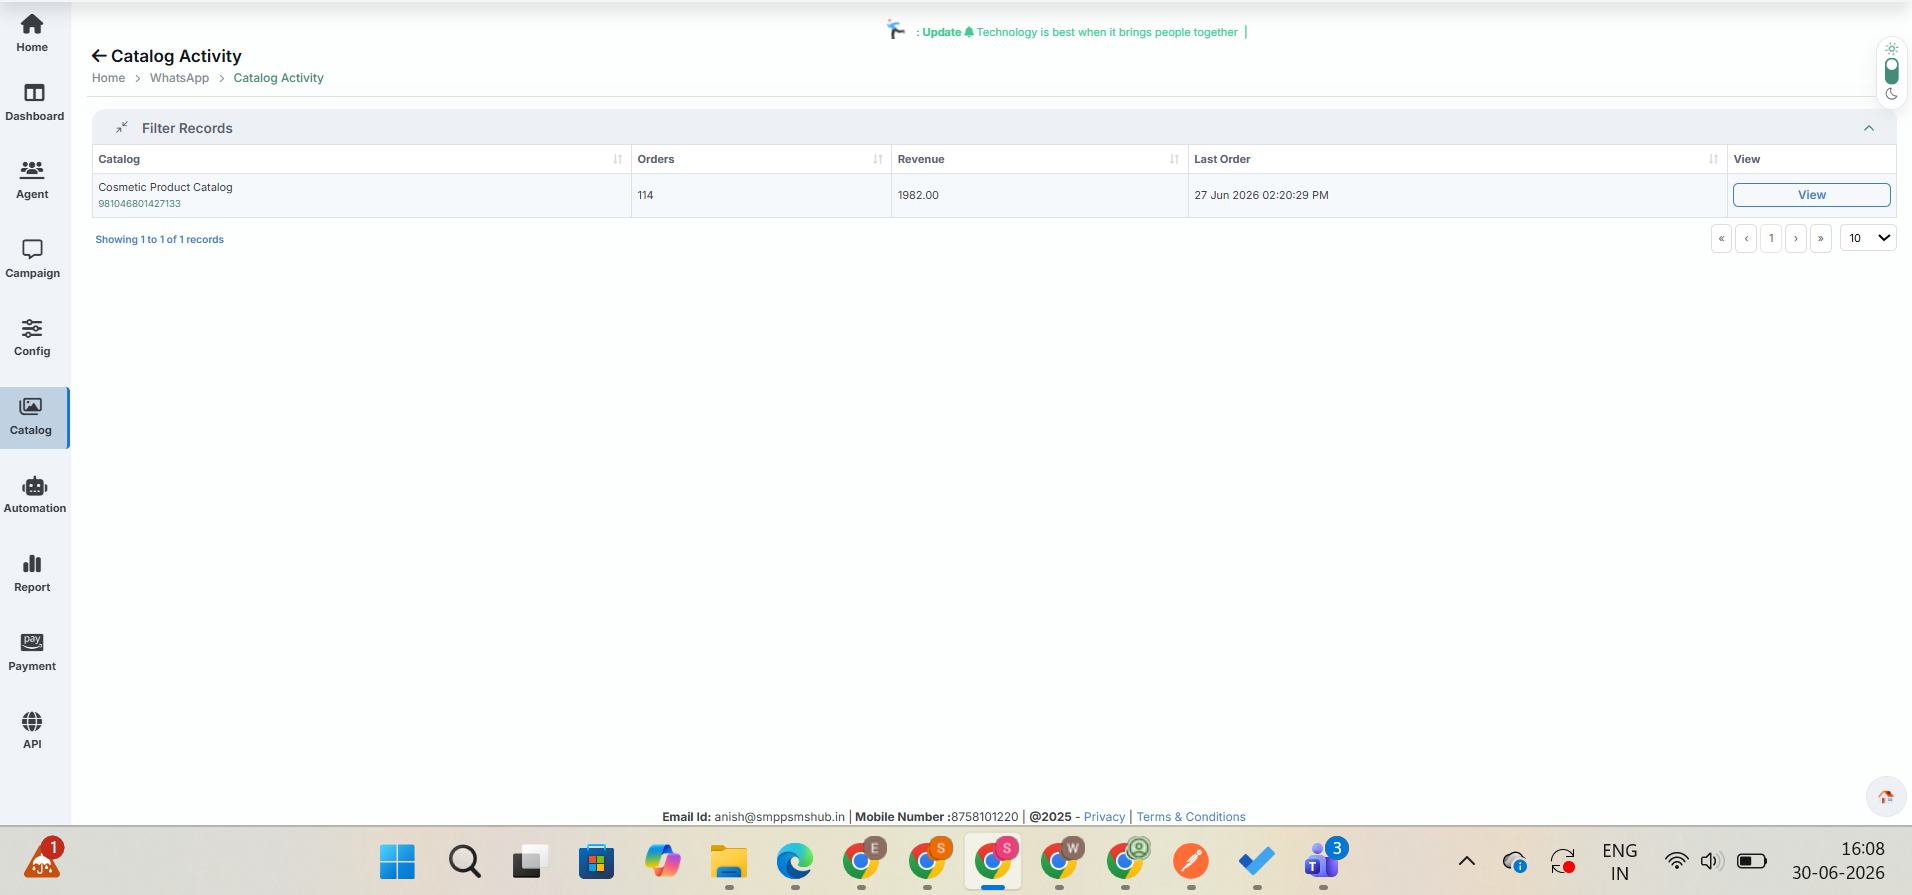
The dashboard provides a consolidated overview of connected catalogue performance including total orders, revenue generated and the most recent order received.
Filter Records
Users can search and organize catalogue activity using the available filters.
- Search specific catalogues.
- Sort activity information.
- Review catalogue performance.
- Monitor order history.
- Analyse generated revenue.
Activity Table
| Column | Description |
|---|---|
| Catalog | Displays the connected catalogue name. |
| Orders | Total customer orders. |
| Revenue | Total revenue generated. |
| Last Order | Most recent order date and time. |
| View | Opens the detailed activity report. |
Viewing Catalog Activity
Selecting the View action opens the detailed report for the selected catalogue.
Best Practices
Summary
The WA Catalogue module provides businesses with a centralized way to manage Facebook Commerce Catalogues and seamlessly integrate them with WhatsApp Business. Products can be created, updated, synchronized, and shared directly during customer conversations, making product discovery and purchasing much easier.
You have successfully learned how to connect Facebook Commerce, create catalogues, upload products, synchronize data, and share catalogue items through WhatsApp Business using the WA Catalogue module.
Voice
The Voice module enables businesses to create and manage outbound voice campaigns, upload voice files,monitor live agents, and analyze campaign performance through dashboards and reports.
Before creating a Voice campaign, ensure that all required voice files, campaign components, and agent configurations are completed. Proper configuration helps improve call delivery, campaign performance, and overall customer experience.
Dashboard
Overview
The Dashboard provides a real-time overview of Voice campaign performance. It displays key outbound (OBD) and inbound (IBD) call statistics, campaign summaries, distribution charts, and performance comparisons, allowing users to monitor call activity from a single screen.
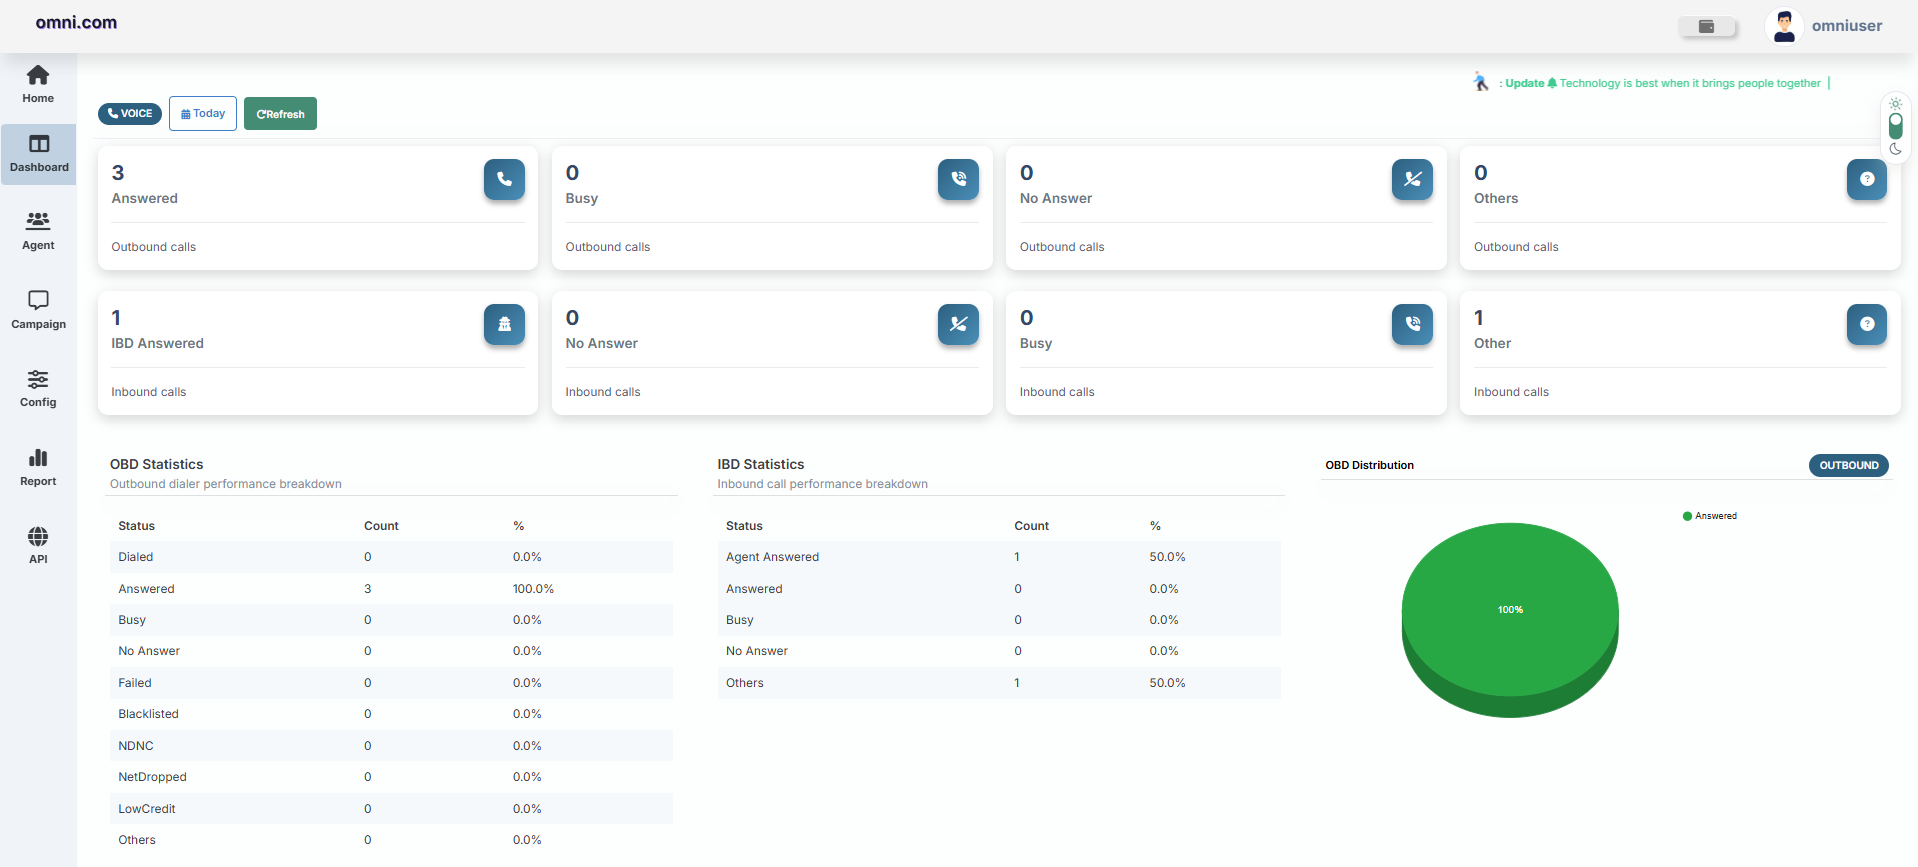
Navigation
To access the Dashboard:
Dashboard Filters
The top section contains quick action buttons.
| Option | Description |
|---|---|
| Voice | Displays Voice campaign statistics. |
| Today | Shows statistics for the current day. |
| Refresh | Reloads the dashboard with the latest campaign data. |
Summary Cards
The dashboard displays summary cards for both Outbound Dialing (OBD) and Inbound Dialing (IBD) campaigns.
Outbound Statistics
Displays overall outbound campaign performance.
| Card | Description |
|---|---|
| Answered | Number of successfully answered outbound calls. |
| Busy | Calls where the destination number was busy. |
| No Answer | Calls that were not answered. |
| Others | Calls with other outcomes such as failed or disconnected. |
Inbound Statistics
Displays inbound call performance.
| Card | Description |
|---|---|
| IBD Answered | Calls answered by agents. |
| No Answer | Incoming calls that were not answered. |
| Busy | Calls that encountered a busy destination. |
| Other | Other inbound call statuses. |
OBD Statistics
The OBD Statistics table provides a detailed breakdown of outbound dialing performance.
| Column | Description |
|---|---|
| Status | Call status category. |
| Count | Total calls under the selected status. |
| Percentage (%) | Percentage of total outbound calls. |
Available Status Categories
- Dialed
- Answered
- Busy
- No Answer
- Failed
- Blacklisted
- NDNC
- NetDropped
- LowCredit
- Others
IBD Statistics
The IBD Statistics table displays inbound campaign performance.
| Column | Description |
|---|---|
| Status | Inbound call status. |
| Count | Total number of calls. |
| Percentage (%) | Percentage of total inbound calls. |
Status Categories
- Agent Answered
- Answered
- Busy
- No Answer
- Others
OBD Distribution
The OBD Distribution chart provides a graphical representation of outbound campaign performance. The pie chart displays the percentage distribution of outbound call statuses, allowing users to quickly identify campaign success rates.
OBD vs IBD Distribution Comparison
The dashboard includes a comparison chart between outbound and inbound campaign statistics.
Line Chart
Displays the trend comparison between OBD and IBD call statuses across different categories.

Bar Chart
Displays a side-by-side comparison of outbound and inbound call counts for each status category.

Status Categories
- Answered
- Busy
- No Answer
- Others
- Dialed / Agent
Dashboard Features
- Dashboard statistics are updated based on the selected date filter.
- The Refresh button reloads the latest campaign information.
- The Today button displays current-day statistics only.
- Charts and tables are automatically generated using campaign data.
- If no campaign data is available, the dashboard displays zero values until calls are processed.
Voice Files
The Voice Files module allows users to upload, manage, and organize audio files used in Voice campaigns. Uploaded voice files can be selected while creating campaigns and played directly from the gallery for verification.
Navigation
To access the Voice Files page:
- Log in to the Omni Portal.
- Navigate to Config.
- Under System Configuration, click Voice Files.
- The Voice File Gallery page opens.
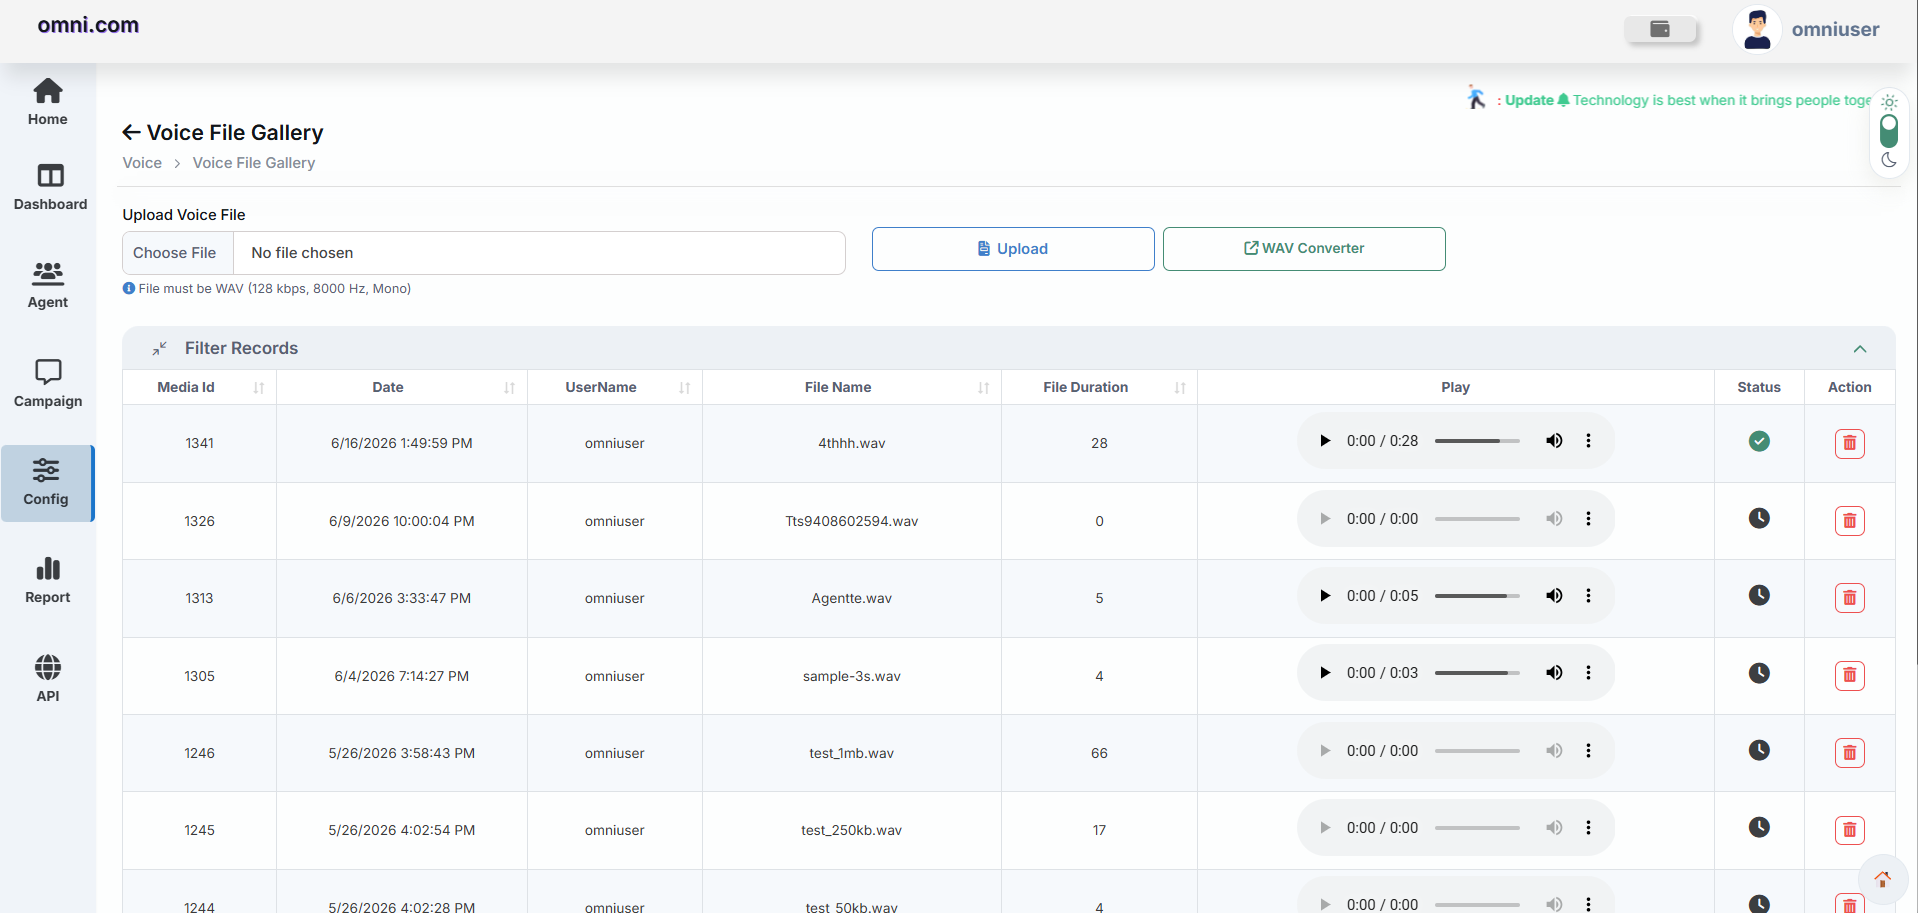
Upload Voice File
The top section allows users to upload a new voice recording.
Steps to Upload
- Click Choose File.
- Select a supported WAV audio file from your computer.
- Click Upload.
- The uploaded file is added to the Voice File Gallery.
Supported File Format
| Property | Value |
|---|---|
| File Type | WAV |
| Bit Rate | 16 kbps |
| Sample Rate | 8000 Hz |
| Audio Channel | Mono |
WAV Converter
The WAV Converter button allows users to convert unsupported audio files into the required WAV format before uploading.
Voice File Gallery
All uploaded voice files are displayed in a searchable table.
| Column | Description |
|---|---|
| Media ID | Unique identifier of the uploaded voice file. |
| Date | Date and time when the file was uploaded. |
| Username | User who uploaded the file. |
| File Name | Name of the audio file. |
| File Duration | Length of the recording. |
| Play | Audio player to preview the voice file. |
| Status | Current status of the uploaded file. |
| Action | Delete the selected voice file. |
Audio Playback
Each uploaded file includes a built-in audio player that allows users to verify the recording before using it in a Voice campaign.
Users can:
- Play the recording.
- Pause playback.
- Seek to a specific position.
- Adjust playback using browser-supported controls.
This allows users to verify the recording before using it in a campaign.
Delete Voice File
To remove an audio file:
- Locate the required voice file.
- Click the Delete icon under the Action column.
- Confirm the deletion.
- The selected voice file is permanently removed from the gallery.
Features
Notes
- Only WAV (16 kbps, 8000 Hz, Mono) audio files are supported.
- Uploaded voice files are available while creating Voice campaigns.
- Audio recordings should be clear and free from background noise.
- Deleted voice files cannot be recovered.
- Always verify recordings using the built-in audio player before using them in campaigns.
Components
The Voice Campaign Flow module allows users to create, manage, and monitor voice call flows used in Voice campaigns. A flow defines the sequence of actions performed during an outbound or inbound voice call, such as playing audio, collecting user input, transferring calls, or ending the call.
Navigation
To access the Voice Campaign Flow page:
- Log in to the Omni Portal.
- Navigate to Config.
- Click Components.
- Select Voice Campaign Flow.
- The Voice Campaign Flow page opens.
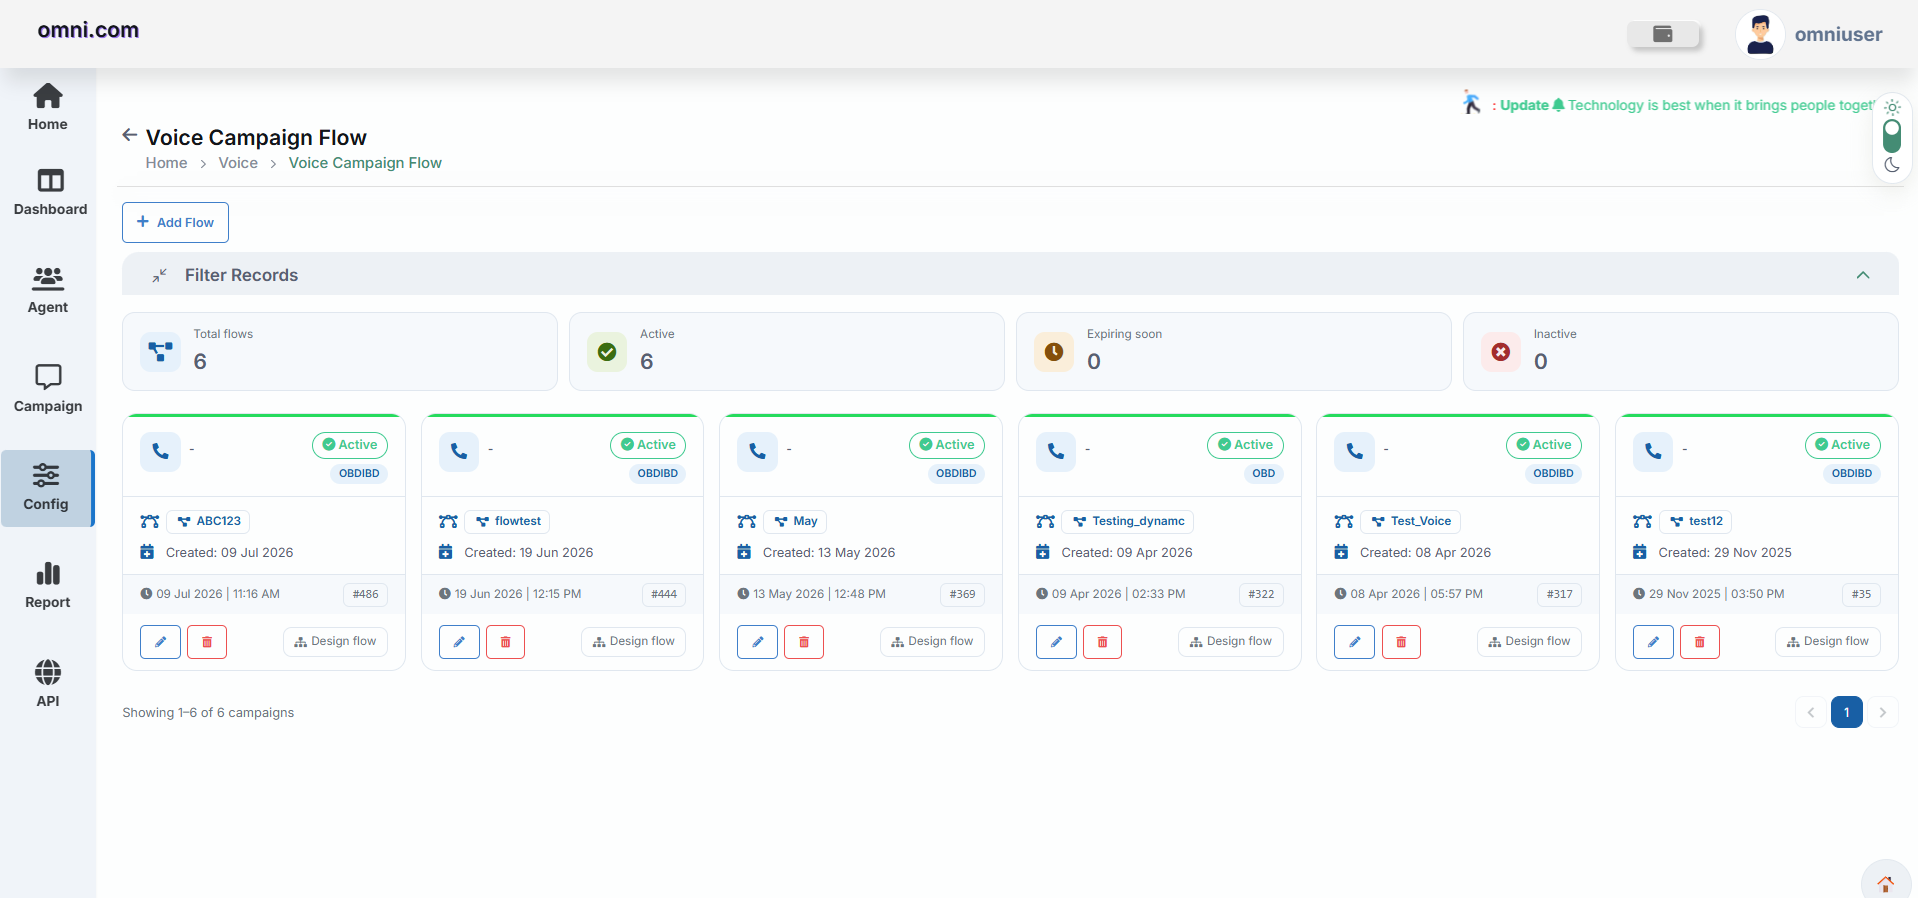
Create a New Flow
Users can create a new voice flow by clicking the Add Flow button.
Steps
- Click Add Flow.
- Enter the required flow information.
- Configure the desired call flow logic.
- Save the flow.
- The newly created flow is displayed in the campaign flow list.
Flow Summary
The top section provides an overview of all configured voice flows.
| Card | Description |
|---|---|
| Total Flows | Total number of configured voice flows. |
| Active | Number of active voice flows. |
| Expiring Soon | Flows approaching their expiration date. |
| Inactive | Number of inactive or disabled flows. |
Flow Cards
Each configured flow is displayed as an individual card containing its information.
| Field | Description |
|---|---|
| Flow Status | Indicates whether the flow is Active or Inactive. |
| Flow Type | Shows whether the flow is OBD or OBDIBD. |
| Flow Name | Name assigned to the voice flow. |
| Created Date | Date when the flow was created. |
| Created Time | Time of creation. |
| Flow ID | Unique identifier assigned to the voice flow. |
Actions
Edit Flow
Allows users to modify an existing voice flow.
- Click the Edit icon.
- Update the required information.
- Save the changes.
Delete Flow
Removes an existing voice flow.
- Click the Delete icon.
- Confirm the deletion.
- The selected flow is removed from the system.
Design Flow
The Design Flow button opens the visual Flow Designer where users can build and modify the voice call workflow using drag-and-drop components.
Users can configure:
- Welcome messages
- Audio playback
- DTMF input
- Voice menus
- Call routing
- Agent transfer
- Decision logic
- Call termination
- Custom workflow actions
Filter Records
The Filter Records section allows users to quickly locate specific voice flows using the available search criteria. This helps manage a large number of configured flows efficiently.
Features
Notes
- A flow must be configured before it can be used in a Voice Campaign.
- Only active flows are available for campaign selection.
- Each flow is assigned a unique Flow ID.
- Changes made using the Design Flow editor are reflected immediately after saving.
- Deleted flows cannot be restored.
Creating a Voice Campaign Flow
To create a new Voice Campaign Flow, click the Add Flow button available on the Voice Campaign Flow page.
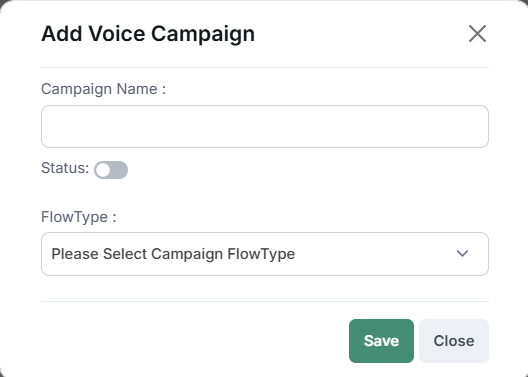
The Add Voice Campaign popup appears, allowing users to enter the required campaign information.
Campaign Information
| Field | Description |
|---|---|
| Campaign Name | Name of the Voice Campaign. |
| Status | Enable or Disable the campaign. |
| Flow Type | Select the Voice Flow Type. |
Available Flow Types
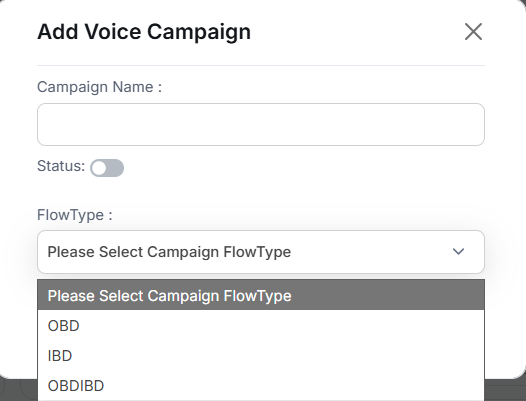
Design Flow
After creating a campaign, click the Design Flow button to open the Flow Designer.
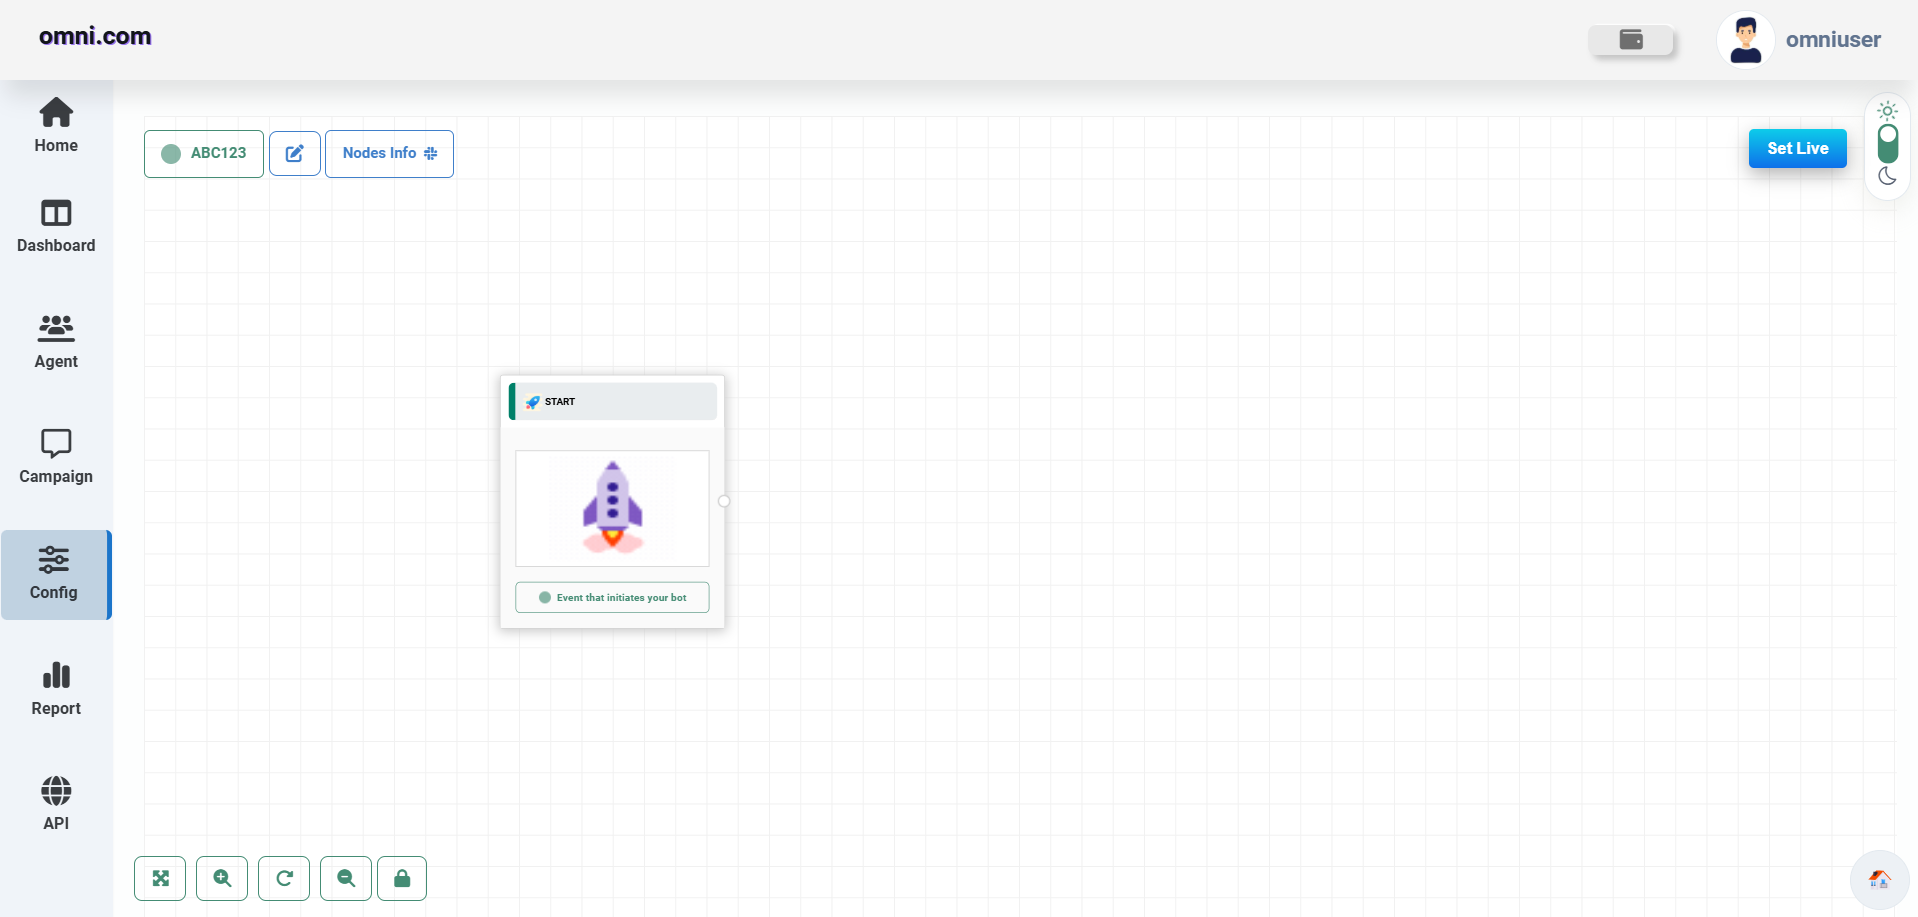
The Flow Designer provides a visual drag-and-drop interface for designing complete Voice Campaign workflows.
Flow Designer Includes
Nodes Information
Click Nodes Info in the Flow Designer to view all supported Voice Flow nodes. A popup window appears displaying every node that can be used while designing a Voice Campaign Flow.
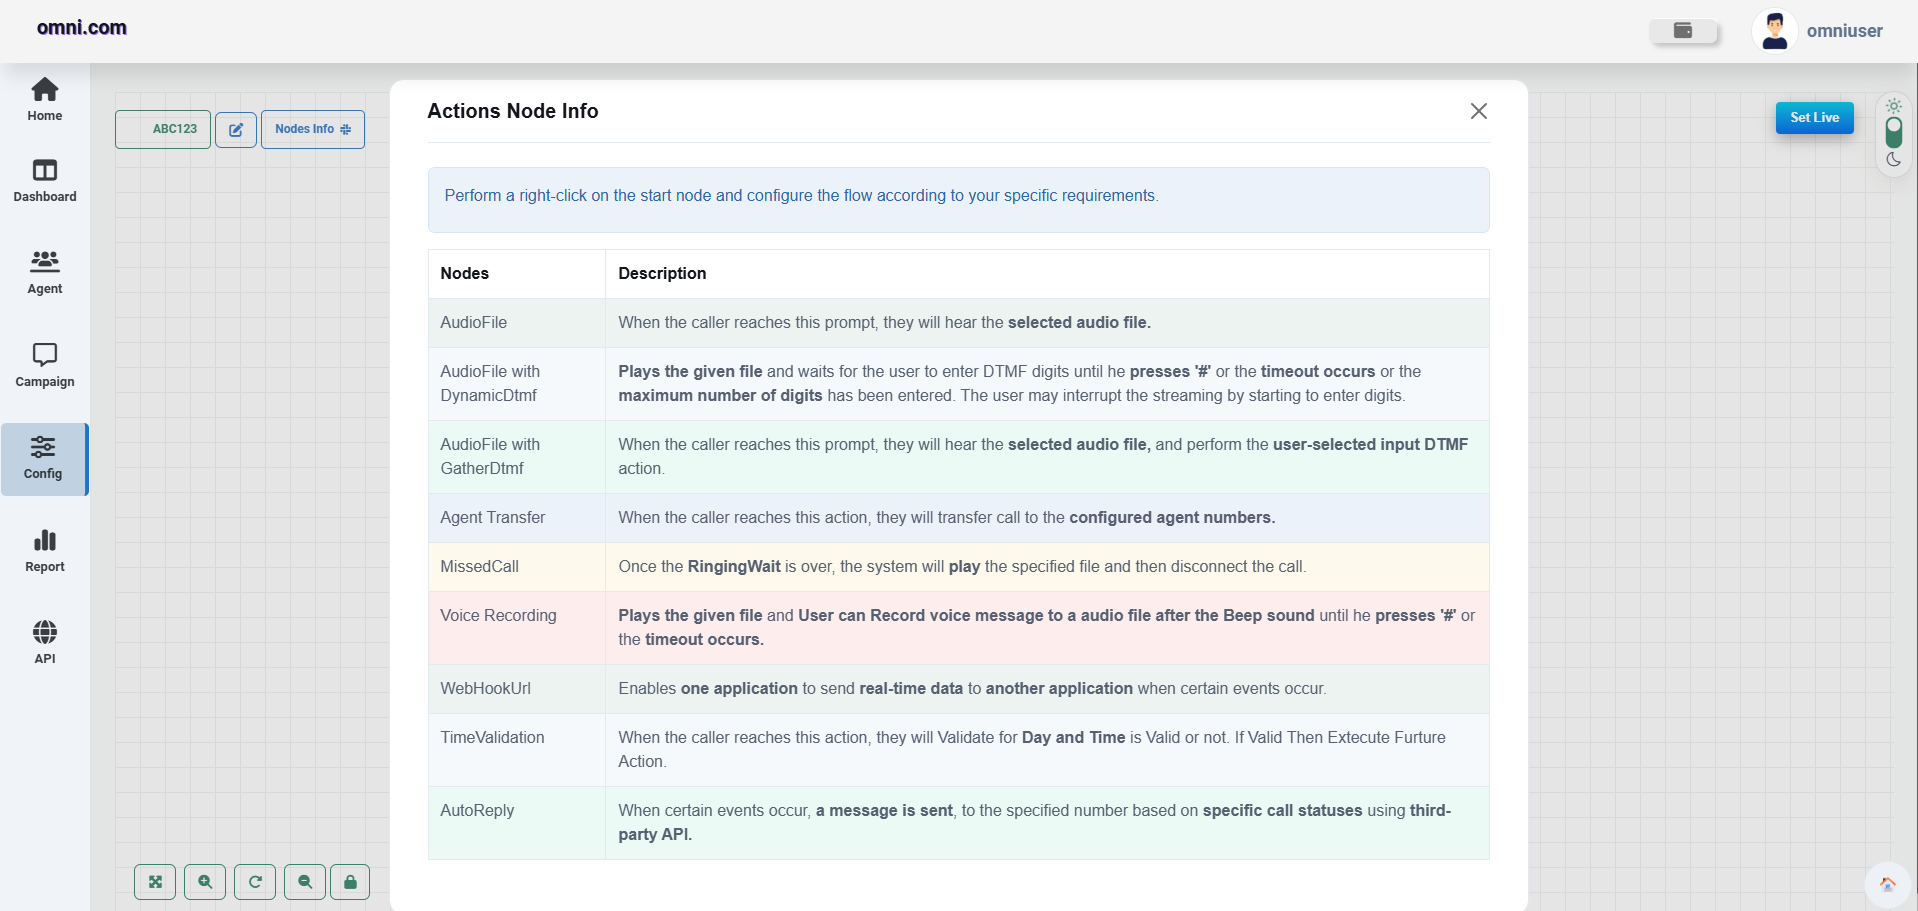
Available Nodes
| Node | Description |
|---|---|
| Audio File | Plays an uploaded audio file. |
| Audio File with Dynamic DTMF | Collects dynamic user input. |
| Audio File with Gather DTMF | Performs actions based on DTMF key presses. |
| Agent Transfer | Transfers the call to configured agents. |
| Missed Call | Disconnects after the configured ringing wait. |
| Voice Recording | Records caller voice messages. |
| WebHook URL | Sends call data to external applications. |
| Time Validation | Executes actions based on configured business days and time. |
| Auto Reply | Sends automated notifications using third-party APIs. |
Purpose of Voice Flow Nodes
Nodes Information
The Nodes Information section displays all available nodes that can be added to a Voice Campaign Flow. To view the list, click Nodes Info or right-click the Start node in the Flow Designer. A menu appears containing all supported Voice Flow nodes.
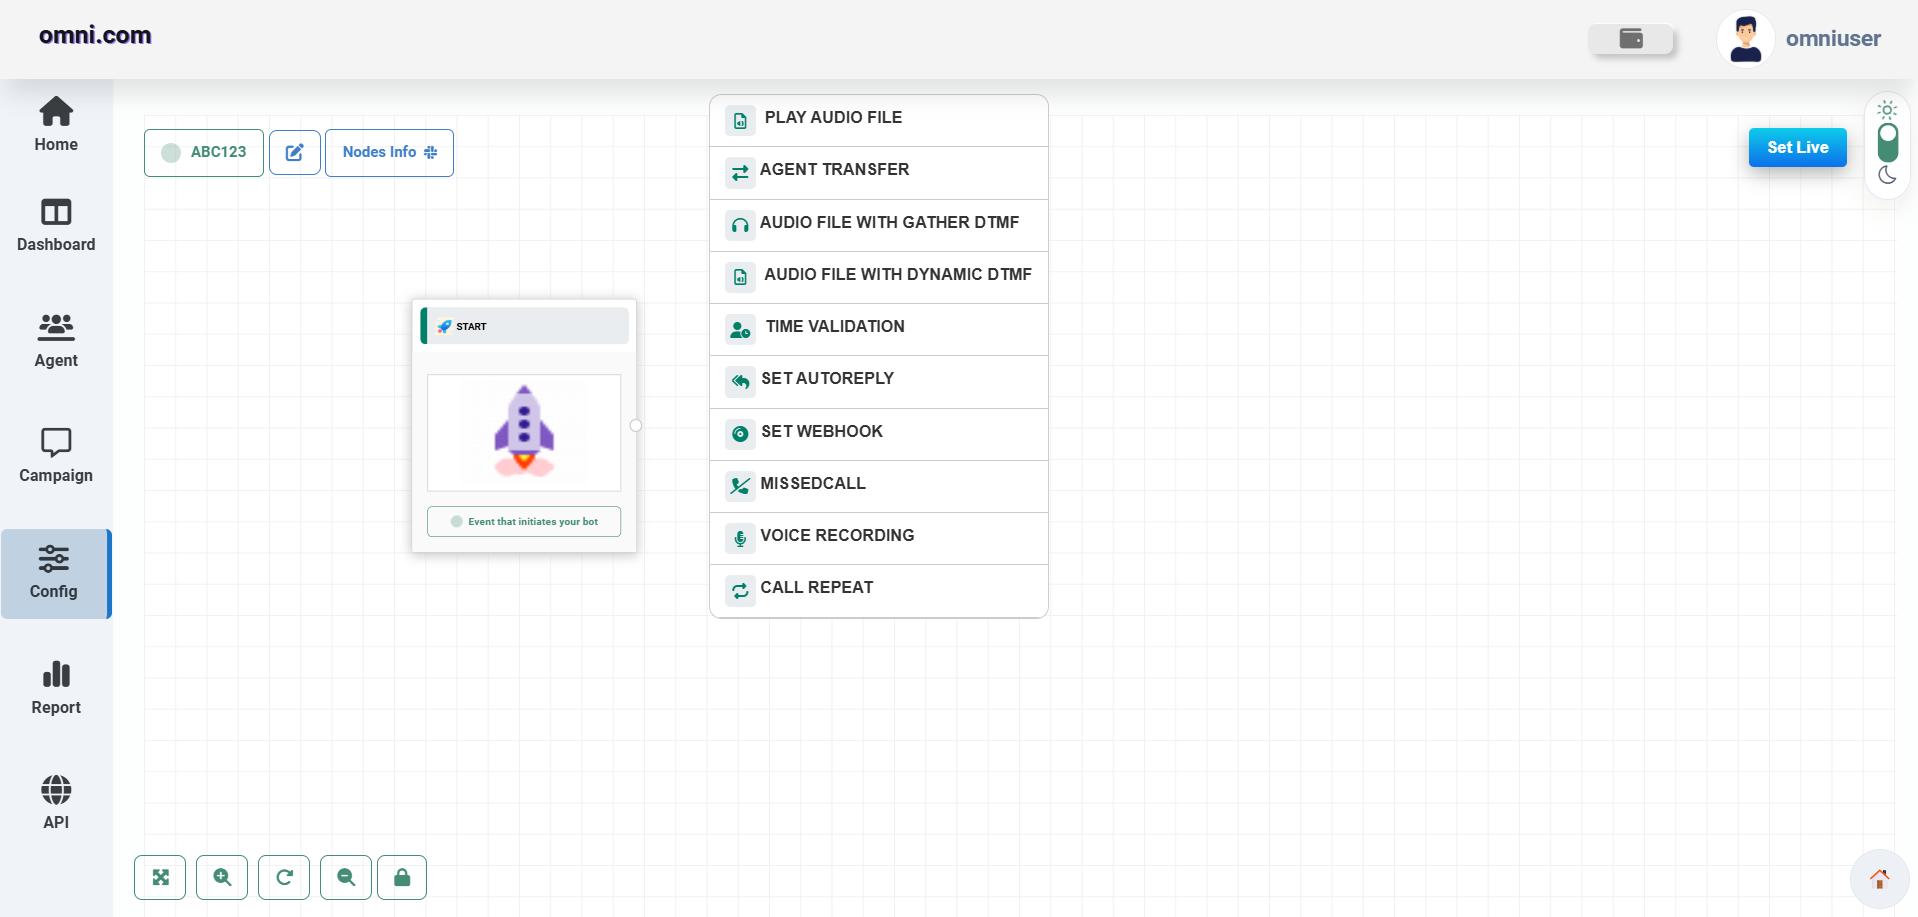
Available Voice Flow Nodes
| Node | Description |
|---|---|
| Play Audio File | Plays a pre-recorded audio file to the caller. |
| Agent Transfer | Transfers the call to one or more configured agents. |
| Audio File with Gather DTMF | Routes callers based on keypad (DTMF) input. |
| Audio File with Dynamic DTMF | Captures dynamic numeric input such as customer IDs or mobile numbers. |
| Time Validation | Validates business days and operating hours before continuing the call. |
| Set Auto Reply | Sends automatic notifications using third-party APIs. |
| Set Webhook | Sends real-time call information to external applications. |
| Missed Call | Handles missed-call campaigns, callbacks and notifications. |
| Voice Recording | Records the caller's voice message after playing an audio prompt. |
| Call Repeat | Repeats the previously played audio message without additional configuration. |
Play Audio File Node
The Play Audio File node is used to play a pre-recorded voice message to callers during a Voice Campaign. It is commonly used for welcome messages, announcements, instructions, or promotional audio before directing callers to the next step in the flow.
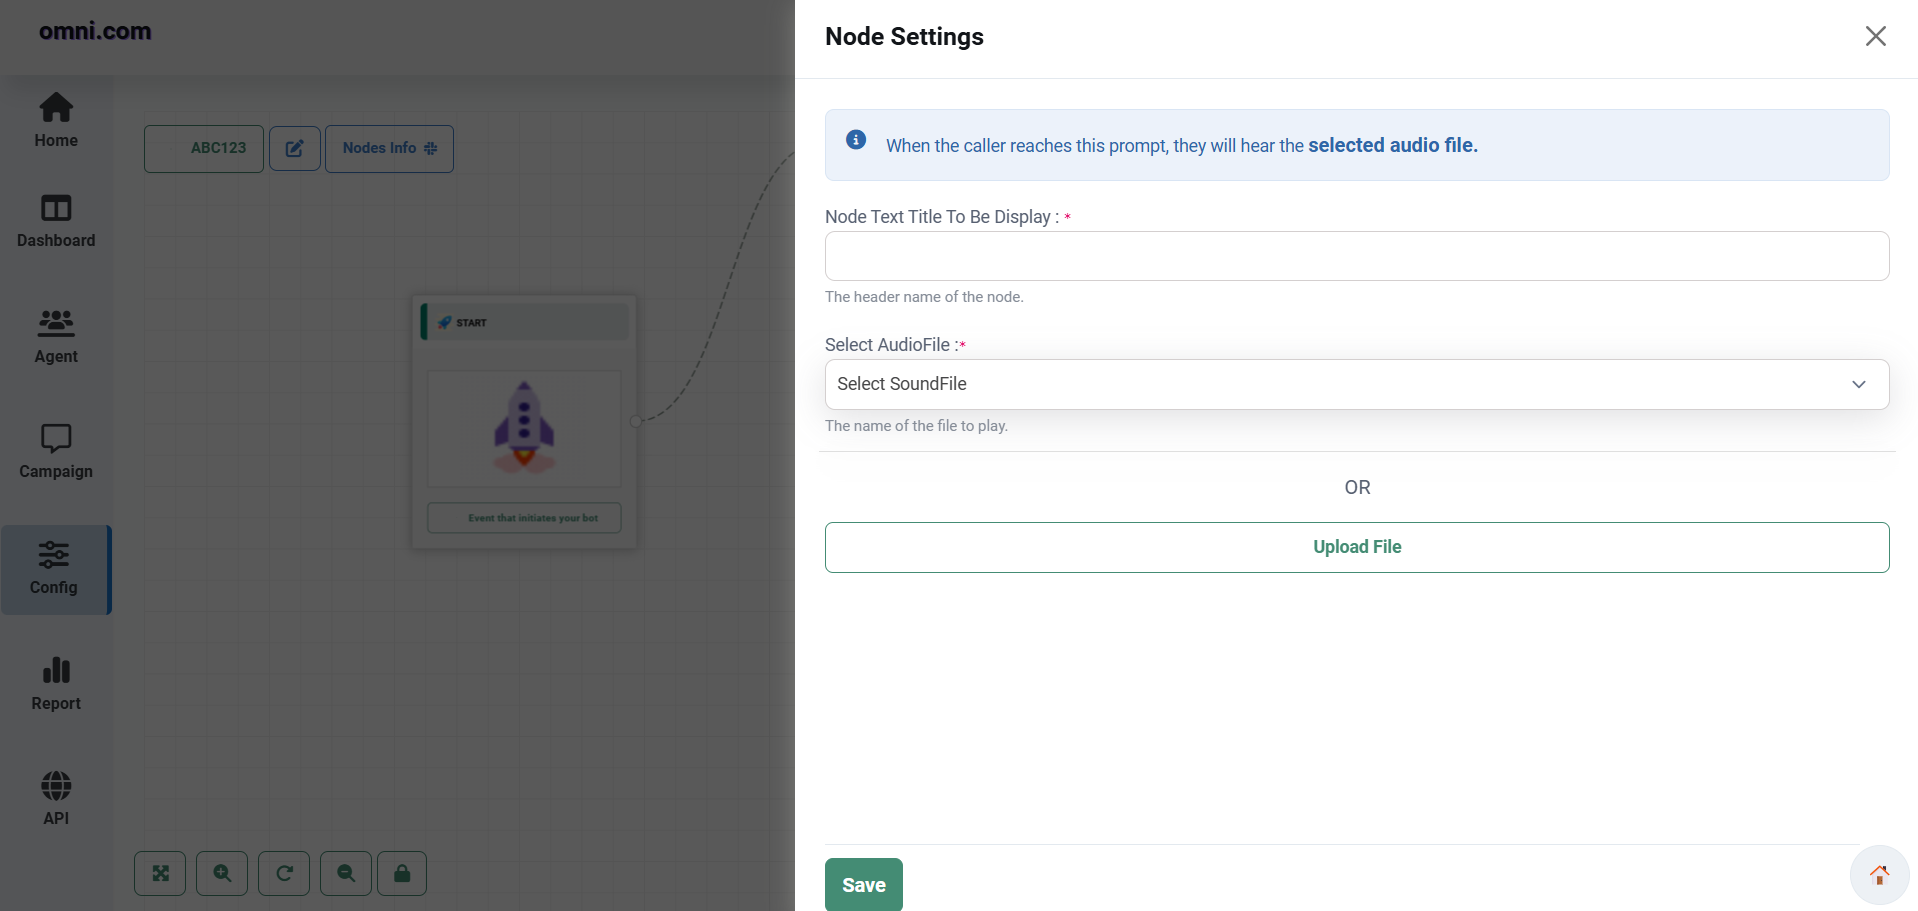
How to Add the Node
- Open the Flow Designer.
- Right-click the Start Node.
- Select Play Audio File.
- The Node Settings panel opens.
Node Configuration
| Field | Description |
|---|---|
| Node Title | Name displayed on the node inside the Flow Designer. |
| Audio File | Select an existing uploaded audio prompt. |
| Upload File | Upload a new audio file directly from your computer. |
Purpose
Agent Transfer Node
The Agent Transfer node transfers an active call to one or more configured agents. It is used when callers need to speak directly with a live representative after completing the Voice flow.
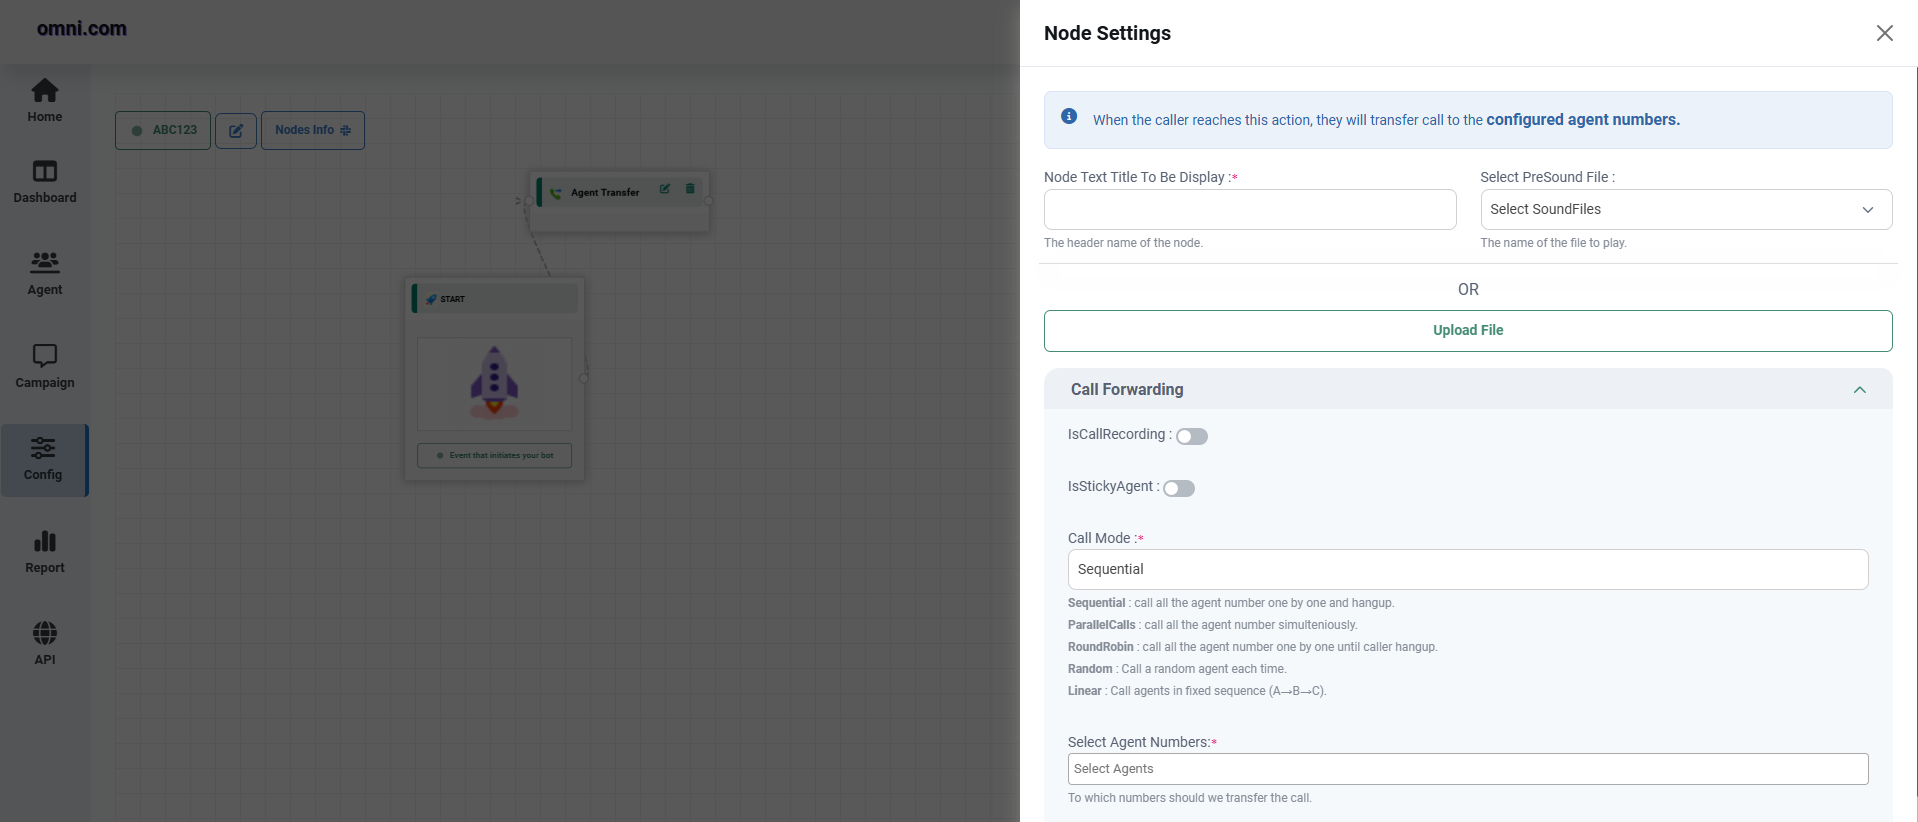
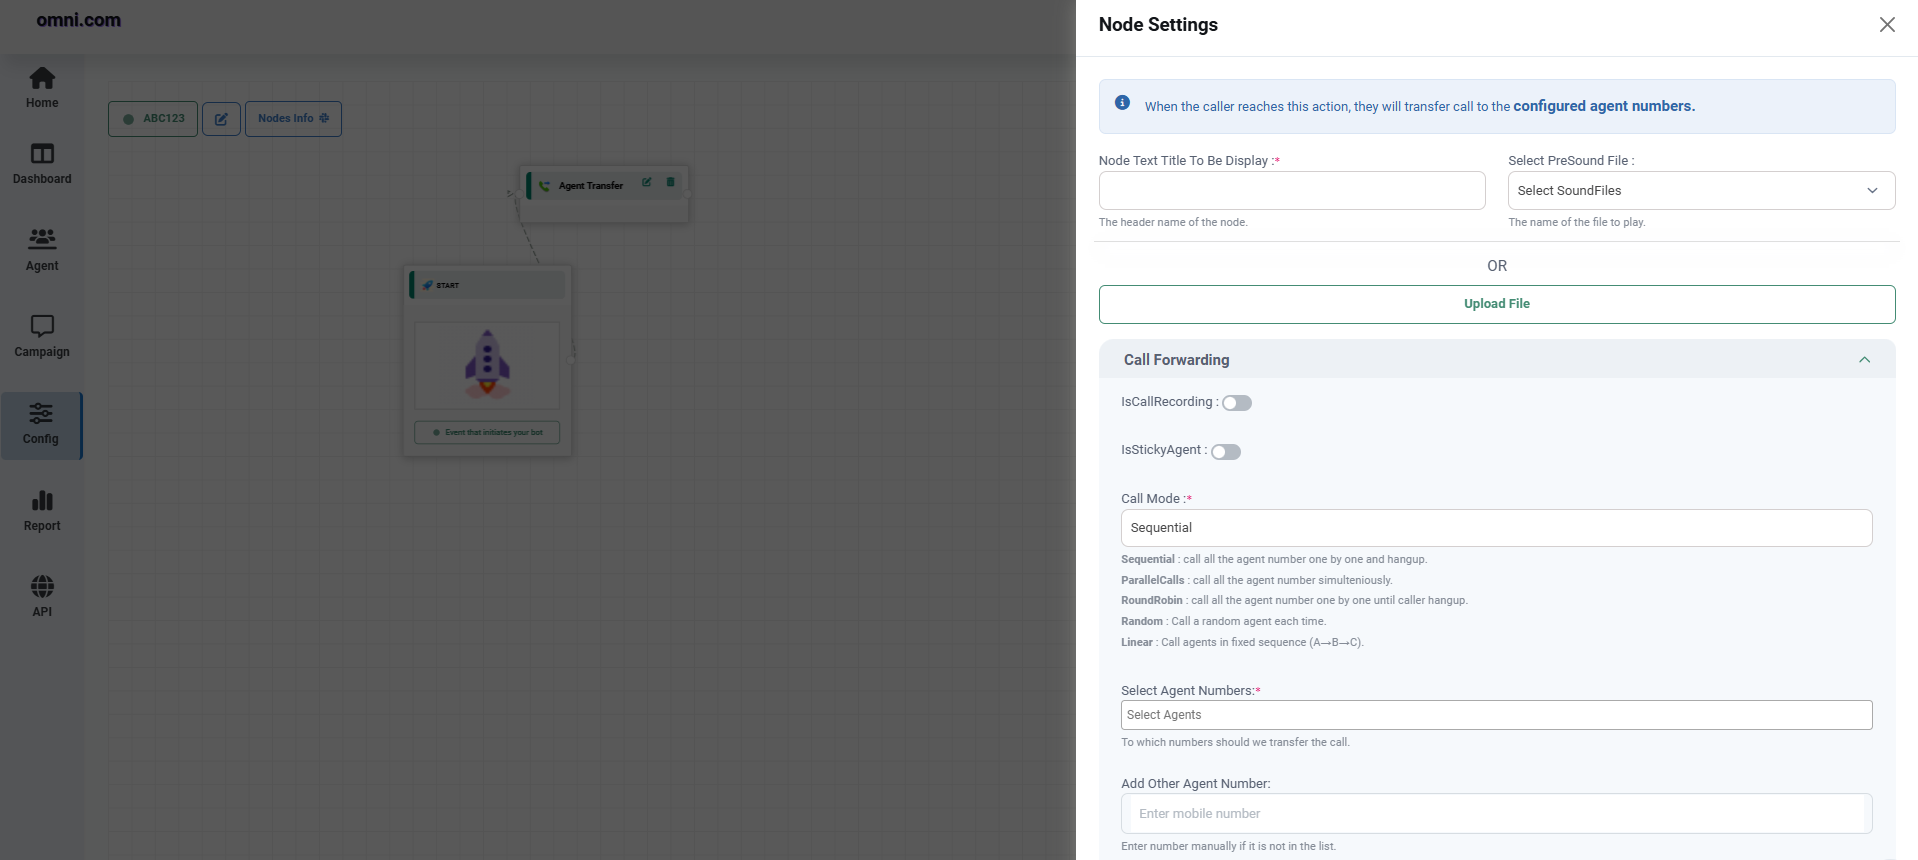
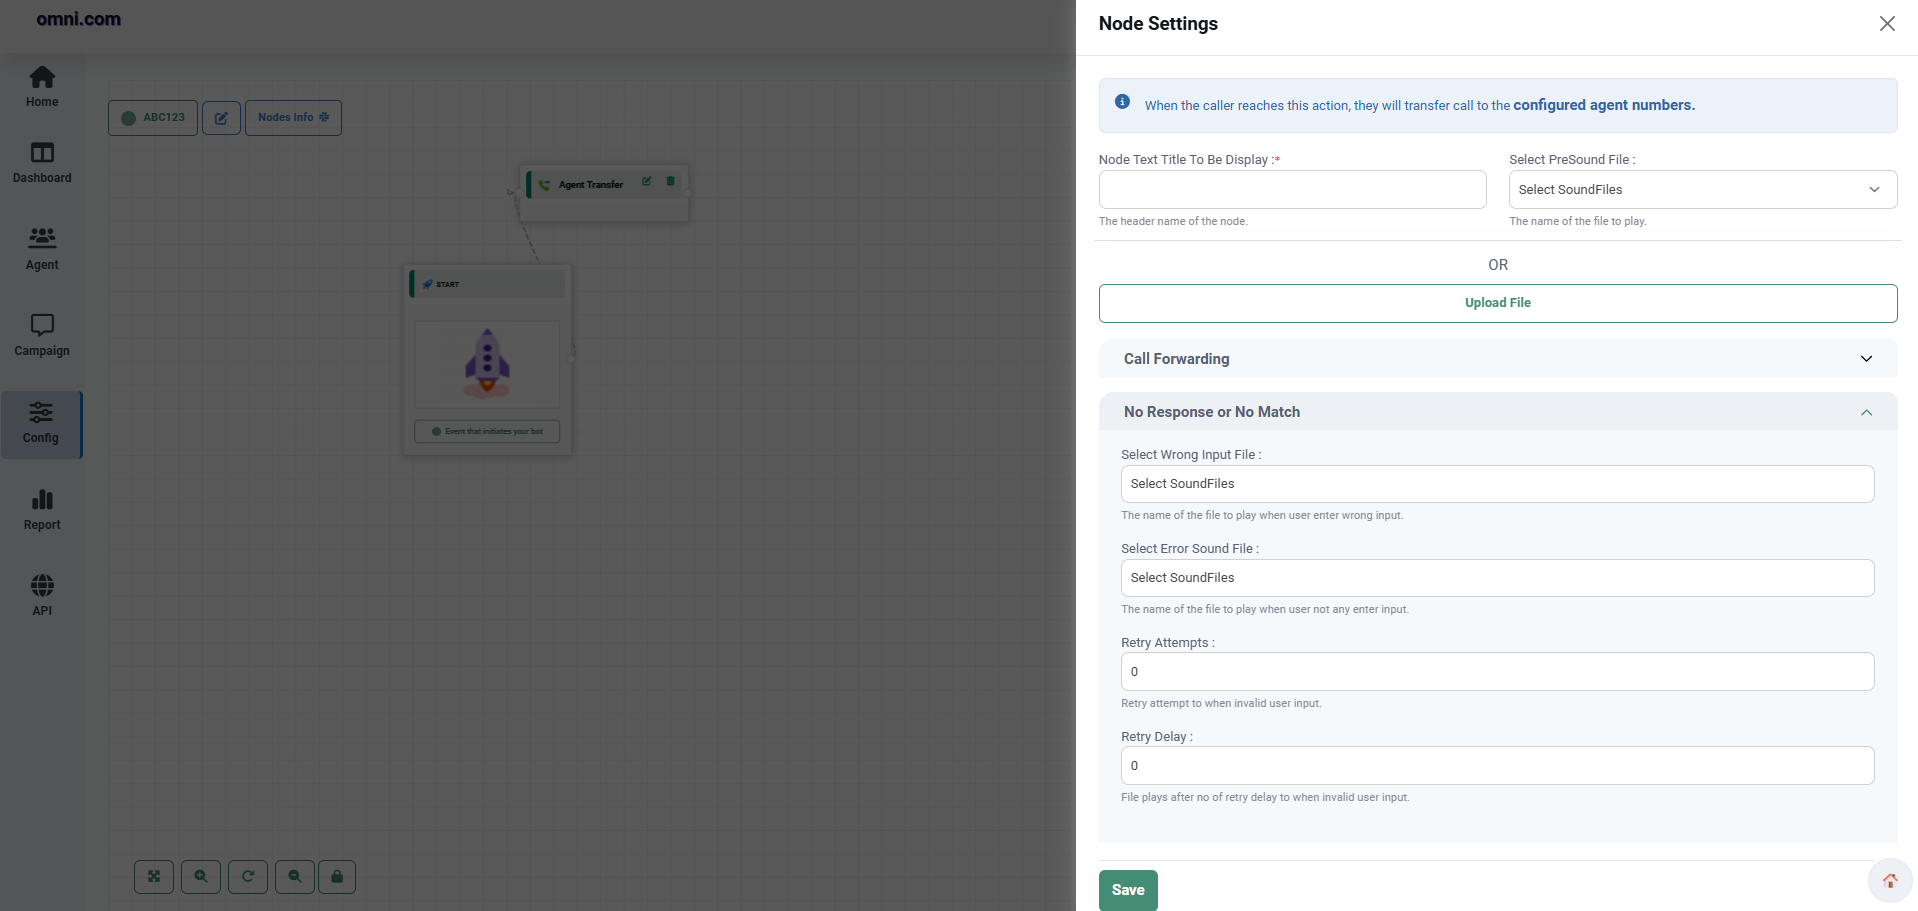
How to Add the Node
- Open the Flow Designer.
- Right-click the required node.
- Select Agent Transfer.
- The Agent Transfer Configuration page opens.
Basic Information
| Field | Description |
|---|---|
| Node Title | Name displayed on the node inside the Flow Designer. |
| Pre-Sound File | Select an audio prompt to play before transferring the call. |
| Upload Voice File | Upload a new audio prompt if required. |
Call Forwarding Configuration
| Setting | Description |
|---|---|
| Call Recording | Enable or disable recording of transferred calls. |
| Sticky Agent | Route repeat callers to the same agent whenever possible. |
| Call Mode | Select the routing strategy for agent assignment. |
| Agent Numbers | Select one or more primary agents. |
| Additional Agent Numbers | Add backup agents for overflow handling. |
Available Call Modes
No Response / No Match
Configure the actions performed when no agent answers or the call cannot be completed.
| Setting | Description |
|---|---|
| Wrong Input Audio | Audio played when an invalid action occurs. |
| Error Audio | Audio played when the transfer fails. |
| Retry Attempts | Maximum number of retry attempts. |
| Retry Delay | Delay before the next retry attempt. |
Purpose
Gather DTMF Node
The Audio File with Gather DTMF node allows callers to interact with the Voice system by pressing keypad numbers (DTMF). Based on the selected key, the call is routed to different nodes within the Voice Campaign Flow.
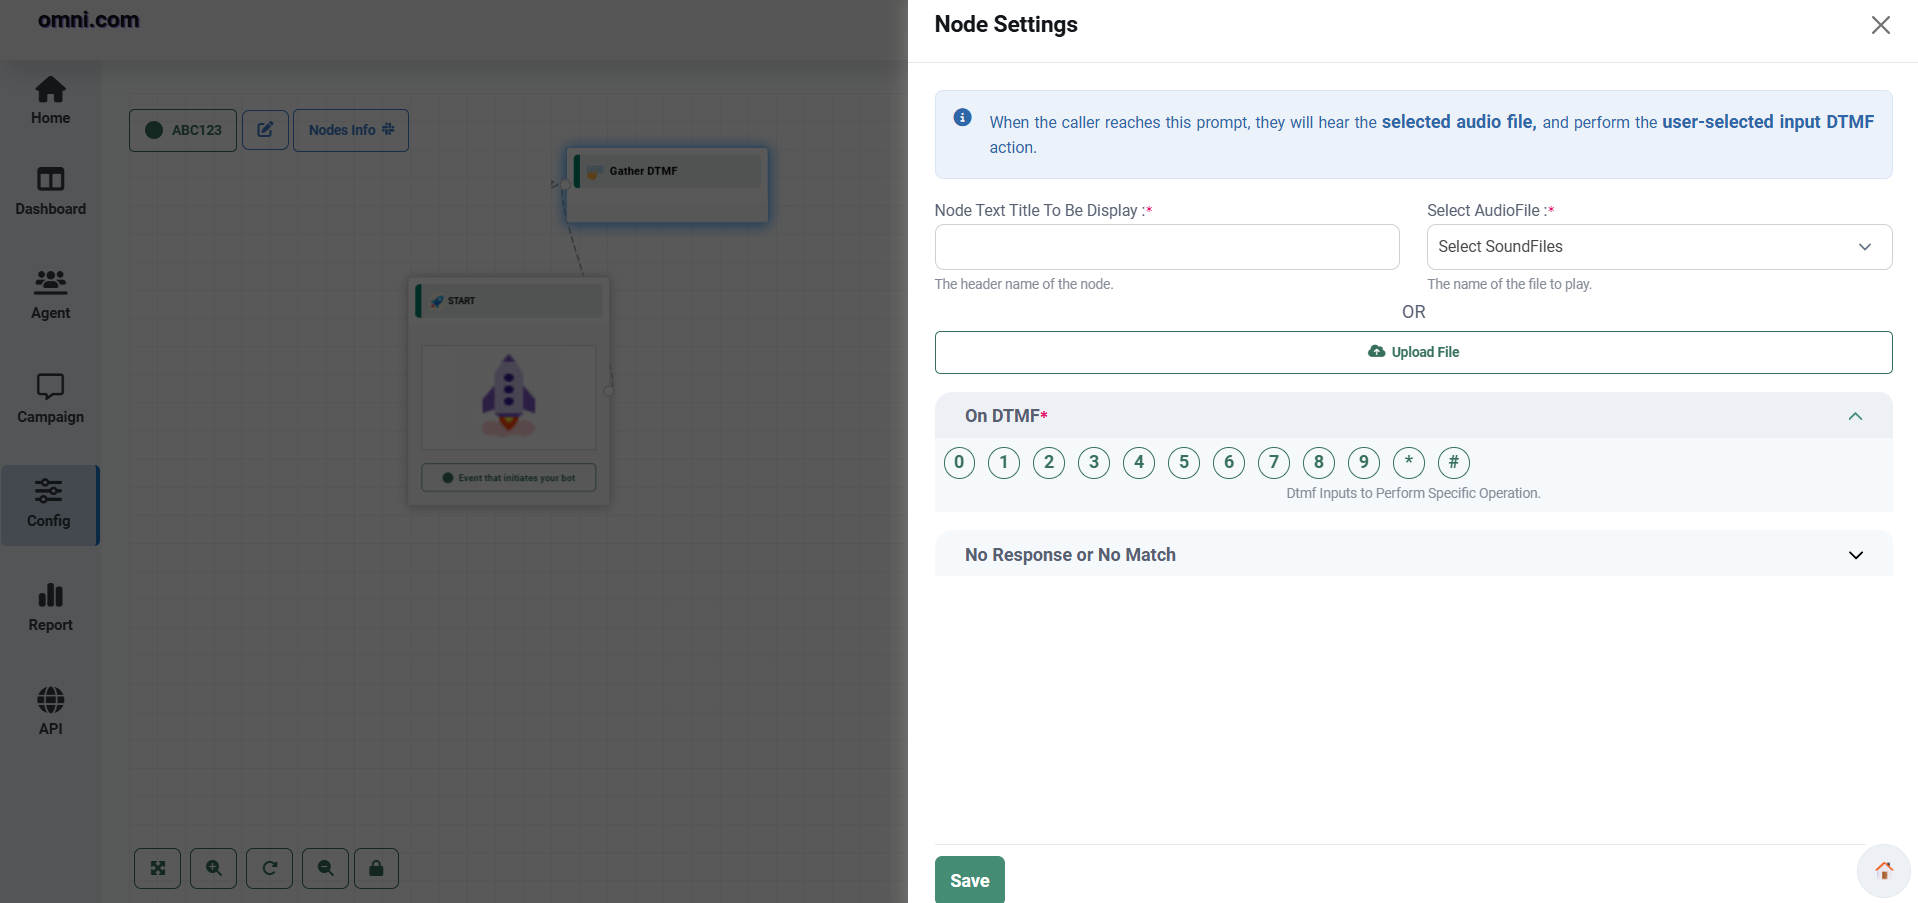
How to Add the Node
- Open the Flow Designer.
- Right-click the required node.
- Select Audio File with Gather DTMF.
- The Node Settings page opens.
Basic Settings
| Field | Description |
|---|---|
| Node Title | Name displayed on the node in the Flow Designer. |
| Audio File | Select an uploaded audio prompt. |
| Upload File | Upload a new audio prompt if required. |
DTMF Inputs
Configure an action for each keypad number. Every key can be connected to another node in the Voice Campaign Flow.
| DTMF Key | Purpose |
|---|---|
| 0 | Connect to another configured node. |
| 1 | Connect to another configured node. |
| 2 | Connect to another configured node. |
| 3 | Connect to another configured node. |
| 4 | Connect to another configured node. |
| 5 | Connect to another configured node. |
| 6 | Connect to another configured node. |
| 7 | Connect to another configured node. |
| 8 | Connect to another configured node. |
| 9 | Connect to another configured node. |
No Response / No Match
Configure the behavior when the caller does not press any key or enters an invalid option.
| Setting | Description |
|---|---|
| Wrong Input Audio | Audio played when the caller presses an invalid key. |
| Error Audio | Audio played when no valid input is received. |
| Retry Attempts | Maximum number of retry attempts allowed. |
| Retry Delay | Delay before replaying the menu. |
Purpose
The Gather DTMF node allows callers to navigate through Voice menus by pressing keypad numbers.
Example
Dynamic DTMF Node
The Audio File with Dynamic DTMF node is used to collect dynamic numeric input from callers during a Voice Campaign. Unlike the Gather DTMF node, this node captures a sequence of digits such as customer IDs, account numbers, mobile numbers, PINs, or other numeric values before continuing the call flow.
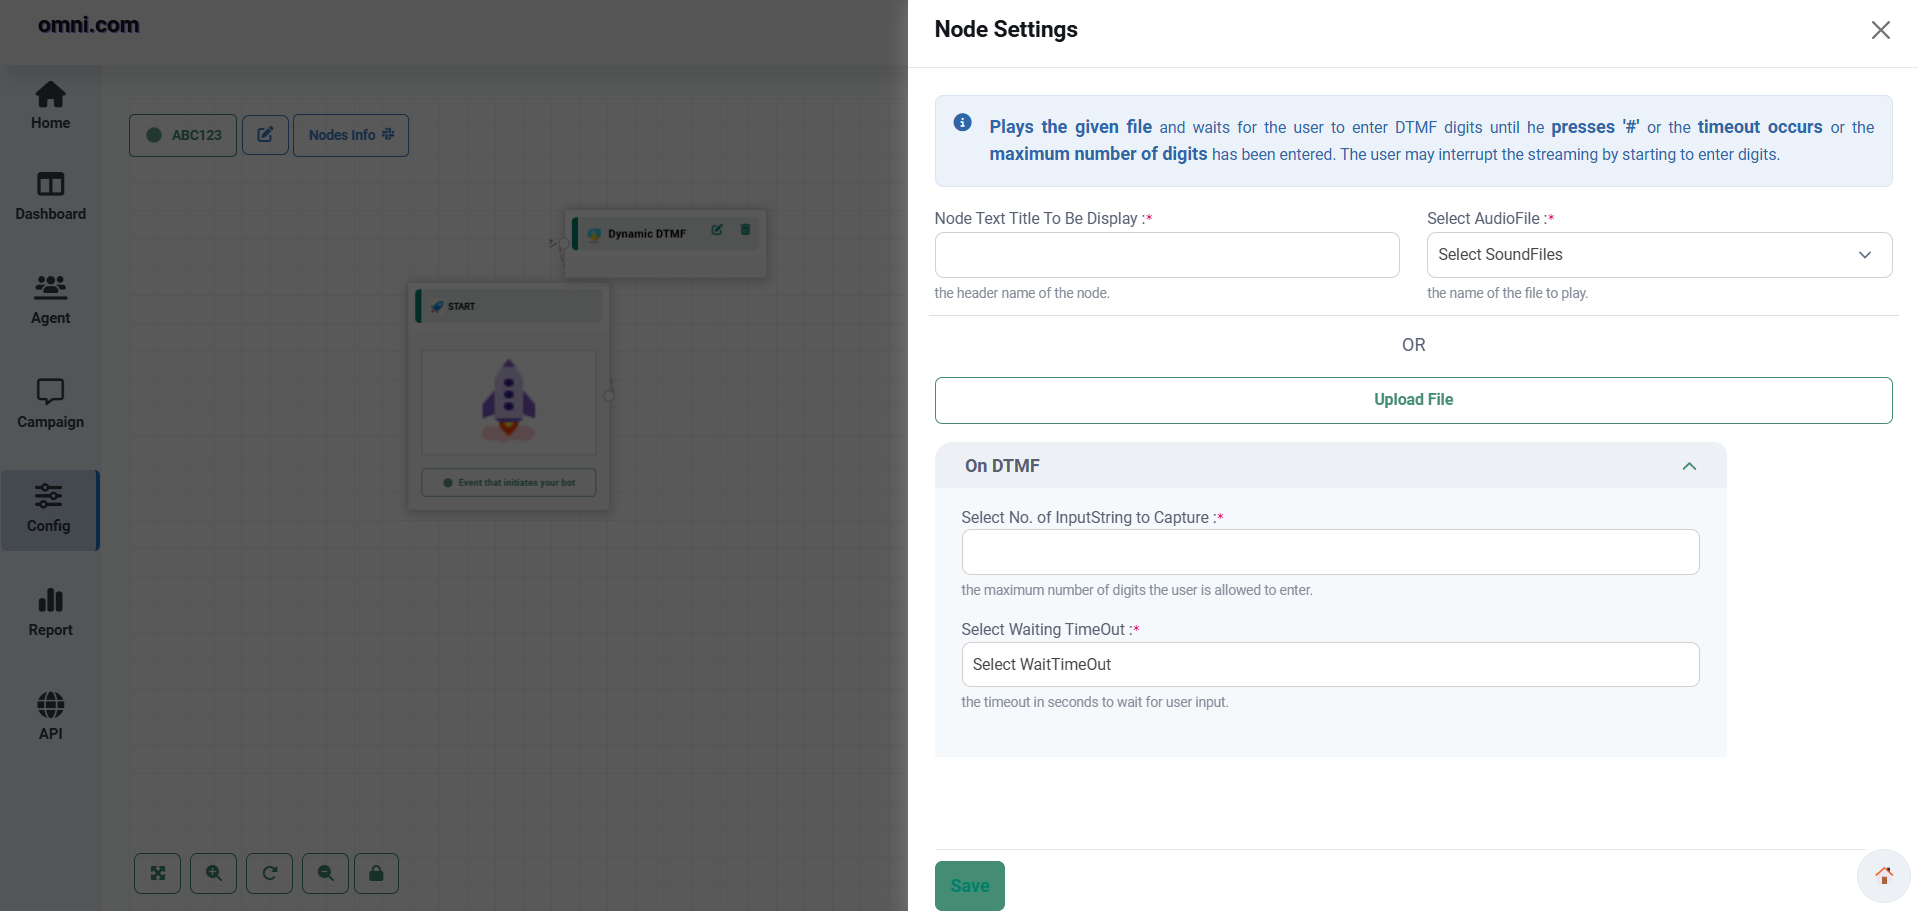
How to Add the Node
- Open the Flow Designer.
- Right-click the required node.
- Select Audio File with Dynamic DTMF.
- The Dynamic DTMF Settings page opens.
Node Configuration
| Field | Description |
|---|---|
| Node Title | Name displayed on the node inside the Flow Designer. |
| Audio File | Select the voice prompt that asks callers to enter information. |
| Upload File | Upload a new audio prompt directly from your computer. |
| Number of Digits | Specify the maximum number of digits the caller can enter. |
| Waiting Timeout | Maximum time the system waits for caller input. |
Purpose
How It Works
- The system plays the configured audio prompt.
- The caller enters the required digits using the phone keypad.
- The system validates the entered digits.
- After successful input, the Voice Campaign continues to the next connected node.
Time Validation Node
The Time Validation node verifies whether an incoming call is received during the configured business days and operating hours. If the current day and time match the configured schedule, the call continues to the next node. Otherwise, an error audio message can be played or the call can be stopped or redirected according to the configured flow.
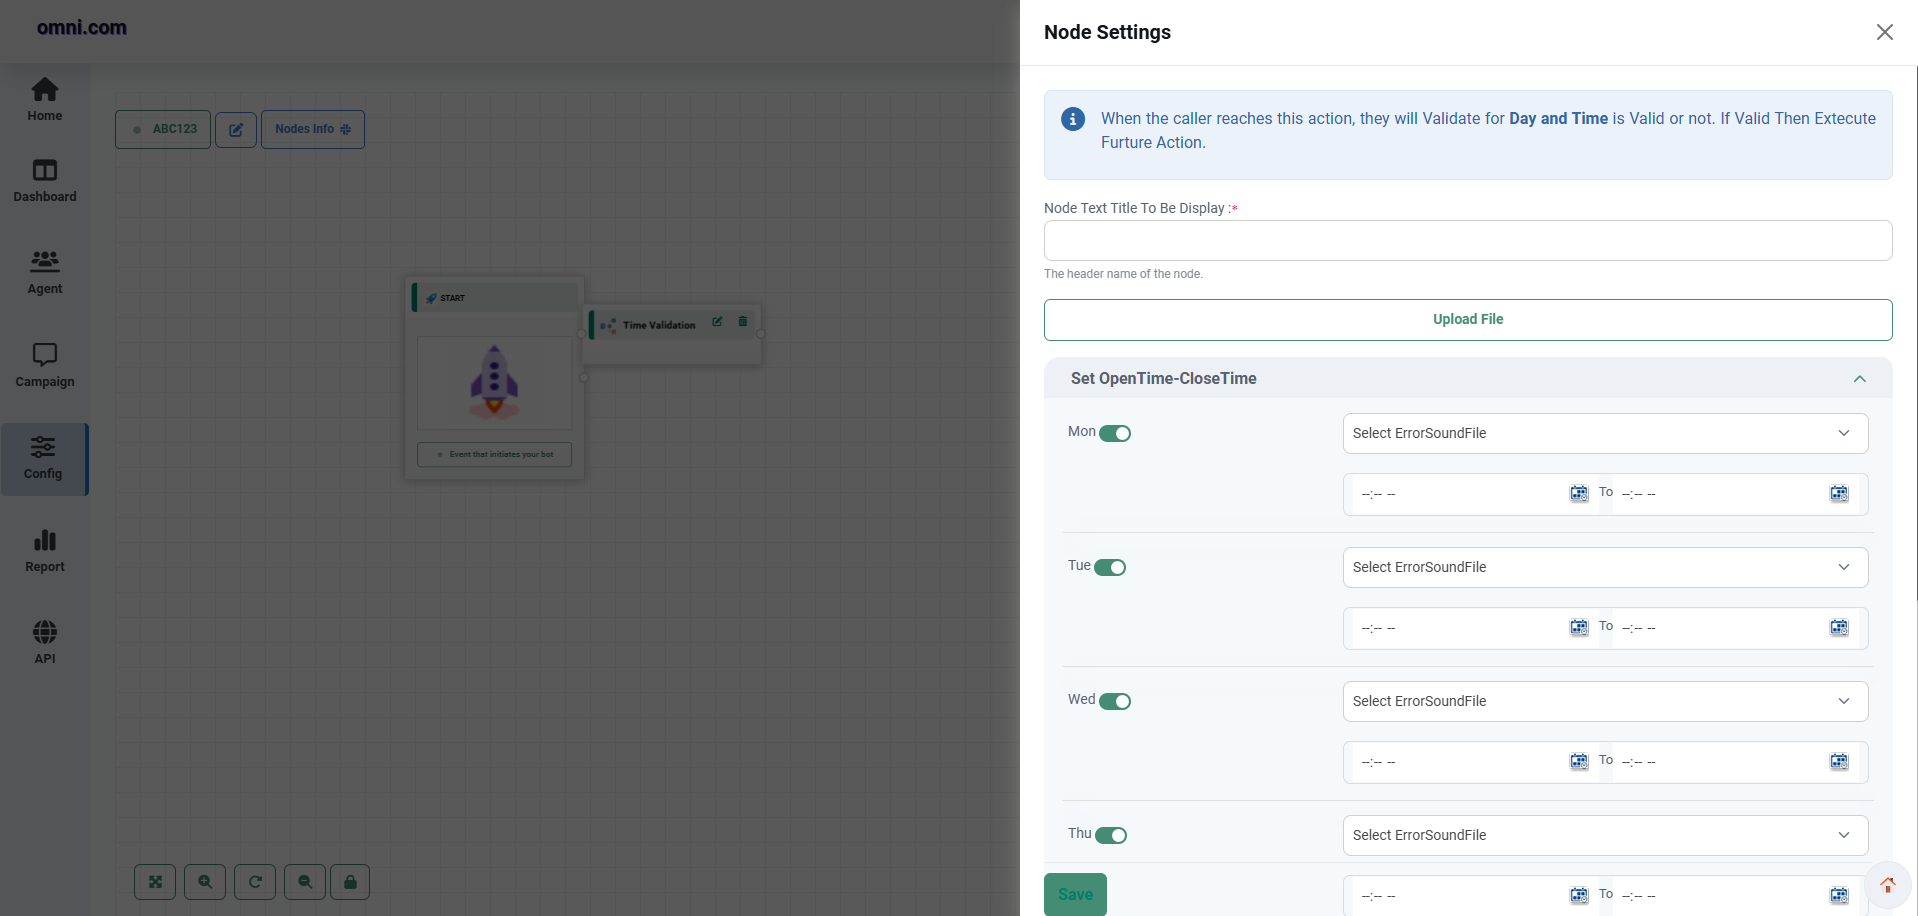
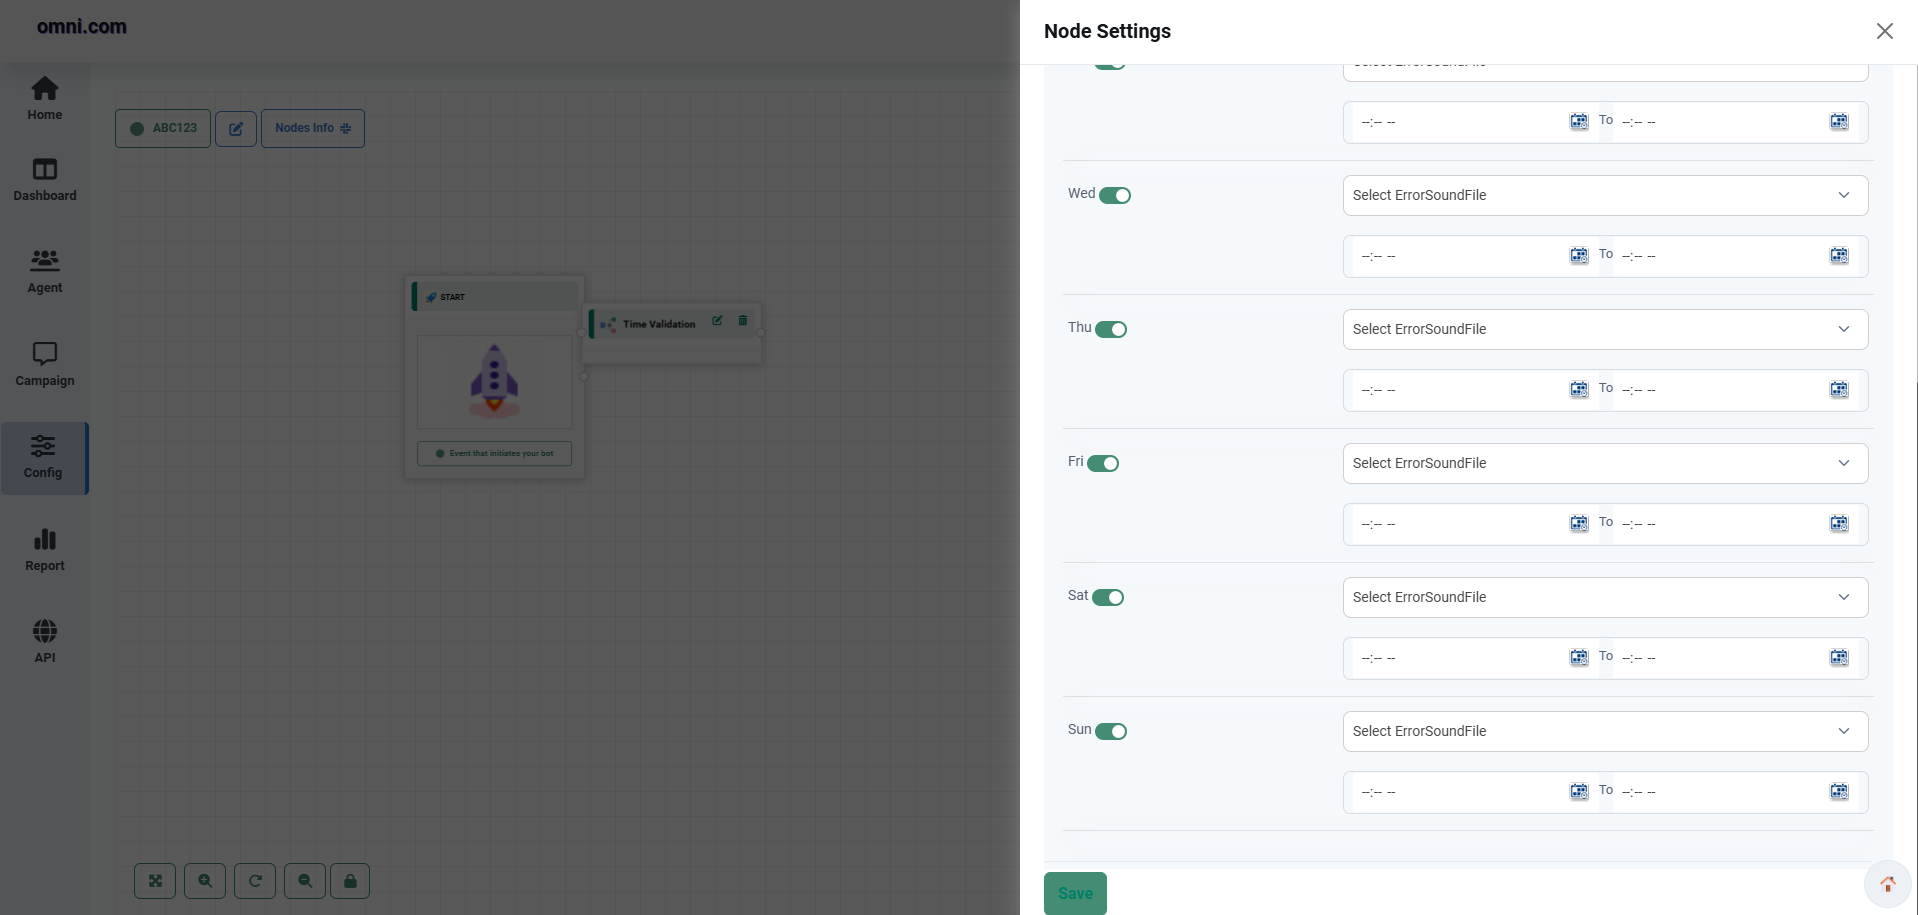
Overview
This node is useful for ensuring that callers can access services only during defined working hours.
Configuration
| Field | Description |
|---|---|
| Node Text Title | Specifies the display name of the node within the Flow Designer. |
| Upload File | Upload an audio file that will be played when the call is received outside business hours. |
| Open Time - Close Time | Configure the working hours for each day of the week. |
Business Hours Configuration
Configure the business schedule individually for every day of the week.
- Enable or disable each day.
- Select an error audio file.
- Configure the opening time.
- Configure the closing time.
- Only enabled days are considered during validation.
Example
Purpose
Auto Reply Node
The Auto Reply node sends automated notifications to callers, called numbers, or agents based on predefined call events. Notifications are delivered using an external third-party API, helping organizations automatically inform users about call status updates without manual intervention.
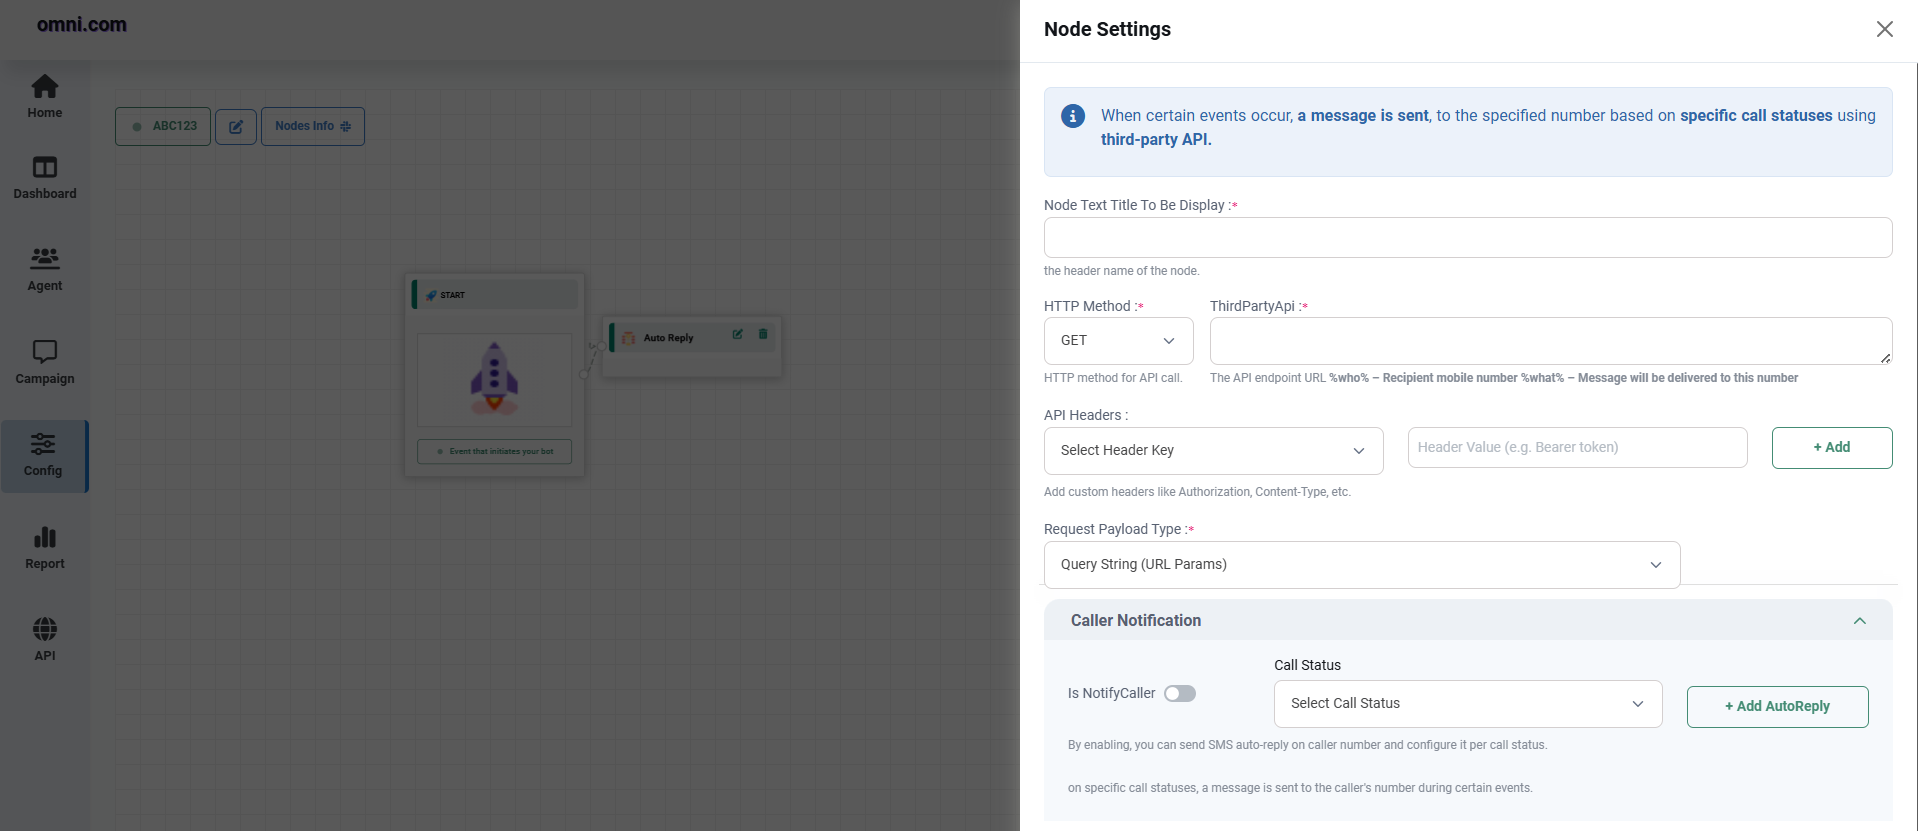

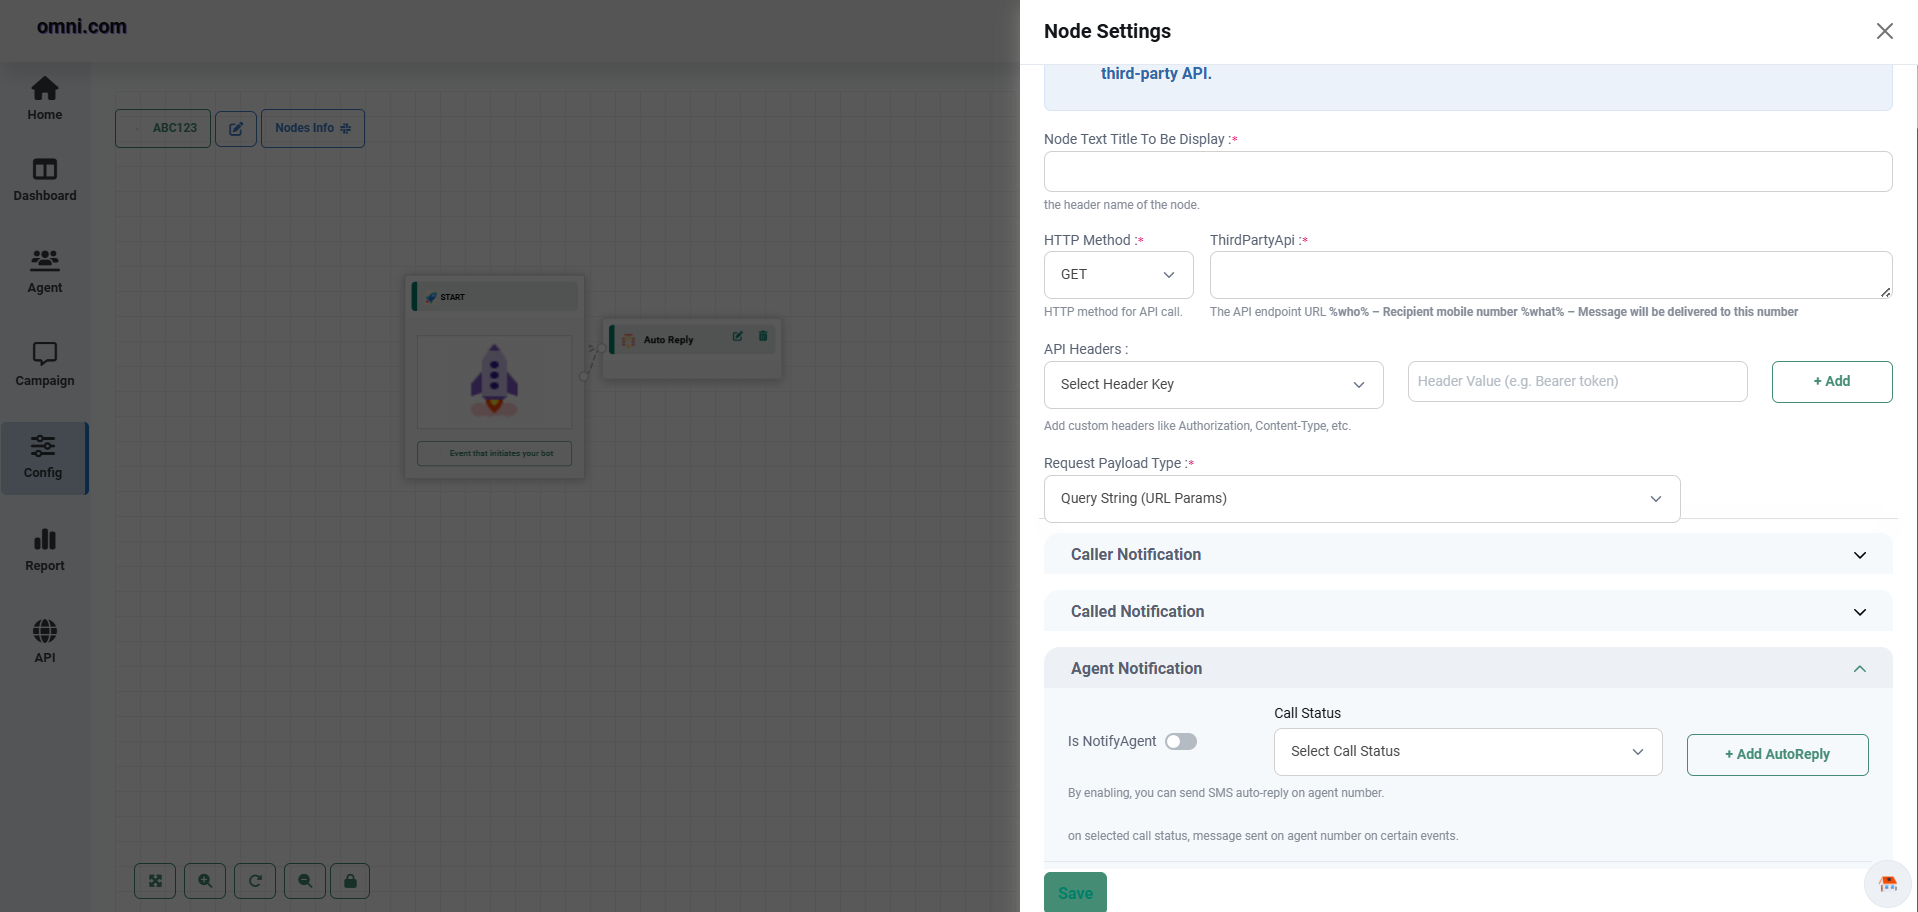
Configuration
| Field | Description |
|---|---|
| Node Text Title | Defines the node name displayed within the Flow Designer. |
| HTTP Method | Select the request method used for the API call. |
| Third Party API | Specify the API endpoint responsible for sending notifications. |
| API Headers | Configure request headers such as Authorization, Content-Type and API Keys. |
| Request Payload Type | Select how request parameters are transmitted. |
Supported HTTP Methods
Supported Payload Types
- Query Parameters
- JSON Body
- Form Data
Caller Notification
Enable automated notifications for the caller when selected call events occur.
| Setting | Description |
|---|---|
| Enable / Disable | Turn caller notifications on or off. |
| Call Status | Select the call event that triggers the notification. |
| Notification Message | Configure the message sent to the caller. |
Called Notification
Enable SMS or notifications for the called party.
- Select Call Status.
- Specify Recipient Mobile Numbers.
- Configure the Auto Reply Message.
Agent Notification
Automatically notify assigned agents during selected call events.
- Select Call Status.
- Configure Notification Message.
- Select the Recipient Agent.
Example
Webhook URL Node
The Webhook URL node sends real-time call information to external applications whenever selected call events occur. It enables seamless integration with CRM systems, helpdesk software, ERP applications, databases, and other custom business services.
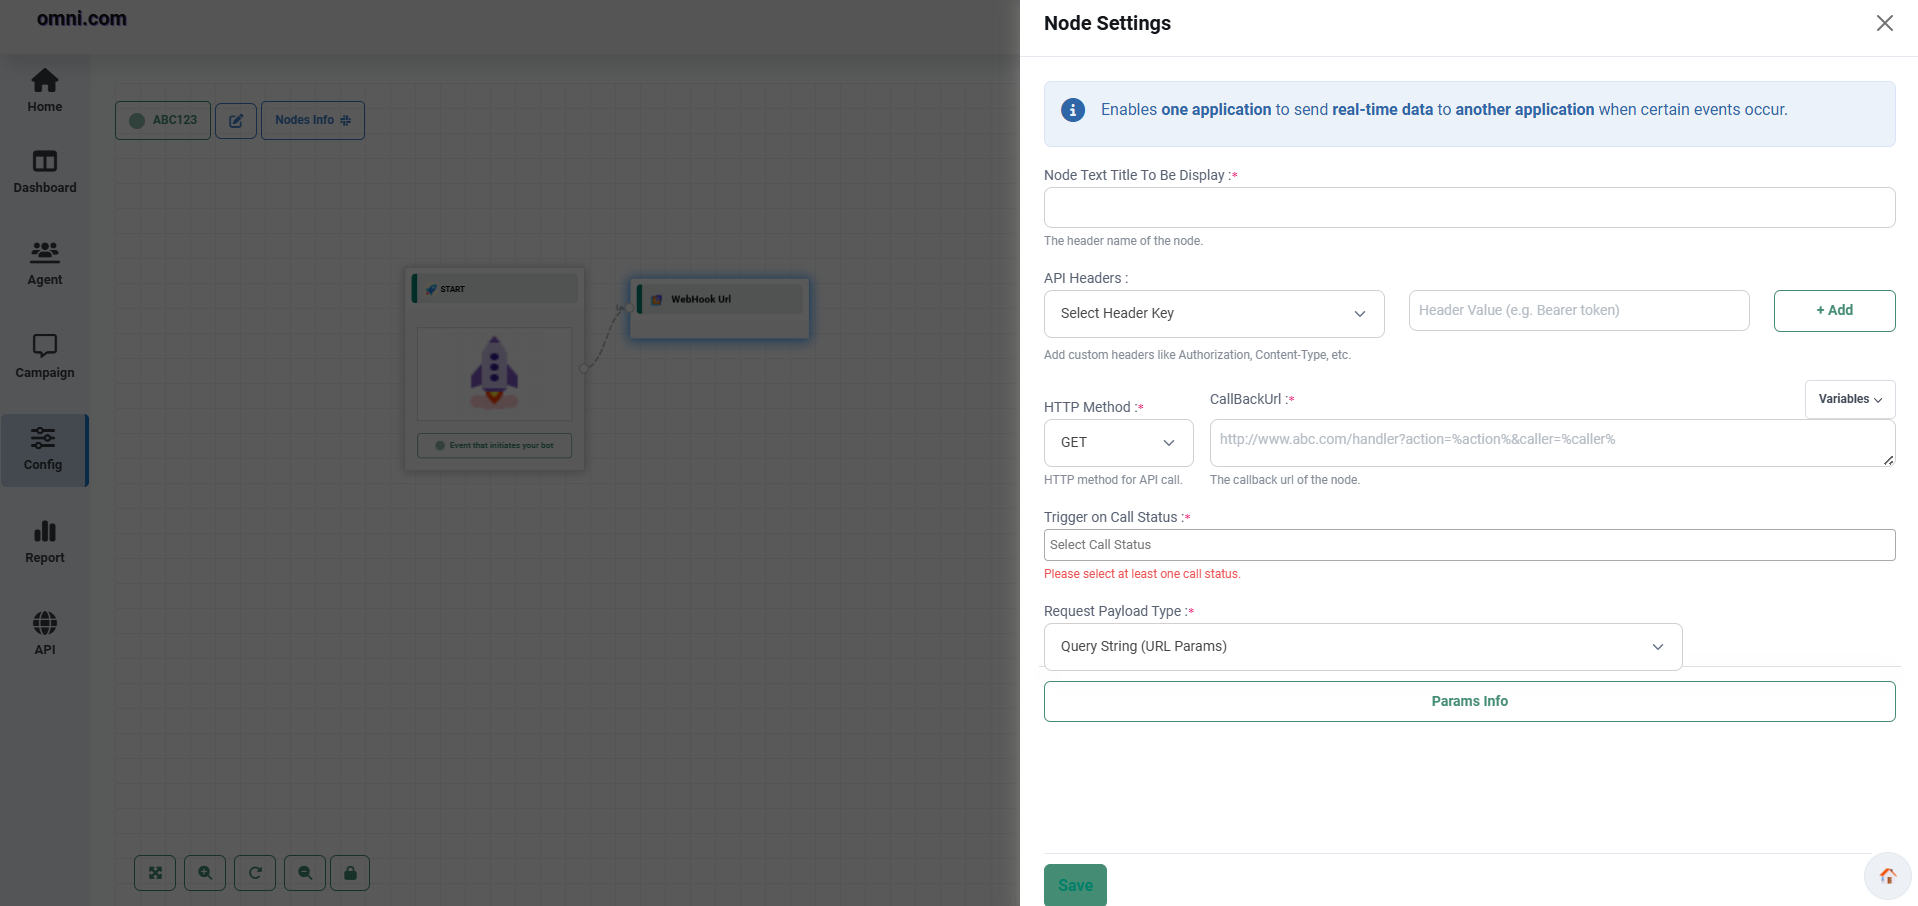
Configuration
| Field | Description |
|---|---|
| Node Text Title | Specify the display name of the node. |
| API Headers | Configure authentication headers required by the destination application. |
| HTTP Method | Select the HTTP request method. |
| Callback URL | Specify the API endpoint that will receive webhook data. |
| Trigger on Call Status | Select the call events that trigger the webhook. |
| Request Payload Type | Select the format used to send webhook data. |
Supported HTTP Methods
Trigger on Call Status
One or more call events can be selected to trigger the webhook request.
Request Payload
Select the payload format used to send data to the external application.
- Query Parameters
- JSON Body
- Form Data
Supported Dynamic Parameters
Dynamic variables are automatically replaced with actual call values when the Voice Campaign is executed.
| Parameter | Description |
|---|---|
| Caller Number | Mobile number of the caller. |
| Called Number | Destination number. |
| Call Duration | Total duration of the call. |
| Call Status | Current status of the call. |
| Agent Name | Name of the connected agent. |
| Recording URL | URL of the recorded call (if available). |
Purpose
Missed Call Node
The Missed Call node manages missed-call activities by playing an audio message after a configurable ringing duration and disconnecting the call. It also supports voice notifications, automatic replies, and spam protection for missed-call campaigns.
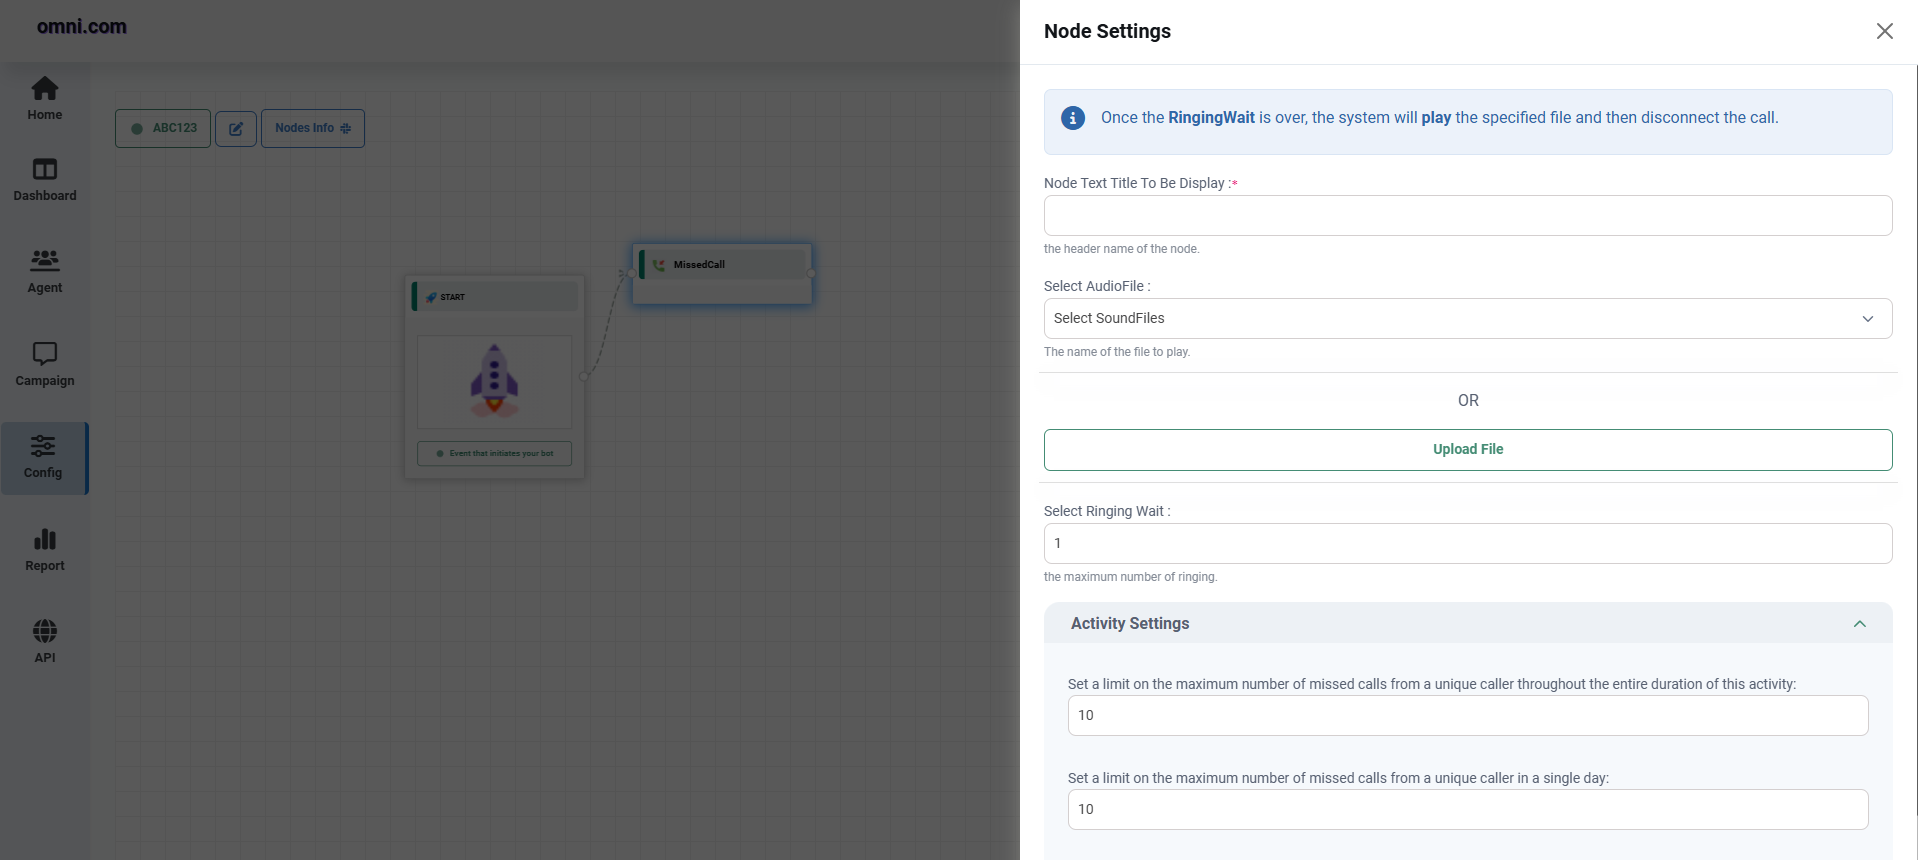
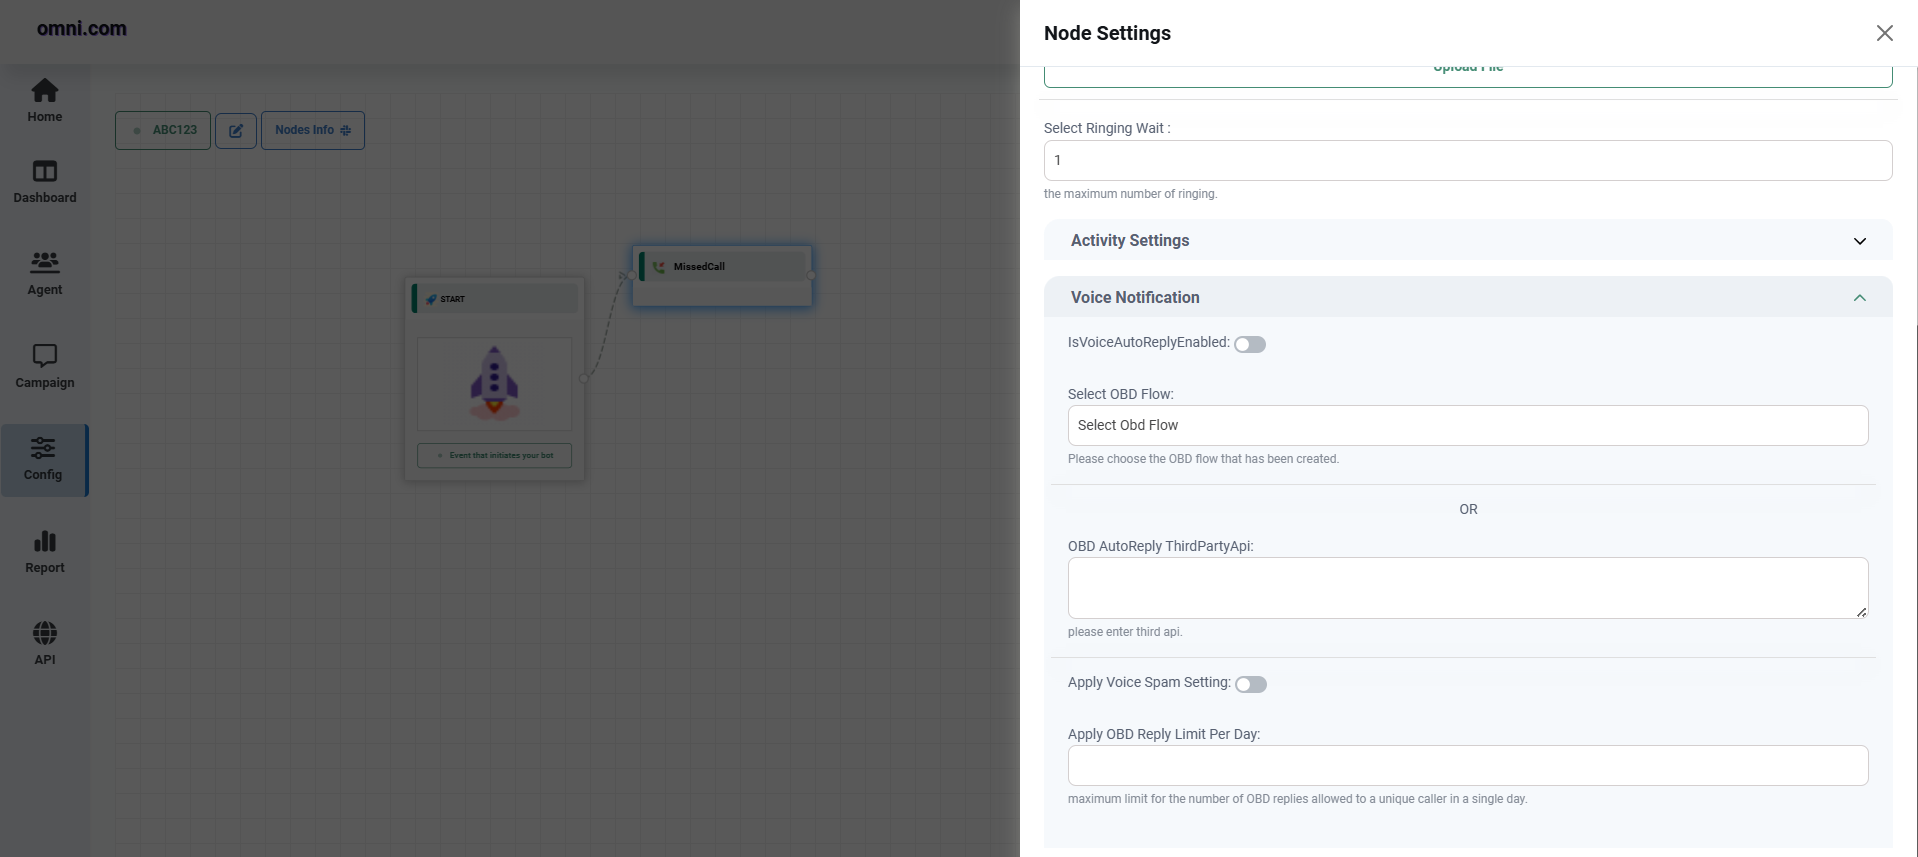
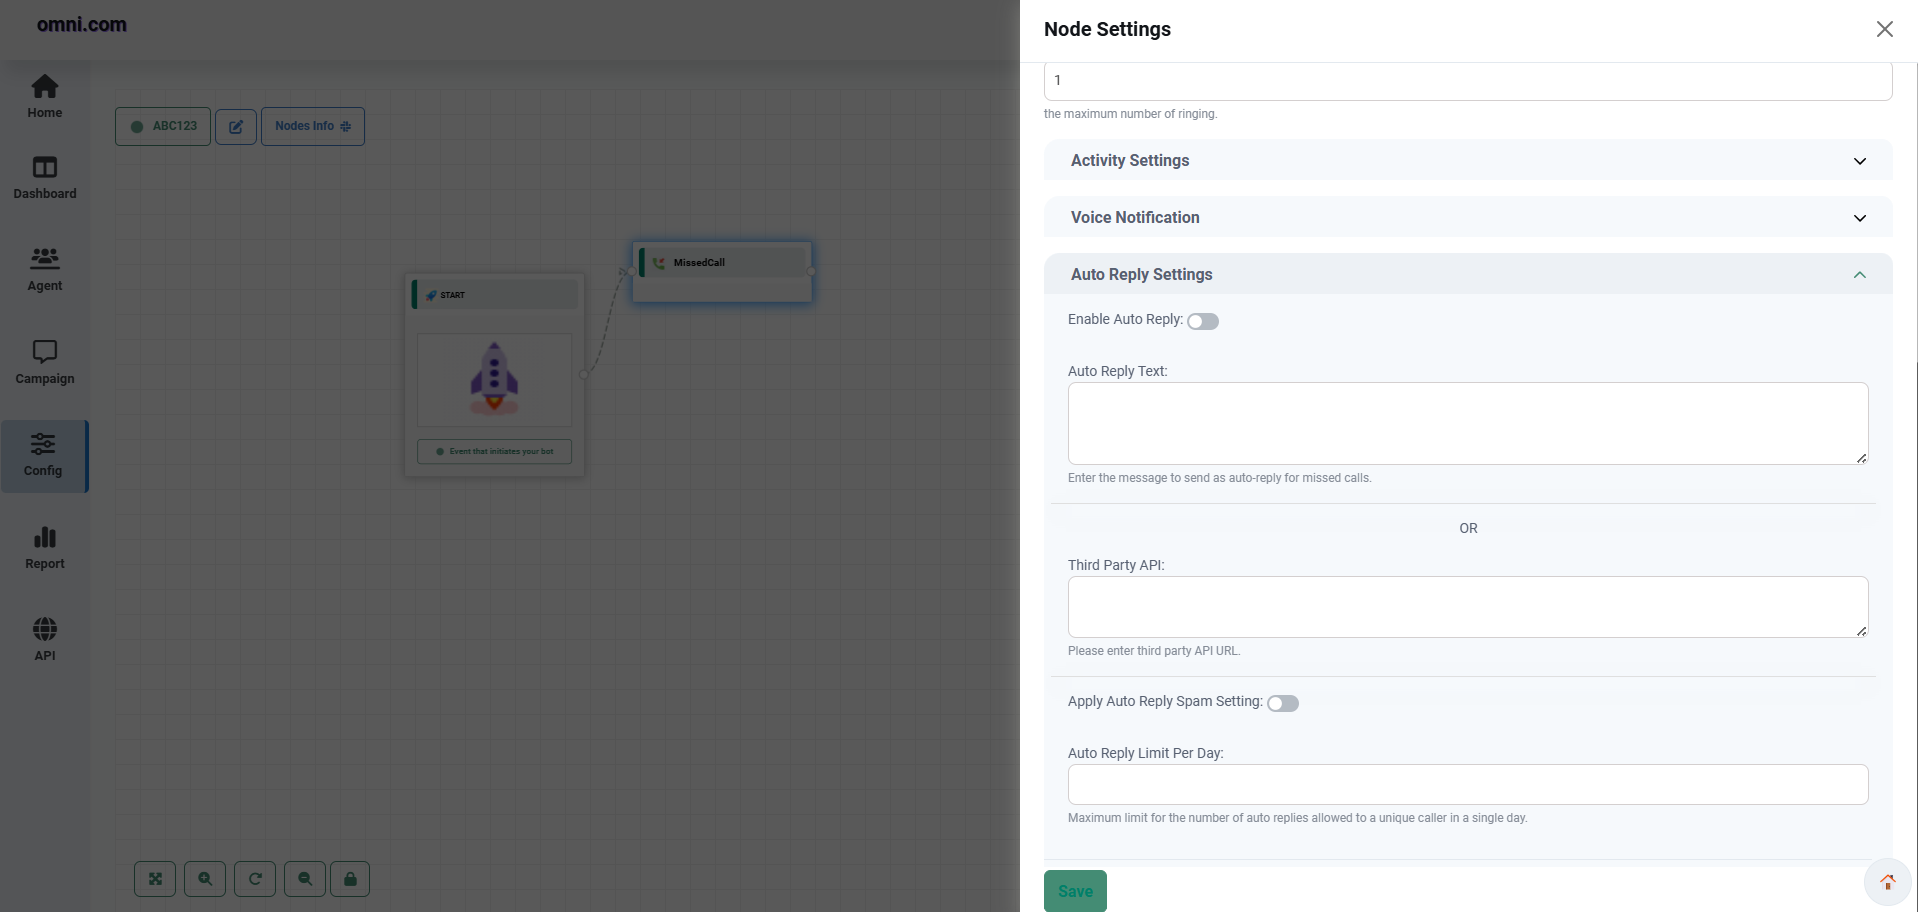
Overview
This node is commonly used for lead generation, callback requests, customer registration, promotional campaigns, and missed-call services.
Configuration
| Field | Description |
|---|---|
| Node Text Title | Specify the display name of the node. |
| Select Audio File | Choose an existing audio file or upload a new one. |
| Ringing Wait | Specify the number of rings before the system answers the call. |
Activity Settings
Configure activity limits to prevent misuse of the missed-call service.
- Maximum missed calls allowed per caller.
- Maximum missed calls allowed per day.
Voice Notification
Enable voice notifications for users who give a missed call.
| Configuration | Description |
|---|---|
| Select OBD Flow | Select the outbound voice flow to trigger. |
| Third-Party API | Configure the API used for notifications. |
| Spam Protection | Prevent repeated voice notifications. |
| Maximum Replies Per Day | Limit the number of notifications sent each day. |
Auto Reply Settings
Automatically send SMS responses after a missed call.
| Setting | Description |
|---|---|
| Enable Auto Reply | Enable or disable automatic SMS replies. |
| Auto Reply Text | Configure the SMS message sent to the caller. |
| Third Party API | Select the API responsible for sending SMS. |
| Spam Protection | Prevent duplicate SMS notifications. |
| Daily Reply Limit | Limit the number of replies sent to a caller each day. |
Example Workflow
Purpose
Voice Recording Node
The Voice Recording node plays an audio prompt and records the caller's voice response. Recording begins after the beep sound and continues until the caller presses # or the configured timeout expires.
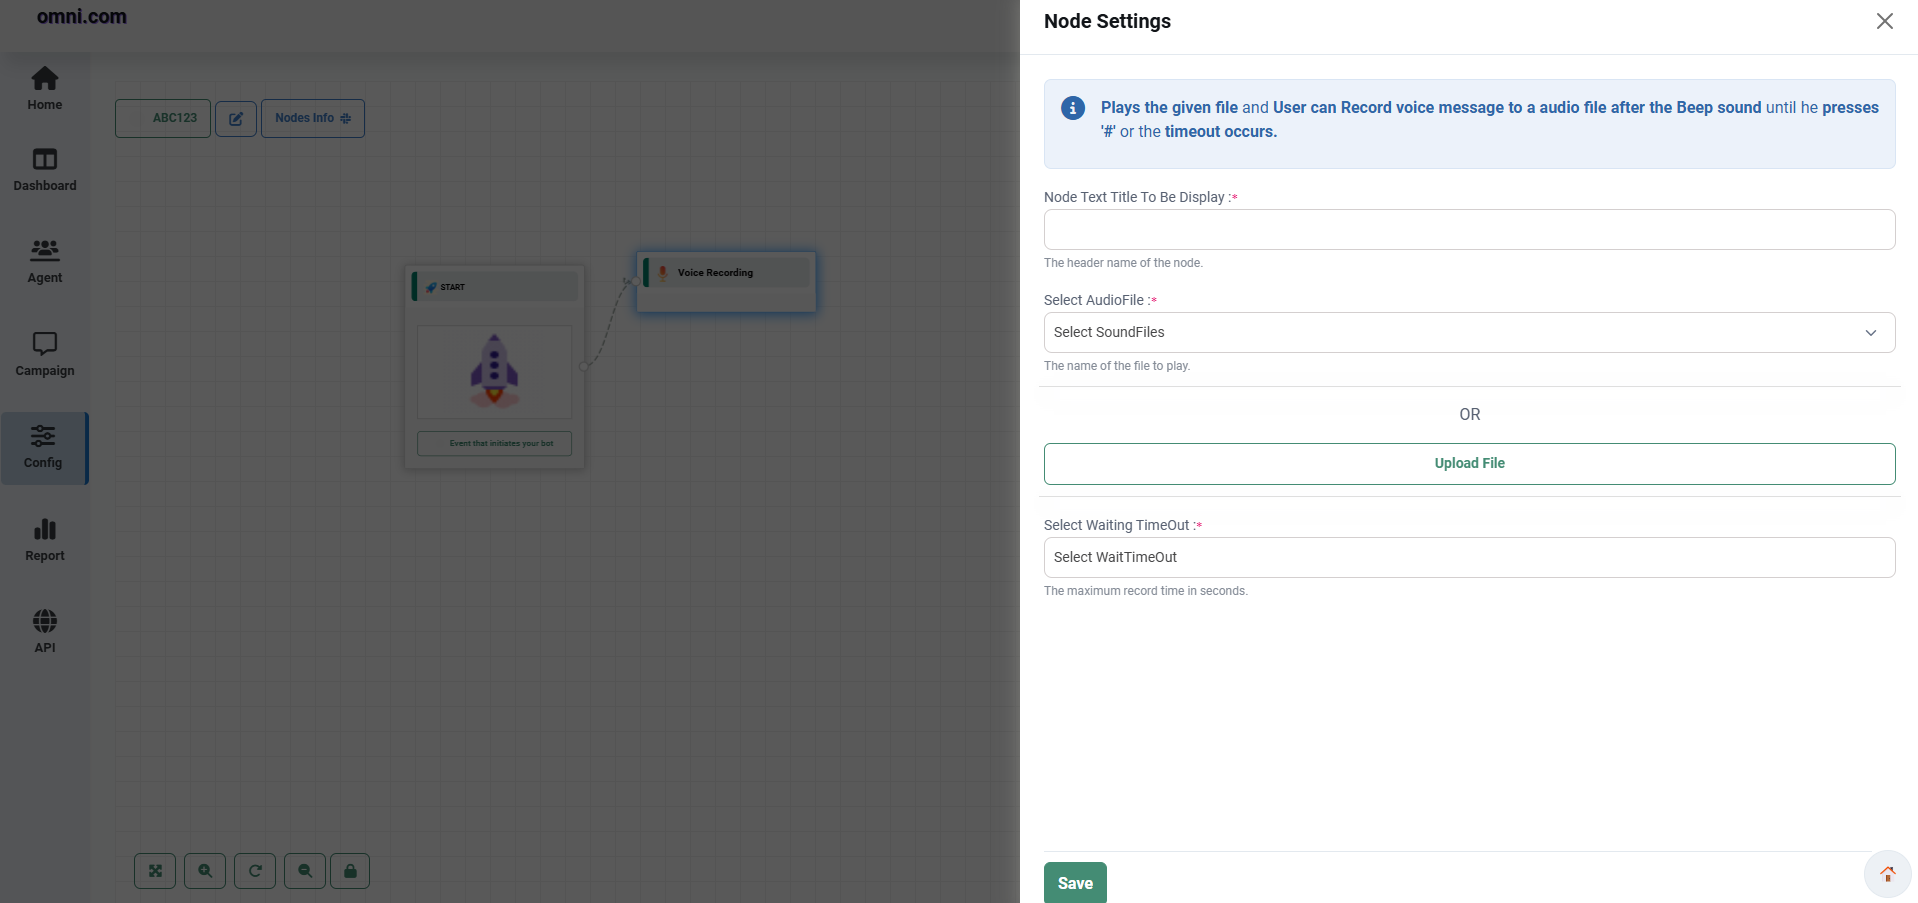
Overview
This node is useful for collecting customer feedback, complaints, survey responses, voice messages, and other spoken information during a Voice Campaign.
Configuration
| Field | Description |
|---|---|
| Node Text Title | Specify the display name of the node inside the Flow Designer. |
| Select Audio File | Select an existing audio prompt or upload a new audio file. |
| Waiting Timeout | Specify the maximum recording duration before recording stops automatically. |
Recording Behaviour
Recording automatically stops when one of the following conditions is met:
- The caller presses #.
- The configured waiting timeout expires.
Example Workflow
Purpose
Call Repeat Node
The Call Repeat node repeats the previously played audio message whenever the caller reaches this node. It is useful when callers need another opportunity to hear instructions before making a selection.
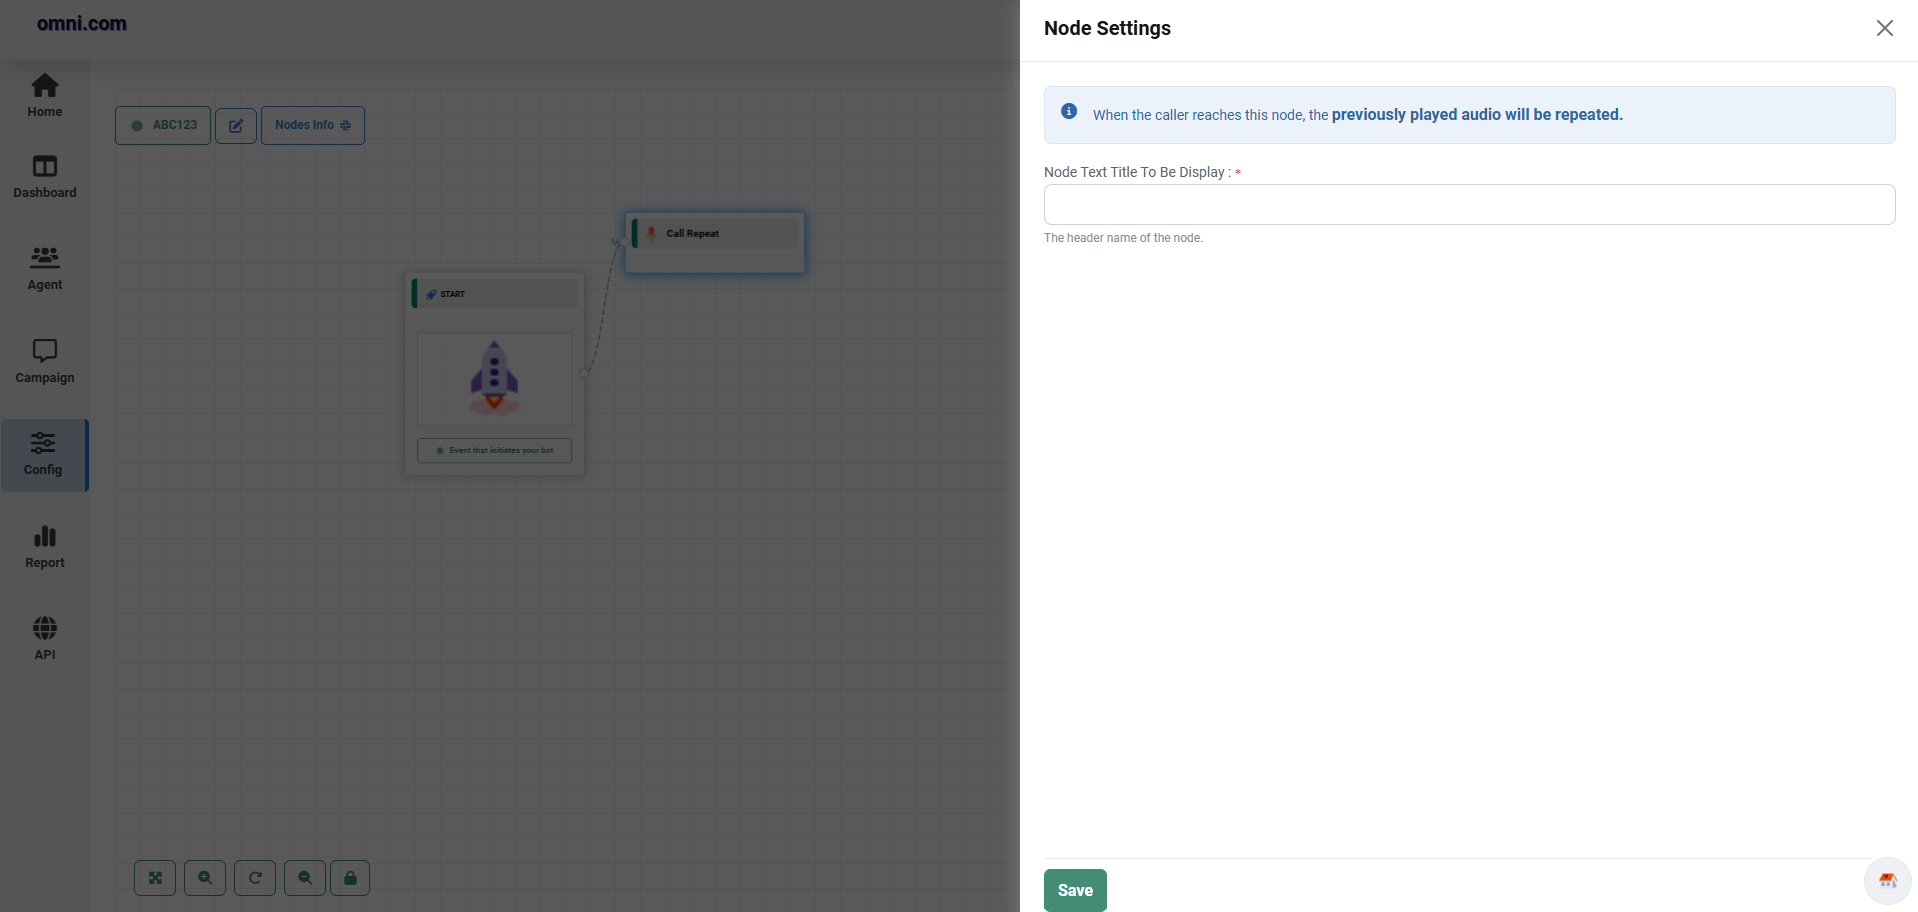
Overview
Unlike other nodes, the Call Repeat node does not require any additional audio file because it automatically replays the most recently played voice prompt.
Configuration
| Field | Description |
|---|---|
| Node Text Title | Specify the display name of the node inside the Flow Designer. |
| Additional Configuration | No additional configuration is required. The node automatically repeats the previously played audio. |
Example Flow
Purpose
Campaign
The Campaign module is used to create and launch outbound voice campaigns. It allows users to configure campaign settings, choose a Voice Plan, assign a Caller ID, upload contact numbers, select contact groups, and initiate calls. Campaigns can also use pre-configured OBD Flows or directly play an audio file during outbound calls.
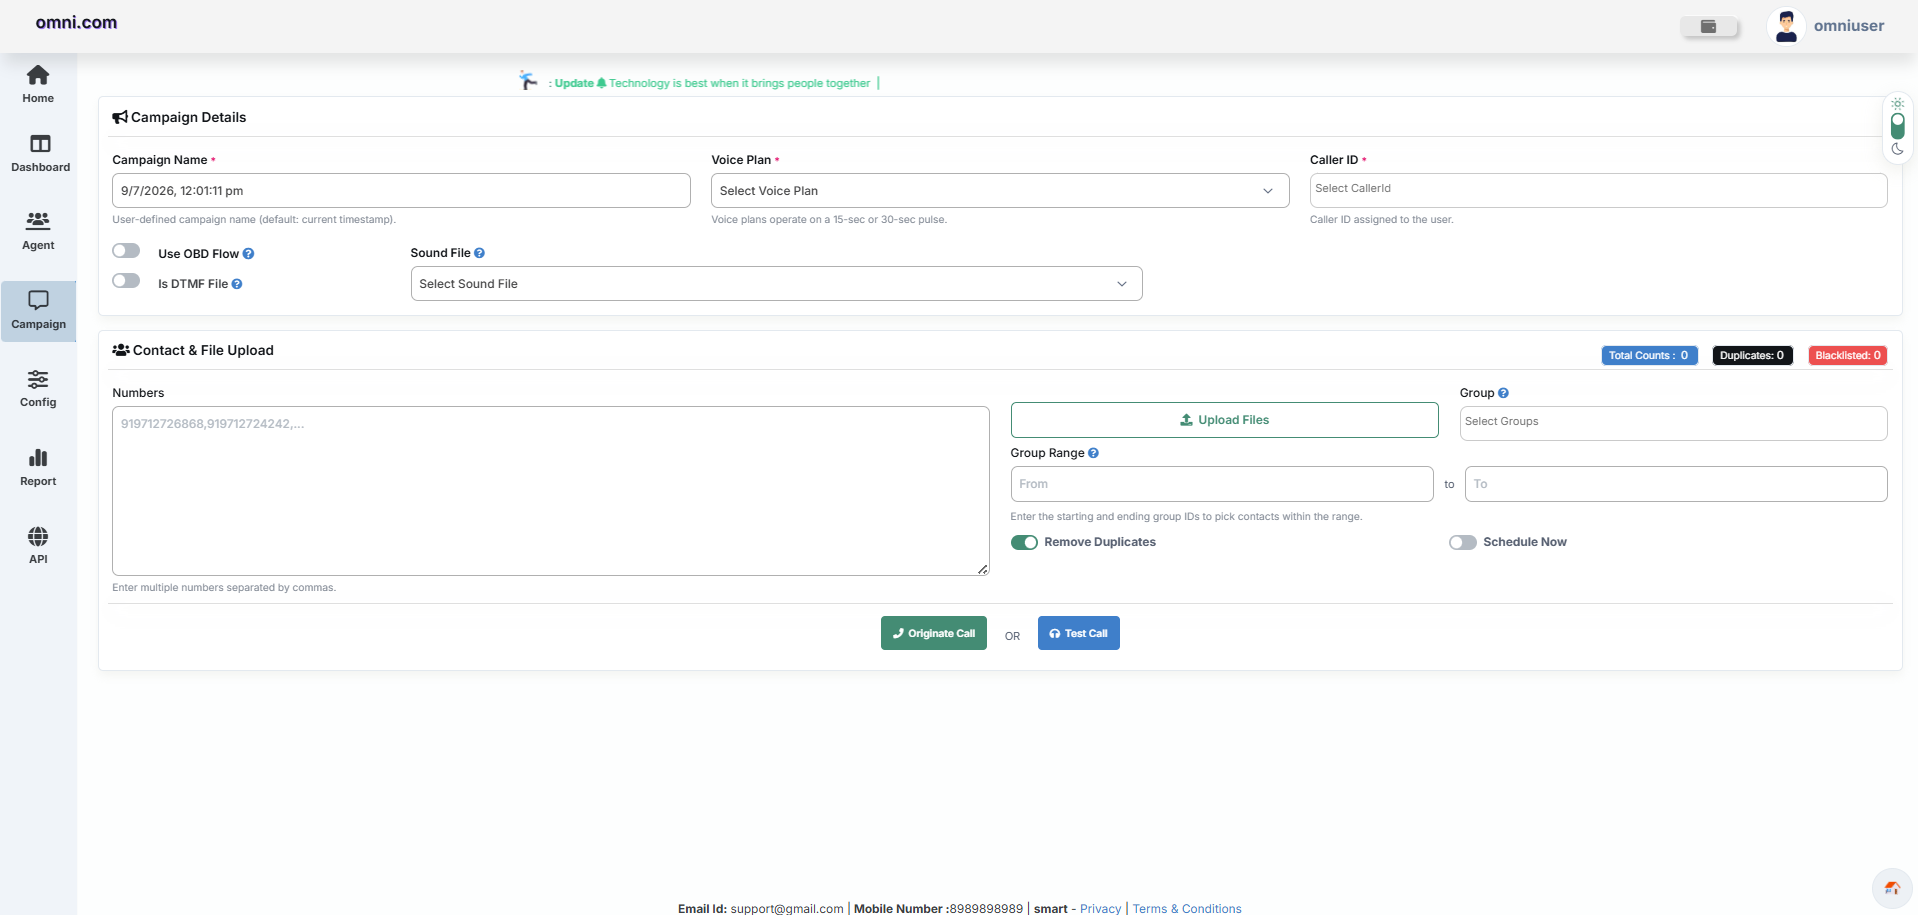
Campaign Details
The Campaign Details section contains the basic configuration required before launching a campaign.
Campaign Name
Enter a unique name for the campaign.
Campaign Configuration
| Field | Description |
|---|---|
| Voice Plan | Select the voice plan used for the campaign. Available plans define the pulse duration such as 15-second or 30-second billing. |
| Caller ID | Select the caller ID displayed to recipients. Only caller IDs assigned to the current user are available. |
| Use OBD Flow | Enable this option to execute calls using a pre-configured Outbound Dialer Flow. |
| OBD Flow | Select the Voice Flow that defines Voice, audio playback, DTMF handling and call routing. |
| Is DTMF File | Enable this option when the campaign uses a DTMF-enabled audio file. |
| Sound File | Select the audio file that will be played during outbound calls. |
Campaign Type
Contact & File Upload
This section is used to specify the recipients of the Voice Campaign.
| Field | Description |
|---|---|
| Numbers | Enter one or more mobile numbers separated by commas. |
| Upload Files | Import recipient numbers from a supported file for bulk campaigns. |
| Group | Select an existing contact group. |
| Group Range | Select a range of contacts from the chosen group. |
| Remove Duplicates | Automatically remove duplicate mobile numbers before the campaign starts. |
| Schedule Now | Schedule the campaign instead of starting it immediately. |
0919812345678,0919876543210,0919998887777
Campaign Statistics
The top-right section displays real-time campaign statistics before launching the campaign.
| Statistic | Description |
|---|---|
| Total Counts | Total number of contacts included in the campaign. |
| Duplicates | Total duplicate mobile numbers detected. |
| Blacklisted | Contacts automatically excluded because they are blacklisted. |
Campaign Actions
Test Call Verification
Before launching the campaign, use Test Call to verify:
- Voice Quality
- Selected Caller ID
- Audio Playback
- OBD Flow Execution
- Campaign Configuration
Example Workflow
Agent Monitoring
The Agent Monitoring module enables supervisors to monitor live calls handled by agents in real time. It provides monitoring tools to evaluate agent performance, maintain service quality, and assist agents whenever required.
Overview
Agent Monitoring allows supervisors to silently monitor active calls, join ongoing conversations when intervention is required, or stop monitoring at any time. This module is commonly used for quality assurance, agent coaching, compliance monitoring, and operational support.
Supervisors can monitor live agent calls without interrupting customer interactions and provide assistance whenever necessary.
Navigation
- Log in to the Omni Portal.
- Open the Campaign Report module.
- Click Agent Monitoring.
- The Supervisor Eavesdrop Dashboard opens.
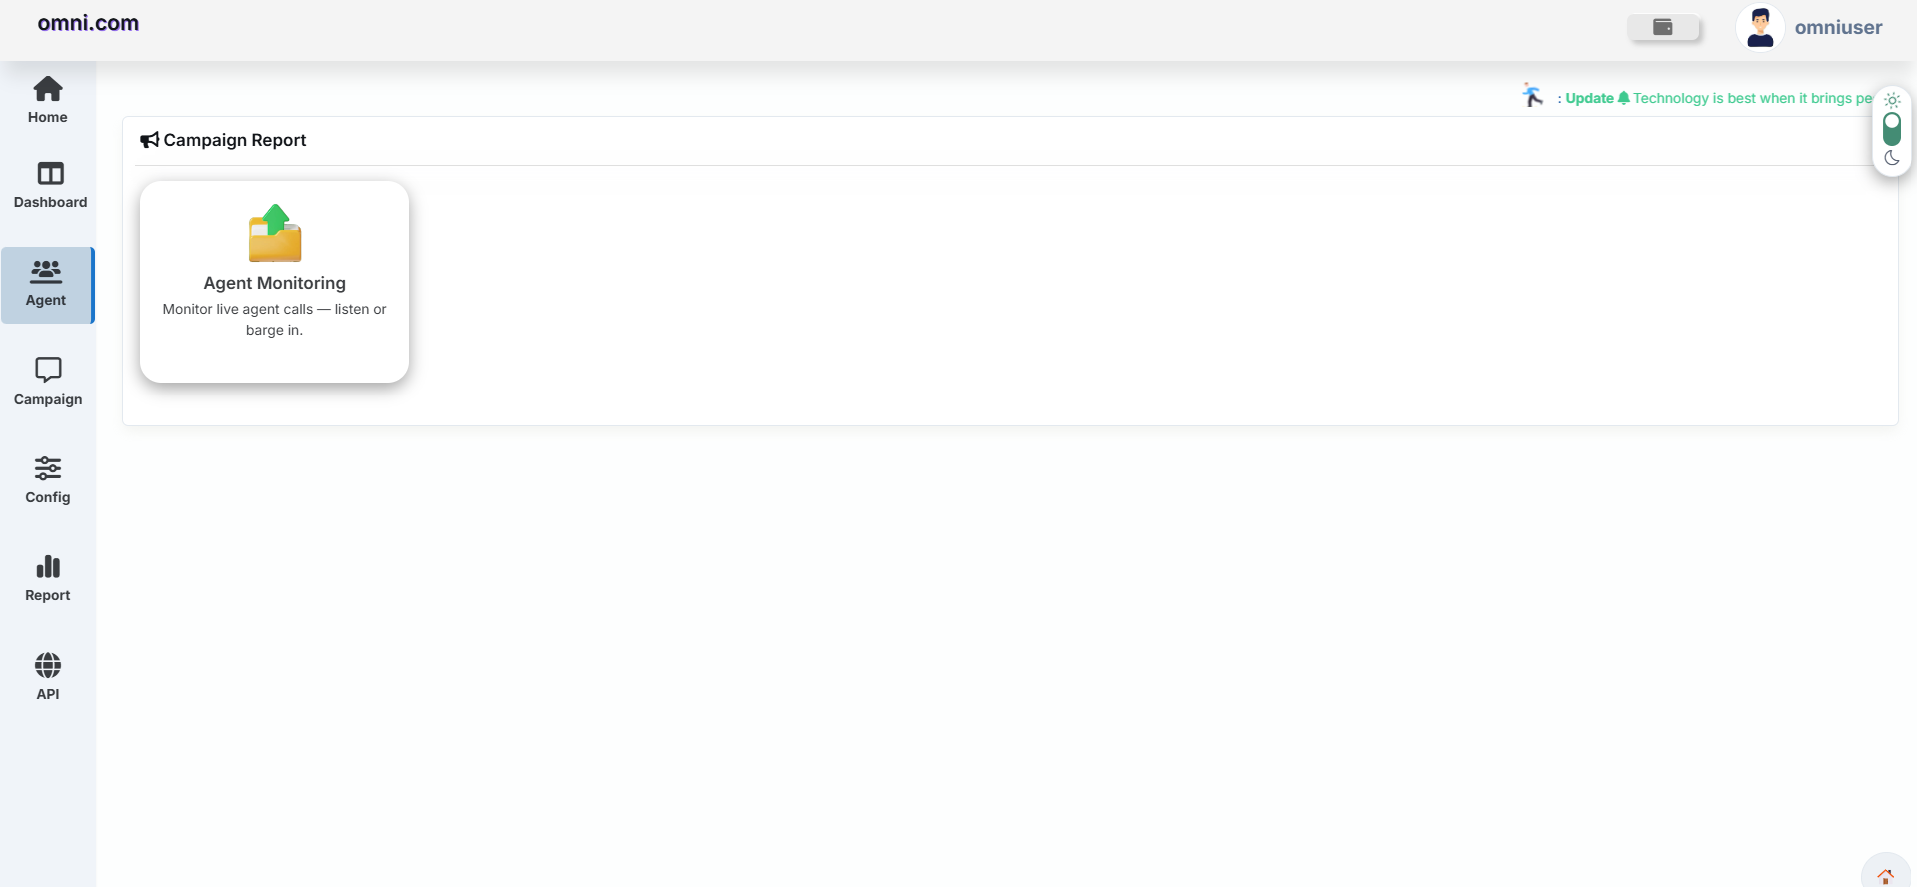
Supervisor Eavesdrop Dashboard
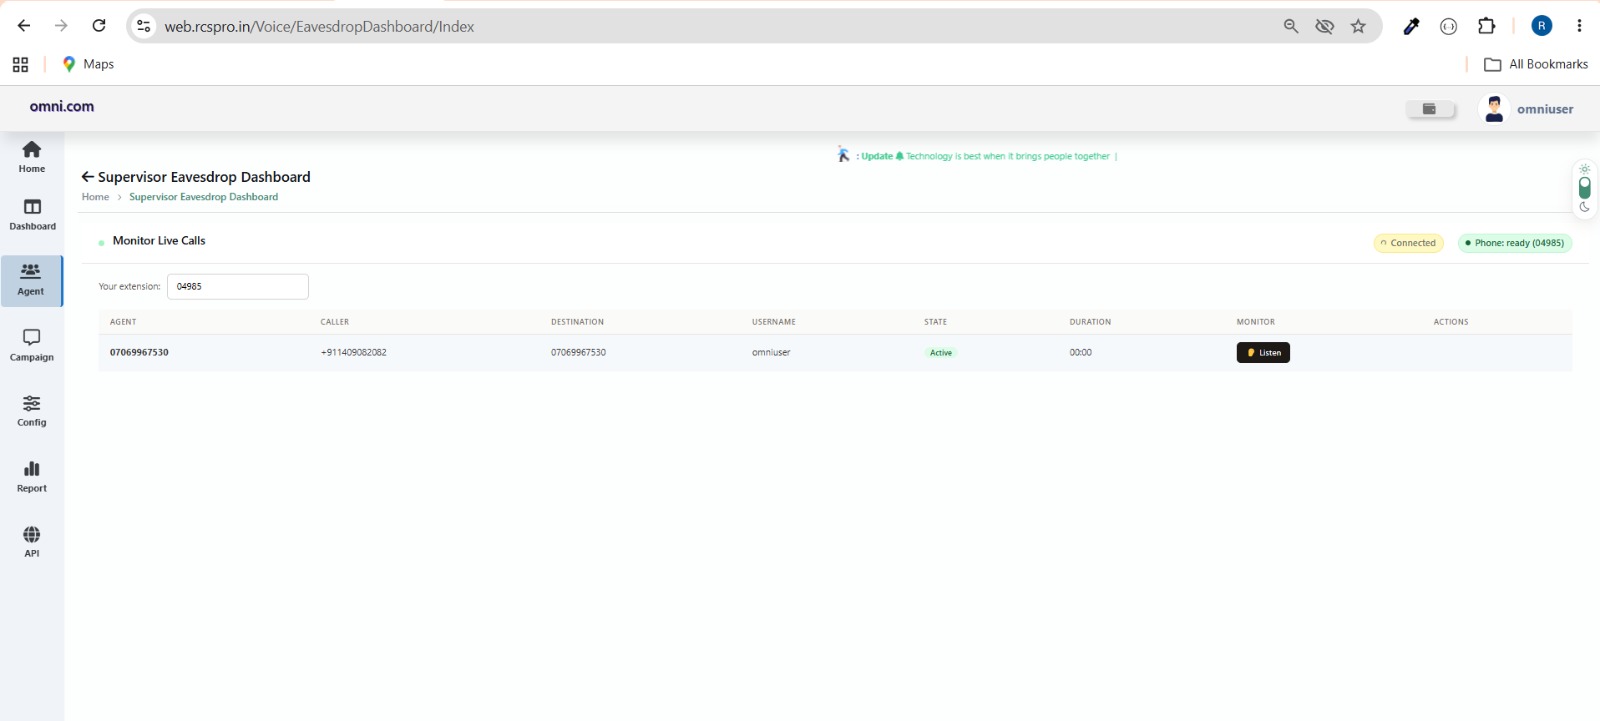
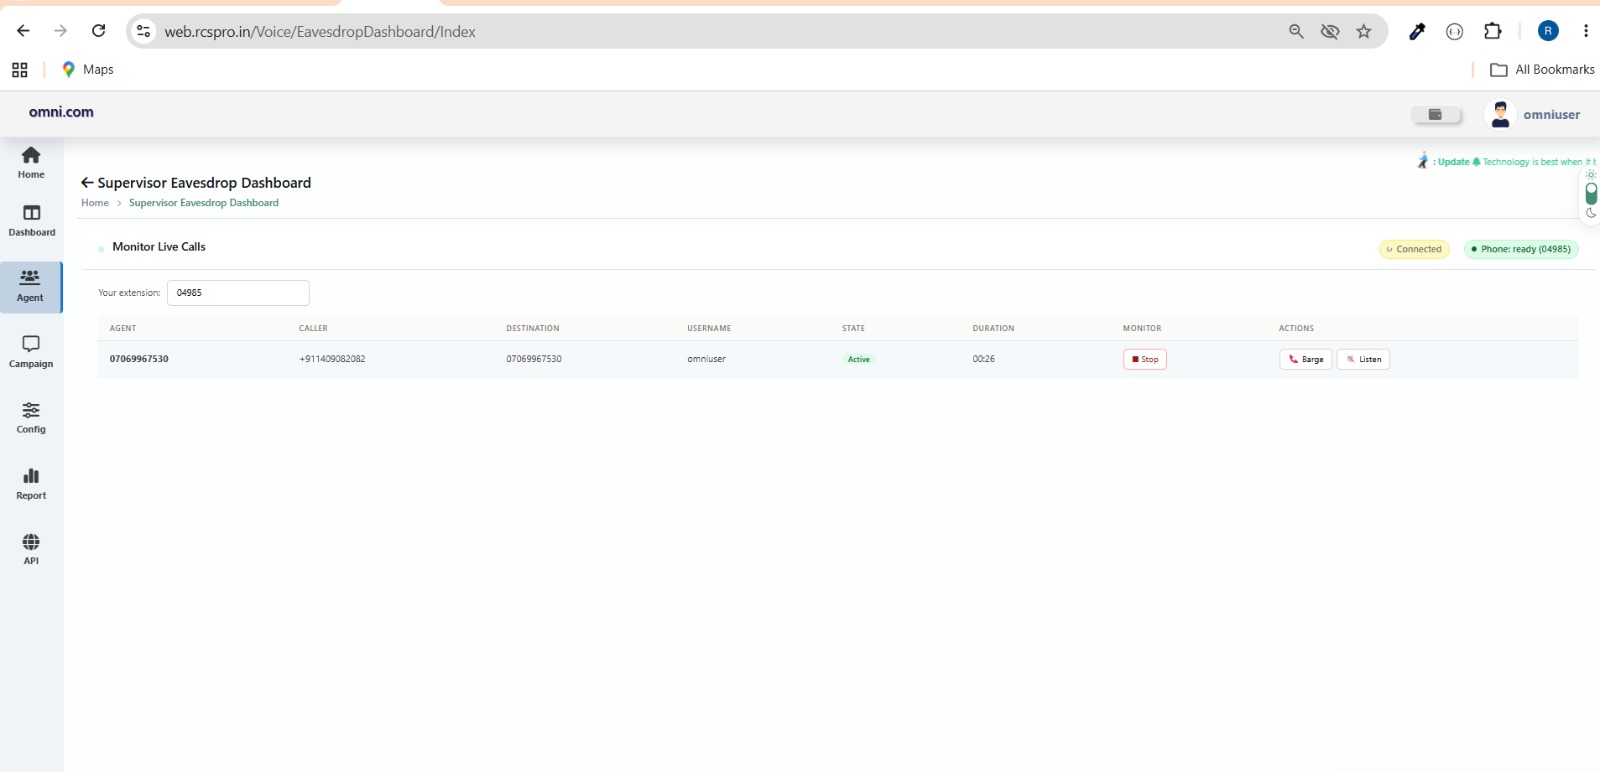
Overview
The Supervisor Eavesdrop Dashboard provides a real-time view of all active calls handled by agents. It enables supervisors to monitor live conversations, review call details, and perform supervisory actions from a centralized interface. The dashboard displays essential call information, allowing supervisors to quickly identify active calls and monitor them whenever necessary.
Monitor Live Calls
The Monitor Live Calls section displays all active agent calls currently in progress. Each record contains important information about the agent, customer, call duration, and current call status.
| Field | Description |
|---|---|
| Agent | Displays the agent's extension or phone number. |
| Caller | Displays the customer's phone number. |
| Destination | Displays the destination number connected to the call. |
| Username | Displays the username of the logged-in agent. |
| State | Displays the current call status such as Active. |
| Duration | Displays the duration of the ongoing call. |
| Monitor | Allows the supervisor to start or stop monitoring the selected call. |
| Actions | Displays additional supervisory actions available for the selected call. |
Supervisor Actions
Listen
Allows the supervisor to silently monitor an active conversation between the agent and the customer. The supervisor can hear both participants without being heard by either party.
Barge
Allows the supervisor to join the active conversation and communicate directly with both the agent and the customer.
Stop
Ends the current monitoring session. The supervisor is disconnected while the conversation between the agent and customer continues.
Monitoring Workflow
- Open the Agent Monitoring module.
- The Supervisor Eavesdrop Dashboard displays all active calls.
- Select the call you want to monitor.
- Click Listen to begin silent monitoring.
- If intervention is required, click Barge to join the conversation.
- Click Stop to end the monitoring session.
Benefits
- Monitor live agent calls in real time.
- Evaluate agent performance and customer interactions.
- Maintain service quality and compliance standards.
- Provide immediate assistance during active conversations.
- Improve agent coaching and training.
- Enhance the overall customer experience.
Use the Listen option to silently monitor agent calls. Select Barge only when immediate intervention is required, and click Stop after the monitoring session is complete.
Only supervisors or users with the required permissions can access the Agent Monitoring module. The availability of Listen, Barge, and Stop actions depends on user permissions and system configuration.
Voice Reports
The Voice Reports module provides comprehensive insights into Voice campaign performance, call status, delivery statistics, and campaign reports. Users can monitor Voice campaign execution, analyze call outcomes, and review detailed reporting information from a centralized dashboard.
Report Dashboard
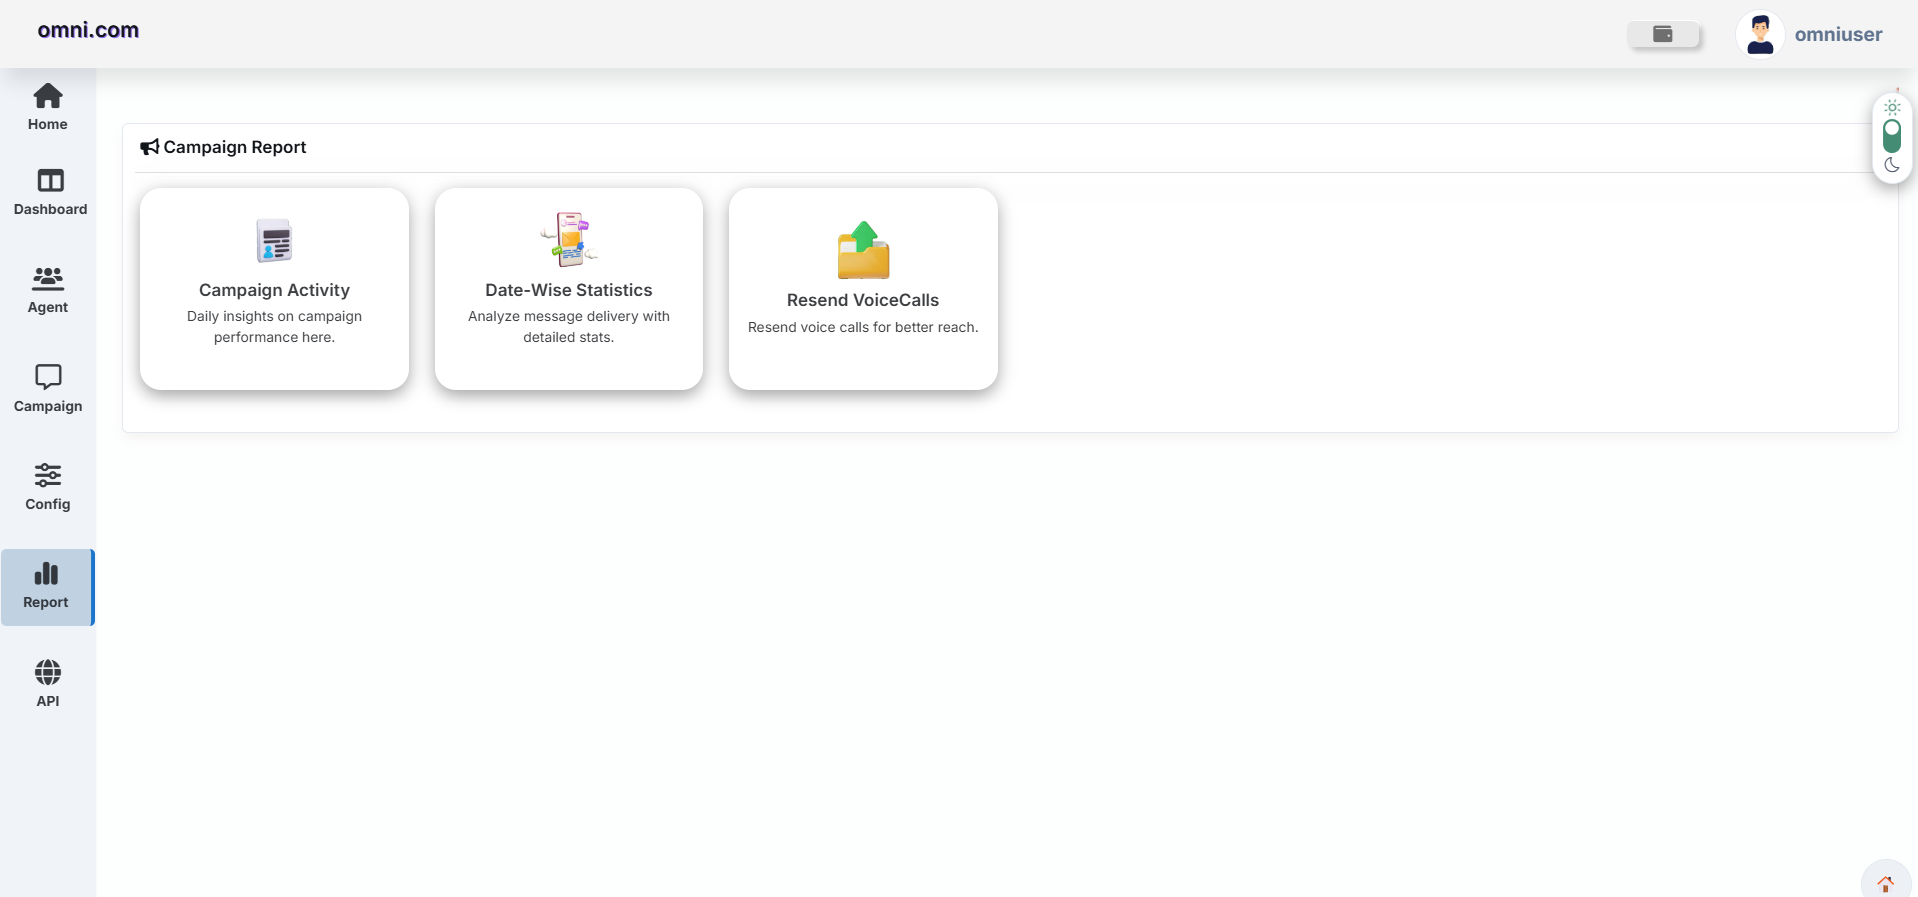
Purpose
The Voice Reports module is designed to provide comprehensive visibility into Voice campaign execution, call activity, delivery statistics, campaign performance, and reporting records. It enables organizations to monitor Voice campaigns, review call reports, and analyze communication performance.
Available Report Sections
| Section | Description |
|---|---|
| Campaign Activity | Displays Voice campaign activity, execution details, and overall campaign performance. |
| Day-Wise Statistics | Provides day-wise Voice call statistics, call outcomes, and performance trends for the selected period. |
| Resend Voice Calls | Allows users to retrieve previously executed Voice campaigns and resend Voice calls to the selected recipients. |
Benefits
- Monitor Voice campaign performance.
- Track call completion and delivery status.
- Analyze campaign execution statistics.
- Export detailed Voice reports.
Users can access reporting tools and monitor Voice campaign performance from a centralized location.
Campaign Activity
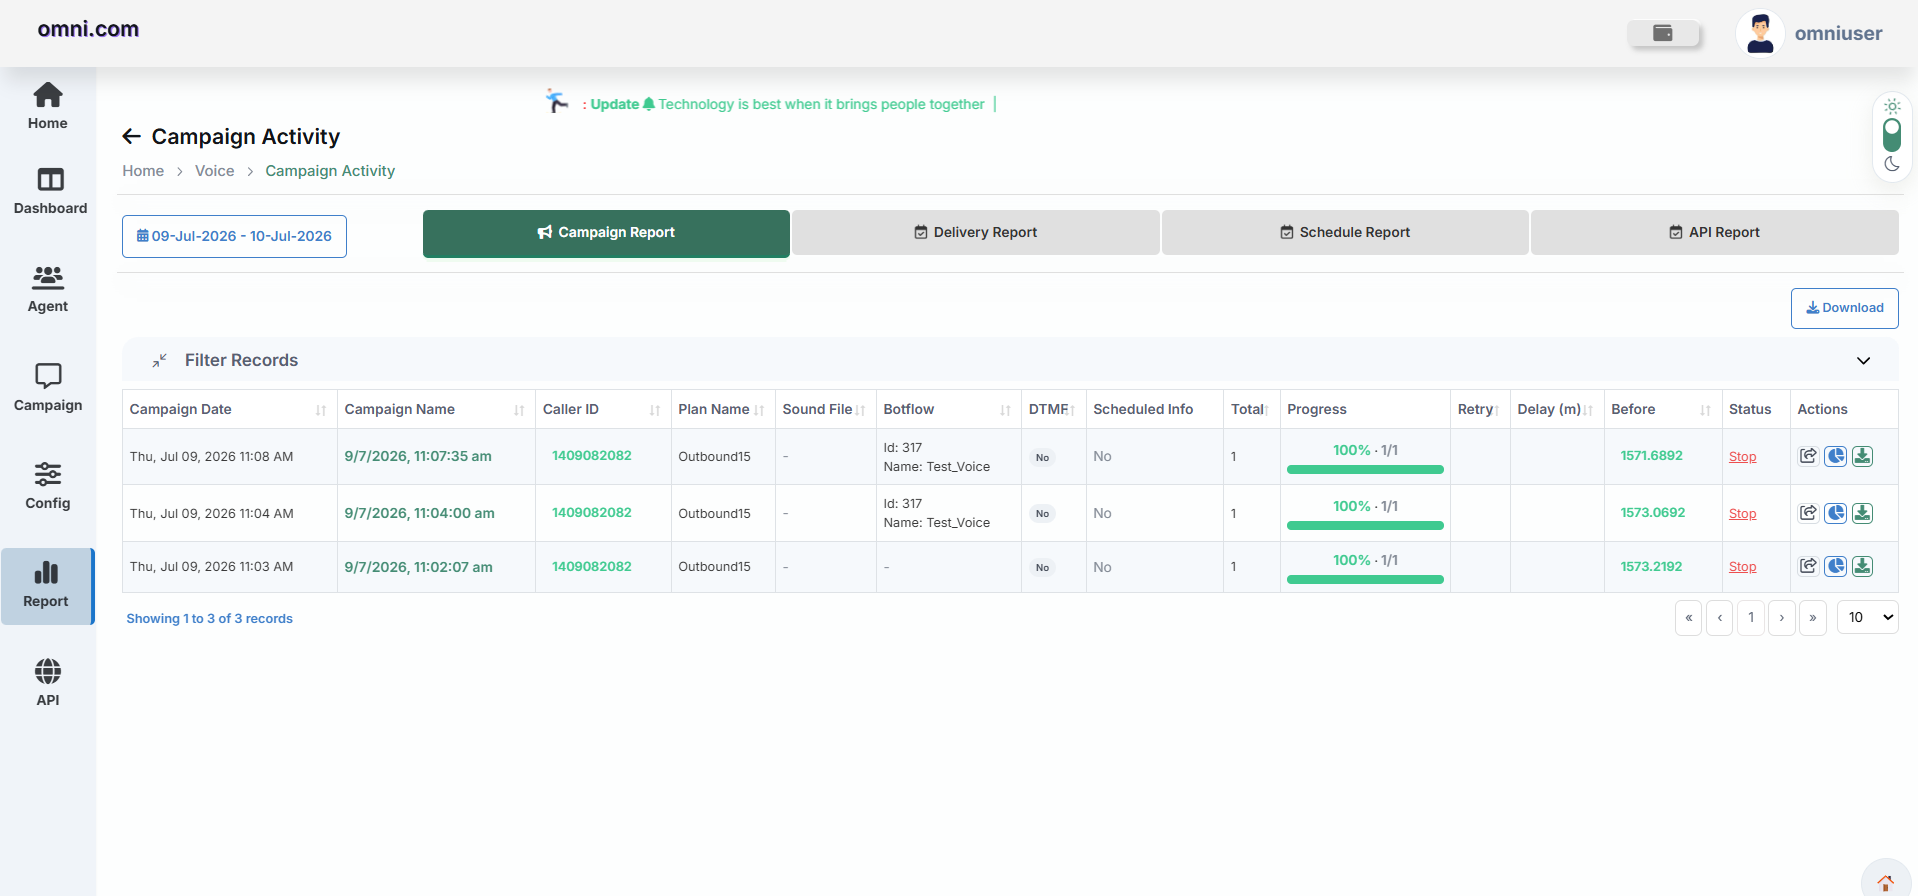
Purpose
The Campaign Activity report provides detailed information about Voice campaigns executed during a selected date range. Users can review campaign performance, delivery status, scheduled campaigns, and fallback reports.
Date Range Filter
Users can select a custom date range to view campaign records.
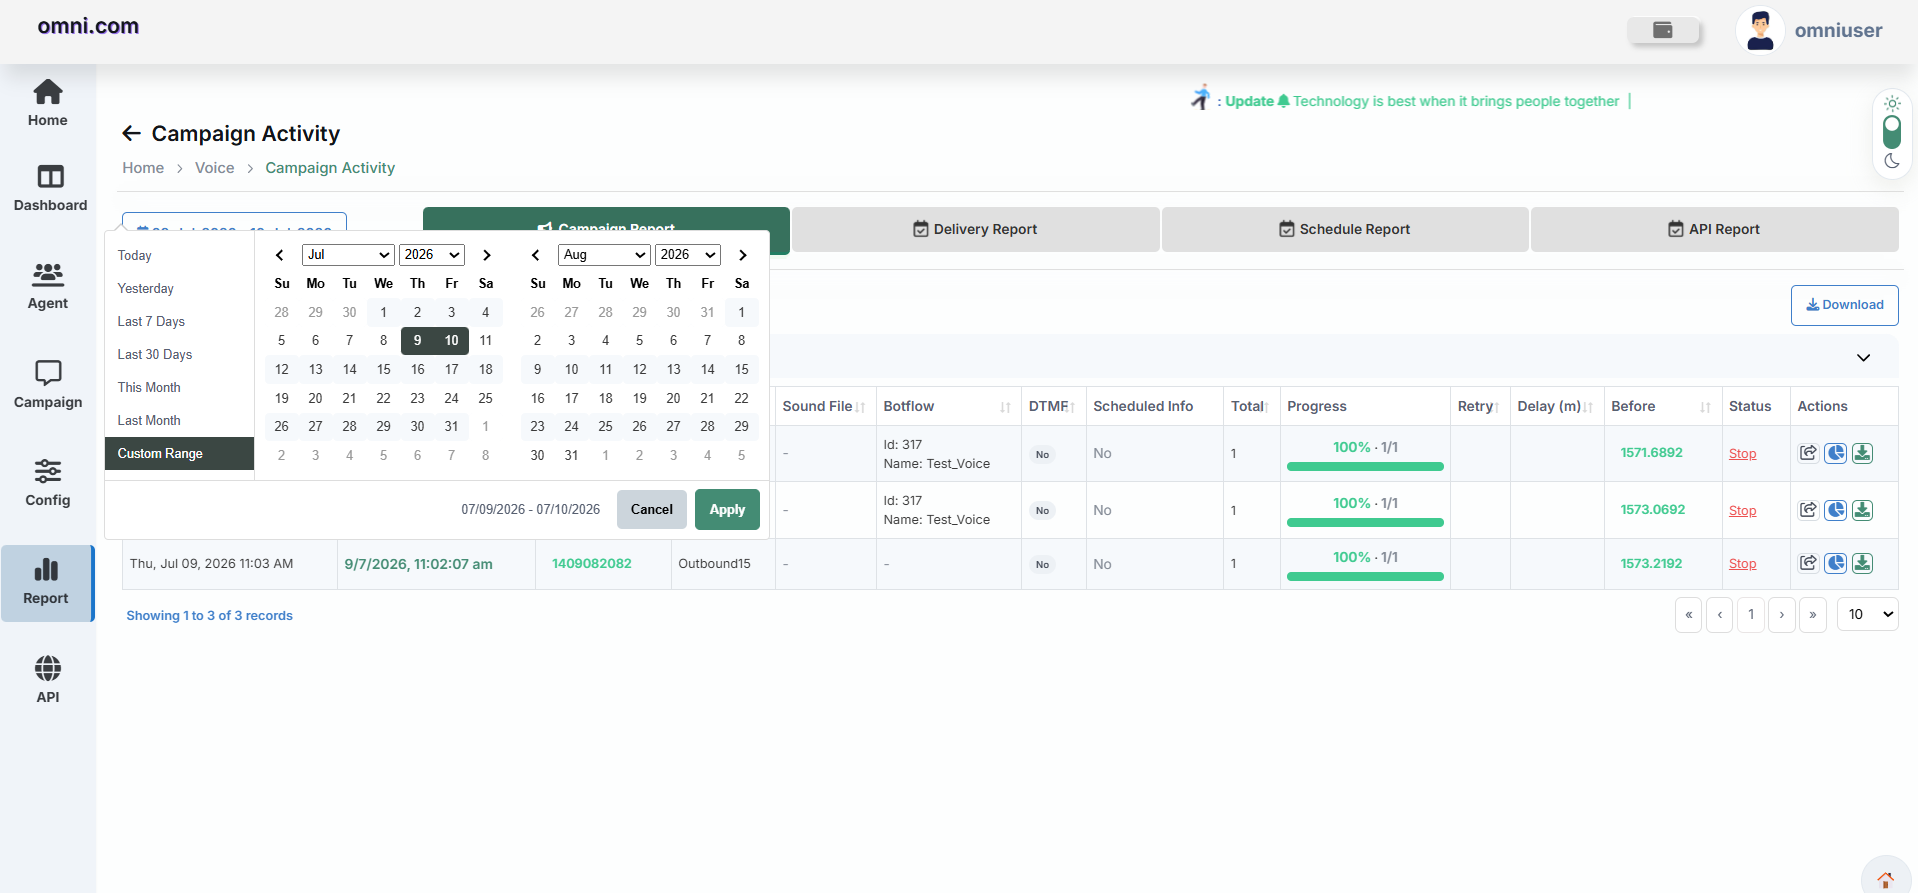
Available Options
- Today
- Yesterday
- Last 7 Days
- Last 30 Days
- This Month
- Last Month
- Custom Range
Click Apply to load campaign data for the selected period.
Campaign Report Information
| Field | Description |
|---|---|
| Campaign Date | Displays the date and time when the voice campaign was created. |
| Campaign Name | Displays the name of the voice campaign. |
| Caller ID | Displays the caller ID used to initiate outbound voice calls. |
| Plan Name | Displays the voice plan selected for the campaign. |
| Sound File | Displays the audio file configured for the campaign. A dash (-) is shown if no audio file is used. |
| Botflow | Displays the Botflow assigned to the campaign, including the Botflow ID and Name. |
| DTMF | Indicates whether DTMF (Dual-Tone Multi-Frequency) input is enabled for the campaign. |
| Scheduled Info | Indicates whether the campaign was scheduled. If scheduled, the configured schedule details are displayed. |
| Total | Displays the total number of contacts or calls included in the campaign. |
| Progress | Displays the campaign execution progress, including the completion percentage and processed calls. |
| Retry | Displays the number of retry attempts configured for unanswered or failed calls. |
| Delay (m) | Displays the delay, in minutes, between consecutive retry attempts. |
| Before | Displays the available voice credits or account balance before the campaign execution. |
| Status | Displays the current status of the campaign, such as Running, Completed, or Stopped. |
| Actions | Provides options to view campaign details, access reports, or download campaign-related information. |
Available Actions
- View Campaign Details
- View Delivery Information
- Download Report
Delivery Report
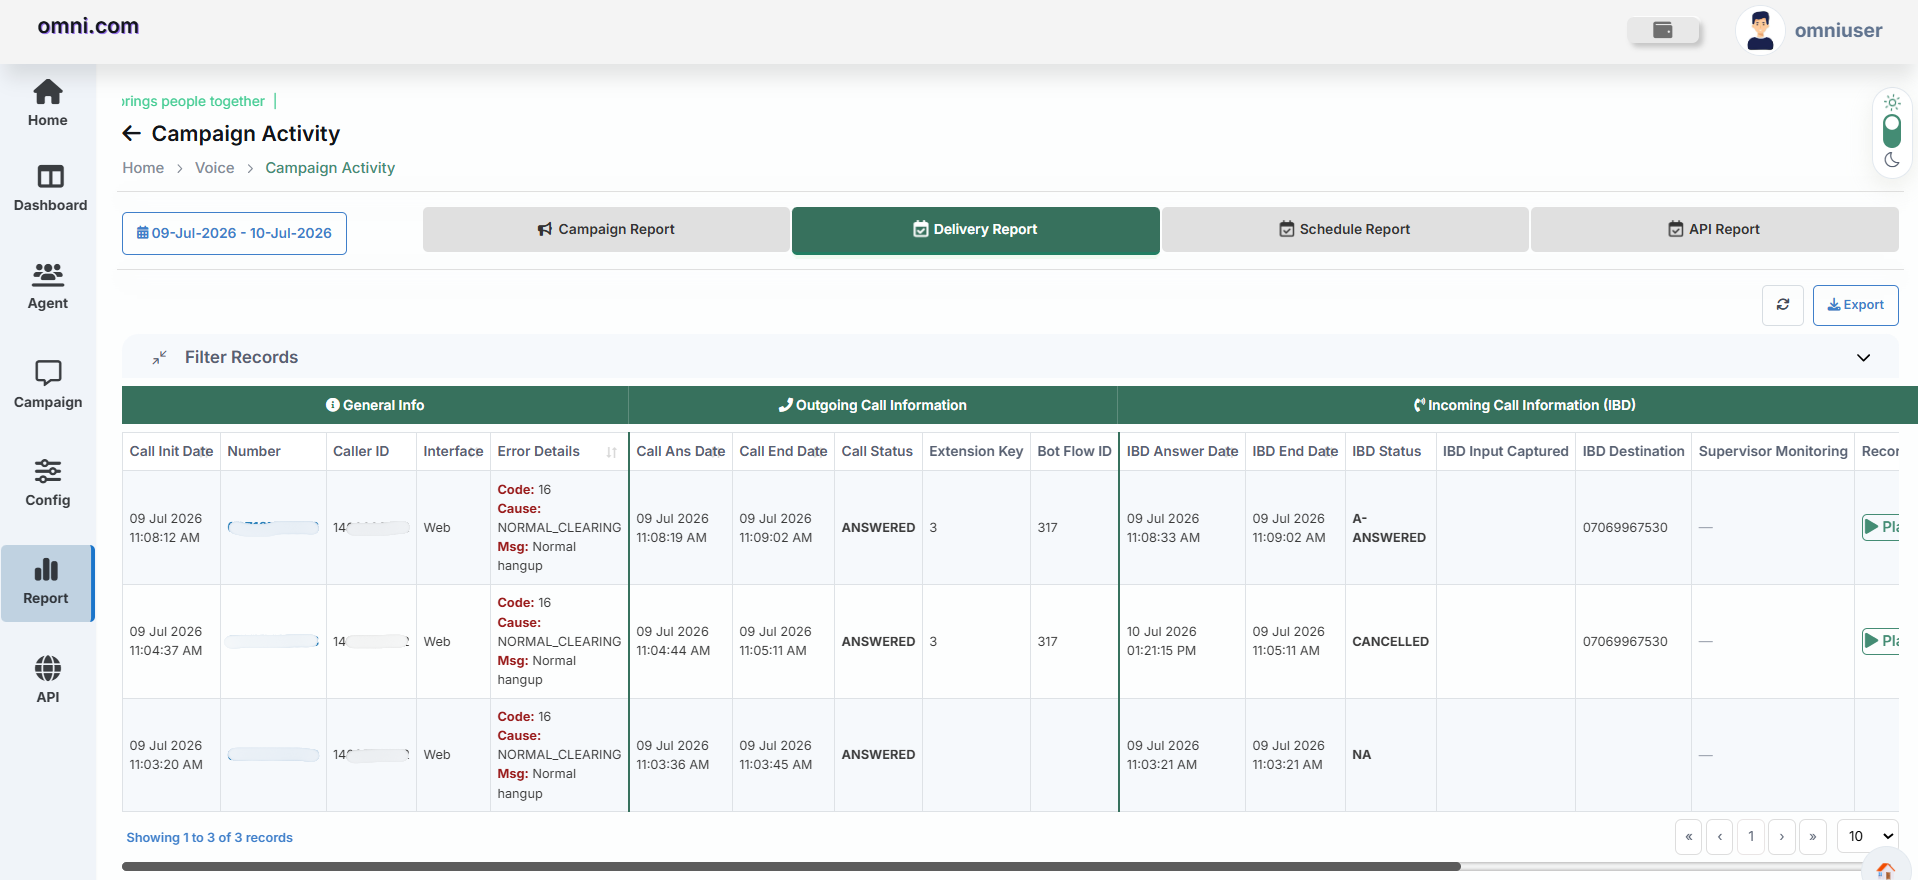
The Delivery Report displays recipient-level delivery information and helps users verify message delivery status.
| Field | Description |
|---|---|
| Call Date | Displays the date and time when the Voice call was processed. |
| Number | Displays the recipient mobile number. |
| Reference ID | Unique identifier generated for the Voice message transaction. |
| Voice Flow | Displays the Voice Flow or audio file used in the campaign. |
| Call Status | Displays the call status along with delivery and read timestamps. |
| Interface | Displays the interface used to send the Voice message, such as Web or HTTP. |
| Call Cost | Displays the cost incurred for sending the Voice message. |
| View | Allows users to view detailed information about the message. |
Features
- View delivery records.
- Download delivery report.
Schedule Report
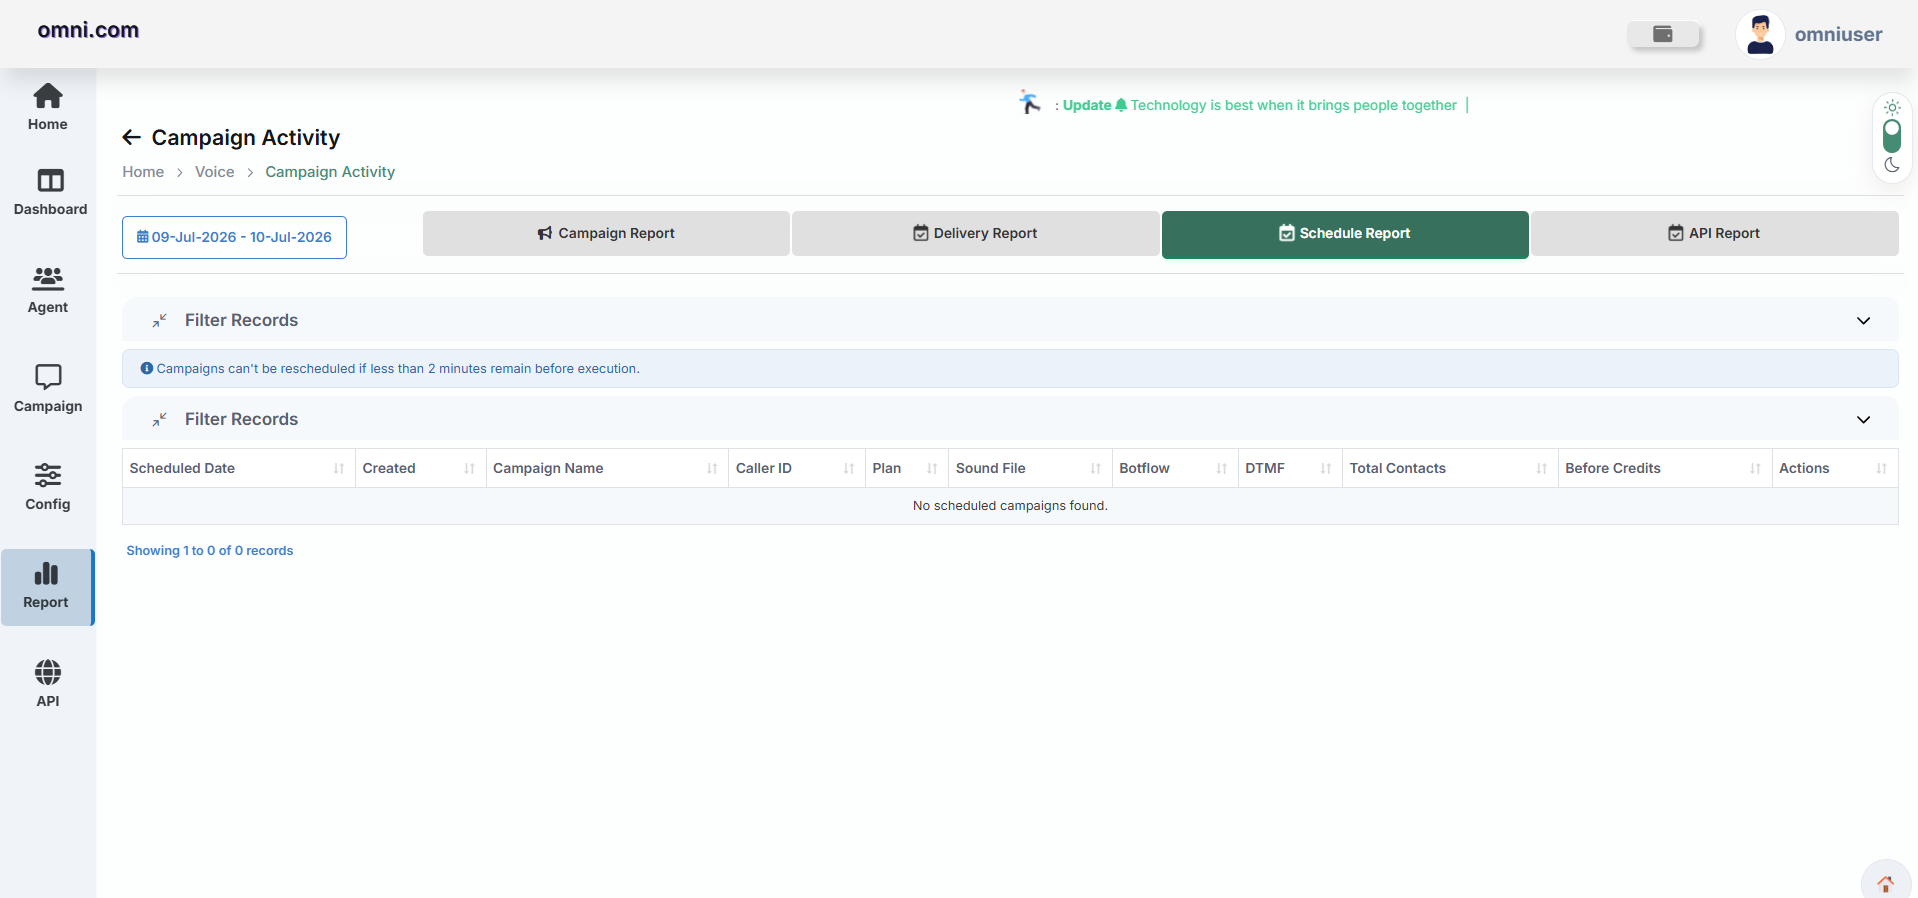
The Schedule Report displays scheduled campaigns that are pending execution.
| Field | Description |
|---|---|
| ScheduleDate | Scheduled execution date and time. |
| Campaign Date | Campaign creation date and time. |
| Campaign Name | Name of the campaign. |
| Voice Flow | Displays the Voice Flow or audio file used for the scheduled campaign. |
| Agent Info | Displays the Voice Agent Name and Agent ID. |
| Interface | Interface used to create the campaign. |
| Call Type | Type of Voice call configured for the campaign. |
| Total Count | Total number of recipients. |
| Credit Used | Total credits consumed by the campaign. |
| Campaign Status | Displays the current status along with start and end time. |
| Action | Displays the available actions for the campaign. |
Voice API Report
The Voice API Report provides detailed information about Voice campaigns initiated through API integration. It allows users to monitor API requests, responses, campaign execution, and recipient-level call activity from a centralized reporting interface.
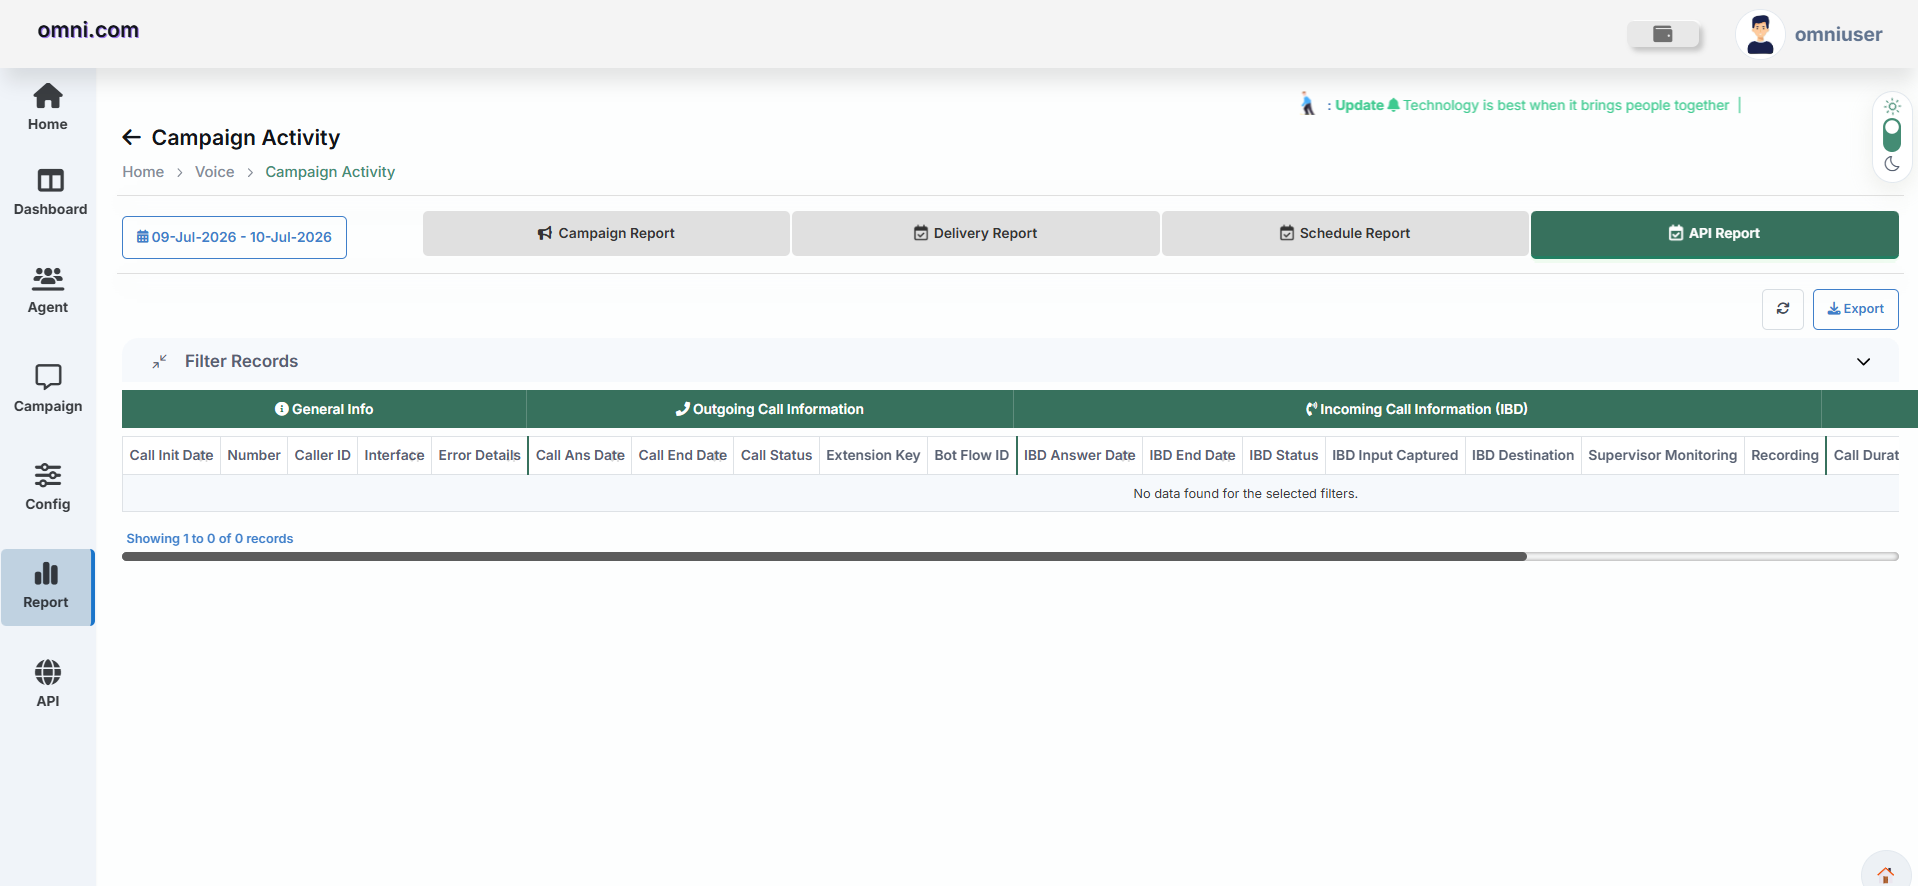
Overview
The Voice API Report helps administrators track Voice campaigns created using API requests. It displays request details, response status, campaign information, and recipient activity, making it easier to troubleshoot issues and monitor API-based Voice communication.
Report Components
| Component | Description |
|---|---|
| Date Range | Select the required date range to retrieve API report records. |
| API Report | Displays all Voice campaigns created through API integration. |
| Refresh | Reloads the latest API report records. |
| Export | Downloads the current API report for analysis. |
| Filter Records | Displays campaign records based on the selected filters. |
Available Information
Features
- Monitor Voice campaigns created through API.
- Track API request and response status.
- View recipient-level Voice call details.
- Filter records using a selected date range.
- Export API reports for analysis.
- Review campaign execution history.
Day Wise Statistics
The Voice Call Statistics report provides a summary of Voice delivery performance for a selected date range. It helps users monitor Voice call status, answered calls, failed calls, and overall campaign performance.
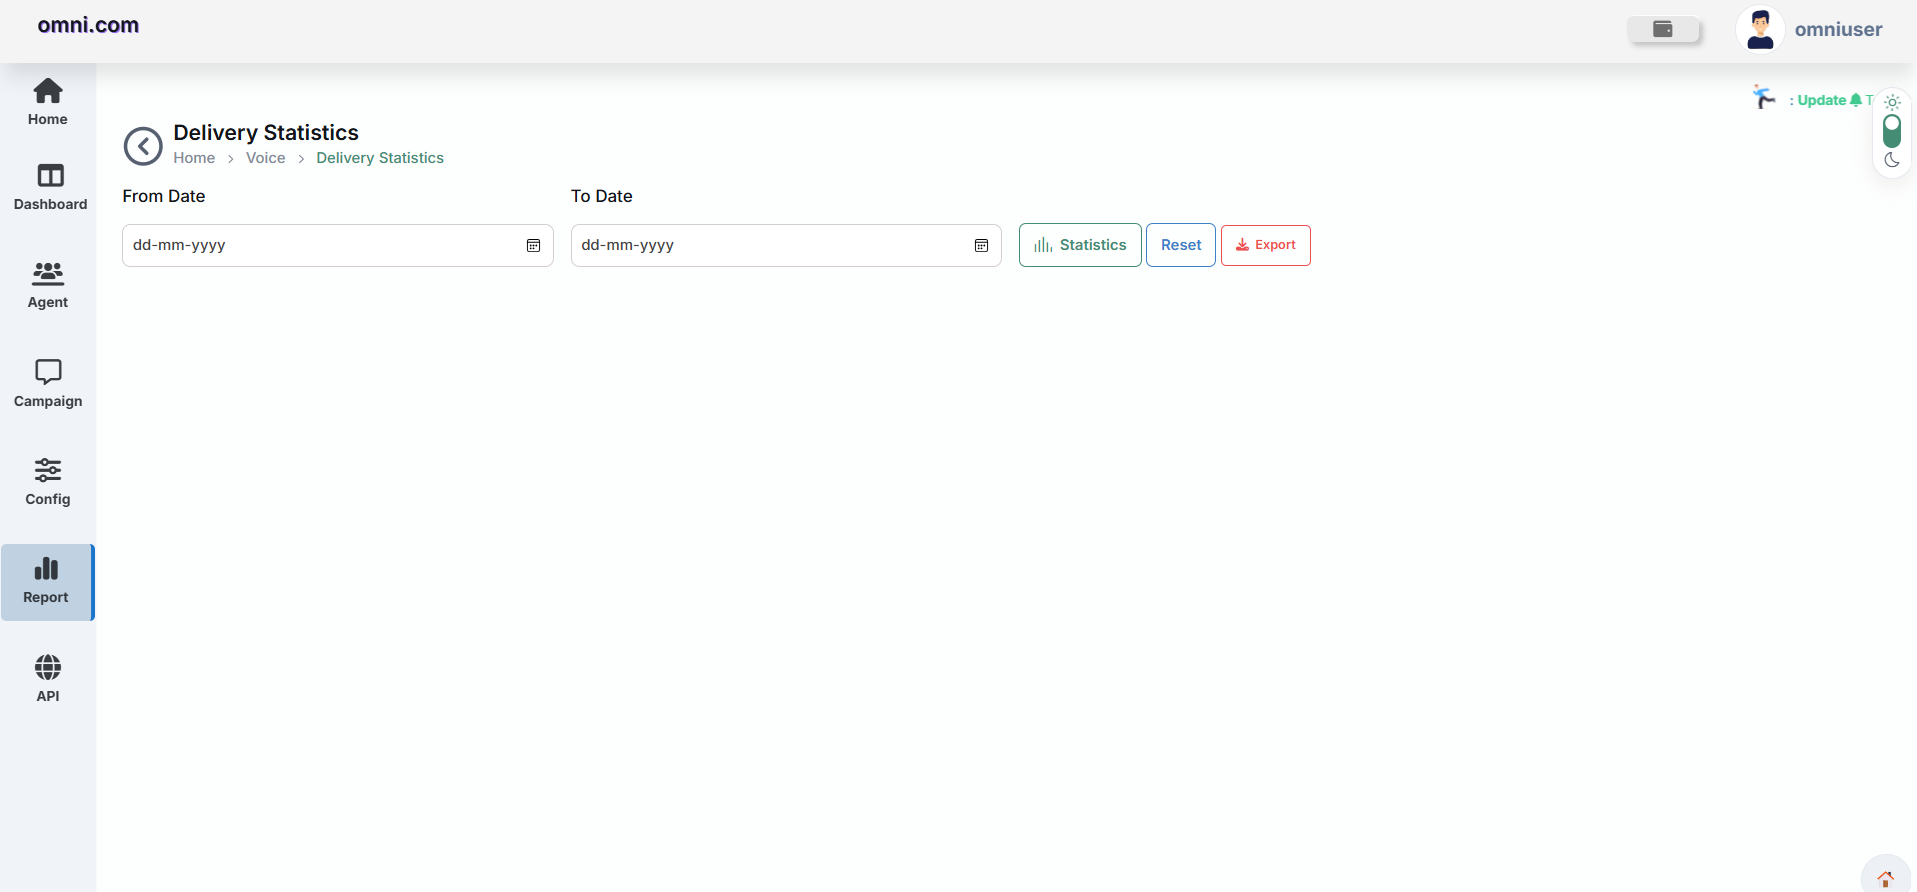
Voice Call Statistics Page
| Field | Description |
|---|---|
| From Date | Start date for the report |
| To Date | End date for the report |
| Statistics | Fetch delivery statistics for the selected period |
| Reset | Clear filters and reload default values |
| Export | Download the report |
Generate Delivery Statistics
- Select the From Date.
- Select the To Date.
- Click the Statistics button.
The system will generate delivery statistics for the selected date range.
Report Columns
- Received Date
- Pending
- Answered
- Not Answered
- Busy
- Failed
- Rejected
- Others
- Total
Resend Voice
The Resend Voice module allows users to retrieve previously executed Voice campaigns within a selected date range and resend voice calls to recipients. This feature is useful when calls fail, remain unanswered, or need to be reattempted.
Navigation
To access the Resend Voice page:
- Log in to the Omni Portal.
- Navigate to Report.
- Click Resend Voice Calls.
- The Resend Voice page opens.
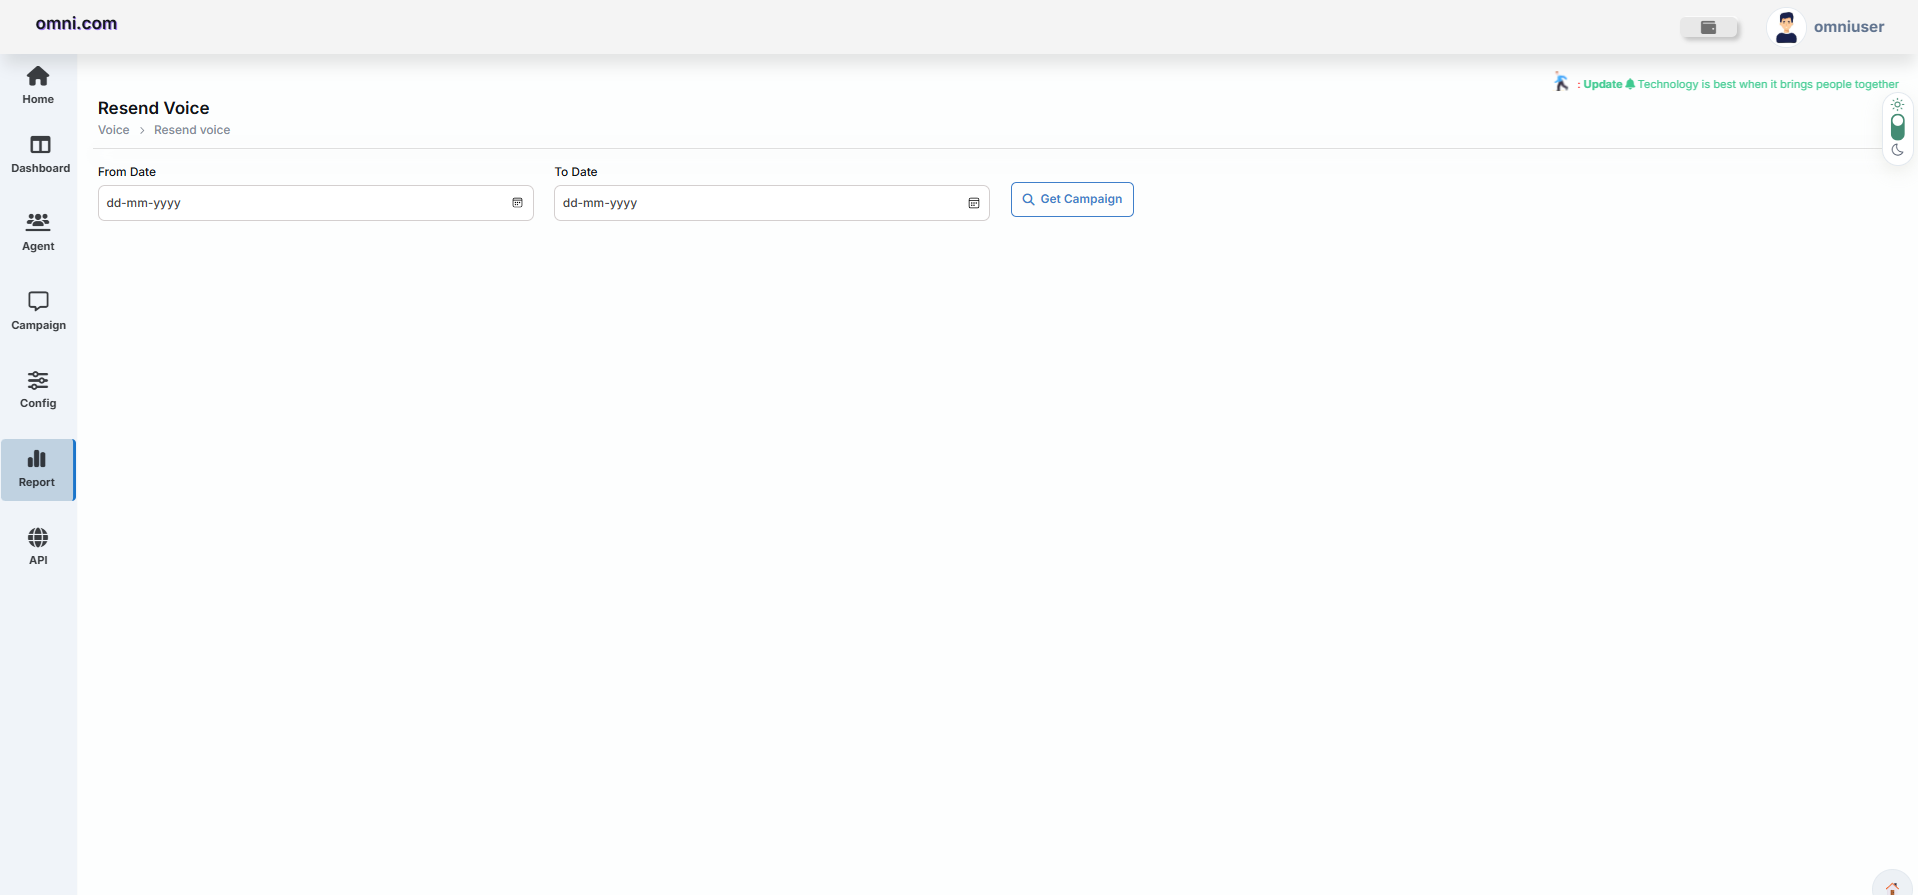
Search Campaign
Users can search for previously executed Voice campaigns by selecting a date range.
| Field | Description |
|---|---|
| From Date | Select the start date for the campaign search. |
| To Date | Select the end date for the campaign search. |
| Get Campaign | Retrieves all Voice campaigns executed within the selected date range. |
Steps to Retrieve Campaigns
Purpose
Features
- Search campaigns by date range.
- Retrieve historical Voice campaigns.
- Resend previously executed Voice calls.
- Reduce the need to recreate campaigns.
- Simple and quick campaign lookup.
- Easy date-based filtering.
- Both From Date and To Date must be selected before retrieving campaigns.
- Only campaigns available within the selected date range are displayed.
- Users can resend calls only from existing Voice campaigns.
- Resending Voice calls uses the original campaign configuration unless modified.
- This feature is intended for retrying previously executed campaigns rather than creating new ones.
Manage Agents
The Manage Agents module allows administrators to create, update, and manage agent accounts used within the Omni platform. Each agent is assigned login credentials, contact information, account validity, and product access permissions.
Administrators can also monitor agent status, edit agent information, and manage the account lifecycle from a centralized dashboard.
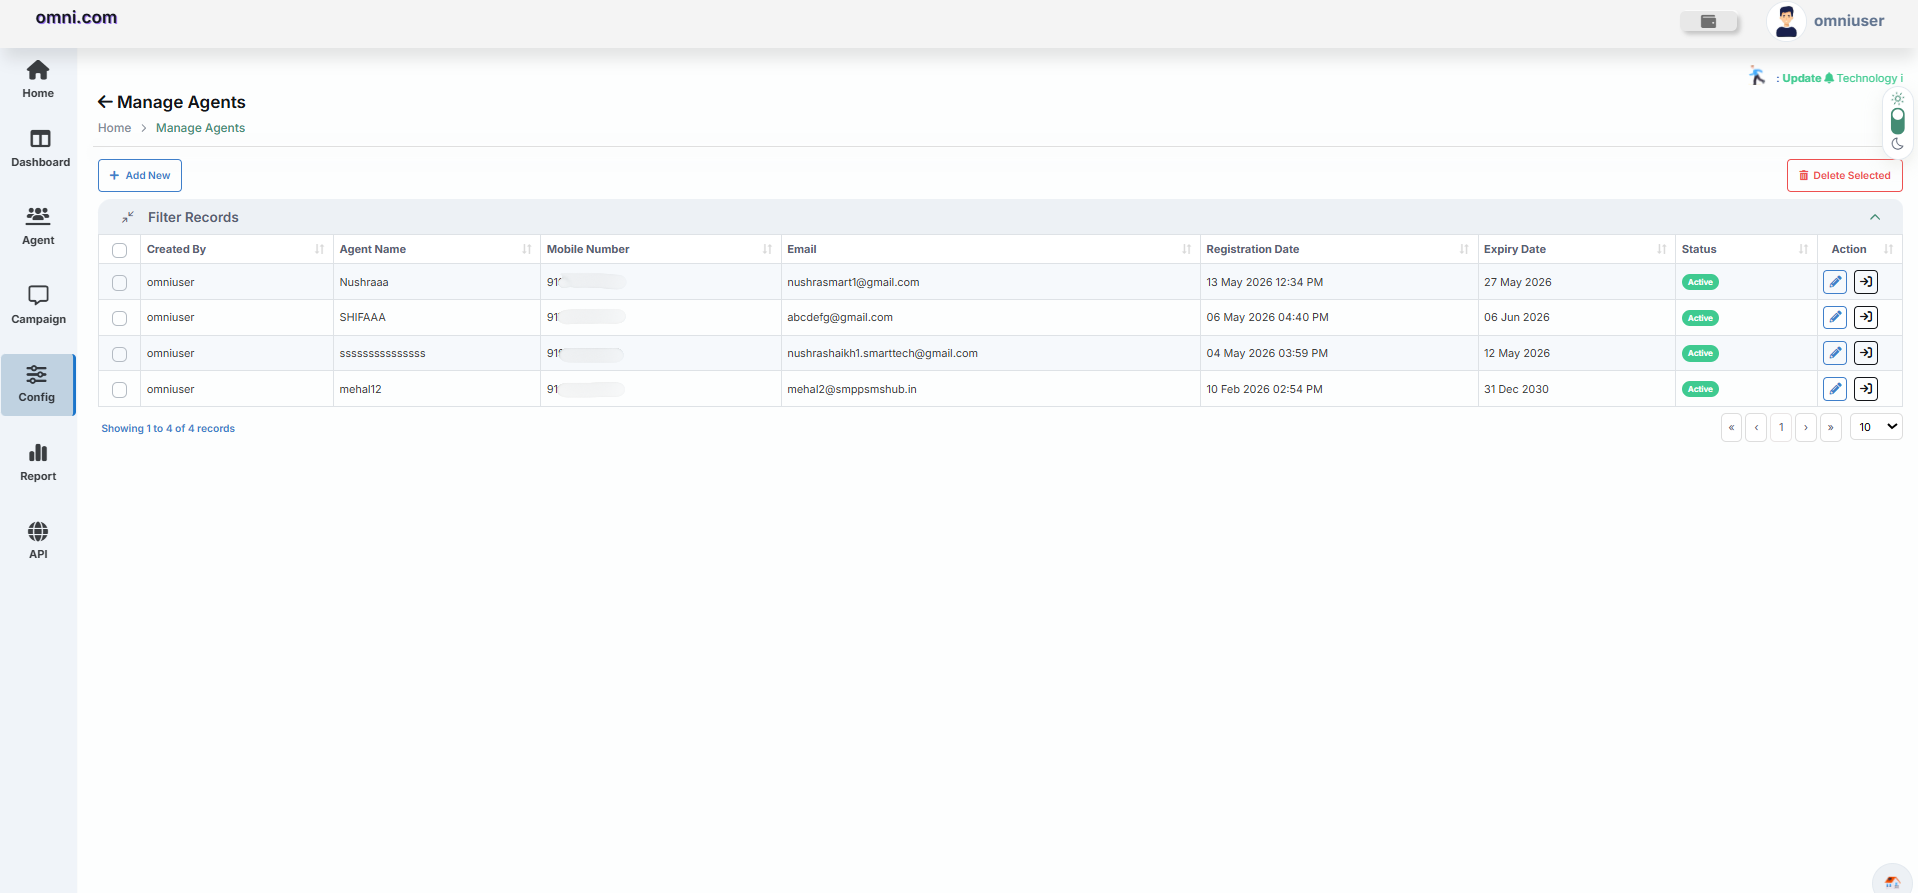
Manage Agents Dashboard
The Manage Agents page displays all registered agents along with their account information.
| Column | Description |
|---|---|
| Created By | Displays the administrator who created the agent account. |
| Agent Name | Shows the name of the registered agent. |
| Mobile Number | Displays the registered mobile number. |
| Shows the registered email address. | |
| Registration Date | Displays the account creation date and time. |
| Expiry Date | Indicates the account validity period. |
| Status | Displays whether the account is Active or Inactive. |
| Action | Provides options to Edit or Login as the selected agent. |
Available Actions
Add Agent
Click Add New to open the Add Agent window. This form is used to register a new agent in the system.
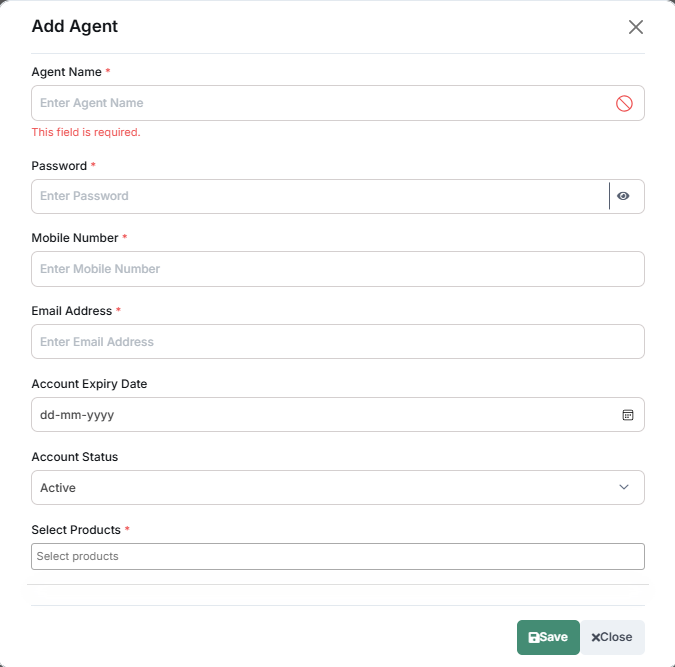
Configuration Fields
The Add Agent window contains all the fields required to register a new agent account. Administrators must provide the necessary information before saving the account.
| Field | Description |
|---|---|
| Agent Name | Enter the full name of the agent. This value is displayed throughout the platform. |
| Password | Create a secure password for the agent login. The password visibility icon can be used to show or hide the entered password. |
| Mobile Number | Enter the agent's registered mobile number. It is used for communication and authentication purposes. |
| Email Address | Provide a valid email address for account notifications and password recovery. |
| Account Expiry Date | Specify the date on which the agent account should expire. After expiry, the account cannot access the platform unless renewed. |
| Account Status | Select whether the account is Active or Inactive. Only active accounts can log in. |
| Select Products | Assign one or more products that the agent is authorized to access after login. |
Configuration Summary
Buttons
| Button | Description |
|---|---|
| Save | Creates the new agent account using the entered information. |
| Close | Closes the Add Agent window without saving any changes. |
Example
Manage Remarks
The Manage Remarks module allows administrators to create, update, and maintain remarks associated with different products within the Omni Portal. Remarks help classify call activities, reports, and workflows, ensuring consistent categorization across communication services.
Administrators can enable or disable remarks as required, making remark management simple and standardized across the platform.
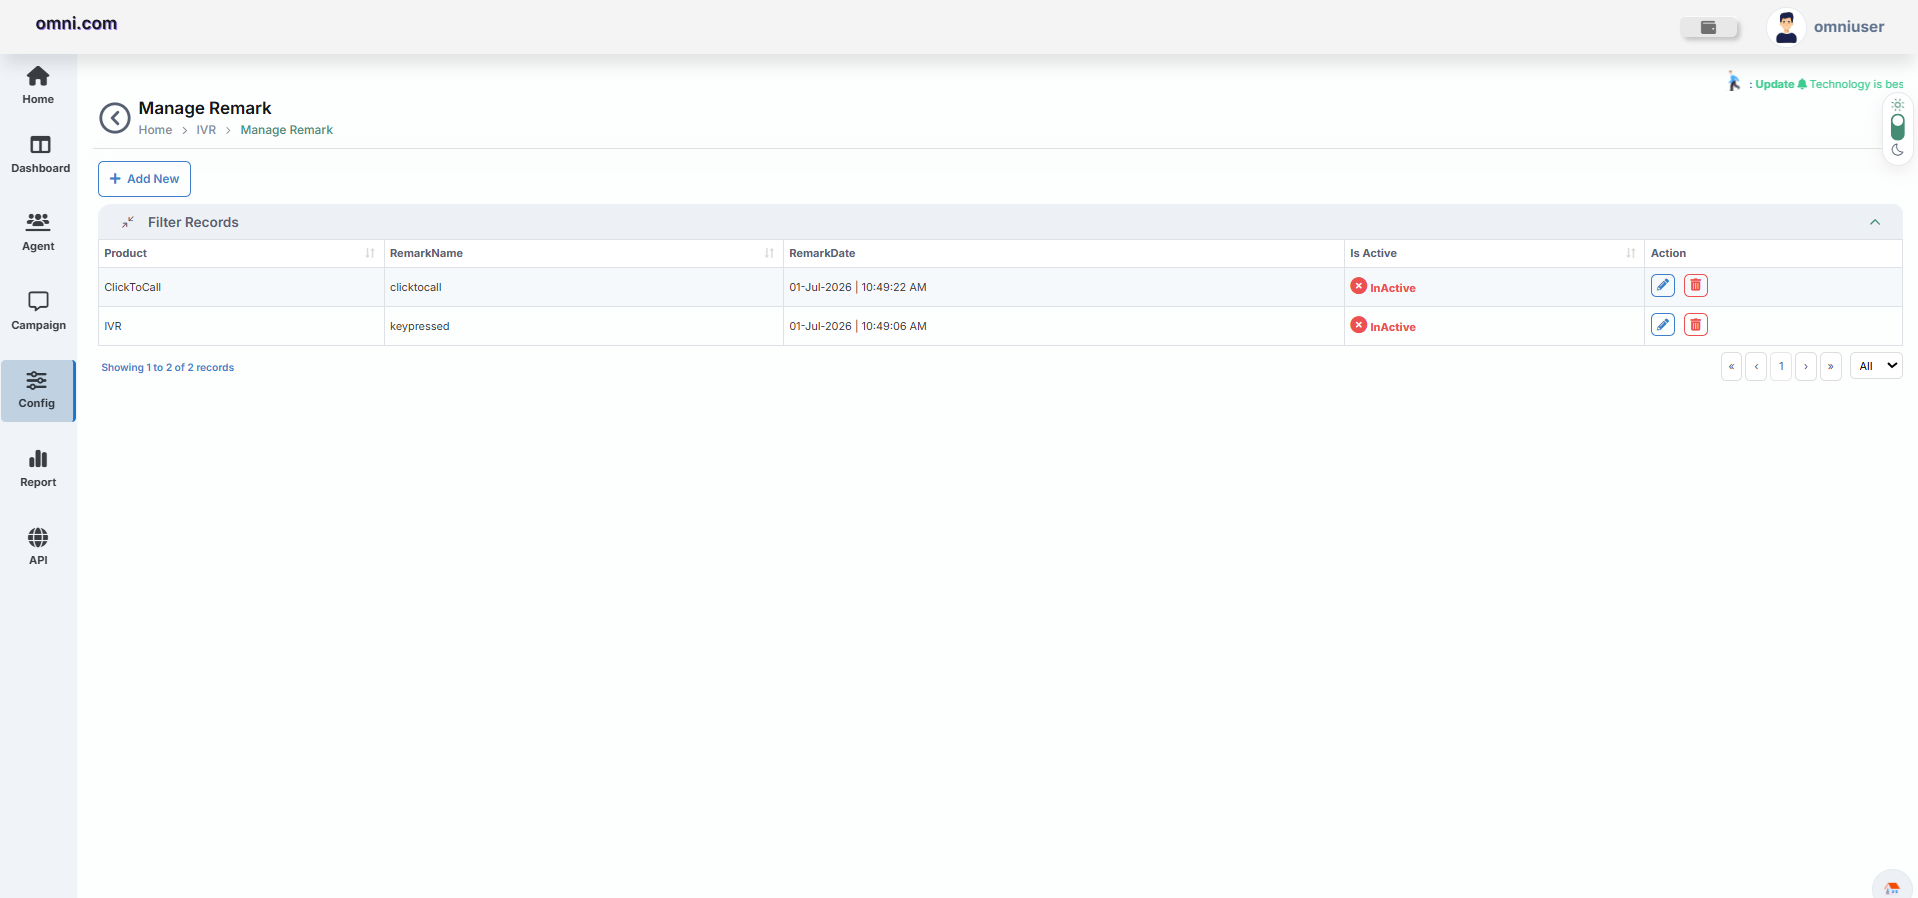
Manage Remarks Dashboard
The dashboard displays all configured remarks along with their product, creation details, status, and available actions.
| Column | Description |
|---|---|
| Product | Displays the product associated with the remark. |
| Remark Name | Shows the configured remark name. |
| Remark Date | Displays the creation date and time. |
| Is Active | Indicates whether the remark is currently active. |
| Action | Provides options to edit or delete the selected remark. |
Available Actions
Remark Detail
Clicking Add New or Edit opens the Remark Detail window. This form is used to create or modify a remark.
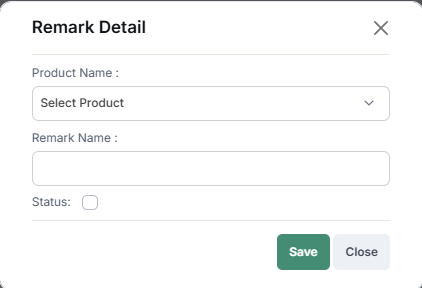
Configuration Fields
The Remark Detail window contains all the fields required to configure a new remark or update an existing one. Administrators must provide the necessary information before saving the remark.
| Field | Description |
|---|---|
| Product Name | Select the product to which the remark belongs. |
| Remark Name | Enter the name of the remark. This name will appear wherever remarks are used throughout the application. |
| Status | Enable or disable the remark. Checked = Active, Unchecked = Inactive. |
Configuration Summary
Buttons
| Button | Description |
|---|---|
| Save | Stores the configured remark in the system. |
| Close | Closes the Remark Detail window without saving changes. |
Example
Example Scenario
An administrator creates a remark named "Customer Requested Callback" under the IVR product.
Whenever an Voice activity requires this remark, users can select it from the available remark list during call processing or reporting.
Interactive Voice Response (IVR)
The Interactive Voice Response (IVR) module enables businesses to automate inbound and outbound customer interactions using voice prompts, keypad (DTMF) inputs, and intelligent call routing. It helps organizations provide self-service options, reduce agent workload, and deliver a seamless customer experience.
Key Features
Benefits of IVR
IVR Dashboard
The IVR Dashboard provides a real-time summary of IVR call activities and campaign performance. It displays important call statistics, call distribution, and balance information in a single view, allowing users to quickly monitor the overall health and performance of their IVR services.
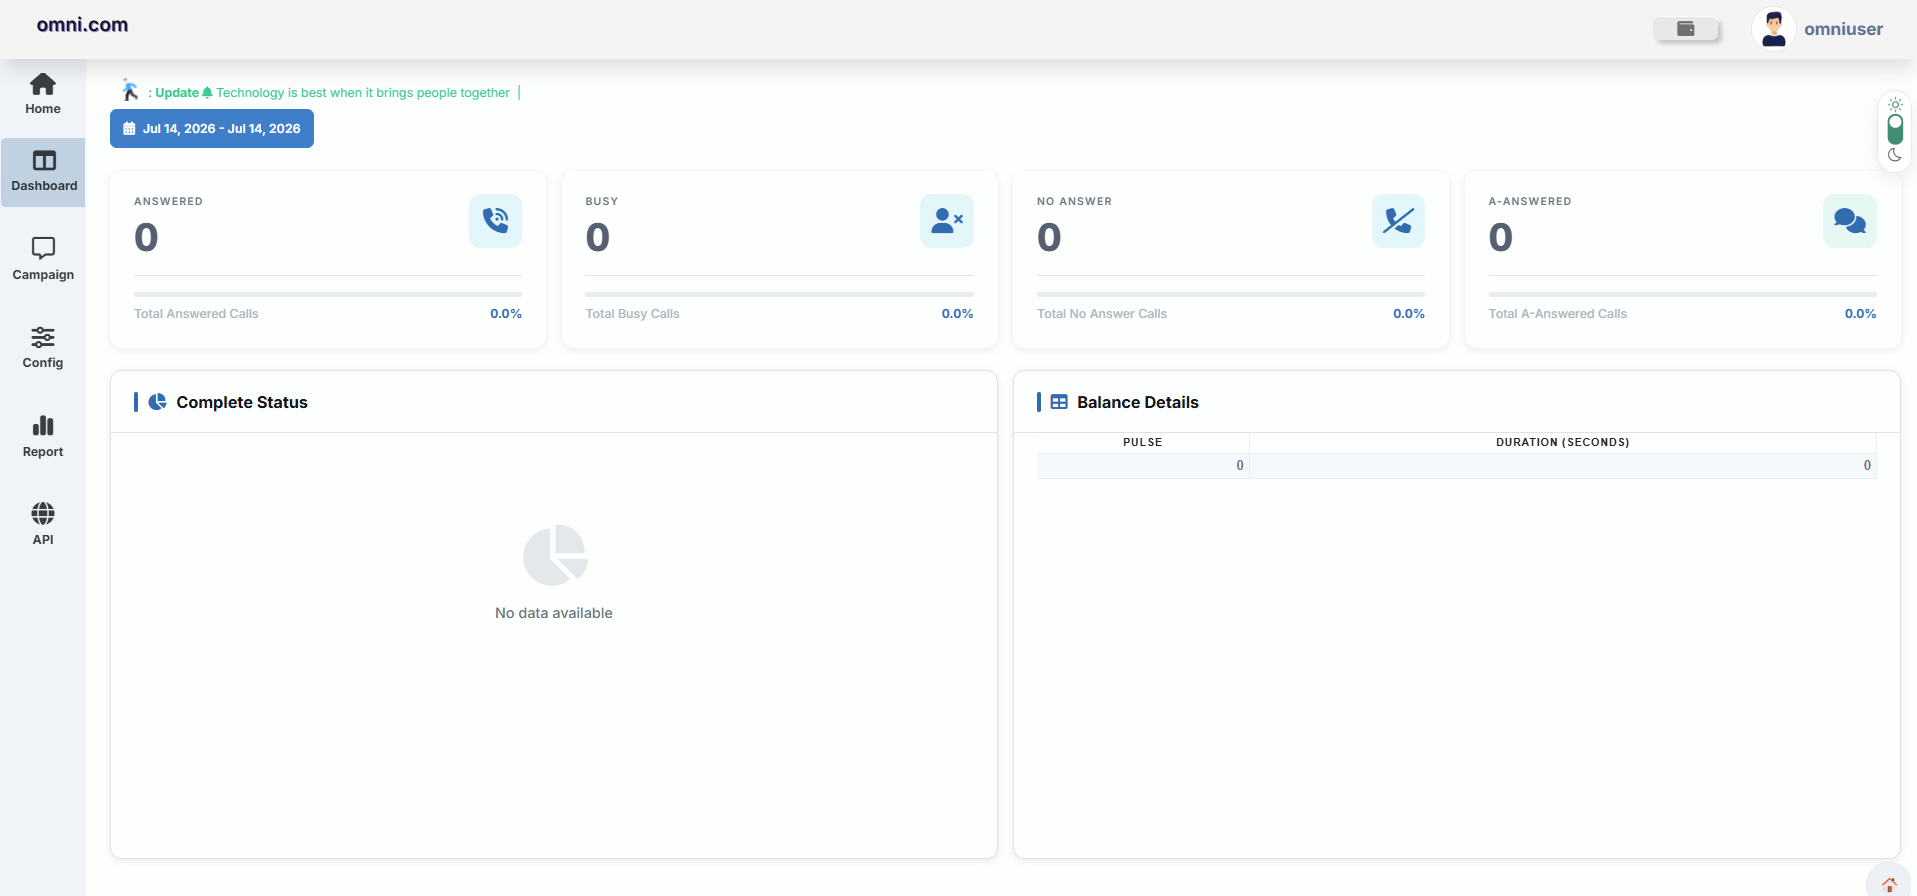
Navigation
IVR → Dashboard
Accessing the IVR Dashboard
Dashboard Components
| Component | Description |
|---|---|
| Date Range | Select a custom date range to display IVR statistics for a specific period. |
| Answered | Total number of successfully answered IVR calls. |
| Busy | Total number of calls that encountered a busy line. |
| No Answer | Total number of calls that were not answered. |
| Auto Answered | Calls automatically answered through the configured IVR workflow. |
| Complete Status | Graphical representation of IVR call outcomes including Answered, Busy, and No Answer. |
| Balance Details | Displays IVR resource usage such as billing pulses and total call duration. |
Key Features
Campaign
The Campaign module allows users to manage IVR flows used for inbound and outbound call handling. From this page, users can create new IVR flows, monitor existing flows, edit configurations, delete unused flows, and open the Flow Designer to modify call logic.
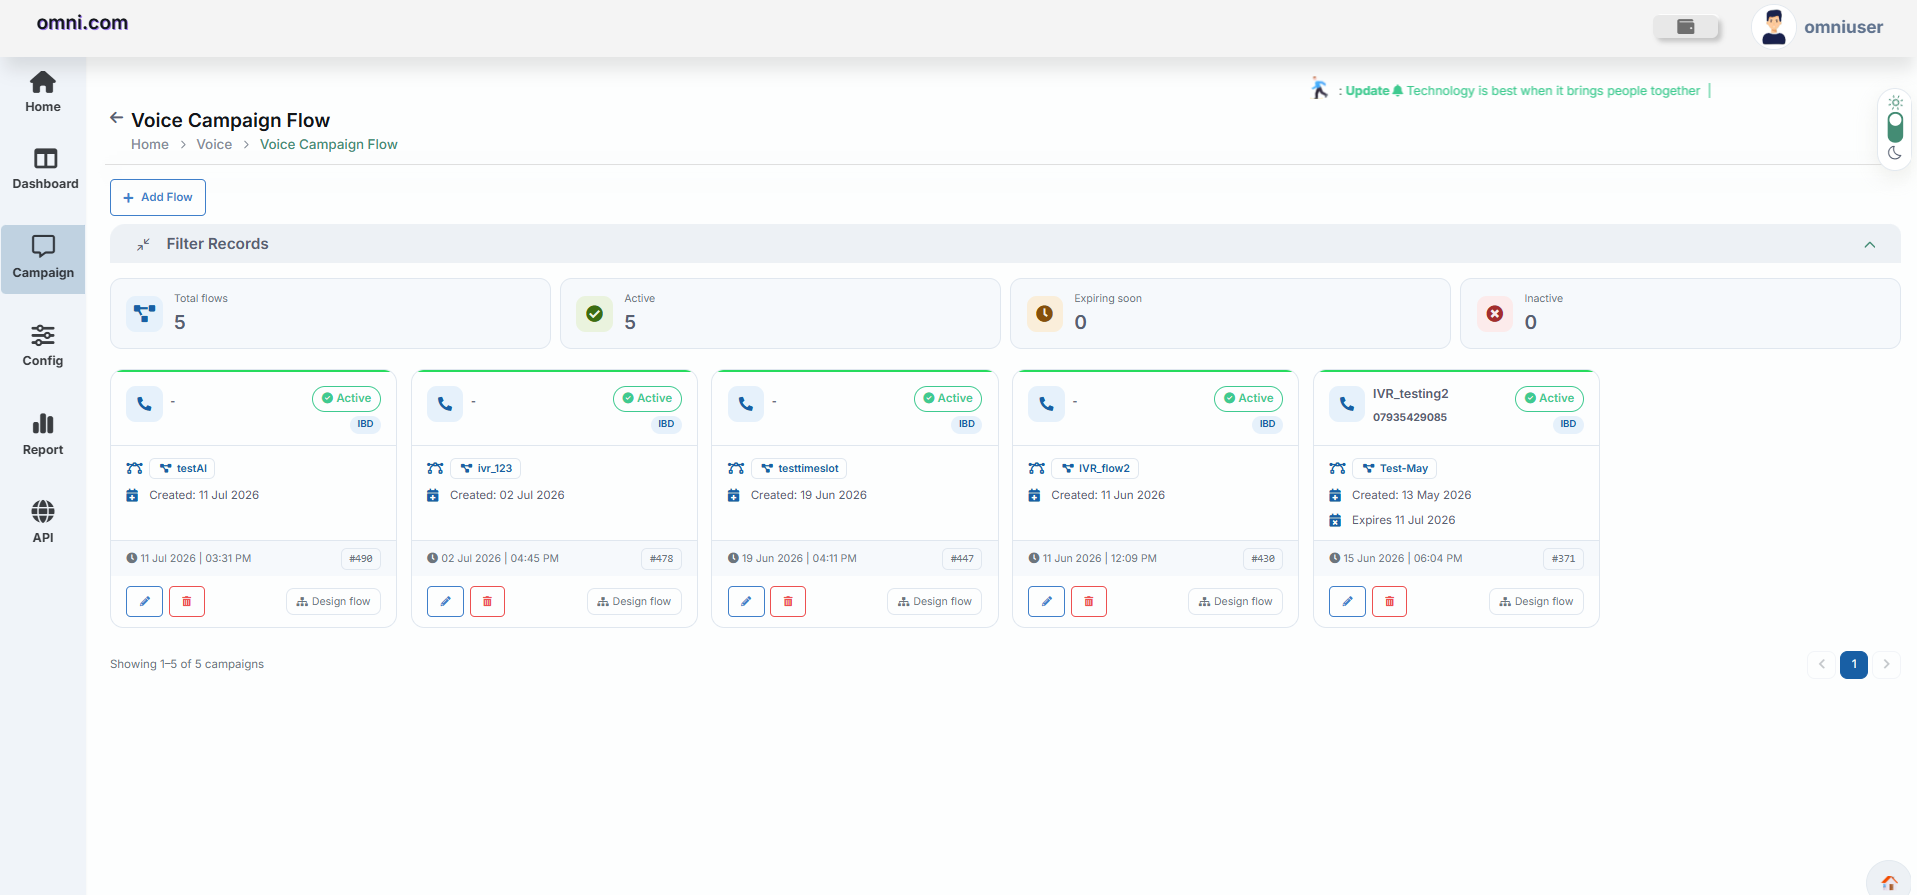
Navigation
- Log in to the Omni Portal.
- Select Campaign from the left navigation menu.
- The Campaign page opens displaying all configured IVR flows.
Add Flow
Click the Add Flow button to create a new IVR flow.
Filter Records
The Filter Records section helps users quickly search and locate IVR flows.
Campaign Summary
Summary cards displayed at the top provide a quick overview of all IVR flows.
| Card | Description |
|---|---|
| Total Flows | Total number of IVR flows available. |
| Active | Number of active IVR flows. |
| Expiring Soon | Flows approaching their expiry date. |
| Inactive | Number of inactive IVR flows. |
Flow Cards
Each IVR flow is displayed as an individual card containing important information and quick actions.
| Field | Description |
|---|---|
| Flow Name | Displays the name of the IVR flow. |
| Mobile Number | Shows the number associated with the IVR flow. |
| Status | Indicates whether the IVR flow is Active or Inactive. |
| Flow Type | Displays the IVR flow type such as IBD. |
| Created Date | Displays the date when the flow was created. |
| Expiry Date | Displays the expiry date of the IVR flow, if applicable. |
| Last Updated | Displays the most recent modification date and time. |
| Flow ID | Unique identifier assigned to each IVR flow. |
Flow Actions
Each flow card provides quick actions for managing the IVR flow.
Flow Designer
Clicking Design Flow opens the visual IVR Flow Designer where users can build or modify the complete IVR workflow.
Pagination
Pagination controls at the bottom of the page help users navigate through multiple IVR flow records efficiently.
Features
Notes
- Create meaningful flow names for easy identification.
- Regularly review Active and Expiring flows.
- Delete unused flows to keep the system organized.
- Always verify flow logic using the Flow Designer before deployment.
- Use the summary cards to quickly monitor overall IVR flow status.
Voice Files
The Voice Files module allows users to upload, manage, and organize audio files used in IVR campaigns. Uploaded voice files can be selected while creating IVR campaigns and played directly from the gallery for verification.
Navigation
To access the Voice Files page:
- Log in to the Omni Portal.
- Navigate to IVR.
- Click Voice Files from the left navigation menu.
- The Voice File Gallery page opens.
Upload Voice File
The top section allows users to upload a new IVR voice recording.
Steps to Upload
- Click Choose File.
- Select a supported WAV audio file.
- Click Upload.
- The uploaded file is added to the Voice File Gallery.
Supported File Format
| Property | Value |
|---|---|
| File Type | WAV |
| Bit Rate | 16 kbps |
| Sample Rate | 8000 Hz |
| Audio Channel | Mono |
WAV Converter
The WAV Converter button allows users to convert unsupported audio files into the required WAV format before uploading.
Voice File Gallery
All uploaded voice files are displayed in a searchable table.
| Column | Description |
|---|---|
| Media ID | Unique identifier of the uploaded voice file. |
| Date | Date and time when the file was uploaded. |
| Username | User who uploaded the file. |
| File Name | Name of the uploaded voice recording. |
| File Duration | Length of the recording. |
| Play | Preview the uploaded voice file. |
| Status | Current upload status. |
| Action | Delete the selected voice file. |
Audio Playback
Each uploaded file includes a built-in audio player that allows users to verify the recording before using it in an IVR campaign.
Users can:
- Play the recording.
- Pause playback.
- Seek to any position.
- Adjust playback using browser-supported controls.
This ensures the voice prompt is correct before using it in an IVR workflow.
Delete Voice File
To remove an uploaded voice file:
- Locate the required voice file.
- Click the Delete icon.
- Confirm the deletion.
- The selected file is permanently removed.
Features
Notes
- Only WAV (16 kbps, 8000 Hz, Mono) audio files are supported.
- Uploaded voice files are available while creating IVR campaigns.
- Voice recordings should be clear and free from background noise.
- Deleted voice files cannot be recovered.
- Always verify recordings using the built-in audio player before using them in IVR campaigns.
Components
The IVR Flow module allows users to create, manage, and monitor IVR call flows used in IVR campaigns. An IVR flow defines the sequence of actions performed during inbound or outbound calls, such as playing audio prompts, collecting DTMF input, transferring calls to agents, executing webhooks, and ending the call.
Navigation
To access the Voice Campaign Flow page:
- Log in to the Omni Portal.
- Navigate to Config.
- Click Components.
- Select Voice Campaign Flow.
- The Voice Campaign Flow page opens.
Create a New Flow
Users can create a new voice flow by clicking the Add Flow button.
Steps
- Click Add Flow.
- Enter the required flow information.
- Configure the desired call flow logic.
- Save the flow.
- The newly created flow is displayed in the campaign flow list.
Flow Summary
The top section provides an overview of all configured voice flows.
| Card | Description |
|---|---|
| Total Flows | Total number of configured voice flows. |
| Active | Number of active voice flows. |
| Expiring Soon | Flows approaching their expiration date. |
| Inactive | Number of inactive or disabled flows. |
Flow Cards
Each configured flow is displayed as an individual card containing its information.
| Field | Description |
|---|---|
| Flow Status | Indicates whether the flow is Active or Inactive. |
| Flow Type | Shows whether the flow is OBD or OBDIBD. |
| Flow Name | Name assigned to the voice flow. |
| Created Date | Date when the flow was created. |
| Created Time | Time of creation. |
| Flow ID | Unique identifier assigned to the voice flow. |
Actions
Edit Flow
Allows users to modify an existing voice flow.
- Click the Edit icon.
- Update the required information.
- Save the changes.
Delete Flow
Removes an existing voice flow.
- Click the Delete icon.
- Confirm the deletion.
- The selected flow is removed from the system.
Design Flow
The Design Flow button opens the visual Flow Designer where users can build and modify the voice call workflow using drag-and-drop components.
Users can configure:
- Welcome messages
- Audio playback
- DTMF input
- Voice menus
- Call routing
- Agent transfer
- Decision logic
- Call termination
- Custom workflow actions
Filter Records
The Filter Records section allows users to quickly locate specific voice flows using the available search criteria. This helps manage a large number of configured flows efficiently.
Features
Notes
- A flow must be configured before it can be used in a IVR Campaign.
- Only active flows are available for campaign selection.
- Each flow is assigned a unique Flow ID.
- Changes made using the Design Flow editor are reflected immediately after saving.
- Deleted flows cannot be restored.
Creating a Voice Campaign Flow
To create a new Voice Campaign Flow, click the Add Flow button available on the Voice Campaign Flow page.
The Add Voice Campaign popup appears, allowing users to enter the required campaign information.
Campaign Information
| Field | Description |
|---|---|
| Campaign Name | Name of the Voice Campaign. |
| Status | Enable or Disable the campaign. |
| Flow Type | Select the Voice Flow Type. |
Available Flow Types
Design Flow
After creating a campaign, click the Design Flow button to open the Flow Designer.
The Flow Designer provides a visual drag-and-drop interface for designing complete Voice Campaign workflows.
Flow Designer Includes
Nodes Information
Click Nodes Info in the Flow Designer to view all supported Voice Flow nodes. A popup window appears displaying every node that can be used while designing a Voice Campaign Flow.
Available Nodes
| Node | Description |
|---|---|
| Audio File | Plays an uploaded audio file. |
| Audio File with Dynamic DTMF | Collects dynamic user input. |
| Audio File with Gather DTMF | Performs actions based on DTMF key presses. |
| Agent Transfer | Transfers the call to configured agents. |
| Missed Call | Disconnects after the configured ringing wait. |
| Voice Recording | Records caller voice messages. |
| WebHook URL | Sends call data to external applications. |
| Time Validation | Executes actions based on configured business days and time. |
| Auto Reply | Sends automated notifications using third-party APIs. |
Purpose of Voice Flow Nodes
Nodes Information
The Nodes Information section displays all available nodes that can be added to a Voice Campaign Flow. To view the list, click Nodes Info or right-click the Start node in the Flow Designer. A menu appears containing all supported Voice Flow nodes.
Available Voice Flow Nodes
| Node | Description |
|---|---|
| Play Audio File | Plays a pre-recorded audio file to the caller. |
| Agent Transfer | Transfers the call to one or more configured agents. |
| Audio File with Gather DTMF | Routes callers based on keypad (DTMF) input. |
| Audio File with Dynamic DTMF | Captures dynamic numeric input such as customer IDs or mobile numbers. |
| Time Validation | Validates business days and operating hours before continuing the call. |
| Set Auto Reply | Sends automatic notifications using third-party APIs. |
| Set Webhook | Sends real-time call information to external applications. |
| Missed Call | Handles missed-call campaigns, callbacks and notifications. |
| Voice Recording | Records the caller's voice message after playing an audio prompt. |
| Call Repeat | Repeats the previously played audio message without additional configuration. |
Play Audio File Node
The Play Audio File node is used to play a pre-recorded voice message to callers during a Voice Campaign. It is commonly used for welcome messages, announcements, instructions, or promotional audio before directing callers to the next step in the flow.
How to Add the Node
- Open the Flow Designer.
- Right-click the Start Node.
- Select Play Audio File.
- The Node Settings panel opens.
Node Configuration
| Field | Description |
|---|---|
| Node Title | Name displayed on the node inside the Flow Designer. |
| Audio File | Select an existing uploaded audio prompt. |
| Upload File | Upload a new audio file directly from your computer. |
Purpose
Agent Transfer Node
The Agent Transfer node transfers an active call to one or more configured agents. It is used when callers need to speak directly with a live representative after completing the Voice flow.
How to Add the Node
- Open the Flow Designer.
- Right-click the required node.
- Select Agent Transfer.
- The Agent Transfer Configuration page opens.
Basic Information
| Field | Description |
|---|---|
| Node Title | Name displayed on the node inside the Flow Designer. |
| Pre-Sound File | Select an audio prompt to play before transferring the call. |
| Upload Voice File | Upload a new audio prompt if required. |
Call Forwarding Configuration
| Setting | Description |
|---|---|
| Call Recording | Enable or disable recording of transferred calls. |
| Sticky Agent | Route repeat callers to the same agent whenever possible. |
| Call Mode | Select the routing strategy for agent assignment. |
| Agent Numbers | Select one or more primary agents. |
| Additional Agent Numbers | Add backup agents for overflow handling. |
Available Call Modes
No Response / No Match
Configure the actions performed when no agent answers or the call cannot be completed.
| Setting | Description |
|---|---|
| Wrong Input Audio | Audio played when an invalid action occurs. |
| Error Audio | Audio played when the transfer fails. |
| Retry Attempts | Maximum number of retry attempts. |
| Retry Delay | Delay before the next retry attempt. |
Purpose
Gather DTMF Node
The Audio File with Gather DTMF node allows callers to interact with the Voice system by pressing keypad numbers (DTMF). Based on the selected key, the call is routed to different nodes within the Voice Campaign Flow.
How to Add the Node
- Open the Flow Designer.
- Right-click the required node.
- Select Audio File with Gather DTMF.
- The Node Settings page opens.
Basic Settings
| Field | Description |
|---|---|
| Node Title | Name displayed on the node in the Flow Designer. |
| Audio File | Select an uploaded audio prompt. |
| Upload File | Upload a new audio prompt if required. |
DTMF Inputs
Configure an action for each keypad number. Every key can be connected to another node in the Voice Campaign Flow.
| DTMF Key | Purpose |
|---|---|
| 0 | Connect to another configured node. |
| 1 | Connect to another configured node. |
| 2 | Connect to another configured node. |
| 3 | Connect to another configured node. |
| 4 | Connect to another configured node. |
| 5 | Connect to another configured node. |
| 6 | Connect to another configured node. |
| 7 | Connect to another configured node. |
| 8 | Connect to another configured node. |
| 9 | Connect to another configured node. |
No Response / No Match
Configure the behavior when the caller does not press any key or enters an invalid option.
| Setting | Description |
|---|---|
| Wrong Input Audio | Audio played when the caller presses an invalid key. |
| Error Audio | Audio played when no valid input is received. |
| Retry Attempts | Maximum number of retry attempts allowed. |
| Retry Delay | Delay before replaying the menu. |
Purpose
The Gather DTMF node allows callers to navigate through Voice menus by pressing keypad numbers.
Example
Dynamic DTMF Node
The Audio File with Dynamic DTMF node is used to collect dynamic numeric input from callers during a Voice Campaign. Unlike the Gather DTMF node, this node captures a sequence of digits such as customer IDs, account numbers, mobile numbers, PINs, or other numeric values before continuing the call flow.
How to Add the Node
- Open the Flow Designer.
- Right-click the required node.
- Select Audio File with Dynamic DTMF.
- The Dynamic DTMF Settings page opens.
Node Configuration
| Field | Description |
|---|---|
| Node Title | Name displayed on the node inside the Flow Designer. |
| Audio File | Select the voice prompt that asks callers to enter information. |
| Upload File | Upload a new audio prompt directly from your computer. |
| Number of Digits | Specify the maximum number of digits the caller can enter. |
| Waiting Timeout | Maximum time the system waits for caller input. |
Purpose
How It Works
- The system plays the configured audio prompt.
- The caller enters the required digits using the phone keypad.
- The system validates the entered digits.
- After successful input, the Voice Campaign continues to the next connected node.
Time Validation Node
The Time Validation node verifies whether an incoming call is received during the configured business days and operating hours. If the current day and time match the configured schedule, the call continues to the next node. Otherwise, an error audio message can be played or the call can be stopped or redirected according to the configured flow.
Overview
This node is useful for ensuring that callers can access services only during defined working hours.
Configuration
| Field | Description |
|---|---|
| Node Text Title | Specifies the display name of the node within the Flow Designer. |
| Upload File | Upload an audio file that will be played when the call is received outside business hours. |
| Open Time - Close Time | Configure the working hours for each day of the week. |
Business Hours Configuration
Configure the business schedule individually for every day of the week.
- Enable or disable each day.
- Select an error audio file.
- Configure the opening time.
- Configure the closing time.
- Only enabled days are considered during validation.
Example
Purpose
Auto Reply Node
The Auto Reply node sends automated notifications to callers, called numbers, or agents based on predefined call events. Notifications are delivered using an external third-party API, helping organizations automatically inform users about call status updates without manual intervention.
Configuration
| Field | Description |
|---|---|
| Node Text Title | Defines the node name displayed within the Flow Designer. |
| HTTP Method | Select the request method used for the API call. |
| Third Party API | Specify the API endpoint responsible for sending notifications. |
| API Headers | Configure request headers such as Authorization, Content-Type and API Keys. |
| Request Payload Type | Select how request parameters are transmitted. |
Supported HTTP Methods
Supported Payload Types
- Query Parameters
- JSON Body
- Form Data
Caller Notification
Enable automated notifications for the caller when selected call events occur.
| Setting | Description |
|---|---|
| Enable / Disable | Turn caller notifications on or off. |
| Call Status | Select the call event that triggers the notification. |
| Notification Message | Configure the message sent to the caller. |
Called Notification
Enable SMS or notifications for the called party.
- Select Call Status.
- Specify Recipient Mobile Numbers.
- Configure the Auto Reply Message.
Agent Notification
Automatically notify assigned agents during selected call events.
- Select Call Status.
- Configure Notification Message.
- Select the Recipient Agent.
Example
Webhook URL Node
The Webhook URL node sends real-time call information to external applications whenever selected call events occur. It enables seamless integration with CRM systems, helpdesk software, ERP applications, databases, and other custom business services.
Configuration
| Field | Description |
|---|---|
| Node Text Title | Specify the display name of the node. |
| API Headers | Configure authentication headers required by the destination application. |
| HTTP Method | Select the HTTP request method. |
| Callback URL | Specify the API endpoint that will receive webhook data. |
| Trigger on Call Status | Select the call events that trigger the webhook. |
| Request Payload Type | Select the format used to send webhook data. |
Supported HTTP Methods
Trigger on Call Status
One or more call events can be selected to trigger the webhook request.
Request Payload
Select the payload format used to send data to the external application.
- Query Parameters
- JSON Body
- Form Data
Supported Dynamic Parameters
Dynamic variables are automatically replaced with actual call values when the Voice Campaign is executed.
| Parameter | Description |
|---|---|
| Caller Number | Mobile number of the caller. |
| Called Number | Destination number. |
| Call Duration | Total duration of the call. |
| Call Status | Current status of the call. |
| Agent Name | Name of the connected agent. |
| Recording URL | URL of the recorded call (if available). |
Purpose
Missed Call Node
The Missed Call node manages missed-call activities by playing an audio message after a configurable ringing duration and disconnecting the call. It also supports voice notifications, automatic replies, and spam protection for missed-call campaigns.
Overview
This node is commonly used for lead generation, callback requests, customer registration, promotional campaigns, and missed-call services.
Configuration
| Field | Description |
|---|---|
| Node Text Title | Specify the display name of the node. |
| Select Audio File | Choose an existing audio file or upload a new one. |
| Ringing Wait | Specify the number of rings before the system answers the call. |
Activity Settings
Configure activity limits to prevent misuse of the missed-call service.
- Maximum missed calls allowed per caller.
- Maximum missed calls allowed per day.
Voice Notification
Enable voice notifications for users who give a missed call.
| Configuration | Description |
|---|---|
| Select OBD Flow | Select the outbound voice flow to trigger. |
| Third-Party API | Configure the API used for notifications. |
| Spam Protection | Prevent repeated voice notifications. |
| Maximum Replies Per Day | Limit the number of notifications sent each day. |
Auto Reply Settings
Automatically send SMS responses after a missed call.
| Setting | Description |
|---|---|
| Enable Auto Reply | Enable or disable automatic SMS replies. |
| Auto Reply Text | Configure the SMS message sent to the caller. |
| Third Party API | Select the API responsible for sending SMS. |
| Spam Protection | Prevent duplicate SMS notifications. |
| Daily Reply Limit | Limit the number of replies sent to a caller each day. |
Example Workflow
Purpose
Voice Recording Node
The Voice Recording node plays an audio prompt and records the caller's voice response. Recording begins after the beep sound and continues until the caller presses # or the configured timeout expires.
Overview
This node is useful for collecting customer feedback, complaints, survey responses, voice messages, and other spoken information during a Voice Campaign.
Configuration
| Field | Description |
|---|---|
| Node Text Title | Specify the display name of the node inside the Flow Designer. |
| Select Audio File | Select an existing audio prompt or upload a new audio file. |
| Waiting Timeout | Specify the maximum recording duration before recording stops automatically. |
Recording Behaviour
Recording automatically stops when one of the following conditions is met:
- The caller presses #.
- The configured waiting timeout expires.
Example Workflow
Purpose
Call Repeat Node
The Call Repeat node repeats the previously played audio message whenever the caller reaches this node. It is useful when callers need another opportunity to hear instructions before making a selection.
Overview
Unlike other nodes, the Call Repeat node does not require any additional audio file because it automatically replays the most recently played voice prompt.
Configuration
| Field | Description |
|---|---|
| Node Text Title | Specify the display name of the node inside the Flow Designer. |
| Additional Configuration | No additional configuration is required. The node automatically repeats the previously played audio. |
Example Flow
Purpose
Manage Agents
The Manage Agents module allows administrators to create, update, and manage IVR agent accounts used for handling IVR calls and customer interactions. Each agent is assigned login credentials, contact information, account validity, and IVR access permissions.
Administrators can monitor agent status, edit agent information, assign IVR-related products, and manage the complete account lifecycle from a centralized dashboard.
Manage Agents Dashboard
The Manage Agents page displays all registered agents along with their account information.
| Column | Description |
|---|---|
| Created By | Displays the administrator who created the agent account. |
| Agent Name | Shows the name of the registered agent. |
| Mobile Number | Displays the registered mobile number. |
| Shows the registered email address. | |
| Registration Date | Displays the account creation date and time. |
| Expiry Date | Indicates the account validity period. |
| Status | Displays whether the account is Active or Inactive. |
| Action | Provides options to Edit or Login as the selected agent. |
Available Actions
Add Agent
Click Add New to open the Add Agent window. This form is used to register a new agent in the system.
Configuration Fields
The Add Agent window contains all the fields required to register a new agent account. Administrators must provide the necessary information before saving the account.
| Field | Description |
|---|---|
| Agent Name | Enter the full name of the agent. This value is displayed throughout the platform. |
| Password | Create a secure password for the agent login. The password visibility icon can be used to show or hide the entered password. |
| Mobile Number | Enter the agent's registered mobile number. It is used for communication and authentication purposes. |
| Email Address | Provide a valid email address for account notifications and password recovery. |
| Account Expiry Date | Specify the date on which the agent account should expire. After expiry, the account cannot access the platform unless renewed. |
| Account Status | Select whether the account is Active or Inactive. Only active accounts can log in. |
| Select Products | Assign one or more products that the agent is authorized to access after login. |
Configuration Summary
Buttons
| Button | Description |
|---|---|
| Save | Creates the new agent account using the entered information. |
| Close | Closes the Add Agent window without saving any changes. |
Example
Manage Remarks
The Manage Remarks module allows administrators to create, update, and maintain remarks associated with IVR activities within the Omni Portal. Remarks help classify IVR call outcomes, reports, and workflows, ensuring consistent categorization across IVR services.
Administrators can enable or disable remarks as required, making IVR remark management simple, organized, and standardized.
Manage Remarks Dashboard
The dashboard displays all configured IVR remarks along with their product, creation details, status, and available actions.
| Column | Description |
|---|---|
| Product | Displays the product associated with the remark. |
| Remark Name | Shows the configured remark name. |
| Remark Date | Displays the creation date and time. |
| Is Active | Indicates whether the remark is currently active. |
| Action | Provides options to edit or delete the selected remark. |
Available Actions
Remark Detail
Clicking Add New or Edit opens the Remark Detail window. This form is used to create or modify a remark.
Configuration Fields
The Remark Detail window contains all the fields required to configure a new remark or update an existing one. Administrators must provide the necessary information before saving the remark.
| Field | Description |
|---|---|
| Product Name | Select the product to which the remark belongs. Select the IVR product to which the remark belongs.. |
| Remark Name | Enter the name of the remark. This name will appear wherever remarks are used throughout the application. |
| Status | Enable or disable the remark. Checked = Active, Unchecked = Inactive. |
Configuration Summary
Buttons
| Button | Description |
|---|---|
| Save | Stores the configured remark in the system. |
| Close | Closes the Remark Detail window without saving changes. |
Example
Example Scenario
An administrator creates a remark named "Customer Requested Callback" under the IVR product.
Whenever an IVR activity requires this remark, users can select it from the available remark list during call processing or reporting.
IVR CDR Report
The IVR CDR (Call Detail Record) Report provides a comprehensive view of all IVR call activities handled through the Omni Portal. It enables users to monitor inbound and outbound IVR calls, review detailed call information, analyze call performance, and export call records for reporting purposes.
This report serves as a centralized location for tracking IVR call history and helps administrators monitor call outcomes, troubleshoot issues and maintain communication records.
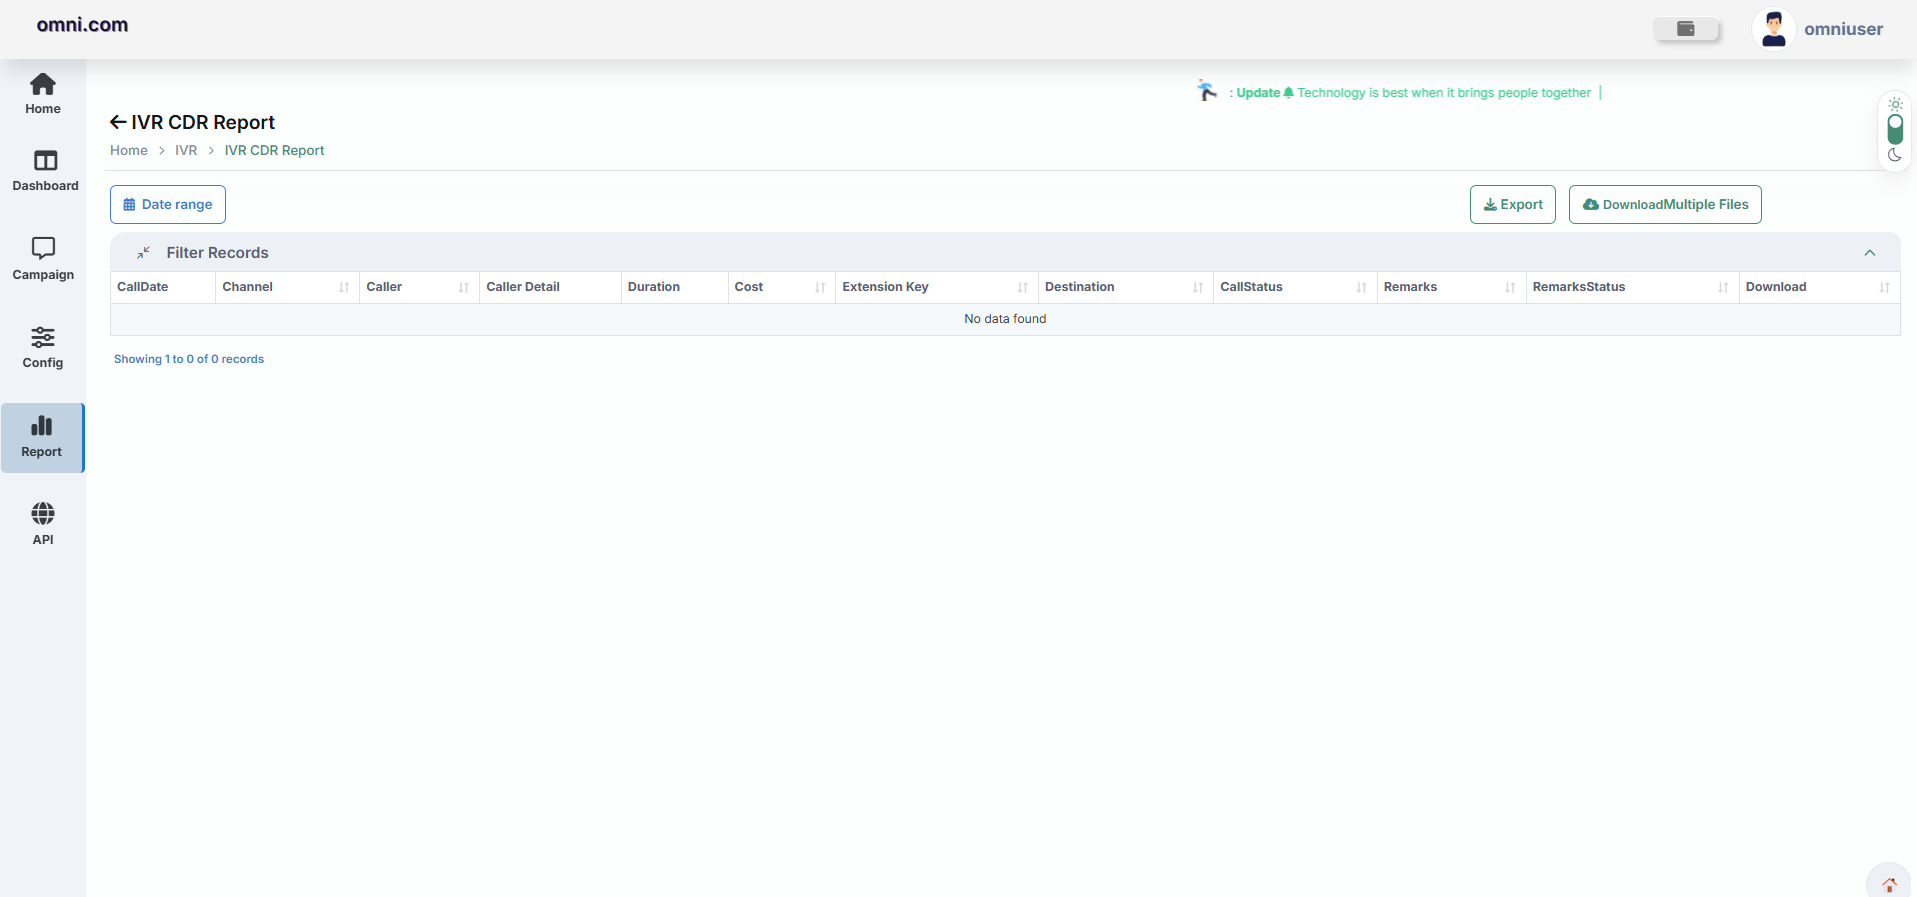
Navigation
Accessing the IVR CDR Report
Page Components
Date Range
The Date Range filter allows users to retrieve IVR call records for a specific period. Selecting an appropriate date range helps narrow down report results and simplifies report analysis.
Filter Records
The report displays detailed information for each IVR call in a tabular format.
| Field | Description |
|---|---|
| Call Date | Date and time when the IVR call was initiated. |
| Channel | Communication channel or IVR line used for the call. |
| Caller | Caller's mobile or telephone number. |
| Caller Detail | Additional caller information such as Circle and Operator (if available). |
| Duration | Total duration of the IVR call. |
| Cost | Call charges associated with the IVR call. |
| Extension Key | Extension or IVR option selected during the call. |
| Destination | Destination number or endpoint connected by the IVR. |
| Call Status | Current status of the call (Answered, Busy, Failed, Missed etc.). |
| Remarks | Additional information or notes related to the call. |
| Remarks Status | Displays the status of remarks added to the call. |
| Download | Download the corresponding call recording, if available. |
Export Report
The Export button allows users to download the displayed IVR CDR records in a supported file format. This feature is useful for maintaining records, sharing reports, and performing offline analysis.
Download Multiple Files
The Download Multiple Files option enables users to download multiple IVR call recordings simultaneously instead of downloading each recording individually.
Pagination
When the report contains a large number of records, pagination controls are available at the bottom of the page to navigate between report pages.
Use Cases
IVR Statistics Report
The IVR Statistics Report provides a summarized view of IVR campaign performance. It allows users to generate statistical reports for a selected campaign within a specific date range.
The report helps analyze call activity, monitor campaign effectiveness, and review overall IVR performance.
Unlike the IVR CDR Report, which displays detailed call-level records, the IVR Statistics Report presents campaign-level statistics and performance metrics.
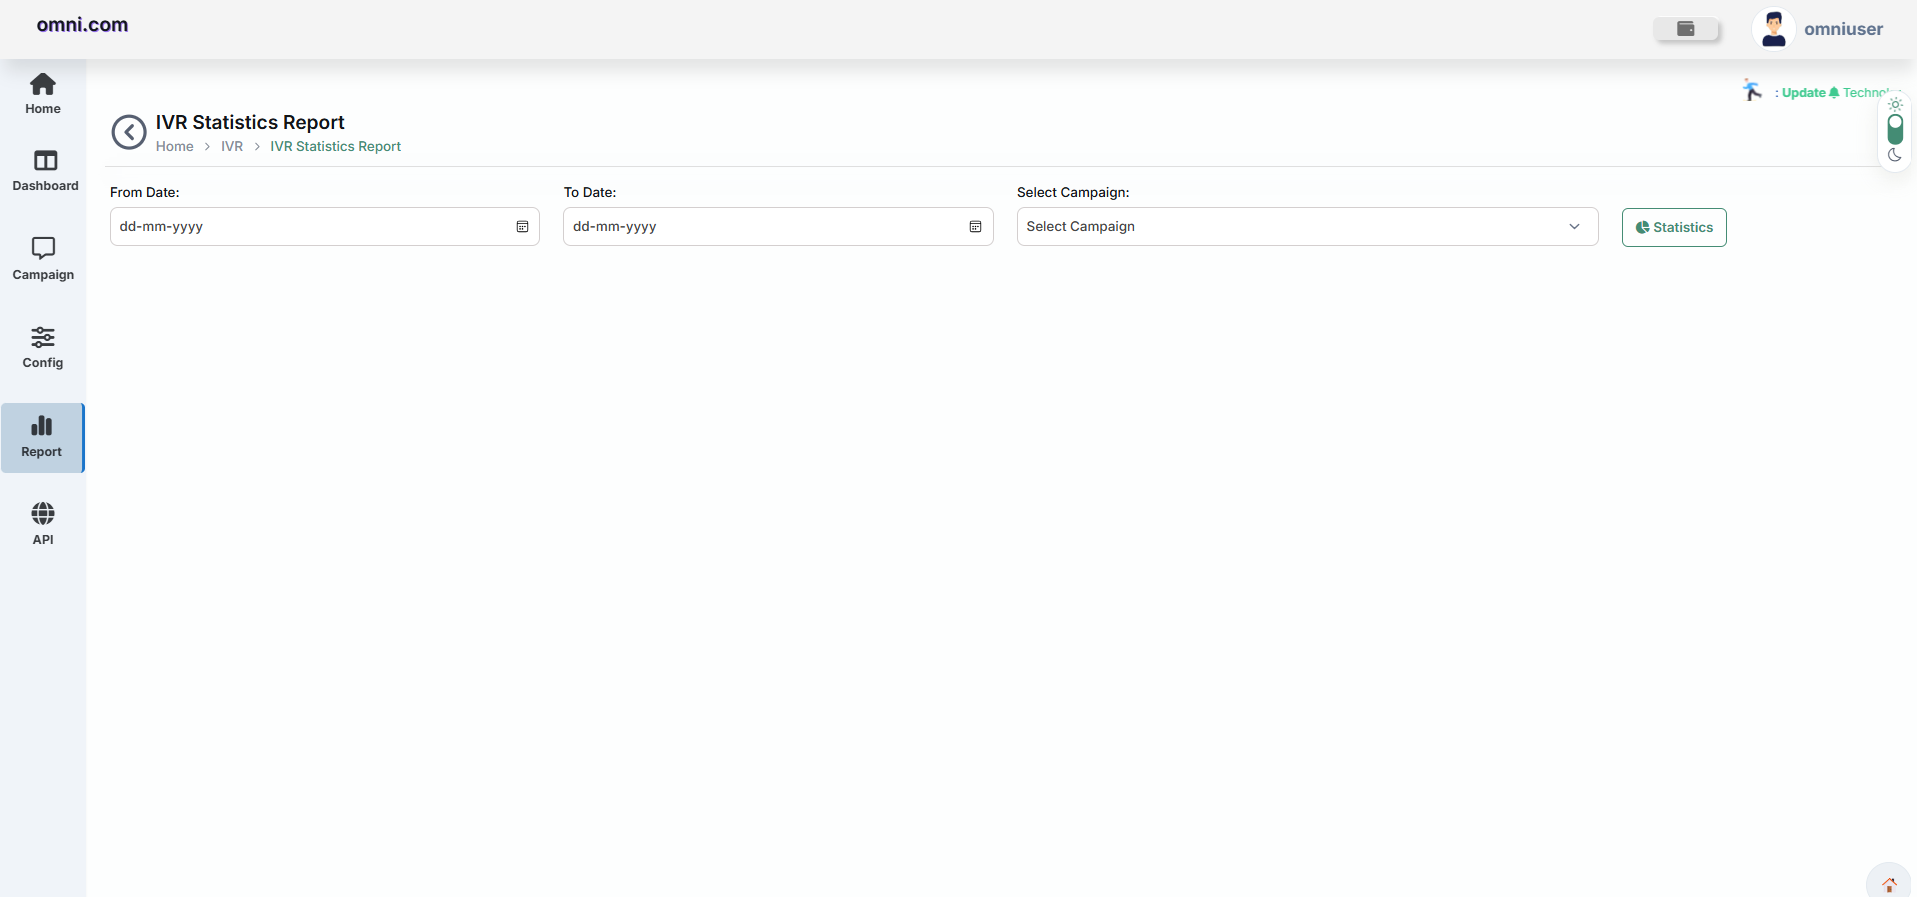
Navigation
Accessing the IVR Statistics Report
- Log in to the Omni Portal.
- Click Report from the left navigation menu.
- Select CDRs Statistics under the Analytics Report section.
- The IVR Statistics Report page opens.
Page Components
| Component | Description |
|---|---|
| From Date | Select the starting date for the report. |
| To Date | Select the ending date for the report. |
| Select Campaign | Choose the IVR campaign whose statistics you want to analyze. |
| Statistics Button | Click the Statistics button to generate the report. |
Click To Call (CTC)
The Click To Call (CTC) module enables businesses to instantly connect with customers by initiating phone calls directly from the Omni Portal. It simplifies customer communication by allowing users to launch, monitor, and manage click-to-call campaigns from a single platform.
Overview
The Click To Call (CTC) module enables organizations to initiate outbound calls directly from the Omni Portal. It provides a centralized interface to manage agents, create campaigns, monitor live call activities, configure call remarks, and analyze campaign performance through comprehensive reports. The module helps improve customer communication while providing supervisors with complete visibility into Click To Call operations.
Key Features
Capabilities
| Module | Description |
|---|---|
| Dashboard | Provides a real-time overview of Click To Call campaign activity. |
| Campaign | Allows users to create, configure, and manage Click To Call campaigns. |
| Reports | Displays campaign performance, call statistics, and detailed call records. |
Benefits
Notes
- Click To Call provides quick customer connectivity without manual dialing.
- Campaigns can be monitored using the Dashboard.
- Reports help evaluate campaign performance and call statistics.
- Ensure the recipient phone numbers are valid before launching campaigns.
- Verify agent availability before launching a campaign.
- Ensure customer phone numbers are accurate.
- Monitor active calls using the Agent Monitoring module.
- Review campaign reports regularly to evaluate call performance.
- Maintain predefined remarks to ensure consistent customer interactions.
Agent Configuration
Before creating a Click To Call Campaign, an Agent must be created and configured in the system. Agents are responsible for handling outbound calls initiated through Click To Call campaigns. Without an active agent, campaigns cannot be executed.
Navigation
Follow the steps below to create a new agent.
- Log in to the Omni Portal.
- Click Config from the left navigation menu.
- The System Configuration page opens.
- Click Manage Agents.
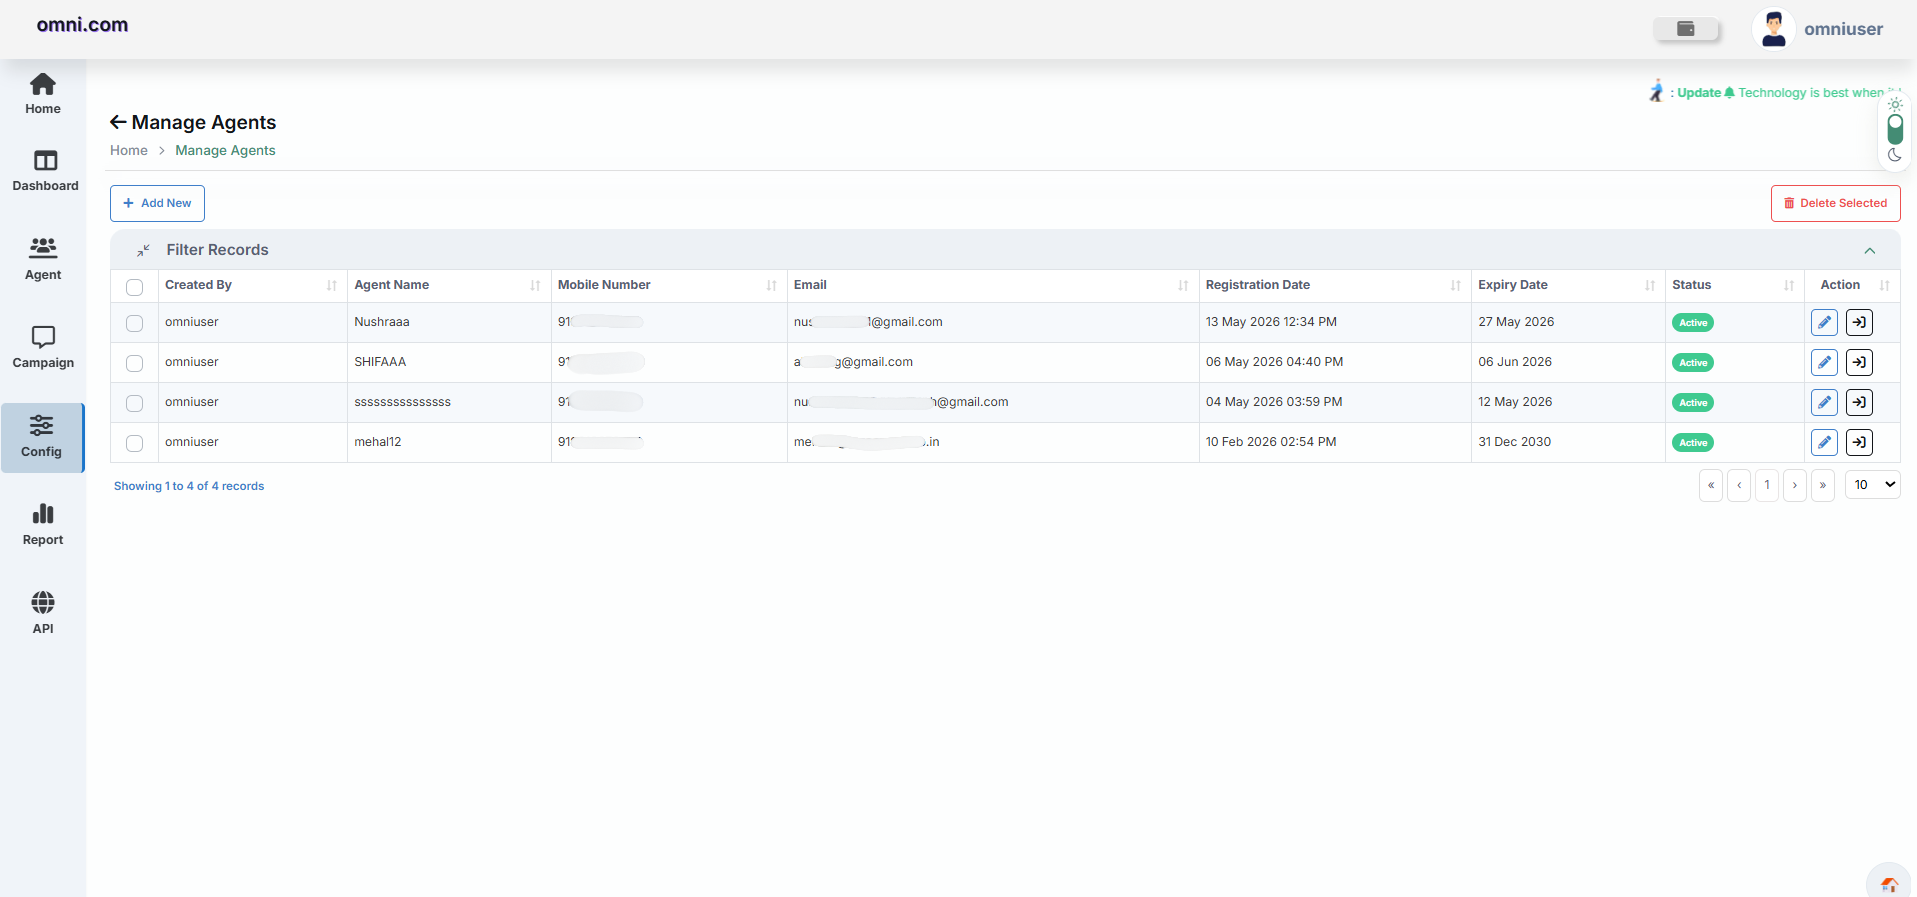
Manage Agents
The Manage Agents page displays all existing agents configured in the system. From this page, users can create, edit, search, and delete agents.
| Feature | Description |
|---|---|
| View Agents | Displays all registered agents. |
| Search | Search and filter existing agents. |
| Edit | Modify existing agent details. |
| Delete | Remove an existing agent. |
| Add New | Create a new agent account. |
Add New Agent
Click the Add New button located at the top-left of the Manage Agents page.
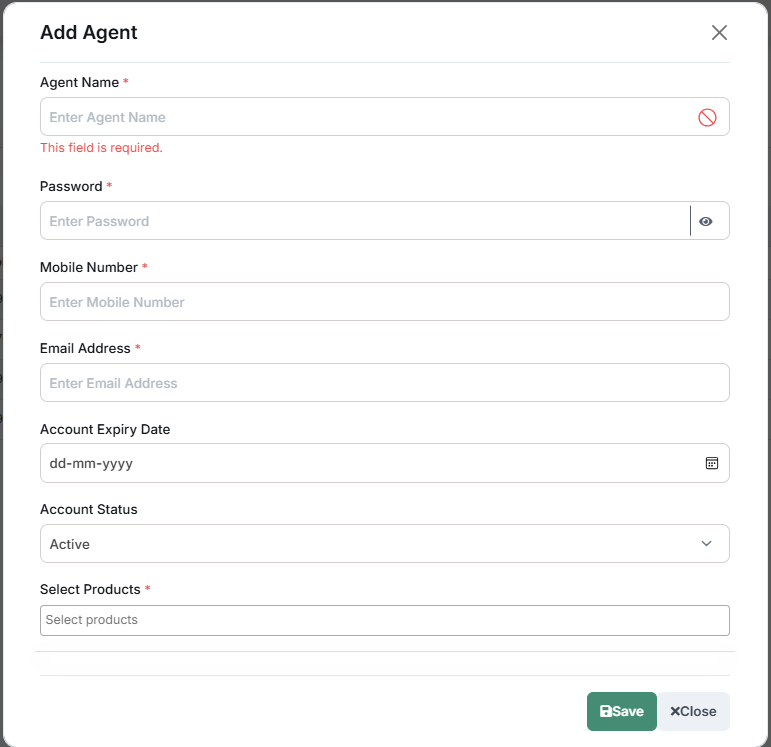
The Add Agent popup window appears where you can enter the required agent information.
Agent Information
| Field | Description |
|---|---|
| Agent Name | Enter a unique name for the agent. |
| Password | Create a secure password for agent login. |
| Mobile Number | Enter the agent's contact number. |
| Email Address | Enter the agent's email address. |
| Account Expiry Date | Select the account expiry date. |
| Account Status | Choose Active or Inactive. |
| Select Products | Assign Click To Call and other required products. |
Save Agent
- Enter all mandatory information.
- Select the required products.
- Click Save.
- The new agent is added to the Manage Agents list.
Features
Click To Call Campaign
The Click To Call Campaign module enables users to create and manage outbound calling campaigns directly from the Omni Portal. It provides a centralized interface to configure campaign settings, assign agents, upload recipient numbers, and initiate outbound calls efficiently.
Overview
The Click To Call Campaign module is designed to simplify outbound customer communication by allowing organizations to create and launch calling campaigns from a single interface. Users can configure campaign information, assign one or more agents, select the required caller ID, upload recipient numbers, configure call behavior, and originate outbound calls directly from the portal. The module supports both Auto Call Dialing and Manual Outbound Calling, making it suitable for both automated and agent-assisted calling operations.
Create outbound calling campaigns, assign agents, configure campaign settings, upload recipient numbers, and initiate calls from a centralized interface.
Navigation
- Log in to the Omni Portal.
- Open the Click To Call module.
- Click Campaign.
- The Campaign Details page opens.
Campaign Details
The Campaign Details page is used to configure all information required before creating a Click To Call campaign. Users can define campaign information, assign agents, configure call behavior, upload recipient phone numbers, and specify campaign options before initiating outbound calls.
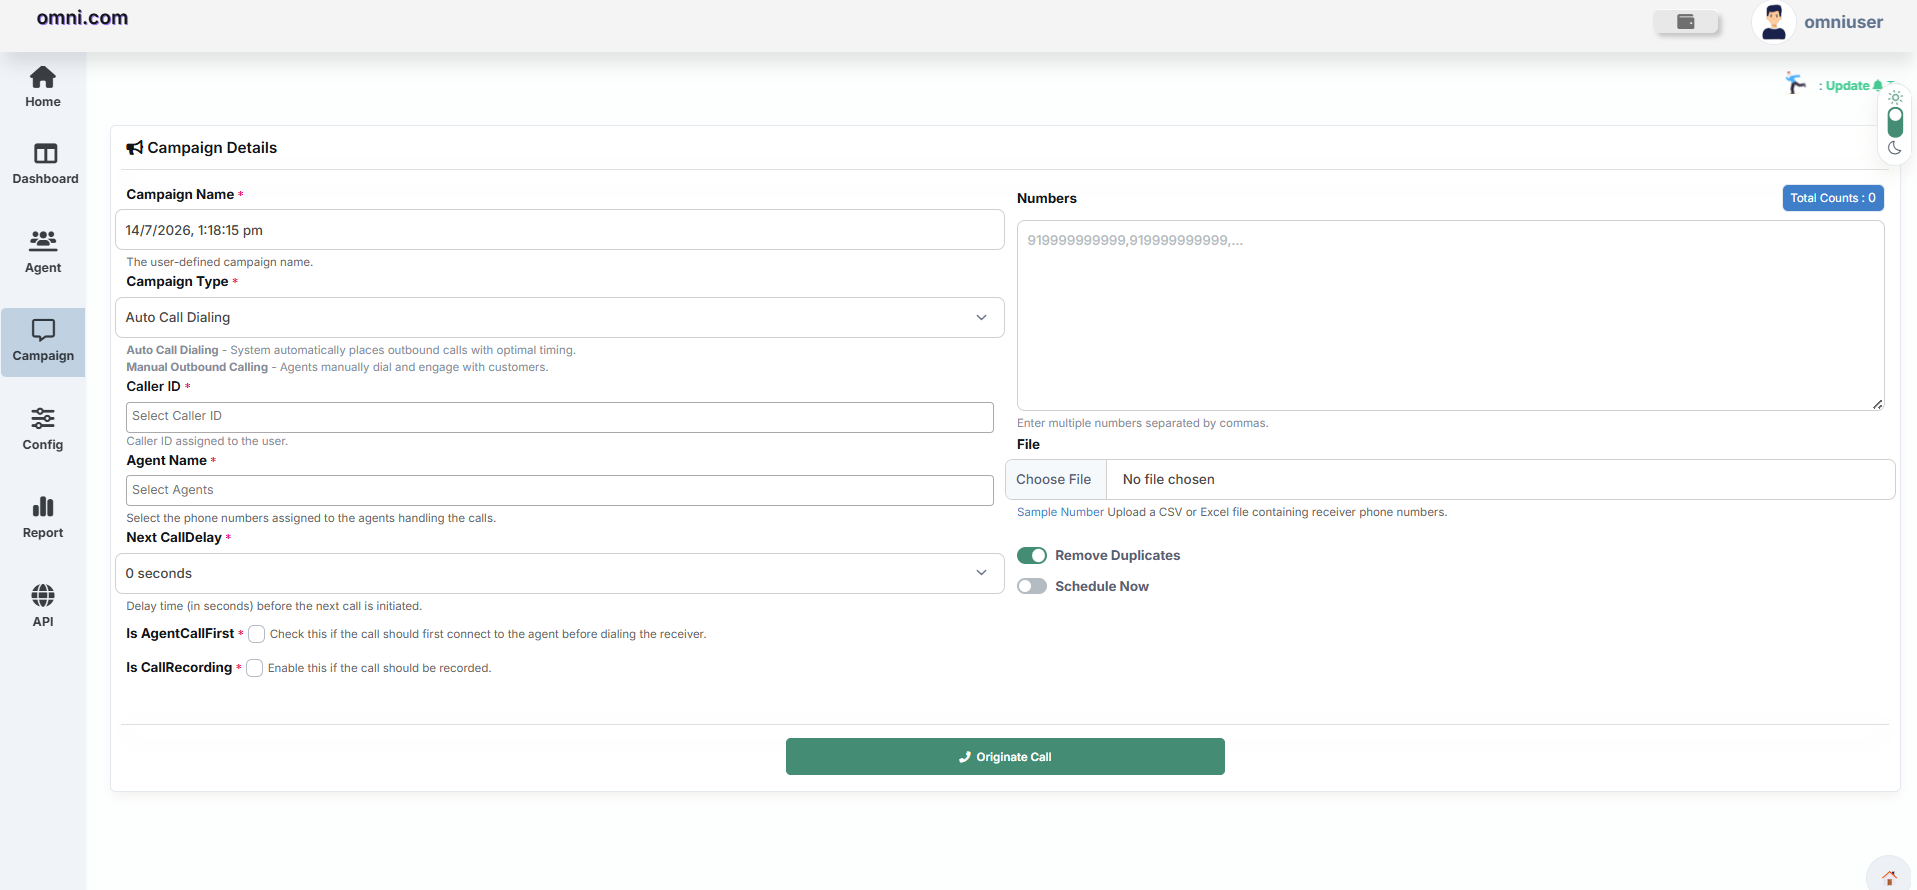
Campaign Configuration
Before launching a campaign, complete the required configuration fields. These settings determine how the campaign will operate, which agents will participate, and how outbound calls will be processed.
| Field | Description |
|---|---|
| Campaign Name | Enter a unique name to identify the campaign. |
| Campaign Type | Select either Auto Call Dialing or Manual Outbound Calling. |
| Caller ID | Select the caller ID that will be displayed to recipients. |
| Agent Name | Select one or more agents who will handle outbound calls. |
| Next Call Delay | Specify the delay before the next outbound call is initiated. |
| Numbers | Enter recipient phone numbers separated by commas. |
| File Upload | Upload a CSV or Excel file containing recipient phone numbers. |
| Remove Duplicates | Automatically removes duplicate phone numbers before the campaign starts. |
| Schedule Now | Starts the campaign immediately after it has been created. |
| Agent Call First | Connects the assigned agent before dialing the recipient. |
| Call Recording | Records conversations for quality monitoring, auditing, and future reference. |
Verify the campaign information, assigned agents, and recipient phone numbers before proceeding to create the campaign.
Campaign Types
The Click To Call Campaign module supports two campaign types. Each campaign type is designed for different outbound calling requirements and provides flexibility based on business needs.
Auto Call Dialing
Auto Call Dialing automatically places outbound calls according to the configured campaign settings without requiring manual intervention from agents. Once the campaign is launched, the system processes recipient numbers, initiates calls, and manages call execution automatically. This campaign type is suitable for organizations that need to contact a large number of recipients efficiently.
Recommended Use Cases
- Promotional campaigns
- Customer notifications
- Customer surveys
- Bulk outbound calling
Manual Outbound Calling
Manual Outbound Calling enables agents to manually initiate outbound calls after the campaign has been created. Instead of automatically placing calls, the system creates the campaign and waits for the assigned agent to start each outbound call individually. This campaign type provides greater control over customer interactions and is commonly used when personalized communication is required.
Recommended Use Cases
- Customer support
- Sales follow-up
- Lead verification
- Personalized customer communication
Originate Call
After completing all campaign information, verify the campaign details, assigned agents, recipient phone numbers, and campaign options. Click Originate Call to continue. The system validates the campaign configuration and displays the Campaign Summary dialog before the campaign is created.
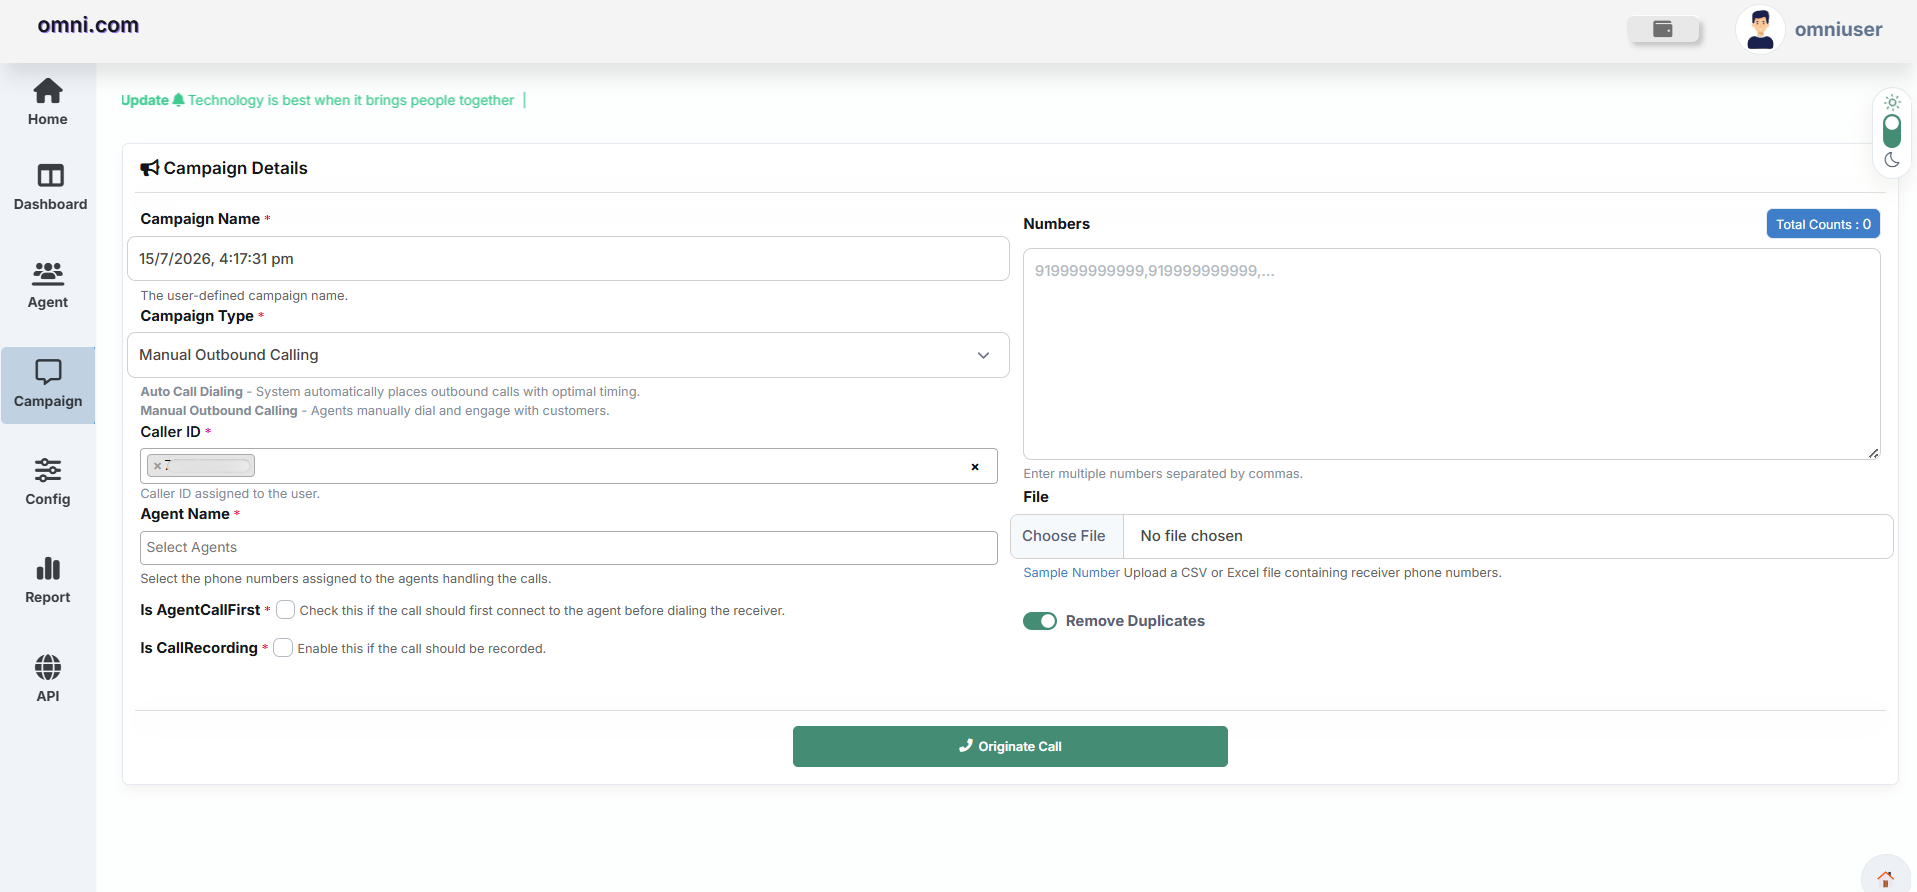
Campaign Summary
The Campaign Summary dialog provides a final review of the campaign configuration before outbound calling begins. Users should carefully verify all campaign information before confirming the campaign.
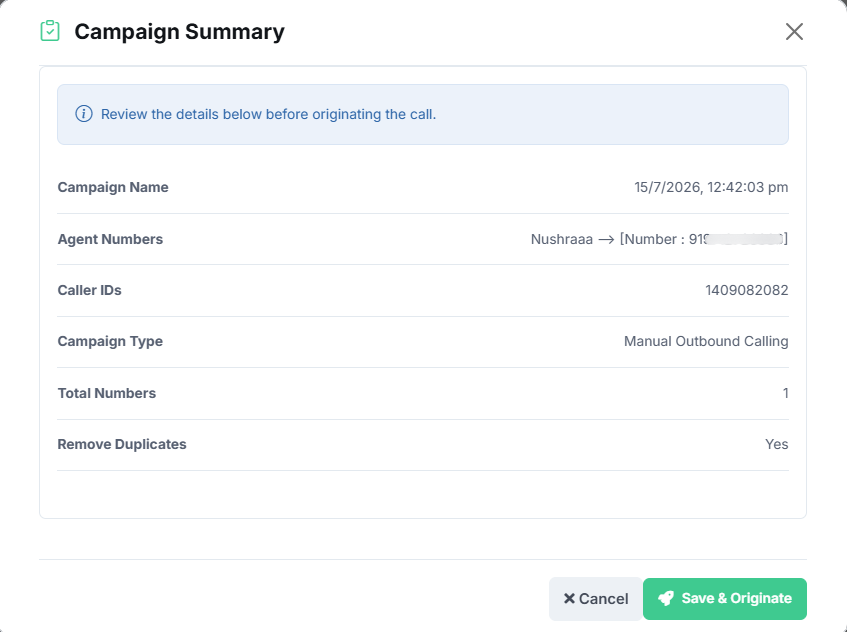
| Field | Description |
|---|---|
| Campaign Name | Displays the configured campaign name. |
| Agent Numbers | Displays the assigned agents for the campaign. |
| Caller IDs | Displays the selected caller ID. |
| Campaign Type | Displays the selected campaign type. |
| Total Numbers | Displays the total number of recipient phone numbers. |
| Remove Duplicates | Indicates whether duplicate phone numbers have been removed. |
Available Actions
Selecting Save & Originate confirms the campaign configuration and redirects the user to the Manual Calling Report page.
Manual Calling Report
After clicking Save & Originate, the campaign is successfully created and the system automatically redirects the user to the Manual Calling Report page. The report displays all manually created outbound calls associated with the selected campaign. Newly created records initially appear with a Pending status until the assigned agent initiates the outbound call.
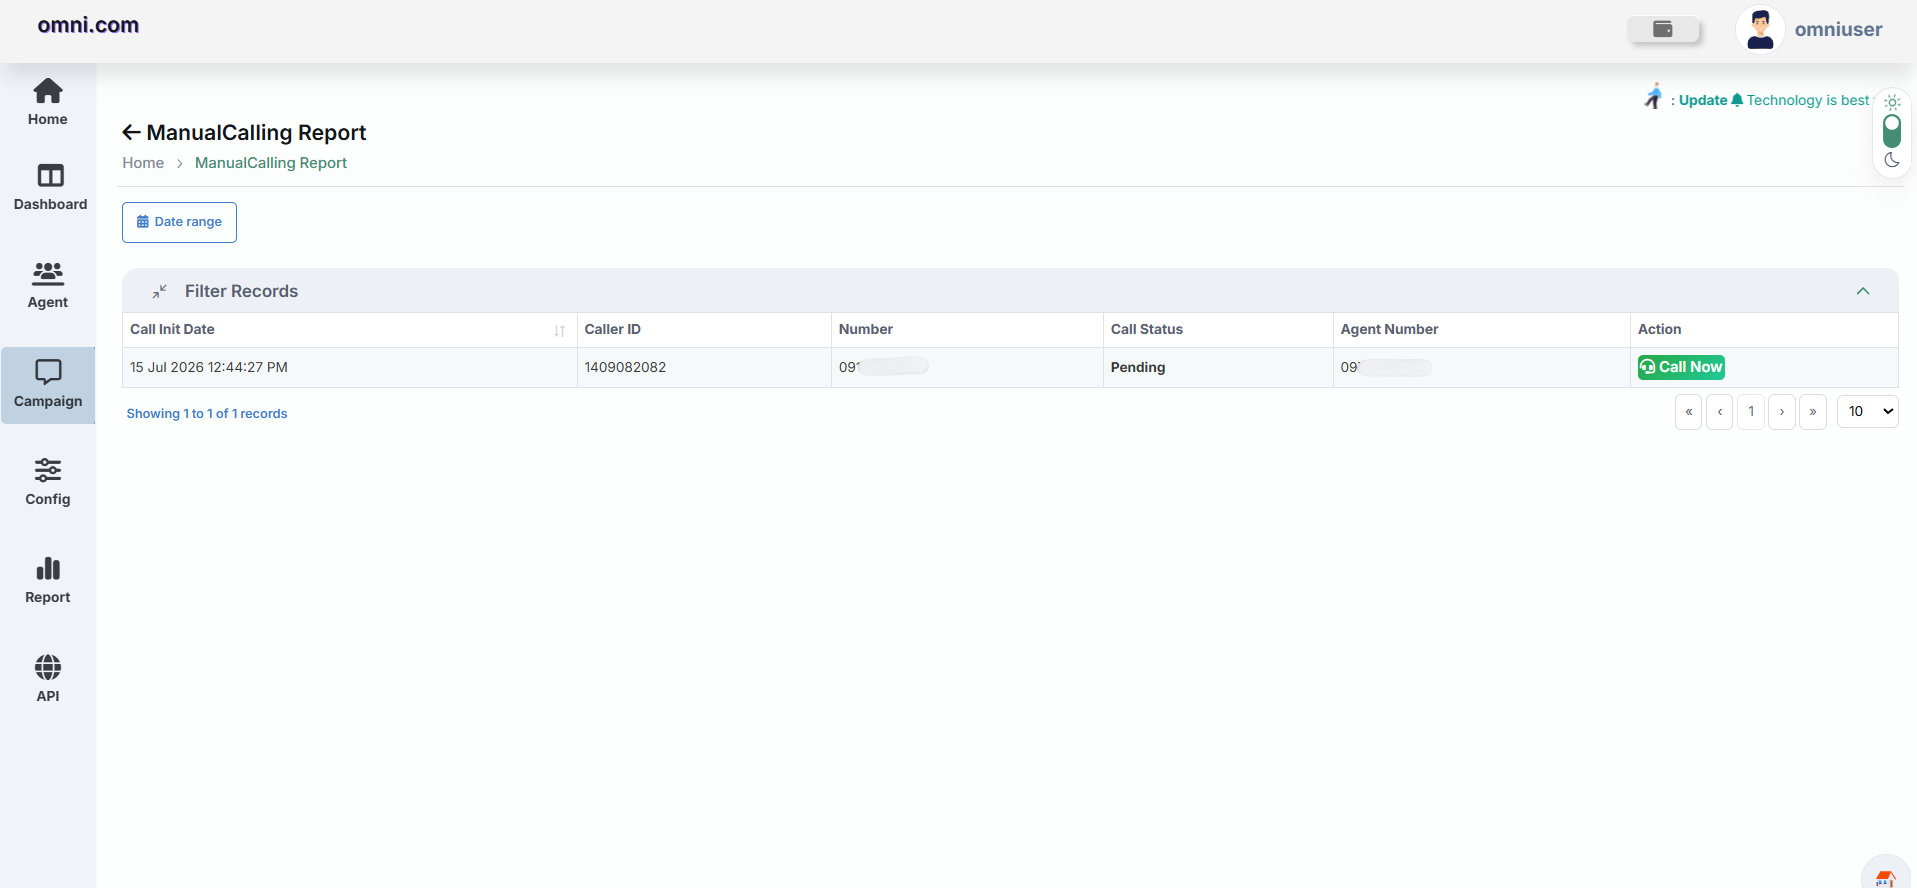
Available Information
| Field | Description |
|---|---|
| Call Initiation Date | Displays the date and time when the outbound call was created. |
| Caller ID | Displays the caller ID used for the outbound call. |
| Recipient Number | Displays the destination phone number. |
| Call Status | Displays the current call status such as Pending, Dialing, Connected, or Completed. |
| Agent Number | Displays the assigned agent handling the call. |
| Action | Provides the option to manually initiate the outbound call. |
Initiating the Call
To begin the outbound call, click Call Now from the Action column. The system immediately starts the outbound calling process and opens the Call Status window, allowing users to monitor the progress of the active call in real time.
Call Status
The Call Status window displays live information about the outbound call while it is in progress. The displayed information is refreshed automatically until the call is completed.
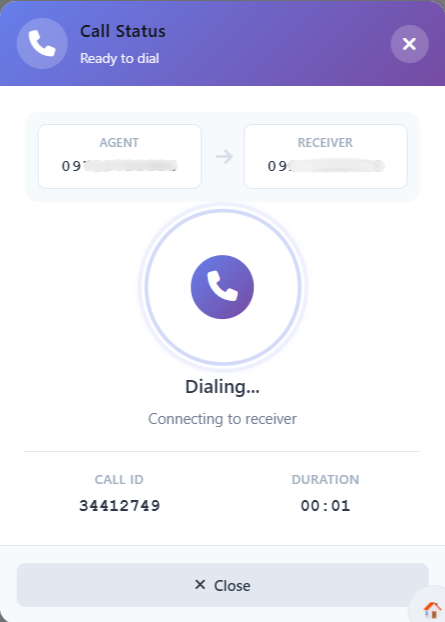
| Field | Description |
|---|---|
| Agent | Displays the assigned agent number. |
| Receiver | Displays the recipient phone number. |
| Call Status | Displays the current call state such as Dialing, Connected, or Completed. |
| Call ID | Displays the unique identifier generated for the outbound call. |
| Duration | Displays the elapsed duration of the active call. |
Call Completion
After the conversation ends, the call is automatically marked as Completed. The completed record is removed from the Manual Calling Report, which only displays calls awaiting manual initiation.
The completed call information is automatically stored in the Delivery Report, allowing users to review call history, monitor campaign performance, and analyze call outcomes at a later time.
Verify campaign information before selecting Save & Originate. Regularly review the Delivery Report to monitor completed calls, evaluate campaign performance, and maintain historical call records.
Manual Outbound Calling campaigns require an available agent before calls can be initiated. Ensure that valid recipient numbers and the appropriate caller ID are configured before creating the campaign.
Manage Remarks
The Manage Remarks module allows administrators to create and maintain remarks for different communication products such as IVR and Click To Call. Remarks help categorize call outcomes, customer responses, or agent feedback, making it easier to analyze campaign performance and generate meaningful reports.
Navigation
To access the Manage Remarks page:
- Log in to the Omni Portal.
- Click Config from the left navigation menu.
- Open Manage Remarks.
The Manage Remarks page displays all configured remarks along with their product association, creation date, status, and available actions.
Manage Remarks Page
The page provides a centralized list of all remarks created in the system.
Users can:
- View all existing remarks.
- Create new remarks.
- Edit remark details.
- Delete remarks.
- Check the status of each remark.
Add a New Remark
To create a new remark:
- Click the Add New button.
- The Remark Detail dialog box appears.
- Complete the required information.
- Click Save.
The newly created remark becomes available for the selected product.
Remark Detail Fields
| Field | Description |
|---|---|
| Product Name | Select the product for which the remark will be used. |
| Remark Name | Enter the name of the remark, such as Interested, Busy, or Callback Required. |
| Status | Enable or disable the remark. Active remarks are available for use, while inactive remarks are hidden from operational use. |
Remarks List
After saving, the remark appears in the remarks table where users can view and manage all configured remarks.
| Column | Description |
|---|---|
| Product | Product associated with the remark. |
| Remark Name | Name of the configured remark. |
| Remark Date | Date and time when the remark was created. |
| Status | Displays whether the remark is Active or Inactive. |
| Action | Edit or delete the selected remark. |
Edit a Remark
To modify an existing remark:
- Locate the required remark in the table.
- Click the Edit icon.
- Update the required information.
- Click Save.
The updated information is immediately reflected in the remarks list.
Delete a Remark
To permanently remove a remark:
- Locate the required remark.
- Click the Delete icon.
- Confirm the deletion.
Status Management
Remarks can be enabled or disabled using the Status option.
| Status | Description |
|---|---|
| Active | The remark is available for campaigns and reports. |
| Inactive | The remark remains stored but cannot be selected during campaign execution. |
Features
Notes
- Create meaningful remark names for easy identification.
- Assign remarks to the correct communication product.
- Disable remarks instead of deleting them if they may be needed in the future.
- Regularly review and update remarks to match current business requirements.
Click to Call Reports
The Click to Call Reports module provides comprehensive insights into Click to Call activity, call status, delivery statistics, and campaign reports. Users can monitor Click to Call campaign execution, analyze call outcomes, and review detailed reporting information from a centralized dashboard.
Report Dashboard
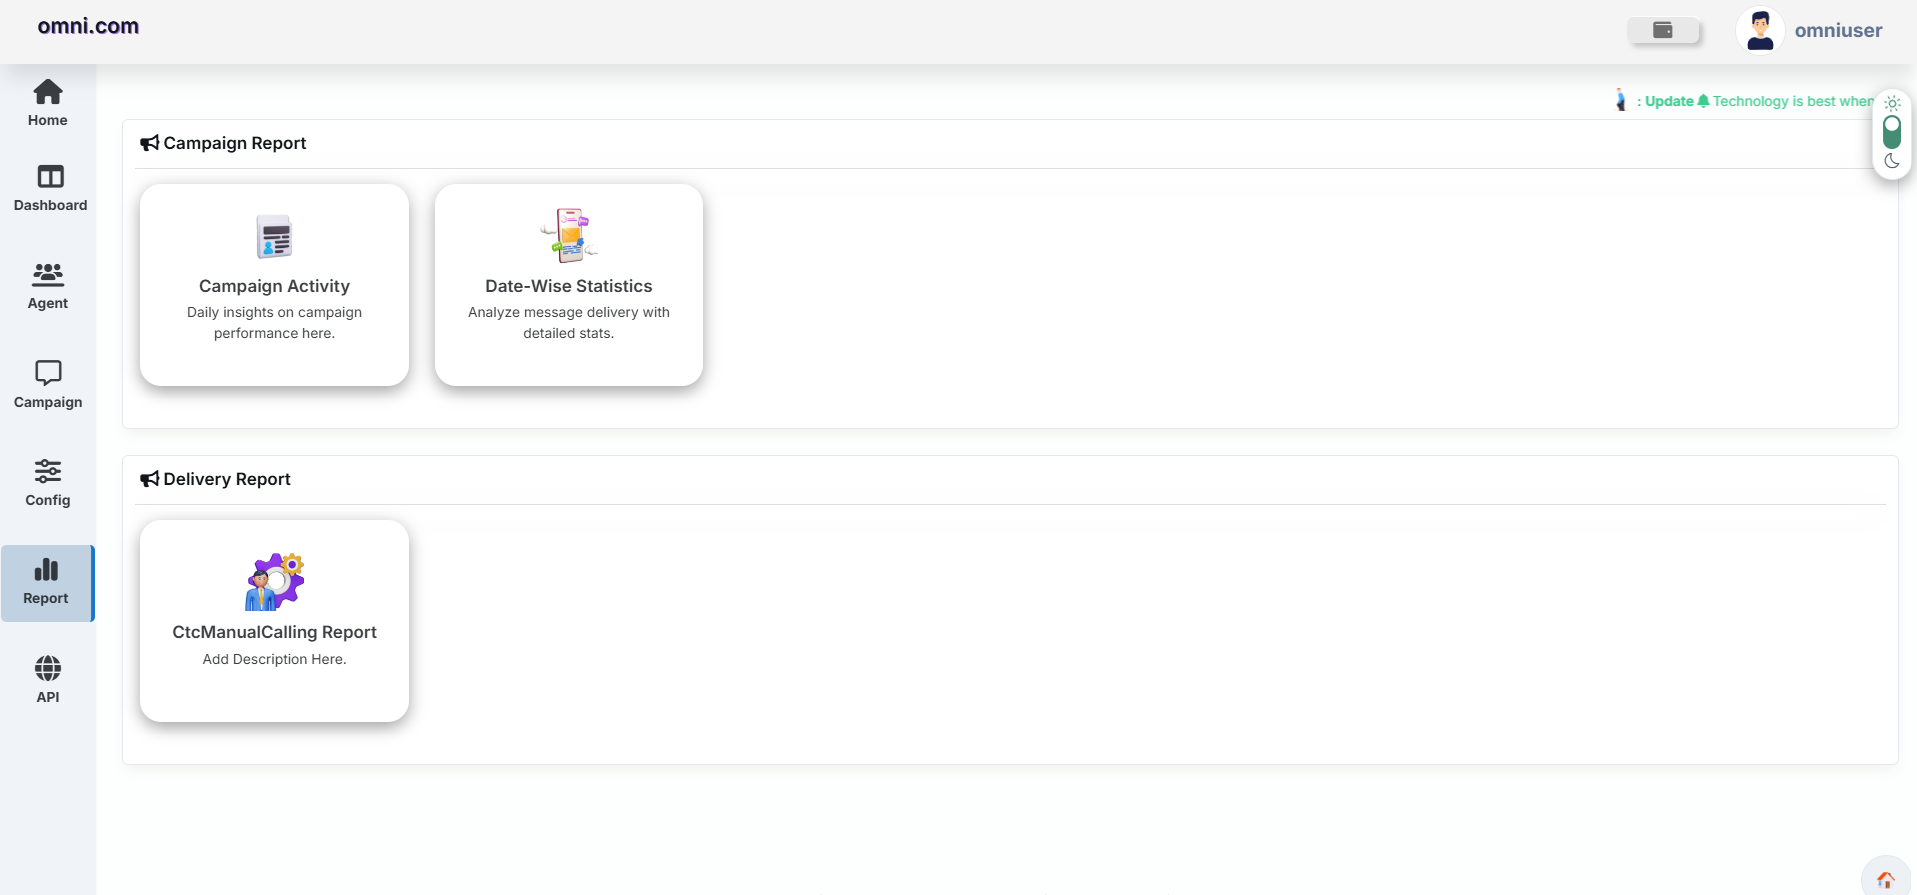
Purpose
The Click to Call Reports module is designed to provide comprehensive visibility into Click to Cal campaign execution, call activity, delivery statistics, campaign performance, and reporting records. It enables organizations to monitor Click to Call campaigns, review call reports, and analyze communication performance.
Available Report Sections
| Section | Description |
|---|---|
| Campaign Activity | Displays campaign execution details, call activity, and overall Click to Call campaign performance. |
| Day-Wise Statistics | Provides day-wise call statistics to help analyze call volume, outcomes, and overall campaign performance. |
| CTC Manual Calling Report | Displays records of manually initiated Click to Call activities, including call details, agent information, call status, and call history. |
Benefits
- Monitor Click to Call activity.
- Track call completion and delivery status.
- Analyze campaign execution statistics.
- Export detailed Click to Call reports.
Users can access reporting tools and monitor Click to Call activity from a centralized location.
Campaign Activity
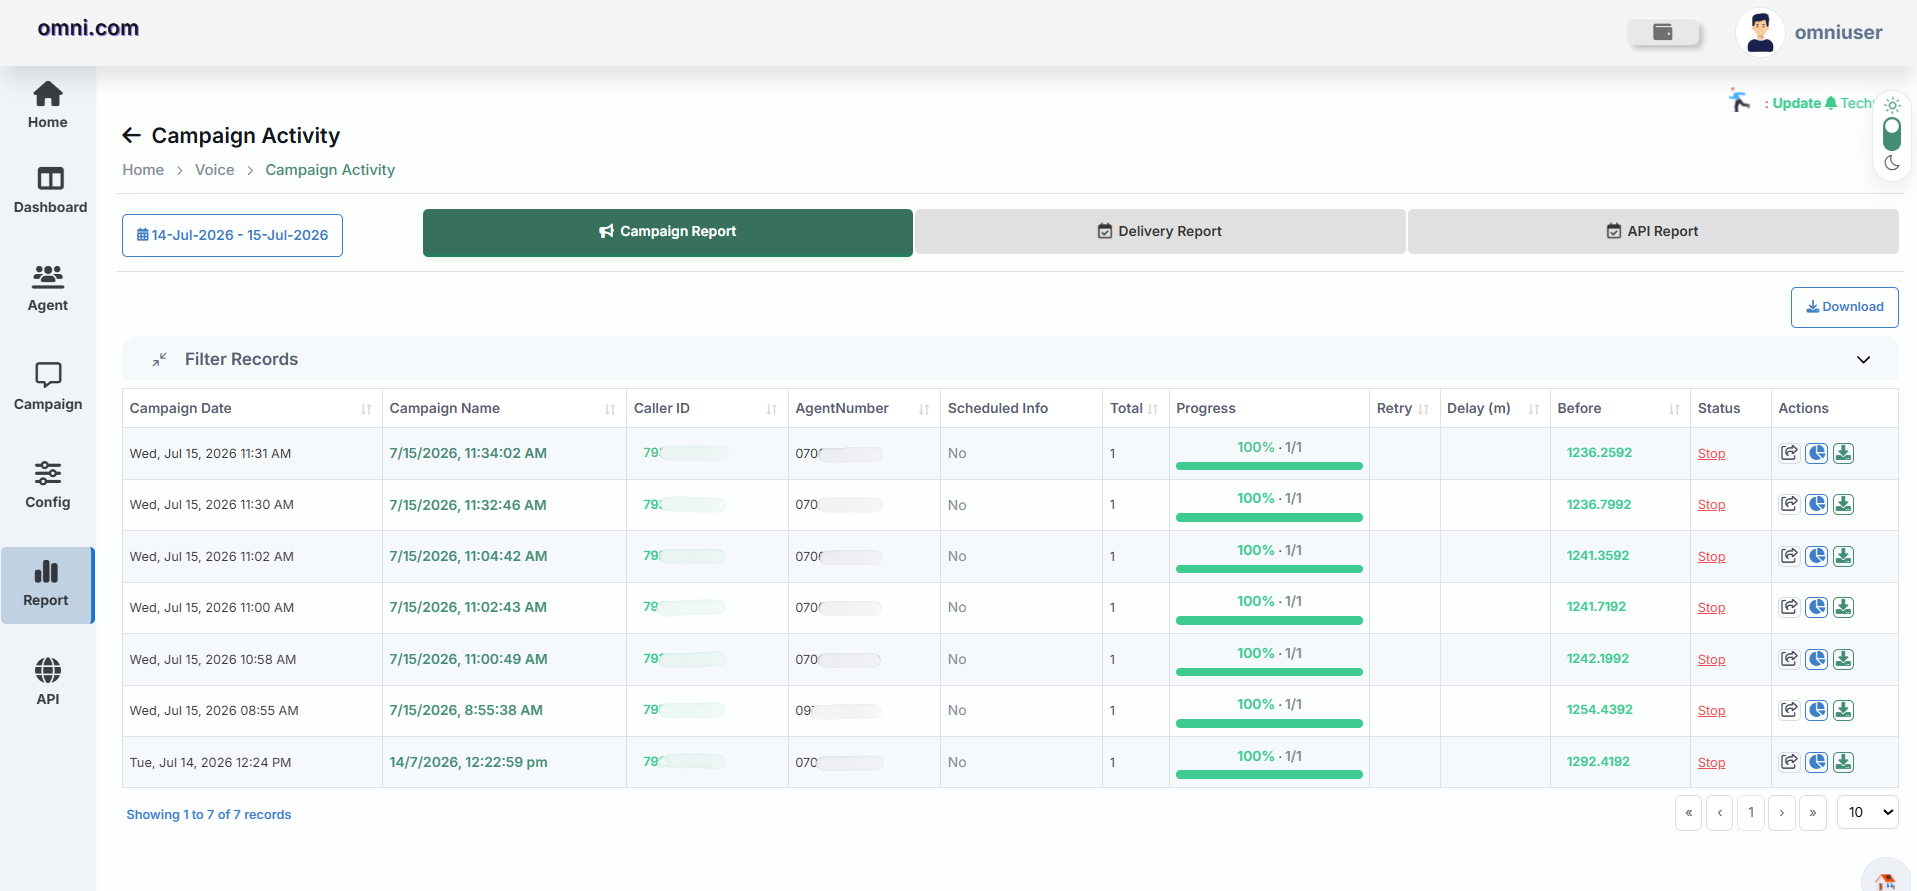
Purpose
The Campaign Activity report provides detailed information about Click to Call campaigns executed during a selected date range. Users can review campaign performance, delivery status, scheduled campaigns, and fallback reports.
Date Range Filter
Users can select a custom date range to view campaign records.
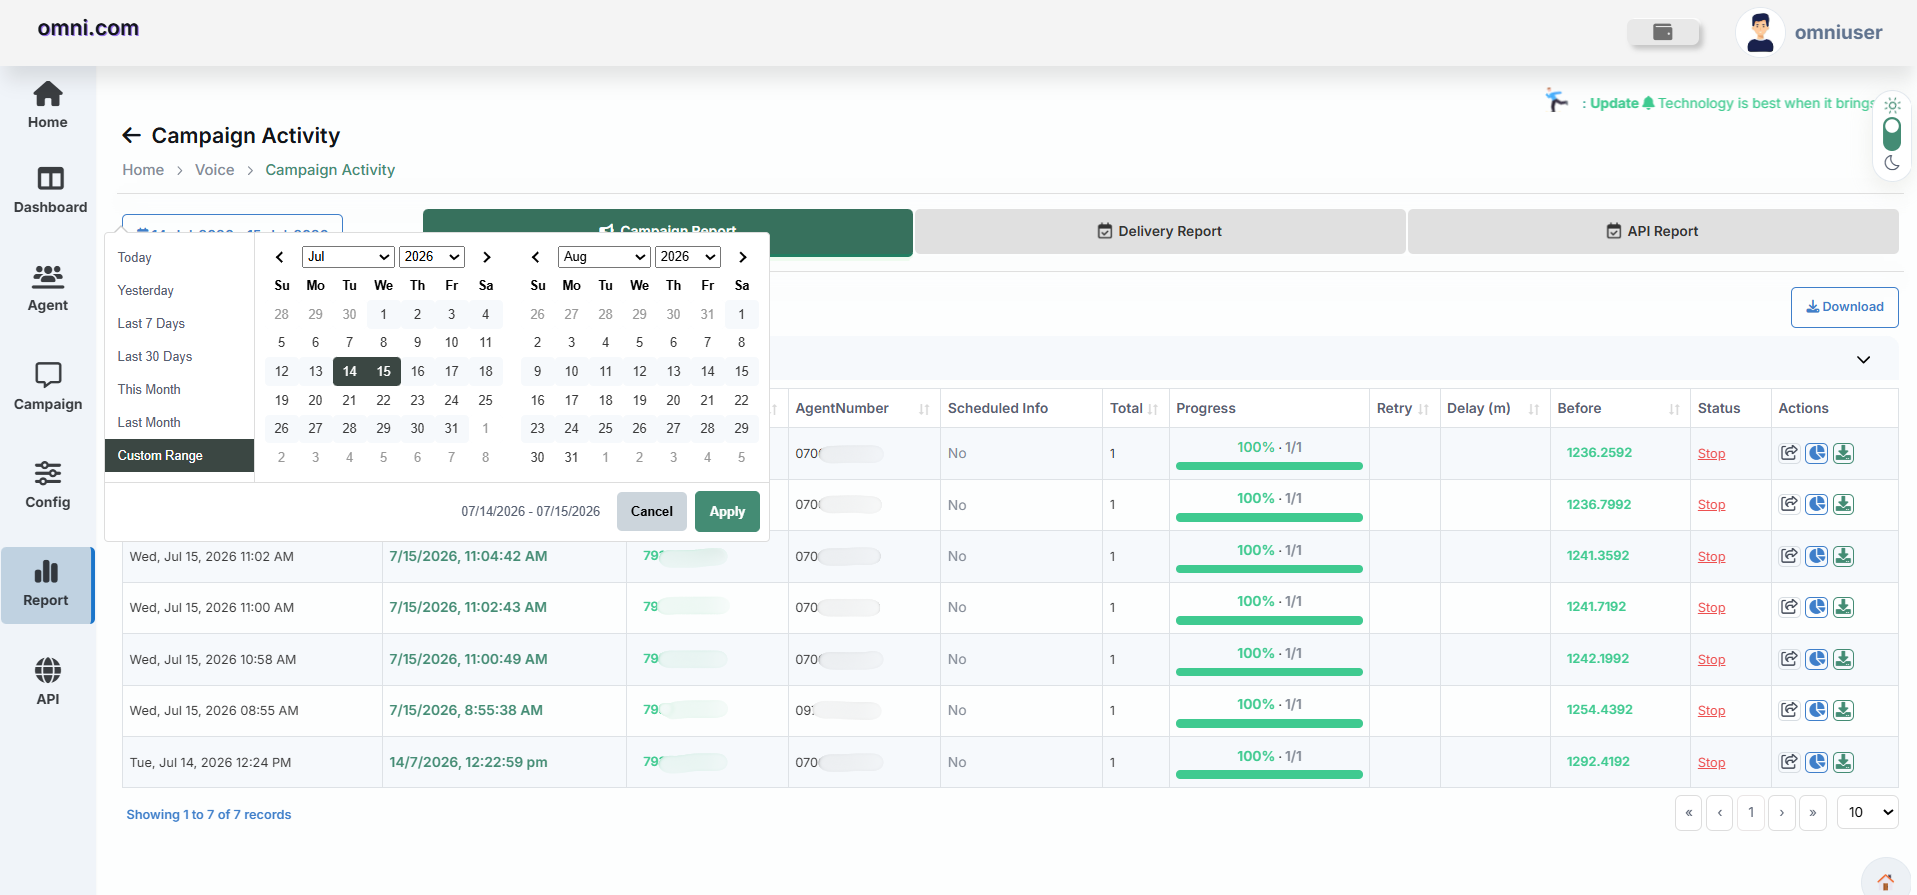
Available Options
- Today
- Yesterday
- Last 7 Days
- Last 30 Days
- This Month
- Last Month
- Custom Range
Click Apply to load campaign data for the selected period.
Campaign Report Information
| Field | Description |
|---|---|
| Campaign Date | Displays the date and time when the Click to Call campaign was created. |
| Campaign Name | Displays the name of the Click to Call campaign. |
| Caller ID | Displays the caller ID used to initiate outbound calls. |
| Agent Number | Displays the destination or agent number associated with the campaign. |
| Scheduled Info | Indicates whether the campaign was scheduled. If scheduled, the configured schedule details are displayed. |
| Total | Displays the total number of contacts or calls included in the campaign. |
| Progress | Displays the campaign execution progress, including the completion percentage and processed calls. |
| Retry | Displays the number of retry attempts configured for unanswered or failed calls. |
| Delay (m) | Displays the delay, in minutes, between consecutive retry attempts. |
| Before | Displays the available Click to Call credits or account balance before the campaign was executed. |
| Status | Displays the current status of the campaign, such as Running, Completed, or Stopped. |
| Actions | Provides options to view campaign details, access reports, or download campaign-related information. |
Available Actions
- View Campaign Details
- View Delivery Information
- Download Report
Delivery Report
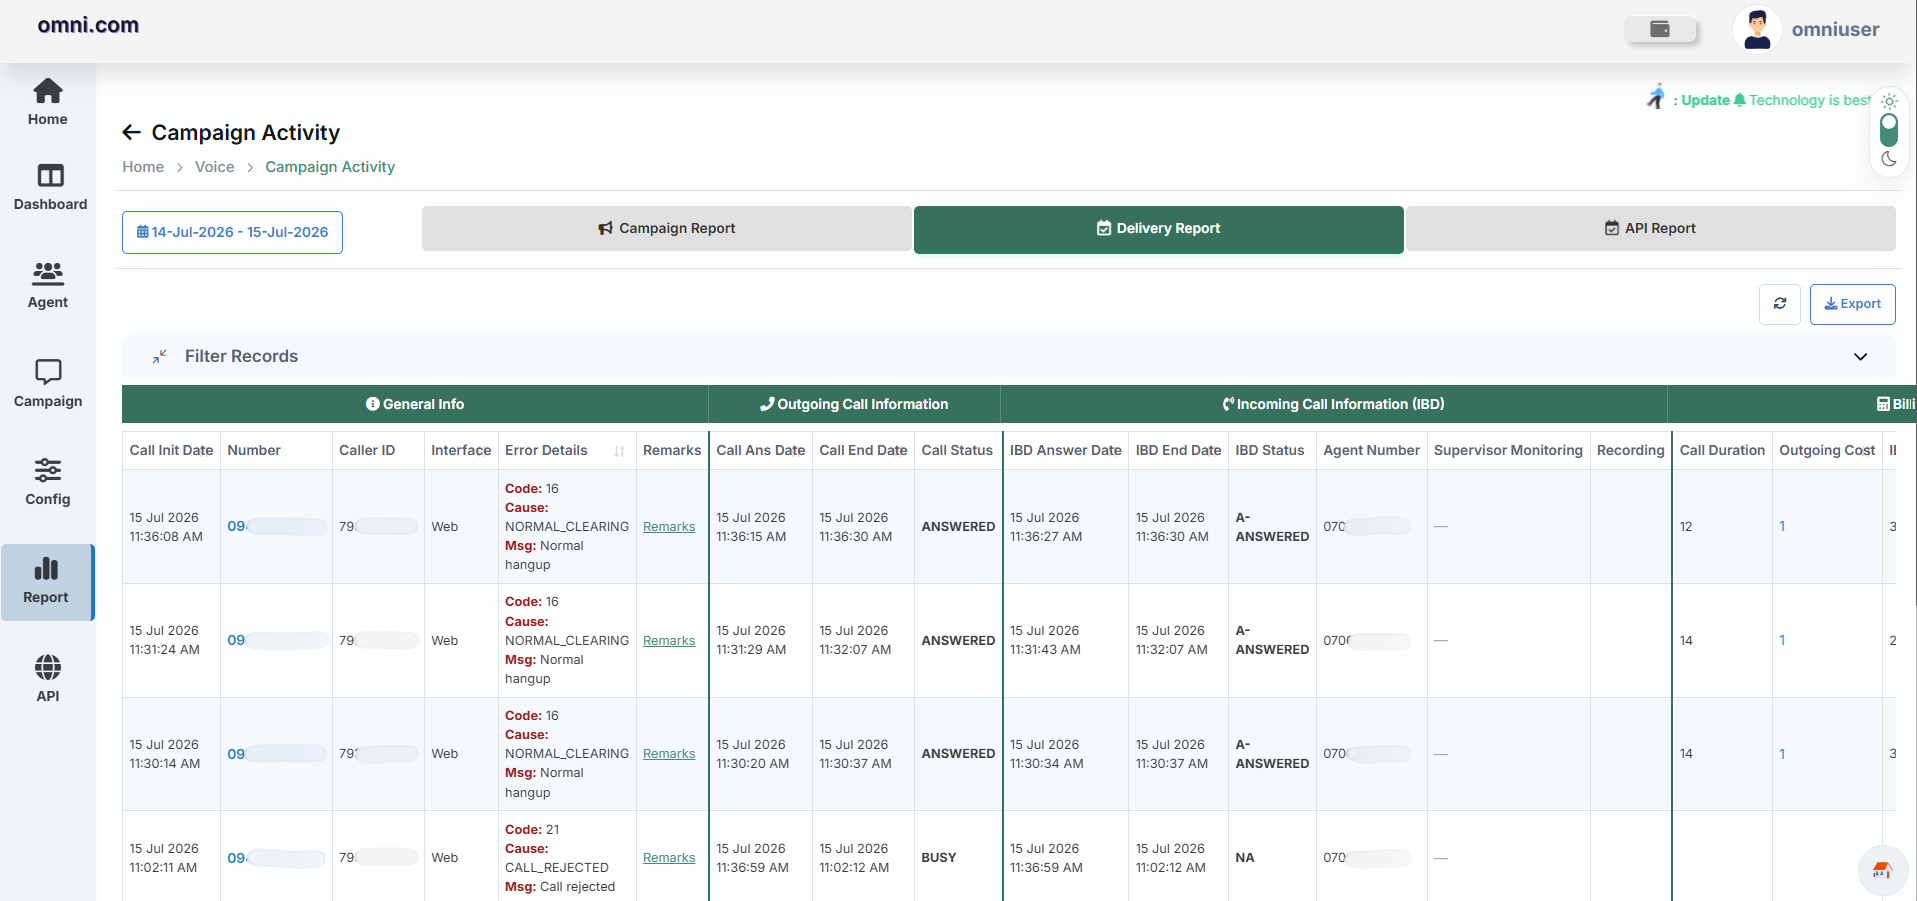
The Delivery Report displays recipient-level delivery information and helps users verify message delivery status.
| Field | Description |
|---|---|
| Call Date | Displays the date and time when the Click to Call was processed. |
| Number | Displays the recipient mobile number. |
| Reference ID | Unique identifier generated for the Click to Call transaction. |
| Click to Call Flow | Displays the Click to Call Flow or audio file used in the campaign. |
| Call Status | Displays the call status along with call completion time. |
| Interface | Displays the interface used to send the Click to Call message, such as Web or HTTP. |
| Call Cost | Displays the cost incurred for sending the Click to Call message. |
| View | Allows users to view detailed information about the message. |
Features
- View delivery records.
- Download delivery report.
Click to Call API Report
The Click to Call API Report provides detailed information about Click to Call campaigns initiated through API integration. It allows users to monitor API requests, responses, campaign execution, and recipient-level call activity from a centralized reporting interface.
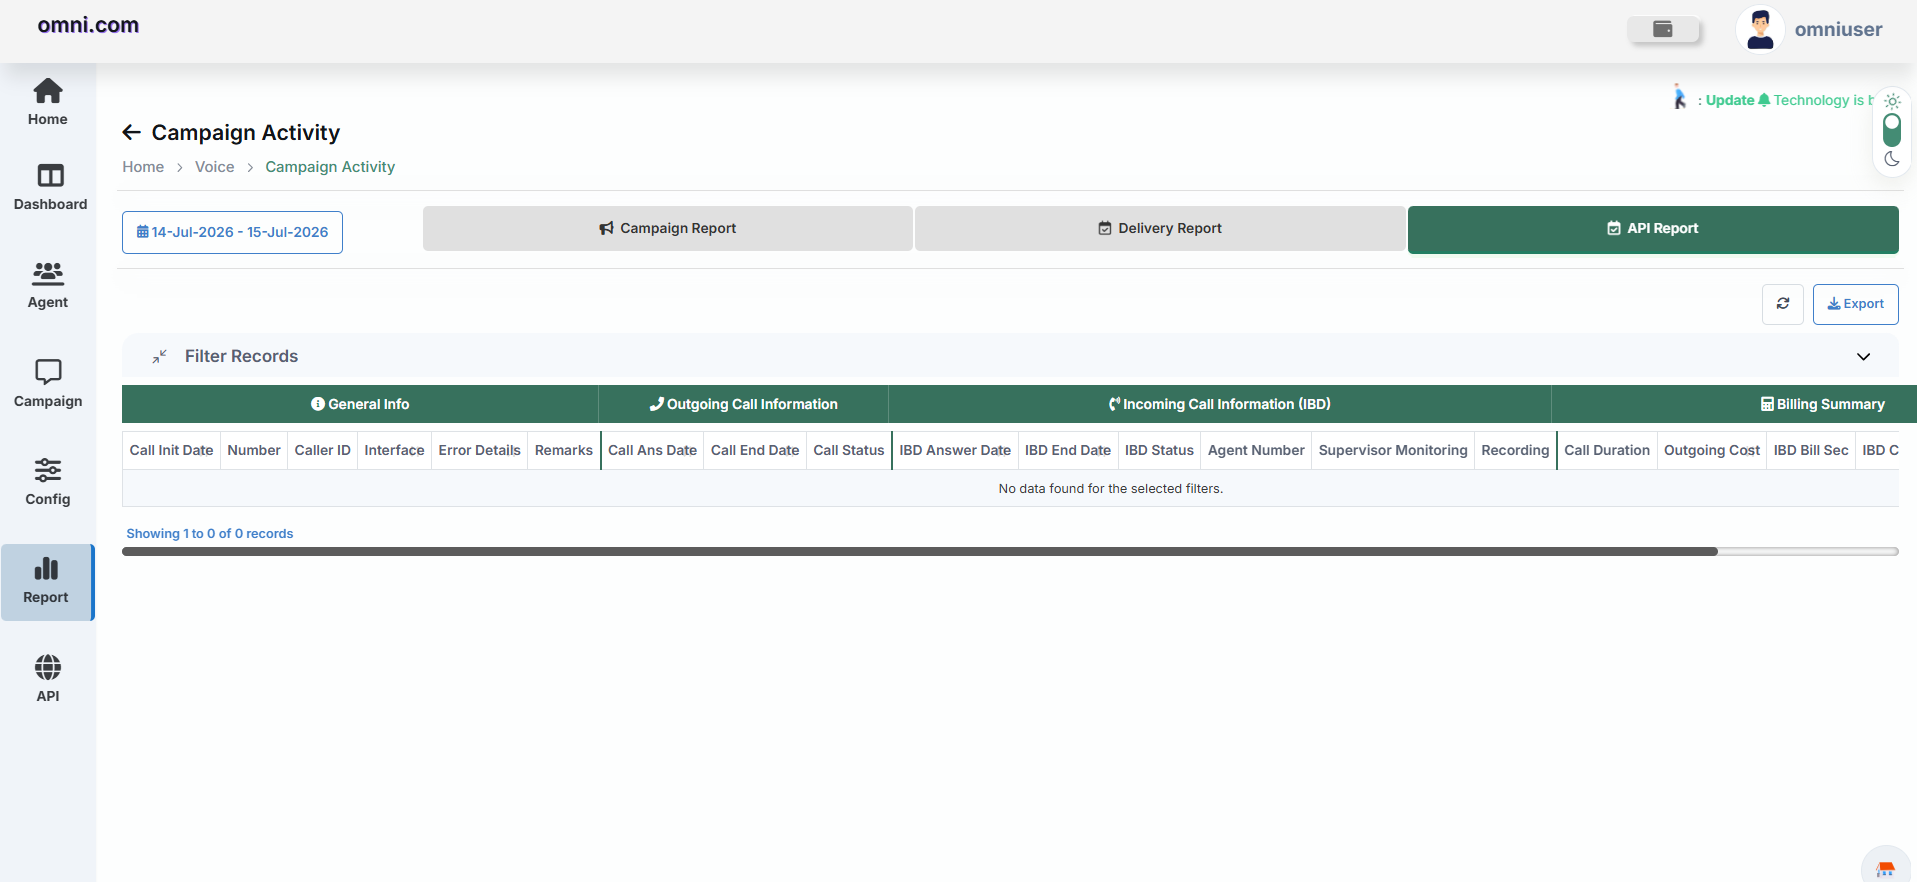
Overview
The Click to Call API Report helps administrators track Click to Call campaigns created using API requests. It displays request details, response status, campaign information, and recipient activity, making it easier to troubleshoot issues and monitor API-based Click to Call communication.
Report Components
| Component | Description |
|---|---|
| Date Range | Select the required date range to retrieve API report records. |
| API Report | Displays all Click to Call campaigns created through API integration. |
| Refresh | Reloads the latest API report records. |
| Export | Downloads the current API report for analysis. |
| Filter Records | Displays campaign records based on the selected filters. |
Available Information
Features
- Monitor Click to Call campaigns created through API.
- Track API request and response status.
- View recipient-level call details.
- Filter records using a selected date range.
- Export API reports for analysis.
- Review campaign execution history.
Day Wise Statistics
The Click to Call Statistics report provides a summary of Click to Call call performance for a selected date range. It helps users monitor Click to Call status, answered calls, failed calls, and overall campaign performance.
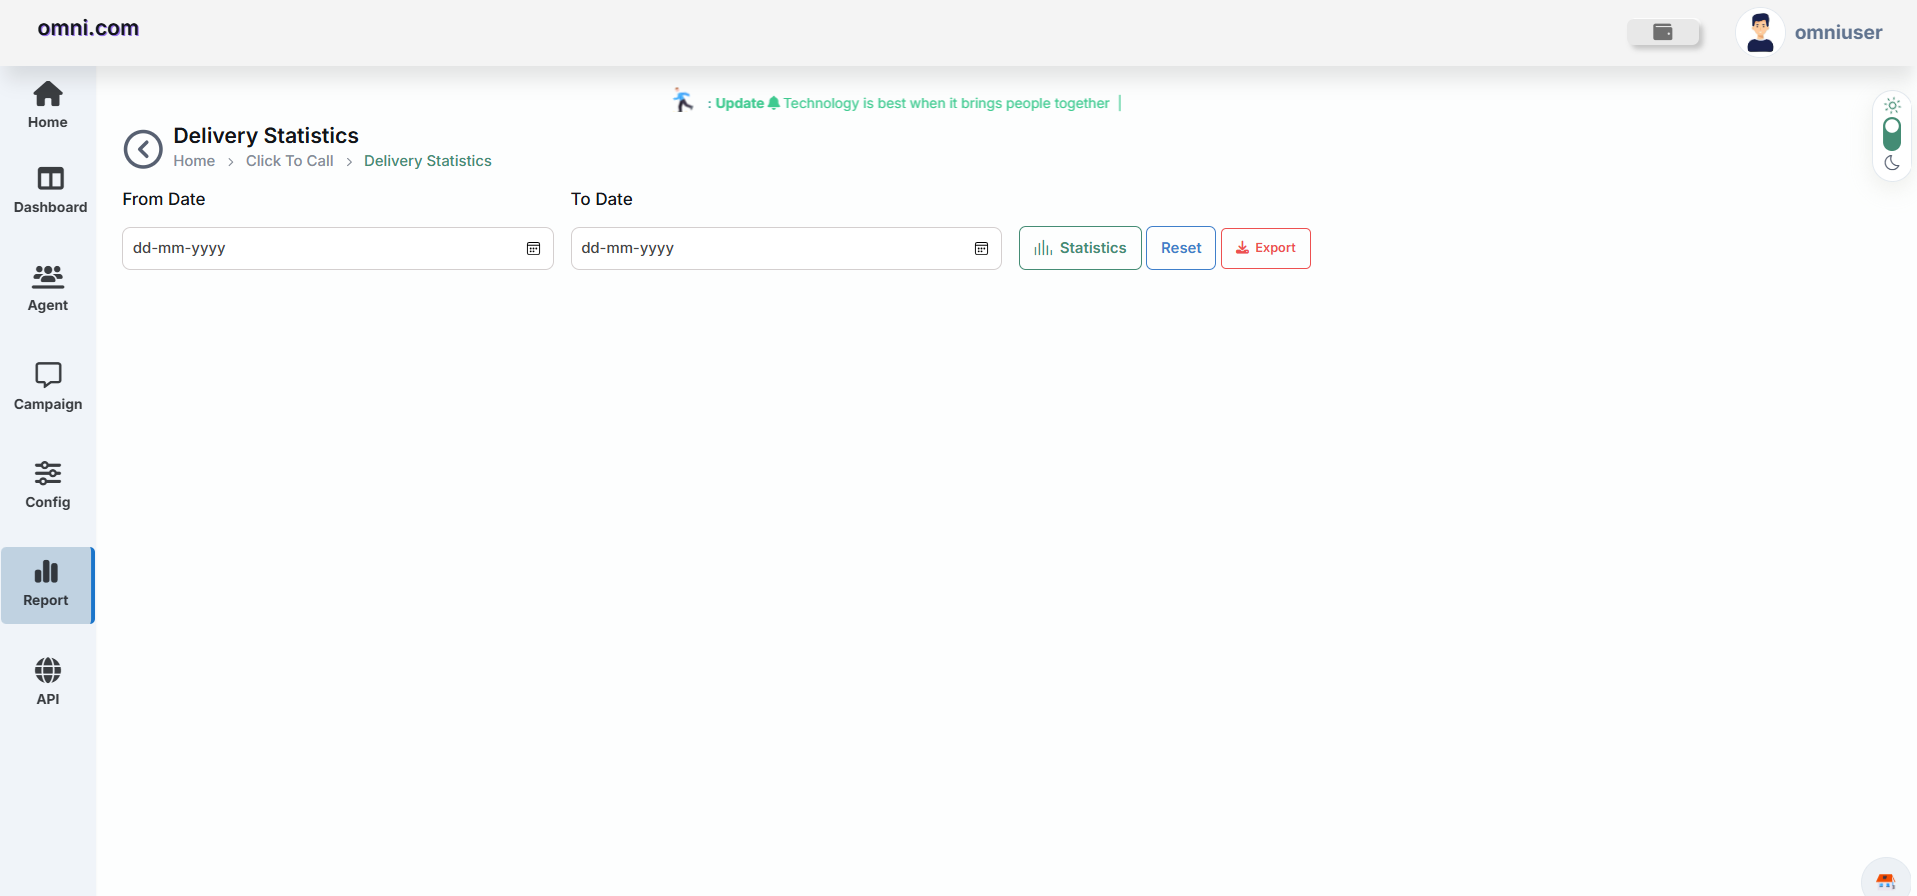
click to Call Statistics Page
| Field | Description |
|---|---|
| From Date | Start date for the report |
| To Date | End date for the report |
| Statistics | Fetch delivery statistics for the selected period |
| Reset | Clear filters and reload default values |
| Export | Download the report |
Generate Delivery Statistics
- Select the From Date.
- Select the To Date.
- Click the Statistics button.
The system will generate delivery statistics for the selected date range.
Report Columns
- Received Date
- Pending
- Answered
- Not Answered
- Busy
- Failed
- Rejected
- Others
- Total
The Click to Call Reports module provides a centralized view of campaign activity, manual calling records, delivery reports, API reports, and day-wise call statistics. Use the available filters and reporting tools to monitor campaign performance, review call outcomes, and export reports for further analysis.
Click To Call Dashboard
The Click To Call Dashboard provides a real-time summary of outbound and inbound call activities. It enables administrators and supervisors to monitor call performance, analyze call outcomes, and evaluate overall system activity from a centralized dashboard.
The dashboard displays key performance indicators (KPIs), statistical tables, and graphical charts that help users understand call distribution, campaign performance, and overall calling activity.
Navigation
To access the Click To Call Dashboard:
- Log in to the Omni Portal.
- Click Dashboard from the left navigation menu.
- Select Click To Call Dashboard.
By default, the dashboard displays the current day's calling statistics.
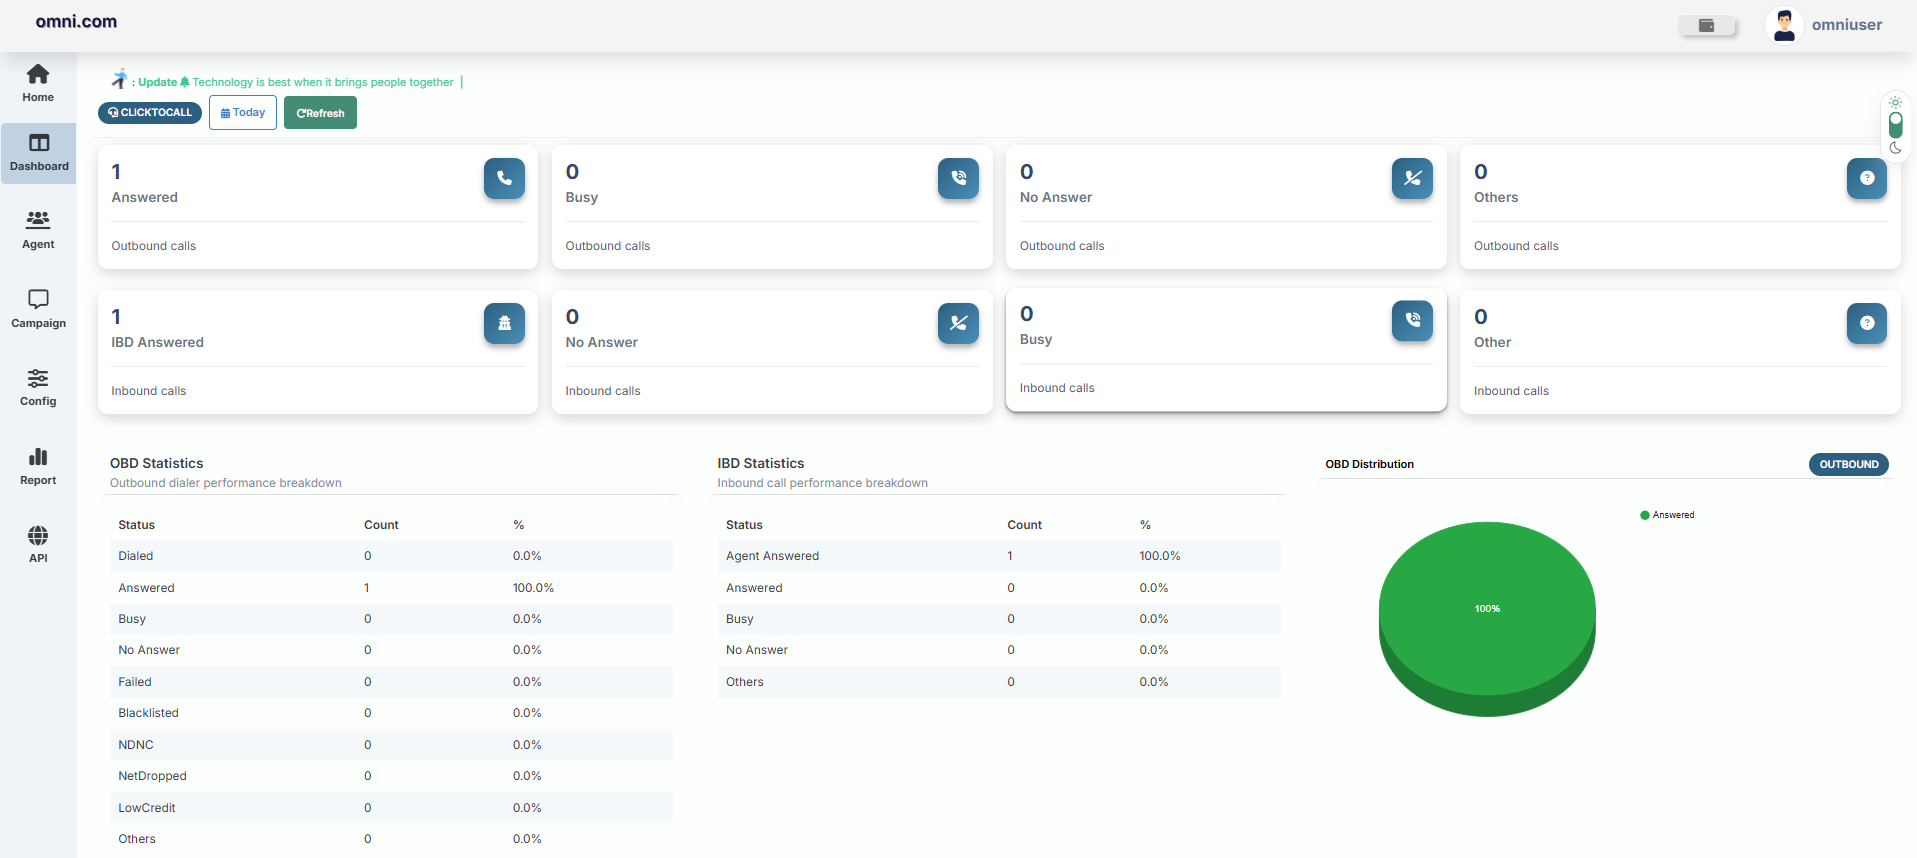
Dashboard Controls
The dashboard includes several controls that allow users to filter and refresh dashboard information.
| Control | Description |
|---|---|
| Click To Call | Displays dashboard statistics for the Click To Call module. |
| Today | Filters dashboard statistics for the current day. |
| Refresh | Reloads the dashboard and updates all statistics with the latest available data. |
Dashboard Summary Cards
The upper section of the dashboard displays real-time summary cards showing the current call statistics.
Outbound Call Statistics (OBD)
| Card | Description |
|---|---|
| Answered | Total outbound calls answered by customers. |
| Busy | Total outbound calls that received a busy response. |
| No Answer | Total outbound calls that were not answered. |
| Others | Displays all remaining outbound call statuses. |
Inbound Call Statistics (IBD)
| Card | Description |
|---|---|
| Answered | Total inbound calls answered by agents. |
| No Answer | Total inbound calls that were not answered. |
| Busy | Total inbound calls that encountered a busy status. |
| Others | Displays all remaining inbound call statuses. |
OBD Statistics
The OBD Statistics table provides a detailed breakdown of outbound call performance. It displays the total number of calls for each call status along with their percentage.
| Column | Description |
|---|---|
| Status | Displays the outbound call status category. |
| Count | Total number of outbound calls for the selected status. |
| Percentage | Percentage of total outbound calls represented by the selected status. |
Common Outbound Statuses
- Dialed
- Answered
- Busy
- No Answer
- Failed
- Blacklisted
- NDNC
- Network Dropped
- Low Credit
- Others
IBD Statistics
The IBD Statistics table displays the performance of inbound calls received by the Click To Call system.
| Column | Description |
|---|---|
| Status | Displays the inbound call status. |
| Count | Total number of inbound calls. |
| Percentage | Percentage of inbound calls represented by the selected status. |
Common Inbound Statuses
- Agent Answered
- Answered
- Busy
- No Answer
- Others
OBD Distribution Chart
The OBD Distribution Chart provides a graphical representation of outbound call distribution across different call statuses.
This visualization helps users quickly understand the overall performance of outbound campaigns and identify the most common call outcomes.
OBD vs IBD Comparison
The dashboard also provides graphical comparisons between outbound (OBD) and inbound (IBD) call activities.
Line Chart

The line chart compares outbound and inbound call performance across different call status categories, allowing users to identify trends over time.
Bar Chart

The bar chart provides a side-by-side comparison of outbound and inbound call statistics, making it easier to analyze differences in call volume and performance.
Dashboard Features
Notes
- Use the Refresh button to load the latest dashboard statistics.
- Review both OBD and IBD statistics for complete call performance analysis.
- Monitor charts regularly to identify calling trends and performance issues.
- Use dashboard statistics to evaluate campaign effectiveness and agent productivity.
- Analyze outbound and inbound call distributions to improve operational efficiency.
Agent Monitoring
The Agent Monitoring module enables supervisors to monitor live calls handled by agents in real time. It provides monitoring tools to evaluate agent performance, maintain service quality, and assist agents whenever required.
Overview
Agent Monitoring allows supervisors to silently monitor active calls, join ongoing conversations when intervention is required, or stop monitoring at any time. This module is commonly used for quality assurance, agent coaching, compliance monitoring, and operational support.
Supervisors can monitor live agent calls without interrupting customer interactions and provide assistance whenever necessary.
Navigation
- Log in to the Omni Portal.
- Open the Campaign Report module.
- Click Agent Monitoring.
- The Supervisor Eavesdrop Dashboard opens.
Supervisor Eavesdrop Dashboard
Overview
The Supervisor Eavesdrop Dashboard provides a real-time view of all active calls handled by agents. It enables supervisors to monitor live conversations, review call details, and perform supervisory actions from a centralized interface. The dashboard displays essential call information, allowing supervisors to quickly identify active calls and monitor them whenever necessary.
Monitor Live Calls
The Monitor Live Calls section displays all active agent calls currently in progress. Each record contains important information about the agent, customer, call duration, and current call status.
| Field | Description |
|---|---|
| Agent | Displays the agent's extension or phone number. |
| Caller | Displays the customer's phone number. |
| Destination | Displays the destination number connected to the call. |
| Username | Displays the username of the logged-in agent. |
| State | Displays the current call status such as Active. |
| Duration | Displays the duration of the ongoing call. |
| Monitor | Allows the supervisor to start or stop monitoring the selected call. |
| Actions | Displays additional supervisory actions available for the selected call. |
Supervisor Actions
Listen
Allows the supervisor to silently monitor an active conversation between the agent and the customer. The supervisor can hear both participants without being heard by either party.
Barge
Allows the supervisor to join the active conversation and communicate directly with both the agent and the customer.
Stop
Ends the current monitoring session. The supervisor is disconnected while the conversation between the agent and customer continues.
Monitoring Workflow
- Open the Agent Monitoring module.
- The Supervisor Eavesdrop Dashboard displays all active calls.
- Select the call you want to monitor.
- Click Listen to begin silent monitoring.
- If intervention is required, click Barge to join the conversation.
- Click Stop to end the monitoring session.
Benefits
- Monitor live agent calls in real time.
- Evaluate agent performance and customer interactions.
- Maintain service quality and compliance standards.
- Provide immediate assistance during active conversations.
- Improve agent coaching and training.
- Enhance the overall customer experience.
Use the Listen option to silently monitor agent calls. Select Barge only when immediate intervention is required, and click Stop after the monitoring session is complete.
Only supervisors or users with the required permissions can access the Agent Monitoring module. The availability of Listen, Barge, and Stop actions depends on user permissions and system configuration.
Text To Speech (TTS)
The Text-to-Speech (TTS) module enables users to create automated outbound voice campaigns by converting written text into natural-sounding speech. Users can upload voice files, create reusable TTS templates, configure campaigns, and monitor campaign performance from a single interface.
Features
| Feature | Description |
|---|---|
| Voice Files | Upload WAV audio files for use in TTS templates. |
| TTS Templates | Create reusable templates with variables and static audio blocks. |
| Dynamic Variables | Personalize voice messages using variables such as names, OTPs, and account numbers. |
| Campaign Management | Create Single or Bulk voice campaigns. |
| Scheduling | Run campaigns immediately or schedule them for later execution. |
| Reports | Monitor campaign performance and outbound call statistics. |
1. Upload Voice Files.
2. Create a TTS Template.
3. Submit the template for approval.
4. Create a TTS Campaign.
5. Monitor campaign status from Dashboard and Reports.
Text-to-Speech Dashboard
The Text-to-Speech Dashboard provides a real-time overview of all outbound Text-to-Speech (TTS) campaigns. It helps users monitor call performance, campaign status, and outbound call statistics from a single screen.
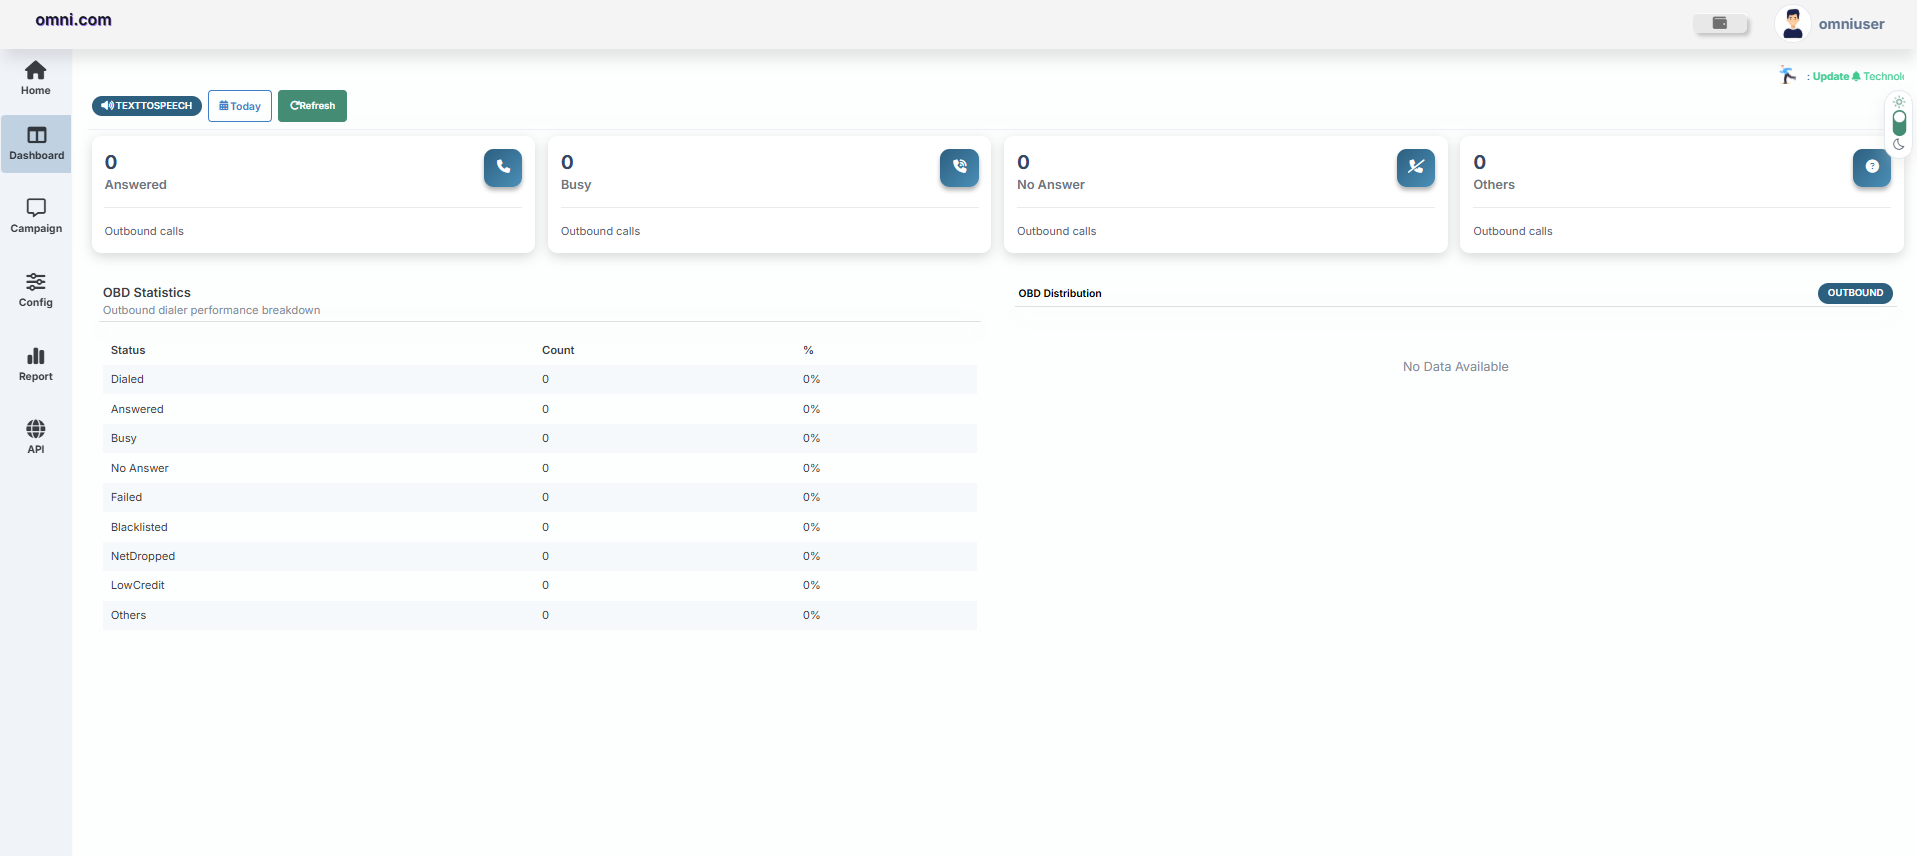
Dashboard Components
| Component | Description |
|---|---|
| Today | Displays campaign statistics for the current day. |
| Refresh | Refreshes the dashboard and loads the latest campaign statistics. |
| Answered | Shows the total number of successfully answered outbound calls. |
| Busy | Displays the number of calls where the recipient's line was busy. |
| No Answer | Shows the total number of calls that were not answered. |
| Others | Displays calls that fall under miscellaneous call statuses. |
| OBD Statistics | Provides a detailed status-wise summary of outbound voice campaigns. |
| OBD Distribution | Displays the graphical distribution of outbound call results. |
OBD Statistics
The OBD (Outbound Dialer) Statistics section provides a detailed breakdown of all outbound Text-to-Speech campaign results.
| Status | Description |
|---|---|
| Dialed | Total outbound calls initiated by the system. |
| Answered | Calls successfully answered by recipients. |
| Busy | Calls where the recipient's line was busy. |
| No Answer | Calls that were not answered. |
| Failed | Calls that could not be completed due to technical or system issues. |
| Blacklisted | Calls that were blocked because the destination number is blacklisted. |
| NetDropped | Calls disconnected because of network issues. |
| Low Credit | Calls that could not be processed because of insufficient account balance. |
| Others | Any additional call status that does not fall into the above categories. |
Click Refresh to load the latest campaign statistics. Use the Today filter to view the current day's outbound campaign performance.
Voice Files
The Voice Files module allows users to upload and manage audio files that can be used within Text-to-Speech (TTS) templates. Uploaded voice files can be combined with Text-to-Speech content to create dynamic and personalized voice campaigns.
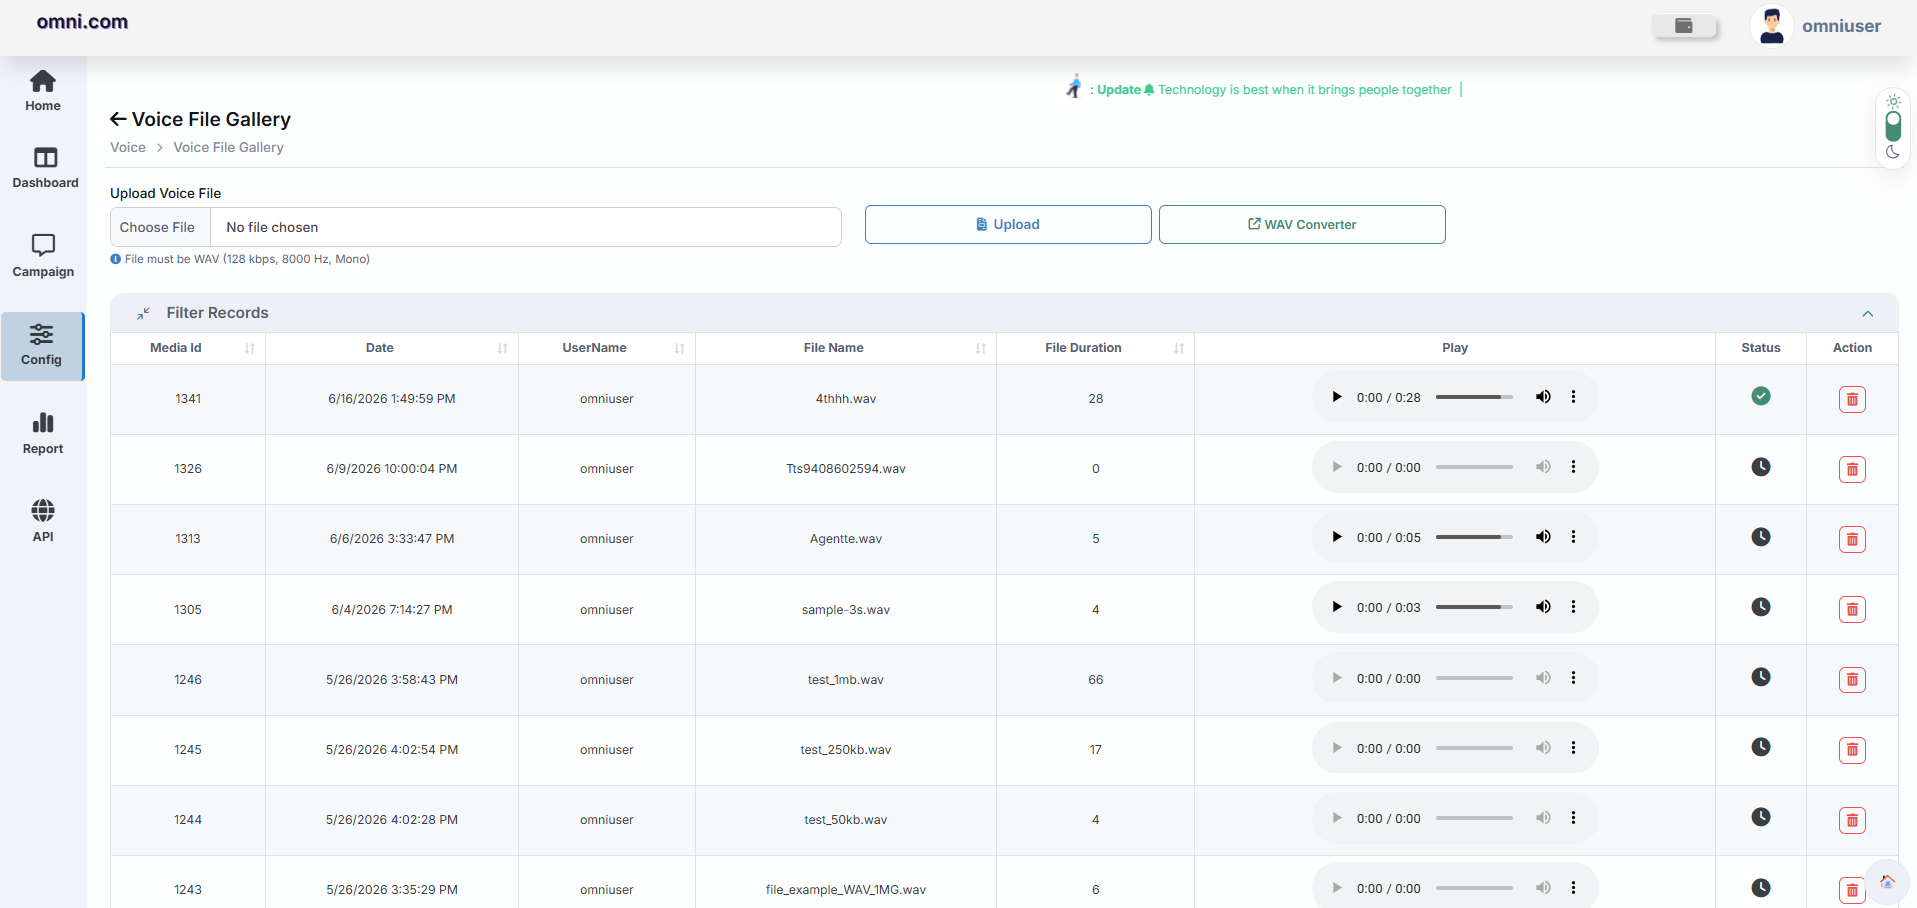
Upload a Voice File
Voice files must be uploaded in WAV format using:
- 16-bit Audio
- 8000 Hz Sample Rate
- Mono Channel
Voice File Gallery
After uploading a voice file, it appears in the Voice File Gallery, where users can preview, manage, and delete uploaded audio files.
| Column | Description |
|---|---|
| Media ID | Unique identifier assigned to each uploaded voice file. |
| Date | Date and time when the file was uploaded. |
| User Name | Name of the user who uploaded the audio file. |
| File Name | Name of the uploaded WAV file. |
| File Duration | Total duration of the audio file. |
| Play | Preview the uploaded audio before using it in a template. |
| Status | Displays the current upload status of the voice file. |
| Action | Delete the selected voice file from the gallery. |
Always preview uploaded voice files before using them in a Text-to-Speech template to ensure the audio quality and duration are correct.
Manage TTS Template
The Manage TTS Template module allows users to create, manage, edit, and submit Text-to-Speech templates for approval. These templates define the voice message that will be played during outbound voice campaigns.
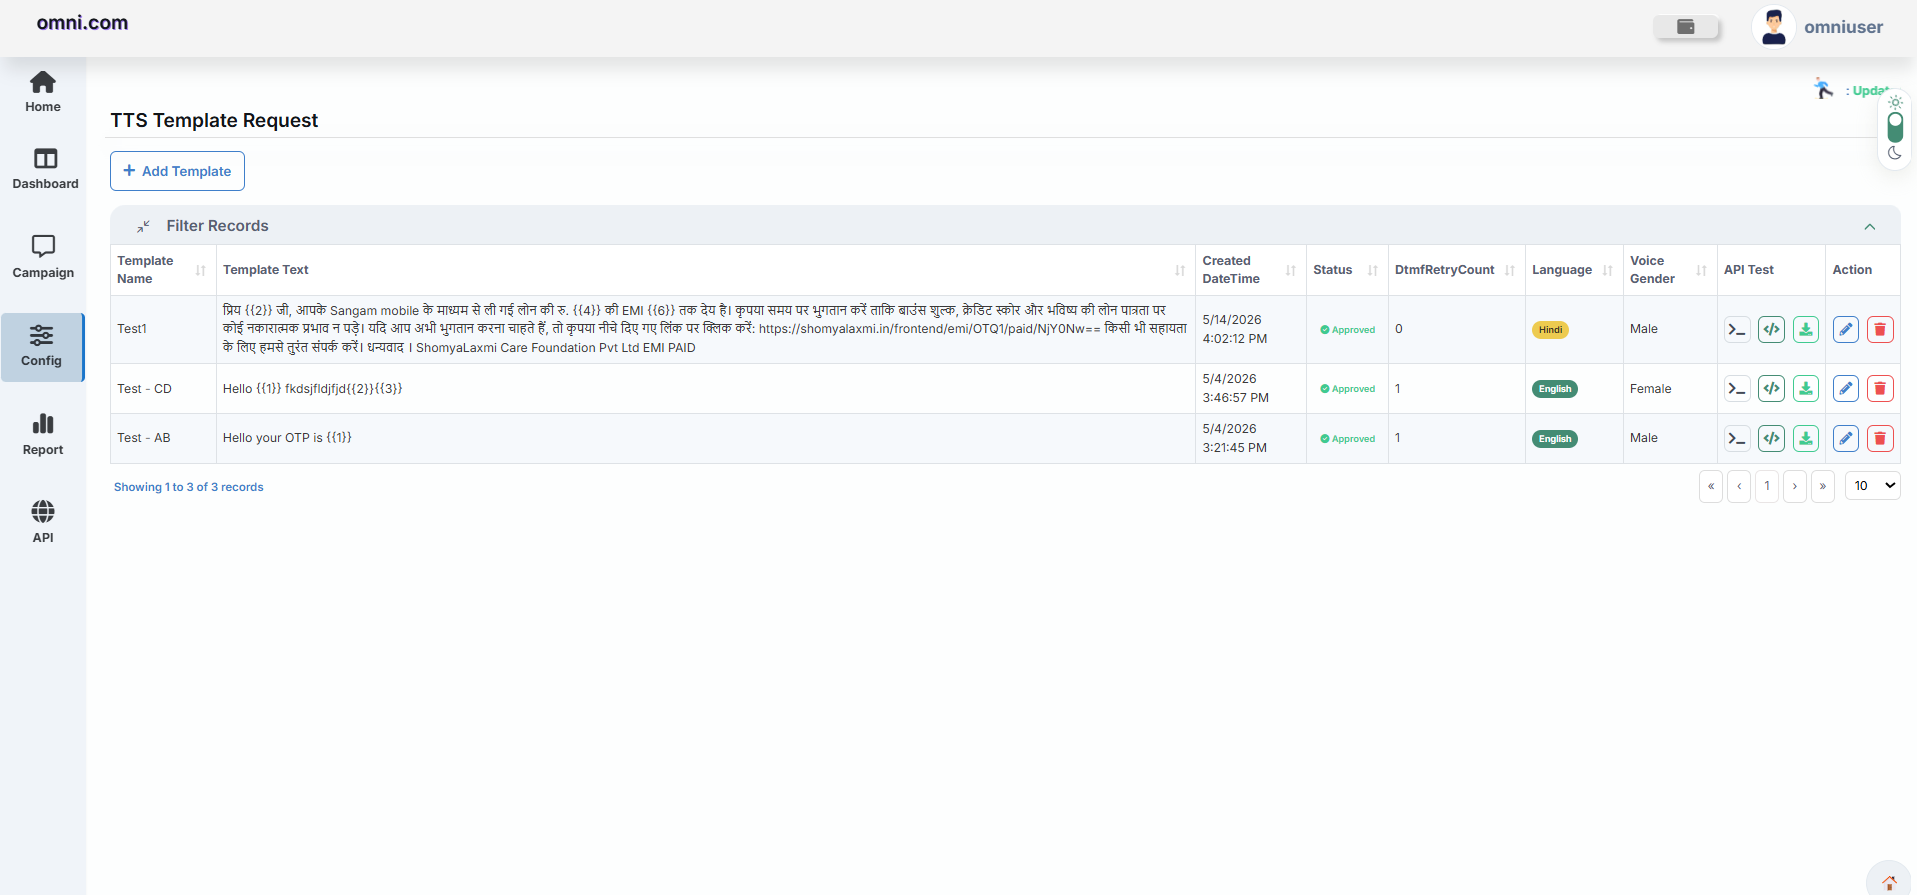
Creating a TTS Template
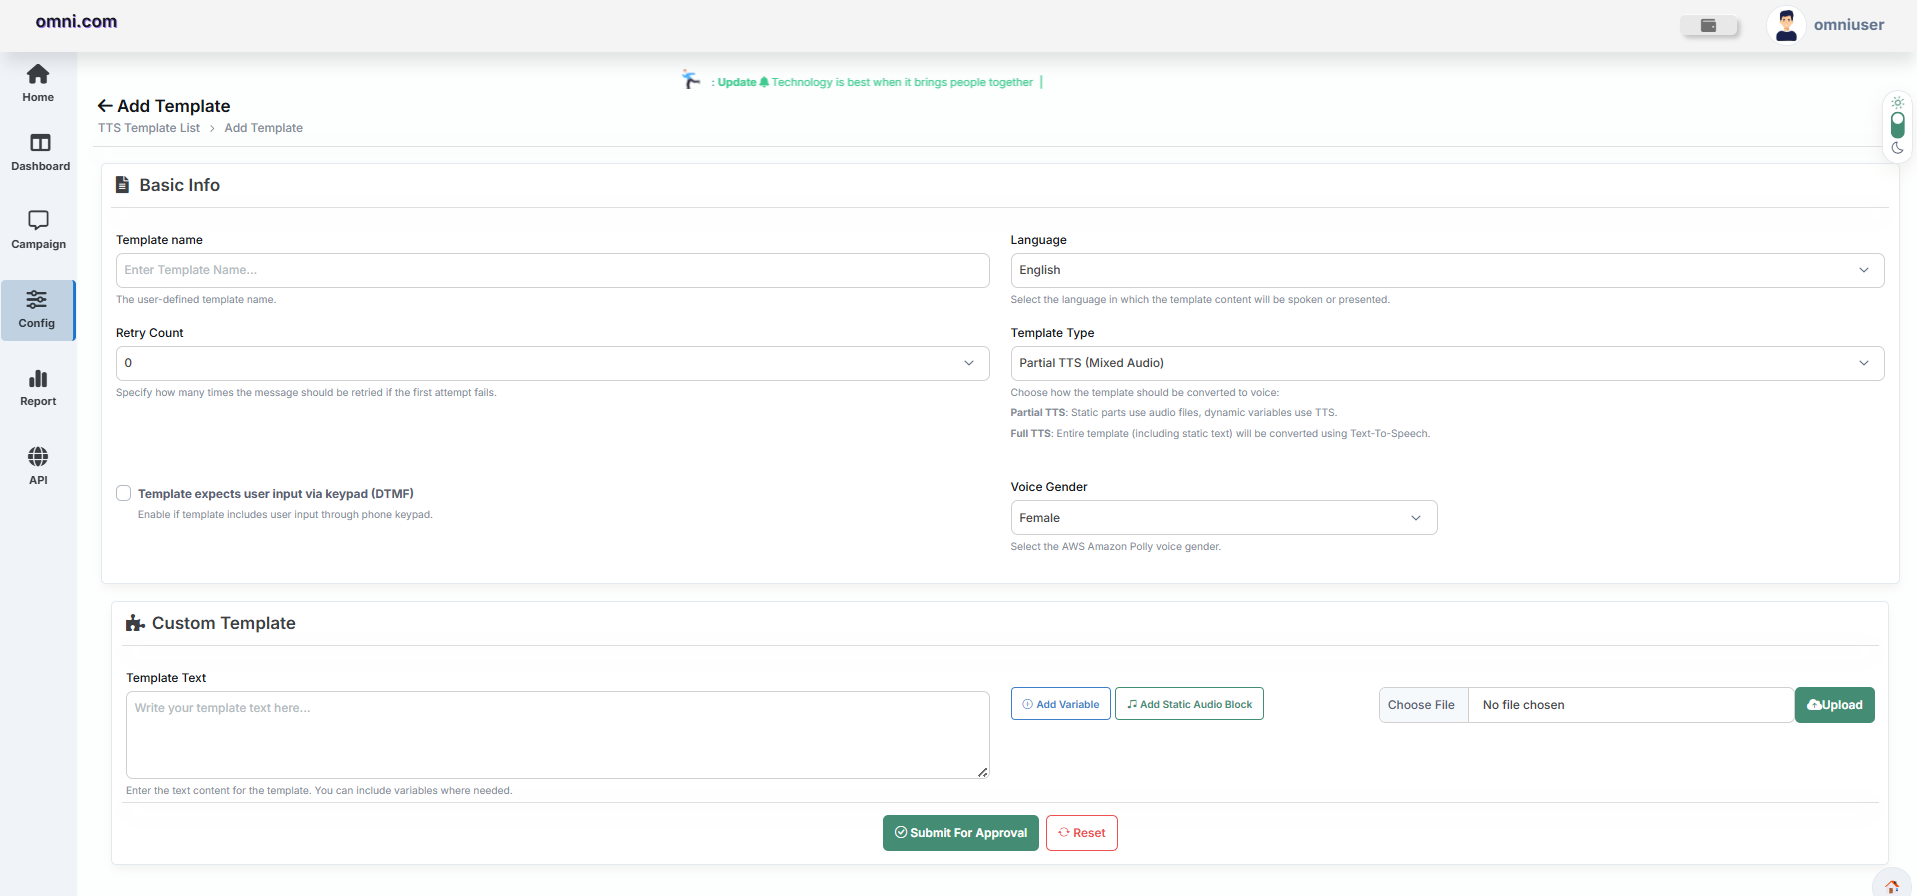
Template Fields
| Field | Description |
|---|---|
| Template Name | Unique name used to identify the template. |
| Language | Select the language in which the message will be spoken. |
| Retry Count | Defines how many times the system retries a failed call. |
| Template Type | Select either Partial TTS or Full TTS. |
| Voice Gender | Select Male or Female voice. |
| DTMF | Enable keypad input if recipient interaction is required. |
| Template Text | Text that will be converted into speech during the call. |
| Variables | Insert dynamic values such as customer name, OTP, or account number. |
| Static Audio Block | Add previously uploaded voice files into the template. |
Template Type
The Template Type determines how the voice message is generated during the call. Users can choose between Partial TTS (Mixed Audio) and Full TTS based on their campaign requirements.
| Template Type | Description |
|---|---|
| Partial TTS (Mixed Audio) | Static parts of the message use uploaded audio files, while dynamic variables (such as customer name, OTP, or account number) are converted to speech using Text-to-Speech. |
| Full TTS | The entire message, including both static text and dynamic variables, is converted into speech using the Text-to-Speech engine. |
Use Partial TTS when you want to combine pre-recorded audio with dynamic information. Use Full TTS when the complete message should be generated directly using Text-to-Speech.
Available Actions
Use variables to personalize voice messages. For example, customer names, OTPs, invoice numbers, and account balances can be dynamically inserted into the speech during campaign execution.
Only approved templates are available while creating a Text-to-Speech campaign. Templates in pending or rejected status cannot be selected.
Create Text-to-Speech Campaign
The Create Campaign module allows users to create and launch outbound Text-to-Speech (TTS) campaigns using approved templates. Users can configure campaign details, select voice plans, define recipients, and initiate automated voice calls.
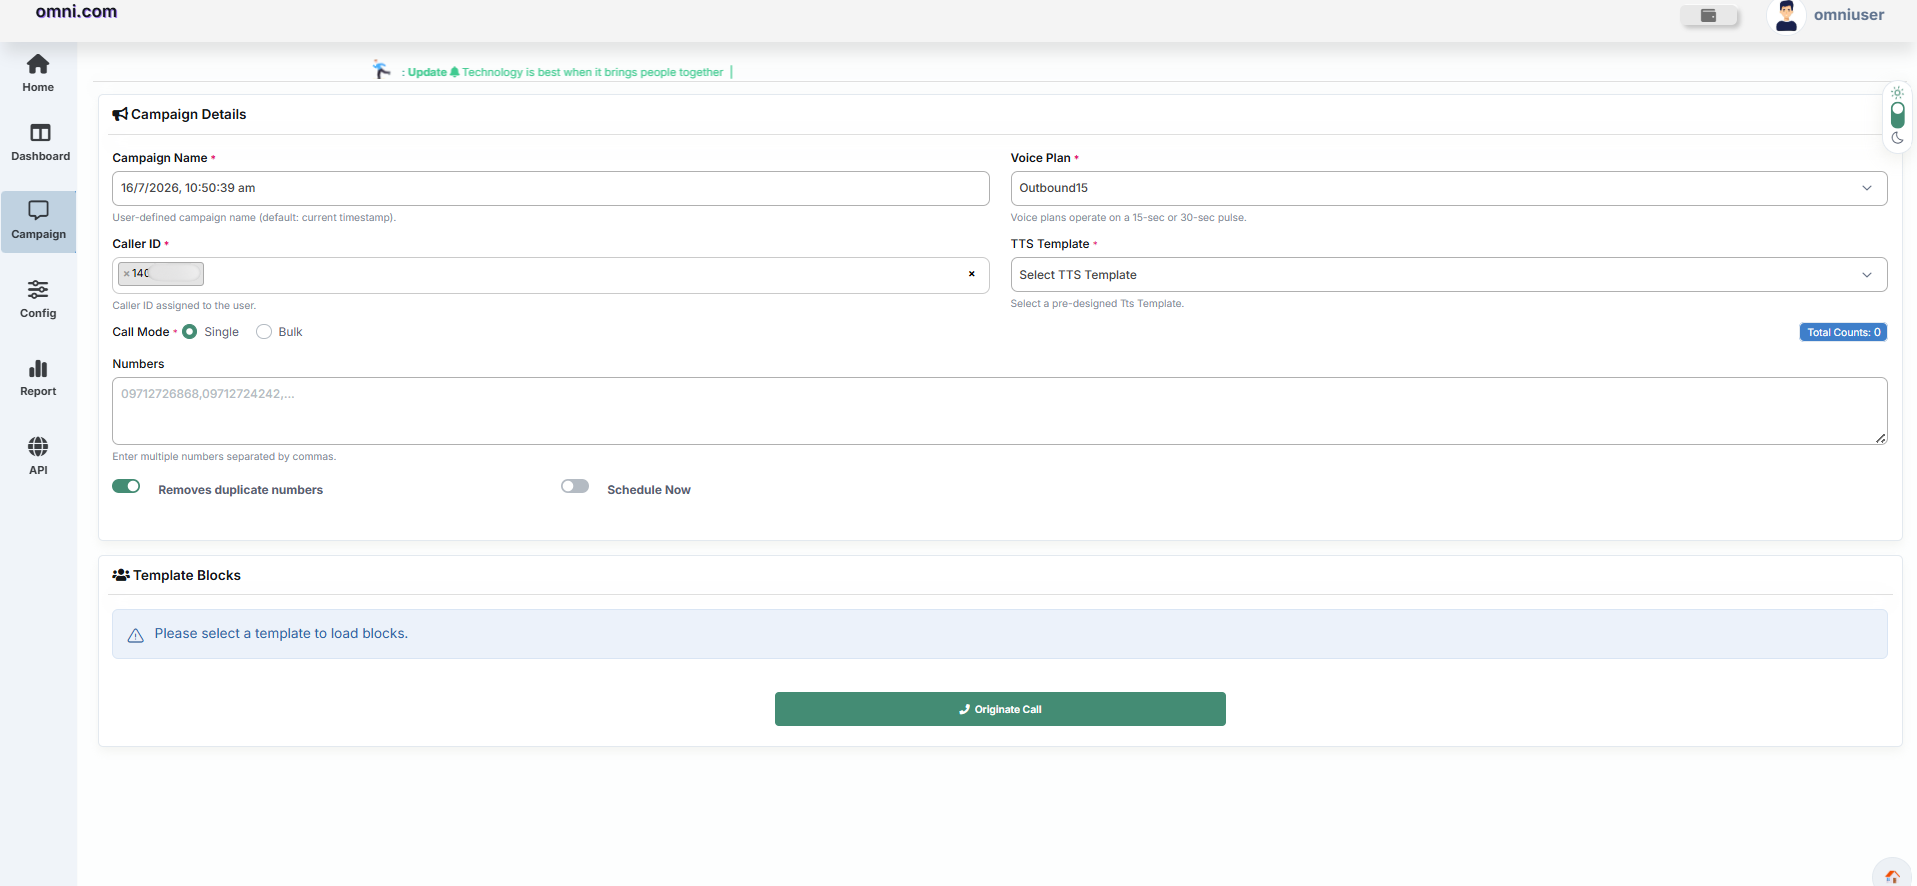
Before You Begin
- Voice Files have been uploaded successfully.
- A TTS template has been created.
- The template has been approved.
Steps to Create a Campaign
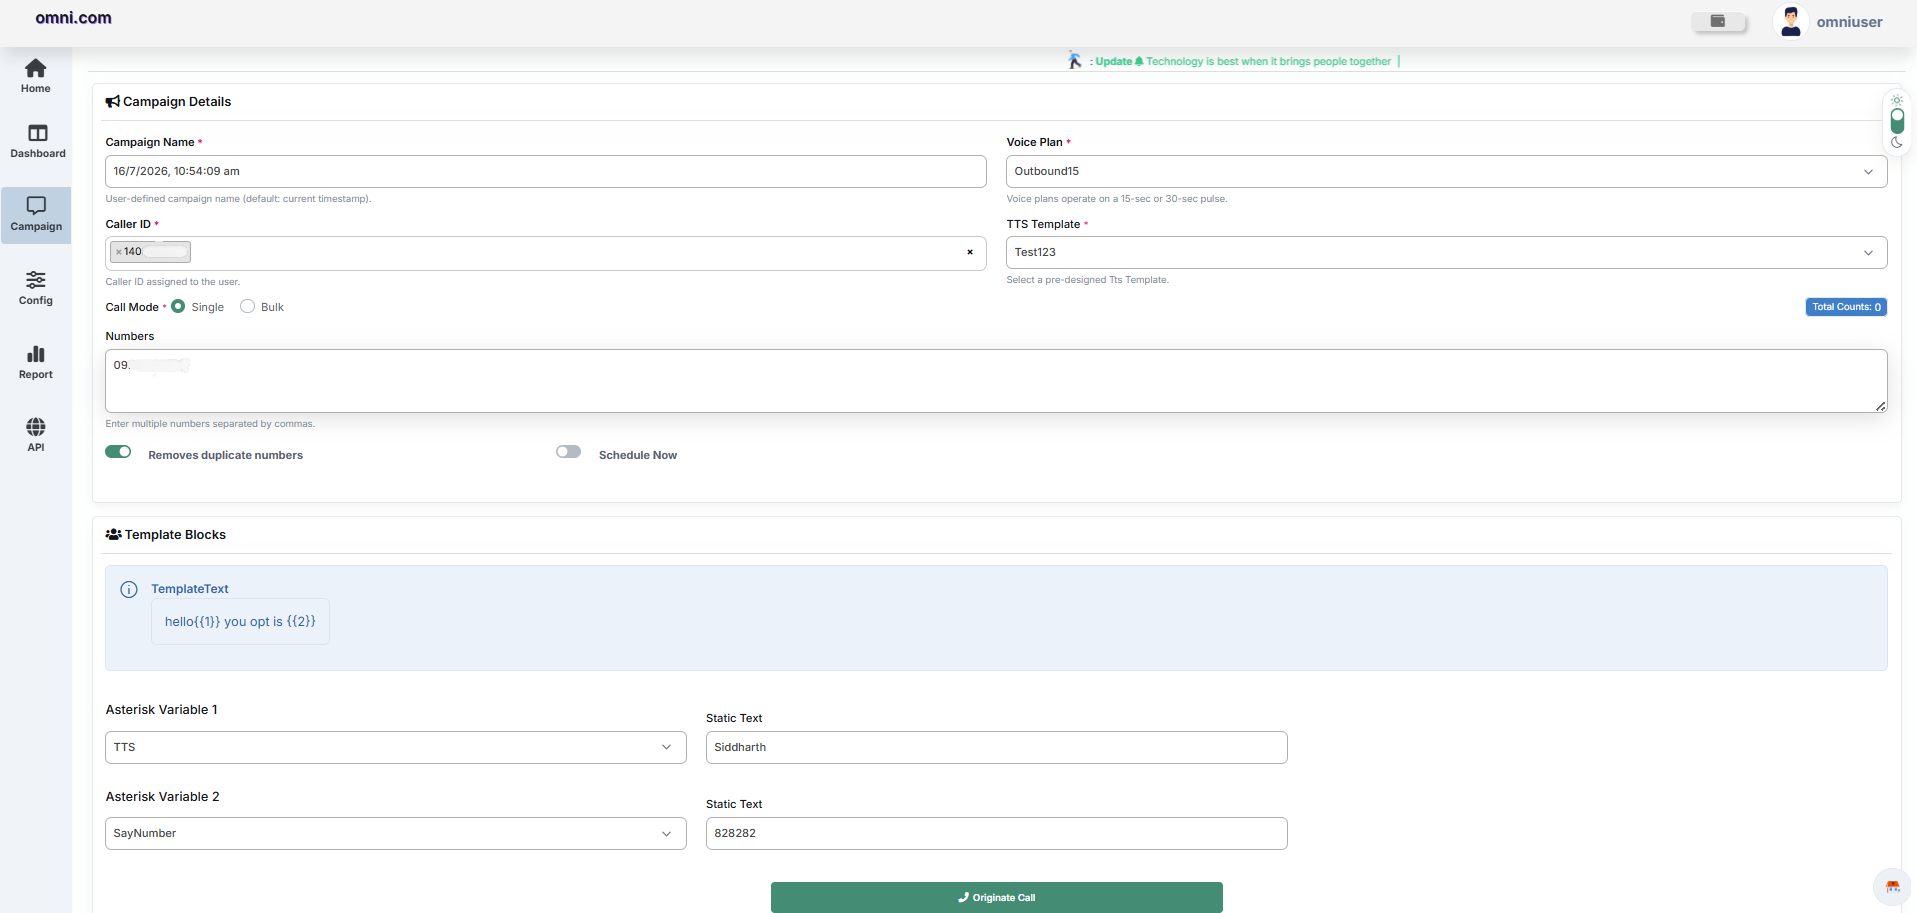
Example
| Variable | Purpose |
|---|---|
| Variable 1 (TTS) | Enter the recipient's name. |
| Variable 2 (SayNumber) | Enter the OTP, account number, or any numeric value that should be spoken during the call. |
The system automatically replaces these variables with the values entered by the user when generating the Text-to-Speech voice message.
Campaign Fields
| Field | Description |
|---|---|
| Campaign Name | Unique name used to identify the campaign. |
| Voice Plan | Select the voice plan used for the outbound calls. |
| Caller ID | Select the caller ID that recipients will receive. |
| TTS Template | Select an approved Text-to-Speech template. |
| Call Mode | Choose Single or Bulk call mode. |
| Recipient Numbers | Enter the destination mobile numbers. |
| Remove Duplicate Numbers | Automatically removes duplicate mobile numbers from the campaign. |
| Schedule Campaign | Schedule the campaign for a future date and time if required. |
Campaign Summary
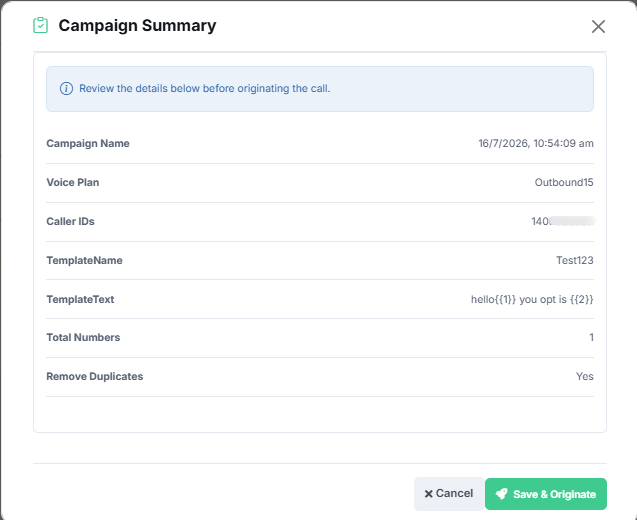
Review all campaign details carefully before clicking Save & Originate.
Always review the campaign summary before clicking Save & Originate to ensure the correct template, caller ID, and recipient numbers have been selected.
After clicking Save & Originate, the campaign is automatically saved in the Reports module, where users can monitor campaign status, call results, execution history, and campaign performance.
Text-to-Speech Reports
The Text-to-Speech Reports module provides comprehensive insights into Text-to-Speech (TTS) activity, call status, delivery statistics, and campaign reports. Users can monitor Text-to-Speech (TTS) campaign execution, analyze call outcomes, and review detailed reporting information from a centralized dashboard.
Report Dashboard
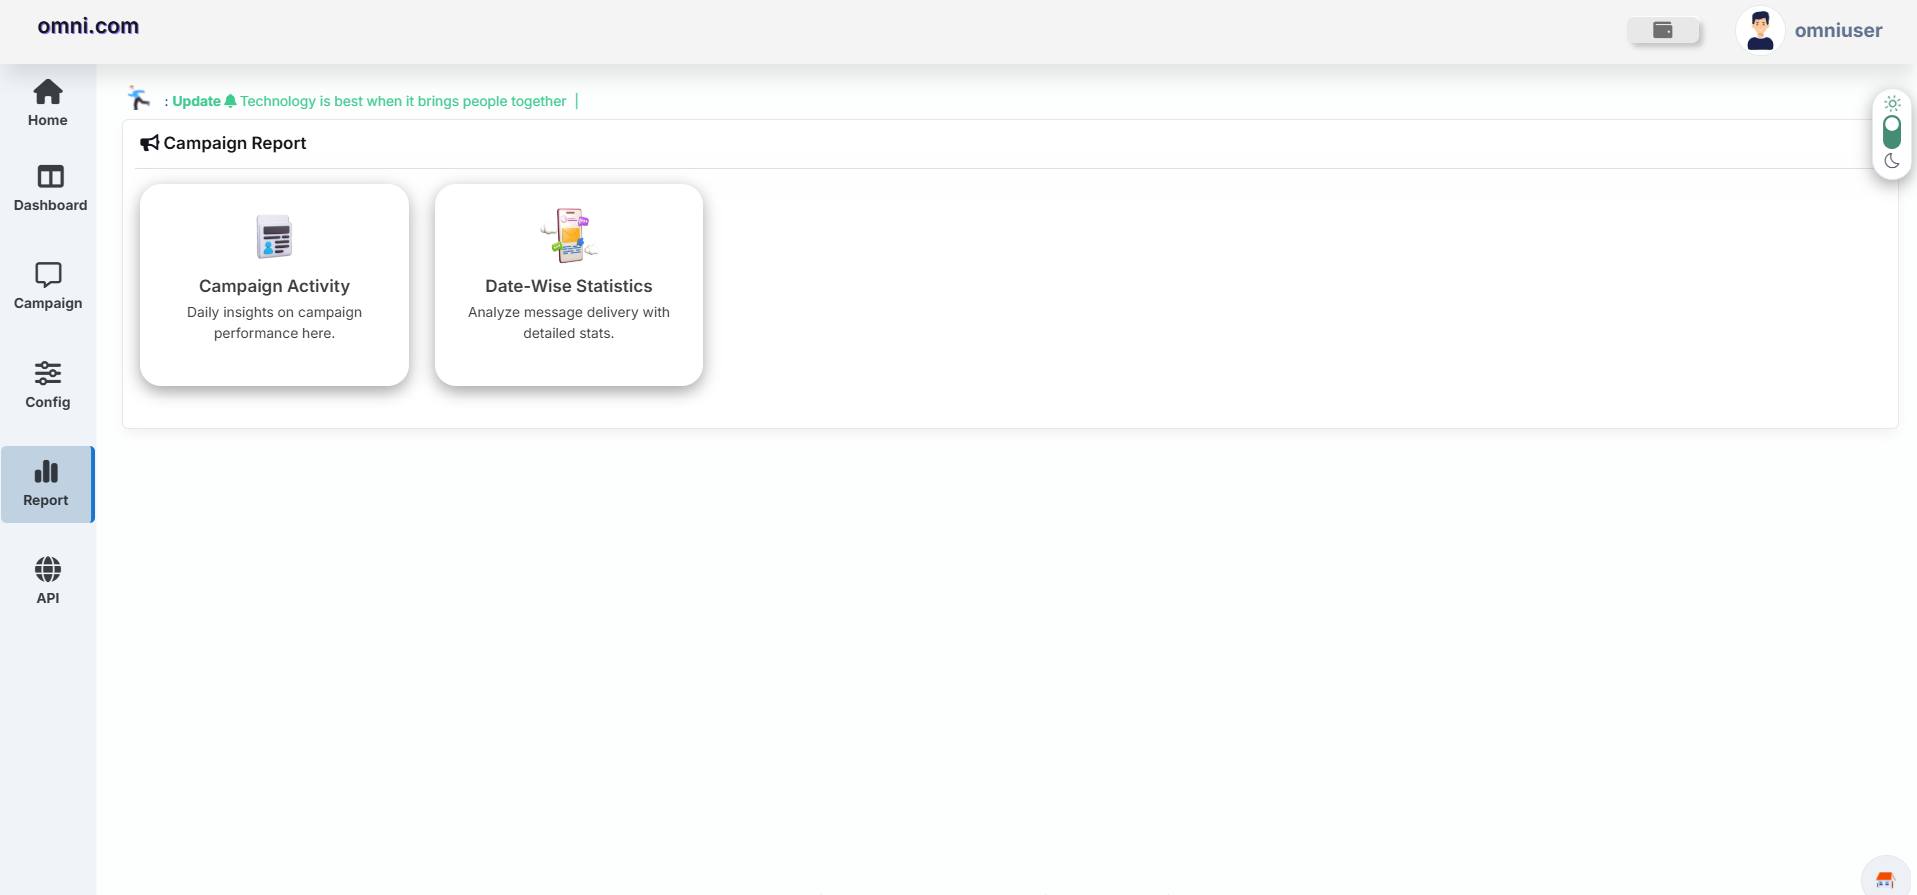
Purpose
The Text-to-Speech (TTS) Reports module is designed to provide comprehensive visibility into Text-to-Speech (TTS) campaign execution, call activity, delivery statistics, campaign performance, and reporting records. It enables organizations to monitor Text-to-Speech (TTS) campaigns, review call reports, and analyze communication performance.
Available Report Sections
| Section | Description |
|---|---|
| Campaign Activity | Displays campaign execution details, call activity, and overall Text-to-Speech (TTS) campaign performance. |
| Day-Wise Statistics | Provides day-wise call statistics to help analyze call volume, outcomes, and overall campaign performance. |
Benefits
- Monitor Text-to-Speech (TTS) activity.
- Track call completion and delivery status.
- Analyze campaign execution statistics.
- Export detailed Text-to-Speech (TTS) reports.
Users can access reporting tools and monitor Text-to-Speech (TTS) activity from a centralized location.
Campaign Activity
Purpose
The Campaign Activity report provides detailed information about Text-to-Speech (TTS) campaigns executed during a selected date range. Users can review campaign performance, delivery status, scheduled campaigns, and fallback reports.
Date Range Filter
Users can select a custom date range to view campaign records.
Available Options
- Today
- Yesterday
- Last 7 Days
- Last 30 Days
- This Month
- Last Month
- Custom Range
Click Apply to load campaign data for the selected period.
Campaign Report Information
| Field | Description |
|---|---|
| Campaign Date | Displays the date and time when the voice campaign was created. |
| Campaign Name | Displays the name of the voice campaign. |
| Caller ID | Displays the caller ID used to place outbound voice calls. |
| Agent Number | Displays the agent or destination number associated with the campaign. |
| Scheduled Info | Indicates whether the campaign was scheduled. If scheduled, the configured schedule information is displayed. |
| Total | Displays the total number of contacts or calls included in the campaign. |
| Progress | Displays the campaign execution progress, including the completion percentage and processed calls. |
| Retry | Displays the retry count configured for failed or unanswered calls. |
| Delay (m) | Displays the delay, in minutes, configured between call retry attempts. |
| Before | Displays the available voice credits or balance before the campaign execution. |
| Status | Displays the current status of the campaign, such as Running, Completed, or Stopped. |
| Actions | Provides options to view campaign details, open reports, or download campaign-related information. |
Available Actions
- View Campaign Details
- View Delivery Information
- Download Report
Delivery Report
The Delivery Report displays recipient-level delivery information and helps users verify message delivery status.
| Field | Description |
|---|---|
| Call Date | Displays the date and time when the Text-to-Speech (TTS) was processed. |
| Number | Displays the recipient mobile number. |
| Reference ID | Unique identifier generated for the Text-to-Speech (TTS) transaction. |
| TTS Template | Displays the TTS Template or audio file used in the campaign. |
| Call Status | Displays the call status along with call completion time. |
| Interface | Displays the interface used to send the Text-to-Speech (TTS) message, such as Web or HTTP. |
| Credits Used | Displays the total voice credits consumed for the call. |
| View | Allows users to view detailed information about the message. |
Features
- View delivery records.
- Download delivery report.
Text-to-Speech (TTS) API Report
The Text-to-Speech (TTS) API Report provides detailed information about Text-to-Speech (TTS) campaigns initiated through API integration. It allows users to monitor API requests, responses, campaign execution, and recipient-level call activity from a centralized reporting interface.
Overview
The Text-to-Speech (TTS) API Report helps administrators track Text-to-Speech (TTS) campaigns created using API requests. It displays request details, response status, campaign information, and recipient activity, making it easier to troubleshoot issues and monitor API-based Text-to-Speech (TTS) communication.
Report Components
| Component | Description |
|---|---|
| Date Range | Select the required date range to retrieve API report records. |
| API Report | Displays all Text-to-Speech (TTS) campaigns created through API integration. |
| Refresh | Reloads the latest API report records. |
| Export | Downloads the current API report for analysis. |
| Filter Records | Displays campaign records based on the selected filters. |
Available Information
Features
- Monitor Text-to-Speech (TTS) campaigns created through API.
- Track API request and response status.
- View recipient-level call details.
- Filter records using a selected date range.
- Export API reports for analysis.
- Review campaign execution history.
Day Wise Statistics
The Text-to-Speech (TTS) Statistics report provides a summary of Text-to-Speech (TTS) call performance for a selected date range. It helps users monitor Text-to-Speech (TTS) status, answered calls, failed calls, and overall campaign performance.
Text-to-Speech (TTS) Statistics Page
| Field | Description |
|---|---|
| From Date | Start date for the report |
| To Date | End date for the report |
| Statistics | Fetch delivery statistics for the selected period |
| Reset | Clear filters and reload default values |
| Export | Download the report |
Generate Delivery Statistics
- Select the From Date.
- Select the To Date.
- Click the Statistics button.
The system will generate delivery statistics for the selected date range.
Report Columns
- Received Date
- Pending
- Answered
- Not Answered
- Busy
- Failed
- Rejected
- Others
- Total
The Text-to-Speech (TTS) Reports module provides a centralized view of campaign activity, campaign records, delivery reports, API reports, and day-wise call statistics. Use the available filters and reporting tools to monitor campaign performance, review call outcomes, and export reports for further analysis.
Manage Remarks
The Manage Remarks module allows administrators to create and manage call remarks used in Text-to-Speech (TTS) campaigns. Remarks help classify call outcomes, customer responses, and campaign results, making it easier to analyze campaign performance and generate reports.
Navigation
To access the Manage Remarks page:
- Log in to the Omni Portal.
- Click Config from the left navigation menu.
- Open Manage Remarks.
The Manage Remarks page displays all configured remarks along with their product association, creation date, status, and available actions.
Manage Remarks Page
The page provides a centralized list of all remarks created in the system.
Users can:
- View all existing remarks.
- Create new remarks.
- Edit remark details.
- Delete remarks.
- Check the status of each remark.
Add a New Remark
To create a new remark:
- Click the Add New button.
- The Remark Detail dialog box appears.
- Complete the required information.
- Click Save.
The newly created remark becomes available for the selected product.
Remark Detail Fields
| Field | Description |
|---|---|
| Product Name | Select Text-to-Speech (TTS) as the product for which the remark will be used. |
| Remark Name | Enter the name of the remark, such as Interested, Busy, or Callback Required. |
| Status | Enable or disable the remark. Active remarks are available for use, while inactive remarks are hidden from operational use. |
Remarks List
After saving, the remark appears in the remarks table where users can view and manage all configured remarks.
| Column | Description |
|---|---|
| Product | Product associated with the remark. |
| Remark Name | Name of the configured remark. |
| Remark Date | Date and time when the remark was created. |
| Status | Displays whether the remark is Active or Inactive. |
| Action | Edit or delete the selected remark. |
Edit a Remark
To modify an existing remark:
- Locate the required remark in the table.
- Click the Edit icon.
- Update the required information.
- Click Save.
The updated information is immediately reflected in the remarks list.
Delete a Remark
To permanently remove a remark:
- Locate the required remark.
- Click the Delete icon.
- Confirm the deletion.
Status Management
Remarks can be enabled or disabled using the Status option.
| Status | Description |
|---|---|
| Active | The remark is available for use while configuring Text-to-Speech campaigns and can be selected during campaign execution. |
| Inactive | The remark remains stored but cannot be selected during campaign execution. |
Features
Notes
- Create meaningful remark names for easy identification.
- Assign remarks appropriately for Text-to-Speech campaigns.
- Disable remarks instead of deleting them if they may be needed in the future.
- Regularly review and update remarks to match current business requirements.
Journeys
The Journeys module enables businesses to create intelligent, multi-channel customer communication workflows. It combines messaging services such as RCS, SMS, and WhatsApp into a single automated journey, allowing messages to be delivered using Sequential, Parallel, or Fallback communication strategies.
Module Overview
The Journeys module provides a complete solution for designing, executing, and monitoring customer communication workflows. Users can create reusable journeys, configure message templates for multiple channels, launch campaigns, and review execution reports from a single interface.
Key Features
| Feature | Description |
|---|---|
| Multi-Channel Messaging | Combine RCS, SMS, and WhatsApp into a single customer communication workflow. |
| Journey Builder | Design communication flows using configurable message components. |
| Flexible Sending Styles | Support Sequential, Parallel, and Fallback delivery methods. |
| Campaign Execution | Launch Journey Campaigns immediately or schedule them for future execution. |
| Campaign Monitoring | Monitor campaign progress and execution status in real-time. |
| Comprehensive Reports | Analyze Journey performance using detailed execution reports and delivery statistics. |
Journey Workflow
A typical Journey consists of the following stages:
- Create a Journey.
- Configure Journey Information.
- Select the Sending Style.
- Add communication components.
- Assign templates for each channel.
- Save the Journey.
- Execute the Journey Campaign.
- Monitor execution progress.
- Review Journey Reports.
Journey Campaign
The Journey Campaign module allows users to create automated multi-channel communication workflows by combining different messaging channels such as RCS Message, SMS and WhatsApp. It enables businesses to design customer engagement flows where messages can be delivered sequentially, in parallel, or through fallback logic.
Accessing the Journeys Module
To access the Journey Campaign module navigate to:
The Journeys page displays all previously created Journey Campaigns. From this page users can create new journeys, manage existing workflows, edit communication flows, launch campaigns and monitor journey execution.
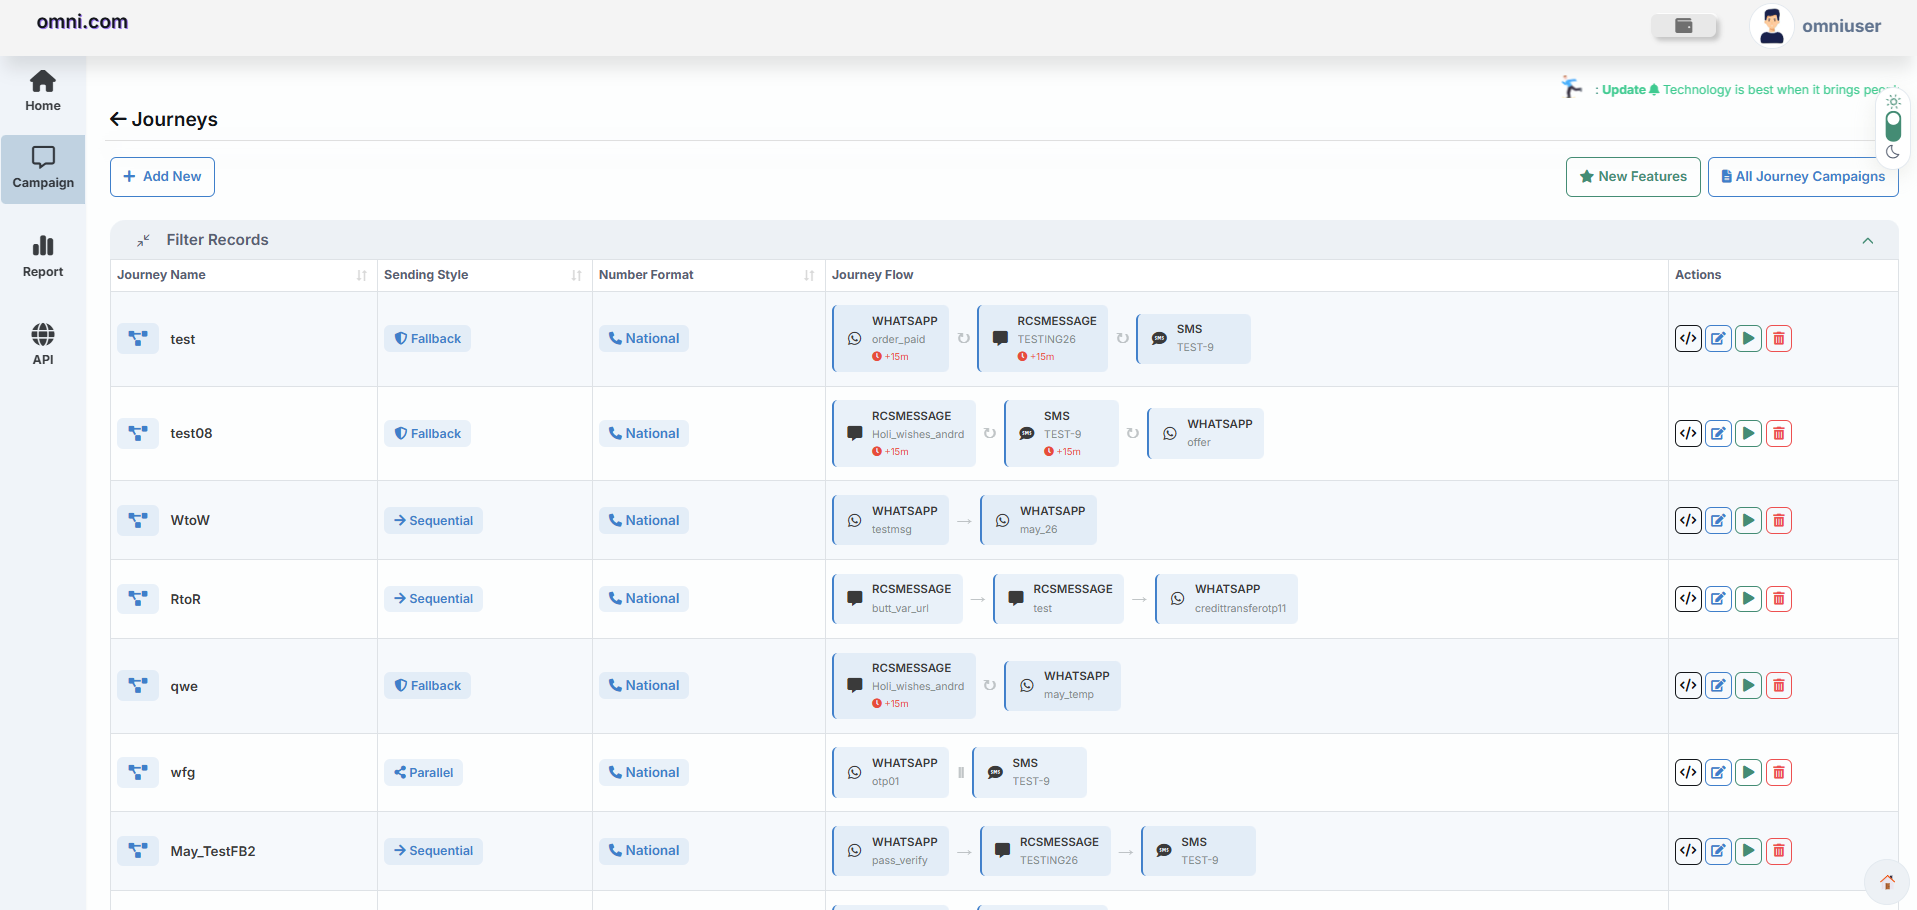
Journey List
The Journey List provides a centralized view of every journey created within the platform.
Users can perform the following actions:
- View all journey records.
- Review the configured Journey Name.
- Check the selected Sending Style.
- View the Number Format.
- Preview the complete Journey Flow.
- Edit an existing journey.
- Launch or Execute a Journey.
- Delete unwanted journeys.
- Create a new Journey.
Create Journey
To create a new workflow, click the Add New button located at the top of the Journey List page.
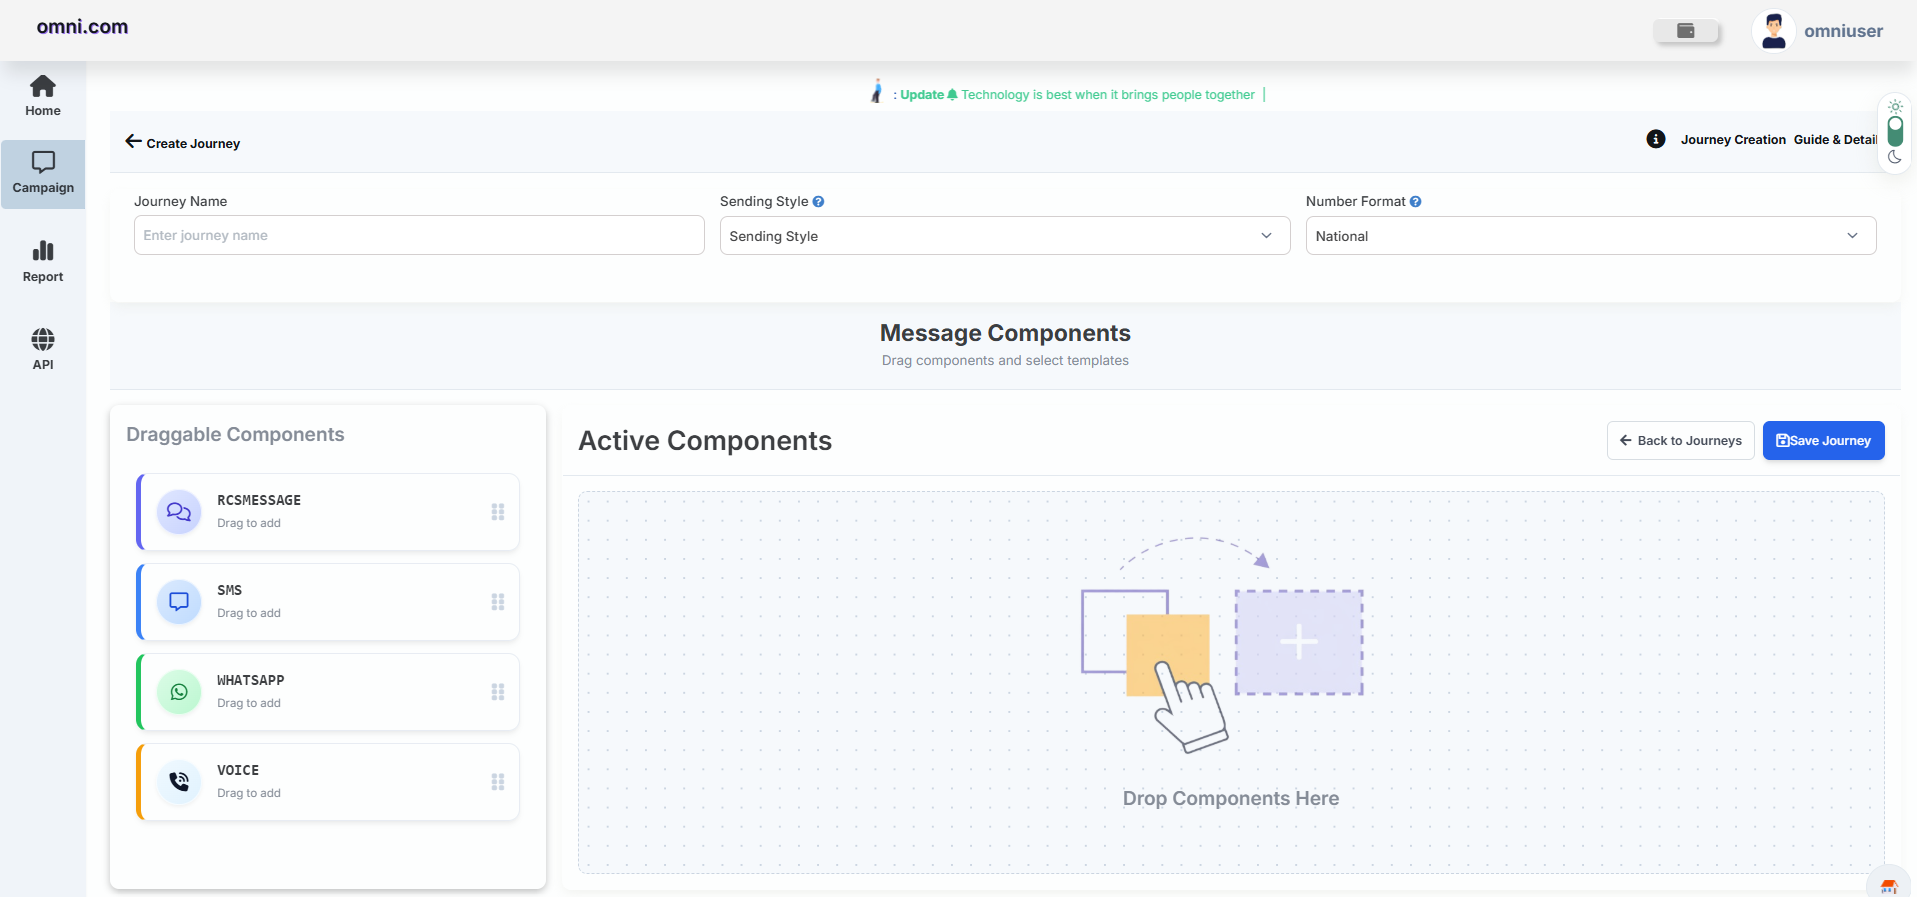
Clicking Add New opens the Create Journey page where users can build a new customer communication workflow.
Major Sections
Journey Information
Before building the workflow, provide the basic Journey details.
Journey Name
Enter a unique and meaningful name for the Journey. This name is used for identification within the platform and helps users easily locate the Journey while editing, executing, or reviewing reports.
Sending Style
Choose how messages should be delivered between different communication channels.
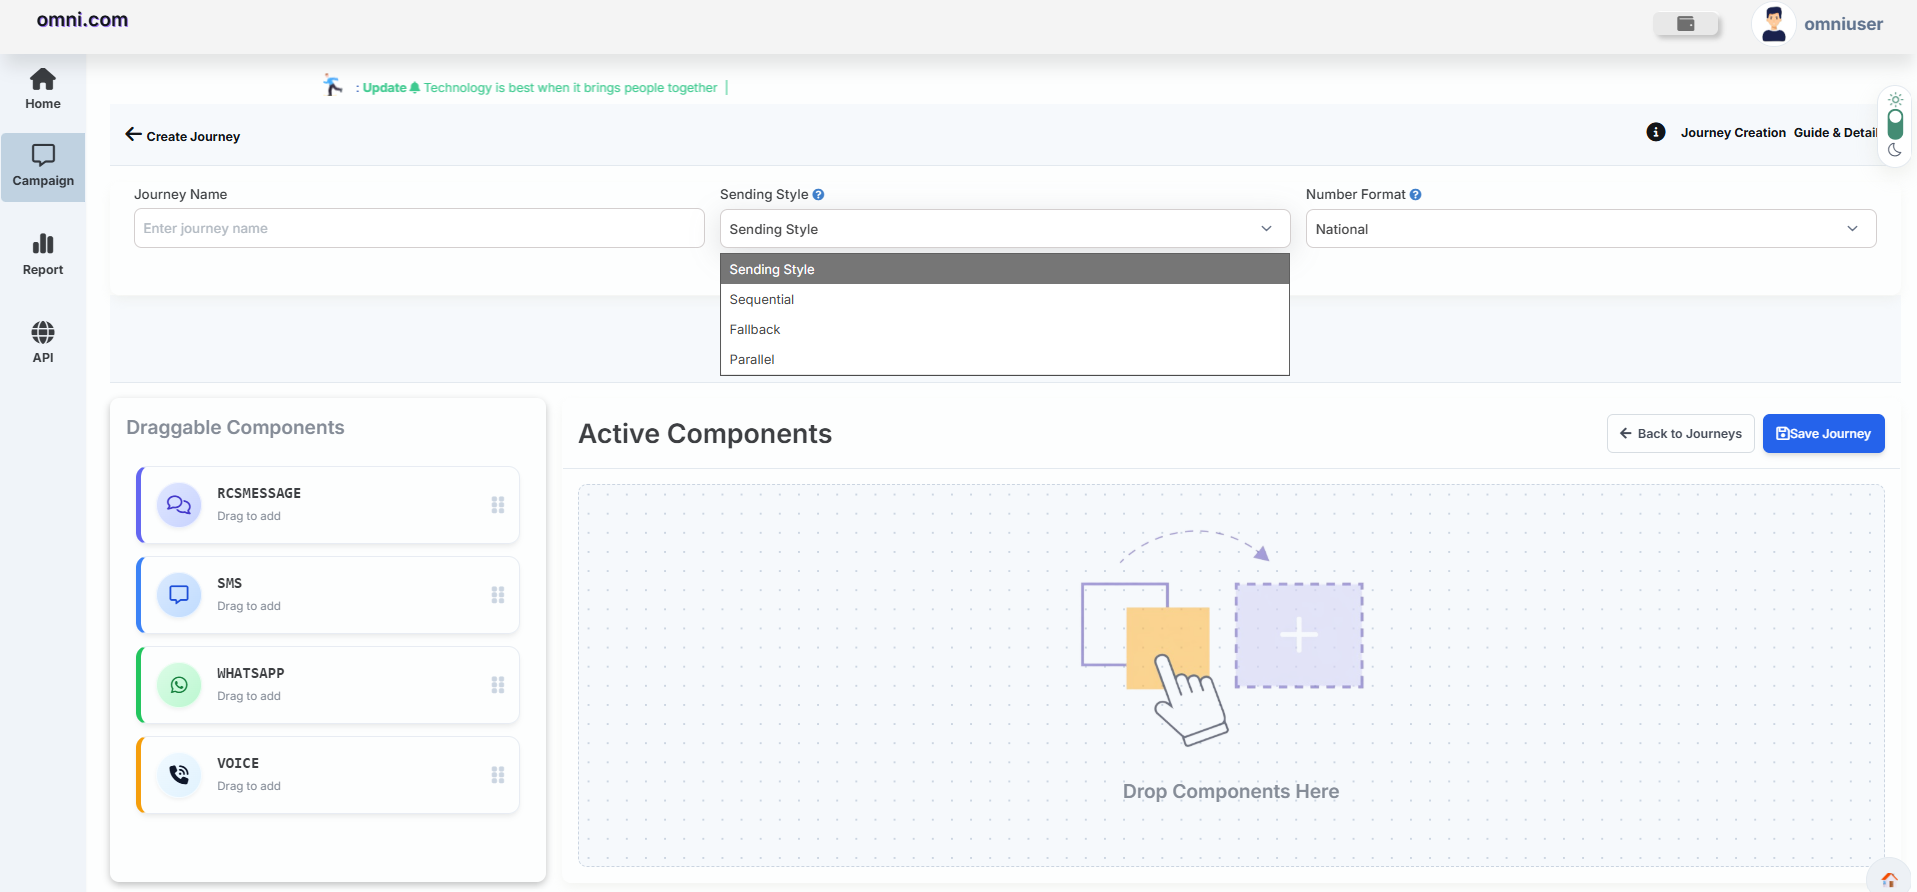
Available sending styles include:
Sequential
Messages are sent one after another in the order they are arranged.
RCS → SMS → WhatsApp
The next message is delivered only after the previous one has been completed.
Fallback
Fallback sends the next message only if the previous communication channel fails or remains undelivered within the configured fallback time.
RCS (Failed)
↓
SMS (Failed)
↓
This improves message delivery by automatically switching to an alternative communication channel.
Parallel
All selected communication channels are triggered simultaneously.
            SMS
          /
    User — RCS
          \
        WhatsApp
This option is useful when the same message needs to reach
customers through multiple channels at the same time.
Number Format
Select the destination phone number format.
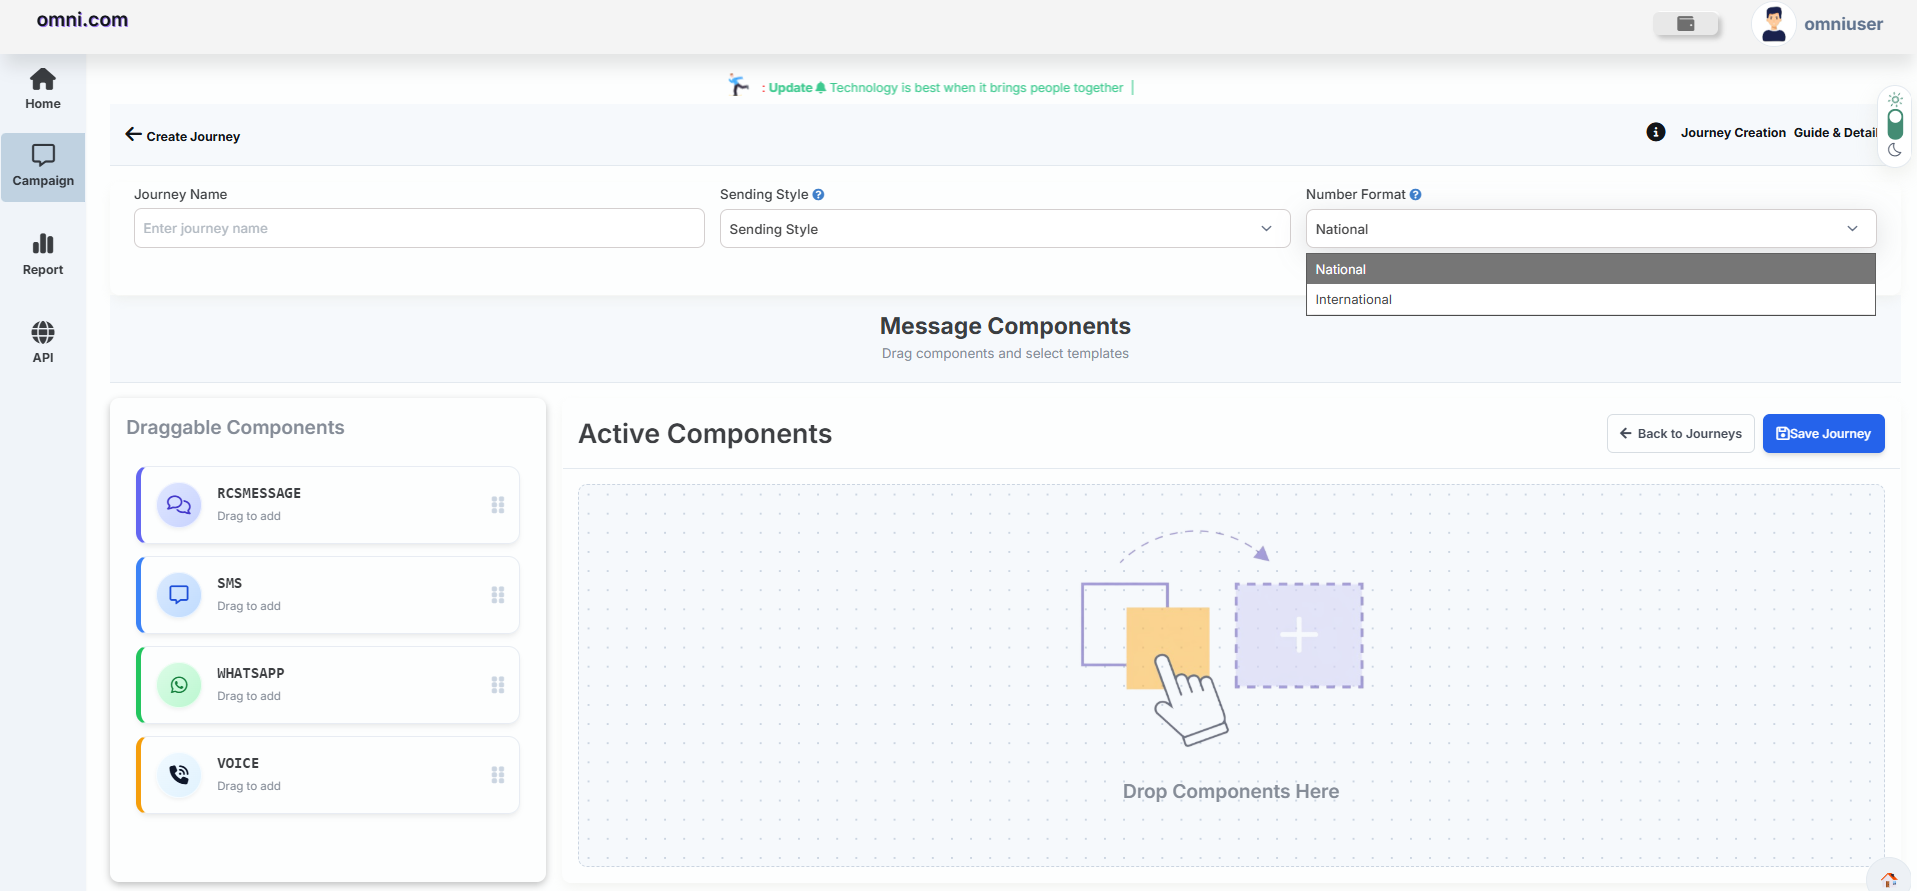
Available options:
- National
- International
Message Components
The Message Components section is used to build the communication flow.
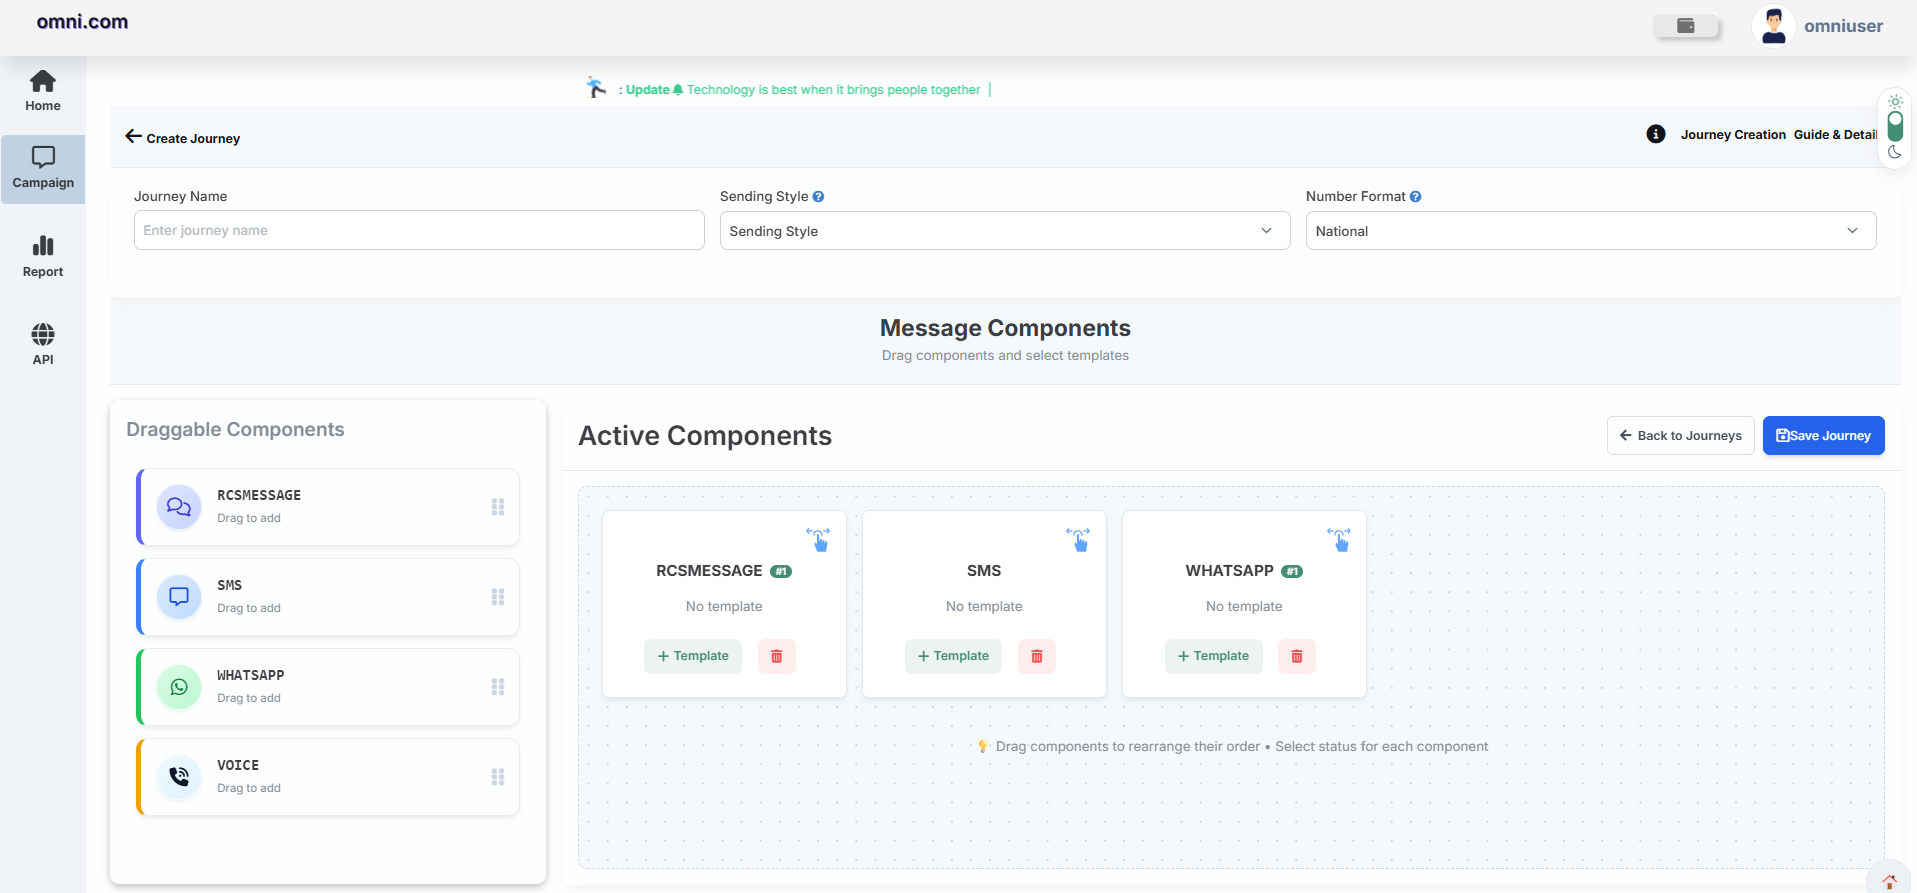
Available components include:
- RCS Message
- SMS
These components can be dragged and dropped into the Active Components area to create the required Journey workflow.
Active Components
The Active Components area represents the actual Journey flow.
After dragging components into the workspace, users can:
- Rearrange component order.
- Assign templates.
- Edit templates.
- Remove components.
- Configure fallback time (for Fallback journeys).
- Preview the configured communication flow.
Configuring an RCS Message Component
Click the + Template button available on the RCS Message component.
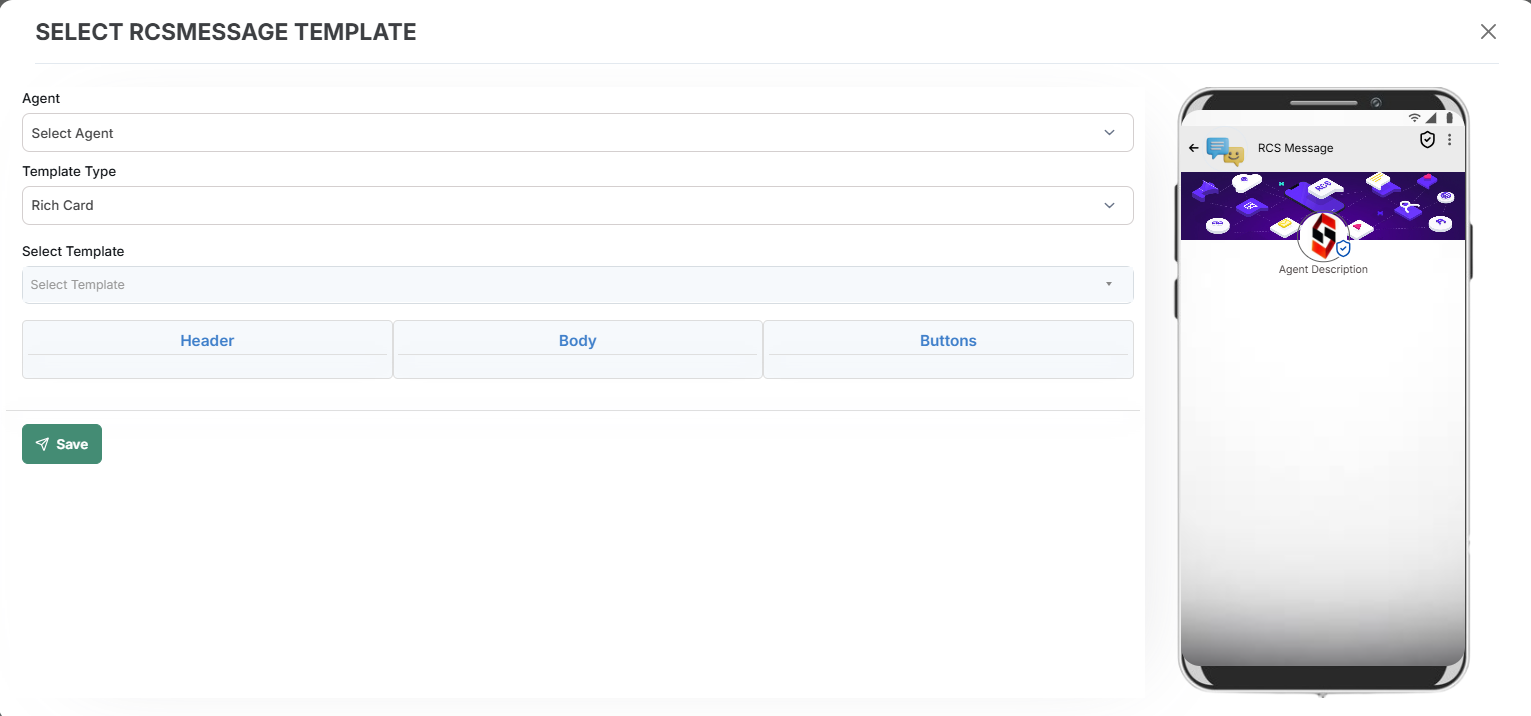
The Select RCS Message Template window opens where users can configure the RCS message for the Journey.
Available Configuration
- Agent – Select the RCS Agent associated with the campaign.
- Template Type – Select the required RCS template format.
- Select Template – Choose an approved RCS template.
- Live Preview – Displays how the selected template appears on the recipient's device.
Supported Template Types
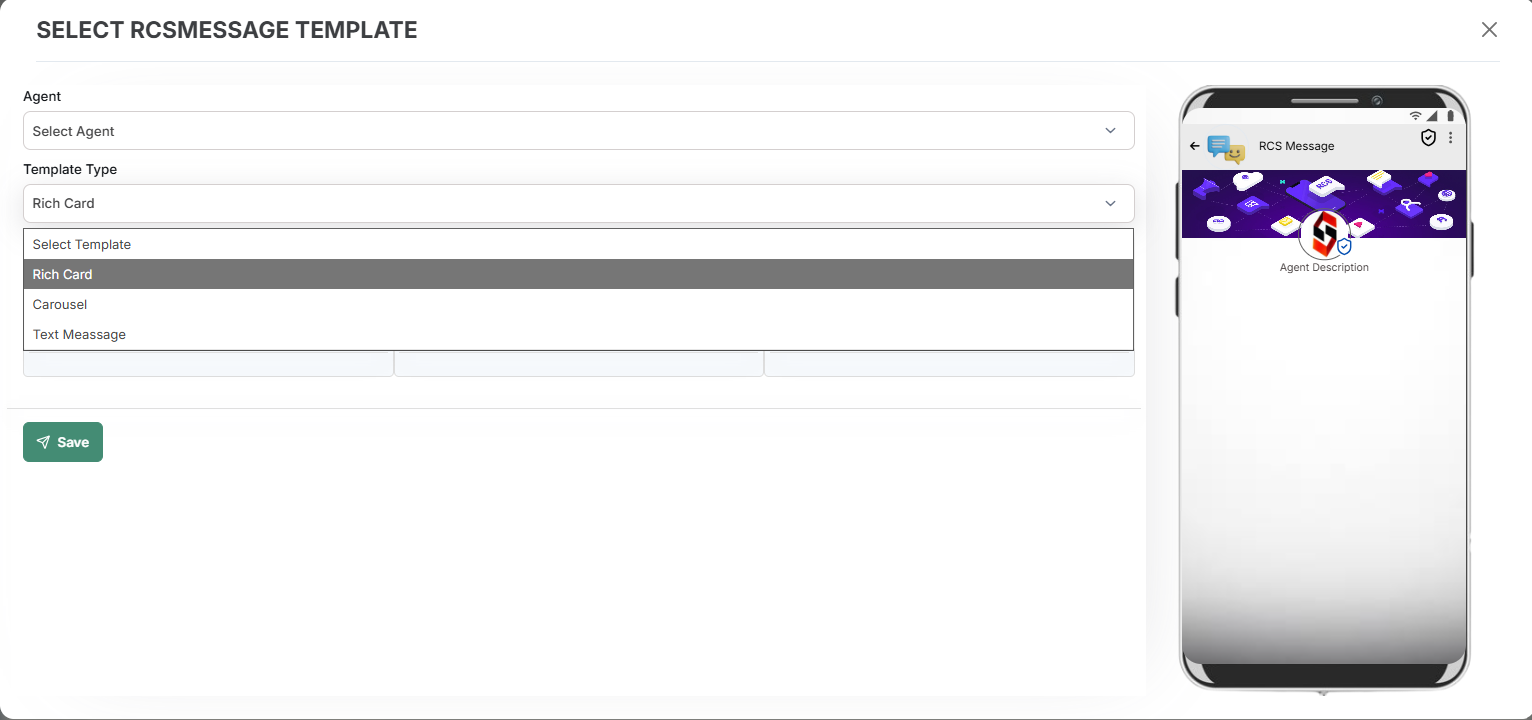
Configuring an SMS Component
Click the + Template button available on the SMS component.
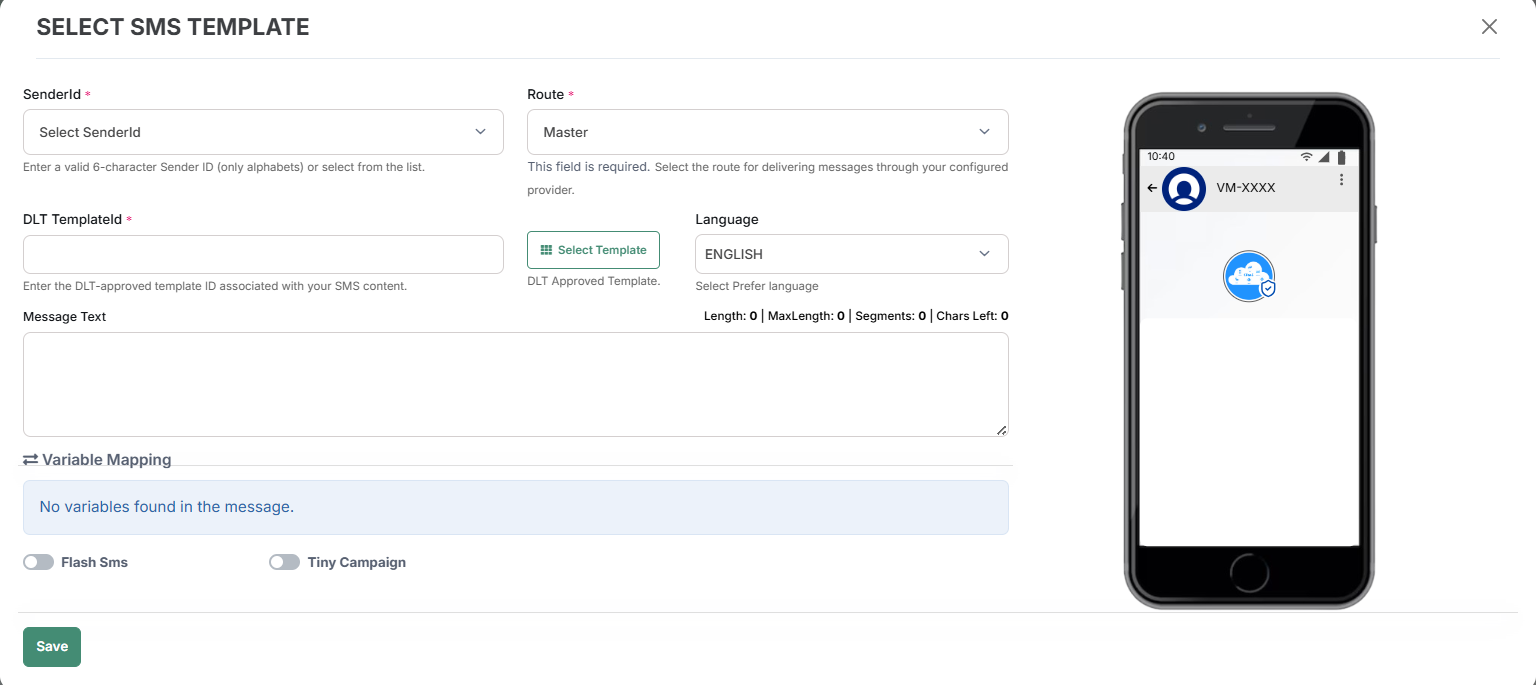
The Select SMS Template window appears.
Configuration Fields
| Field | Description |
|---|---|
| Sender ID | Select the Sender ID used for sending SMS. |
| Route | Select the configured SMS Route. |
| DLT Template ID | Select or enter the approved DLT Template. |
| Language | Select the language of the SMS. |
| Message Text | Review or enter the SMS content. |
Additional Information
- Message Length
- Maximum Length
- Number of Segments
- Remaining Characters
- Variable Mapping
- Flash SMS
- Tiny Campaign
Configuring a WhatsApp Component
Click the + Template button available on the WhatsApp component.
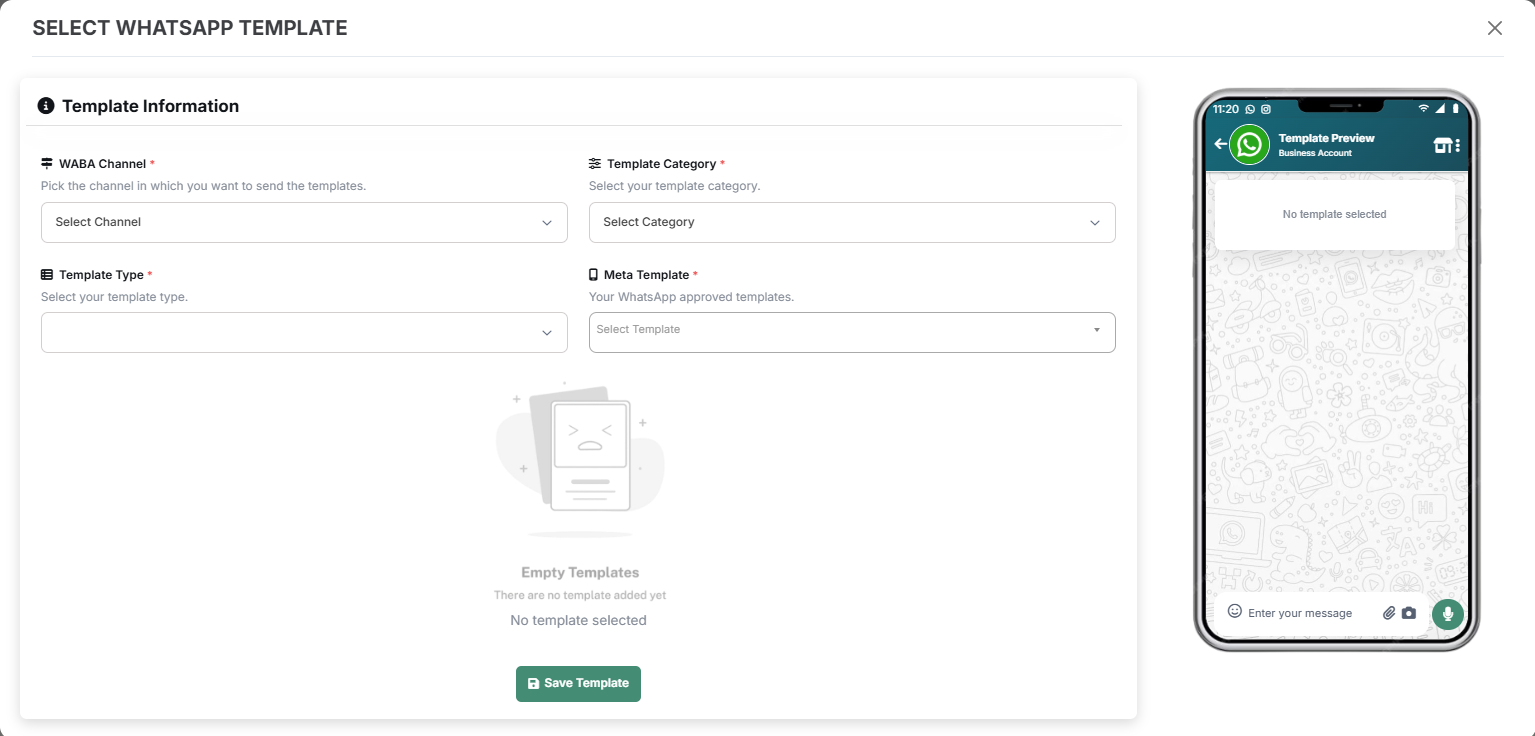
The Select WhatsApp Template window opens.
Configuration Options
- WABA Channel
- Template Category
- Template Type
- Meta Approved Template
Available Categories
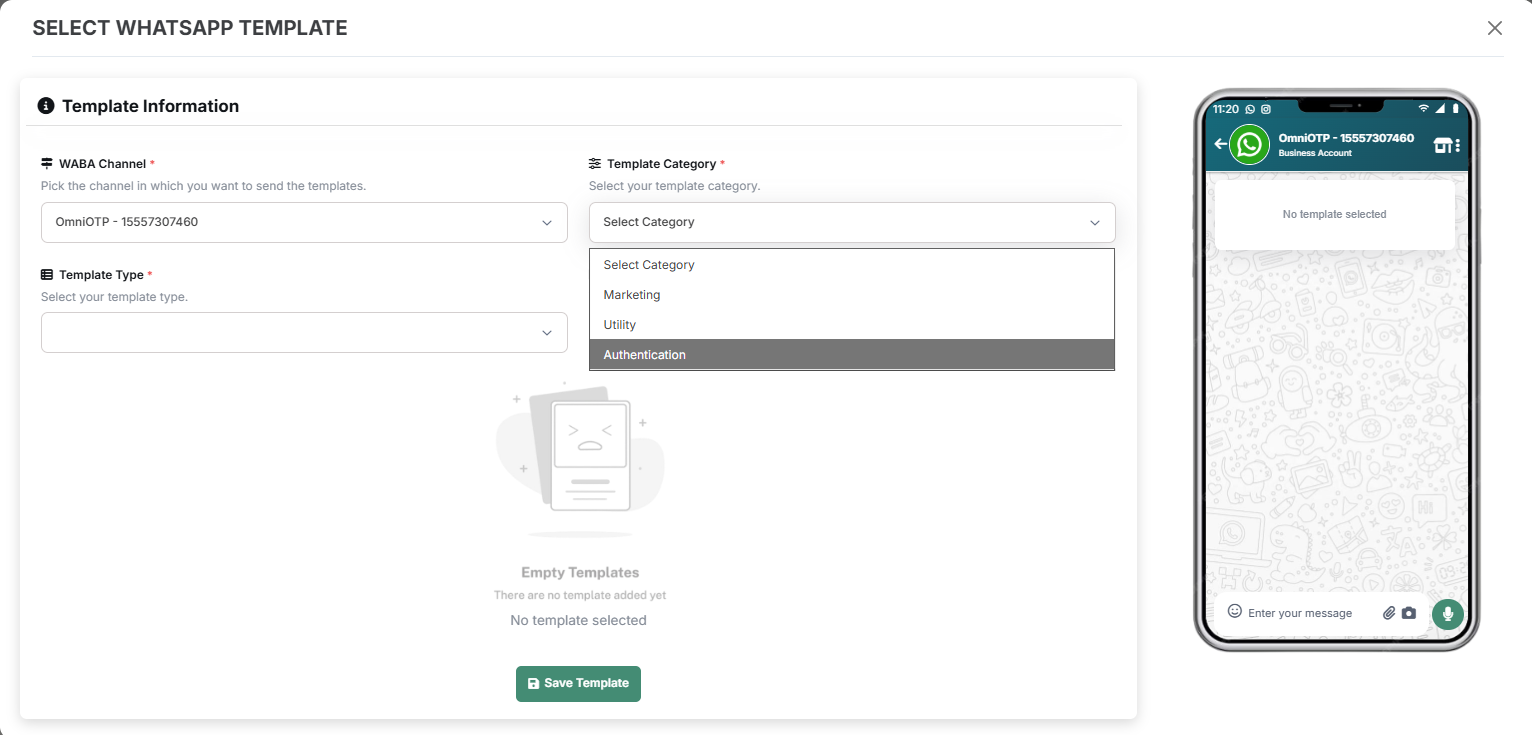
- Marketing
- Utility
- Authentication
Saving the Journey
Once all required components have been configured, review the Journey before saving.
- Verify the Journey Name and settings.
- Ensure every messaging component has an assigned template.
- Arrange the components in the required order.
- Configure fallback timing if applicable.
- Click Save Journey.
Executing a Journey
Once a Journey has been created, it can be executed to deliver messages through the configured communication channels.
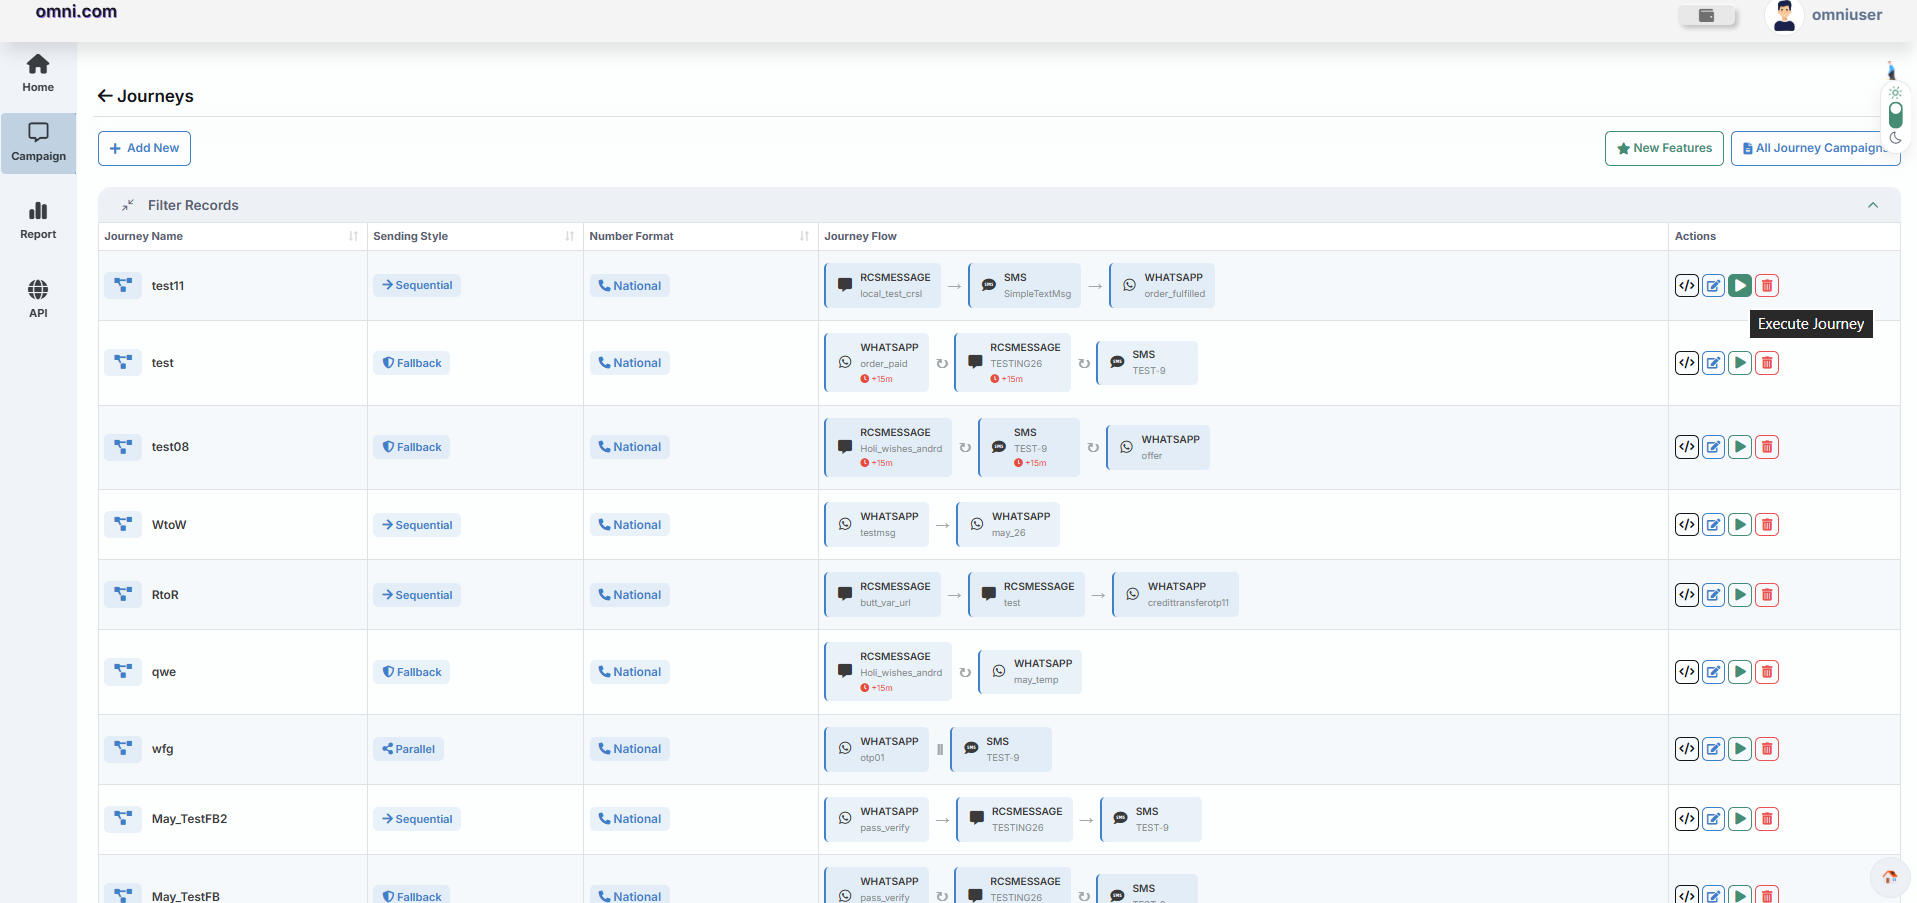
To execute a Journey, navigate to the Journeys page and click the Execute Journey (▶) icon corresponding to the desired Journey.
Step 1 – Input Configuration
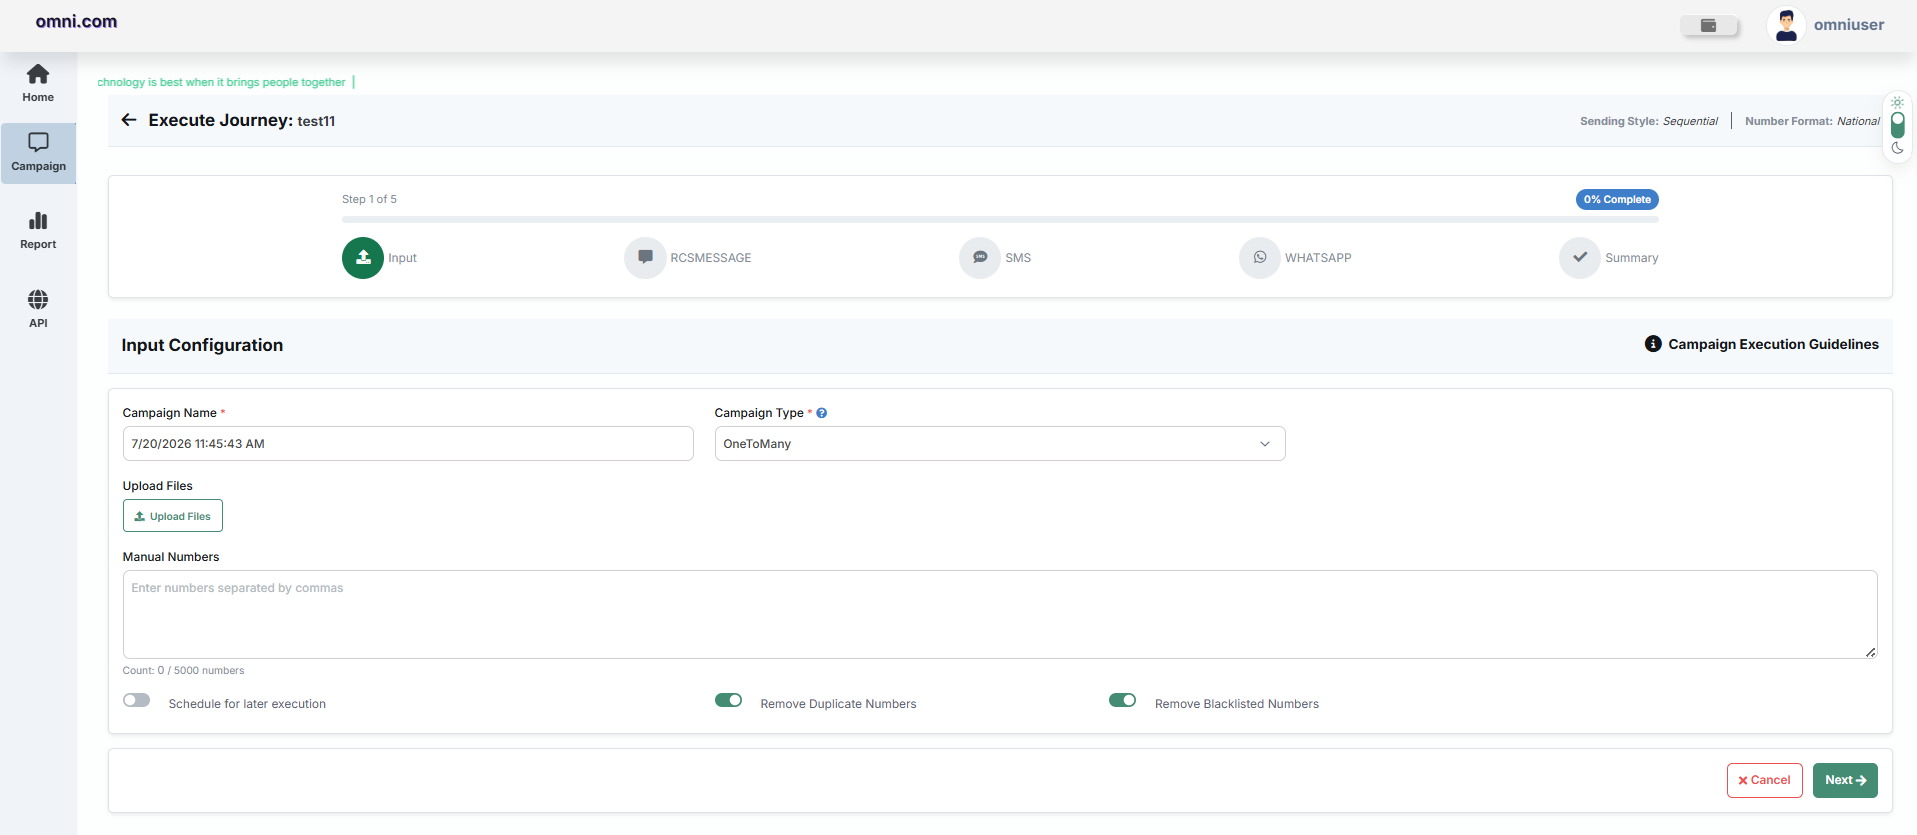
Configure the campaign details and upload recipient information.
Required Information
| Field | Description |
|---|---|
| Campaign Name | Unique name used to identify the campaign. |
| Campaign Type | Choose OneToMany or ManyToMany. |
| Upload File | Upload recipient contact file. |
| Manual Numbers | Enter numbers manually if required. |
| Schedule Later | Schedule campaign execution for a future date and time. |
| Remove Duplicate Numbers | Automatically removes duplicate mobile numbers. |
| Remove Blacklisted Numbers | Automatically excludes blacklisted numbers. |
Step 2 – RCS Message Configuration
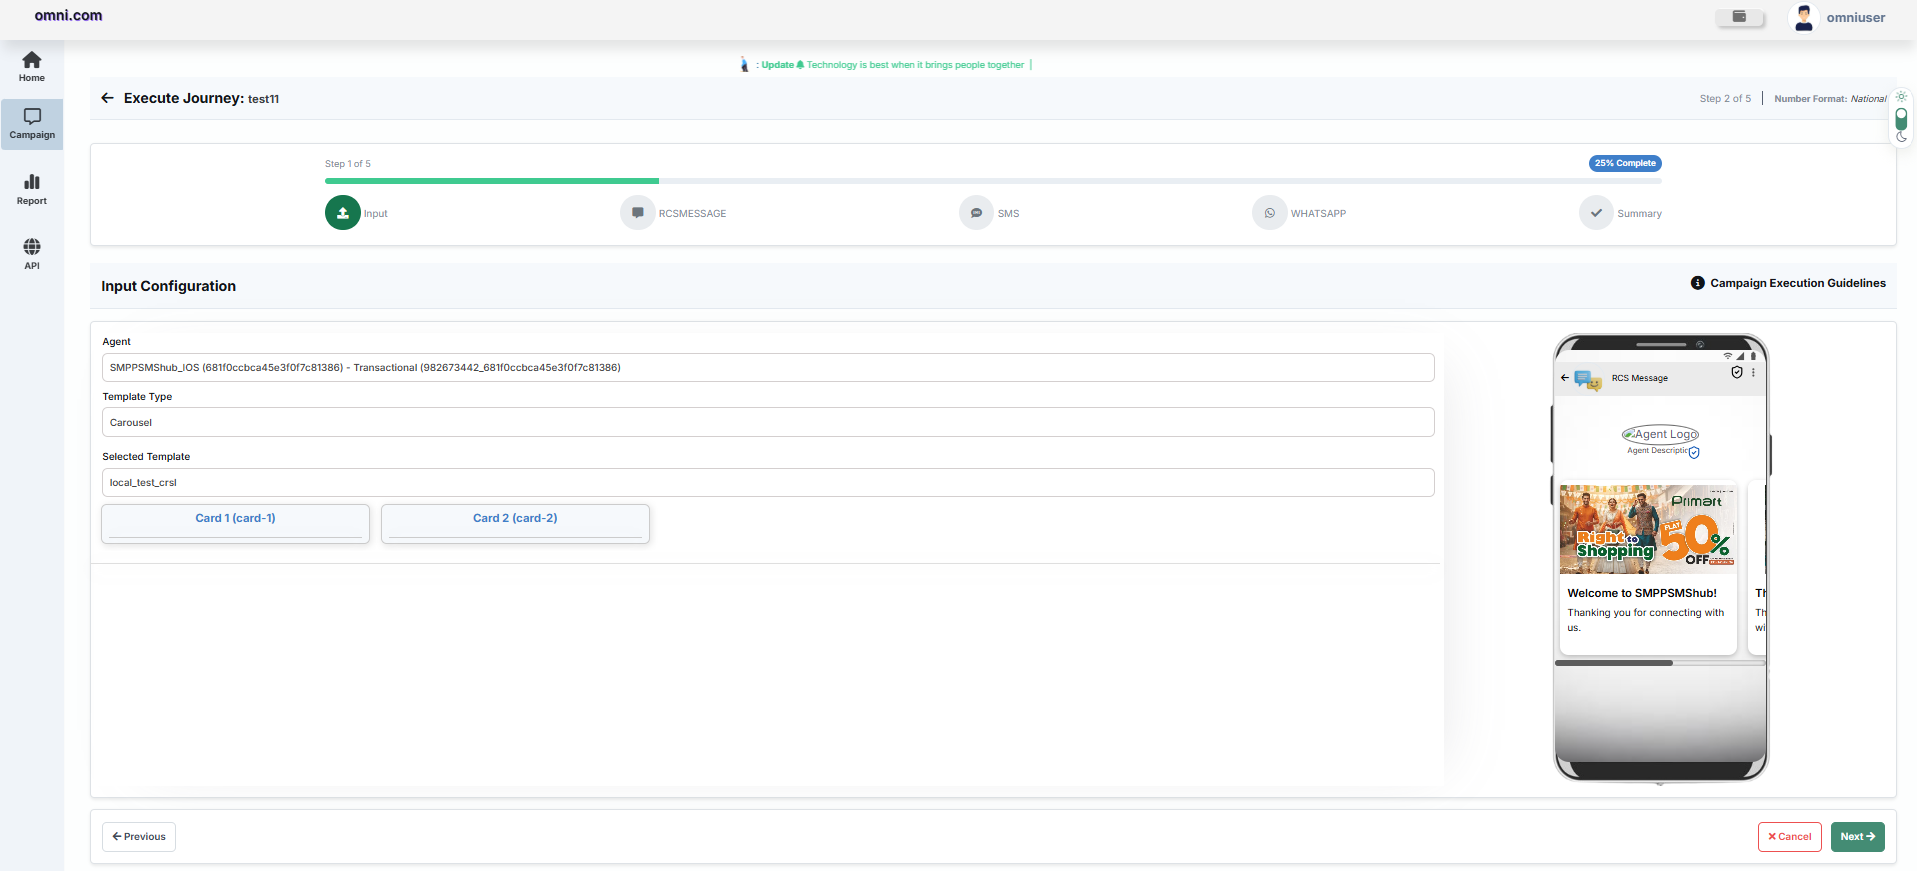
The second step displays the RCS template selected while creating the Journey.
- Agent
- Template Type
- Selected Template
- Template Cards (Carousel)
- Live Mobile Preview
Step 3 – SMS Configuration
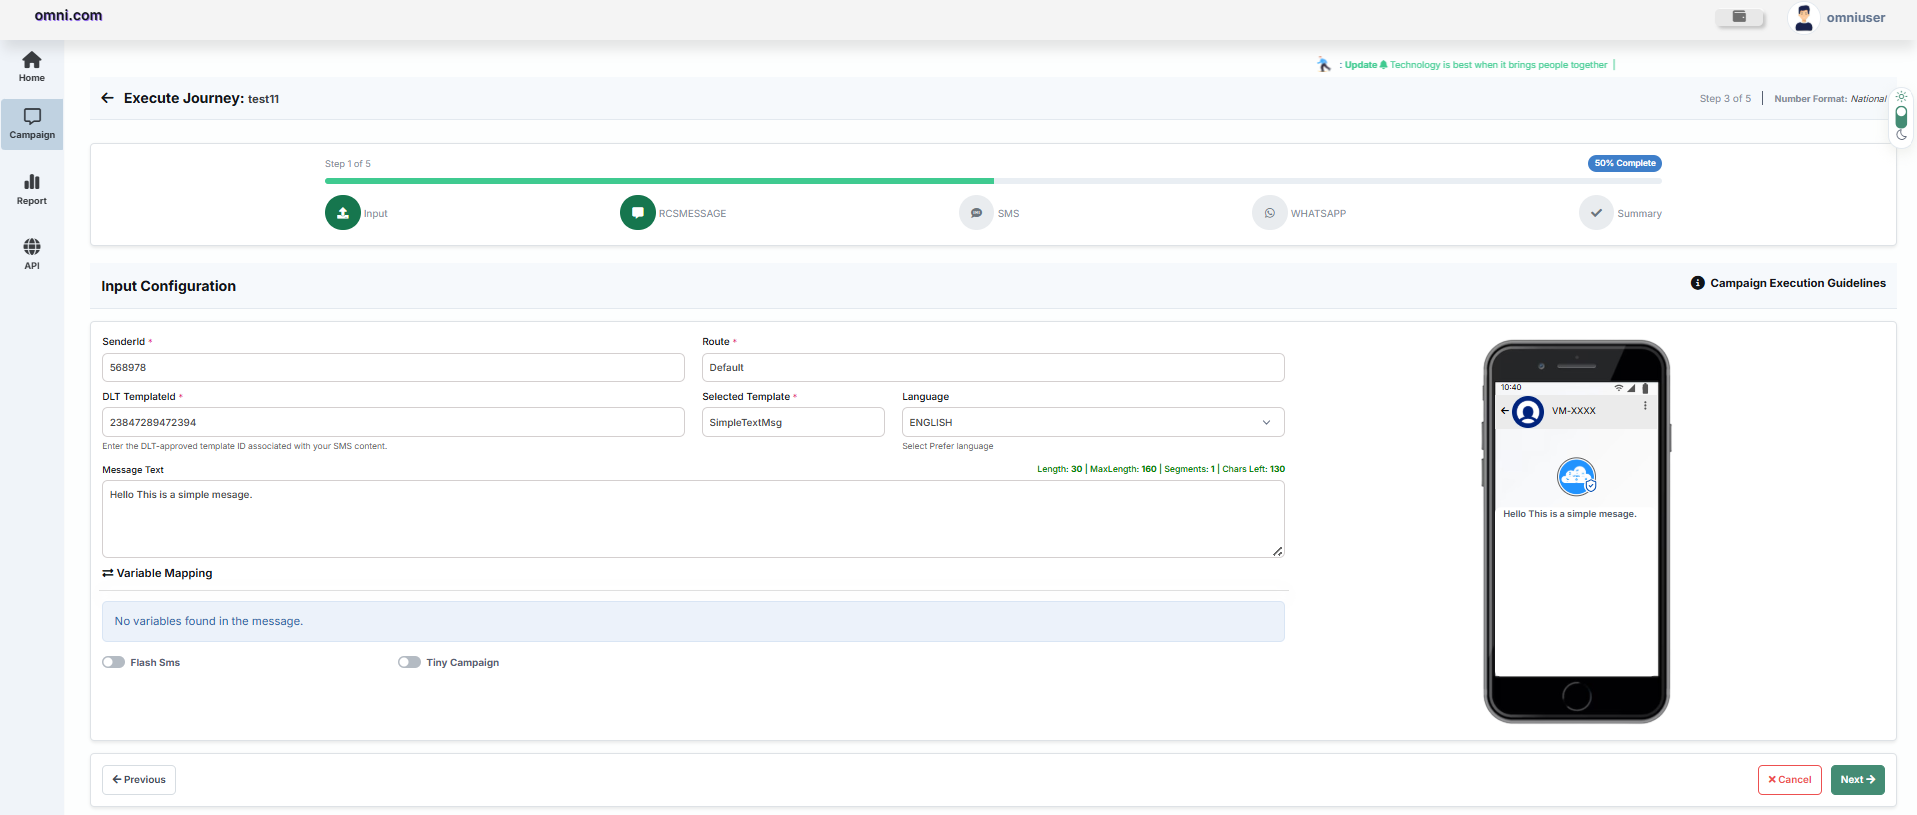
Review the SMS template configured for the Journey.
- Sender ID
- Route
- DLT Template ID
- Selected Template
- Language
- Message Text
- Variable Mapping
- Flash SMS Status
- Tiny Campaign Status
Step 4 – WhatsApp Configuration
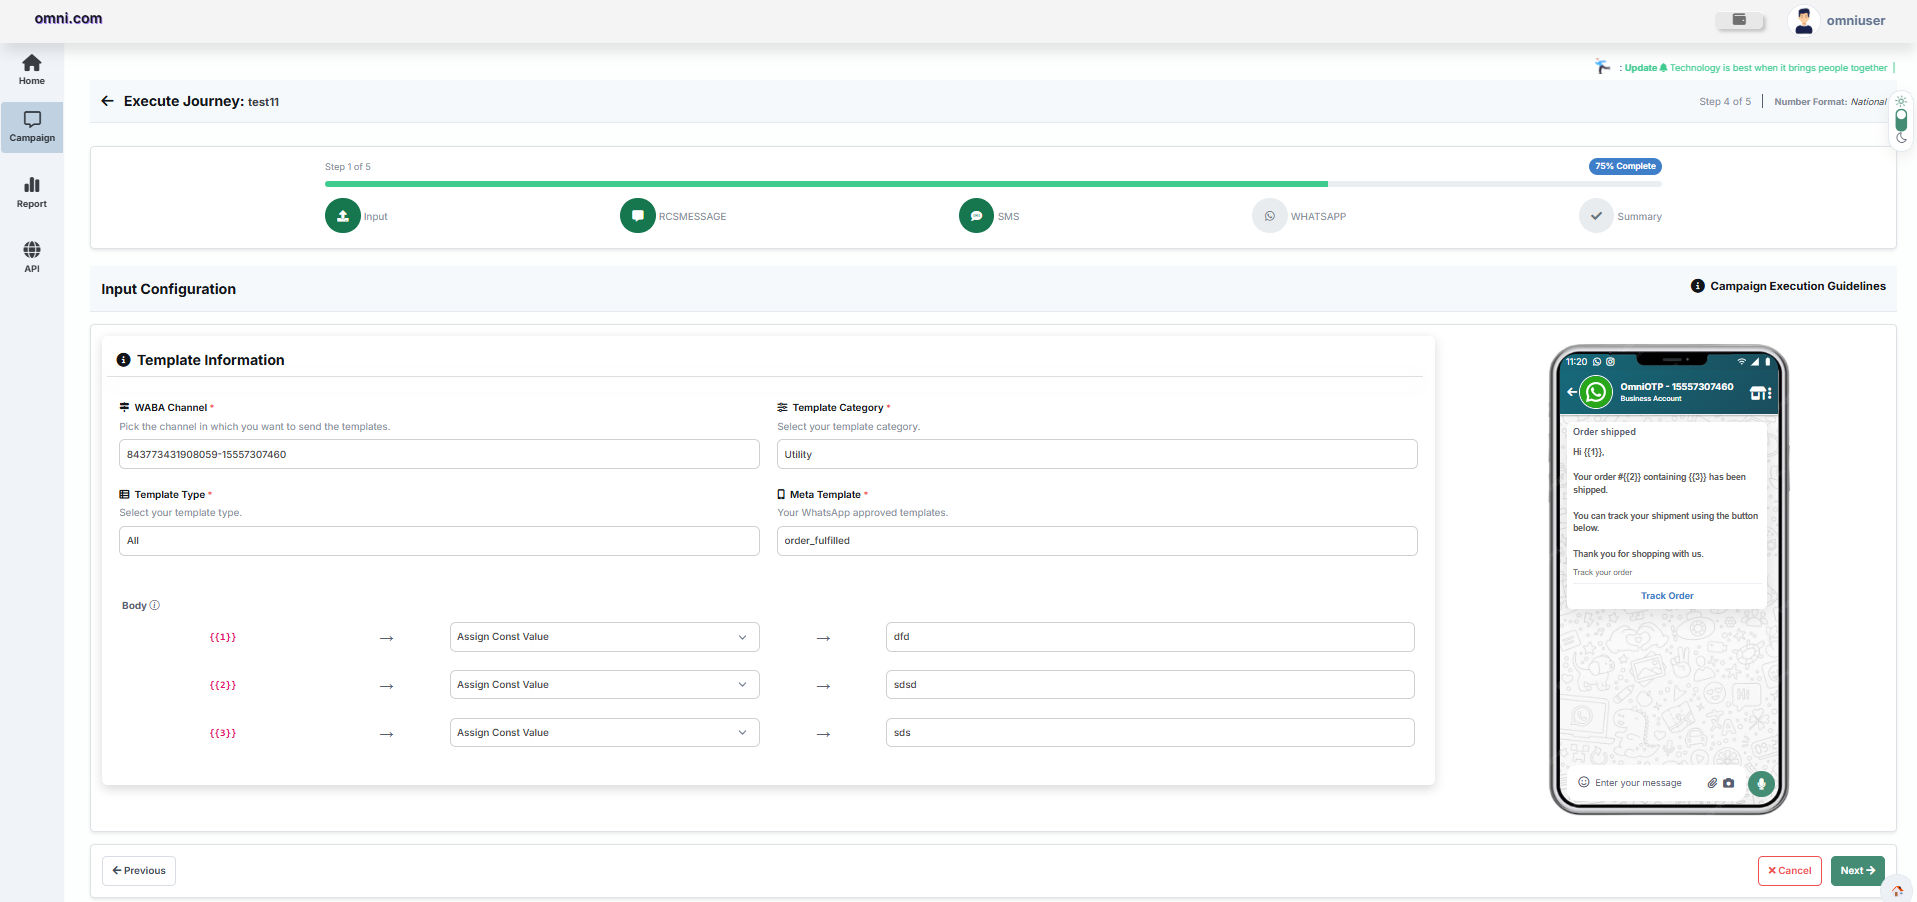
Review the selected WhatsApp Business template before campaign execution.
- WABA Channel
- Template Category
- Template Type
- Meta Approved Template
- Variable Mapping
- Live WhatsApp Preview
Step 5 – Campaign Summary
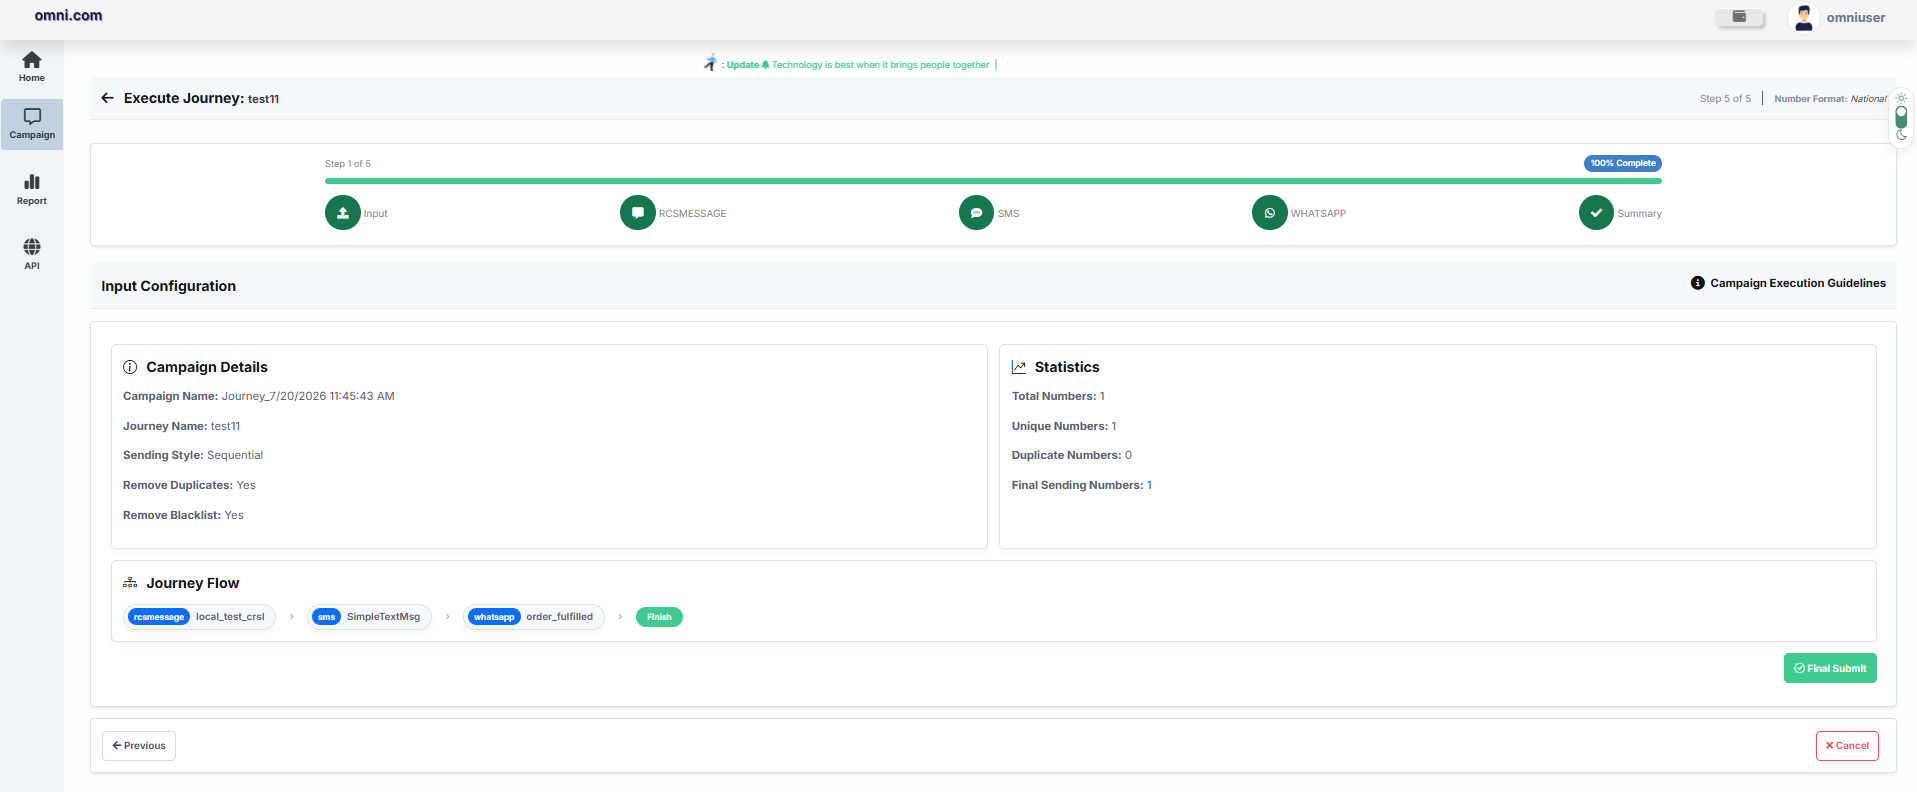
The final step displays a complete summary of the Journey before execution.
Campaign Details
- Campaign Name
- Journey Name
- Sending Style
- Remove Duplicates Status
- Remove Blacklist Status
Campaign Statistics
- Total Numbers
- Unique Numbers
- Duplicate Numbers
- Final Sending Numbers
Journey Flow
A visual representation of the configured Journey is displayed showing the order of communication channels that will be executed.
Final Submission
Click Final Submit to validate all campaign settings and create the Journey Campaign for execution.
After Successful Submission
- The Journey Campaign is created.
- The campaign is queued or executed based on the selected schedule.
- Users are redirected to the Journey Campaigns page.
Journey Reports
The Journey Reports module provides a centralized dashboard for monitoring and analyzing Journey executions. It enables users to track campaign performance, review delivery statistics, and access detailed reports across multiple communication channels.
Purpose
The Journey Reports module helps users to:
- Monitor Journey campaign performance.
- Analyze campaign execution and delivery.
- Track communication across SMS, RCS, and WhatsApp.
- Access detailed campaign and API reports.
- Download reports for analysis and auditing.
Journey Reports Dashboard
The Journey Reports Dashboard serves as the main entry point for all Journey-related reports. It provides quick access to different report categories, allowing users to monitor campaign activities, review execution details, and analyze communication performance from a single interface.
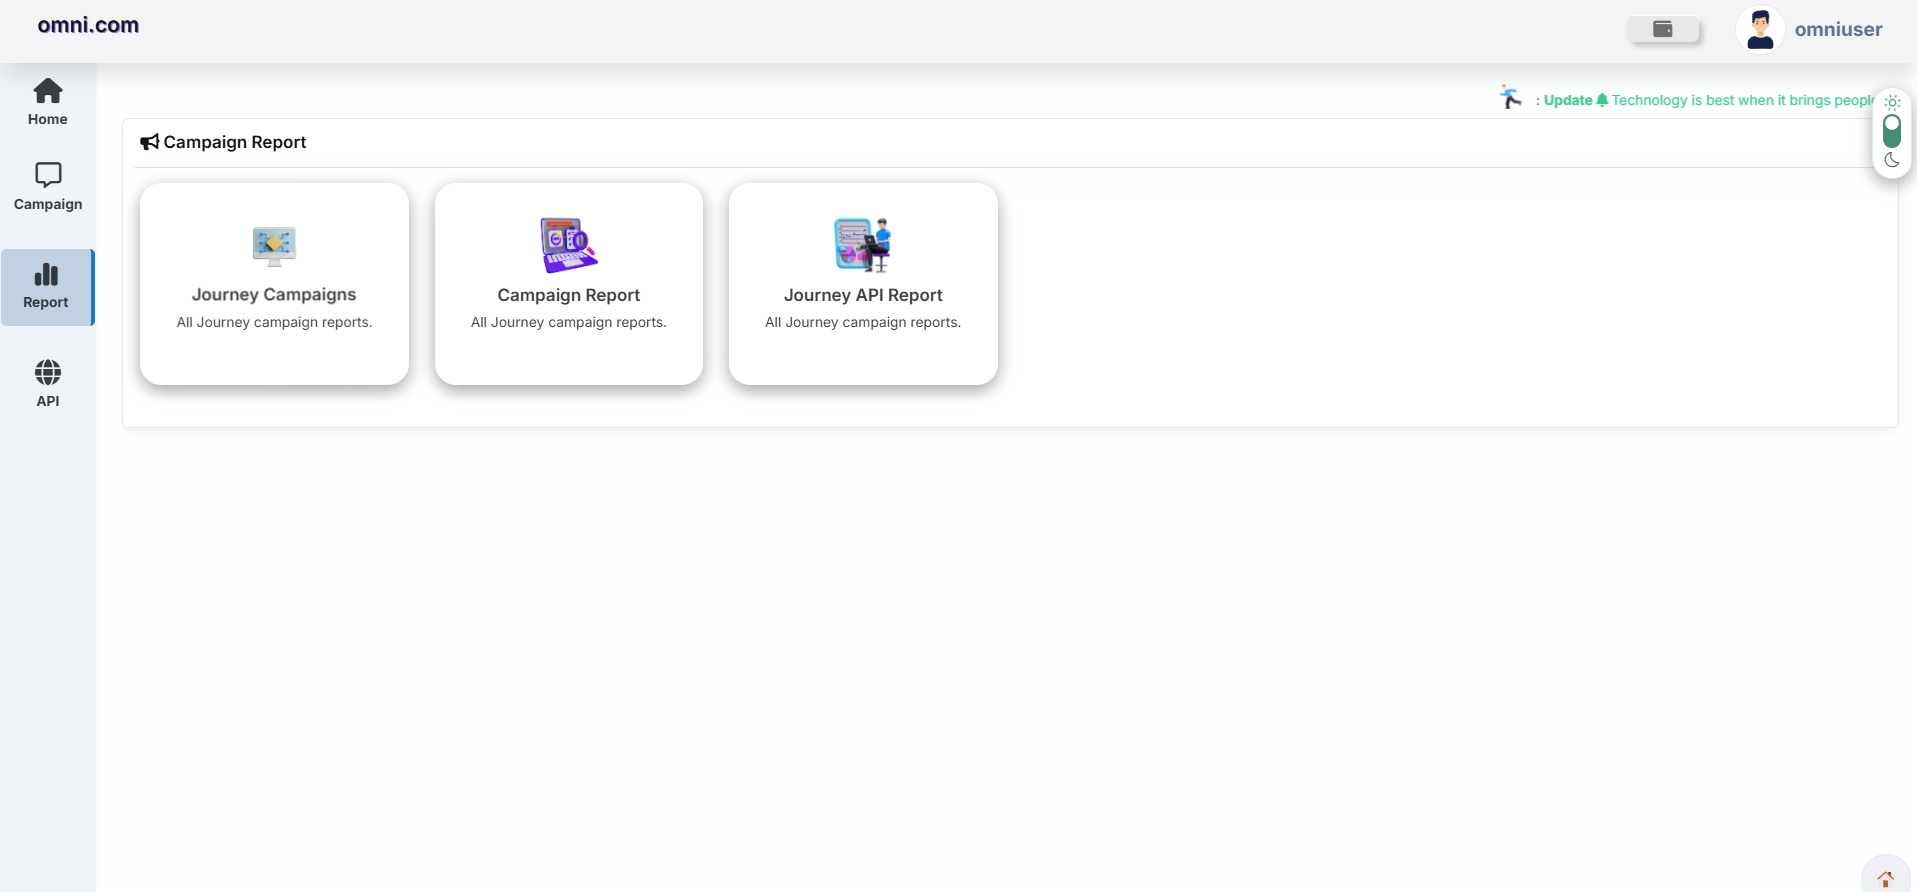
Available Reports
The Journey Reports Dashboard provides quick access to the following report categories.
| Report | Description |
|---|---|
| Journey Campaigns | Displays all campaigns executed through a Journey. Users can monitor campaign execution, review channel-wise reports, and access detailed campaign information. |
| Campaign Report | Provides detailed information about individual Journey campaigns, including execution status, scheduling details, delivery statistics, and campaign performance. |
| Journey API Report | Displays reports for Journey campaigns triggered through APIs, allowing users to monitor API executions and review campaign activity. |
Journey Campaign
The Journey Campaign Reports page provides a centralized view of all campaigns executed through a Journey. It enables users to filter campaigns by date, switch between communication channels, monitor campaign performance, and access detailed delivery reports.
Accessing Journey Campaign Reports
- Navigate to Report from the left navigation menu.
- Click Journey Campaigns.
- The Journey Campaign Reports page opens.
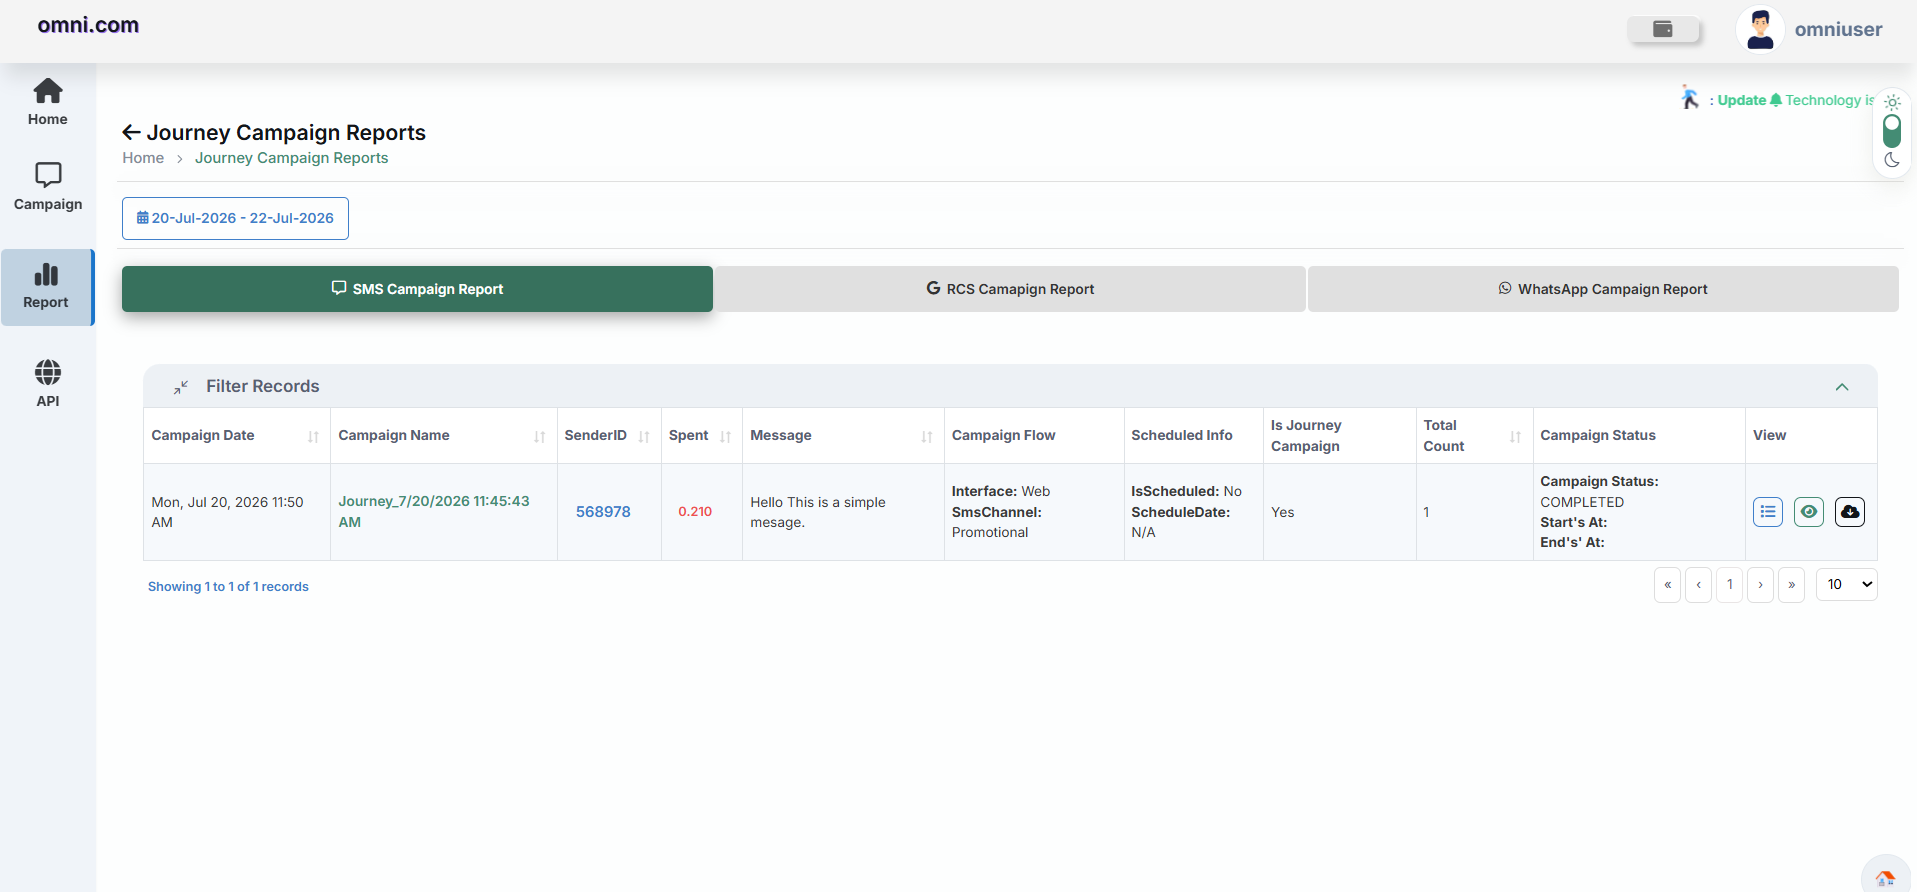
Page Overview
The Journey Campaign Reports page consists of the following sections:
- Date Range Filter
- Channel Tabs
- SMS Campaign Report
- RCS Campaign Report
- WhatsApp Campaign Report
Date Range Filter
Use the Date Range selector to filter campaign records for a specific period.
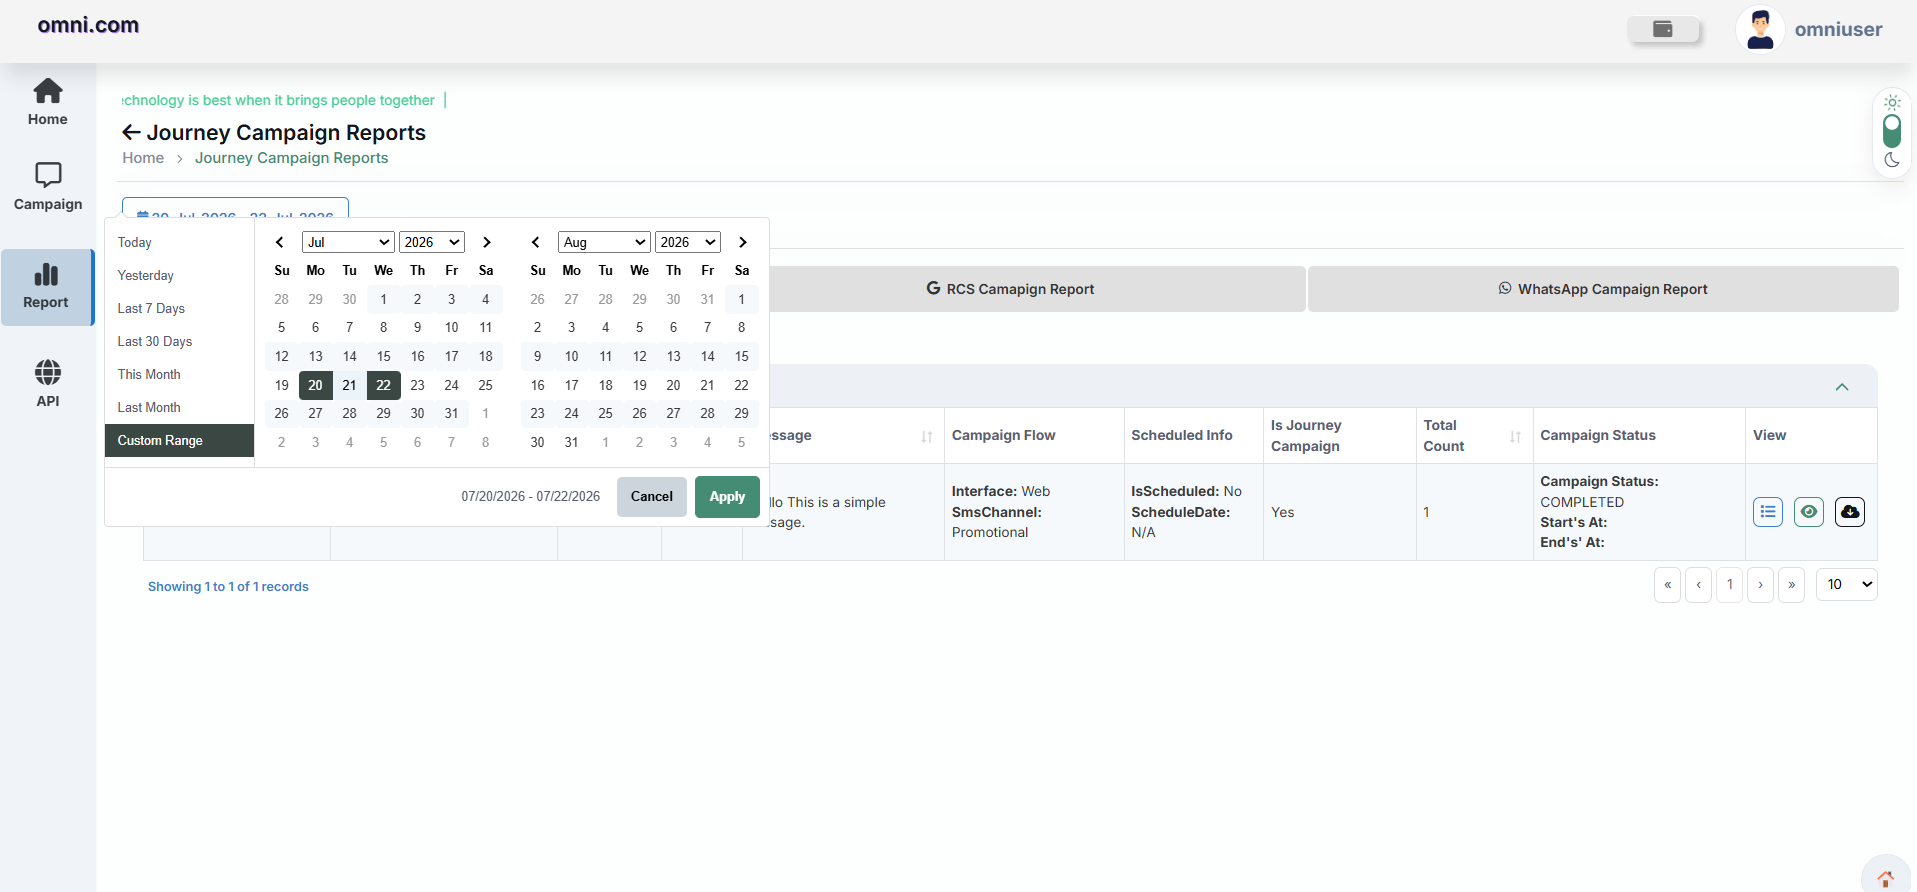
Users can select:
- Today
- Yesterday
- Last 7 Days
- Last 30 Days
- This Month
- Last Month
- Custom Date Range
After selecting the desired range, click Apply to refresh the report.
Channel Tabs
Journey Campaign reports are categorized based on the communication channel used in the Journey.
Available tabs include:
- SMS Campaign Report
- RCS Campaign Report
- WhatsApp Campaign Report
Selecting a tab displays reports only for the selected communication channel.
SMS Campaign Report
The SMS Campaign Report displays all SMS campaigns executed through a Journey. It provides detailed information about campaign execution, message content, scheduling details, and delivery status.
The report includes the following information:
| Field | Description |
|---|---|
| Campaign Date | Date and time when the Journey campaign was executed. |
| Campaign Name | Name of the Journey campaign. |
| Sender ID | SMS Sender ID used for sending messages. |
| Spent | Total SMS credit consumed. |
| Message | SMS message content sent to recipients. |
| Campaign Flow | Displays the interface and SMS channel used for execution. |
| Scheduled Info | Displays schedule status and scheduled execution date. |
| Is Journey Campaign | Indicates whether the campaign belongs to a Journey. |
| Total Count | Total number of SMS messages processed. |
| Campaign Status | Displays campaign execution status along with Start and End time. |
| View | Opens detailed SMS campaign reports and additional actions. |
RCS Campaign Report
The RCS Campaign Report displays all Rich Communication Services (RCS) campaigns executed through a Journey.
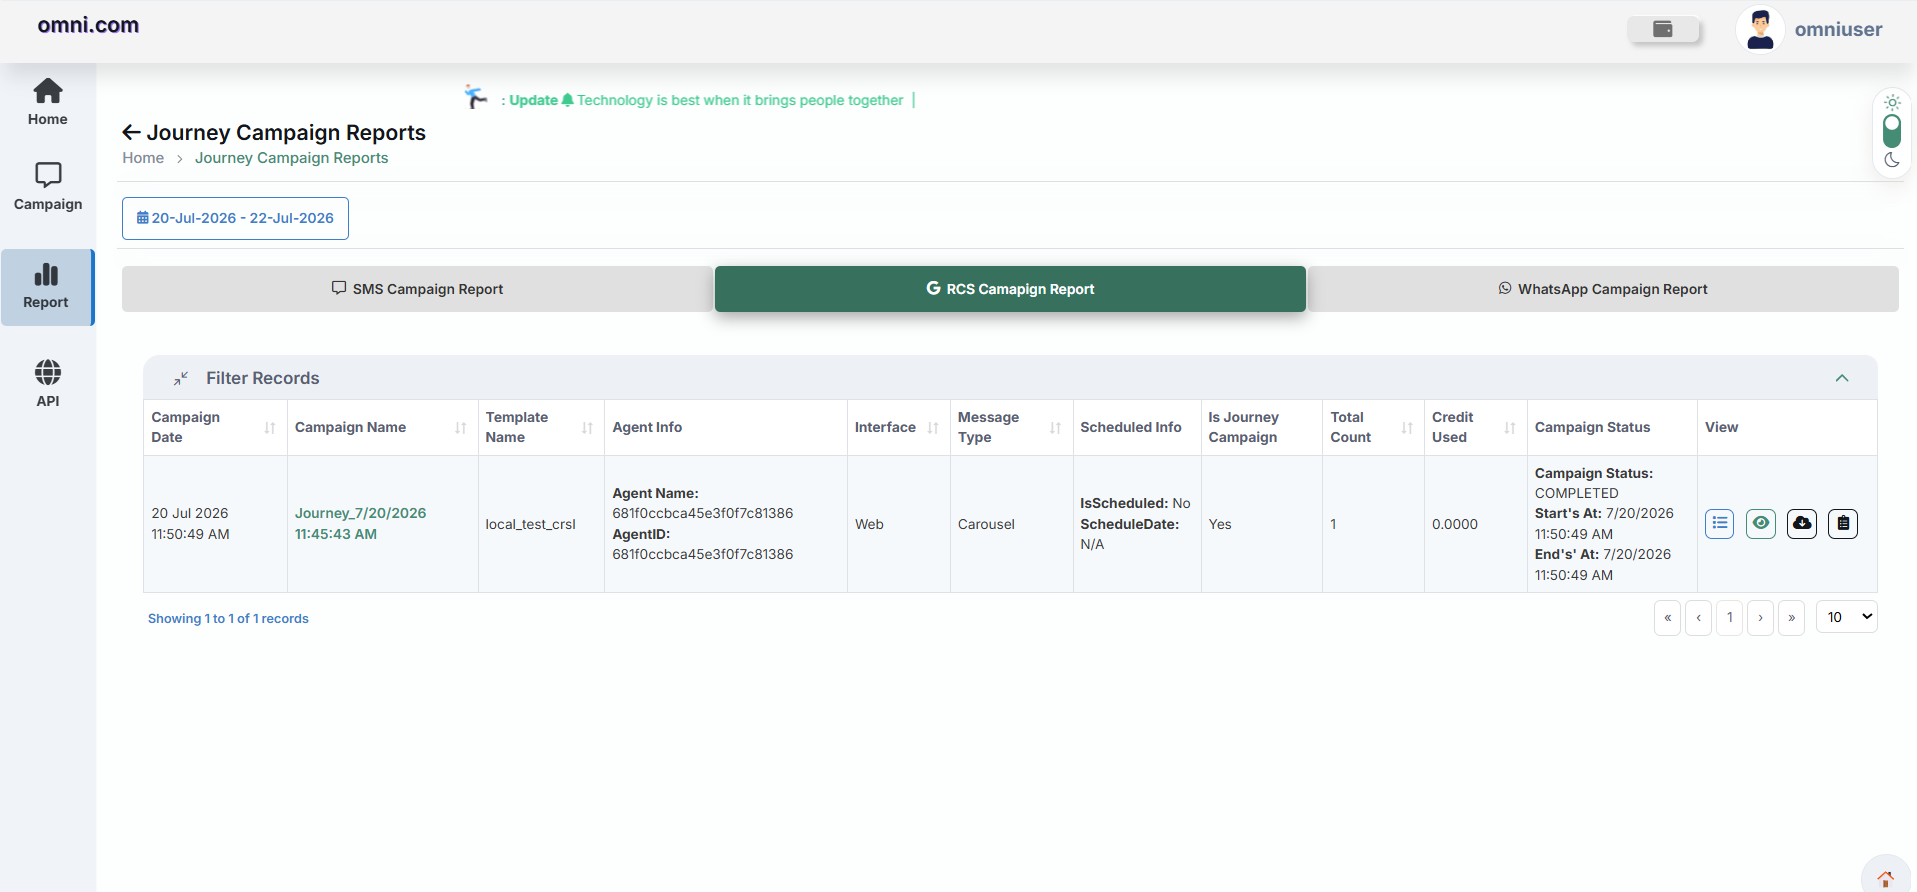
The report provides the following information:
| Field | Description |
|---|---|
| Campaign Date | Date and time of campaign execution. |
| Campaign Name | Name of the Journey campaign. |
| Template Name | RCS template used in the campaign. |
| Agent Info | Displays Agent Name and Agent ID. |
| Interface | Source used to trigger the campaign. |
| Message Type | Type of RCS message such as Carousel, Rich Card, or Text. |
| Scheduled Info | Campaign scheduling information. |
| Is Journey Campaign | Indicates whether the campaign belongs to a Journey. |
| Total Count | Total number of RCS messages processed. |
| Credit Used | Credits consumed for the campaign. |
| Campaign Status | Displays campaign status with Start and End timestamps. |
| View | Opens detailed RCS campaign reports. |
WhatsApp Campaign Report
The WhatsApp Campaign Report displays all WhatsApp campaigns executed through a Journey.
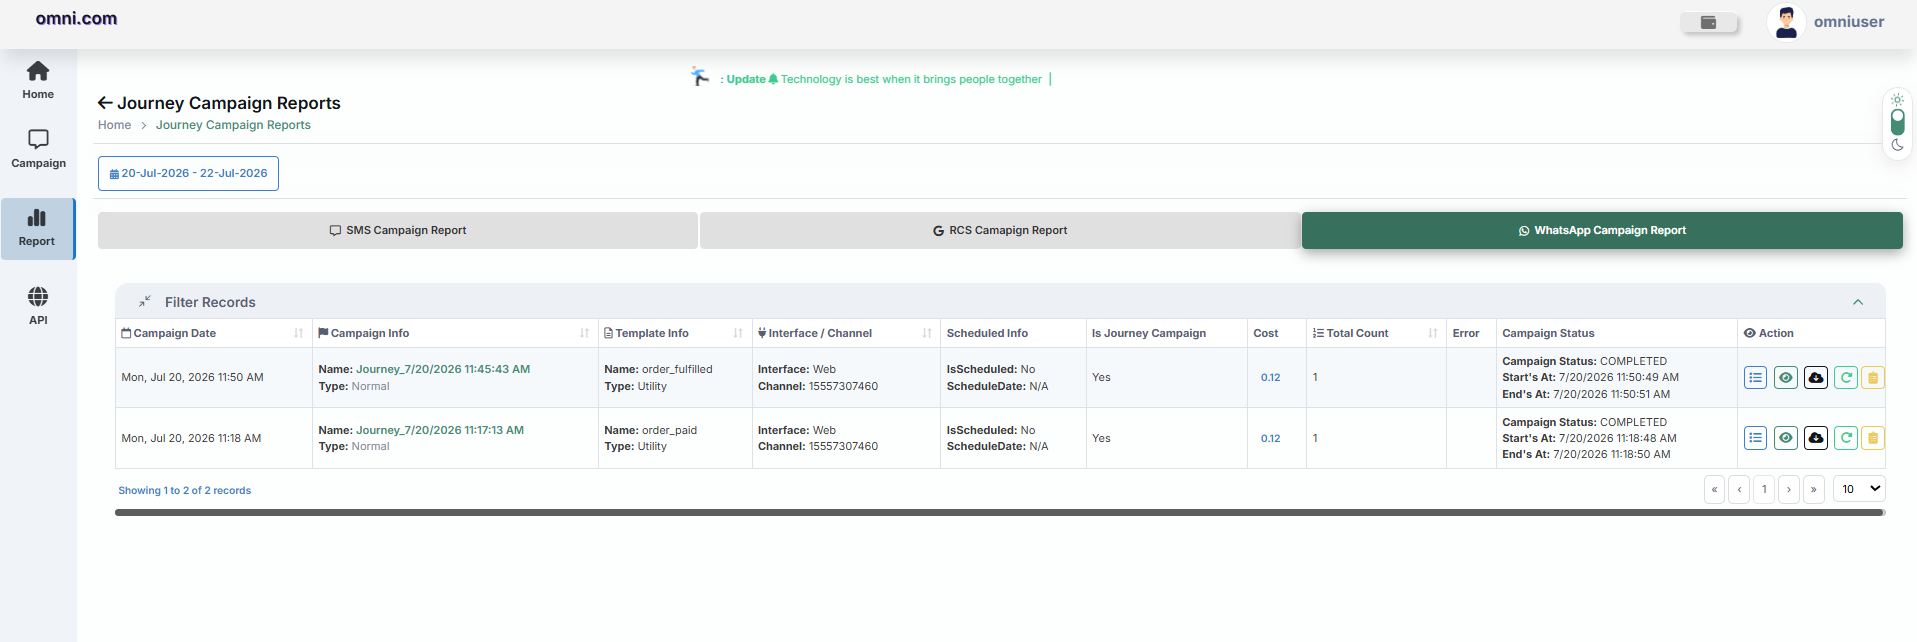
The report contains the following information:
| Field | Description |
|---|---|
| Campaign Date | Date and time of campaign execution. |
| Campaign Info | Displays Campaign Name and Campaign Type. |
| Template Info | Displays Template Name and Template Category. |
| Interface / Channel | Displays the interface used and WhatsApp Business Number. |
| Scheduled Info | Campaign scheduling information. |
| Is Journey Campaign | Indicates whether the campaign belongs to a Journey. |
| Cost | Total campaign cost. |
| Total Count | Total recipients processed. |
| Error | Number of failed messages, if any. |
| Campaign Status | Displays campaign status with Start and End timestamps. |
| Action | Provides options to view reports, download reports, logs, and campaign details. |
Report Actions
Each campaign record provides action buttons that allow users to quickly access campaign details, delivery information, and downloadable reports.
Available actions include:
- Campaign Details – View complete campaign information.
- Delivery Report – View recipient-wise delivery status.
- Download Report – Export campaign reports for offline analysis.
- Logs – Review campaign execution logs.
- Additional Actions – Access other campaign-specific operations.
Pagination
The Journey Campaign Reports page supports pagination for convenient navigation through large datasets.
Users can:
- Navigate to the first or last page.
- Move between previous and next pages.
- Select the number of records displayed per page.
Journey Campaigns
The Journey Campaigns section provides a detailed report of all Journey Campaigns created and executed within the Omni Portal. It enables users to monitor campaign execution, review campaign configurations, and analyze the performance of every Journey.
To access this report:
- Navigate to Report.
- Click Campaign Report.
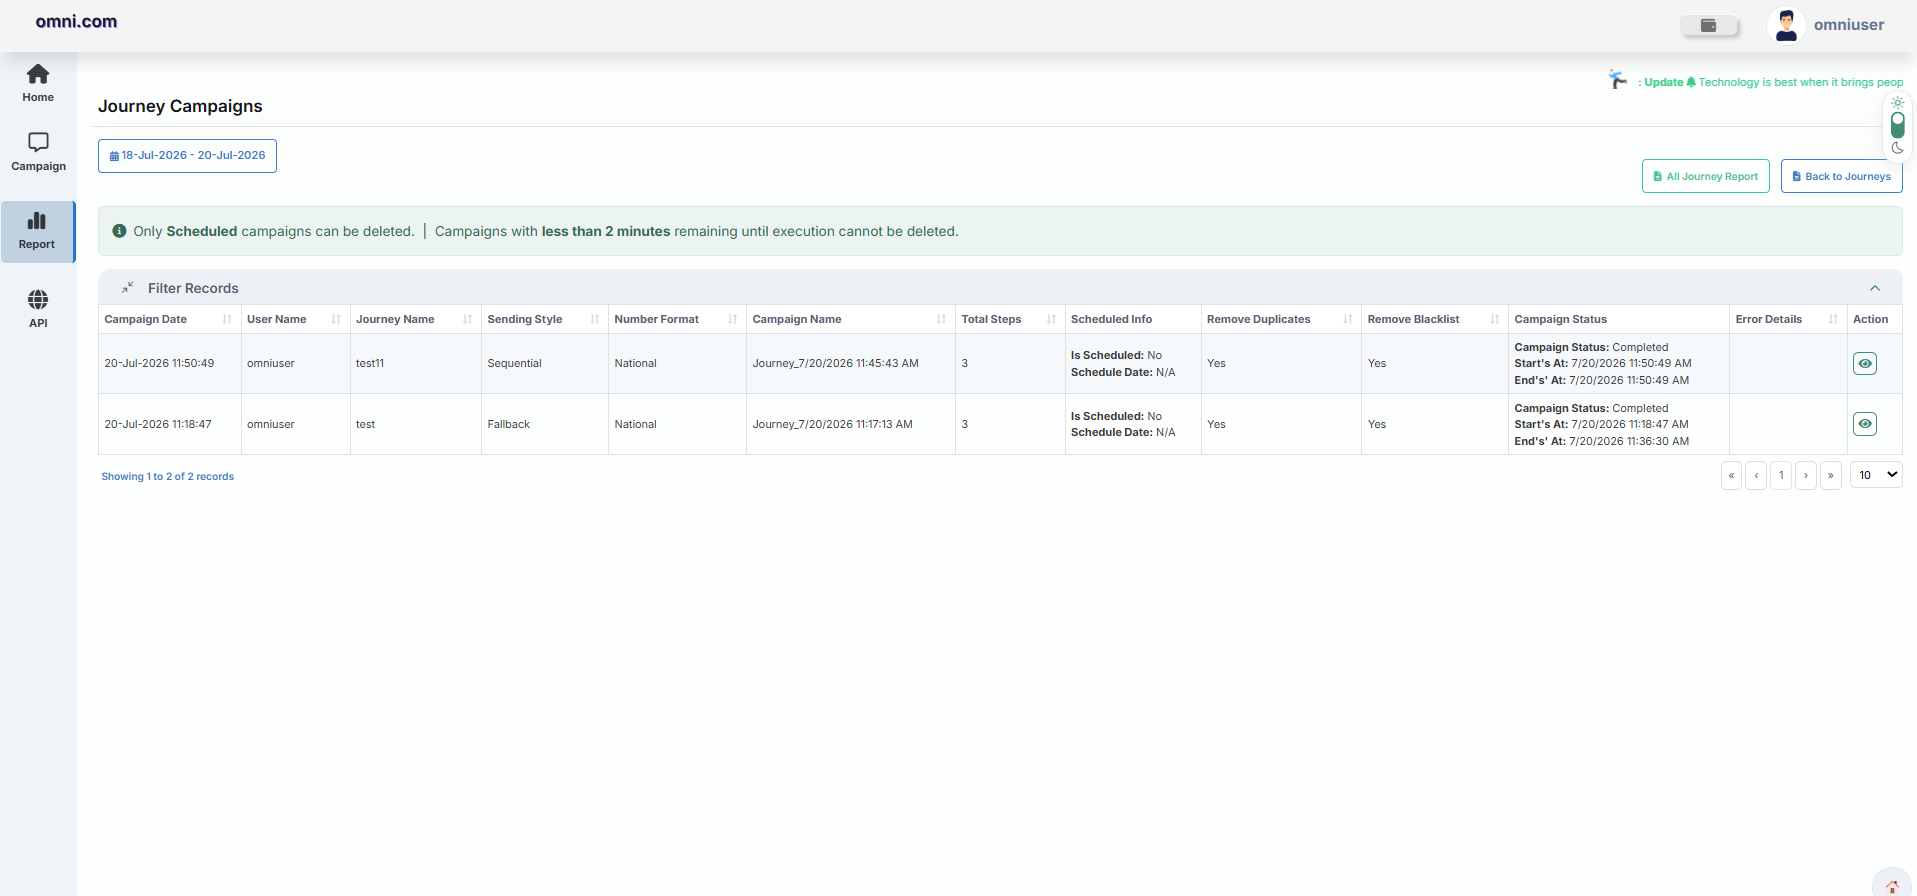
The Journey Campaigns page opens, displaying a list of all Journey Campaign executions.
Available Information
Each Journey Campaign record includes the following details:
| Field | Description |
|---|---|
| Campaign Date | Date and time when the campaign was created or executed. |
| User Name | User who executed the Journey Campaign. |
| Journey Name | Name of the selected Journey. |
| Sending Style | Configured message flow (Sequential, Parallel, or Fallback). |
| Number Format | Phone number format used during execution. |
| Campaign Name | Name assigned to the Journey Campaign. |
| Total Steps | Total communication steps included in the Journey. |
| Scheduled Information | Displays whether the campaign was scheduled and its scheduled execution time. |
| Remove Duplicates | Indicates whether duplicate numbers were excluded. |
| Remove Blacklist | Indicates whether blacklisted numbers were excluded. |
| Campaign Status | Shows the campaign execution status along with the start and end time. |
| Error Details | Displays any execution errors, if applicable. |
Viewing Journey Campaign Details
The Journey Campaign Details page provides a comprehensive overview of an executed journey campaign, including campaign information, execution progress, channel-wise reports, and campaign statistics.
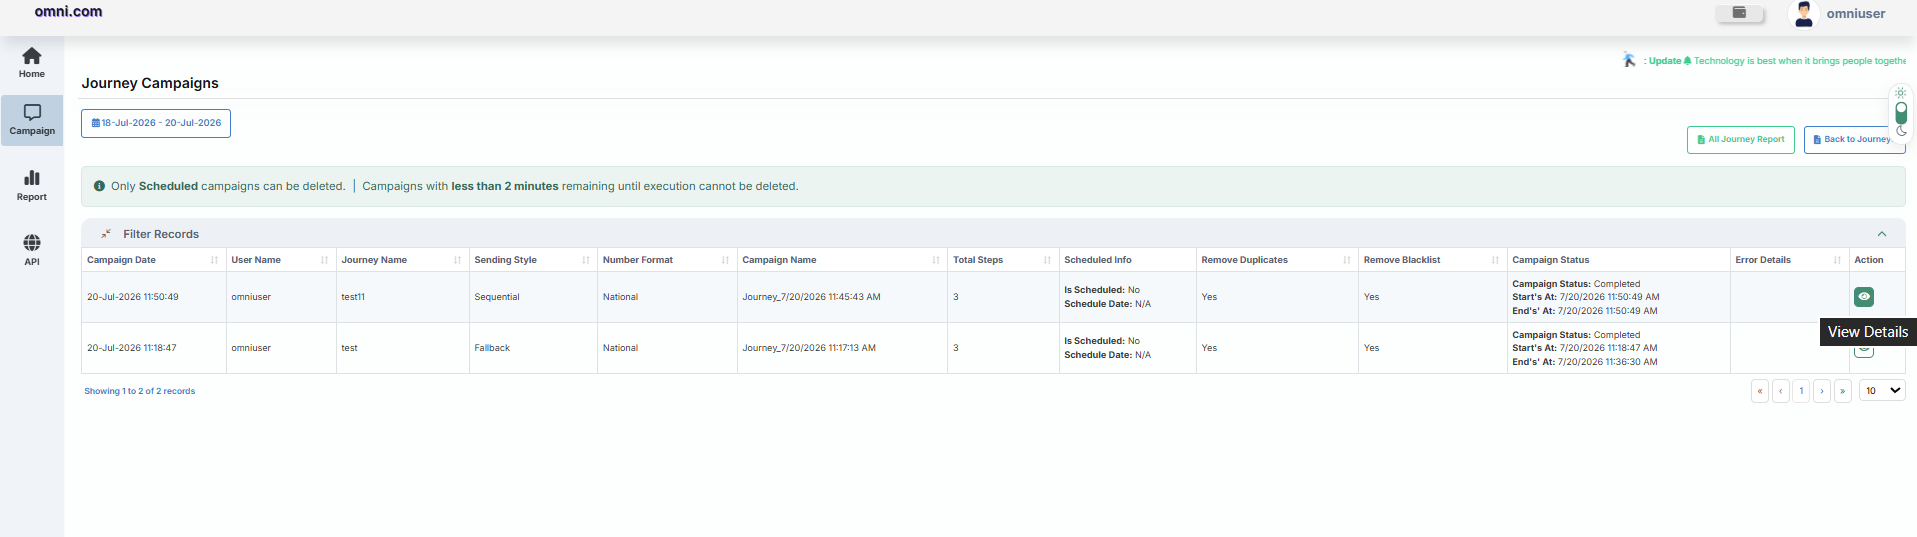
- Navigate to Journey Campaigns.
- Locate the required campaign.
- Click the View Details (👁) icon in the Action column.
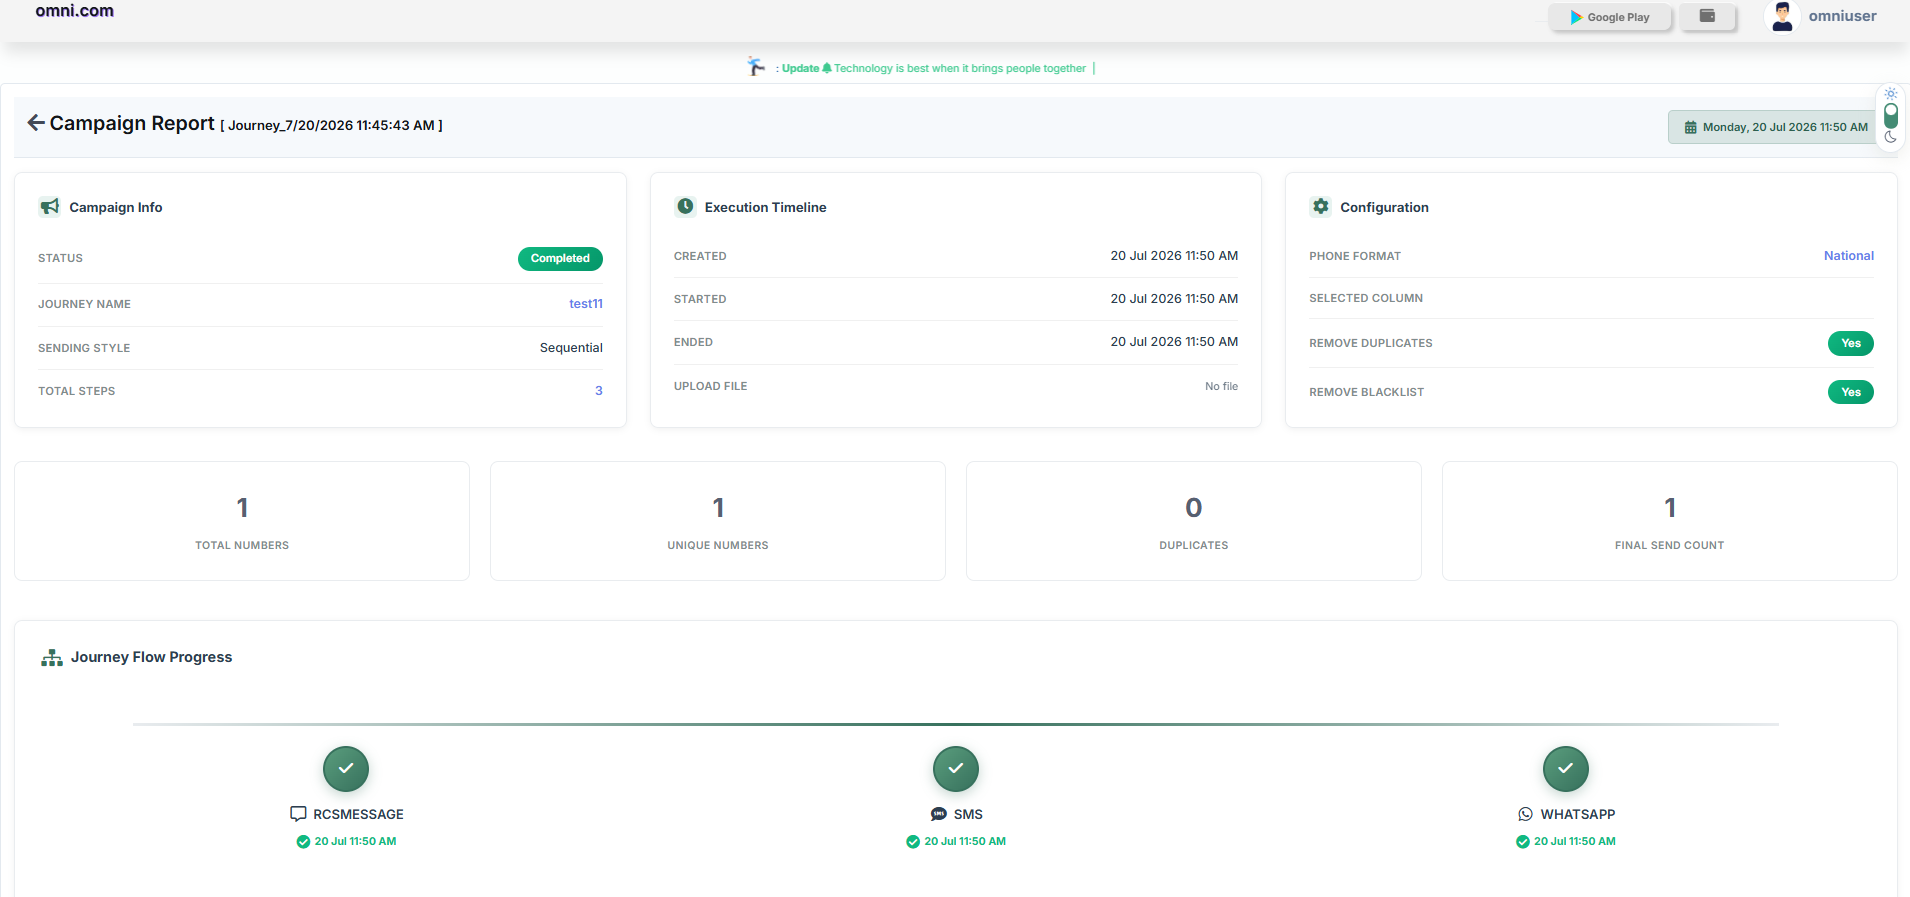
Campaign Report
The Campaign Report page displays the complete execution details of the selected journey campaign.
It consists of the following sections:
- Campaign Information
- Execution Timeline
- Configuration
- Campaign Statistics
- Journey Flow Progress
- Channel-wise Campaign Reports
Campaign Information
The Campaign Information section provides basic details about the executed journey.
Displayed information includes:
- Campaign Status
- Journey Name
- Sending Style
- Total Steps
Execution Timeline
The Execution Timeline displays important timestamps related to the campaign.
Available information includes:
- Campaign Creation Time
- Campaign Start Time
- Campaign End Time
- Uploaded File Name (if applicable)
This information helps users track the execution lifecycle of the campaign.
Configuration
The Configuration section displays the campaign settings selected during execution.
The following information is available:
- Phone Number Format
- Selected Data Column
- Remove Duplicates Status
- Remove Blacklist Status
These settings indicate how recipient data was processed before campaign execution.
Campaign Statistics
The statistics panel summarizes recipient information for the campaign.
Available metrics include:
- Total Numbers
- Unique Numbers
- Duplicate Numbers
- Final Send Count
These values provide an overview of the campaign audience after validation and filtering.
Journey Flow Progress
The Journey Flow Progress section visually represents the execution status of each communication channel within the journey.
Each completed step is displayed with a success indicator, allowing users to easily monitor the progression of the campaign through the configured messaging channels.
Example flow:
↓
SMS
↓
Channel-wise Campaign Reports
The bottom section contains separate reports for each communication channel included in the journey.
Each channel is displayed in its own tab.
Available tabs include:
- Step 1 – RCS Message
- Step 2 – SMS
- Step 3 – WhatsApp
Selecting a tab displays detailed execution information for that specific channel.
Step 1 – RCS Message Report
The RCS Message report displays detailed information about the RCS campaign executed as part of the journey.

The report includes:
Available Information
The RCS Message Report displays detailed information about the RCS campaign executed as part of the Journey.
| Field | Description |
|---|---|
| Campaign Date | Date and time when the RCS campaign was executed. |
| Campaign Name | Name of the Journey campaign. |
| Template Name | Name of the RCS template used for the campaign. |
| Agent Information | Displays the Agent Name and Agent ID associated with the campaign. |
| Interface | Source or interface used to trigger the campaign. |
| Message Type | Type of RCS message, such as Carousel, Rich Card, or Text. |
| Scheduled Information | Shows whether the campaign was scheduled and its scheduled execution time. |
| Is Journey Campaign | Indicates whether the campaign belongs to a Journey. |
| Total Count | Total number of messages processed. |
| Credit Used | Total credits consumed by the RCS campaign. |
| Campaign Status | Displays the campaign execution status along with the Start and End time. |
| View | Provides options to view campaign details, reports, download reports, and logs. |
The View column provides additional actions such as viewing detailed reports or downloading available campaign data.
Step 2 – SMS Report
The SMS report provides complete execution details for the SMS campaign.

Displayed information includes:
Available Information
The SMS Report displays detailed information about the SMS campaign executed as part of the Journey.
| Field | Description |
|---|---|
| Campaign Date | Date and time when the SMS campaign was executed. |
| Campaign Name | Name of the Journey campaign. |
| Sender ID | Sender ID used to send SMS messages. |
| Spent | Total SMS credits consumed by the campaign. |
| Message | SMS message content sent to the recipients. |
| Campaign Flow | Displays the interface and SMS channel used for campaign execution. |
| Scheduled Information | Shows whether the campaign was scheduled and its scheduled execution time. |
| Is Journey Campaign | Indicates whether the campaign belongs to a Journey. |
| Total Count | Total number of SMS messages processed. |
| Campaign Status | Displays the campaign execution status along with the Start and End time. |
| View | Provides options to view campaign details, reports, and download campaign data. |
The View column allows users to access additional SMS campaign reports and related records.
Step 3 – WhatsApp Report
The WhatsApp report displays the execution details for the WhatsApp campaign included in the journey.

Available information includes:
Available Information
The WhatsApp Report displays detailed information about the WhatsApp campaign executed as part of the Journey.
| Field | Description |
|---|---|
| Campaign Date | Date and time when the WhatsApp campaign was executed. |
| Campaign Information | Displays the Campaign Name and Campaign Type. |
| Template Information | Shows the Template Name and Template Category used for the campaign. |
| Interface / Channel | Displays the interface used to trigger the campaign and the associated WhatsApp Business number. |
| Scheduled Information | Shows whether the campaign was scheduled and its scheduled execution time. |
| Is Journey Campaign | Indicates whether the campaign belongs to a Journey. |
| Cost | Total WhatsApp conversation cost consumed by the campaign. |
| Total Count | Total number of recipients processed. |
| Error | Displays the number of failed messages or errors encountered during campaign execution. |
| Campaign Status | Displays the campaign execution status along with the Start and End time. |
| Action | Provides options to view campaign details, delivery reports, download reports, retry campaigns, and other available actions. |
The Action column provides options to view detailed reports, delivery information, and other available campaign actions.
Monitoring Campaign Execution
The Campaign Report page serves as the centralized monitoring dashboard for executed Journey Campaigns.
Using this page, users can:
- Monitor the execution progress of each communication channel.
- Review campaign configuration and execution settings.
- Analyze channel-wise campaign performance.
- View campaign timelines and statistics.
- Access detailed reports for RCS Message, SMS, and WhatsApp campaigns.
- Verify the overall status and completion of the Journey Campaign.
Campaign Info.
Select the desired channel tab:
- Step 1 – RCS Message
- Step 2 – SMS
- Step 3 – WhatsApp
Locate the campaign record.
Click the Campaign Info (👁 / Information) icon available in the View or Action column.
The Campaign Information popup is displayed.
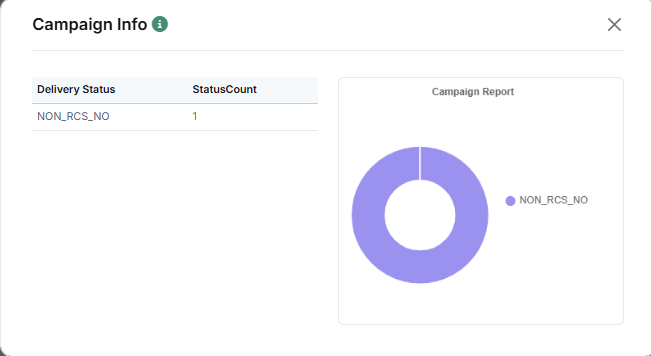
Campaign Information
The popup provides a quick overview of the selected campaign's delivery performance.
It contains two sections:
Delivery Status Summary
The left section displays the delivery status of the campaign along with the number of recipients corresponding to each status.
The information includes:
- Delivery Status – Displays the current delivery status of the message.
- Status Count – Displays the number of recipients associated with each delivery status.
Depending on the campaign execution, multiple delivery statuses may be displayed.
Campaign Report Chart
The right section displays a graphical representation of the delivery status distribution.
The chart provides an easy-to-understand visualization of campaign performance by illustrating the number of recipients associated with each delivery status.
Supported Channels
The Campaign Information popup is available for all Journey communication channels, including:
- RCS Message
- SMS
Although the delivery statuses may vary depending on the communication channel, the popup provides a consistent interface for reviewing campaign performance.
Purpose
The Campaign Information popup enables users to:
- View the delivery status of the selected campaign.
- Review recipient counts for each delivery status.
- Analyze campaign performance through graphical visualization.
- Verify the overall execution status without navigating away from the Journey Campaign Report.
AI Agent
The AI Agent Campaign enables businesses to automate customer interactions using AI-powered virtual assistants. Before creating an AI Agent Campaign, at least one AI Agent must be configured in the system. Each AI Agent defines its knowledge, personality, behavior, and response settings, allowing organizations to deliver intelligent and personalized customer conversations across supported channels.
Available Modules
Prerequisite
AI Agent Campaign
The AI Agent Campaign enables businesses to automate customer interactions using AI-powered virtual assistants. Before creating an AI Agent Campaign, at least one AI Agent must be configured in the system.
Creating an AI Agent
Step 1: Open AI Agent Module
Step 2: Open Agent Management
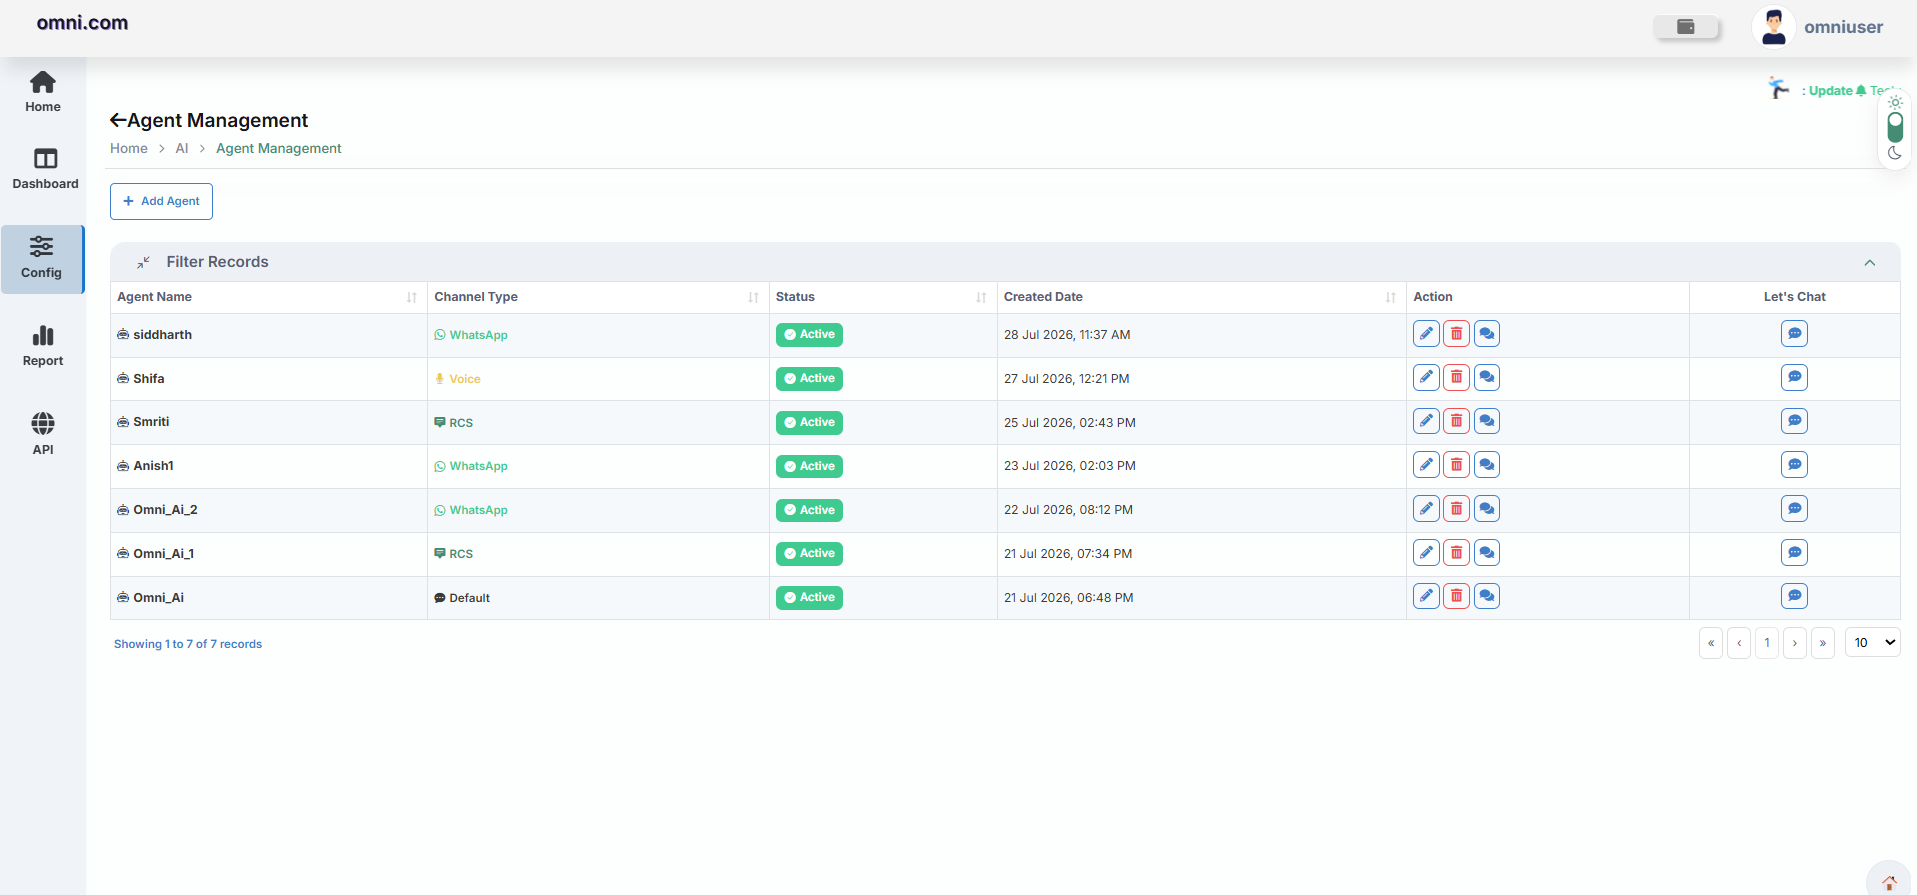
The Agent Management page displays all configured AI Agents along with their channel type, status, creation date, and available actions.
To create a new AI Agent, click Add Agent.
Creating a New Agent
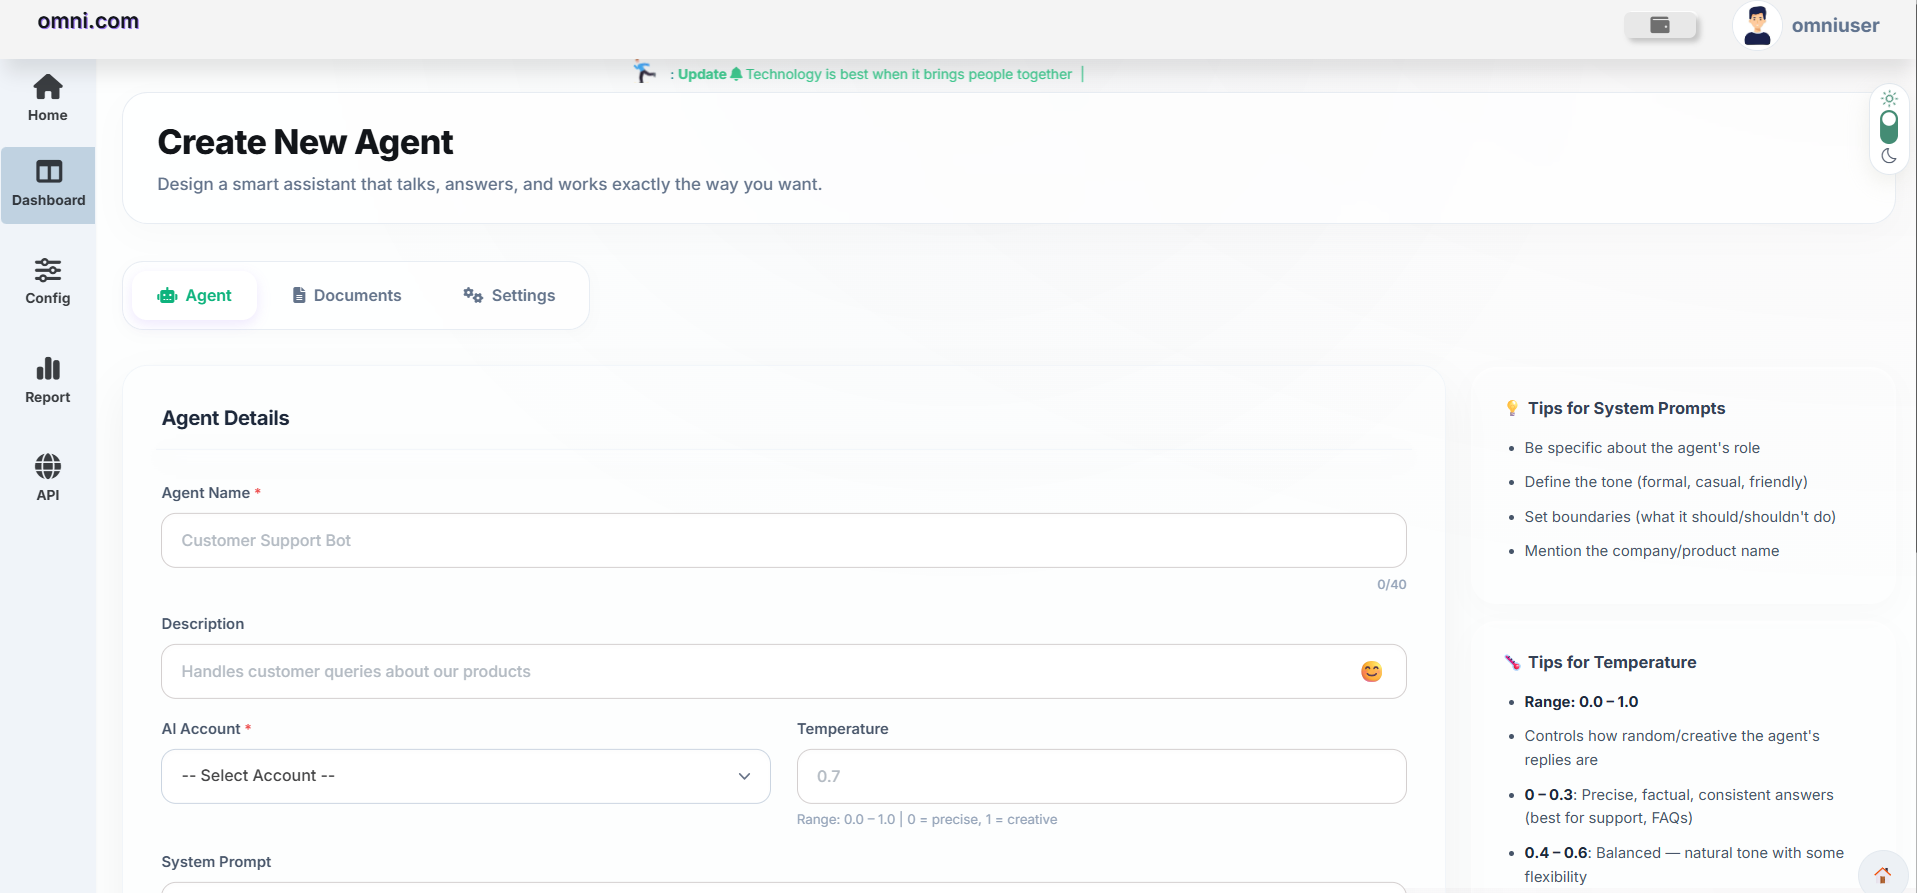
The agent creation process consists of three steps:
- Agent
- Documents
- Settings
Step 1: Agent
The Agent tab defines the identity and behavior of the AI assistant.
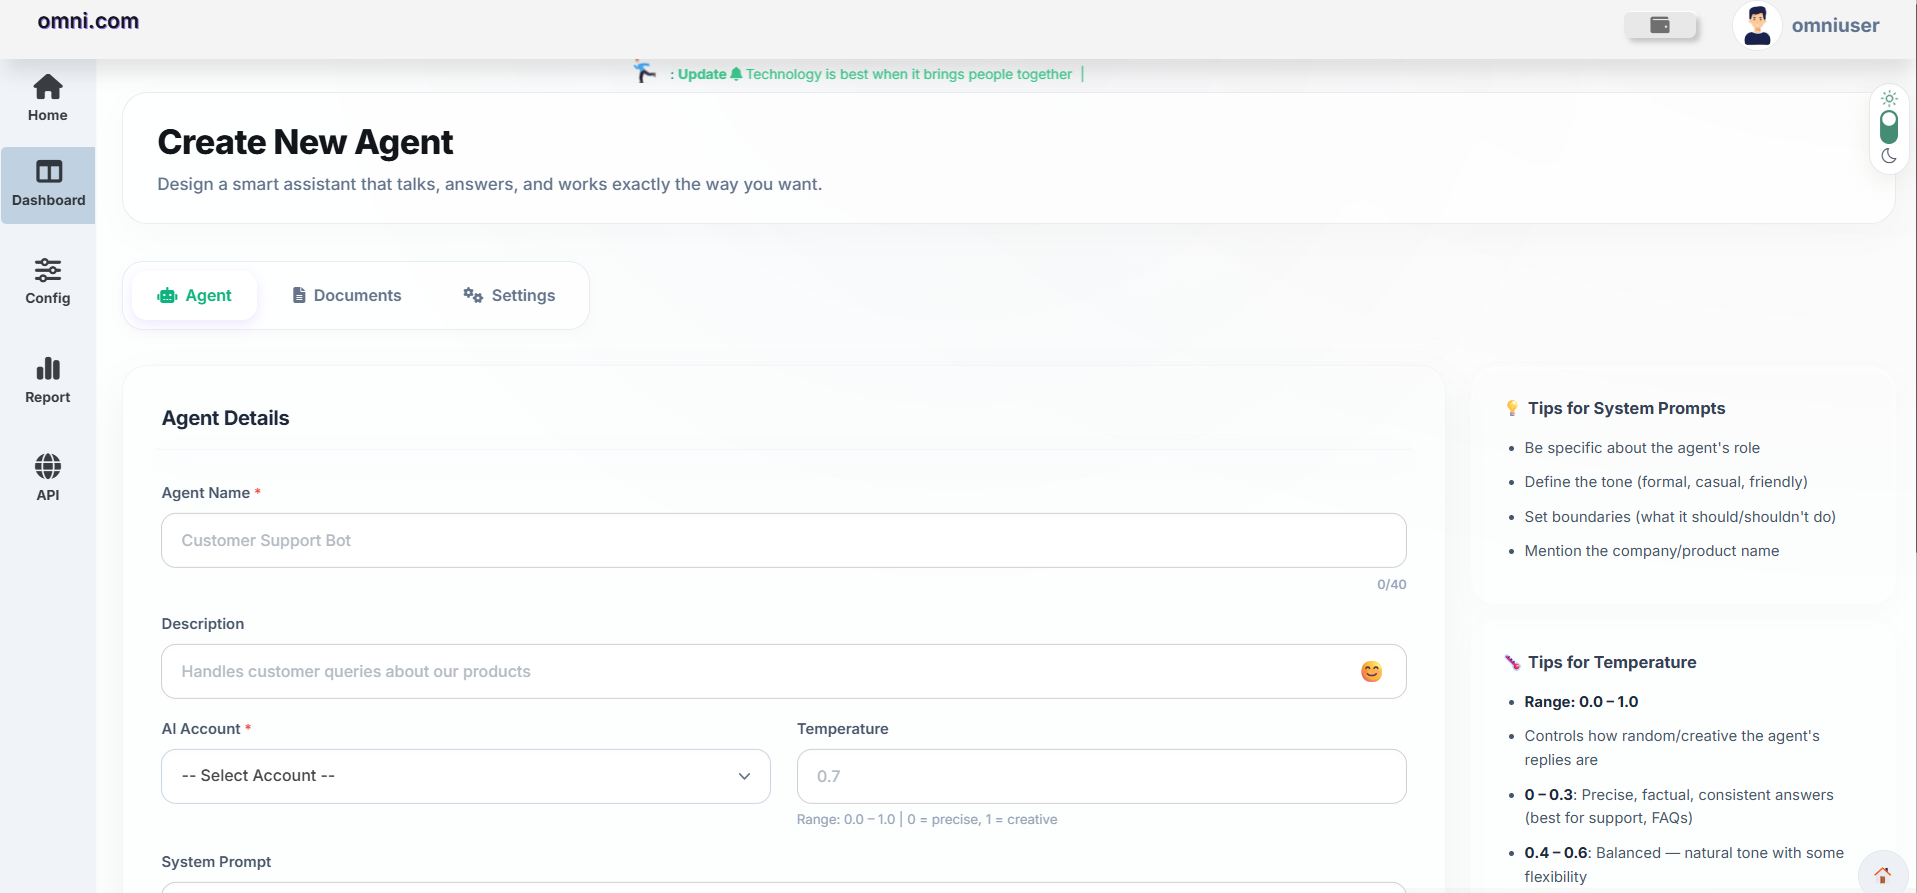
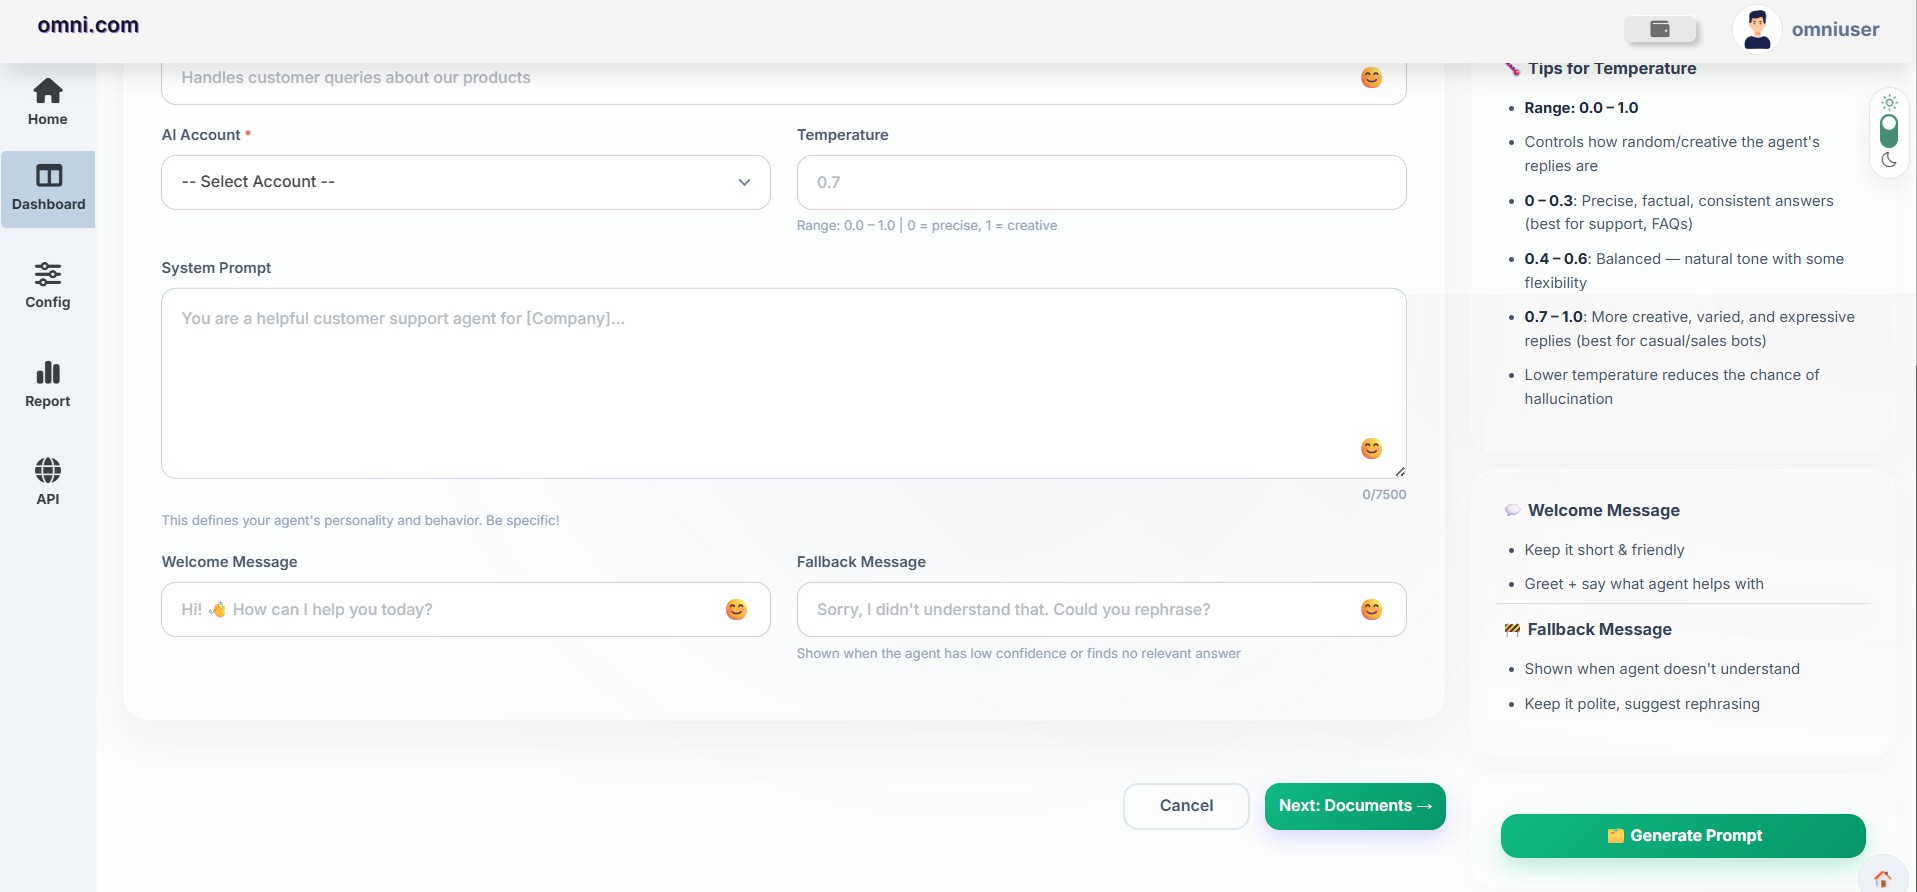
Complete the following fields
| Field | Description |
|---|---|
| Agent Name | Enter a unique name for the AI Agent. |
| Description | Provide a brief description of the agent's purpose. |
| AI Account | Select the AI provider/account to be used. |
| Temperature | Controls the creativity and randomness of responses. |
| System Prompt | Defines the personality, behavior, and instructions for the AI Agent. |
| Welcome Message | Message displayed when a conversation starts. |
| Fallback Message | Message shown when the AI cannot understand the user's request. |
Temperature Guidelines
| Range | Behaviour |
|---|---|
| 0.0 – 0.3 | Precise and factual responses. |
| 0.4 – 0.6 | Balanced responses. |
| 0.7 – 1.0 | Creative and conversational responses. |
Generating a System Prompt
Instead of manually writing a System Prompt, Omni Portal provides a Generate Prompt feature.
Click Generate Prompt to open the Choose Template window.
The prompt can be generated using one of the following options:
Business Agent
Select a business category based on your industry. Omni Portal generates an optimized System Prompt according to the selected business domain.
Available Categories
Personal Assistant
Generate prompts for personal AI assistants using predefined templates.
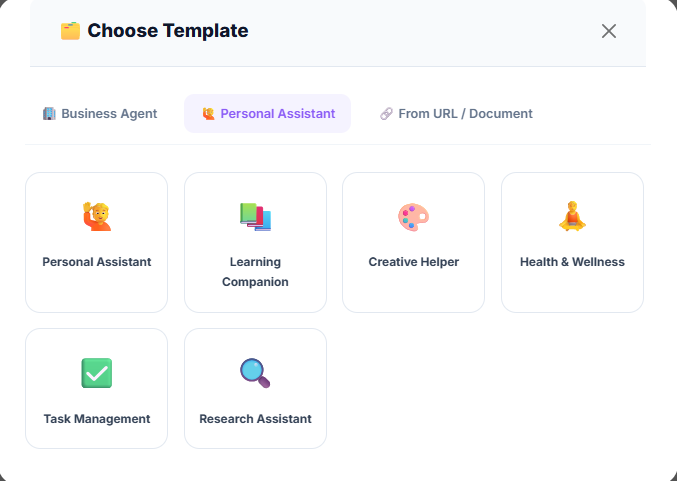
Available Templates
From URL / Document
Omni Portal can automatically generate a System Prompt using existing website content or uploaded documents.
Website URL
- Provide a public website URL.
- The system analyzes the webpage.
- An optimized System Prompt is generated automatically.
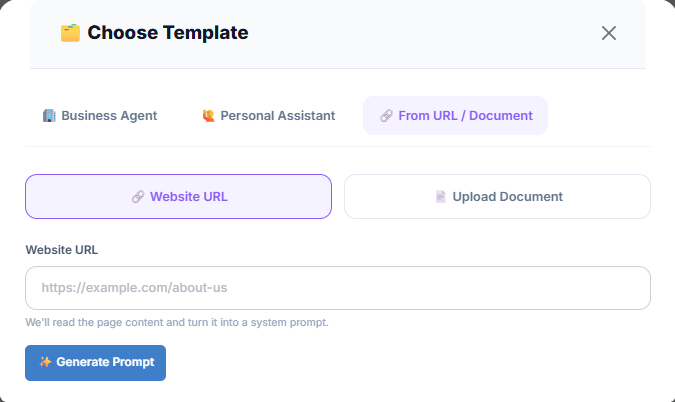
Upload Document
- Upload a PDF, DOCX or TXT document.
- The uploaded content is analyzed.
- The content is converted into an AI-ready System Prompt.
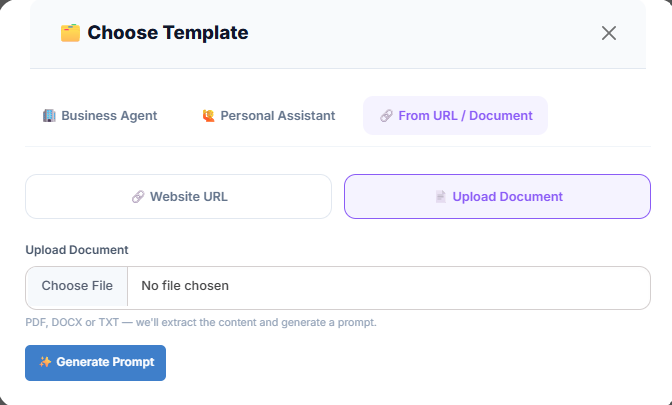
Step 2 : Documents
The Documents tab allows you to provide the AI Agent with knowledge that will be used to answer user queries accurately.
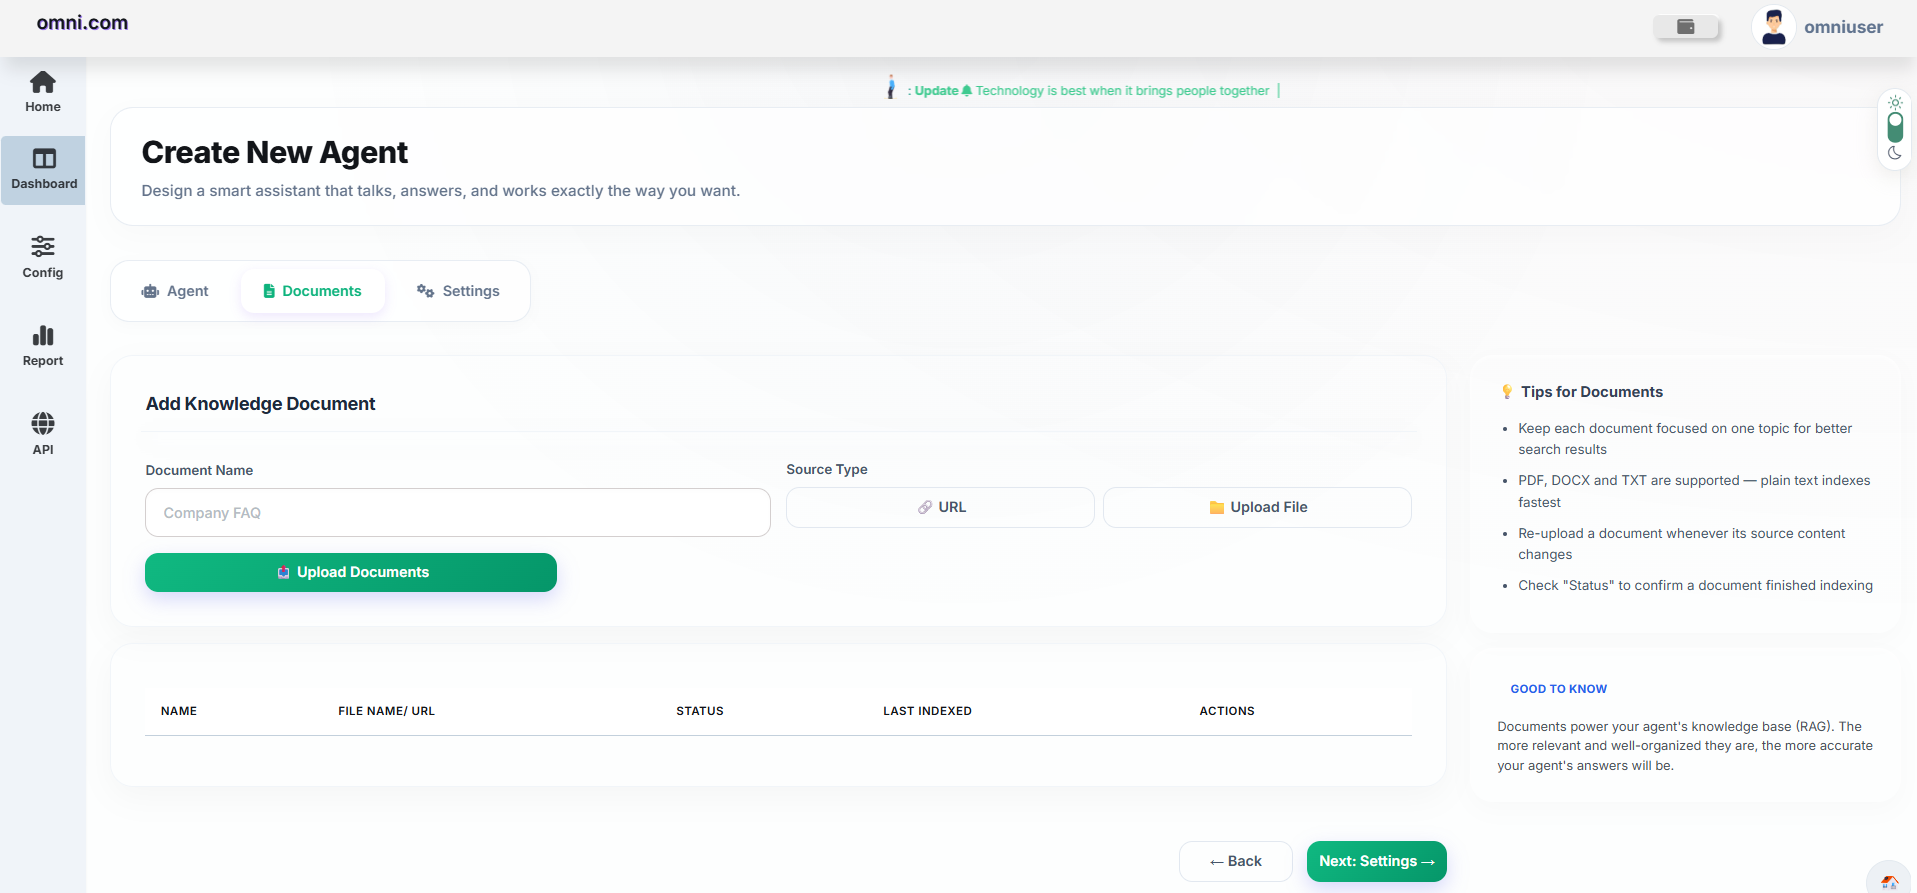
Knowledge can be added using one of the following methods:
- Website URL
- Document Upload (PDF, DOCX or TXT)
| Field | Description |
|---|---|
| Document Name | Name of the knowledge document. |
| Source Type | Select either URL or Upload File. |
Using Website URL
Uploading a Document
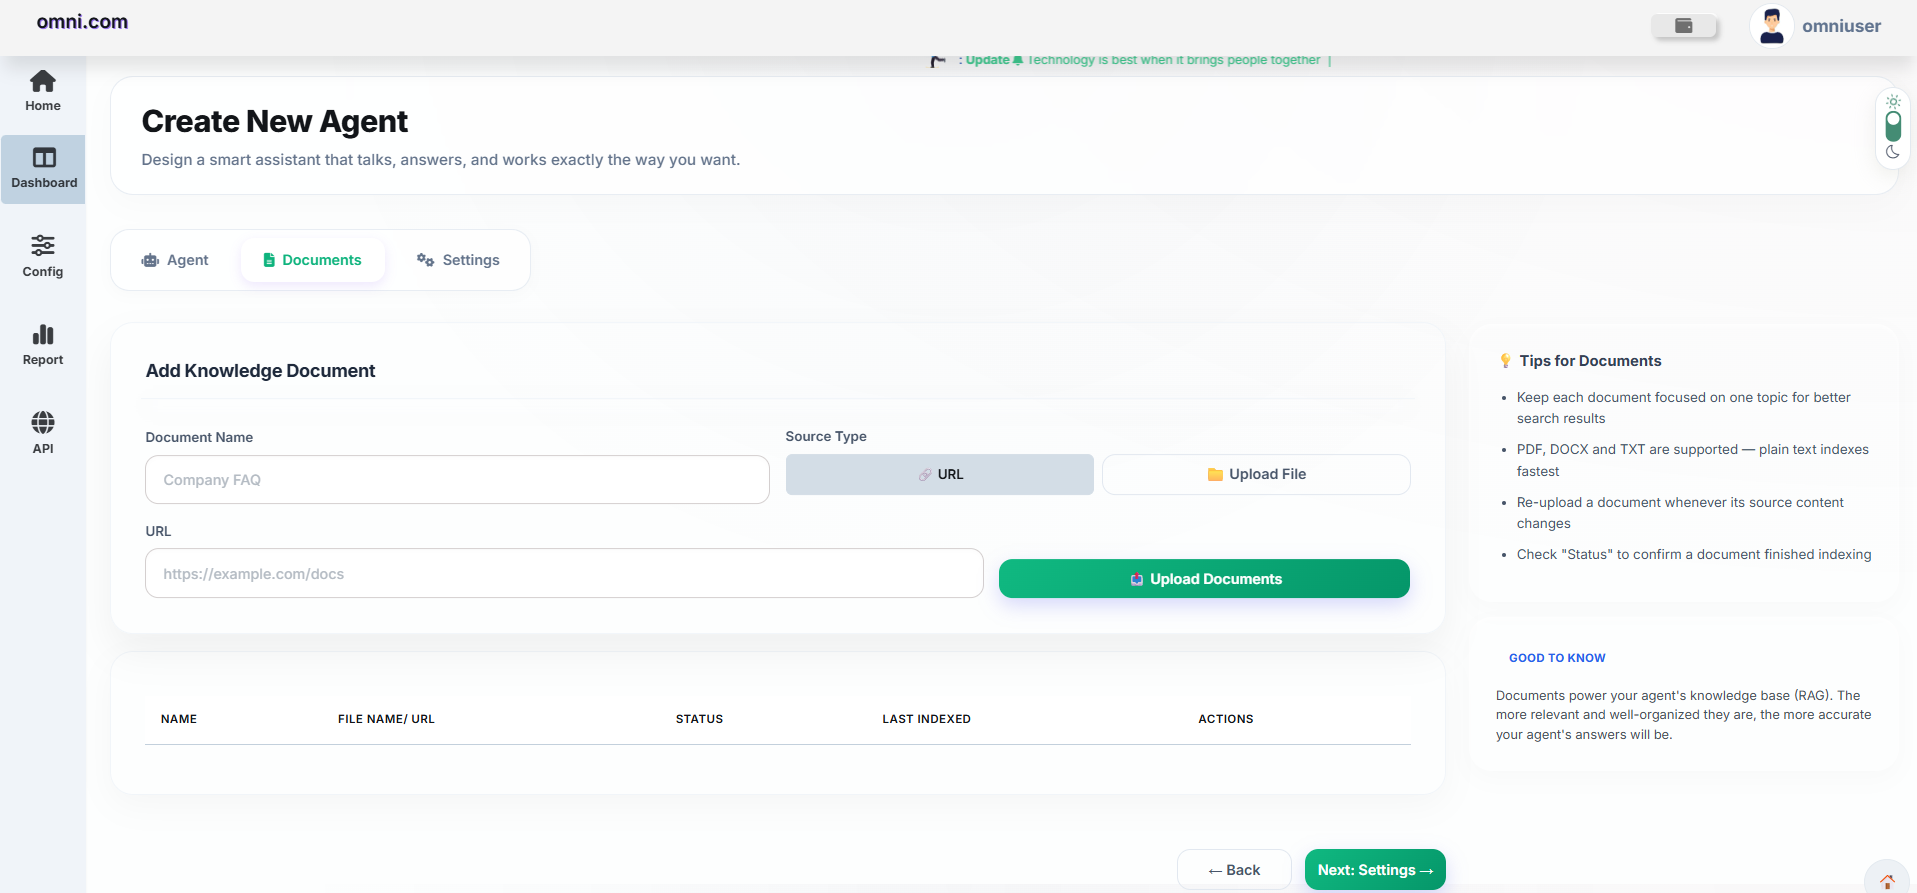
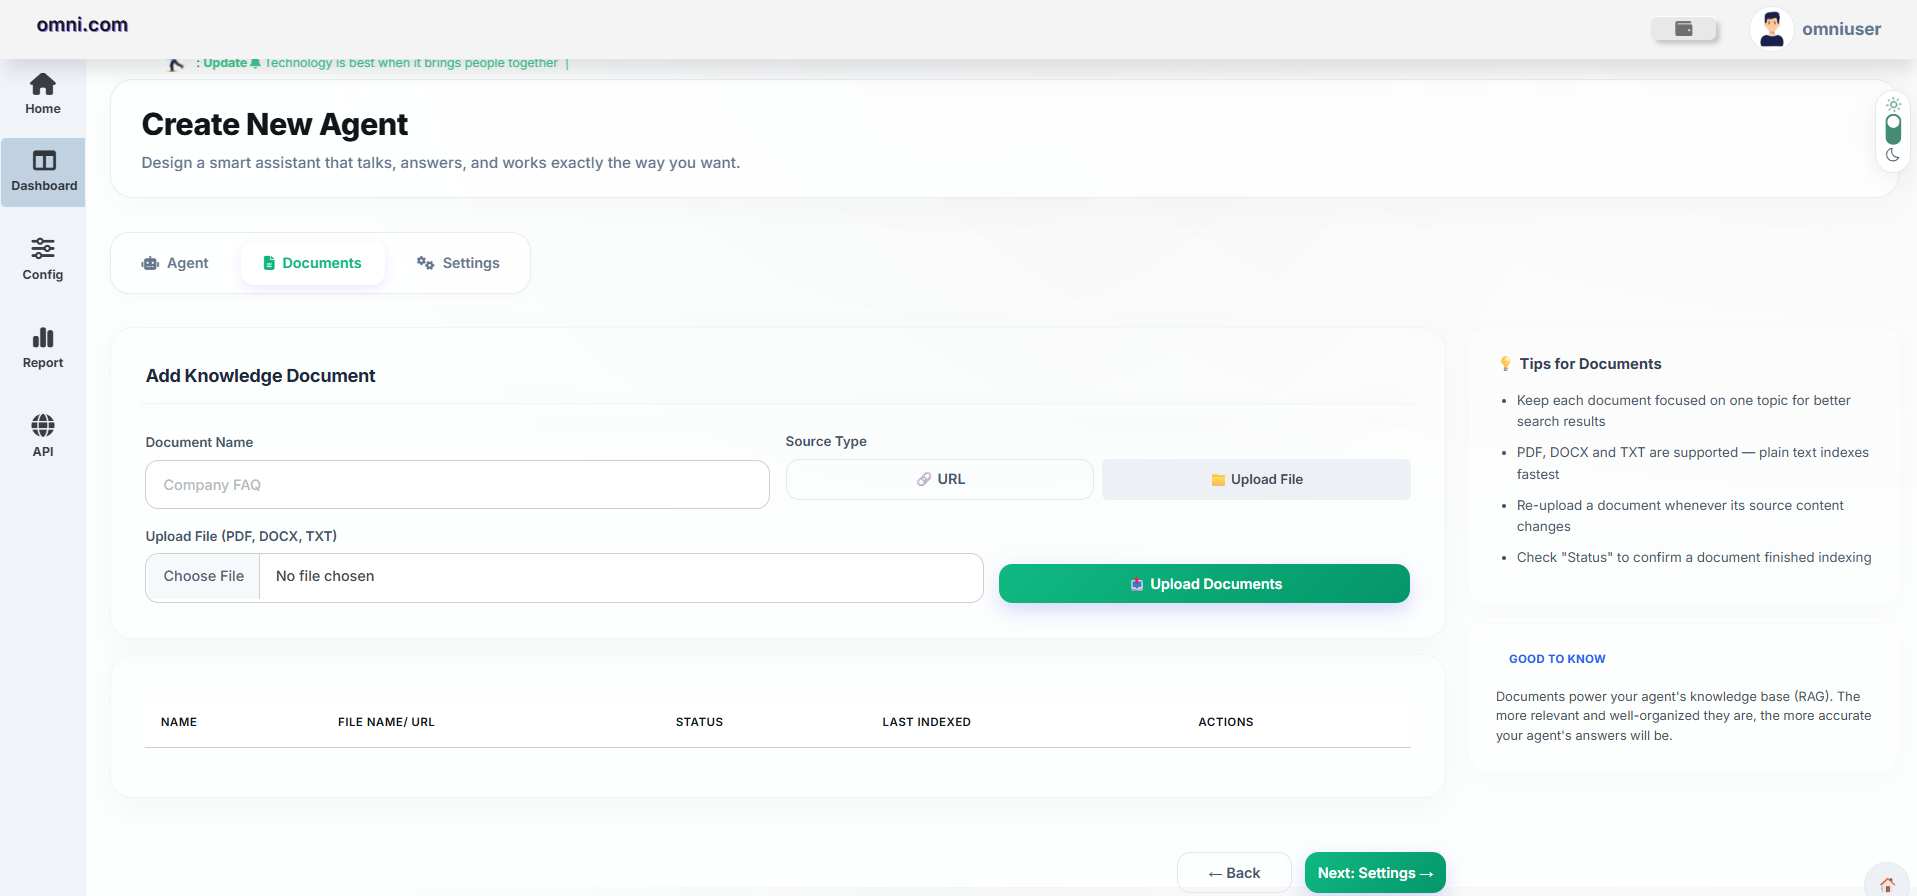
- DOCX
- TXT
Step 3 : Settings
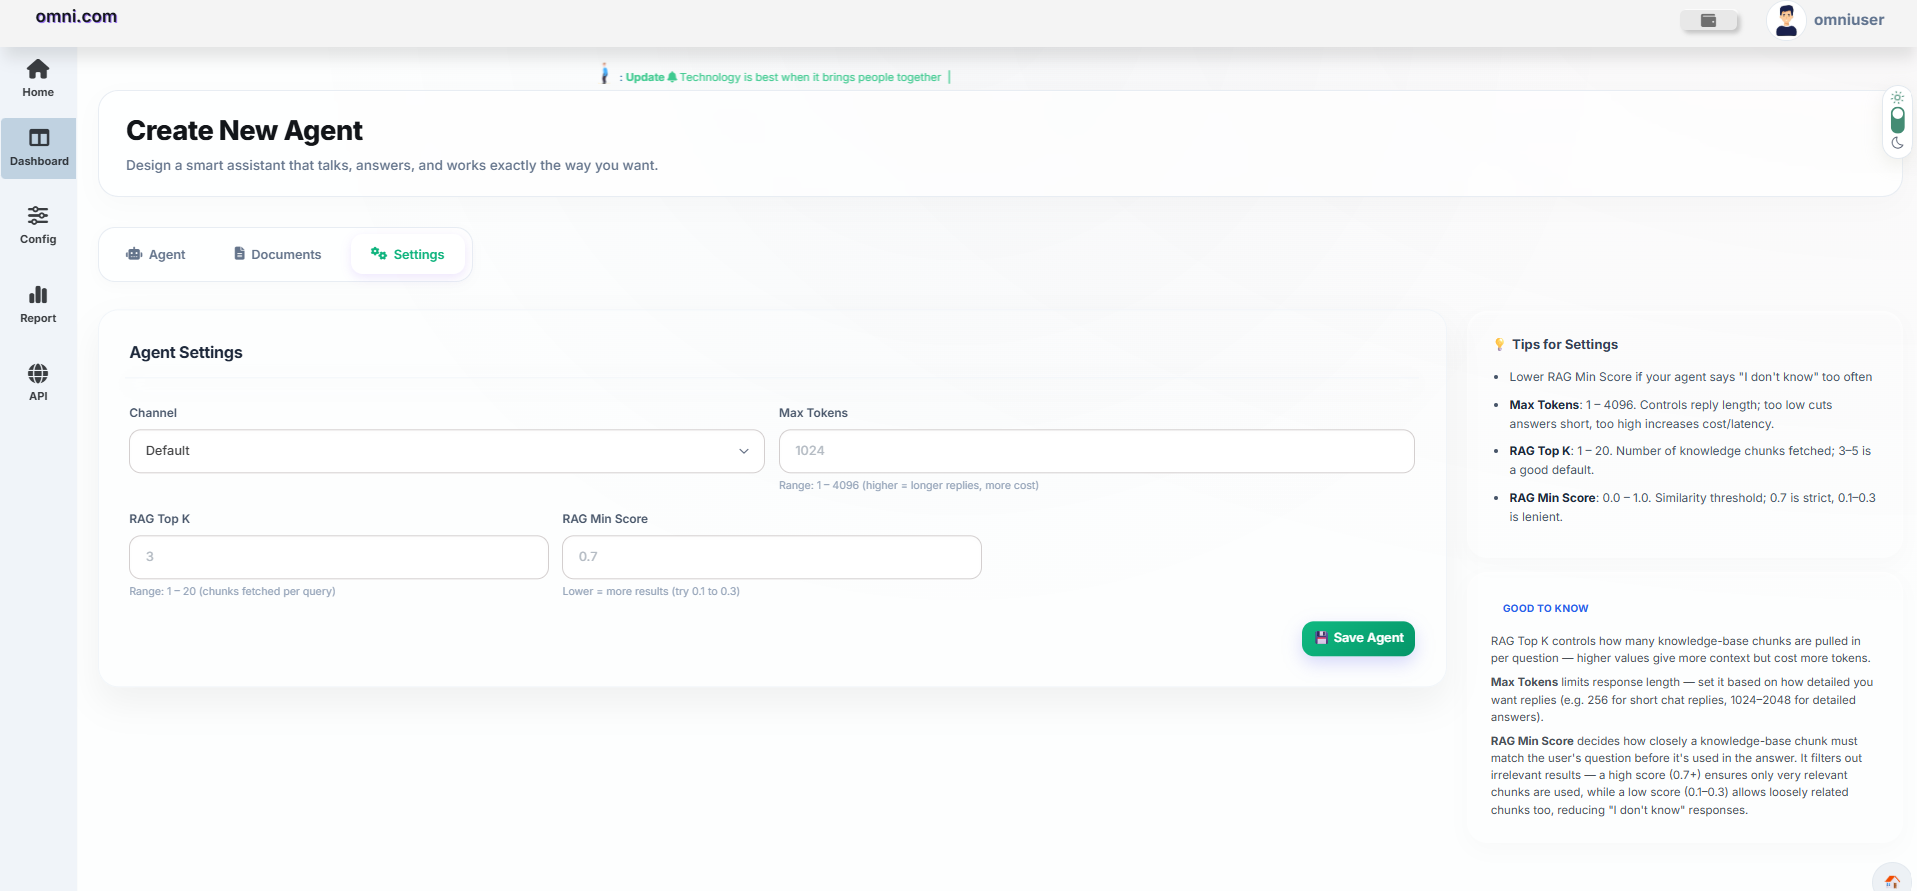
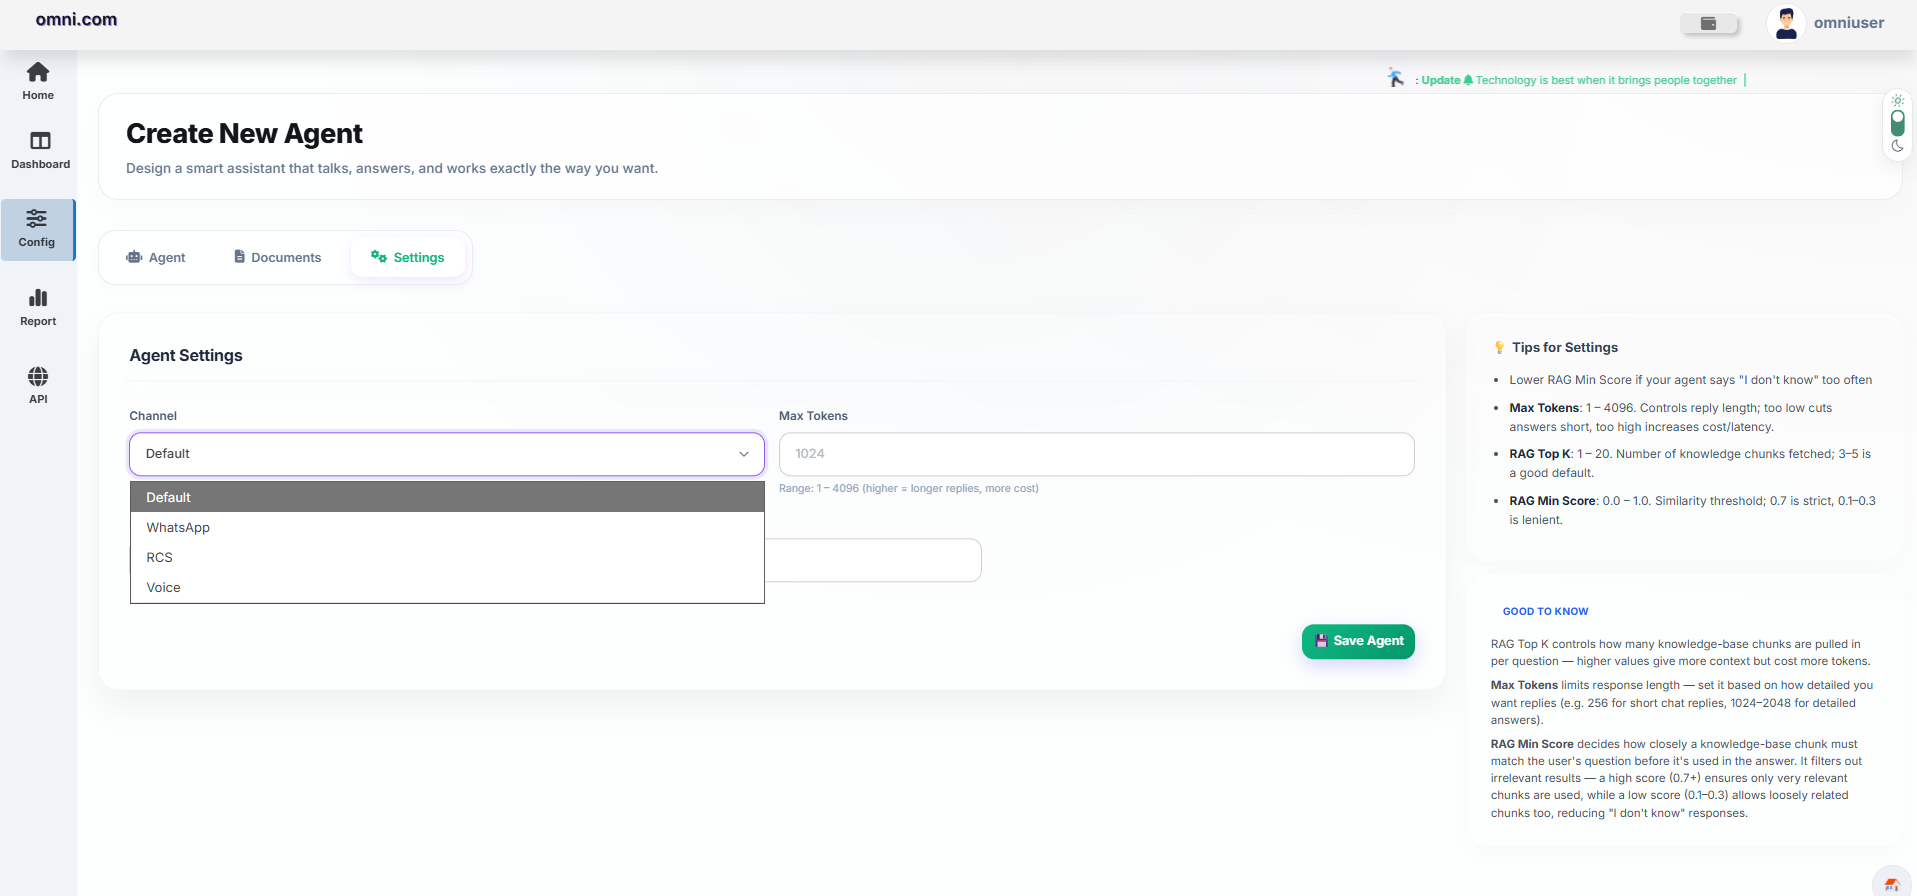
Configure the AI Agent's retrieval and response settings.
| Field | Description |
|---|---|
| Channel | Select the communication channel ( WhatsApp , RCS , Voice ) for the AI Agent. |
| Max Tokens | Maximum number of tokens the AI can generate in a single response. |
| RAG Top K | Number of knowledge chunks retrieved for each user query. |
| RAG Min Score | Minimum similarity score required before retrieved knowledge is used. |
Creating an AI Agent Campaign
Important Notes
- An AI Agent must be created before configuring an AI Agent Campaign.
- Multiple AI Agents can be created for different business use cases.
- Generate Prompt automatically creates System Prompts from templates, websites or uploaded documents.
- Uploaded documents are indexed and used as the AI Agent knowledge base (RAG).
- The generated System Prompt can be edited before saving.
- Saved AI Agents become available while creating campaigns.
AI Agent Chat
The Let's Chat feature allows administrators to test an AI Agent before deployment using a real-time chat interface.
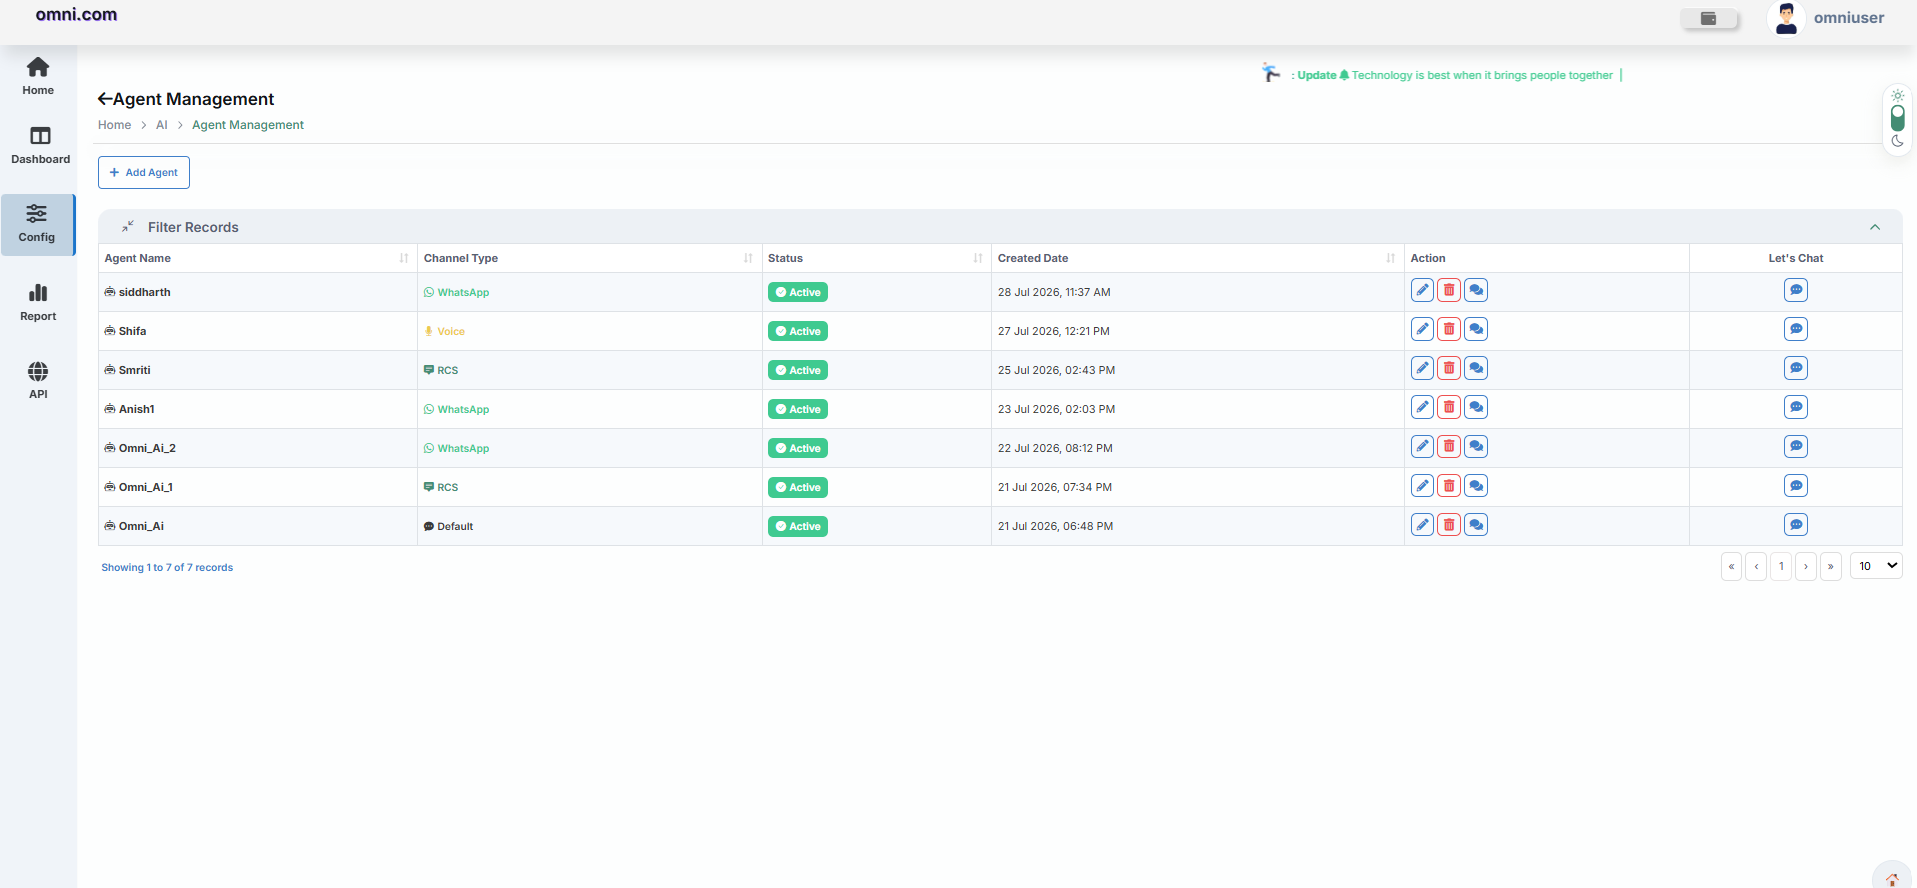
Accessing the Chat Window
- Navigate to Config → Agent Management.
- Locate the required AI Agent.
- Click the Let's Chat icon.
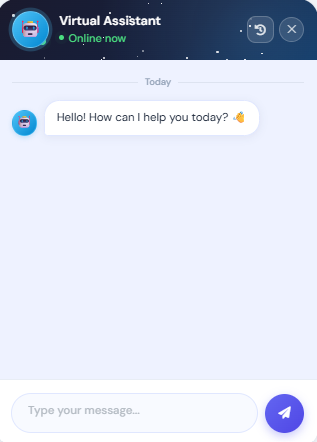
Chat Window Components
| Component | Description |
|---|---|
| Agent Header | Displays the AI Agent name and online status. |
| Conversation Area | Displays the conversation history. |
| Message Input | Allows users to type questions. |
| Send Button | Sends the message to the AI Agent. |
| Chat Controls | Provides minimize and close options. |
Testing the AI Agent
Responses are generated using:
- Configured System Prompt
- Uploaded Knowledge Documents (RAG)
- Selected AI Model
- Agent Settings
- Response Temperature
Responses are generated in real time, allowing administrators to verify accuracy before deployment.
Use Cases
- Verify AI Agent configuration.
- Test the generated System Prompt.
- Validate uploaded knowledge documents.
- Ensure accurate and context-aware responses.
- Identify configuration issues before deployment.
- Test conversation flow and user experience.
Notes
- Only active AI Agents are available for testing.
- Responses are generated using the configured AI Account and System Prompt.
- Uploaded knowledge documents provide context-aware answers during conversations.
- Configuration changes are reflected in new chat sessions after saving the AI Agent.
AI Agent Reports
The AI Agent Reports module provides detailed insights into AI Agent activities, conversation history, message delivery, response performance, and system errors. These reports help administrators monitor AI interactions, analyze communication trends, identify failures, and evaluate overall AI Agent performance.
Overview
The AI Agent Reports module provides centralized reporting for AI Agent conversations processed across supported communication channels. It enables administrators to monitor AI interactions, analyze response performance, review conversation history, identify processing failures, and evaluate overall AI Agent activity through multiple report modules.
Access AI Agent Reports
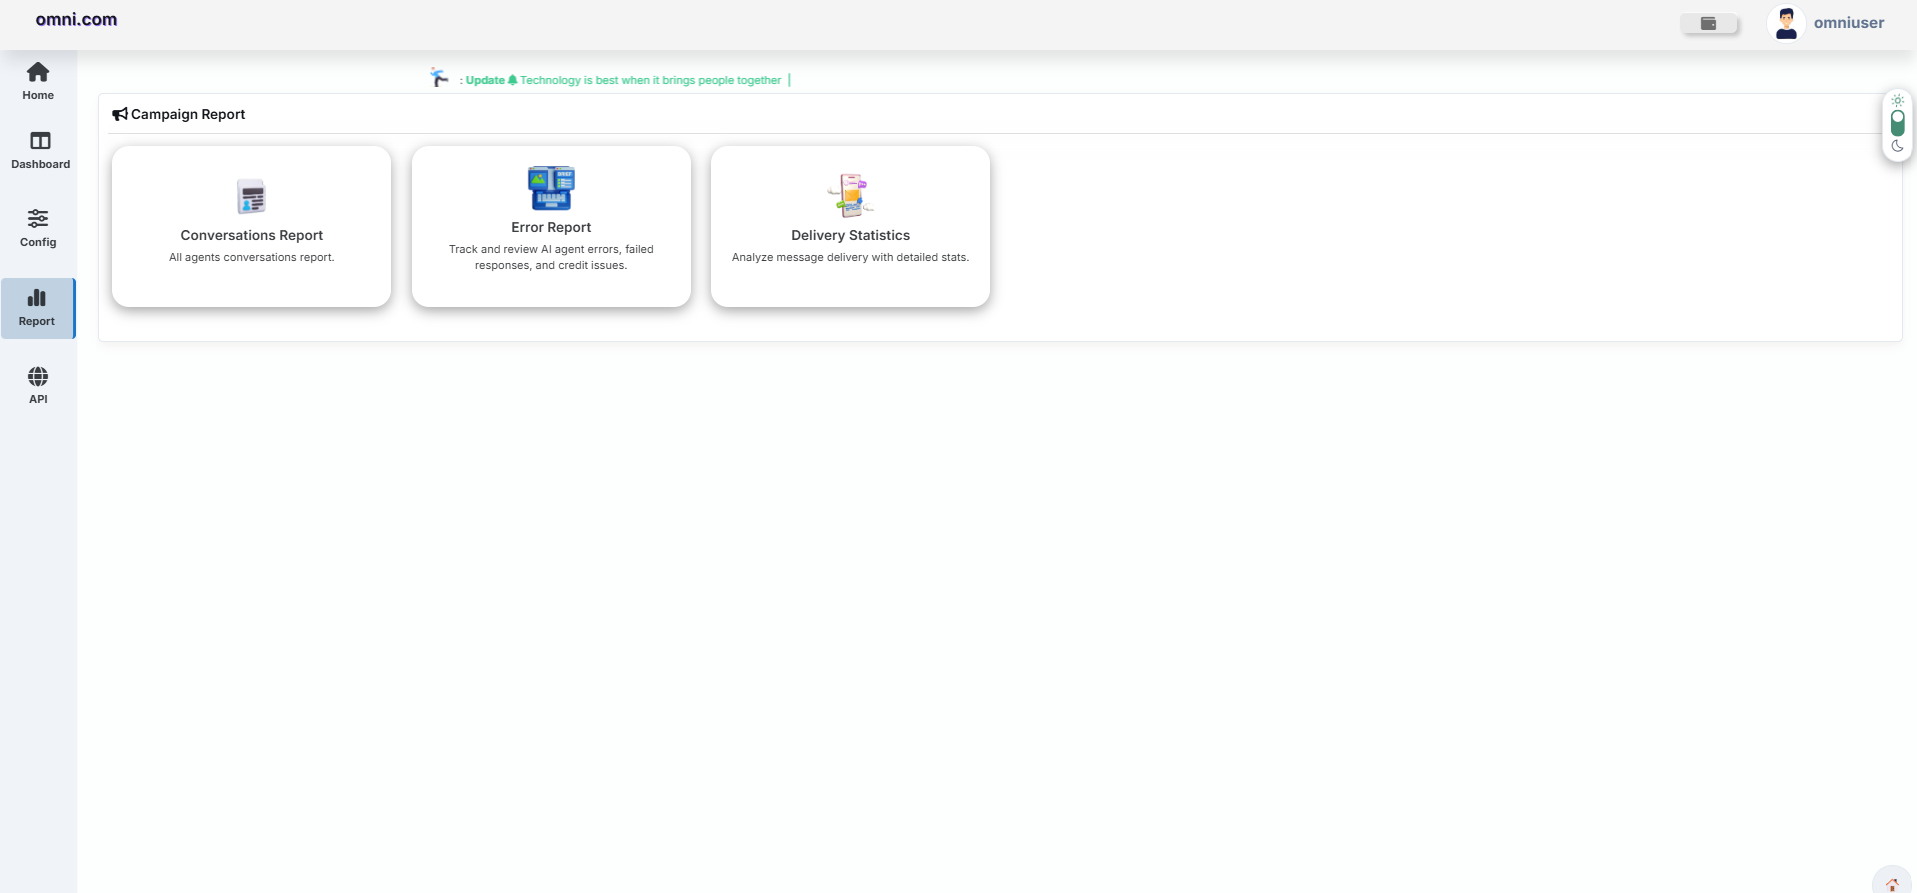
Available Report Modules
| Report Module | Description |
|---|---|
| Conversations Report | View all AI Agent conversations and interaction history. |
| Error Report | Review failed requests and processing errors. |
| Delivery Statistics | Analyze AI response delivery performance. |
Conversations Report
Overview
The Conversations Report provides a complete record of all conversations handled by AI Agents across supported communication channels. It allows administrators to monitor customer interactions, review AI-generated responses, measure conversation performance, and analyze AI usage costs.
Dashboard Summary
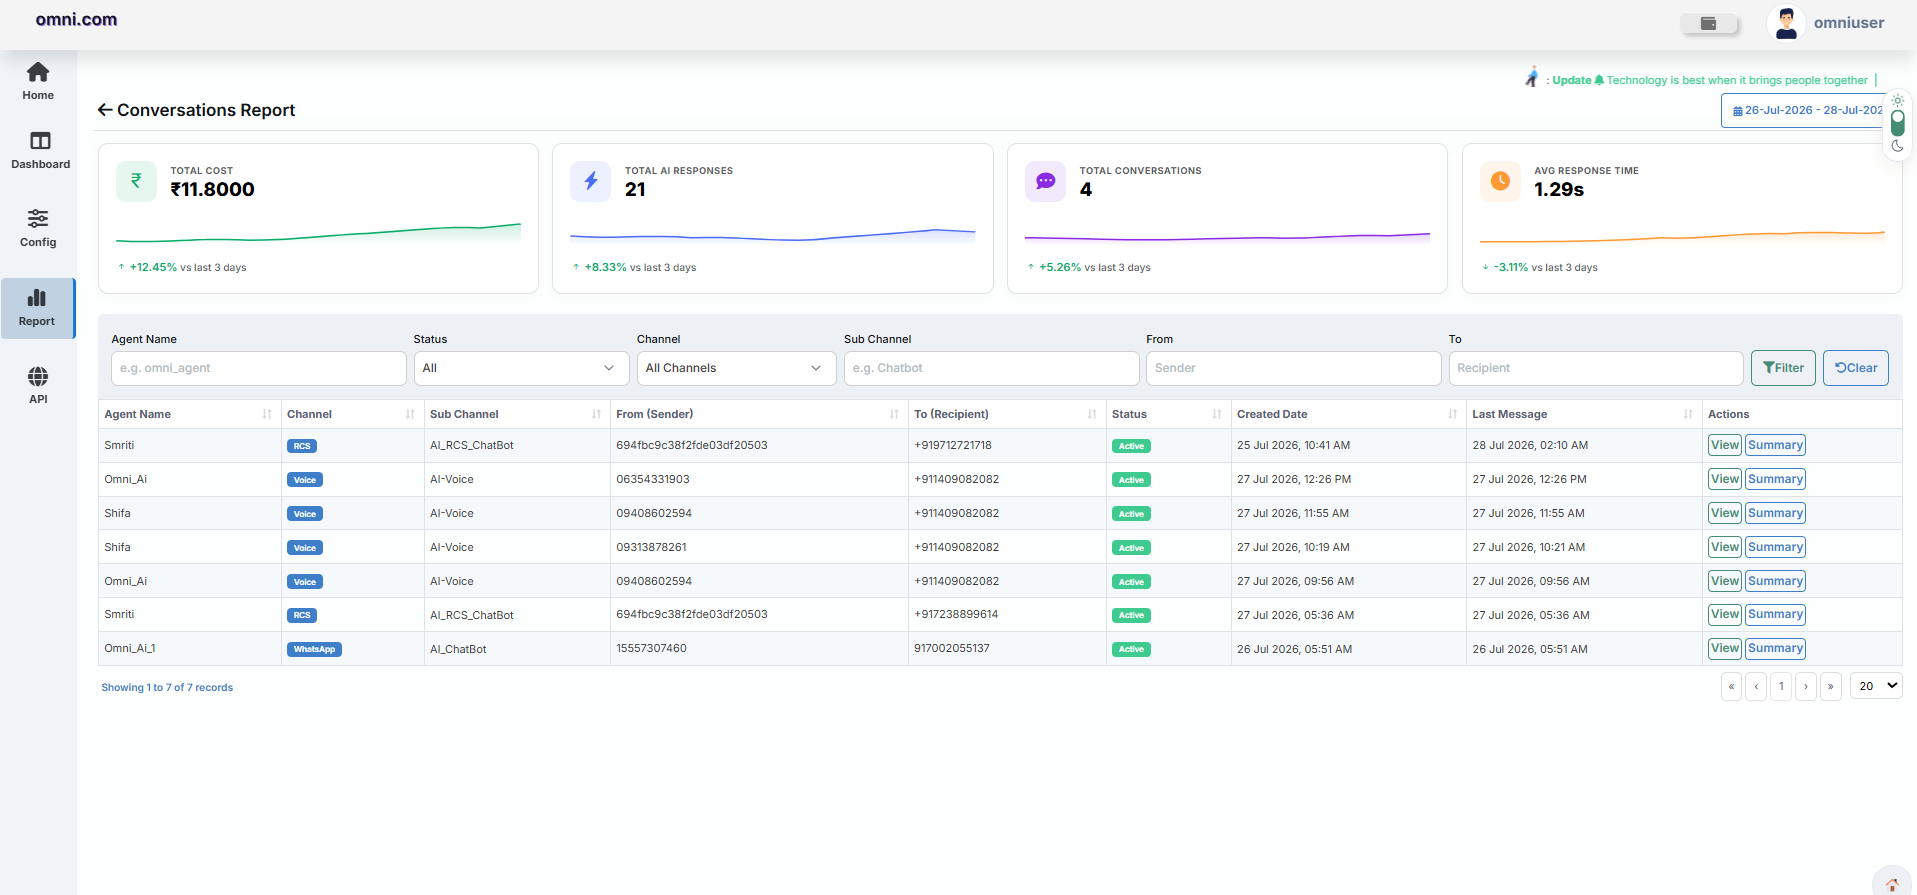
The dashboard displays key performance metrics for the selected date range.
| Metric | Description |
|---|---|
| Total Cost | Displays the total AI processing cost incurred during the selected period. |
| Total AI Responses | Displays the total number of responses generated by AI Agents. |
| Total Conversations | Displays the total number of conversations initiated. |
| Average Response Time | Displays the average time taken by the AI Agent to respond to user messages. |
Filter Options
Use the available filters to locate specific conversations.
| Filter | Description |
|---|---|
| Agent Name | Search conversations using the AI Agent name. |
| Status | Filter conversations based on their current status. |
| Channel | Select the communication channel such as WhatsApp, RCS, Voice, or others. |
| Sub Channel | Filter conversations by chatbot or sub-channel. |
| From | Search using the sender's mobile number or identifier. |
| To | Search using the recipient's mobile number or identifier. |
| Date Range | Displays conversations within the selected date range. |
Report Details
Each conversation record contains the following information.
| Column | Description |
|---|---|
| Agent Name | Name of the AI Agent that handled the conversation. |
| Channel | Communication channel used for the interaction. |
| Sub Channel | Chatbot or service associated with the conversation. |
| From (Sender) | Sender's mobile number or identifier. |
| To (Recipient) | Recipient's mobile number or identifier. |
| Status | Current conversation status. |
| Created Date | Date and time when the conversation was initiated. |
| Last Message | Timestamp of the latest message exchanged. |
| Actions | View the complete conversation or display its summary. |
View Conversation
Selecting View opens the complete conversation between the customer and the AI Agent.
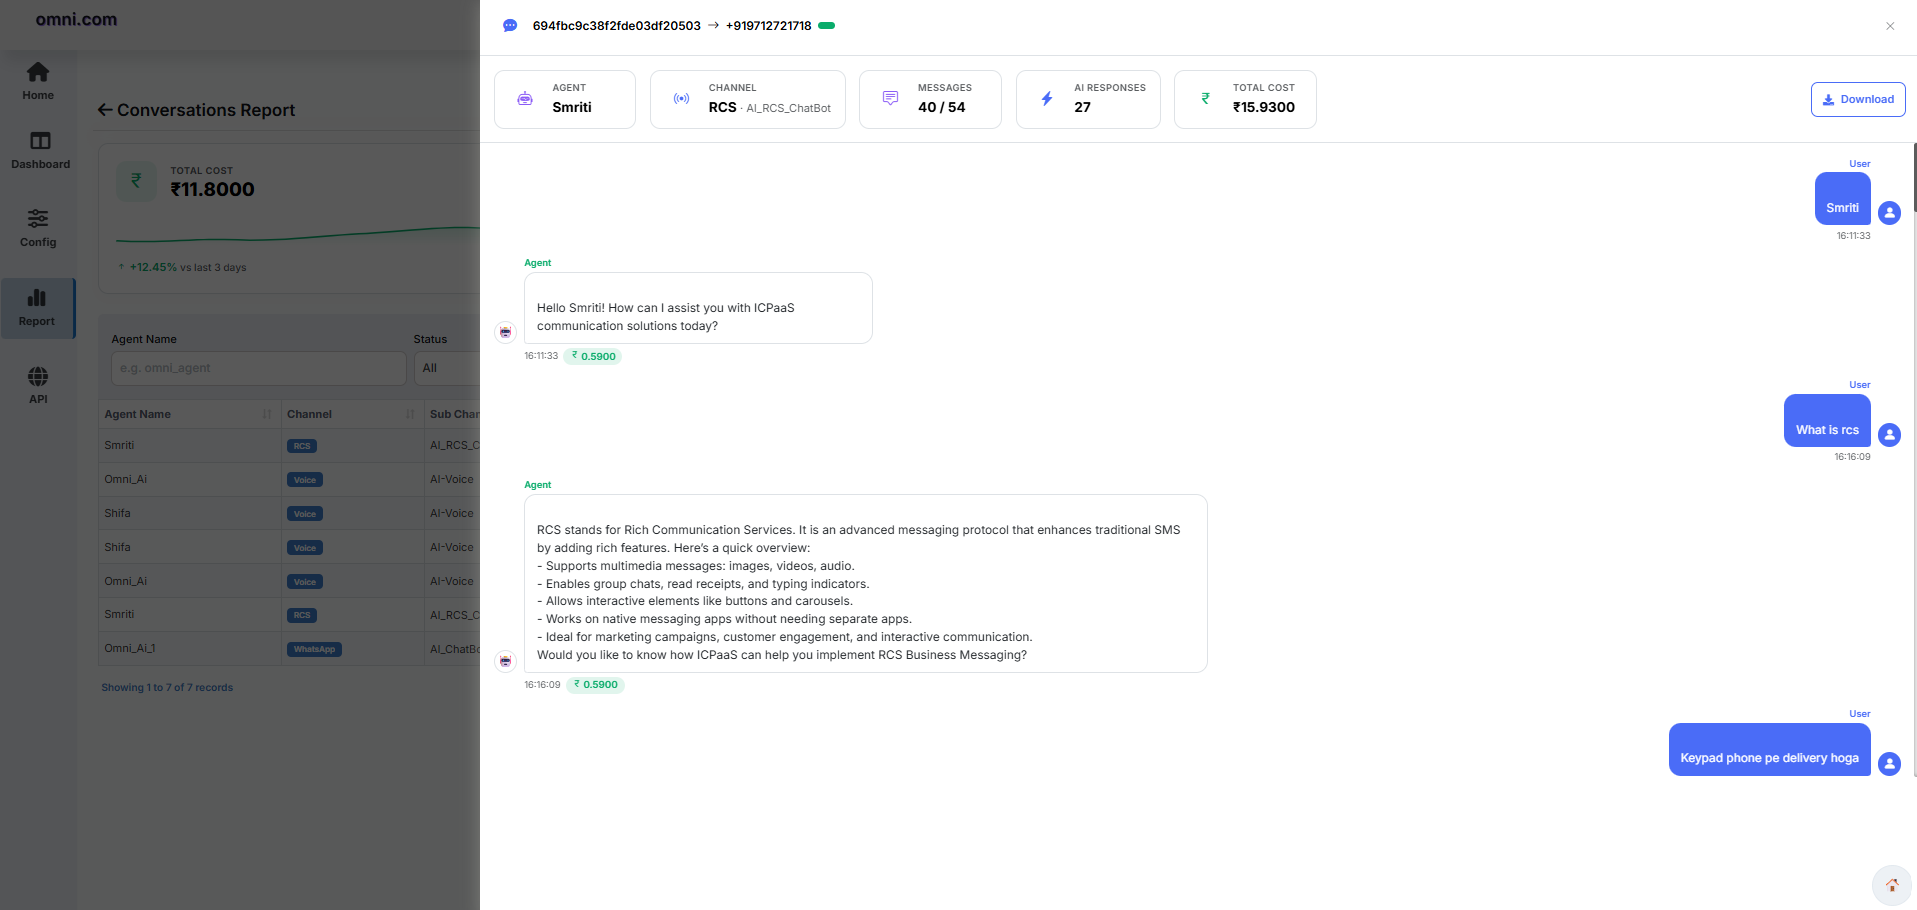
The conversation window displays:
- Complete message history.
- User and AI responses.
- Message timestamps.
- AI response cost.
- Sender and recipient details.
Conversation Statistics
The header section displays the following conversation statistics.
| Field | Description |
|---|---|
| Agent | Name of the AI Agent. |
| Channel | Communication channel used. |
| Total Messages | Total messages exchanged during the conversation. |
| AI Responses | Number of responses generated by the AI Agent. |
| Total Cost | Total AI processing cost for the conversation. |
Conversation Summary
Selecting Summary opens a concise overview of the selected conversation.
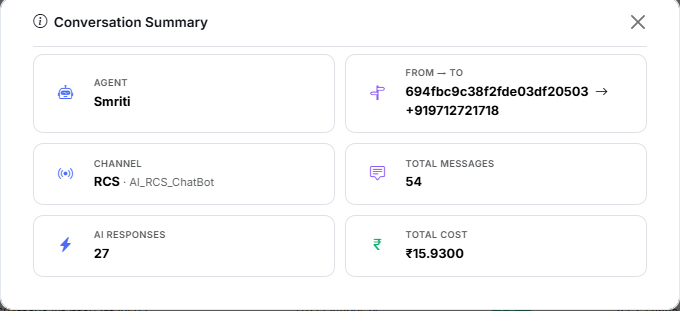
The summary contains the following information.
| Field | Description |
|---|---|
| Agent | Name of the AI Agent. |
| From → To | Sender and recipient information. |
| Channel | Communication channel used. |
| Total Messages | Total messages exchanged. |
| AI Responses | Number of AI-generated responses. |
| Total Cost | Total AI processing cost for the conversation. |
Error Report
Overview
The Error Report provides details of errors encountered while processing AI Agent conversations. It helps administrators identify failed requests, troubleshoot issues, and monitor system performance.
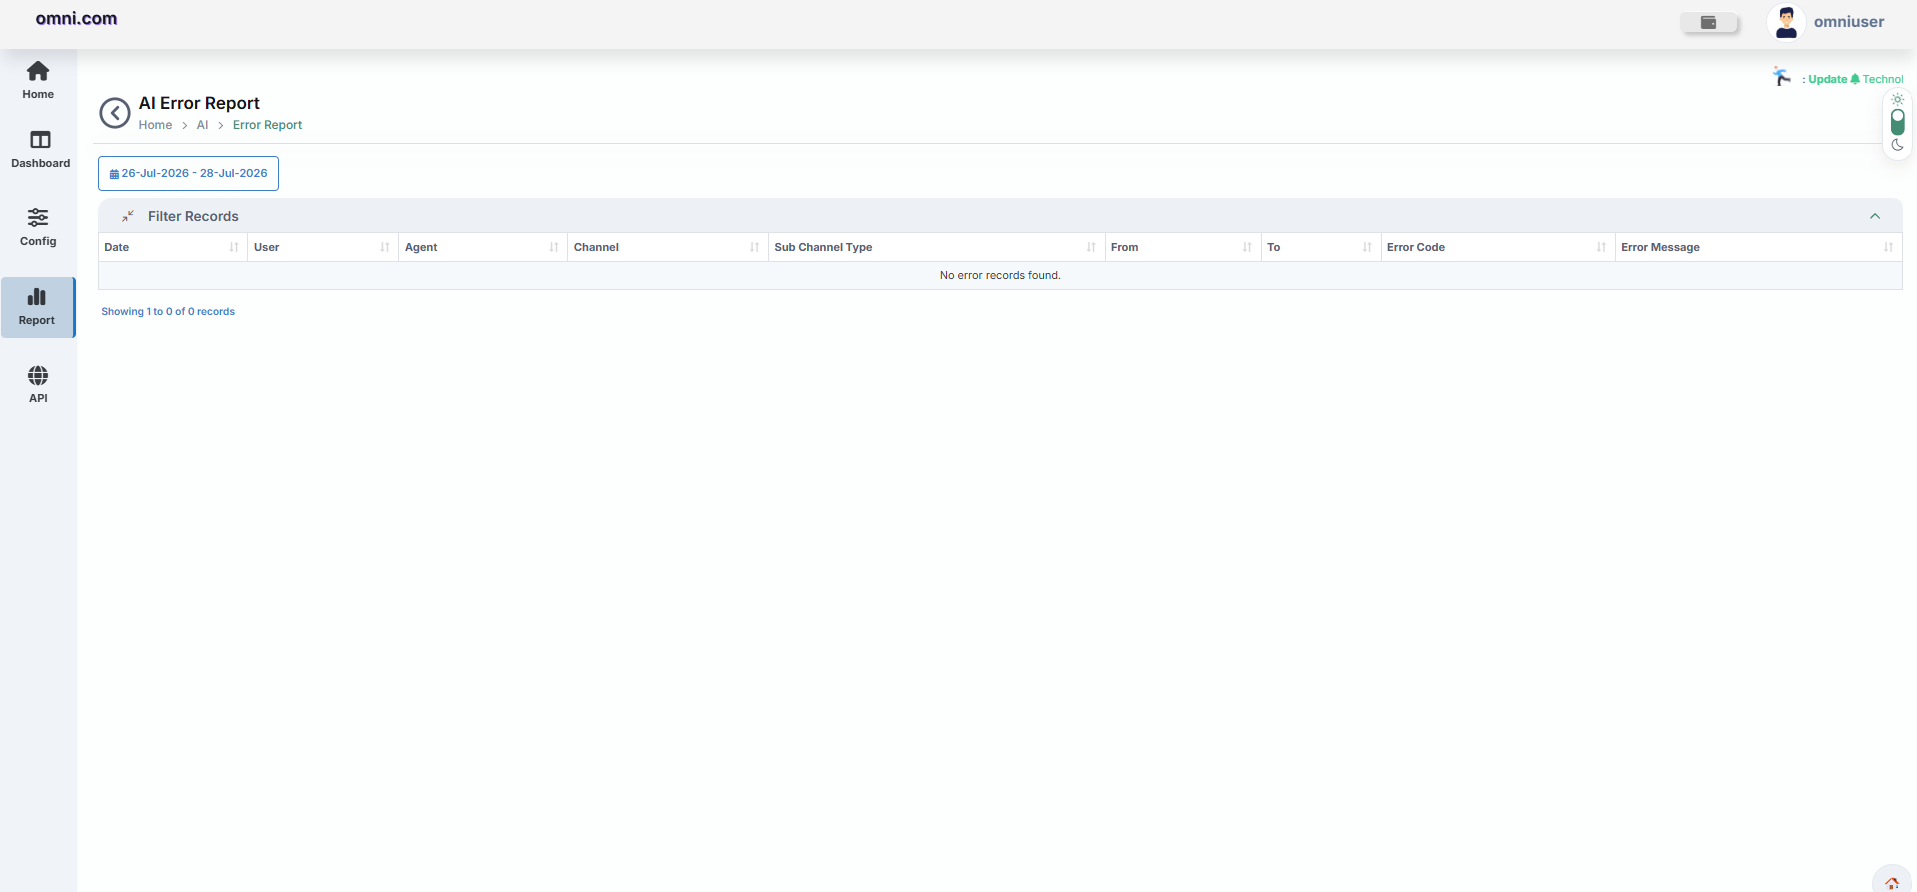
Filter Options
The report can be filtered using the selected Date Range.
Report Details
The Error Report displays the following information.
| Column | Description |
|---|---|
| Date | Date and time when the error occurred. |
| User | User associated with the request. |
| Agent | AI Agent involved in the interaction. |
| Channel | Communication channel used. |
| Sub Channel Type | Chatbot or service associated with the request. |
| From | Sender information. |
| To | Recipient information. |
| Error Code | System-generated error code. |
| Error Message | Description of the error encountered during processing. |
Delivery Statistics
Overview
The Delivery Statistics report provides delivery analytics for AI-generated responses across all supported communication channels. It enables administrators to monitor delivery performance and evaluate AI response activity over a selected period.
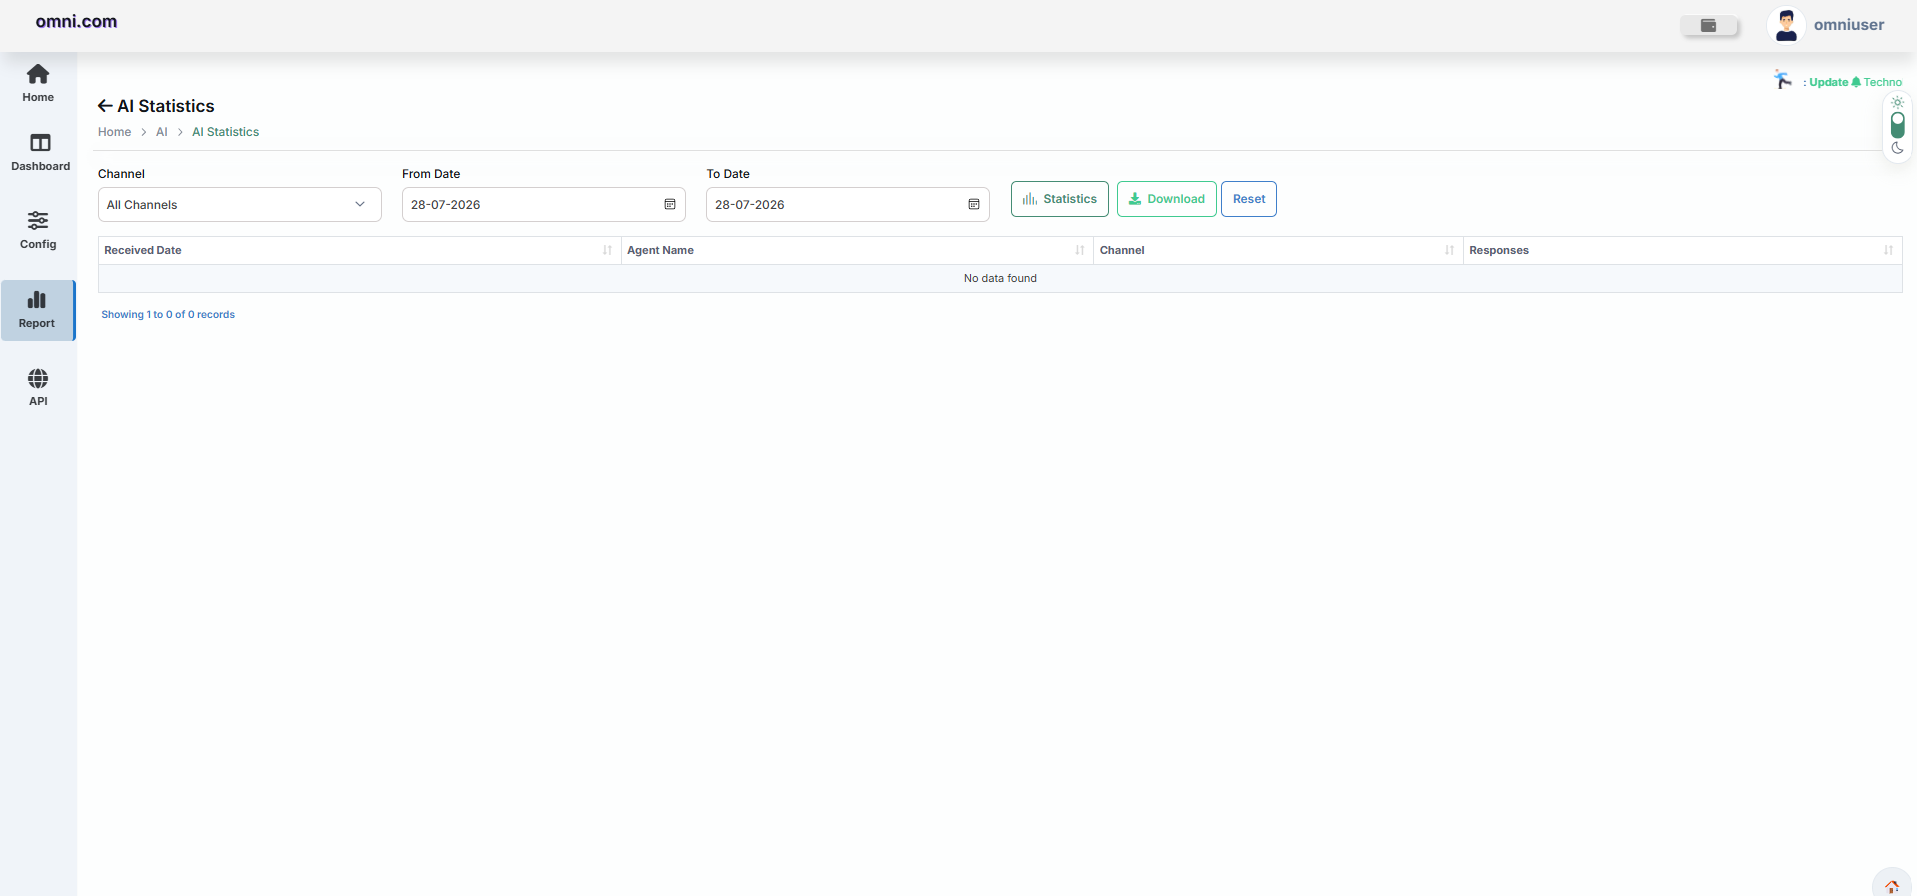
Filter Options
The Delivery Statistics report can be filtered using the following options.
| Filter | Description |
|---|---|
| Date Range | Select the required period to view delivery statistics. |
| Channel | Filter statistics based on the communication channel. |
| Agent Name | Display delivery statistics for a specific AI Agent. |
Report Details
The Delivery Statistics report displays delivery performance for AI-generated responses using the following information.
| Column | Description |
|---|---|
| Date | Date of the AI response activity. |
| Agent Name | Name of the AI Agent. |
| Channel | Communication channel used. |
| Total Responses | Total AI-generated responses. |
| Delivered | Total successfully delivered AI responses. |
| Failed | Total failed AI responses. |
| Pending | Responses that are currently pending delivery. |
| Delivery Rate | Percentage of successfully delivered AI responses. |
AI Agent Reports provide administrators with comprehensive visibility into AI conversations, response costs, delivery performance, and operational errors. These reports help monitor AI Agent activity, troubleshoot issues, and evaluate communication performance across all supported channels.
AI Agent Dashboard
The AI Agent Dashboard provides a centralized view of all AI Agents configured within the Omni Portal. It enables administrators to monitor agent availability, approval status, communication channel distribution, and overall AI activity in real time.
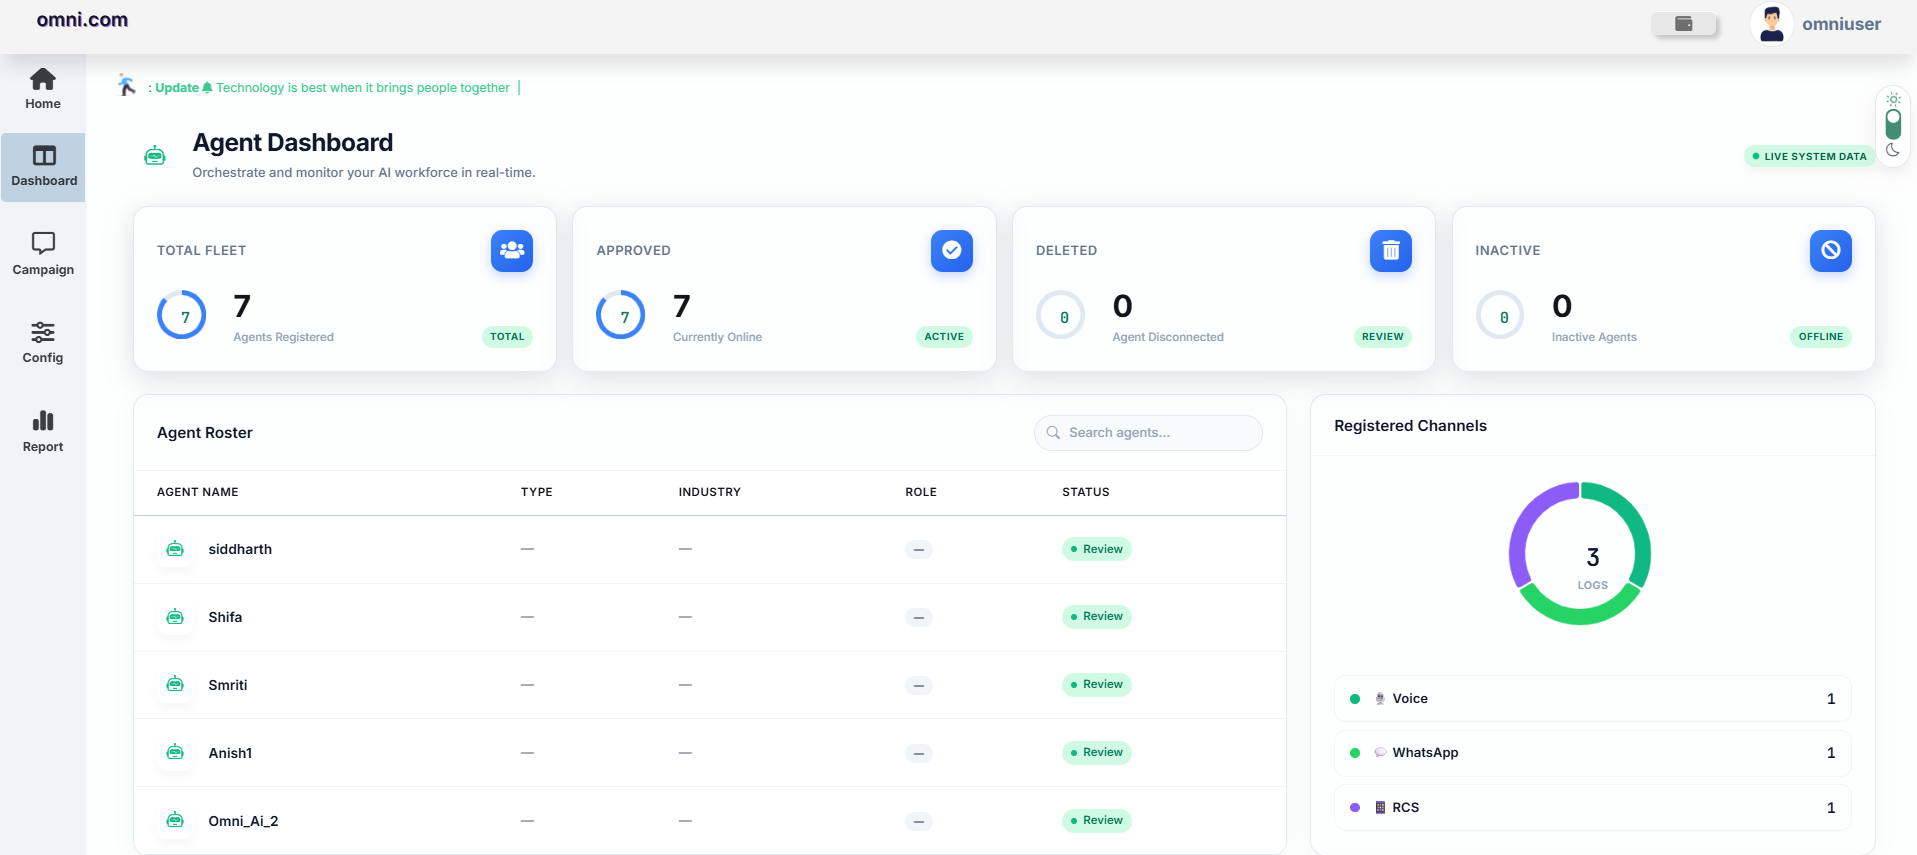
Overview
The AI Agent Dashboard provides a centralized view of all AI Agents configured within the Omni Portal. It enables administrators to monitor agent availability, approval status, communication channel distribution, and overall AI activity in real time.
The dashboard serves as the primary monitoring interface for AI Agent operations, allowing users to quickly assess the health and performance of their AI environment. It provides instant visibility into agent statistics, operational status, channel usage, and activity trends, helping administrators efficiently manage and supervise AI-powered interactions.
Dashboard Components
Total Agents
The Total Agents card displays the total number of AI Agents registered in the system. This includes all agents regardless of their current status.
Approved Agents
The Approved Agents card displays the number of AI Agents that have been approved and are currently available for use. These agents can be assigned to campaigns and interact with customers.
Pending Agents
The Pending Agents card displays AI Agents that are awaiting approval. Pending agents cannot be used until the approval process is completed.
Deleted Agents
The Deleted Agents card displays the number of AI Agents that have been removed from the system. These agents are no longer available for campaigns or customer interactions.
Agents Fleet
The Agents Fleet section provides a consolidated list of all registered AI Agents along with their operational details. It enables administrators to quickly review the status and configuration of every agent from a single location.
The table displays the following information:
| Field | Description |
|---|---|
| Agent Name | Name assigned to the AI Agent. |
| Agent Type | Primary category of the AI Agent. |
| Sub Agent Type | Additional classification of the AI Agent, if applicable. |
| Role Type | Assigned functional role of the AI Agent. |
| Status | Current operational status of the AI Agent. |
Channel Distribution
The Channel Distribution panel provides a real-time overview of AI Agent activity across different communication channels. It displays the number of interactions or logs associated with each configured channel, allowing administrators to understand channel utilization at a glance.
Fleet Activity Trend
The Fleet Activity Trend section displays graphical statistics representing AI Agent activity over a selected period. The chart helps administrators monitor usage patterns and analyze AI operations based on different activity metrics.
The graph includes the following metrics:
| Metric | Description |
|---|---|
| Query | Number of user queries received by AI Agents. |
| Prompt | Prompts processed by the AI model. |
| Completion | Responses generated by the AI Agent. |
These metrics provide valuable insights into AI Agent utilization and overall system activity.
Benefits
The AI Agent Dashboard enables administrators to:
- Monitor the operational status of all AI Agents from a centralized interface.
- Track approved, pending, and deleted agents.
- View channel-wise AI Agent activity.
- Analyze AI usage trends through graphical reports.
- Quickly identify the overall health and availability of AI Agent services.